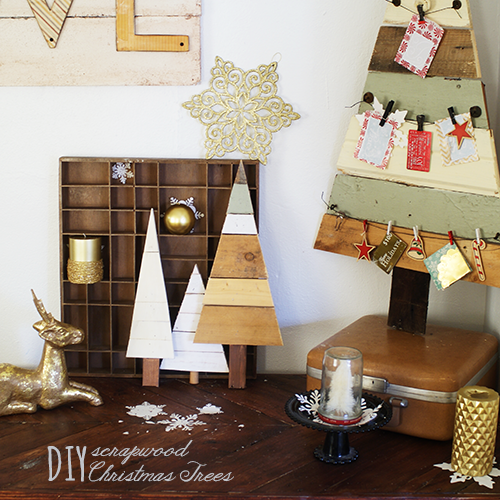
Archives for 2013

Make Wood Pallet Christmas Trees

[pinit]DIY Wood Scrap Christmas Tree Tutorial-Recovered[pinit]

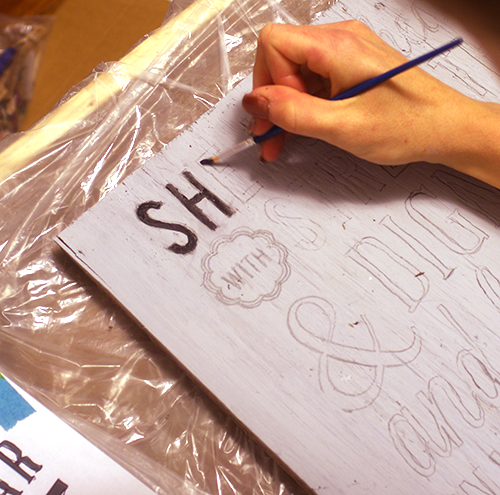
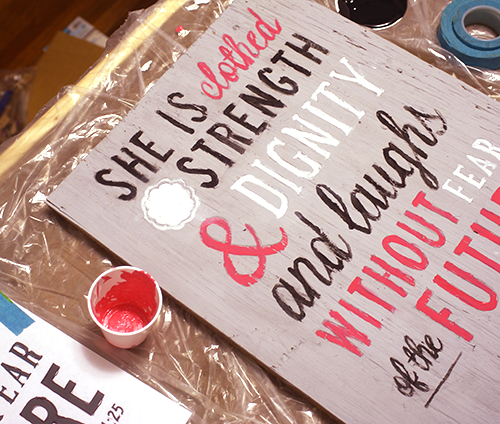
Today I have another  scrap wood/ pallet wood project to help you get in the Christmas spirit.  There is a video showing how to create adorable trees from your scrap pile that you can use as decor, card holders, advent calendars, outdoor decor, gifts and more.  The larger one I am using as a card display.  Super cute, quick and easy to make, these primitive trees are the way to go.

SUPPLIES:

Scrap wood

Wood glue

Mitre saw

Brad Nailer

Wire and hooks for Christmas card holder

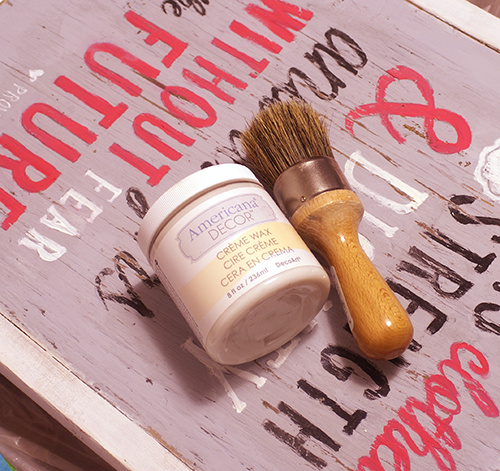
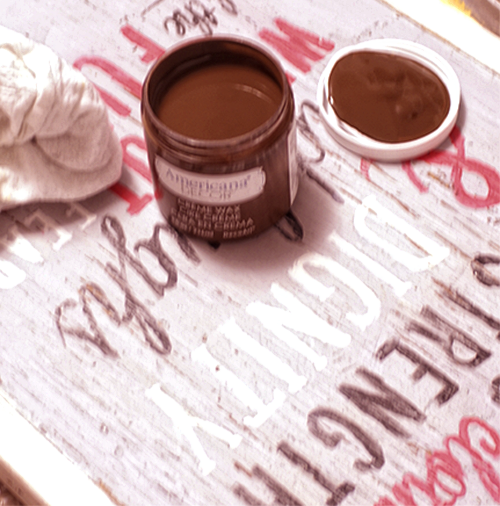
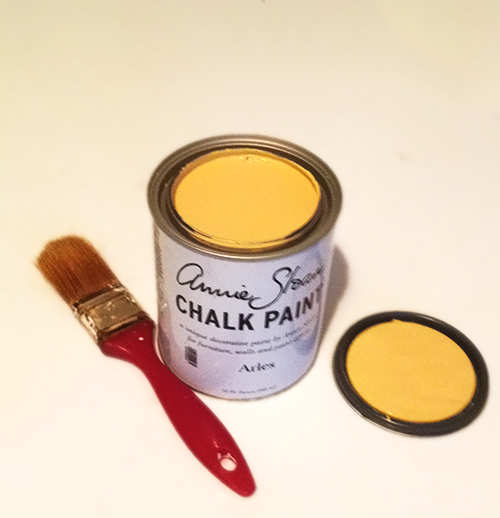
Paint if you want to paint your trees

TUTORIAL:

DIY Handpainted Signs With New Americana Decor Chalky Finish Paint

[pinit]DecoArt Chalky Finish Paint Tutorial[pinit]

I had the wonderful opportunity to try out the new Americana Decor Chalky Finish paint, available online at Home Depot.  You can have it shipped to your home, or to your local Home Depot for free pick-up!  This product is perfect for creating distressed signs, which is what I am sharing with you today.  I am most impressed by the huge color palette, the high quality of the paint, the ease of distressing and the variety of mediums and finishing options.  There are so many things I plan to do with this stuff, but for now…

Diy Rustic Sign tutorial at saved by love creations

The technique is the same as this rustic sign DIY from guest artist Pam of The Little Red Porch, using the chalky finish paint.  I also added a video illustrating how to use Photoshop to print sections of your sign for taping together and transferring onto the wood.  We had several questions on that part in the first post, so hopefully things will be clearer, at least for those of you who use Photoshop.

DIY Chalk Painted Sign

Begin with a piece of scrap wood in the size you want your sign.  I have tons of the stuff lying around here.  The 2 signs I am using for this tutorial are on very different wood.  The Proverbs verse is on rough MDF, and the other is on smooth ply wood.  Both have their place, depending on the look you are trying to achieve.  I prefer the smoother, I discovered.

Chalky Finish Paint Primitive

My cheap foam brush worked great for the background.  I used the chalky finish paint in “Primitive” for my background.  Great coverage, especially on this chippy, rough surface!  While that is drying…

DIY Tutorial Signs

Create your text using your favorite software.  Print your artwork in sections if your sign is larger than your printer will print.  Here is how to do that with Photoshop:

DIY sign with chalky paint


Tape image sections together.  You may need to cut off any border your printer added where the sections meet.

Transferring image to wood

Place transfer paper between text and wood and trace letters with stylus or pen.

DIY tutorial using chalk paint

Once your text is transferred, fill it in with your color of choice.  I used Carbon for the black, Everlasting for the white, and a mixture of Romance and Innocence for the pink color.

DIY painting letters

Just use a small round paintbrush.  I like to use watercolor brushes for hand lettering with paint.  I wet them first and it seems to help the flow.  Play around until you figure out what works best for you.
DIY how to make wood signs

Once you are happy with your lettering, you may want to sand distress the piece, and frame your sign like we showed you in Pam’s DIY sign tutorial previously.

Clear wax for chalky finish paint

I applied clear wax and let that dry for about one hour.

Dark aging waxI applied the dark brown creme wax over the top of the clear creme wax, with a lint free cloth.  Wipe back to remove excess, working in a few inch sections at a time.  If you find you have overdone it with the dark and can’t wipe away enough, you can use the clear wax to pull it up.  Just dip a clean cloth in the clear and wipe the area that is too dark.

SONY DSC

For the “Awesome” sign, I cut the text out and made a stencil with my Cricut.  Also, I painted it on smooth ply sheets.  I used the soft varnish finish instead of wax, and it is velvety fabulousness.

I heart it so much I want to make a thousand more.

DIY subway art on wood

Decoart chalky finish Awesome sign

Visit DecoArt for more chalky finish project ideas.

Stay tuned as I am planning projects using the Americana Chalky finish image transfer and crackle mediums.@DecoArt_IncChalky finish handpainted rustic sign DIY with video tutorial on printing sections of large artwork with Photoshop

Newspaper Crafts HGTV Style

Recycled newspaper coaster tutorialNo newspaper passes from these hands to the recycling center, nope. There are way to many uses for them to let that happen.  I was reminded of my coiled newsprint crafting days by HGTV’s roundup of creative newspaper projects to make.  Decorate your fingernails, your shoes, even create your own woven gift bags from this abundant supply.

Still on the lookout for crafts using recycled materials?  We’ve got you covered…

RecycledProjects

Just scroll through using the arrows to see all of our recycled craft projects!
[Not a valid template]

Over 50 Creative Scrap Wood Projects to Make

[pinit]

Over 50 creative uses for your scrap wood #diy #woodworking @savedbyloves[pinit]

I was pondering what to do with the ever growing pile of scrap wood in my work room, when it occurred to me that you might have the same quandary.  I started searching and was amazed to find everything from toys, to storage to jewelry to home decor and more.  Lots of cool wall art and holiday decor projects are waiting for you and your scraps.  Get going!


Easy DIY Number Vintage Plate Wall

[pinit]Make a Number Plate Wall @savedbyloves[pinit]

I saw this idea in Flea Market Magazine and had to give it a go.  It is super fast and easy, and costs not much.  You don’t even need to buy plate wall hangers.  I will be showing you a cheap way to display your plates on the wall using safety pins!

DIY Plate Wall

Supplies:

Collect old plates from flea markets, thrift stores, garage sales

E6000 Industrial Glue

Safety Pins

Numbers cut from Scrap paper

Glossy Accents or other craft glue

TUTORIAL:

Plate Wall Tutorial

Glue your numbers onto the plates.  I cut mine from scrapbook paper using my cricut.  I measured each plate diameter to determine what sizes to make the numbers.

How to Hang A Plate

Using E6000, glue safety pin onto back of plate, making sure it is centered so your number hangs upright.  Let dry overnight.

DIY Tutorial Numbered Plate Wall

Hang on wall in desired design.  That is it!

DIY Numbered Plate Wall

DIY Mixed Media Portrait On Reclaimed Wood

[pinit]
How to Paint Mixed Media Faces


[pinit]

Today I am sharing how to create a mixed media portrait on scrap wood.  This project involves layering acrylic paint, distress ink and paper with Mod Podge for a unique and personal piece of art that is all you!  Some of you may be thinking, “but I can’t draw or paint”.  Yes you can.  Last year at some point I ordered a video from Cloth Paper Scissors Called All about Faces, with mixed media artist Julie Fei-Fan Balzer.  This fantastic workshop helped me overcome my fear of creating faces, and drove home the fact that we may not all be able to draw realistically, but we can all draw and our art will get it’s point across!

SUPPLIES:

Mod Podge Matte

Foam Brushes, Watercolor brushes size 0, small and med round

Gesso and Brush

Scrap Wood

Collage paper scraps

Acrylic Paints:  Titanium White, Titan Buff, Burnt Sienna, Red, Black, Aqua, Blue, Green Used here

Distress ink Pads Walnut and Antique Linen

Brayer

Background stamps

White Gel Pen

Graphite Pencil

Eraser

All About Faces with Julie Fei-Fan Balzer

TUTORIAL:

Paint scrap wood with gesso

I cut a scrap piece of 3/4 inch plywood into two 12 inch squares and painted a layer of gesso on top of each.  Let dry.

Mod Modge Mixed Media Art

Cover gesso in thin layer of Mod Podge, then adhere random collage papers in coordinating colors.  Cover papers with layer of Mod Podge and let dry.

Brayer paint onto background

Run a smooth or textured brayer through 2 colors of acrylic paint that coordinate with your background papers.  I used green and Titan Buff.  Randomly run brayer over papers to create background interest.  Add one or 2 drops of alcohol ink in to leftover paint and brayer in different areas.    Let dry.

Mixed Media Techniques

Sketch outline of object.  Fill in skin  and clothing with acrylic wash (water plus paint) and dab with paper towels to reveal paper underneath until you are happy with the look.

How to Paint faces

Paint in the details as shown and let dry.  Outline with fine detail watercolor brush and  black acrylic paint.  The video linked above gives great tips for face painting, but basically use 3 colors; light, medium and dark for creating the dimension.

DIY Mixed Media Portrait Tutorial @savedbyloves

I ended up tearing strips of washi tap and filling in the arms and skirt.  I used distress stain to color the skirt.  I stamped “Love” with black acrylic paint.  The lettering around the head I did with size 0 paintbrush and black acrylic paint.  Play with hand lettering on scrap paper to get the feel for it.

More mixed media to come!

Over 50 of the Best of DIY Christmas Decor and Gifts to Make

[pinit]
Christmas Gifts to Make Square[pinit]

It is that time again… snowballs, mittens, cocoa, and handmade lovers everywhere, busily creating gifts and ornaments for the holiday season.  We have gathered up all of SBLC’s Christmas posts, for a fantastic collection of over 50 handmade ornaments, gifts, printables and inspiration to get you going this Christmas.  Happy handmade holidays!

Powered by CGView

Build an Armoire & Distress it With Chalk Paint

Knobs

Ana White Armoire Plan #woodworking @savedbyloves

DIY armoire woodworking plan from Ana White and how to distress with #chalkpaint #AnnieSloan[pinit]

I am so excited about today’s project.  The closet situation in my new place is less than optimal (totally crappy).  In desperate need of a solution, I searched and landed on this simple armoire building plan from Ana White.  If you have been around here long, you know I am a big fan of Ana’s site.  She introduced me to woodworking and I have been covered in sawdust since that day.  This project was easy to follow.  I made some adjustments since I wanted it larger than the dimensions of the original plan, and I was improvising with salvaged wood I had on hand.

This was my first project using Annie Sloan chalk paint.  Don’t you love the color?!  It is called Arles, and I finished with Annie Sloan Clear Wax, then Dark Wax over the top of that.  Its a bit more “aged” than what I had planned.  Turns out a little of the dark wax goes quite far.  I will keep that in mind for my next project.   I still love it.  If you run into that, you can always paint over the wax.  It wasn’t that big of a deal to me in this case.  We all know I will be painting it a new color when I change my room decor anyway, right?

Annie Sloan Chalk Paint Arles

Here is the Annie Sloan paint.  Yum.

How to build an Armoire from salvaged wood

Sad quality iPhone shot of the armoire before painting.  Hard to get any shots of it really, because of the room size and… oh yeah, I made it huge.

Knobs

Did you check out the knobs I found at Hobby Lobby?  Perfect.

Pin

That’s it.  I love it.  Off to figure out what to build next.

Woodworking Project Gallery Page

Powered by CGView

Over 50 Things to Make from Repurposed Chair Parts

[pinit]

50+ Repurposed Chair Projects to make @savedbyloves #upcycle #furniture #DIY[pinit]

The abundance of curbside discarded chairs in my area has me looking for ways to repurpose old chairs and their parts.  Today’s post brings my favorite finds for DIY upcycling inpsiration.  I truly didn’t anticipate finding a wreath during my searching on this one, but it happened.  Not only that, but it’s pretty cool, I must say.  You will see chair back, legs, spindles, even entire chairs given new purpose in some seriously creative ways.  Enjoy!

GreenCraft Magazine Featured Project

[pinit]

Saved By Love Creations featured in GreenCraft Magazine using @sizzix_US and @rangerink @savedbyloves

[pinit]

This is a joyous moment for me.  The Fall Aluminum Can Leaf Wreath DIY I shared with you was featured in GreenCraft Magazine!  When i got the email expressing interest in my project for this issue, I literally squealed from my bed, where I lay with the then current issue of GreenCraft on my nightstand.  It is my go to publication for creative upcycling inspiration, and I am delighted to have my project amongst its beautiful pages.

Check out the issue, and be sure and visit our Recycled Projects Gallery for tons more project ideas using recycled materials!

RecycledProjects

Privacy Policy