How to Make Jewelry From Flattened Pennies

pin-how-to-make-upcycled-jewelry-from-pennies

This post has been a long time coming. At this point, I can’t even recall what inspired me to smash pennies and turn them into jewelry, but something did and here we are. I will walk you through the interesting, not entirely legal process I used. Please note that in no way am I encouraging anyone to break the law, or to go anywhere near railroad tracks. The Midnight Rider controversy is no joke. While cute, this jewelry is not worth dying for, so be smart.
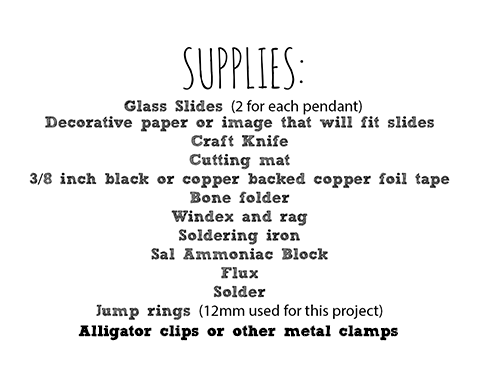
how-to-make-aa-jewelry

SUPPLIES:

Pennies or other coins

Clear masking tape

Jump rings

Jewelry Hole punch

jewelry rivets

Vintaj metal paints

Lisa Pavelka Resin Magic Glos

Magic Glos UV Resin, by Lisa Pavelka

Sizzix machine

Butterfly rings Sizzix Die

Media Mixage Triangle Dies

Media Mixage Circle Dies

Vintaj Vogue Stamping Blanks, Triangle 14mm

Your favorite embossing folders

eyelet setter

ear wire

Jewelry pliers (2 pair)

Paint brush or sponge dauber
1/4 cup white vinegar
1 teaspoon salt
Non-metal bowl
Paper towels


wm-aa-jewelry

TUTORIAL:

tape-pennies-to-track

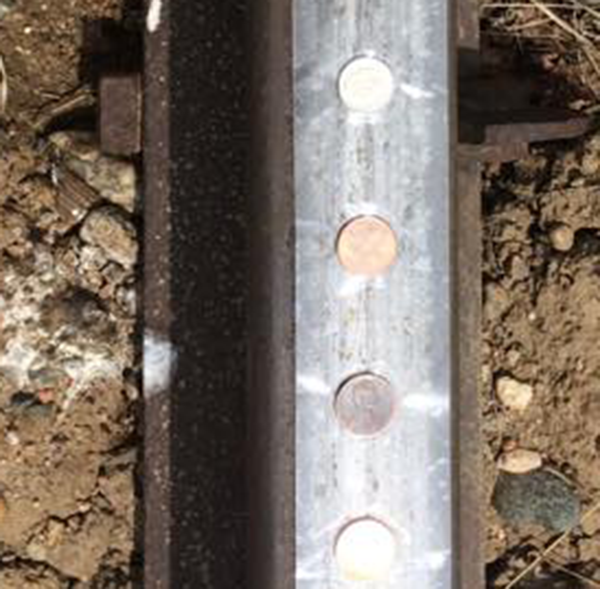
This is the sketchy part. SBLC assumes no responsibility for any injuries that may occur. That said, this is also the super fun part. Tape the coins to the railroad track as shown in the photo. Not taping them just means searching needlessly after the train has passed, since they get thrown from their original location during the process. The tape keeps them in place.

pennies-after-flattening

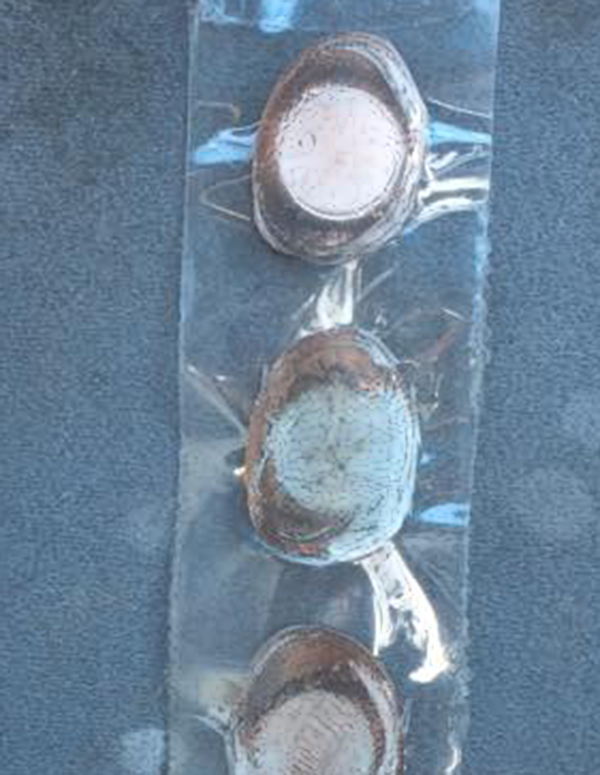
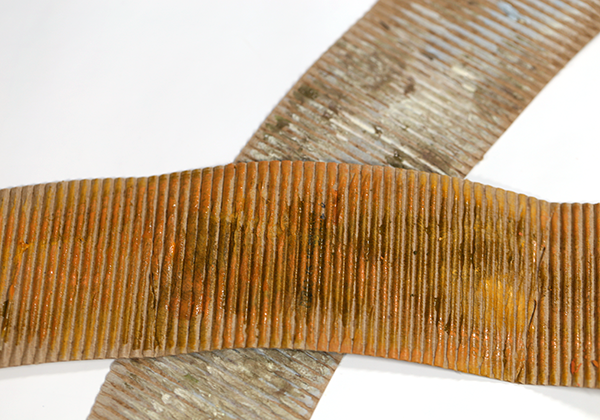
This is what y0u will have when you retrieve your now flattened pennies. Flat, but yucky, right? No problem. To clean the little guys, pour the vinegar into the bowl and stir in salt. Put about 5 pennies into the solution and let them soak for about 10 seconds. Use a toothbrush and running water to remove debris and rinse clean.

how-to-flatten-pennies-for-free

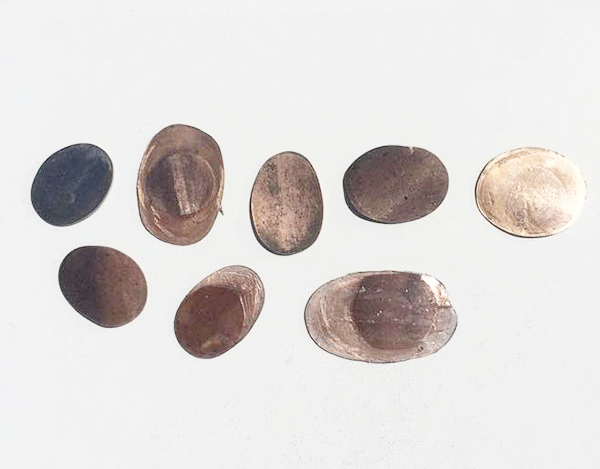
They don’t have to be perfect.

how-to-flatten-pennies

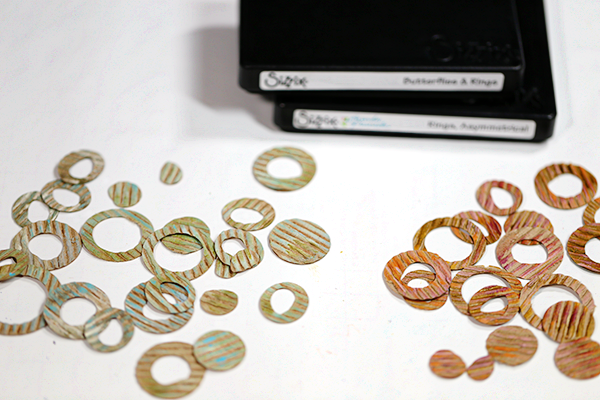
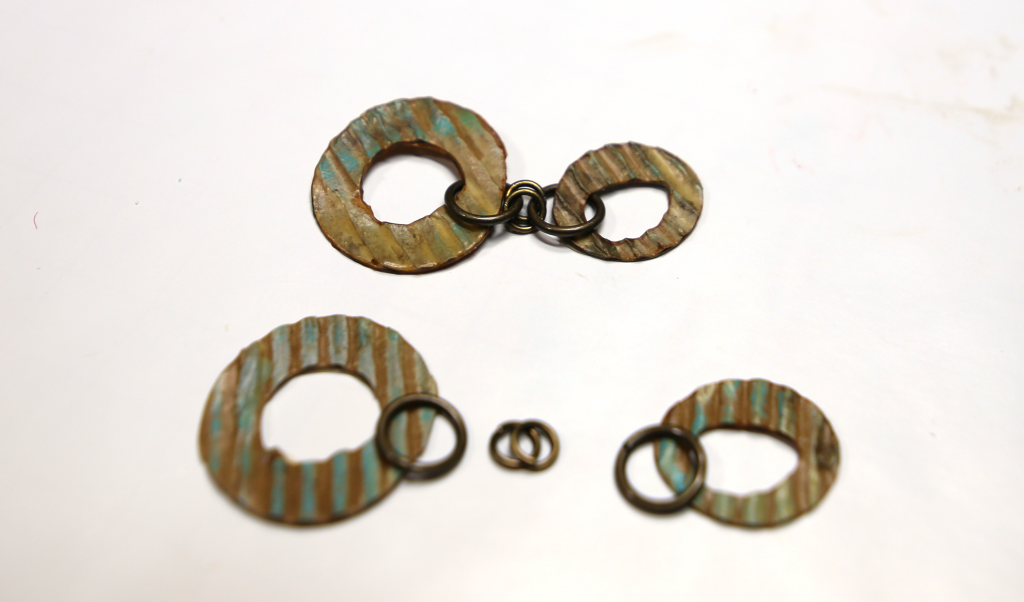
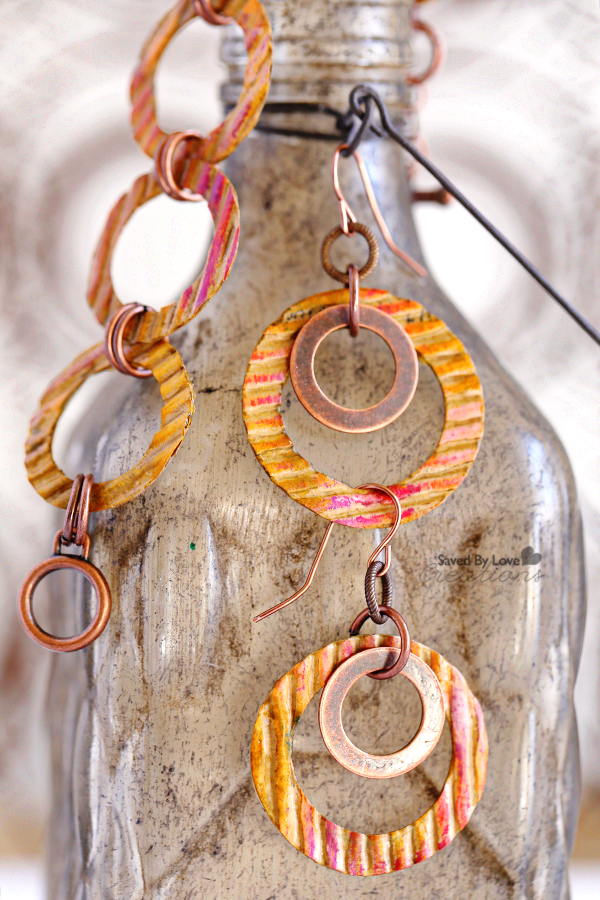
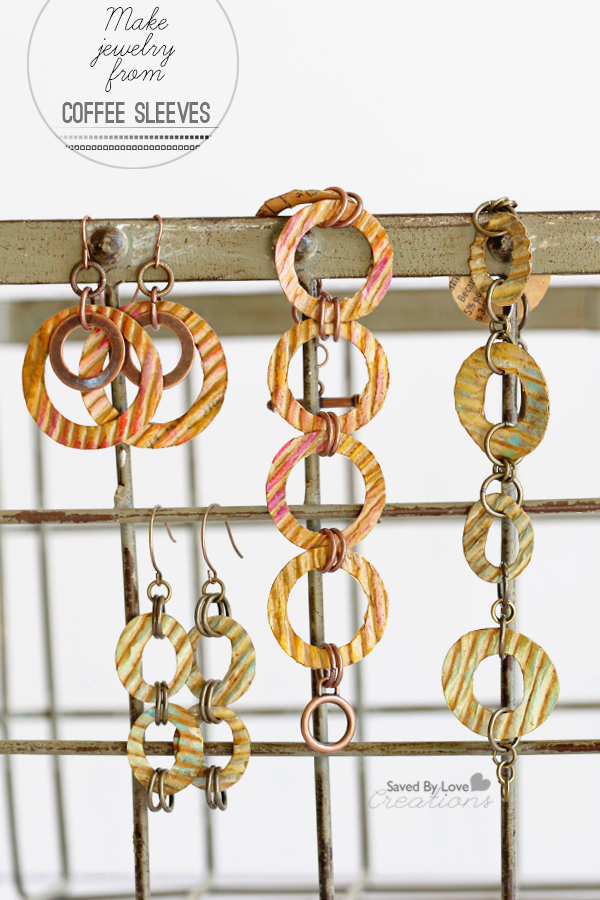
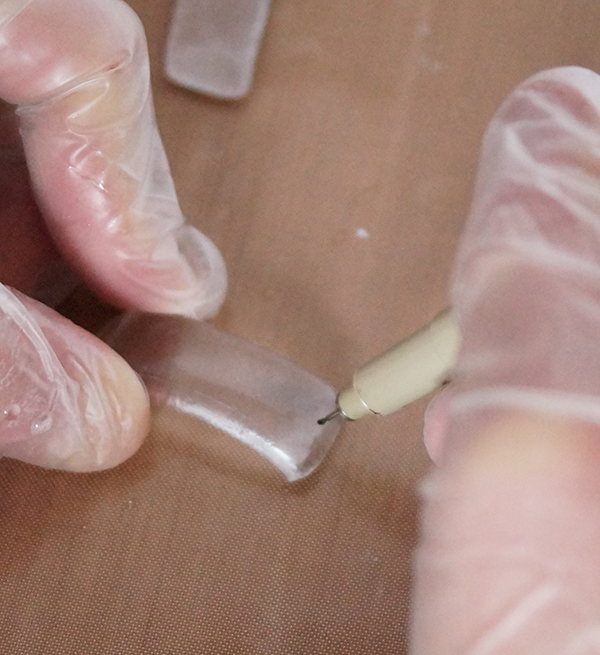
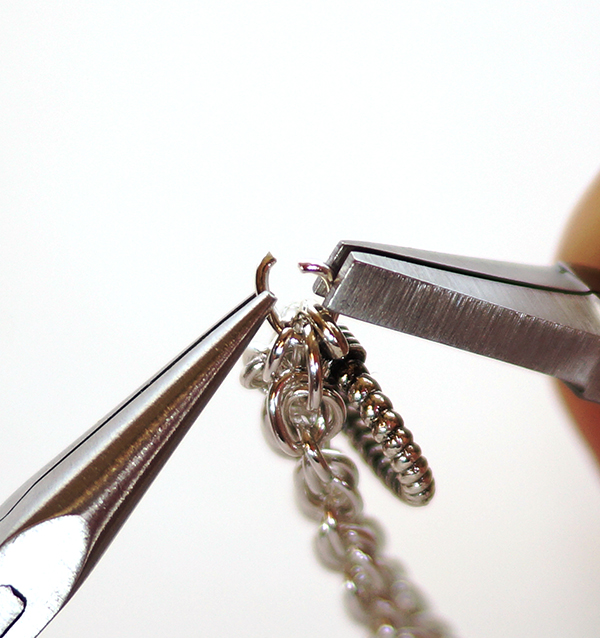
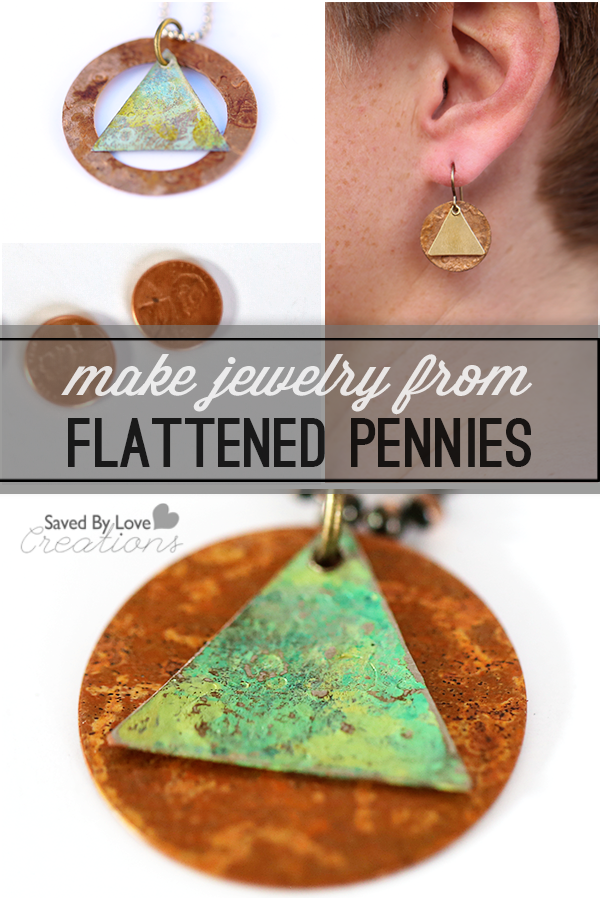
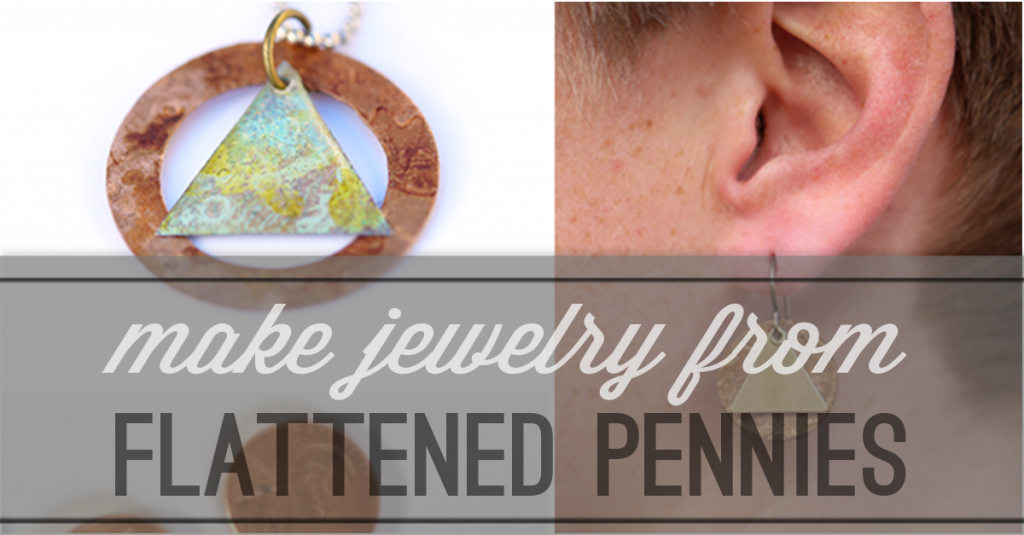
Emboss your pennies and die cut into jewelry shapes. Here i cut the flattened and embossed pennies into circles and attached Vintaj Vogue Stamping Blanks Triangle 14mm using a rivet. Just hole punch the penny circles, insert rivet through triangle and circle, set with eyelet setter and attach jump ring and ear wires. Done!

aa-necklace-circle-triangle

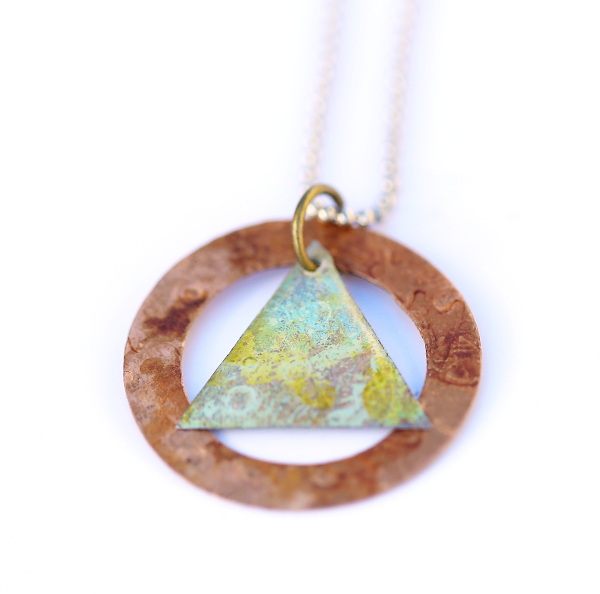
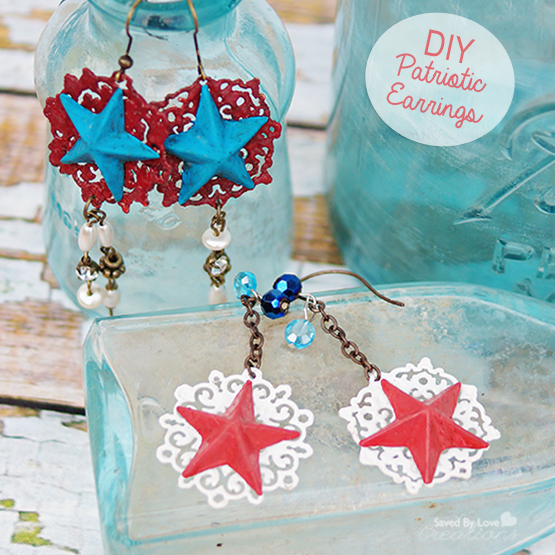
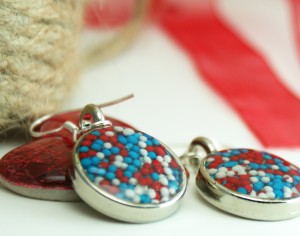
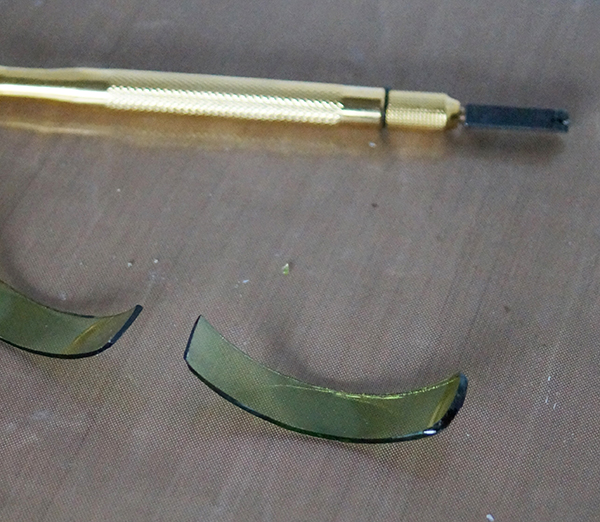
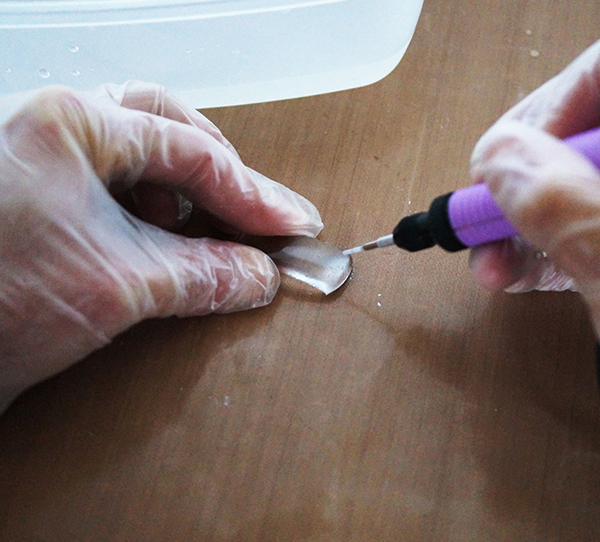
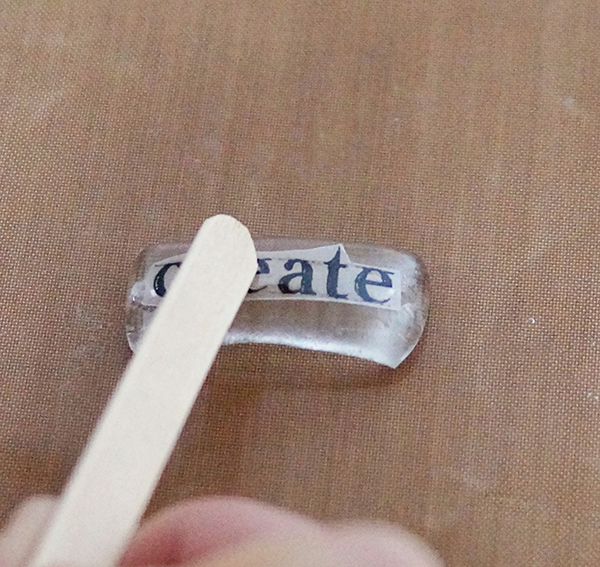
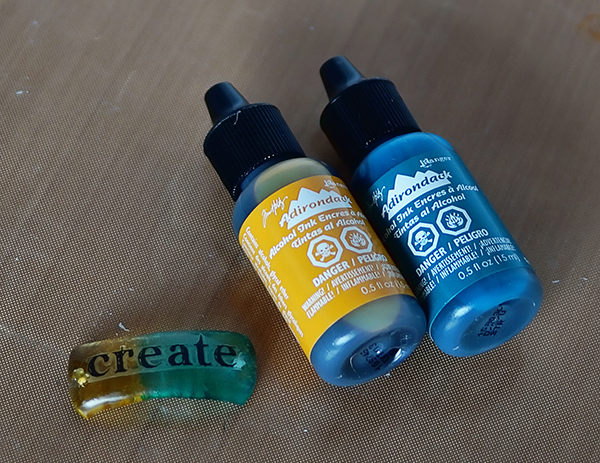
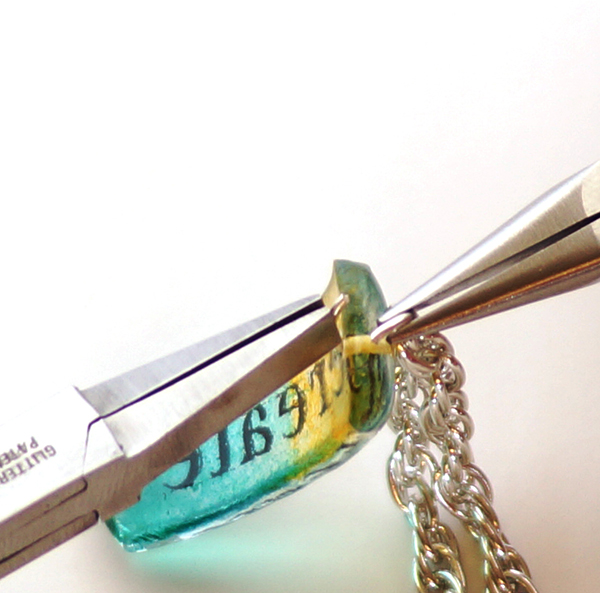
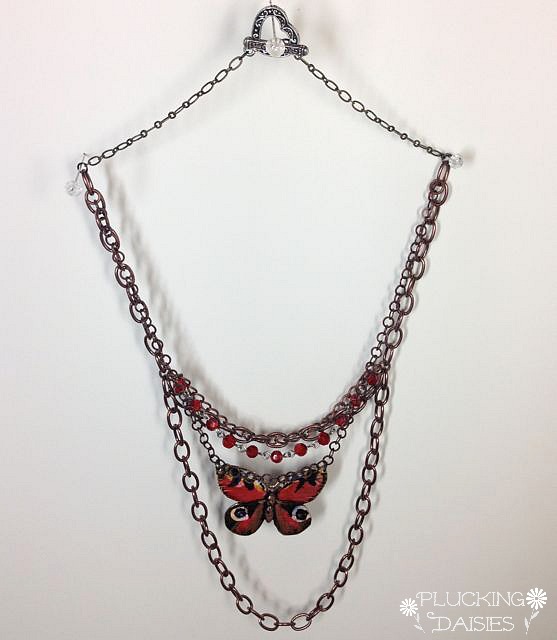
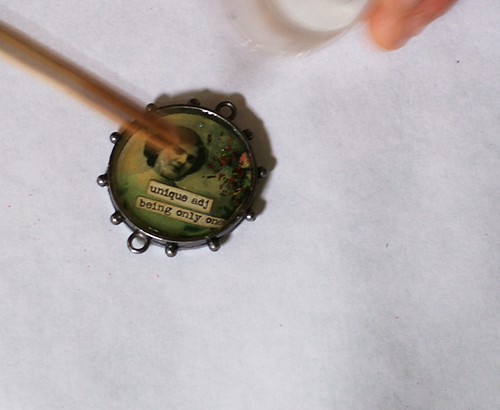
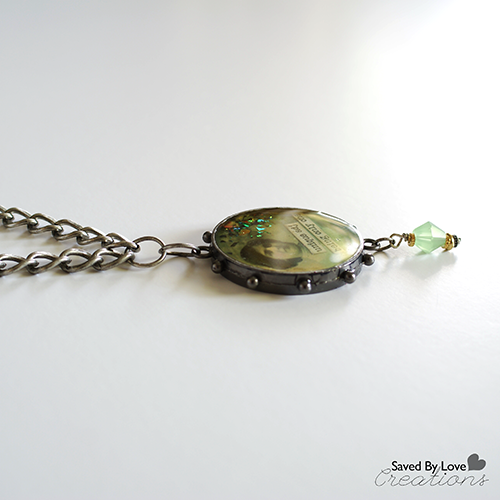
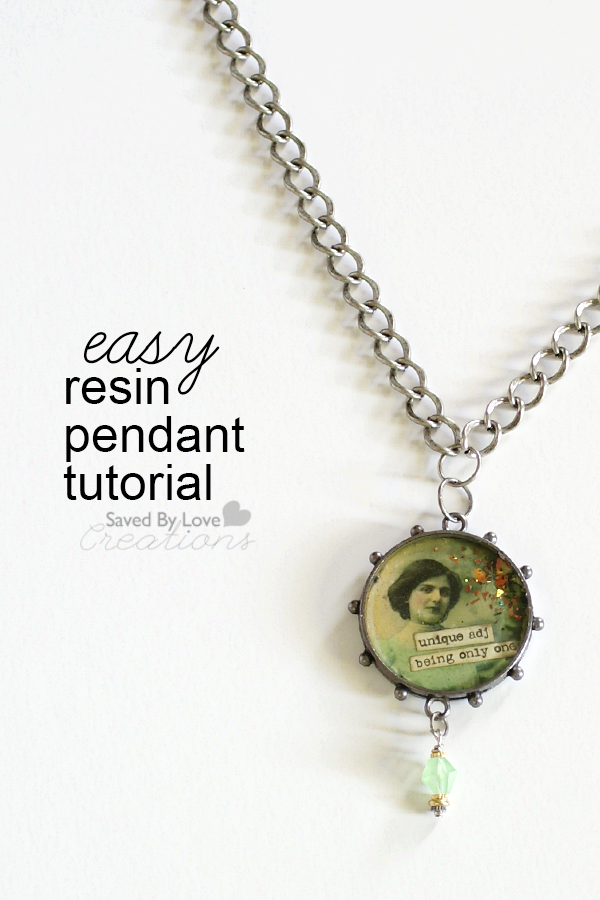
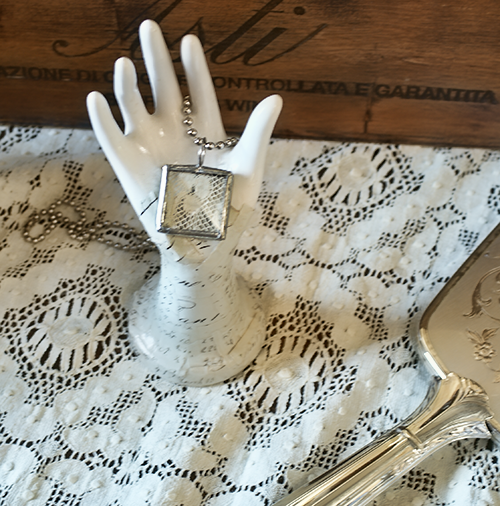
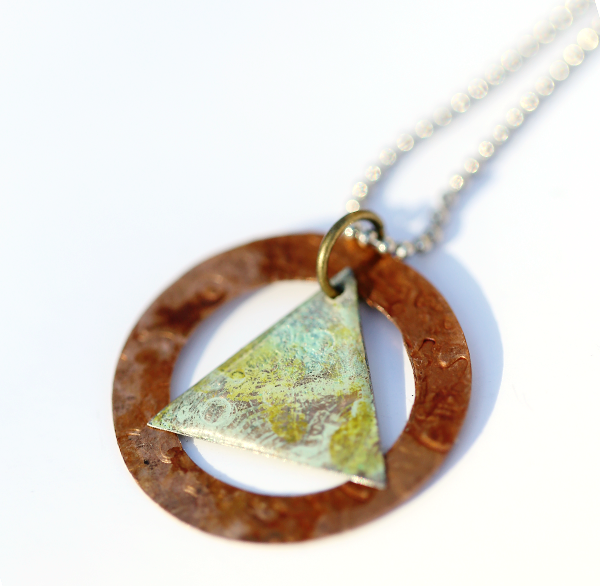
For this pendant, I die cut a ring with the Sizzix butterfly rings die – a favorite die of mine. I cut a triangle with another embossed flattened penny and painted it using vintaj patina paints for metal. Once the paint was dry, I applied Magic Glos UV Resin, by Lisa Pavelka. I love the domed resin look. You can put this in direct sunlight to cure, or cure it in 10 minutes using Lisa Pavelka’s UV light. I went the 10 minute route! It’s been awhile since I used that stuff, and I forgot how fun it is.

upcycled-coin-pendant-jewelry-tutorial

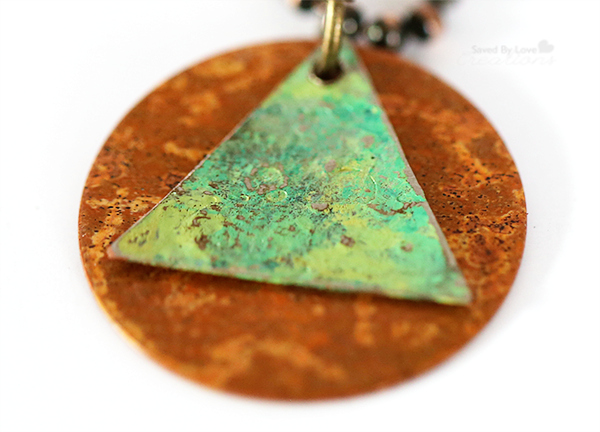
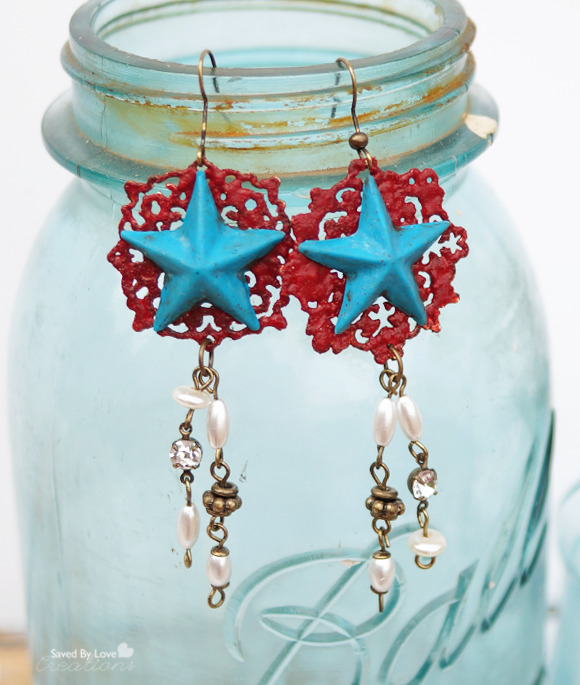
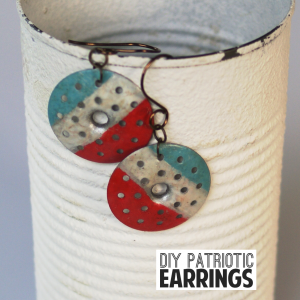
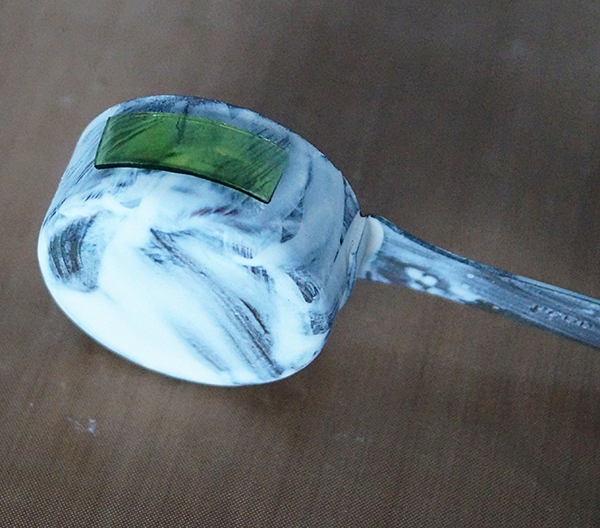
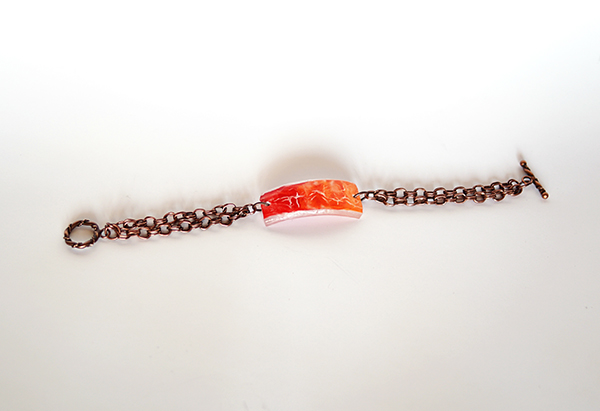
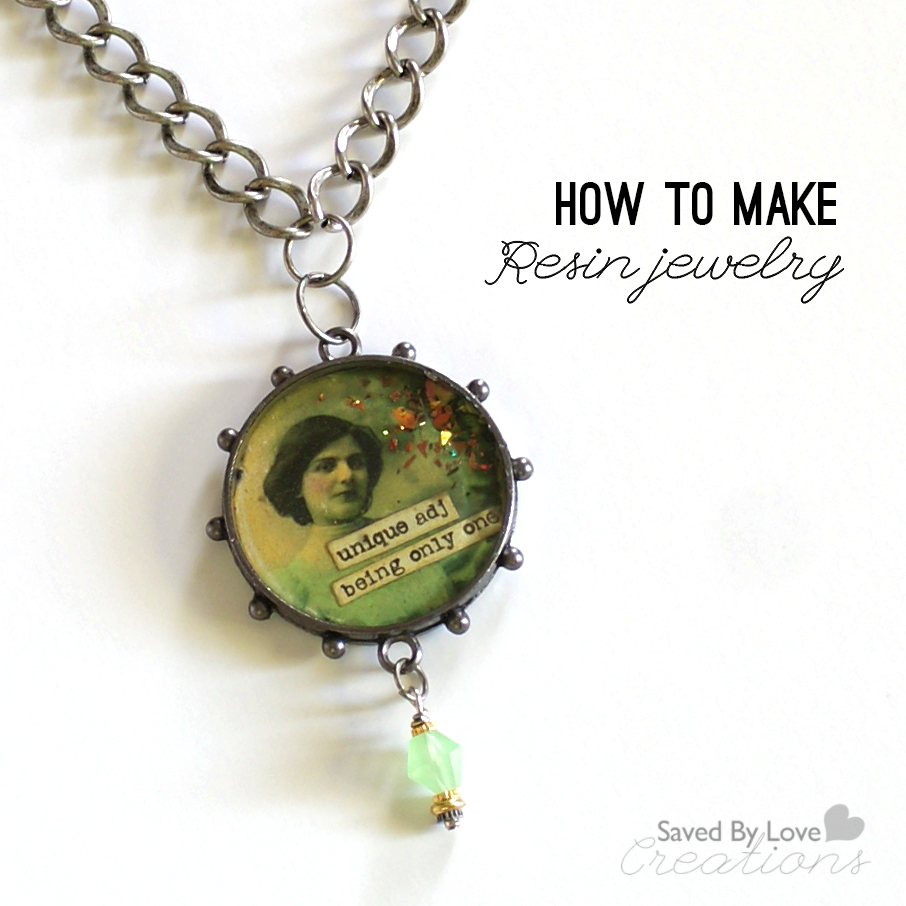
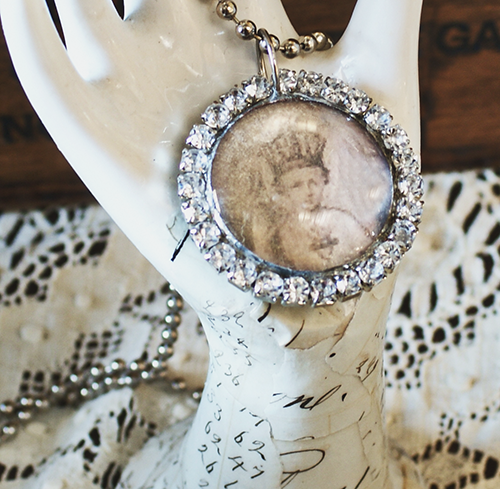
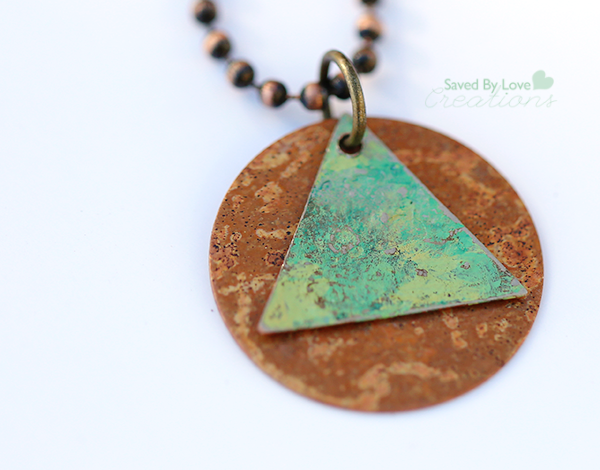
This piece is comprised of a Vintaj metal blank (the background circle) and a flattened penny triangle that I painted with Vintaj Patina. I didn’t seal it. I enjoy the simplicity of the circle/triangle, and love the colors together. After applying the paint, go over the triangle lightly with medium grit sand paper to reveal the raised areas created by embossing previously.

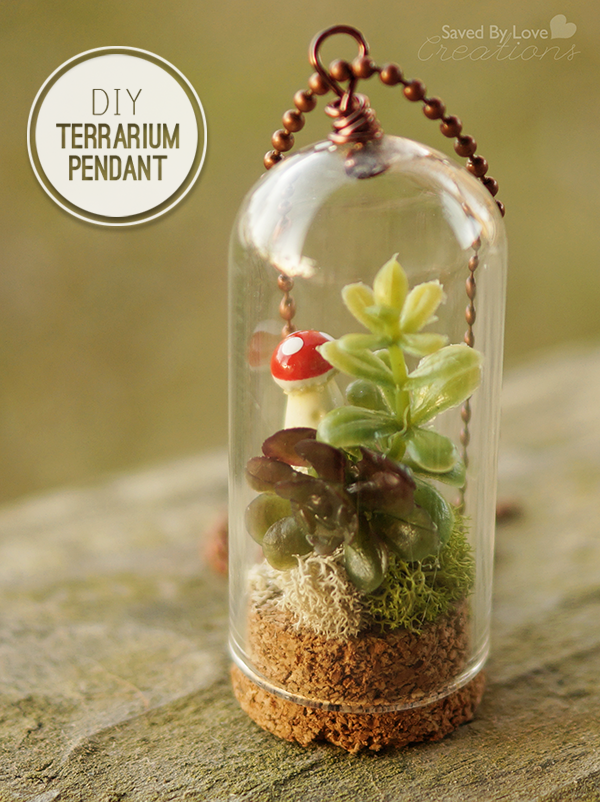
Visit here for more RESIN JEWELRY TUTORIALS

fb-how-to-make-upcycled-jewelry-from-pennies

What do you think? Do you have a less illegal method for flattening pennies? Can your rope your husband into doing it for you, like I did?

You can use any coin, by the way. I just like copper.

I’d love to see what you can do with flattened coins. If you don’t have a die cut machine, you can cut shapes with metal shears or tin snips for your own custom creations! Happy crafting!

Upcycle Coffee Sleeves into Gorgeous Jewelry

How to Make Gorgeous Jewelry From Coffee Sleeves @savedbyloves

Today I am sharing with you this great coffee sleeve upcycle. With the amount of coffee I drink, the sleeves were starting to pile up. I saved them, knowing one day, inspiration would strike and I would repurpose them. The idea to create jewelry from them came to me over the weekend as I was sorting through my Sizzix dies. These are easily customizable to coordinate with any style. Follow along and make your very own!

SUPPLIES:

upcycled jewelry tutorial

Coffee Sleeves

Acrylic Paint (I used Distress Paint)

Asymmetric Rings Sizzix Die

Butterfly and Rings Sizzix Die

Mod Podge Antique

Non-Stick Craft Mat

Markers to coordinate with paint(I used Distress Marker – Vintage Photo)

Jump rings

Toggle clasp

Ear wires

2 pairs of jewelry pliers

INSTRUCTIONS:

2 Repurpose jewelry

Unfold coffee sleeve.

3 Upcycled Jewelry Tutorial

Randomly apply your favorite acrylic paint colors.

4 Jewelry Making Tutorial

I went for a warm and cool color range.

5 DIY Jewelry

Once paint is dry, cut out rings with sizzix as shown. If you don’t have a sizzix, you can cut by hand, or use paper punches.

6 How to Seal Paper Jewelry

Seal pieces for durability. I dipped them in Mod Podge antique finish.

7 Upcycled Jewelry Ideas

Brush away excess Mod Podge and let dry.

Distress Paper Edges

Mark around the inner and outer edges of the rings. On the left is before marking, the two on the right have been marked around the edges.

9 Attach rings with jump rings

Use various jump rings to attach rings for earrings and bracelets as shown.

Upcycled Earrings from Coffee Sleeves

How to Make Cardboard Jewelry

Jewelry from Coffee Sleeves

I am in love with these pieces! Super easy and cheap to make. You could also use the die cut coffee sleeve shapes in your mixed media art.

Epoxy Clay DIY Patriotic Filigree Earrings

DIY Epoxy Resin Filigree Patriotic Earrings

DIY patriotic jewelry is a tradition here at Saved By Love Creations! For this pair I combined my newest obsession – epoxy clay – with metal filigree, to create these lovely, star spangled pieces. This project is super easy, so lets get started.

DIY Patriotic Earrings @savedbyloves

Supplies:

Epoxy Resin Mold

Martha Stewart Silicone Star Mold

Epoxy Clay (Martha Stewart shown here)

Metal Filigree

Ear wires

Metal Chain

Jump rings

Charms

Tim Holtz Distress Embossing Powder

White Embossing Powder

Heat tool or Melting Pot

Red Acrylic Paint (I used Vintaj Patina)

Antiquing Glaze

Small Paint Brush

Paper Towel

Latex gloves

Two pairs of jewelry pliers (flat or needle nose)

Instructions:

Silicone Resin Mold

Make the Stars

Mix equal parts of the epoxy clay per instructions, with gloved hands. Here I used Martha Stewart’s clay. I also like Crystal Clay and Envirotex Epoxy Clay.

Press Clay into silicone mold, making sure to push it down into the corners of the stars. Smooth out back of star with wet fingertip to avoid fingerprints.

Let the stars cure overnight, and paint as desired with acrylic paint. I left the blue stars as is, and for the red, I used the Vintaj Patina in red. I antiqued all of the stars with antiquing medium, applying it with a paintbrush and wiping it away with a paper towel while still wet.

Color the Filigree

Use red and white embossing powder to coat the filigree as shown in this Vintaj video:

Epoxy Resin Jewelry Tutorial

Adhere stars to colored filigree with a small amount of epoxy clay or strong jewelry glue.

Easy Epoxy Clay Jewelry DIY Patriotic Earrings @savedbyloves

Attach ear wires and charms and you are set!

Easy Epoxy Clay Jewelry DIY Patriotic Earrings @savedbyloves Pin

Remember Patriotic Earrings from prior years:

DIY Dollar Store Eraser Valentine Earrings

Valentines Day Jewelry Tutorial

I heart creating with dollar store supplies. For one, it is cheap, and it challenges me creatively. When I saw these cute Valentine’s Day erasers over the weekend, I immediately thought they need some resin and ear wires! Follow along to see how I made earrings from dollar store erasers!

Dollar Store Craft Idea

At first I imagined making a pendant, but then I realized the erasers came in pairs, just perfect for earrings. This project is super cheap and easy to do. Don’t be intimidated by resin if you’ve never used it.

ICE Resin Jewelry Tutorial

Especially now that ICE resin has made mixing the two parts so simple.

Dollar Store Resin Craft Idea

When working with 2 part resin, it is crucial to mix equal parts A and B. If you are off even just a little, the resin may no cure properly. ICE resin comes in a plunger that extrudes equal parts automatically.

How to Use Resin

Use a craft stick and mix the 2 parts by stirring for at least 1 minute.

TIP:  After mixing, let resin sit for 5 minutes before applying it. This lets the mixture settle and decreases air bubbles.

How to apply resin

Apply a little bit of resin at a time, starting in the center using the craft stick. It can take awhile to get use to how much resin to use. Just don’t go overboard. You can always add more to create a dome effect after the first layer has dried, but you are in for a mess if you use to much and it spills over the edge.

Let resin cure for 12 hours.

Upcycled Jewelry

I picked up these screw eyes at Walmart for $0.97.

How to Make Earrings

 Upcycling

Just screw the hardware into the top center of your resin eraser.

Jewelry Making Tutorial

Add ear wire and you are set!

Valentines Day Craft

Do you love them as much as I do? You can make 6 pairs with the pack of $1 erasers!

Make Adorable Valentine's Day Earrings Dollar Store Craft @savedbyloves

Find over 50 ways to decorate for Valentine’s Day:

50+Valentine’s Gifts to Make:

Cut Wine Bottle Bracelets

Create Bracelet From Wine Bottle Glass

Your friends will be amazed when you tell them these bracelets use to be wine bottles!  This project involves cutting glass and firing in a kiln, but you could do a version without the kiln too.  Use rub on transfers and alcohol inks to create a piece of wearable art!

MATERIALS

-glass bottle label removing and cleaning supplies (see techniques)

-glass bottle cutting supplies (see techniques)

-stainless steel measuring cup

-kiln

-kiln wash

-glass drilling supplies

-jewelry chain

-jump rings

-toggle clasp

-two pairs of jewelry pliers; flat and or needle nosed

-alcohol inks and felt pad applicator

-non stick craft sheet

-rub on transfers

-beads and charms for embellishing as desired

-permanent marker

 DIRECTIONS

 1.  Cut a ring from your chosen bottle (See How to Cut Wine Bottles)

Make jewelry from wine bottles

Wine Bottle Bracelets 3

2.  Carefully score ring with glass cutter and tap to break score, leaving you with a half circle.  Score this to the size you would like your bracelet to be, about 2.5 inches.

 Wine Bottle Bracelets 4

3.  Place bracelet piece on kiln washed stainless steel mold or measuring cup as shown and fire to full fuse (see techniques).

Wine Bottle Bracelets 5

4.  Once the bracelet is cool, remove it from the kiln.  Mark for placement of holes where chain will be attached with a jump ring.

Wine Bottle Bracelets 6

5.  Drill the holes using small diamond bits (see How to Drill Holes in Glass).  I use this diamond tipped micro engraving drill bit kit for my small holes.

Wine Bottle Bracelets 7

6.  Begin drilling at the mark, coming in at an angle to start your hole, then moving to 90 degrees as described in the techiques.  Make sure to cool the drill bit in water every 30 seconds or so to prevent glass from shattering due to heat.

Wine Bottle Bracelets 10

7.  Apply rub on transfer per instructions to the front surface of the bracelet.

Wine Bottle Bracelets 12

8.  Use felt applicator or brush to apply alcohol inks to back surface of bracelet.

 Wine Bottle Bracelets 14

9.  Open jump ring using two sets of pliers to twist each end in opposite directions.  Do not pull ends apart to open, rather twist open as shown.

10.  Attach the appropriate length of chain to get desired bracelet length and close jump ring by twisting ends back together.  Keep in mind the closure will add about ½ inch to the length of the bracelet.

Wine Bottle Bracelets 15

11.  To finish, attach toggle clasp ring to one end and bar to the other, using a jump ring for each.

 Bracelet on Fire

EXTRA TIPS

○ Create custom bracelets, earrings and pendants using this technique.  Use blank rub on transfer paper made for inkjets to transfer your own designs to your recycled glass jewelry!

50+ Ways to Upcycle CDs and Vinyl Records

[pinit]50 Plus Best DIY Upcycle Vinyl Records and CD projects to make @savedbyloves[pinit]

Since most of us no longer listen to CDs or records, our planet is left with a ton of these seemingly useless items. Today I am sharing with you 50+ upcycle projects that solve this dilemma using some outside of the box creativity. You will think twice before considering old records and CDs to be useless!


Make a DIY Terrarium Necklace

[pinit]DIY Terrarium Necklace Tutorial using Tim Holtz Corked Cloche @savedbyloves[pinit]

This tiny little treasure is easy to make and takes just minutes.  I found a new to me product from Tim Holtz called Corked Domes and knew immediately that I would be making a terrarium pendant with them.  There is glass drilling required, but do not fear.  You can do it, no problem.  I will help you and you will be a pro in no time.  I am warning you now that I used fake plants to make my terrarium.  You can use live plants.  It is way hipper if they are alive, but I have a tendency not to water things, so I went plastic.  If you are honest and you don’t have a PhD in succulentology, you’ve gotta give me that they look like the real deal.

SUPPLIES:

Rotary tool (I use Bead Landing Rotary Tool

Diamond Drill Bits

Tim Holtz Corked Domes

Small container of water and lint free towel

Hot glue/glue gun or Flora Bond if using live plants

Necklace Tutorial

Moss, small stones, mushrooms and whatever you want in your dome

Succulents (live or fake) – I got my fake succulents at Michael’s

20 Gauge copper wire or eye pin

Round Nose jewelry pliers

Flat nose jewelry pliers

Needle nose pliers

 Flush wire cutters

Chain or cord for hanging your pendant

DIY Terrarium Necklace

TUTORIAL:

First you need to drill a hole in the top of your dome for a place to insert wire for hanging the pendant.  Follow the detailed instructions I showed you in this tutorial:  Mason Jar Chimes Tutorial and Drilling in Glass.

NOTE:  These glass domes are very thin.  I tried drilling the hole using my dremel and shattered the first dome I attempted.  I like the rotary tool used in the tutorial linked above because it is way fewer RPMs than my dremel and it has adjustable speed.  Many people swear by their Dremels for drilling glass.  I find my rotary tool way easier and I have success 99% of the time with it.

Make a pendant bail

Either use an eye pin (pictured) or cut a lenght of wire about 4 inches and create a loop in one end with your round nose pliers.

How to Wire Wrap

Insert wire through Dome hole so that loop is on inside, then use flat nose pliers to bend wire to 90° about 1/8-1/4 inch above where it exits the top of the dome.

Jewelry Making Tutorial Terrarium Necklace

Use round nose pliers to grab the a few mm past the bend.  With your free hand, grab the wire end and wrap wire around the pliers to form a loop.  (That gunk on the round nose pliers is Tool Magic – it coats your jewelry making tools so they don’t leave scratches and dents in soft wire).

Handmade Jewelry Tutorial Saved By Love Creations

Wrap the remaining wire starting at the base of the loop down to the top of the dome.  Trim off excess wire with flush cutters and tuck in the end with needle nose pliers.  Now you have your wire bail for hanging your pendant!

Necklace Tutorial

Lay out your goodies and start gluing things into place on the cork.  Flora Bond works with live plants and won’t kill them!  I used hot glue since mine are artificial.

How to make your own jewelry

Once you have everything in place, add the dome and string your chain.  You are now super cool…

How to make a Terrarium Necklace

These would be cute as keychains too.  If you go crazy and your junk won’t fit in the dome, just tear some off and patch up any glue spots showing with moss.  Play around until you are satisfied with how it looks.

Remember last year when I showed you how to make bigger terrariums?

How about our 50+ DIY Terrariums and Creative Planters?

Make a Butterfly Necklace with Vintaj

Hi there SBLC friends!  Amy from Plucking Daisies here to share a Butterfly Necklace tutorial with you.  I created this Necklace using art metals and patinas from Vintaj.  This was my first time playing with Vintaj Patinas and I’m so excited to share what I discovered along the way!
how to make jewelry with vintaj
Generally I am not much of a Jewelry maker.  If I have to open more than a few jump rings I get squeamish so fear not this jewelry tutorial will be relatively easy.  I completed this project in about an hour and had a lot of fun doing it and I think you will too.
There were a lot of good sales in the jewelry section of my local craft store this week and I wanted to try something new.  I grabbed a few pieces from the Vintaj collection and this multi-strand chain from Industrial Chic to use as the base of my necklace design.
Make a Butterfly Necklace with Vintaj
I fell in love with this Vintaj butterfly and decided to try the Vintaj Patinas out to add some color to it.
Make a Butterfly Necklace with Vintaj
Start by adding Vintaj Patinas with a paint brush.  Allow Patina to dry between coats.  You can experiment by layering different colors on top of one another or mixing them together on a craft sheet.
Make a Butterfly Necklace with Vintaj
After coloring my butterfly with Vintaj Patinas I added highlights to the wings with Snow Cap Alcohol Ink using a q-tip.   I layered on several other colors of Alcohol Ink (with q-tips ) to the outer edges of the wings as well.
Make a Butterfly Necklace with Vintaj
Once the Alcohol inks were dry I tore a small piece of cotton from the end of a clean q-tip and wrapped it around the end of a toothpick.  By squeezing a few drops of Pitch Black Alcohol Ink on my craft sheet I was able to use the tooth pick to add bold details to the butterfly.
Make a Butterfly Necklace with Vintaj
When the detailing was finished I gave the butterfly the once over and touched up areas that needed more Alcohol Ink.
Make a Butterfly Necklace with Vintaj
Using a soft file I removed some of the ink from the raised areas and edges of the butterfly to bring out a lovely metallic sheen.
Make a Butterfly Necklace with Vintaj
This was my Inspiration photo.  Pretty close eh?  You can find this inspiring photo and more on my Doodle Diva Pinboard.
Make a Butterfly Necklace with Vintaj
To create the necklace I used a bead board to measure the Industrial Chic chain.  It was just a touch short so I added some chain from my stash and attached it with Vintaj Jump rings.  So far Vintaj Jump rings are the best I’ve ever seen!  So sturdy and easy to work with!
Make a Butterfly Necklace with Vintaj
Here I have attached toggle clasps to the end of the chain with Vintaj jump rings.  When it comes to clasps for jewelry I’m a huge fan of the toggle clasp.  I always struggle with lobster clasps and have found that toggles make putting on jewelry a breeze.
Make a Butterfly Necklace with Vintaj
Now all that’s left to do is attach that freshly Patina-d Vintaj butterfly with…you guessed it…Vintaj jumprings.
I hope you get a chance to play with Vintaj Patinas and create some fun jewelry pieces of your own.
Wear your art with pride 🙂
Amy*

Ice Resin Bezel Pendant Tutorial

Making Jewelry With ICE Resin and Susan Lenart Kazmer Iced Enamels @savedbyloves

I have shared several resin tutorials with you, trying out the various types available.  ICE resin is quickly becoming my favorite.  It is easy to use, and hardens to a strong, clear, glass-like finish.  Today’s project is a fun bezel resin pendant using Susan Lenart Kazmer’s papers, Iced Enamels and ICE Resin.  You can find everything I used for this piece at your local Hobby Lobby.

Resin Jewelry Tutorial

SUPPLIES:

Iced Enamels:  Shattered Fire Opal

ICE Resin

Spellbinders Bezel

Tim Holtz Word Stickers

Chain

Charm

Image

Pen

Scissors

Popsicle stick and cup for mixing resin

Sealant such as Mod Podge or Embossing medium

TUTORIAL:

How to make a Bezel Pendant

Place your bezel over the part of the image you want and trace with permanent marker.

ICE Resin Tutorial

Place word stickers where you want.

Susan Lenart Kazmer Iced Enamels

Seal image and word stickers with embossing medium or Mod Podge and dry with heat tool.  This protects the image from the resin, which can darken it if not sealed.

Iced Enamels Shattered Fire Opal

Sprinkle in Shattered Fire Opal Iced Enamels, or glitter or other mica powder.  Anything sparkly will do!

ICE Resin Projects

 Drip resin into bezel using popsicle stick until it domes.  Be careful not to overfill!

How to Make a Resin Pendant

Let dry 6-12 hours, attach chain and charm.  Enjoy your awesome, custom resin jewelry.

Resin Pendant Jewelry Tutorial

Check out more SBLC Resin Projects:


Video Tutorial – DIY Gorgeous Soldered Pendants + GIVEAWAY

[pinit}

how to make a vintage soldered pendant

[pinit]

UPDATE:  WE HAVE A WINNER!  Do you love the look of soldered jewelry, but feel totally intimidated by that hot freaking iron and molten metal?  My creative friend Hope is here to break it down for us in a detailed How to Solder Jewelry video that demystifies the process and will have you making jaw dropping pieces lickity split!  As if that isn’t enough, Hope has teamed up with Saved By Love Creations to give you lovely readers a chance to win your choice of 3 gorgeous pendants!

Soldering Tips for Jewelry

Hope invited me in to record her process!  Before jumping into the video, I want to let you know the supplies you see will being used are from GlassSupplies on Etsy, a shop owned by Robin Ramsden.

Foil Tape For Soldering

This tape used in the video is 3/8 inch wide copper backed foil tape, which you can get at the linked store and probably elsewhere.  Hope recommends black backed foil tape for most simple projects since it holds the pieces together better and is just strong/less frustrating for us newbies!  She was out of it or we would have been using it for sure.  It is available in the linked shop above (GlassSupplies on Etsy).

Obviously if you are using thicker glass pieces than we did, you may need wider tape.  You will have to experiment.

More info on supplies is found below and in the video tutorial.

I did a soldered pendant experiment and shared it with you here:

I took my pendants to Hope’s with me and she helped me figure out how to make them more what I was going for.  I learned so much from hanging out with her that I haven’t seen elsewhere.  It turns out I wasn’t using near enough solder, and oh yeah, my soldering iron tip is disintegrating.   There is a solution for that, and many soldering woes.  This woman solders A LOT and is a wonderful resource!  She is also super sweet, so if something isn’t covered that you want to know about, you can find her on Facebook:  Hope Ellington.  She even takes custom orders, although she is pretty swamped with them right now from what I have seen so hurry if you are interested.

There were so many tips and tricks that I had to break the video up into 2 parts, and they are still long.  You will learn a ton, and if you are like me, your soldering will be vastly improved.  I made a pendant this morning and love it!  Don’t worry, you will see it soon.

SUPPLIES (the video goes over specific brands Hope loves):

Supplies for Soldering Jewelry

Jewelry Soldering Techniques

VIDEO TUTORIAL Parts 1 & 2:

GIVEAWAY

Now for the best part.  You get a chance to win a free handmade soldered pendant from Hope’s Bloomington Indiana Shop, Girlfriends on the Farm!

Pendant 1 – A fancy pants, blinged out vintage ephemeral piece

how to make a vintage soldered pendant

Pendant 2 – A message in a bottle “LOVE”

Jewelry Soldering Techniques

Pendant 3 – Vintage Lace under beveled glass

Soldered Doily Pendant

a Rafflecopter giveaway

Privacy Policy