
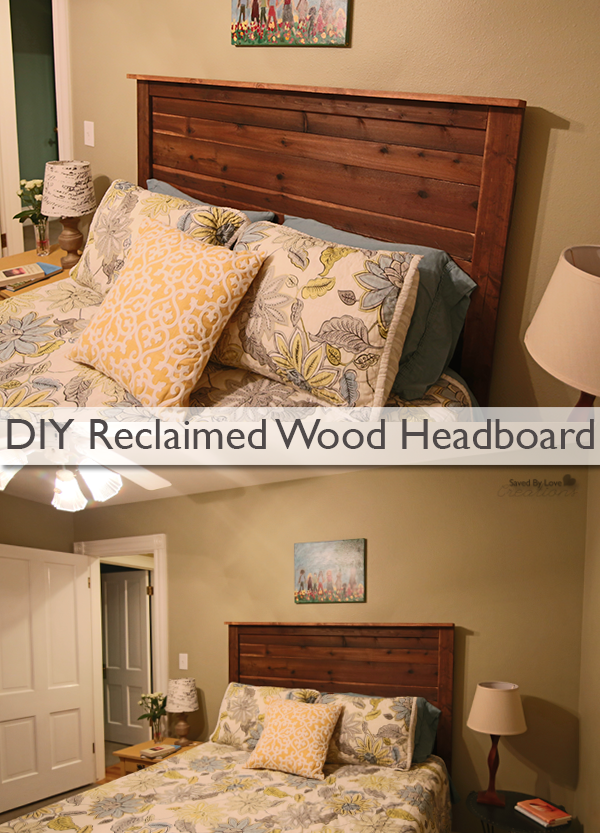
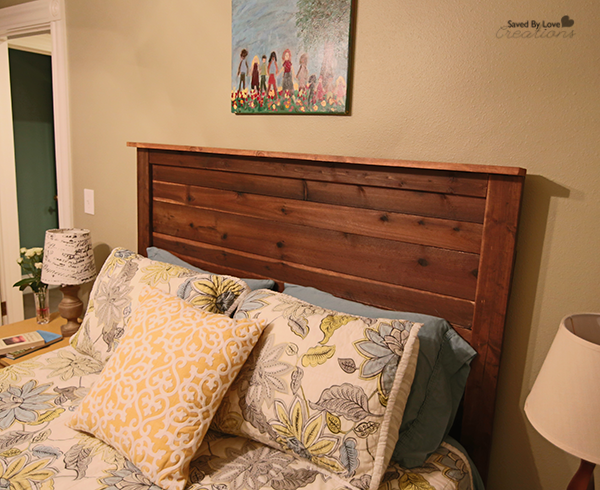
 Want a beautiful rustic headboard that’s easy to build and easy on the wallet? Stick with this plan and you can have one in about 4 hours (if you have already prepared the “aging solution”… more on that later). The one we built was made to fit a queen size bed frame but this can easily be modified to fit your particular bed size. Let’s do this!
Step 1.
Decide on the size. As I said earlier we made ours to fit a standard queen size frame. The distance between the attachment points on a frame that size is about 60 inches. So we made the over- all width to be about 3 inches wider than that. This allows the two main upright legs to fall right on the frame so it can be attached with a couple screws.
The height of the headboard is also a personal preference. We chose to make ours about 56 tall. I wouldn’t go any shorter than 40 and not too much taller unless you have an unusually tall mattress and box springs. Otherwise it looks a little overwhelming.
Step 2.
Obtain the lumber. We found some old weathered barn and scrap wood on the free craigslist site. The following boards were used for this particular size head board. The dimensions are approximate because reclaimed stuff comes in various sizes. So long as you keep the main leg rails and the back boards straight and the same thickness, you can use whatever you like.
For ours:
Main leg rails: (2) 2×4 x 56 inches
Back boards: (5) 5/8” x 5.5 “ x 6 ‘ and (3) 5/8” x 3” x 6 ‘ rough sawn cedar or pine dogged eared fencing boards.
Top mantel board: (1) ¾” x 3” x 6’ rough pine or cedar board. (cut to length after assembly)
Trim Board: (1) 5/8 x 1” x 6’ board (cut to length after assembly)
If you end up buying these form a big box place pick out the gnarly, rough looking ones that nobody else wants. They are super cheap (less than a buck and a half a board) and the take up the “aging solution” very well.
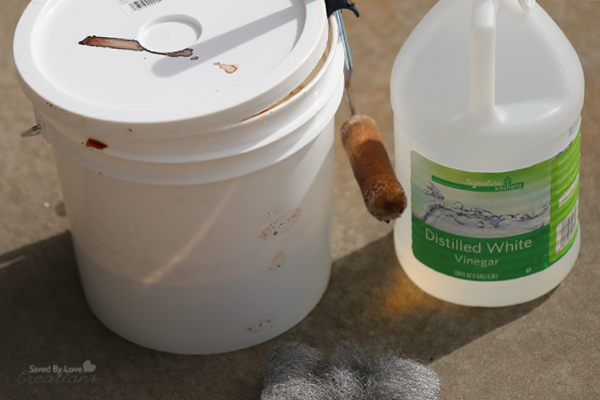
Aging solution: To put a darker, weathered look on any new wood that you may have to use in the construction of your piece, here is a kind of a neat and cheap way to do it.
In a plastic bucket mix 1 part water and 1 part white vinegar. Place three or four steel wool pads that you have teased apart a little bit into wispy strands. Make sure the steel wool is submerged in the solution. Put the lid on the bucket and allow it to stand for about 4 days.
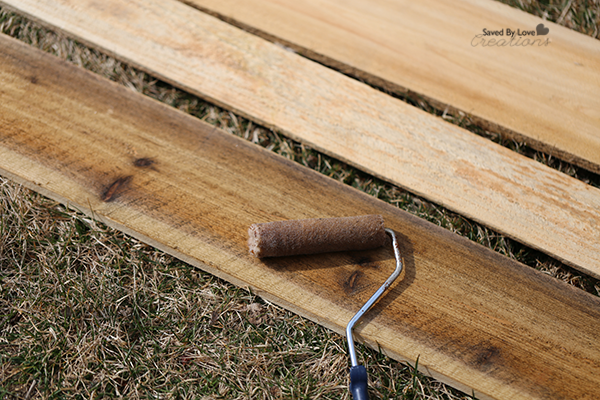
When its ready to go, use a brush or a cheap roller to apply it to the boards that you want or age or darken. When you first put it on it will want to “bead” up on the wood. After a few seconds the grain opens and it pulls in to the wood and it evens out to a nice “wet” look. The only tip I have is to make sure you don’t leave a big drop or a splash on the surface. Make sure you roll or brush it out so that it the entire surface is evenly wet. It’s a fooler because it’s like painting with water. You don’t think it’s doing anything at first except wetting the surface…but in about an hour you will see what happens. Try some on a practice piece to get comfortable with how to apply it and how many coats. The more you do it the darker it gets. Less is more. Do this to all of your boards before you cut and assemble.
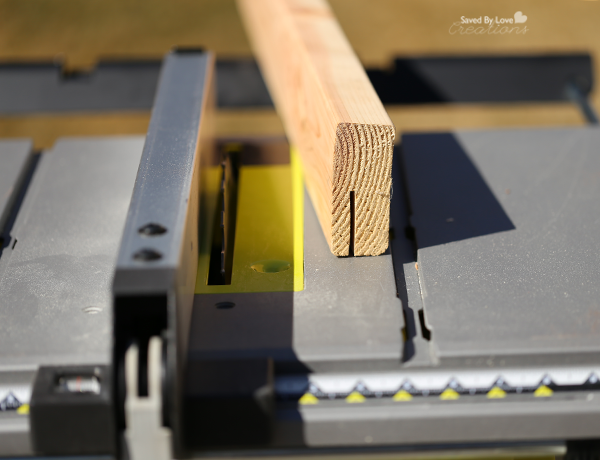
Saw Cuts: The only cut that you have to make that is just a little out of the ordinary cross-cut style is the rabbit cut on the leg rails. Don’t worry they are simple too, but it does require a table saw or a radial arm saw if you want to do it right. I used our table saw so that’s what I’ll explain.
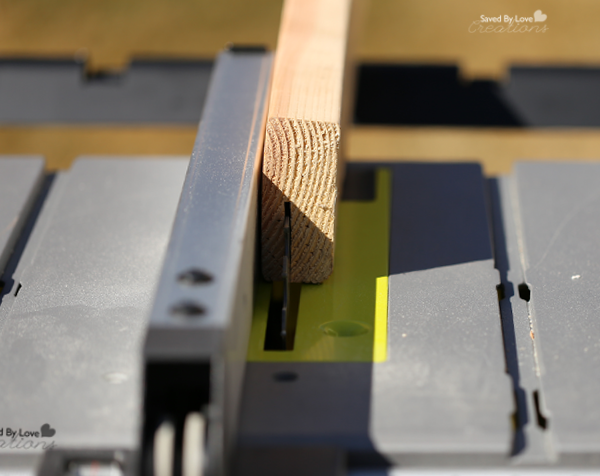
After you have cross cut the 2×4 leg rails to the right length of 56 inches, you are going to perform a rip –cut down the center of the 2×4 with the blade depth set such that it will only go half way through the thickness of the board. So that means the fence is set to 1.75 inches from the blade and the depth of the blade is set to ¾ inches. Rip the entire length of the board. Then do the other leg the same way. Now reset the fence to ¾ inch from blade and the blade depth to 1.75 inches. Fli the board 90 degrees and rip the length of the board. Repeat with other board.
What you should have now is two boards that have a rabbit or lap that runs the entire length. This is where the back boards will sit and what creates the finished hidden edge when you look from the front of the headboard.
Next cut your back boards to exactly the same length. They can be whatever length your bed frame demands, and they don’t have to be exactly 60 inches for example, but it is critical that they are all the same. So cut the 5 wide backboards and the three narrower backboards all the same.
Assembly:
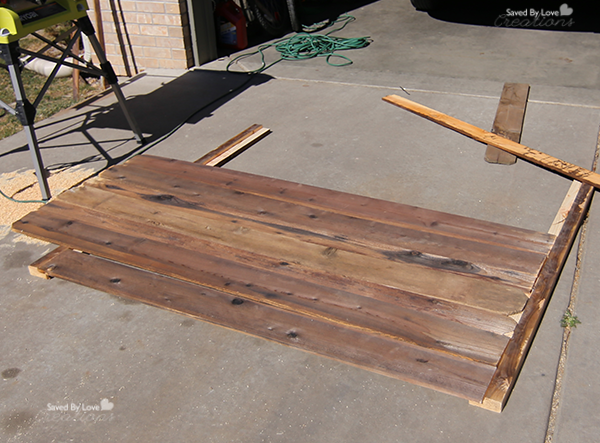
Lay the leg rails down on a flat surface ( garage floor?) and then lay the back boards face down between them so they span from one rail horizontally to the other. We decided to run a couple of the narrower ones in between the wider ones to give it a little less uniform look . You can do whatever. If you actually prepared 5 wide and three narrow boards for this you have plenty run down below where a typical mattress and box spring will sit. The idea is that you don’t see a huge gap above the mattress for the pillow to fall down in and that just looks silly. So measure your bed from floor to top of mattress and make sure you attach enough back boards to go all the way down past where the top of the mattress will be.
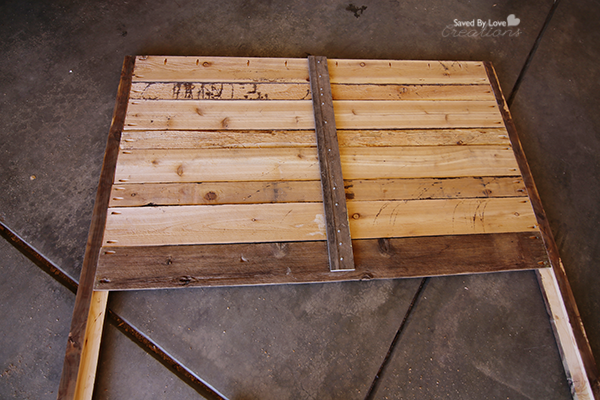
After you have laid the boards out and checked them for length and fit , you can actually fasten them into the leg rails. There are a number of ways to do this, we like to use Kreg jig screws. They provide secure, quick fastening. We put two holes in the end of each of the back boards to keep the board from cupping. We also used glue under the edge for added measure. For the top board, we used the Kreg jig to drill pocket holes facing up for the attachment of the top “shelf” board.
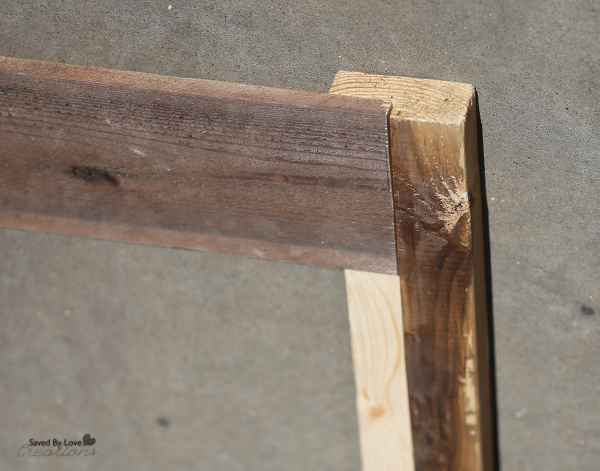
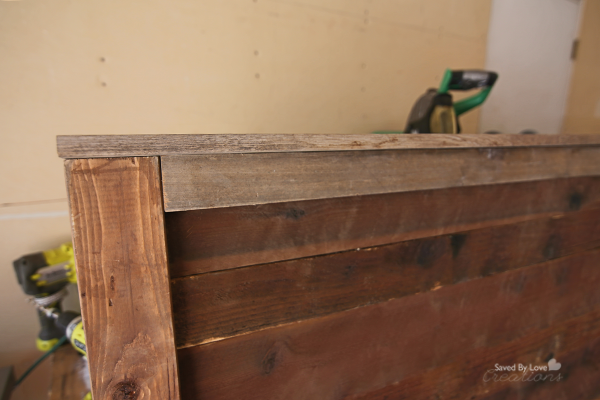
After you have secured all of the back boards the headboard assembly is pretty much complete. It should be strong enough to stand it up and measure the final length of the top finish piece and the trim piece. We like to run the top “mantel” all the way from the outside leg rail edge to the other. Flush. The width of this top board will dictate the over hang you achieve. You can let it hang over the back and the front if you like. We allowed ¾ inch over hang in the back.

Secure it to the top board using the kreg pocket holes you drilled along the top edge.
The ¾ inch over hang of the top mantel board in the back allowed us to run a ¾ inch board down the back (perpendicular) to each of the horizontal back boards. We then screwed it into each of the back boards from the back so none of it shows (see photo above). This kept all of the horizontal boards even when viewed from the front and will tie them together as on unit so they don’t warp or bend apart from one another and create an unsightly gap over time.
The last piece to put on is the trim board that goes between the legrails and right up under the top mantel piece. This just finished the look of the whole thing in my opinion. Attach with small finish nails and glue.
Final finish
Touch up anything you need to with some more aging solution and then seal with your favorite wax or varnish!
