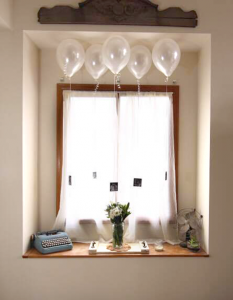
DIY Birthday Decor Balloon Photo Display

Birthday Party Decor PIN

Add a personal touch to your birthday party decor, with this simple, quick and inexpensive DIY balloon photo display! This project can be translated to fit any celebration or holiday. Use photos of the happy couple for a golden anniversary celebration, or for wedding reception decor. Here you will see adult female birthday party decor, but use your imagination. The possibilities are endless, especially if you have a Balloon Time Helium Tank, allowing you to bring whimsy anytime, anywhere! Let’s get this party started…

For this project, you will need the following supplies:

Balloon Time Helium Tank

Balloon Time Helium Tank

Balloons in your color choice

Ribbon to tie off balloons

Photos to display

Glue dots or adhesive of your choice

DIY Photo Display Using Balloons FB

To create your own balloon photo display, follow these instructions:

Begin by printing off your favorite photos to go with the occasion. I edited photos in Photoshop to give them a black and white, framed Instagram type feel. I created a file sized to 8.5 x 11 inches and pulled each edited photo to the new file. Then I took them to my local big box office supply store and had them print 2 copies of the file on white card stock. It was $1.40 total! Cut them out and set them aside. You have 2 prints of each photo.

Inflating Balloon

Next, turn the green valve four times, counter clockwise. Slide the balloon neck over the black nozzle.

Balloon Inflating

Simply push down on the nozzle to inflate the balloon! So simple to use and convenient to have on hand for whimsical decor, any time.

Photo Display Ideas

Tie a knot in the balloon and attach ribbon to each balloon. Now you can use glue dots to adhere photos to the ribbon. Sandwich the ribbon between the 2 copies of each photo so that when the ribbon twirls with balloon movement, there won’t be a blank side.

That is it! Go grab a Balloon Time Helium Tank and show us what unique balloon displays you can create!

This is a sponsored conversation written by me on behalf of Balloon Time. The opinions and text are all mine.

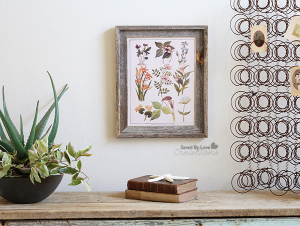
Botanical Specimen Art Free Printable

Free Printable Botanical Specimen Art from @savedbyloves

Today is another gem from my recent old book inheritence! This is a cool North American Wildflower botanical art print. Mine is sized 11×14, but you can resize as you wish.Wildflowers

Just right click this thumbnail and the full resolution print will pop-up for you to print or edit as desired.

Free Botanical Printable

For tons more free printables, check out our site: Printable Decor

free floral printable art

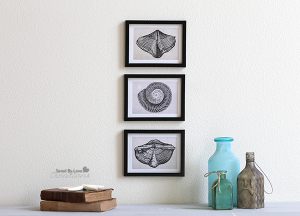
Free Printable Shell Specimen Art Trio

Free Printable Shell Art Trio Coastal Decor @savedbyloves

Today I am sharing with you this free printable shell speciment art trio I created, using images I found in an early 1920’s flea market book. Mine are framed in Dollar Tree shadow boxes that came matted to fit 5×7 inch images. Who knew you could get such a thing for a mere dollar? I was pleasantly surprised! You really can’t beat this $3 instant wall art deal. Get your downloads and spruce up your decor, coastal style.

Shell 3

Shell 2

Shell 1

To access the full resolution versions of the above thumbnail images: right click the image, then download or print the full res version that pops up in a new browser.

Free Specimen Art Printable Trio

I printed mine with my Epson Artisan 837, on Premium Matte Presentation Paper. You can print 2 of the 5×7 files on one 8.5×11 sheet.

Free Printable Shell Art Trio Coastal Decor WM

I am loving my new vignette for spring!

Stay tuned for a tutorial on how to scan images from old books and use them to create art prints in Photoshop! Not all books are public domain. Find out about what is o.k. to use in this great article: Public Domain Frequently Asked Questions. Keep your eyes peeled for old books on your junking and thrifting adventures for books published prior to 1923, and examine them for cool images to use in your graphic design projects!

Free Printable Shell Art Trio Coastal Decor CG

If you love this style, check out our 50+ Coastal Decor Projects:

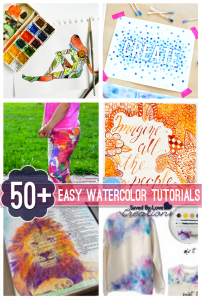
Over 50 Easy Watercolor Inspired DIY Tutorials

50 Plus Easy Watercolor DIY Decor and Art Tutorials @savedbyloves
I am thrilled to share today’s 50+ round-up! It is a colorful collection of watercolor inspired DIY tutorials that you can make, even if you aren’t an artist! From fashion to wall decor to kid’s crafts and more, you will be ready to create with these detailed tutorials. Enjoy!

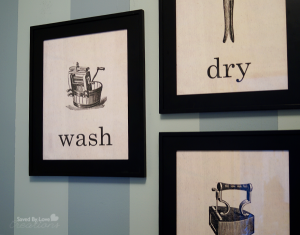
Free Vintage Laundry Room Printables


Three Free Laundry Room Printables @savedbyloves

We recently renovated our laundry room, top to bottom. I will be sharing all the juicy details with you in upcoming posts, but today is all about free laundry room printables, from me to you! I created these in photoshop, using these free graphics from my favorite vintage graphics source, The Graphics Fairy: Washer and Iron, Clothespin.

Free DIY Laundry Room Printables @savedbyloves

I pulled them into Photoshop and added an old book page background I scanned in from a stack of books I inherited recently. The font I used to ad the text is “Century”. Super easy to create, I made them in 11×14 to go with the black frames I had on hand, but feel free to resize them to meet your needs. Download the freebies by clicking the text under each thumbnail below to pull up the full res version, then print, or save to a flash drive to take to your local printer. I had mine done at Office Depot on cardstock for less than $3 total! Not bad for some adorable laundry room art.

Wash Laundry Room Printable

WASH PRINTABLE

Dry Laundry Room Printable

DRY PRINTABLE

Press Laundry Room Printable

PRESS PRINTABLE

Enjoy and stay tuned for the mudroom bench reveal and tutorial!

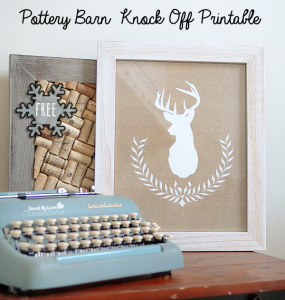
Pottery Barn Knock Off Christmas Decor Printable

Pottery Barn Christmas Art Knockoff


Sometimes when I am having trouble coming up with a project, I visit my favorite store catalogs or websites for inspiration. This project is inspired by a Christmas Wall Art piece from Pottery Barn that cost $99 on the website. I got the print for $1.75 at Office Depot by downloading it to my flash drive and taking it to my local store. Total, my version was under $20!

Reindeer Wreath Printable

Download the 11×14 Reindeer Wreath Printable and grab a frame with your Michaels 40% off coupon and you can have your own Pottery Barn winter art knock off for 1/5 of their price. You can click the above link or thumbnail to pull of the full res version and save to your flash drive for going into the store, or save to your computer and order a print electronically.

*I used this classic wreath graphic from The Graphics Fairy and this Reindeer Silhouette from Lolly Jane on this burlap background in Photoshop to create the print!

I hope you enjoy!
Pottery Barn Christmas Printable Art Knockoff from @savedbyloves

Do you want to see more knock off designs for decor, jewelry and more? Visit our 50+ Knock Off Designs Roundup:

DIY Recycled Glass Bottle Frames

Photo In a Bottle Upcycle from @savedbyloves

Display meaningful photos in a unique way while busting through your stash of vintage buttons, ribbons, fabric scraps and found objects. These little medicine bottles can be found in thrift stores, at tag sales and online for cheap.  Use them for Christmas gifts, or as photo frames for yourself!

Photo In a Bottle 6


MATERIALS

Photo In a Bottle 1

-Variety of antique medicine and food bottles

-Photos sized to fit in bottles and printed in black and white or sepia tone on copy paper

-Glitter, sand or other filler

-Found objects, beads, vintage buttons, old keys and other embellishments

-Decorative ribbon, twine, lace, burlap and fabric scraps

-Corks for bottle tops

-Copper craft wire gauge 20-22

-wire cutter

-scissors

-hot glue

-Bamboo skewer or pencil

DIRECTIONS


  1. Clean bottle and remove any labels. Let dry.

Photo In a Bottle 4

  1. Add sand or glitter using funnel or folded paper scrap
  2. Drop in a few beads, buttons or other small meaningful objects.

Photo In a Bottle 5

  1. Roll the photo into a tube and insert it into the bottle. Use a skewer to unroll it and flatten it against the inner surface of the bottle.
  2. Embellish outside of bottle with ribbon, lace, twine, vintage pearls and other scraps. Glue on buttons and found objects with hot glue.

Photo In a Bottle 10

  1. Place cork in bottle and embellish with vintage buttons, beads or brooches. Secure with wire wrapped around cork and through button. Add a dab of hot glue at the base of the button to hold in place on top of the cork.

Photo In a Bottle Upcycle from @savedbyloves

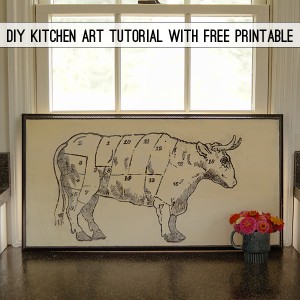
DIY Butcher’s Chart Cow Vintage Kitchen Art With Free Graphic

[pinit]DIY Kitchen Art Tutorial With Free Printable Butcher Cow Art @savedbyloves[pinit]

Vintage kitchen art in the form of the butcher’s beef chart is tops in the design world these days.  That is why I was thrilled to score a cookbook from 1898 with the perfect image for such a piece!  I scanned it in, cleaned it up in Photoshop and enlarged it to fit a 28 in x 14 in piece of art scored from a garage sale.  This tutorial shows you how to transfer a large image to a chalky finish surface, and provides the butcher beef chart cow art for you to download for use in your own projects!

SUPPLIES:

Vintage Butcher’s Beef Chart Image  (Click link for image download page)

Image transfer kitchen cow art

Paint brush

Chalky Finish Paint by DecoArt in Whisper

Image Transfer Medium

Clear Wax DecoArt

Laser Printer and Photoshop or other editing software

Painter’s Tape

Spray bottle with water or cup of water

Image Transfer Cow Butcher Art

TUTORIAL:

Image Transfer Vintage Cow Butcher Art

Prepare the surface for the image transfer by painting with Chalky Finish in your choice of color.  I used Whisper.  It took 3 light coats with 15 minutes of drying in between to cover the image on the garage sale art.

While that is drying, prepare your image.  I resized mine in Photoshop to fit the 28×14 inch recipient surface.

 Make sure you reverse the image before printing it so the numbers won’t be backwards in the transfer!

If you are making art larger than your printer will print, you will need to print it in sections and tape it together like I showed you in the video found here:

DIY Rustic Sign Tutorial Using DecoArt Chalky Finish Paint

How to Make Vintage Wall Art

Print the sections, align them and tape together on the back with painter’s tape.

Chalky Finish Home Decor Project Vintage Kitchen Art

Large Art Image Transfer Tutorial

Paint the surface with a thin layer of Americana Image Transfer Medium, and paint the ink side of the image to be transferred with the medium too.  For more detail on using this product, see my Vintage Image Transfer Coaster Tutorial shared at Printable Decor.

How to do an image transfer

Spray water on the back of the printed image and let soak for 3-5 minutes.

Rub paper backing away with your finger tips (there are detailed pictures of this in the graphic coaster tutorial linked above).

Seal the piece with clear wax and you are all set!

DIY Kitchen Cow Art Tutorial With Free Printable Butcher Cow Art @savedbyloves

Check out more cool ideas in our 50+ Image Transfer Projects

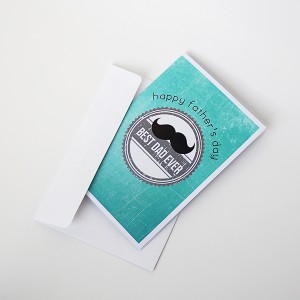
Printable Father’s Day Cards Freebie

[pinit]

Free Printable Father's Day Card

Free Printable Father's Day Cards 2014 @savedbyloves[pinit]

I am excited to share with you these fun vintage Father’s Day Card Printables!  Show your dad he is the best ever.  These are sized 5×7 and can be printed on photo paper or card stock, and folded in half as shown.  There are two version.  I hope you enjoy!

Version 1

*Just right click the thumbnail to pull up the full size version and save to your computer, print, or send to your favorite online photo printer.  I used Walmart one hour photo for this and my card with envelope was $0.97!

FathersDay2

Version 2

Fathers Day Printable Card from @savedbyloves

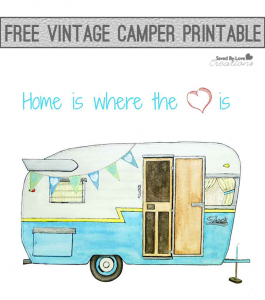
Free Printable Vintage Camper Art

[pinit]

Free Vintage Camper Printable by Colleen @JustPaintIt @savedbyloves

[pinit]

Hi there, Saved By Love readers! This month I have a little different type of project to share with you and I hope you like it. I love crafting and I especially love sharing craft tutorials but I realized I hadn’t shared any of my artwork with you yet.

With Father’s Day coming up, along with summer vacations getting started, I thought you might enjoy a fun printable that I made from one of my watercolor paintings. I have links to the downloads at the bottom of the post, but first I wanted to show you some of the steps I go thru for a watercolor.

camper-sketch

I start with a sketch, of course.

No, that’s wrong. I actually start by gathering loads of visual references. Google makes it so easy now.

When I started painting in the ’90’s, I was a magazine ripper. I had binder after binder of cataloged photos. When I’d paint a mural at someone’s house, their wall would be covered with magazine photos, held up with blue painter’s tape. Now I just keep photos in folders on my computer. Much, much easier.

When it comes to sketching, there are lots of techniques and methods out there. (I think YouTube has quite a few.) I don’t know any, however. I pretty much eyeball everything. Good erasers are a must!

For drawings like this vintage camper, I sketch in pencil pretty lightly until I’m satisfied that everything is in proper relation to everything else. Then I’ll grab a ruler to draw the straight lines. When the pencil sketch looks about right, I go over the pencil markings with a black marker, usually a Prisma .03. I don’t use a ruler with the marker, however, because if the ruler isn’t lined up perfectly, the whole drawing is shot. That’s happened a couple of times.

I’d rather freehand the lines and have a few bumps here and there. It also adds to the ‘charm’ of a freehand illustration. There are so many great digital artists now, and I love their work, but there’s something pleasingly ‘organic’ to a handdrawn or handpainted piece. At least, I think so.

Another drawing tip I have is to turn the paper (or canvas) upside down and all around while sketching, both with pencil and the marker. This is particularly helpful for curves and circles. Although another reason to turn the sketch upside down is you’ll see imperfections more clearly and, therefore, can fix them.

Try turning your paper upside down the next time you draw something. You’ll be surprised at what you see!

Finally, after everything is inked in – and it has dried (!) – I erase all of the pencil markings. That’s important before the painting starts otherwise you’ll get some graphite smeared into the paint.

camper-watercolor

With the sketch inked in, it’s time to lay down the colors. I’m new to watercolors so bear with me if you’re a watercolorist because I don’t really have any idea what I’m doing. Although I am having a lot of fun with them!

I still need a lot of practice with highlighting and shading but for simple illustrations like this camper, I just add layers of color until I get the depth I want. If you haven’t painted with watercolors since . . . well, since you were a kid, then you ought to give them a whirl again. It’s a great medium and the results are beautiful without a huge time investment, for the most part.

camper-watercolor

Sometimes I’ll leave the painting right there and call it finished, just with the initial inked sketch and color over it.

camper-watercolor

But going back over everything with a marker again helps sharpen the details, I think.

Either way, you wind up with a cute little painting that you can turn into a fun printable.

Home Printable

Click the above photo or here to download this 8 x 10 printable.

I thought this might be nice for a Father’s Day gift or just keep it for yourself!

Home-Camper-blank

Click the above photo or here to download this 8 x 10 printable.

Or you can download this camper and add your own text with PicMonkey or any other photo editing program.

Ever since I started painting, (nearly 20 years now) my goal has been for people to use my art. Sure, if you want to hang it on a wall, that’s great too. But I always wanted my paintings to be on everyday items. Now, with sites like Zazzle, that’s possible!

I also noticed that some artists were making their own digital clipart. After some research, I jumped into that pool too and opened a shop on Etsy where all of my art will be available as downloads. Clip art is in the works and will be in the shop soon. Not only does this keep my prices down, it means that people can use my art to make their own creations, including their blogs and web sites. So exciting for me!

I hope you like these camper printables! And I hope you’ll use them for other creations, besides just printing. I’d love to see what you come up with!

I’ll be back at the end of June with another fun project. In the meantime, drop by Just Paint It for more paint projects. You can also find me on Facebook, Google+, Pinterest and Instagram too. And of course, I’d love for you to drop by my Etsy and Zazzle stores.

Before too long, this camper will be in both. Not yet though. Right now, it’s just for Saved By Love Creations readers.

Happy Summer!

Colleen

Privacy Policy