Another DIY Adirondack Set on the Cheap

DIY Adirondack Chairs and Table Pin

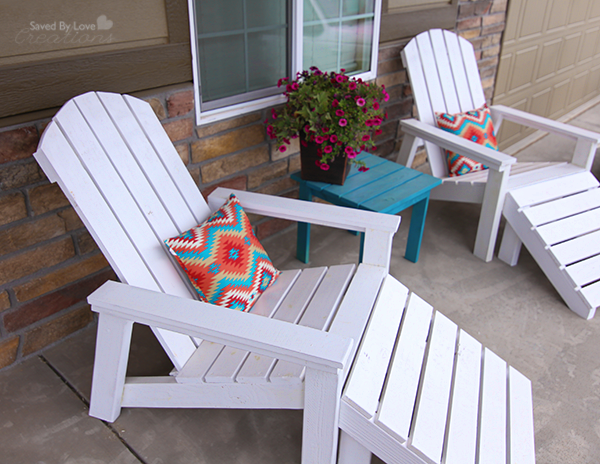
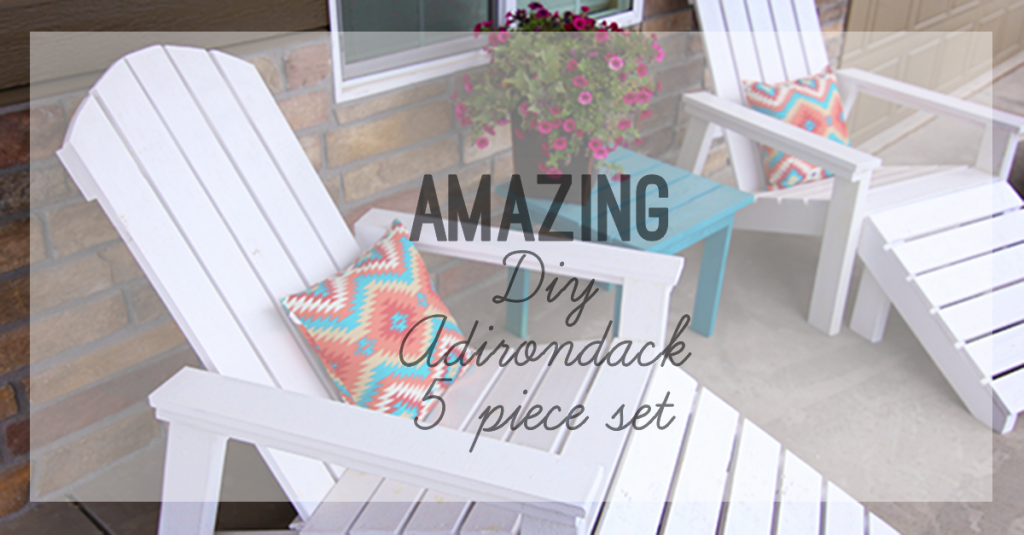
We are so excited building things for our new abode! Directly across the street is a lovely, wildflower, rabbit, squirrel and bird abundant park. We’ve decided to rid our lives of cable t.v., which affords us way more extra time than I realized, or care to admit. Instead of vegging out to the news upon awakening, we enjoy our morning coffee on the front porch in our super comfy adirondack set that we built with our own hands! We are forced to be more present and enjoy one another and nature more than ever, but the benefits of minimizing screen time are out of the scope of this article. I just want to talk about awesome adirondack-ness!DIY Adirondack Chairs Stools and Table

DIY Outdoor Furniture

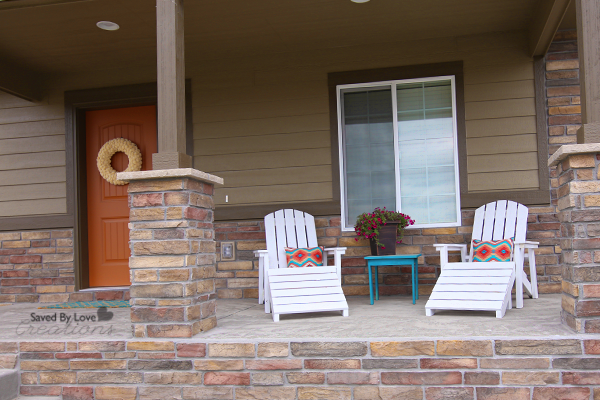
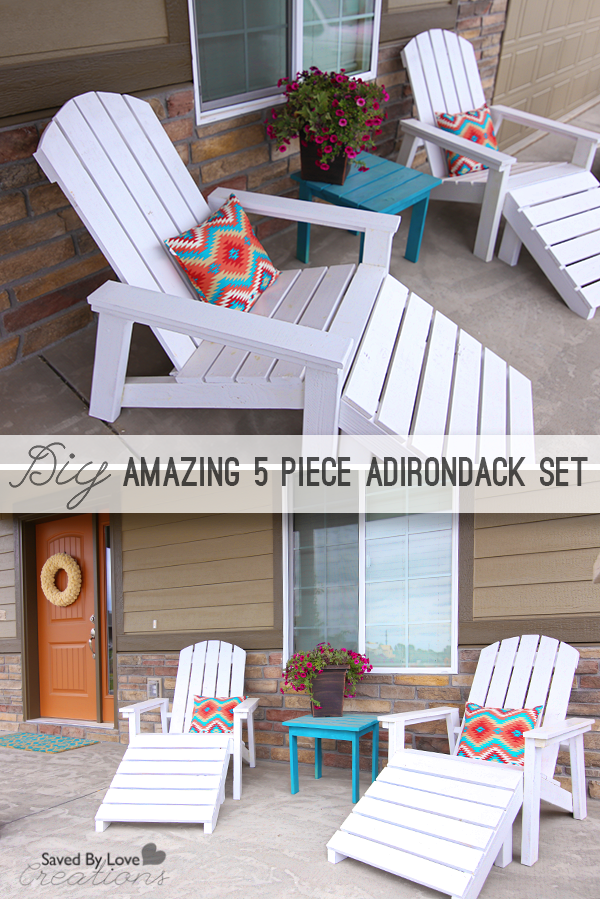
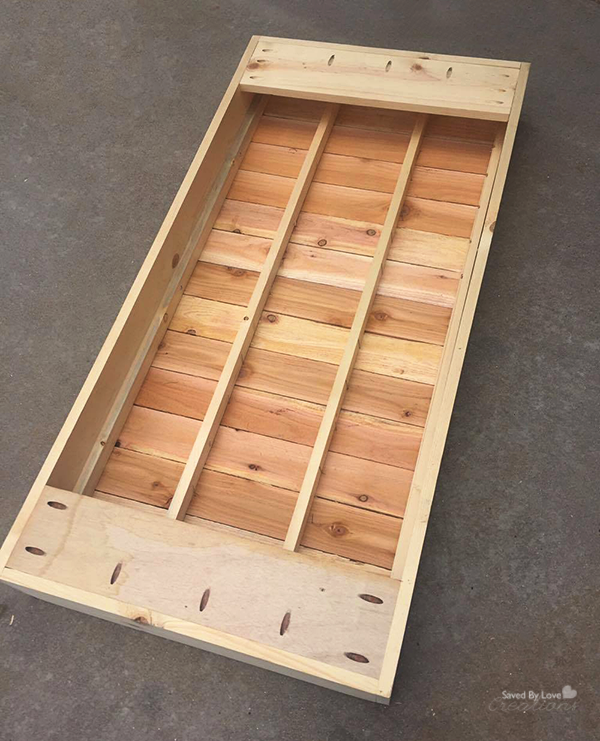
This whole set took us a week, a few hours a day or so. We built the exact same set we shared in this DIY Adirondack Set post, so you can find the plan there.

DIY Adirondack Table

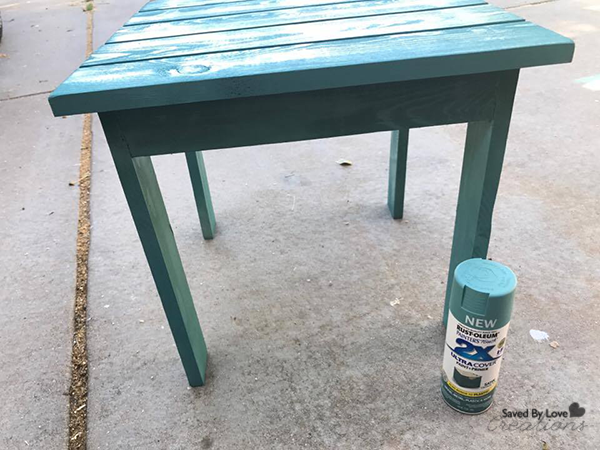
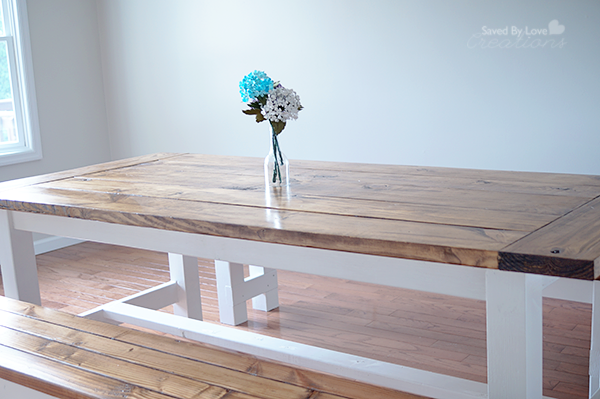
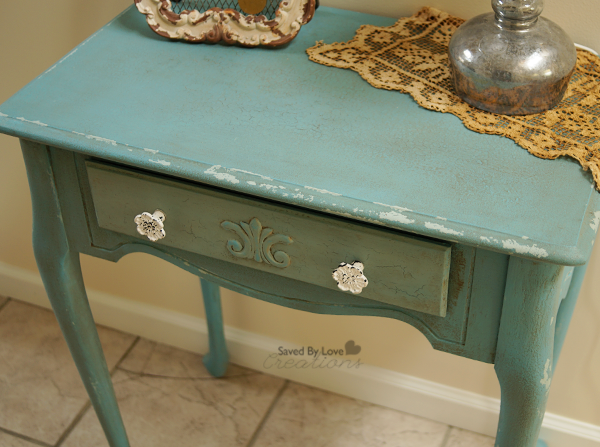
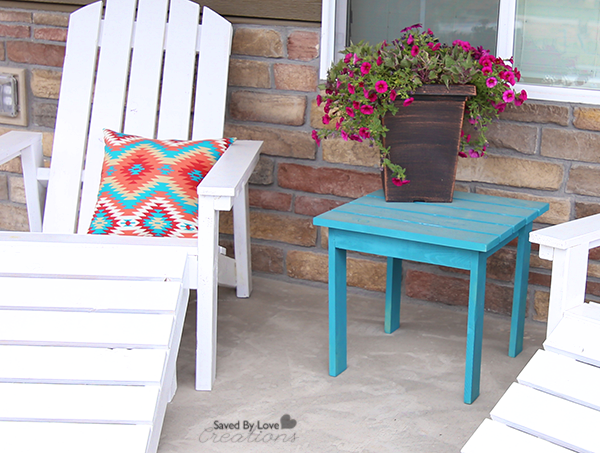
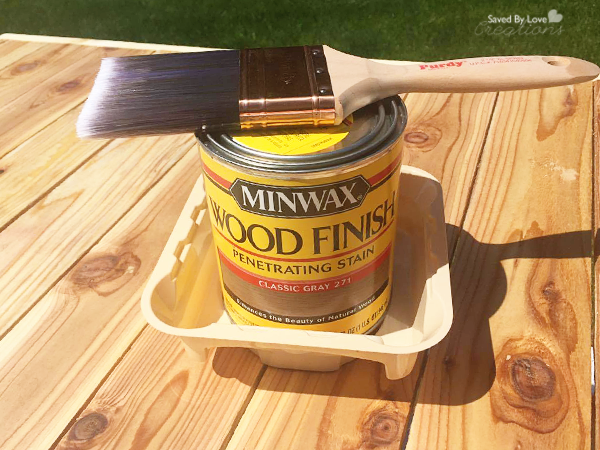
We changed the color scheme. I used Rustoleum Vintage Teal for the table. I found outdoor pillows at Walmart for $5 each that tied everything together!

DIY Adirondack Chair Woodworking Plan

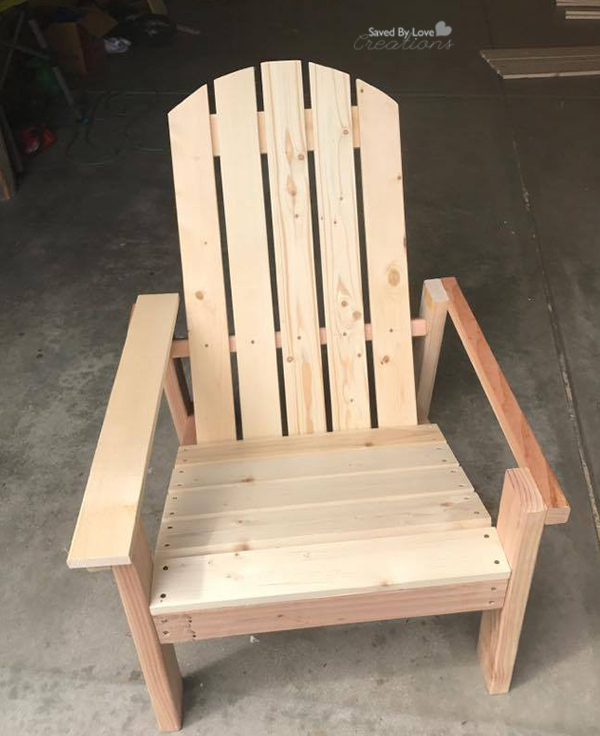
Here is the first chair finished. Notice all the screw holes we had to fill before painting! I prefer Fast’N Final by DAP.

Chalk Painted DIY Adirondack Chair Set

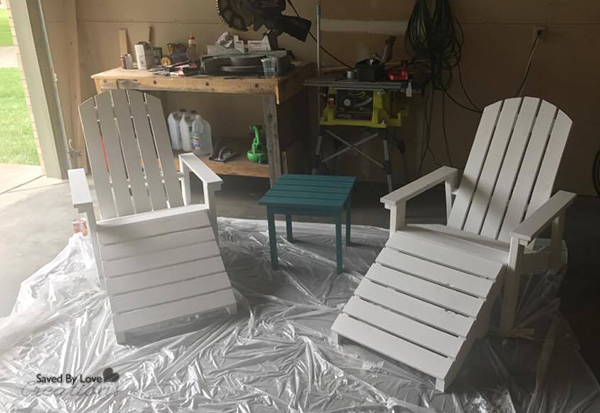
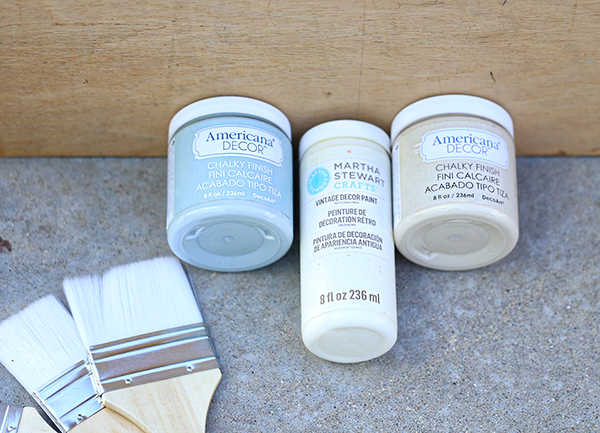
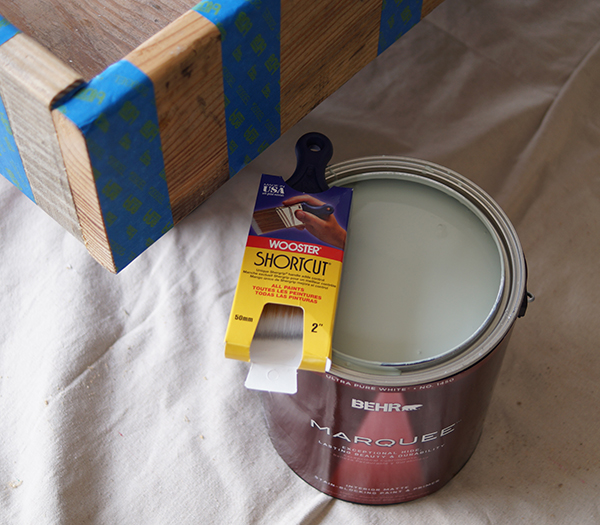
For the chairs and stools, I used Rustoleum Chalked in Linen White. It took 3 coats, which in my experiences is a lot for chalk paint. All in all, I am happy with the product and will use it again.

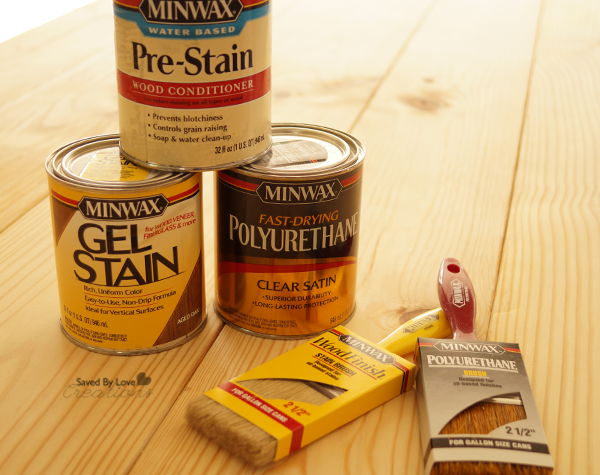
All five pieces were sealed with Minwax Polycrylic Water Based Protective Finish. It is my go to!

Facebook Adirondack DIY

How to build Adirondack Chairs

We love our new set, and our mornings spent together, present and peaceful!

DIY Industrial Reclaimed Wood Coffee Table

DIY fence board coffee table WM

We needed a coffee table, and I found the perfect-ish plan on Ana White’s website. I used her Factory Cart Coffee Table Plan, with some size adjustments that I will explain. I wanted my table longer and not as wide as hers. You will also learn how to make the less expensive casters with plastic wheels look like the more expensive versions with some spray paint. This project cost less than $50!

DIY Industrial Coffee Table Woodworking Plans @savedbyloves

I am in love with how the table came out. So, where Ana’s plan shows 23.5 inches, I used 23 inches. Where she used 44 inches, I used 49 inches, and where she used 45.5, I used 51.5.

DIY Coffee Table Woodworking Plans

For the top planks, I used 1×4 cedar fence planks I found on craigslist for free! 14 of them fit in the frame I made, with a tiny gap (less than 1/8 inch) in between each plank. I eyeballed the space. You could use a wood shim, or some other uniform object that is the same width as your desired space.

Kreg jig pocket holes

This shows the 4 support 1×2 boards, and how I attached the 1×6 23 inch boards using Kreg jig pocket holes.

Minwax Wood Conditioner

I attached the top planks to the supports below using my Ryobi Cordless Air Nailer and 2 inch nails. This nailer is a life saver and second only to my Kreg jig in terms of my favorite tools!

I filled the nail holes and any other defects with wood puddy and let that dry over night. I then sanded the table down with my orbital sander and applied Minwax Wood Conditioner. I love to use this before staining, particularly in projects with a combo of new and old wood like this one. It makes the wood take the stain beautifully and evenly. So glad I used it here!

Classic Grey Minwax Wood Stain

After the wood conditioner penetrated for 15 minutes, I stained the piece with my current favorite color, Minwax Classic Grey. This post is not sponsored by Minwax, btw! I just love their wood finishing products!

DIY fence board coffee table WM

I sealed the piece with Minwax Satin Polyurethane, three coats, per the instructions on the can.

Spray Paint Wheels on Casters

I couldn’t find the exact casters  I wanted, so I bought these 5 inch diameter casters with grey rubber wheels. I removed the wheels from the metal bracket and spray painted them with Krylon Dual in Black Hammered. It bonds to plastic and requires no primer. Just my kind of spray paint!

free Woodworking plans WM

I love the warm tone of the cedar with the Classic Grey stain!

DIY reclaimed wood industrial coffee table WM

This is just what I wanted for the space. So happy with the result, and the low cost was a bonus.

DIY Industrial Coffee Table Woodworking Plans FB @savedbyloves

Let me know if you have questions!

How to Build a Dog Feeding Station

This is a sponsored post written by me on behalf of DAP Products Inc. for IZEA. All opinions are 100% mine.

How to Build a Dog Feeding Station

Today you get free woodworking plans and distressed painting instructions to build this custom dog feeding station. All of the wood in this project was scored in the Craigslist free section. I literally stalk this section daily, which has paid off in spades over the years!

Saint Bernarnd Puppy

This project is for our friend’s irresistibly adorable Saint Bernard puppy, Willy (above). You can easily adjust the height to fit your animal just right. This was my first time using DAP® RapidFuse™ Wood Adhesive, which I am excited about for many reasons. You will be too! Let’s get started.

Tools and Materials list:

Identical food and water bowls (They don’t have to be the same size as ours, but need to fit in the space                               dictated by the width of the wood you are using for the top).

DAP® RapidFuse™ Wood Adhesive

¾ inch finished-one-side plywood – 10 feet

Kreg Jig and 1.5 inch Kreg screws

1.5 inch x 0.25 inch trim strips (Or desired wood for trim)

Glue, Pencil, paper, Scissors

Table saw and Jig Saw

Nail gun

Drill

Craigslist free section gave us a section of ¾ quarter inch finished plywood in perfect shape. The piece was dry, flat, hole-free, and large enough to cut out all the pieces.

  1. The first thing to do is to build the basic box using the ¾ plywood. Here are the dimension for each piece:

(2 Pieces) Front/Back – 12” x 23”

(2 Pieces) Sides – 12” x 12”

(1 Piece) Top – 12” x 21.5”

  1. Cut Bowl opening in Top.

Willy’s bowls were the stainless steel, slightly tapered ones with a little ¼ inch lip around the top edge. The trick is to cut the opening so that it is large enough that the bowl slips all the way down in but small enough that it catches the lip of the bowl. Seems simple but because of the slight taper it is a little tricky. Here’s the way I found easiest.

Woodworking project plans
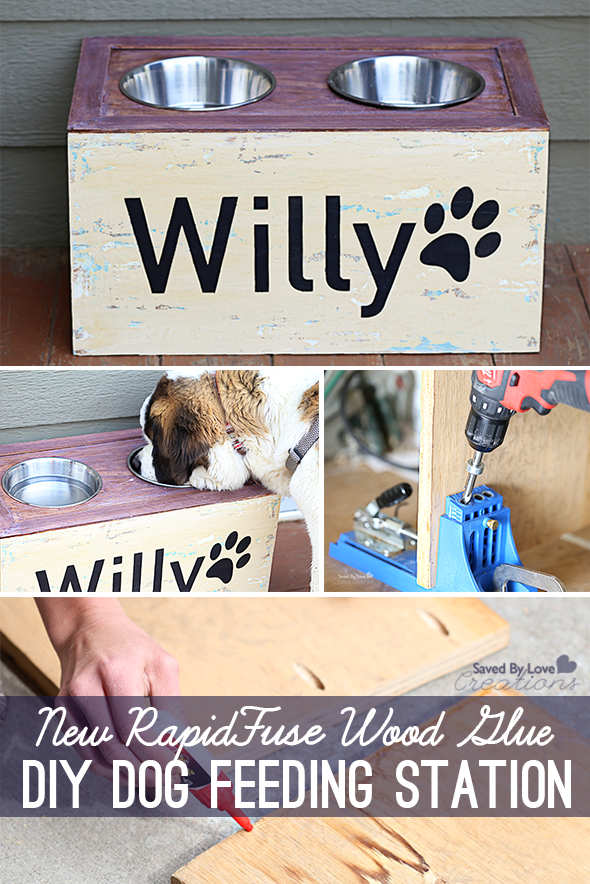
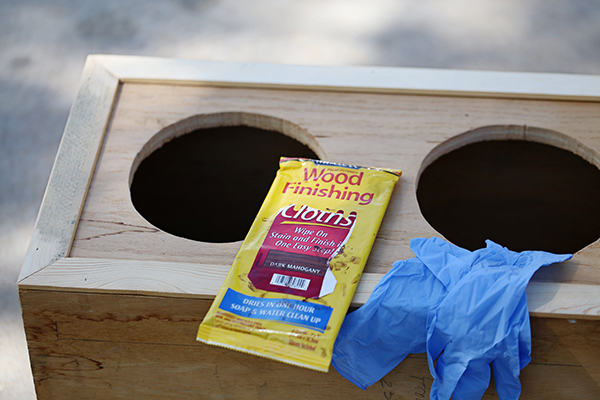
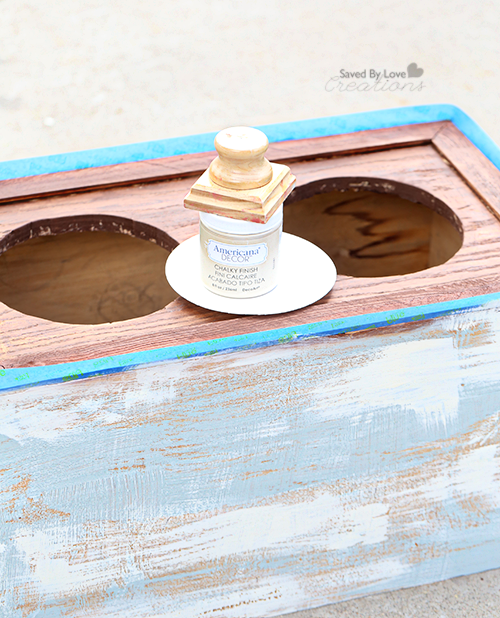
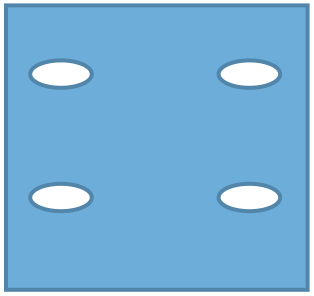
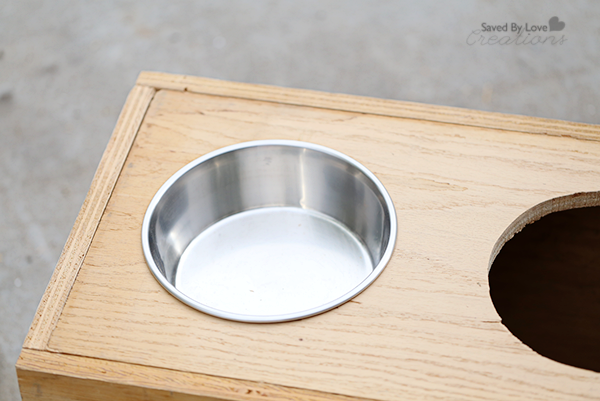
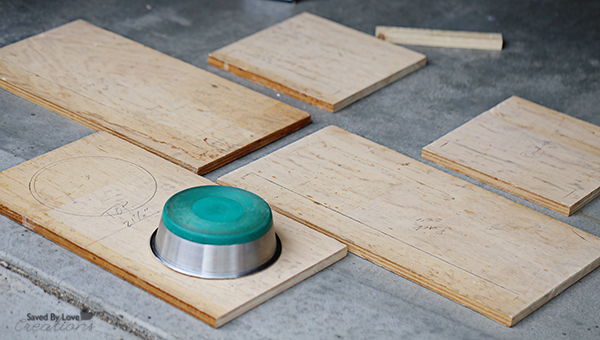
Get the bowl into position. For mine each bowl opening ended up being 3.25 inches apart in the center and 7.5 inches in diameter. You can set them however you want visually. Once in place, trace a line around the upside down bowls.

Drill hole for Jig Saw

Use your drill and drill a hole inside the circle large enough for your jig saw blade to pass through.

Insert Jigsaw blade

Using your jig saw cut out the circle you traced on to the top. The trick is to cut the opening so that it is large enough that the bowl slips all the way down in but small enough that it catches the lip of the bowl. If you prefer not to eyeball it, draw a circle inside the traced circle. If you’re like me, I had to do a little finishing touch with the saw and the sandpaper, in order to get the bowls to sit down nicely in the hole. BE CAREFUL don’t get happy with the cutting and make the hole too big. You don’t want the bowl to fall through!

  1. Drill Kreg holes into each piece as follows:

          TopKreg Hole Placement for Top Piece
                                                                                  SidesKreg Hole Placement for sides of holder

Use Kreg Jig to Join Wood

For more info on using this jig, see my previous post: How to Make a Pallet Sign Using a Kreg Jig

  1. Assembly – Time to put it all together and talk about wood glue!

Wood Glue Tips

I had the opportunity to try out DAP® RapidFuse™ Wood Adhesive, and I won’t go back to other wood glues! After just 30 minutes, you can plane, sand and stain wood. No more waiting 24 hours. No more not being able to stain. The stuff is also water resistant, so it’s great for indoor and outdoor projects. The joint is stronger than with yellow glue or polyurethane glue, and doesn’t swell, shrink or crack! There is no other glue like it. Seriously.

Wood Glue Application

Apply a line of glue on the side piece.

Attach with Kreg Jig

Attach the side pieces to the front piece first using the 1.5 inch Kreg screws.

Next, attach the TOP piece so that it sits inside the sides and flush with the top edge of the front piece. Also attach the top to the side pieces.

Lastly, attach the back piece in the same way you did the front piece.
Attach top last

Now you have a box that is extra sturdy, with a recessed top that has holes in it to sit the bowls.

Attach Mitered Trim

    1. Trim – We decided to cut mitered trim pieces around the perimeter of the Top to cover the little seam and just add a little “finished” look. It’s totally optional. We make our own trim board by using the table saw with the fence set to about ¼ inch and then we rip 1.5 wide boards. You can buy trim board already cut if you prefer. We also mitered the corners but you can butt them if you don’t have confidence in your mitering skill. Just do it like you’re cutting a picture frame and attach it to the box with glue and then small brads in the nail gun.

Sand edges
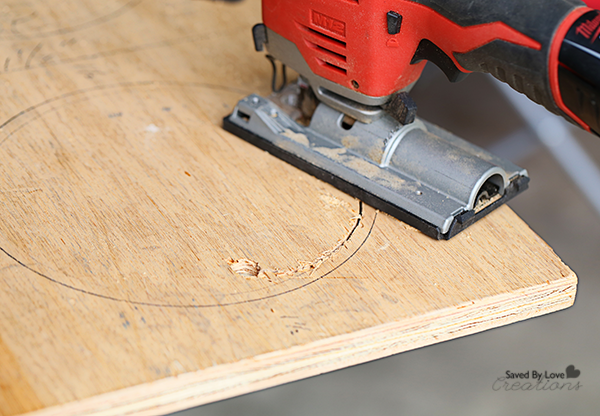
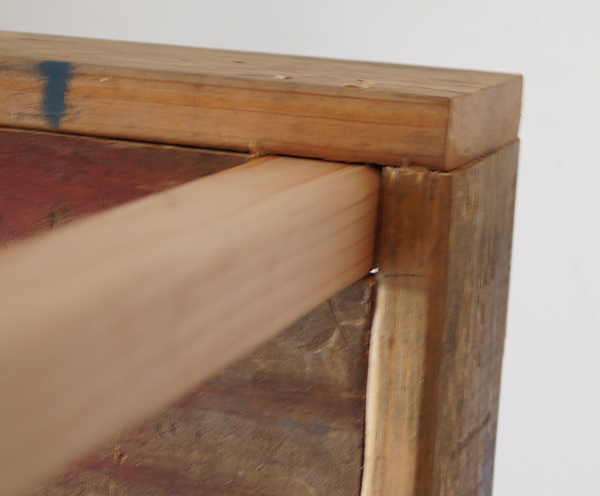
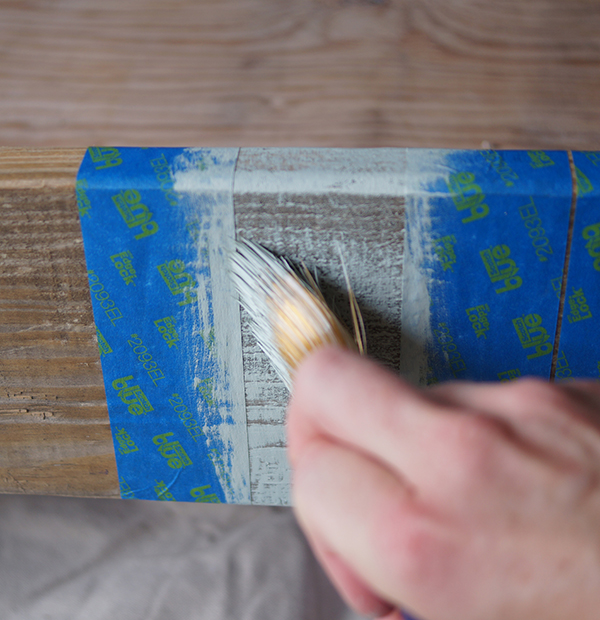
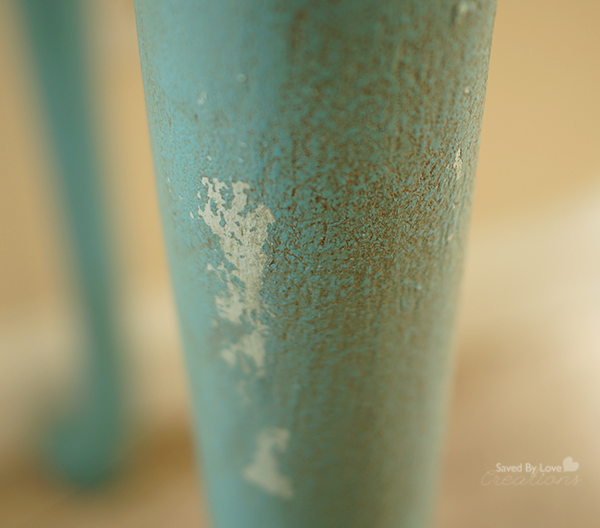
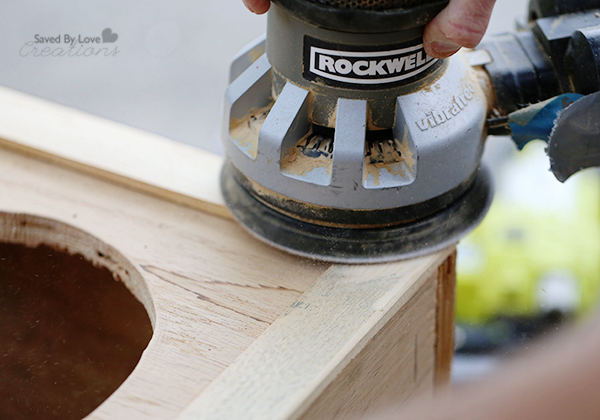
Before painting, sand any uneven areas.How to Chalk Paint Distress Wood

    1. Paint – We wanted a distressed look, and decided to go with a stained top, painted bottom. This is a super easy paint distressing technique that you can apply to any project.

Stain top

I stained the top with Wood Finishing Cloths. These are super convenient as they aren’t as messy as using stain from a can, and they contain sealant!

Dry Brush for DIY Weathered Wood Finish
Tape off the top (pictured below). Apply your first base coat color randomly on all sides. This is fun because you paint in every which way, quickly and messily!

Dry Brush on Second Color

Once the first color is dry, apply the second color in the same fashion. I realized at this point I needed to tape off the top so I wouldn’t get paint on the stained area.

Apply Final Paint Color with Wooden Block

A block of wood is a great tool for creating a chippy paint look. You can use a piece of scrap wood, or this fancy distressing tool with a handle. Just get a glob of paint on the wood, and drag it across your surface, repeating until you are happy with the result.

Create Stencil with Cricut and Paint Name

Finally, I created a stencil with my cricut machine and cut it out of white contact paper. I used a dark gray/black chalk paint for this part, applying it with a paint dauber.

DIY Dog Feeding Station Tutorial

Seal as desired and you are finished!

How to Make a Dog Feeding Station FB

Thanks to DAP for the great new woodworking product. I will be keeping up with them here: DAP Facebook, and for sure using RapidFuse in my future builds!

Visit Sponsors Site

50 Plus Awesome DIY Storage Ideas

50 Plus Awesome DIY Storage Ideas @savedbylovesIt is time for spring cleaning, and I am here to help you with 50+ awesome DIY storage ideas. You can get organized on a budget with this week’s collection. As always, if we missed your awesome DIY storage tutorial, send us the link or comment after this post. Enjoy!

DIY Mudroom Storage Bench and Coat Rack

DIY Mudroom Storage Bench Free Woodworking Plans @savedbylovesOur laundry room is the high traffic area of the house. We go through it every time we come or go from the house. It had been crying out for a place to hang coats and to drop off “stuff” rather than haul it in and lay it on the kitchen table. One Saturday my husband decided that he was going to throw together some sort of a coat rack / bench that would serve our needs. Once he got me going on the idea it turned into a full blown re-do of the room. I have shown you the Free Laundry Room Printables and DIY Hardware Update, and today I am sharing how to make this fabulous mudroom bench/coat rack. This project was pretty easy once we got started, and cost under $150! We LOVE it. It is super handy, and it prompted us to paint and replace the floor in the room. It is now my favorite room in the house! On to the project.

Shopping List

1. 3/4-inch birch-veneer plywood to build the seat box. Get one 4×8 sheet.

2. exterior-grade beadboard plywood to make the back panel on the wall. One 4×4 sheet will cover the area.

3. 1×16 solid-wood panel to make the seat lid. Get one 6-foot board.

4. 1×12 solid-wood panel to make the fascia board and shelf. Get two 6-foot boards.

5. 2×4 to create a support strip for the hinges that hold the box lid. Get 6 feet.

6. 1×4 to create the applied paneling on the front and sides of the box. Get four 8-foot boards.

7. 1×2 to cap the unfinished top edges of the bench box. Get 10 feet.

8. 3/8×7/8-inch panel molding to add a picture-frame detail to the paneling on the box and to trim above and below the beadboard panel. Get five 8-foot lengths.

9. ½x1-inch parting bead to finish the edges of the beadboard plywood.

10. 3/4-inch quarter-round molding to trim the beadboard panel and the base of the box. Get 16 feet.11. ½x7/8-inch decorative shoe molding to trim out the shelf, seat lid, and fascia. Get three 8-foot lengths.

12. 9-inch shelf brackets

13. 2-inch L-brackets to secure the box to the floor. Get seven.

14. European cabinet hinges to allow the lid to overlay the box and open smoothly. Choose ones that are labeled “for frameless cabinets.” Get three.

15. Toy-box lid supports to keep the lid from slamming shut. Get two to support the weight of the lid.

16. 1 5/8-inch deck screws

17. 3½-inch deck screws

18. 2½-inch deck screws

19. 2-inch trim-head screws

20. 2d finish nails

21. 3d finish nails

22. carpenter’s glue

23. vinyl adhesive caulk

24. 180-grit sandpaper

25. Shims


THE BENCH

The bench I chose was modeled after a picture I saw of a classic entry hall built-in I saw on the This old house blog. It had everything we wanted; a place to sit, a place to store stuff, a shelf and plenty of coat hook space. All of this combined into a really nicely appointed, decorative piece that looks nice fits the room. We made adjustment to the plans to fit our needs where necessary. The dimensions were altered because our particular space required the bench to fit in a corner. Likewise, I changed a few pieces of the trim work to suit our taste. The shopping list I’m going to provide you will cover the better part of your project for the size bench we used. If you decide you want to expand or alter to fit your room then you might need to modify your purchase list accordingly. Here’s the one I used to start.

  1. Build and trim out the bench seat:


I found the best spot in my laundry room was in one of the corners. So the first thing I did was take up the baseboard around the entire room. Next I just built a simple plywood box that would become the bench. No need to put a bottom in it. The box dimensions for my particular spot turned out to be 451/2 inches wide by 18 1/4 inches deep by 16-3/4 inches tall. Build this box out of ¾ inch “good-one-side” plywood. Try to get the box to sit as level on the floor as possible and fasten through the back into the studs in the wall using 2.5 inch deck screws. Just a couple or three places will be plenty. The Top of the box (which will be the bench seat is going to be made from the same ¾ inch plywood. It will need to overhang the box by about ½ inch on the front and the sides. But it will not go all the way to the back. ( you will see why later) Also, if your situation is like mine, where the bench will butt up against a wall in the corner, the top wont overlap on that side. So the dimension of my Top piece was 46 ½ by 16 inches.


  1. Install the hinge support

Using a miter-saw, cut a 2×4 to fit the inside of the box along the back wall. Cut a 3½-inch-wide strip of plywood to the same length. Screw the pieces together with 15/8-inch deck screws. Position the 2×4 assembly along the back of the box, 3/4 inch above the back edge. Screw it on, through the box and into the studs, using 3½-inch deck screws. This piece will later be hidden by a plywood strip and molding. This is why the top is not as deep as the whole box. This is where the hinges are going to fasten.
Screw L-brackets inside the box and to the floor, three inside the front edge and two on each side, to hold the box in place.

  1. Attach the panel molding to the seat.Next, I trimmed out the front and the one visible side of my box with 1 x 4 boards. This gives the box a dimensional, shadow box appearance. Cut the 1 x 4 so that the long pieces fit inside the two shorter upright pieces. This way you don’t see a cut edge. To create a profile on the inner edge of the 1×4 framing, cut panel molding to fit inside the 1×4 rectangles. Miter the ends of the molding. Nail the molding to the box, tight against the 1x4s, with 2d nails.


  1. Cap and Trim the box

Cut a piece of 1×2 to the width of the box. Glue and nail it to the top edge of the box front with 3d finish nails. Cut two pieces the depth of the box and use them to cap the sides. The side caps should now sit flush with the 2×4 assembly secured to the wall. Trim the base of the box using quarter round molding mitered 45 degrees at the corner joints.

  1. Trim the seat lid


Using a miter saw, cut strips of ½x7/8-inch decorative shoe molding to fit the front and side edges of the lid. Miter the ends at the corners, but leave the back edges square. Attach the molding to the lid edge with wood glue and 2d finish nails.

TOH Tip: To avoid splitting narrow wood stock with finish nails, dull the points of the nails with the strike of a hammer before tapping them in.


  1. Install the Lid

Rip a piece of plywood to 2¼ inches wide and the length of the box This 45/3/4 inches in my case. Nail it down at the back edge of the seat box to cap the 2×4 assembly. This is labeled as the “Hinge support” on the above photo. Attach the lid to the 2×4 assembly using three European cabinet hinges, installed according to the “full overlay” instructions. This type of hinge allows the lid to open completely over the 2×4 assembly but conceal that same assembly when it’s closed. The lid should overhang the box by 1 inch on the sides and front. This sounds more complicated than it is…Since your top has been cut short of the box dimension by this amount, you will have this 2/1/4 inch strip across the back that does not open with the lid. (see pic). You have to have this to carry the hinges. Setting the hinges requires a little bit of patience. The proper distance will be determined after a couple of openings and closings. There has to be a slight space to allow the lid board to pivot by the stationary hinge mounting board.


  1. Mount the bead-board back panel

I ran the beads on my piece vertically. Since my bench was less than 48 inches I could use just one 4×4 sheet and rip it to the right height. In my case I liked keeping the board 4 feet above top of the lid. So actually you could purchase just one 4×4 sheet already cut. Where the bead-board meets the top of the bench seat I put a 1×4 trim piece to finish out the back. As you will see later, when I finish placing the shelf facia board later, I will put a matching piece at this seam. I think it finishes the back board nicely.


  1. Hide the Bead-board edges


I chose to use a small cove molding to finish out the vertical edges of the bead board. As with all of the trim in this project, take a look at the variety of Trim pieces available and get ones that suit your taste. There are lots and lots of styles available. Some will obviously not work at all and others will be great. There is no hard and fast rule to my knowledge. We often just use what we have left over from other projects.


  1. Finish the Trim

I chose to use lengths of quarter round trim along the bottom edge of the box where it meets the floor. I mitered the corner where it wraps to the side. Take a look at your finished box at this point and decide if there are any gaps or spots that you feel like you want to cover with trim work or if just caulking alone will fill.

  1. Install the Fascia for the shelf


Use a piece of 1×12 shelving board cut to the length of the top of the beadboard panel. This board will be called the fascia board for the shelf and will be where the coat hangers will ultimately goMount it to the wall using 2-inch trim-head screws installed through the studs


  1. Mount the Shelf Brackets


Measure and mark the placement of two shelf brackets on the fascia board.
Using the provided hardware, install the shelf brackets flush with the top edge of the fascia board and on center at your marks.


  1. Secure the Shelf


Cut a piece of stock 1×12 shelving board the width of the bead-board.
Set the shelf on the brackets and tight against the wall. Secure it to the brackets with 2-inch trim-head screws. Cut a 1×4 trim board and attach it to the top of the bead-board to fascia board seam. Attach with 2d nails. Caulk seams.

DIY mudroom bench plans


  1. Paint the Bench


Sand the entire bench with 180-grit sandpaper. Fill all the nail holes and gaps between moldings with caulk. Prime the bench, bead-board panel, shelf, and moldings, then paint them with two coats of semi-gloss latex.

Mudroom bench woodworking plans

  1. Attach the hardware


Screw coat hooks to the fascia board, spaced evenly between the brackets.


Here you can see the accent wall we painted with stripes. Click the image or text for the FREE Laundry Room Printables!


Three Free Laundry Room Printables @savedbyloves


DIY Custom Built-ins from Bookshelves

Today I finally get to show you my completed DIY custom built-ins we made using the 5 Shelf Bookcases from the Sauder website Four of the bookshelves cost less than $250, so we ended up getting four more to fill our space! These are perfect for the built-in project we had in mind, and we love the result!

Here are the assembled bookshelves.

I showed you these a few months ago, before we customized them to look like built-ins here: Stylish Craft Storage with Sauder Bookcases. They looked great then, but we wanted to add trim where they meet, and wrap the tops with crown molding and bottom with the room’s baseboard to tie them into the room.

We removed the room’s baseboard on the walls where we would be putting the bookshelves.

There were several things we ran into during this project. The first was we notices the baseboard was higher than the bottom shelf, so we added a new bottom shelf with 1×12 wood to be flush with the top of the baseboard. We attached the shelves with pocket holes using the Kreg jig.

Where the bookshelves meet, we had 1.75 inches to cover, and we found the perfect trim at our local hardware store. On the edges where there was just one bookshelf wall, we put 1×12 wood as shown so the 1.75 inch trim as flush on both sides.

We started with the baseboards and used construction adhesive along with the nailer.

Luckily we found baseboard to match what was already in the room!

We found this molding at our local big box hardware store and I was elated. We didn’t have to figure out any complex angles since the molding was solid to a right angle!! Phew. You can read about our first experience cutting crown molding here: DIY Kitchen Cabinet Upgrade.

For the molding, baseboard and trim, we used construction adhesive and our cordless nailer to attach. We started with the baseboard and molding, then added the trim to cover the seams.


We found corner trim that was perfect for the corners at the hardware store. We used an unfinished cabinet door we scored for free on Craigslist as a desk in between shelves!

Above the desk we placed three 1×6 shelves, attaching them to the wall stud and bookshelves on both sides using pocket holes.

To see how I made the shelves on the left check out this tutorial: DIY Pallet Wood Paint Storage Shelves.

We primed and painted the trim and added wood and that was that!

These bookshelves are great as they come. With just a few supplies and a day’s time, you can customize them for designer built-in style!

Visit Sauder for more than 30 distinct, affordable furniture collections in a full
line of ready to assemble furnishings for your home, including entertainment, home office, bedroom, kitchen and storage!

Visit my Woodworking Pinterest Board for more home decor and furniture ideas!

This is a sponsored conversation written by me on behalf of Sauder. The opinions and text are all mine.

DIY Shipping Pallet Dog Bed

Shipping Pallet Dog Bed Tutorial from @savedbyloves #thehomedepot & #3MPartner

What kind of DIY blogger am I, with my dogs sleeping on a pillow tossed on the floor?  I know.  That is why I thought a striped doggie bunk bed made from shipping pallets would be perfect for the “Get It, Got It, Go” Summer Blog Hop hosted by ScotchBlue™ Painter’s Tape and The Home Depot!  This project is a wonderful upcycle that can be color customized to fit any decor, and requires beginner woodworking skills to achieve.

MATERIALS USED

Shipping Pallet Dog Bed 2

ScotchBlue™ Painter’s Tape Multi-Surface with Advanced Edge-Lock™ Paint Line Protector 2093EL

Behr  Marquee™ Paint in Costal Storm #MQ6-20, Recycled Glass #MQ6-18 and Aquifier #MQ6-8 colors

Wooster® Shortcut 2 in. Nylon/Polyester Angle Sash Brush

Shipping Pallet Dog Bed 3

Shipping pallets

1/2 inch plywood sheets

Reciprocating saw with blade for cutting metal

Kreg® jig

1 1/4 inch Kreg® screws

2 inch wood screws

drop cloth or plastic painters tarp

Wood Glue

jig saw

Drill

Hammer

Crow bar

Table saw or circular saw

TUTORIAL

Shipping Pallet Dog Bed 4

The first step in this, and any pallet wood project, is breaking down the pallets.  My favorite method for this is cutting through the nails holding the wooden slats to the support beams with a reciprocating saw.  Sometimes it is necessary to use the crow bar and hammer to create enough space for the reciprocating saw blade, then you just cut through the nails and free one board at a time.

Here is a quick video showing the pallet breakdown process:

Shipping Pallet Dog Bed 5

To build the bottom bed, I cut two 35 inch pieces and two 28 inch pieces from the pallet wood for the sides.  I picked these measurements based on the dimensions of the pillow I already had on hand. Using my Kreg® pocket hole system (I showed you how to use a Kreg® jig HERE), I attached the four sides together with 1 1/4 inch screws and wood glue. For the top “bunk”, I followed the same process, cutting two sides 20 inches and two sides 18 inches long.

Shipping Pallet Dog Bed 6

To create floors for the beds, I placed the bed frames on a large piece of 1/2 inch plywood and used a marker to outline the inner edges of the frame onto the plywood.  I cut along these lines using my table saw, for a floor that fit right inside each frame.

Shipping Pallet Dog Bed 7

To attach the floors, I placed pocket holes every 5-6 inches around all four sides and screwed the floor into the frame with 1 1/4 inch pocket hole screws/wood glue.

After building the individual beds, it was time to join them.  For this, I created three 2×2 poles by ripping a 2×4 with my table saw.  Two of the poles I cut to 19.5 inches and one to 15 inches in length.

Shipping Pallet Dog Bed 8

I attached the three poles to the bottom bed, using the top bed to guide placement.  The shorter pole goes in the back right corner of the bottom bed, and the top bed rests on top of it (which will become clear in the next step).  The two longer poles will go through the floor of the top bed, nestling up against the right front corner and back left corner of it.  Once they were placed in the correct location on the bottom bed to fit where they needed to on the top one, I used wood glue and 2 inch wood screws to secure them in place.  I placed clamps to hold everything in place until the glue was dry.

Once that dried, it was time to secure the top bunk in place.  I needed to create holes in the floor at the right front and back left corners for the poles.

Shipping Pallet Dog Bed 9

To do this, I took a scrap 2×2 and traced it where I wanted the holes to be.

Shipping Pallet Dog Bed 10

Shipping Pallet Dog Bed 11

I drilled a hole in the middle of the square I just traced, for the jigsaw blade.

Shipping Pallet Dog Bed 12

Using the jigsaw, I cut out the square for the pole.

Shipping Pallet Dog Bed 13

Shipping Pallet Dog Bed 14

To finish the assembly, I just placed the top bed with the poles extending up from the bottom bed in their corresponding corners.  The back right corner was secured in place with a 2 inch wood screw going through the floor of the top bed, into the top of the back right pole.  The other two corners where the poles extended up through the floor were secured with 2 inch wood screws though the side of the top bed, into the poles.

Finishing

Once the bed was built, I decided to paint randomly patterned stripes.

Shipping Pallet Dog Bed 15

Shipping Pallet Dog Bed 16

Shipping Pallet Dog Bed 17

Shipping Pallet Dog Bed 18

I placed the ScotchBlue™ Painter’s Tape and began painting with the first color.  The paint coverage was great!   I wanted a distressed look, so I used the dry brush technique with Wooster® Shortcut Brush.

Once the first color was dry, I taped again and repeated for the 2nd and 3rd colors.  It was no problem to tape over the paint, but keep in mind that Delicate Tape is the recommended tape to use on freshly painted surfaces (24hrs).The lines were perfect, and the tape didn’t remove the paint when I taped over the stripes I had already added.  There was no pattern in the colors, I just painted randomly.

For the top bunk, I dry brushed the entire bed in Aquifier.

Shipping Pallet Dog Bed 19

I love it, and so do my boys!  Way better than the pillow on the floor, right?!

I am proud to be a 3M, Behr®, and Wooster® – sponsored blogger, and, as part of my responsibilities, I get the opportunity to evaluate products. Opinions are my own and additional product used in the project were selected by me.

Find the products used for this project, and tons more inspiration at the following links:

Wooster® Brushes Behr® Paint

The Home Depot

The Home Depot Consumer Program

ScotchBlue™ Painter’s Tape Facebook

ScotchBlue™ Painter’s Tape Twitter

ScotchBlue™ Painter’s Tape Pinterest

The Home Depot Facebook

The Home Depot Twitter

The Home Depot Pinterest

320 Sycamore: Front Porch Project

Simply Designing: DIY Board & Batten

Brooklyn Limestone: Farmer’s Market Display Stand

Fave Crafts: DIY Aztec Planters

Domestic Imperfection: Rusty Metal Shed Makeover

Studio Pebbles: Faux Frame Modern Art

Whipperberry: BBQ Tool Storage

Dukes & Duchesses: Color Block Umbrella Table

HoneyBear Lane: Patriotic Lanterns

Uncommon Designs: Striped Workbench

Better After: Geometric State Art

I Heart Nap Time: Striped Hall & Gallery Wall

The Pinning Mama: Oversized Painted Wall Frame

Love of Family & Home: Grain Sack Table

The Girl Creative: DIY Lemonade Stand

At The Picket Fence: Over-sized Outdoor Checker Board


DIY Farmhouse Table and Bench Using Free Plans from Ana White

Farmhouse bench plan
How to build a farmhouse table and benches rustic decor woodworking plans @savedbylovesI have wanted to build a farmhouse table since I first started building a couple of years ago. Our new house I showed you in the recent Home Tour has just the spot for one, so we got busy woodworking and today I am sharing the fruit of our labor. Using free plans from Ana White, we built a lovely table and matching benches.  I have seen similar sets going for around $1200.  Ours cost under $200!  Building saves so much money, and is super gratifying.  If you are intimidated by power tools, I am here to tell you that you can overcome the fear, just like I did!

Minwax Wood Conditioner Gel Stain and Polyurethane

I built my table using Ana White’s free DIY Farmhouse Table Updated Pocket Hole Plan, and the benches using her Farmhouse Bench Plan.  As always her plans are amazing, and free!  This site is my go to for all things woodworking.  It is where I went to begin this journey, and as you can see in my Woodworking Project Gallery, I have built several of her lovely pieces!  Our house is becoming a hand-built home, one plan at a time.

We decided to stain the top and paint the base white.  Finishing each before attaching them together made things easier.  We did this for the benches too.

I used Minwax Pre Stain Wood Conditioner on the table tops before staining.  This evens out the surface of the wood and makes the stain take more evenly.  I kinda feel like a pro when I stain after conditioning!  The conditioner is easy to apply and one can is enough for several projects.  You just apply with a lint free cloth, let it soak in for about 5 minutes and wipe away any excess conditioner.  After 30 minutes, apply stain.

I used Minwax Gel Stain in Aged Oak.  This is my first time using it, and it is gorgeous!

Staining with Gel Stain

This is my first time using the Gel Stain.  I applied it with Minwax’s Staining Brush.  It is definitely less drippy/runny than the regular stain, but not as mess free as the Wood Finishing Cloths.  Those are still my favorite, and if I didn’t want to try the Aged Oak so badly, I would have used the cloths!  I am hooked and you will be too.  Find out why they are so magical here: DIY Reclaimed Wood Headboard.

After Staining

After the stain dried overnight, it was time to seal.  I used Minwax Polyurethane in Clear Satin.  I applied two coats, drying 4 hours between and sanding with 220 grit paper between coats as well.

For the legs, I primed and painted with white glossy latex paint we had leftover from painting out trim.  It took 2 coats.

DIY Farmhouse Table woodworking plan

I am completely in love with this set.  It took a couple of weeks to build all three pieces and finish them, but I was busy with several other projects at the same time.  If you were determined, you could do this in a weekend.

Have you braved power tools?  If not, I hope you are a little closer to taking the leap now.  It is so worth it!!

Chalk Paint Map Decoupaged Table Revamp

[pinit]Furniture Flip Chalk Paint Table Old Map Decor @savedbyloves[pinit]

Today I am sharing another furniture flip! We will be taking a retro 50’s side table to a chalk painted, old map bearing, stylish addition to the master bedroom.  A little decoupaging and glitter blast add a special touch.  Let’s do it!

SUPPLIES:

Table Before Furniture Revamp

Old table

Mod Podge Satin Finish

Decoupage Map Paper from Martha Stewart or actual old maps

Foam Paint Brush

Pen or pencil

 Scissors

Chalky Finish Paint in desired color

Americana Clear Creme Wax

Krylon Gold Glitter Blast

Krylon Glitter Blast Clear Sealer

TUTORIAL:

Americana Chalky Finish Paint Projects

I lightly painted 2 coats of Americana Chalky Finish in Timeless, allowing 20 minutes to dry between each coat.

How to Decoupage Furniture

I removed the doors/hardware and outlined them onto my decoupage paper, then cut out the paper to size.

Decoupage a Table With Mod Podge and Map Paper

How to Decoupage a Table

Next I added a layer of Mod Podge to the door surface with a foam brush.

Decoupage Table Tutorial

I smoothed wrinkles out from the center with the palm of my hands.  A brayer would work too.  Then I added a uniform layer of Mod Podge to the top of the map paper to seal everything.

Krylon Glitter Blast

I sprayed the pulls on the door, and the shoes on the table legs with Krylon Gold Glitter Blast.

DIY Old Map Table

I applied a coat of Americana Decor Creme Wax in clear to the whole piece and replaced the glittery hardware once everything dried.

DIY Map Craft

I love our new side table.  Just the perfect colors and style for our decor.

I hope you are inspired to get chalky and decoupagey!

Side Table Flip Distressed With Chalk Paint

[pinit]Furniture Flip Chalk Paint Distressed Table DIY[pinit]

My mom gave me an outdated oak table that she was ready to let go.  I saw curves that would look fantastic with some chalk paint distressing, so that is what I did.  See how some paint, crackle medium, antiquing medium and a change in hardware went into this fun furniture flip.  As an aside, mom wants her table back now.  Should I charge her?!

How to paint furniture

I removed the hardware and painted a layer of Chalky Finish in “Vintage” as the base layer.

DecoArt Chalky Finish Paint

Once that dried, I painted a thick layer of crackle medium from the Chalky Finish line.  When that dried I painted a layer of Chalky Finish “Treasure”..

How to Distress Furniture

I rubbed away the top layer of paint on the edges in random places to show the base layer in a chippy paint kinda way.  For the drawer, I followed the same steps, using the Treasure as my base paint and Vintage as the top paint layer.

How to create an antique effect

I sealed the entire piece by brushing on Clear Creme Wax, followed by Aging wax.

Table Flip @DecoArt_Inc Distressing with Chalk Paint @savedbyloves #chalkyfinish

I am loving the transformation!  What do you think?  Have you used this paint?

Privacy Policy