DIY Snowflake Window Garland

DIY Christmas Decor Idea


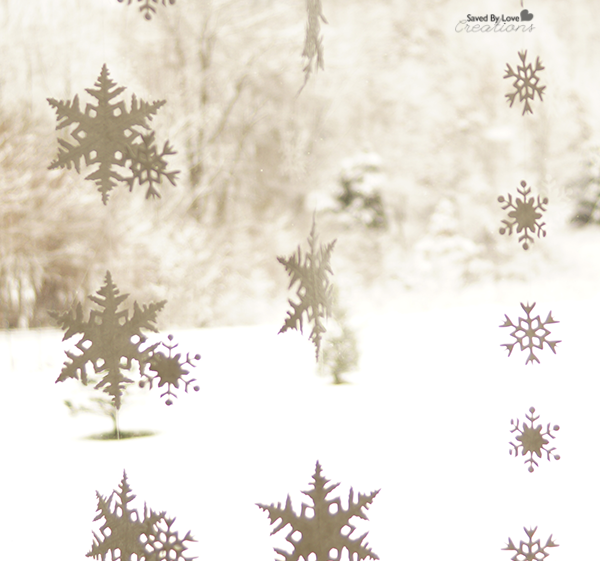
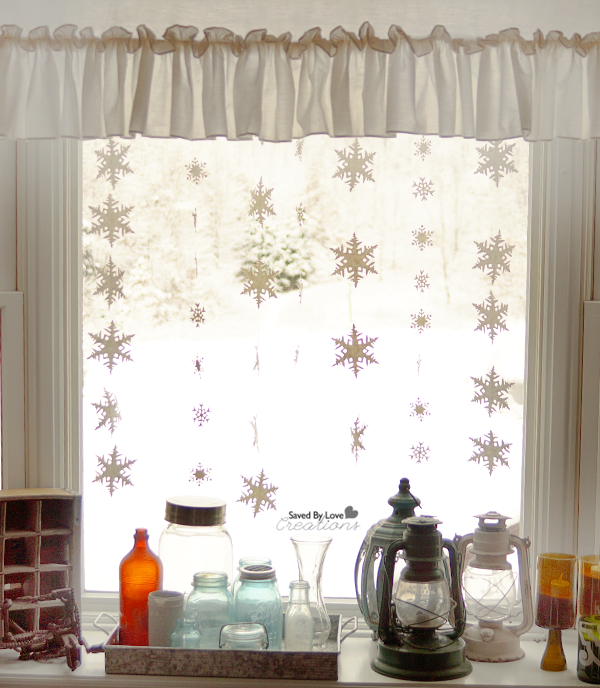
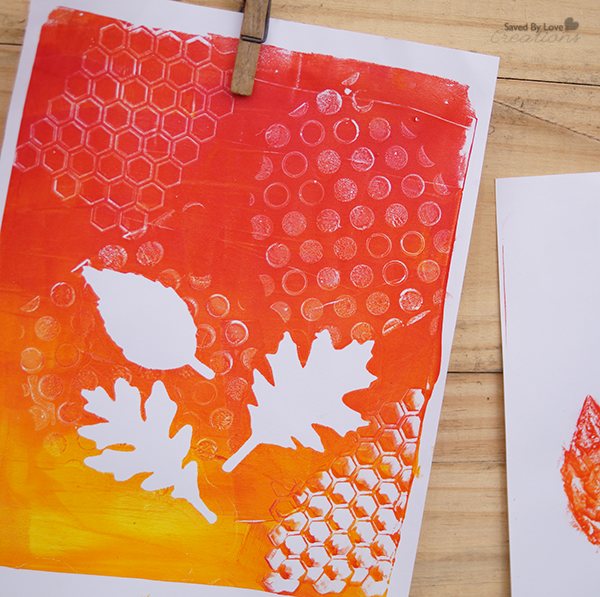
Today I am sharing with you a simple way to add some wintery snowflake decor to your house for the season! This project is super quick, easy and cheap with the right supplies. I love it with the first snowfall of the season painting the landscape beyond the window.  Perfect!
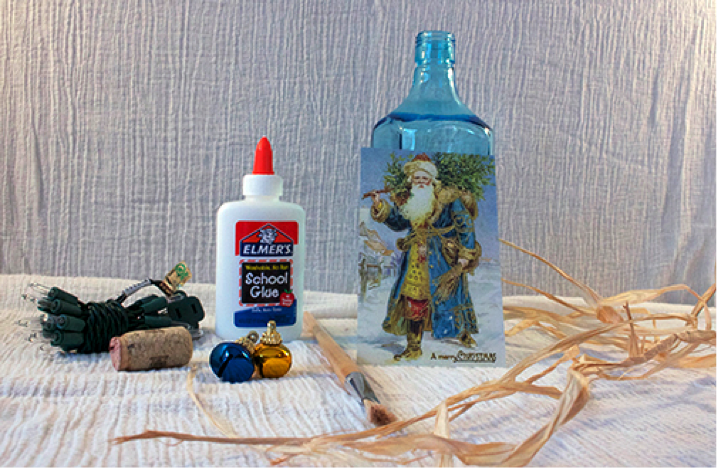
DIY Snowflake Window Garland @savedbyloves

SUPPLIES

Snowflake Decor

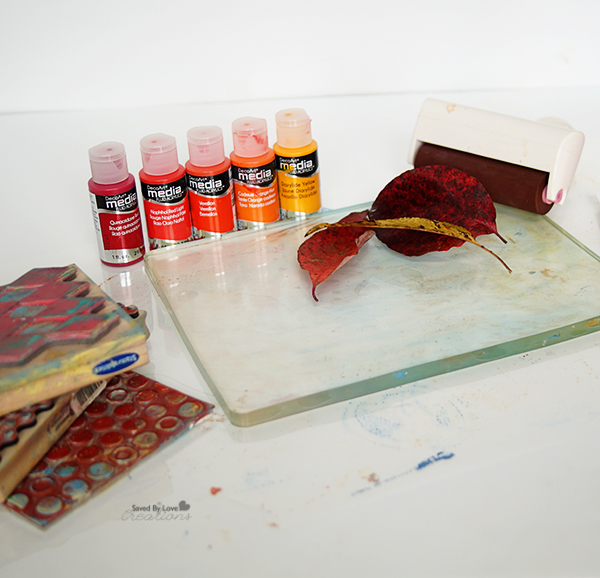
White paper (I used filter paper I was given from the local recycling center)

Sizzix Snowflakes #3

Sizzix Snowflake With Texture Fade by Tim Holtz

Clear string

Hot Glue and glue gun

Sticky foam mounts or other removable tape

TUTORIAL

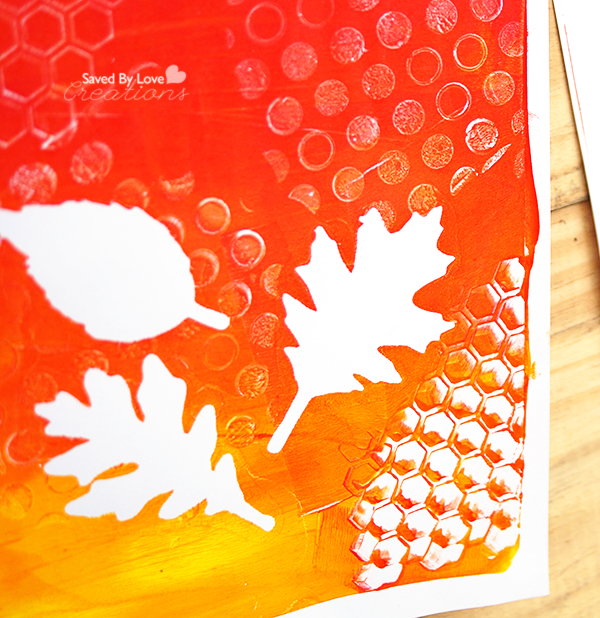
Die cut several snowflakes from white paper.

Add a line of hot glue to the back of the snowflakes and adhere the clear string.

                                                    Continue adding snowflakes this way until the strand is as long as you want.

Snowflake Decor DIY

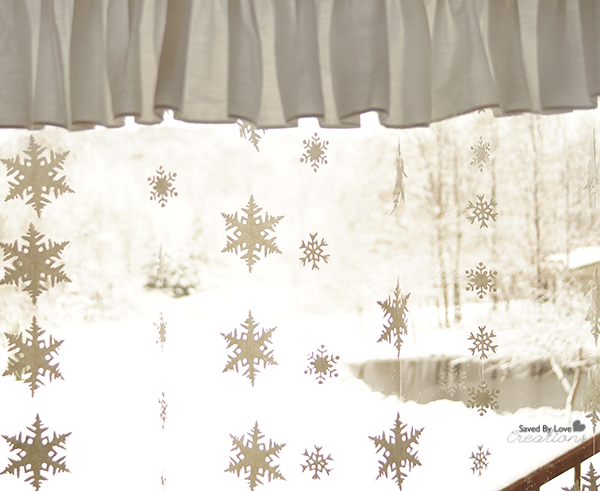
I made 7 strands of snowflakes and stuck them to the window’s “ceiling” using removable foam mounting tape.

If you don’t have a die cut machine, you can make your paper snowflakes with this detailed tutorial from Instructables:

How to make Paper Snowflakes

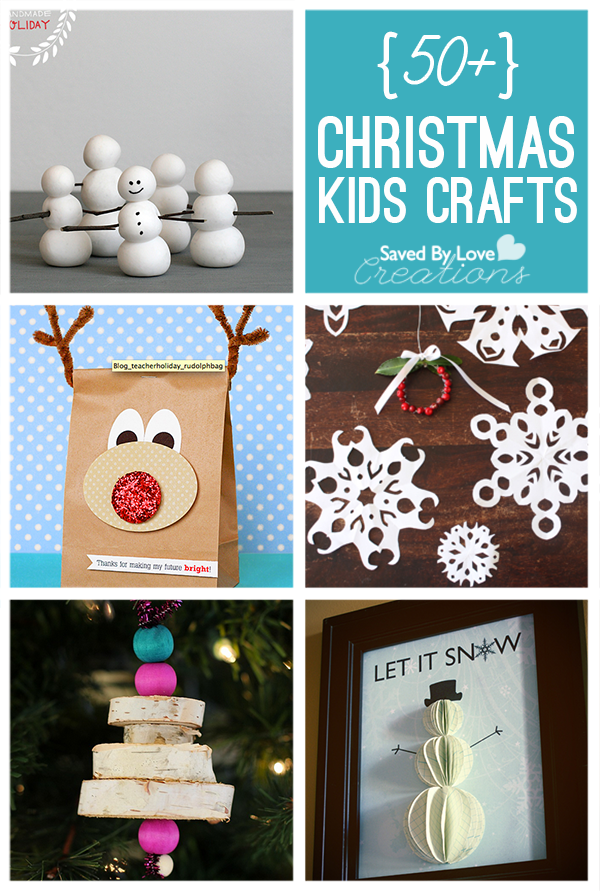
For more Christmas inspiration, visit our 50+ Christmas Kid’s Crafts:

Christmas-Kids-Crafts-to-Make-Pinterest-Saved-By-Love-Creations1

Make gifts for your loved ones on the cheap with our 50+ Gifts to Make for Under $10:

50 Christmas gifts to make for less than $10

DIY Fused Mini Amber Glass Bottle Earrings

DIY Fused Glass Bottle Earrings @savedbylovesSo, I am crazy excited to share today’s jewelry tutorial with you. These earrings are my go to piece for several reasons.  They are beautiful, unique and go with all kinds of outfits.  I got the idea when flattening wine bottles in my kiln.  I remembered the tiny bottles, or vials that people fill with mica powder and little notes and thought it would be so cool to flatten them.  I wasn’t sure what I would do with them flat, but as soon as the kiln cooled and I laid eyes on them, I knew I wanted to wire wrap and wear them!

MATERIALS

7 Gypsies Amber Apothecary Bottles

Round nose jewelry pliers

Flat nose jewelry pliers

20 gauge jewelry wire

Flush wire cutter

Earring findings

10 coordinating seed beads

Microwave kiln

 TUTORIAL

Fuse your bottles, one at a time in your microwave kiln.  I showed you how to use that here: DIY Wine Bottle Earrings. You can also use a regular kiln if you have that. Let them cool to room temperature before continuing.

How to wire wrap jewelry

Cut 7 inches of wire and string 5 beads onto it.

How to make fused glass jewelry

Place beads in front and situate wire at neck of fused bottle as shown.

How to wire wrap jewelry2

Bring the left side wire around the bottle neck and back to the front as shown.

How to wire wrap jewelry3

Wrap both wire ends around the neck a few times, ending with 2 wire tails in the back as shown.

How to wire wrap jewelry4

Wrap the two ends as shown so that they are vertical.

How to wire wrap jewelry5

Coil one end around the other as shown.

How to wire wrap jewelry6

Trim the end of the wire you just coiled.

How to wire wrap jewelry7

Use the flat nose pliers to bend the remaining tail to form a 90 degree angle.

How to wire wrap jewelry9

With the round nose pliers, form a loop as shown.

How to wire wrap jewelry10

Thread the ear wire onto the loop, then trim the excess tail.

Fused Amber Glass Bottle Earrings

I love them!  I can’t wait to make more.  Next I will use clear vials and color them with alcohol ink.  Exciting stuff!

DIY Recycled Glass Bottle Frames

Photo In a Bottle Upcycle from @savedbyloves

Display meaningful photos in a unique way while busting through your stash of vintage buttons, ribbons, fabric scraps and found objects. These little medicine bottles can be found in thrift stores, at tag sales and online for cheap.  Use them for Christmas gifts, or as photo frames for yourself!

Photo In a Bottle 6


MATERIALS

Photo In a Bottle 1

-Variety of antique medicine and food bottles

-Photos sized to fit in bottles and printed in black and white or sepia tone on copy paper

-Glitter, sand or other filler

-Found objects, beads, vintage buttons, old keys and other embellishments

-Decorative ribbon, twine, lace, burlap and fabric scraps

-Corks for bottle tops

-Copper craft wire gauge 20-22

-wire cutter

-scissors

-hot glue

-Bamboo skewer or pencil

DIRECTIONS


  1. Clean bottle and remove any labels. Let dry.

Photo In a Bottle 4

  1. Add sand or glitter using funnel or folded paper scrap
  2. Drop in a few beads, buttons or other small meaningful objects.

Photo In a Bottle 5

  1. Roll the photo into a tube and insert it into the bottle. Use a skewer to unroll it and flatten it against the inner surface of the bottle.
  2. Embellish outside of bottle with ribbon, lace, twine, vintage pearls and other scraps. Glue on buttons and found objects with hot glue.

Photo In a Bottle 10

  1. Place cork in bottle and embellish with vintage buttons, beads or brooches. Secure with wire wrapped around cork and through button. Add a dab of hot glue at the base of the button to hold in place on top of the cork.

Photo In a Bottle Upcycle from @savedbyloves

Upcycled Frap Bottle Frosty Heart Lanterns

Frosty HeartsDIY Upcycled Frap Bottle Votive Holders @savedbyloves

Handmade lanterns are all the rage. With adhesive stencils and paints made just for glass, creating fun designs on bottle is easier than ever. This project involves cutting the bottles roughly in half. Frost and glitter paint are used with heart stickers in a masking technique, so that light from the candles shines through the frosty heart shapes. Create a warm glow for your Valentine’s Day dinner at home!


Frosty Hearts Frap Bottle Votive Holders 7


MATERIALS

– Frappuccino bottles

–Martha Stewart frost glass paint in white

– glitter glass paint in red and pink

– heart stickers cut from foil tape or adhesive vinyl

– cosmetic sponge

– Rubbing Alcohol

– Lint free dry cloth

– Protective gloves

– heart stickers that adhere well to glass

-Surface protector such as newspaper or craft sheet

-bottle cutting supplies (See How to Cut Glass Bottles)

DIRECTIONS

  1. Remove labels with soapy water or Krylon Adhesive Remover. Clean and dry bottles.

Frosty Hearts Frap Bottle Votive Holders 2


  1. Cut bottles roughly in half. You don’t have to be exact. You just want to be able to lift off the top and place a votive candle inside when you are finished.
  2. Protect your work area with newspaper or craft sheet.

Frosty Hearts Frap Bottle Votive Holders 1


  1. Paint bottles by dabbing thin layer of frosty glass paint in white with a cosmetic sponge. Don’t go over the same area more than once. It is best to apply several light layers, allowing 10-15 minutes of dry time between to achieve the look you want. Applying too heavily leads to streaks and splotches that you won’t like. Once you are happy with coverage (1-3 coats should do it) let dry for about 30 minutes before moving onto the next step.

Frosty Hearts Frap Bottle Votive Holders 3


  1. Vinyl and foil tape work well for heart stickers. Cut out hearts using die cut machine, freehand or template (see Hearts page ?)
  2. Apply Heart stickers where you want light to come through the frosty heart. I went for almost center, spanning the cut seam.

Frosty Hearts Frap Bottle Votive Holders 4


  1. Paint one jar with glitter pink, and the other with glitter red. Several light layers with 10 minutes or more dry time in between is best.
  2. After your final layer, remove the heart stickers with tweezers or a craft knife, being careful not to smudge adjacent paint.
  3. Let dry overnight, with top and bottom apart so that they don’t dry stuck together.
  4. Lift off top and place candle.
  5. Light and enjoy!


EXTRA TIPS

○ Masking Tips – Foil tape in the electrical section at the hardware store works great for these projects. It adheres well so that the paint doesn’t seep underneath, but doesn’t disturb any base layers of paint when removed. A large roll of it is under $8 and lasts years. Don’t leave the stickers on overnight, or the surrounding paint will peel away with them upon removal. You want to remove them soon after your last coat of paint.


DIY Upcycle Lighted Santa Bottles

DIY Santa Light Bottle Upcycle Project @savedbyloves


This handmade Santa light-up bottle adds a warm and cozy feeling to any space for the Christmas season. This project requires a recycled bottle and drilling a hole in the lower backside of the bottle. Also required is a fun search for a Santa image. The choices are endless, ranging from recycled Christmas cards, magazines, printed images, and the imagination goes on. Most importantly don’t forget a strand of Christmas lights. Now let’s get started and enjoy the fun.


Materials for drilling a hole in glass

  • Drill
  • Drill Bit
  • Safety Glasses
    • Facemask
  • Spray Bottle With Water


image 1 Drilling Materials


Directions

  1. Drill a hole in the bottle. Through my research I found that using a 1/2 inch hole saw diamond grit drill bit works best for drilling a hole in a bottle. You can find this type of drill bit in most hardware stores and online.


  1. Safety first: Wear safety glasses and a facemask to prevent eye injury and inhaling glass dust.
  2. Starting on the backside and lower end of the bottle place the drill bit at an angle. This will allow you to start a groove in the bottle. Once you have the groove started you will begin to slowly bring the drill to an upright position. Apply pressure but not too much as this will cause the bottle to break. Periodically stop drilling and spray the drill bit and bottle where you are drilling the hole to keep the drill bit and bottle cooled off. This also keeps the glass dust level down while you are drilling.

image 2 drill at angle

image 3 b groove started

image 2b Drill Perpendicular

image 3c spritz with Water

image 3d Hole Drilled


Tip: I have also seen websites online where you can purchase predrilled bottles from suppliers.


Materials for Santa bottle


  • Empty Bottle (most types of bottles will work for this project)
  • Cork (optional)
  • Strand of Christmas Lights (20-30 bulb strand with a one-ended plug)
  • Santa Image (of your choice)
  • Raffia
  • Christmas Bells (two)
  • Glue
  • Water
  • Paintbrush

Santa Bottle DIY


  1. Removing labels from the bottle. Soak bottle in warm soapy water until the label is saturated with water. Use a putty scraper or a scraper with a razor blade on the end. Once the bottle is clean allow it to dry.

Tip: If the inside of the bottle has any residue from the drilling process you can tear off a small piece of a cleaning cloth and swish it around with the water in the bottle and that will help to rid of it.


  1. Apply the Santa image. I prefer to make a mixture of Elmers glue and ¼ water. If the image is on thick paper this mixture will work well. If the image is on a thinner paper use a thicker consistency of glue (less water). Note: Other types of glue or Mod Podge products will work. Check your local craft stores to see what products they carry.


Measure the Santa image up to the bottle to insure the placement of the image will be where you want it. Using your paintbrush brush glue on the area where the image will be placed. Starting from the center of the image place your image on the bottle and gently glide your fingers from the center to outer edges of the image. Once you have the image glued down brush some more glue over the top of the image. Start this from the center working your way out as well. If any bubbles occur on the image you can smooth them out with your fingers from center to outer edges. Allow image to dry. Note: Once dry you can add glitter or a coat of crafting varnish on the Santa image.


Santa Bottle DIY 2Santa Bottle DIY 3


  1. Wrap raffia around neck of the bottle. Two or three strands of raffia will cover the neck of this size bottle. More strands may be required if your bottle is taller. Start by tying one end of the raffia around the neck of the bottle leaving a little excess on one end to tie off in the end of the wrapping process. Begin wrapping it fairly tight around the neck of the bottle. If your strand starts to run out tie the next strand to the one you started with and keep going until you have covered the neck of the bottle. Now tie off with the excess. Note: Twine, yarn, or ribbon can be used in place of the raffia.


Wrap Raffia around bottleWrap Raffia around bottle 2 

  1. Tying on the Christmas bells. Using another strand of raffia, tie the raffia around the top of the bottles neck, leaving a generous amount on both ends so that you can tie one bell on each end.Tying on Bells

 Tying on Bells 2

  1. Place a cork in the top of the bottle. (Optional)Place Cork
  2. Inserting the strand of Christmas lights. Turn the bottle upside down to insert lights (this helps the light strand to flow more evenly throughout the bottle). Starting from the bulb end of the light strand insert each bulb individually into the bottle. Once you have your strand of lights in it is time to plug in and enjoy.Insert Lights

Insert Lights 2

DIY Wood Pallet Hanging Planters

Wood Pallet ProjectKreg Jig K4 Pocket Hole System

I love decorating with mums in the fall, and it is well know that I am a wood pallet upcycling kind of DIY blogger. Today’s project combines the two for some easy, inexpensive wood pallet hanging planters. This is a great way to use up your scrap wood, and is a perfect project for those new to woodworking since it doesn’t require any fancy techniques. The metal chain and hardware with the wood give these planters a rustic, industrial feel that I adore.  Let’s get started!

Cut List

4 – 2×2 pieces 6 inches long for the side posts

8 – 1×3 pieces 8 inches long for the side panels

1 – 1×6 piece 1o inches long for the bottom (this doesn’t have to be exact – you can use whatever scrap wood you have on hand to make the bottom)

Materials

Metal chain and eye screws

Kreg screws 1 inch and 1.25 inches

Wood Glue

Kreg jig

Instructions

I made my planter to fit the plants I had on hand.  You can adjust the size to fit your plant.

Make Wood Pallet Home Decor

*I always use wood glue!

Begin by assembling the side panels with two pocket holes (I show you how to use the Kreg Jig here).  Set the depth of the jig to match with thickness of your pallet wood.  My pieces were 1×3 (which is really .75 inches thick) so I set the depth to 0.75 inches.  Use 2 – 1.25 inch screws to connect the sides.  Drill pocket holes one both sides of each side panel for attaching to 2×2 posts later.

Wood Planter Free Woodworking Plan

Next, attach the four posts to 2 of the side panels as shown.  I made the posts by cutting 2×4 to 6 inch pieces, then ripping those in half, all with my mitre saw.

Attach the bottom piece to the remaining 2 side panels with 2 pocket holes in each end.  Knowing what size kreg screw to use can be a process of elimination, but a general way to gauge pretty closely is to add the widths of the two pieces you are attaching and subtracting 0.25 from that to get your screw length.  So in this case 0.75 for the bottom piece + 0.75 for the side panel thickness – 0.25 equals 1.25 inch screws.

Free Woodworking Plans Hanging Planter

Finish the planter using the side panel pocket holes you drilled for the side post to attach the three pieces you assembled.

DIY Wood Pallet Hanging Planters @savedbyloves

Add eye screws into the 4 posts for chain and enjoy!

Gelli Printing DIY Fall Art

DIY Gelli Printed Fall Art @savedbyloves

A creative friend introduced me to gelli printing, and I am hooked. I think you will be too! Today I will show you how to use leaves from your yard and die cut leaves to create beautiful one of a kind fall art prints. Use gelli printing for your art journal and mixed media backgrounds, for handmade greeting cards or frame them for instant art!

DIY Fall Art

MATERIALS

DecoArt Mixed Media

Gelli Printing Plate; I purchase this 8×10 inch plate (*this is my Amazon affiliate link)

Brayer

Acrylic Paints in fall reds, oranges and yellows; I used DecoArt Media Fluid Acrylics

White Card Stock 8.5 x 11 inches

Rubber Stamps, bubble wrap or other texture materials

Leaves from outside

Die cut leaves

TUTORIAL

Gelli Printing Tutorial

Drip paint in yellow, orange and red as shown.  It doesn’t take much paint to cover the gelli plate.

Mixed Media Background Technique

Use the brayer to spread the paint over the gelli plate.

Use Bubble Wrap to Create Texture

Create texture in the wet paint with bubble wrap, stamps, combs, etc.

Crafting with leaves

Place the real leaves or die cut leaves over the texture you just made. Now you are ready to lift your first print!

How to Gelli Print

Place the white card stock over the gelli plate and smooth out with hands, ensuring contact all over the card stock.

Gelli Print Ideas

After lifting the first print, and removing the leaves, you are left with this, which creates a cool second print.

How to Create Mixed Media Backgrounds

The left is the first print and the right is the second print after removing the leaves.

Mixed Media Techniques

Here I followed the above steps, but used leaves I die cut from cardstock with the Sizzix Tattered Leaves Die instead of real leaves.

DIY Leaf Art

I love this technique, and the DecoArt Media Fluid Acrylics are great to use for it.  I tried a few other paints, but got blurred lines with the leaf outlines.  I am excited to do more gelli prints!

Have you tried gelli printing?

DIY Wood Pallet Coat Rack

How to Make a Wood Pallet Coat Rack @savedbyloves


My sweet friend Jordan came over to learn how to build, and we started with this simple DIY Coat Rack from Shanty 2 Chic. I love when people have an interest in learning how to work with power tools, especially women.  It is so much easier than most would think, and there is not much more fulfilling than creating your own beautiful pieces from a pile of wood.  We followed Ashley’s steps, substituting pallet wood everywhere except for the 4×4 and the furniture foot on top of the coat rack.  That made this project super cheap, and Jordan mastered the Kreg Jig, compound mitre saw, drill and air nailer! I think she is addicted, just like I was after My First Woodworking Build.

Wood Pallet Ideas

Here are the pallet wood legs that attach perpendicular to the bottom of the 4×4.

DIY Wood Pallet Furniture Plans

I was so glad the Shanty  2 Chic instructions suggested to make a line around the bottom of the 4×4 using the width of 1×3 scraps attached to the underside of the legs. This made attaching the legs to the 4×4 super simple.  Jordan used the Ryobi Air Strike cordless nailer to attach the pallet scrap “feet” to the underside of the legs. This tool makes building way faster and easier!

Wood Pallet Project Idea

Jordan attached the legs to the 4×4 using pocket holes she created with the Kreg jig, just like Ashley did in the Shanty 2 Chic tutorial.  To attach the angled supports, she used the Ryobi Nailer again.

DIY Furniture Woodworking Pallet Plans

To finish up, I cut a square from pallet wood and drilled a hole in the middle of it, using a bit just smaller than the diameter of the rebar on the furniture foot I picked up at Lowes.  (Jordan had to take off for an appointment, so I finished up the project that took just a couple of hours start to finish).

Mineral Green Stain

I applied Minwax Wood Conditioner, followed by Rustoleum Wood Stain in Mineral Green. Since I used wood that was different to start (the purchased, unfinished 4×4 and the weathered pallet wood), the stain took differently.  To unify the piece, I went over the stain in aging wax by Plaid.

Wood Pallet Furniture

Once that dried, I placed the furniture foot in place on top, and added 4 hooks purchased from Lowes.

DIY Wood Pallet Furniture

The piece stayed at my home for a few days before I took it to Jordan.  I got attached.  That is why I am no building my own!  It is a perk of creating with others… this isn’t a piece I would have thought of for my space, and now I must have it.  Thanks Jordan!

DIY Graphic Centerpiece from Reclaimed Wood

How to Make a Reclaimed Wood Crate Centerpiece


Make a Reclaimed Wood Chicken Wire Crate

Now that I have your attention with a seriously adorable puppy and his one blue eye, I would like to show you how to make this chicken wire reclaimed wood graphic centerpiece! This piece definitely evolved as it was being made.  My friend came over to see if we could come up with a centerpiece for her square kitchen table, and we started at my wood pile.  We ripped some chippy painted trim, and added it to some pallet wood and wire.  We thought we were finished there,  but had the idea to visit The Graphics Fairy where we found the perfect vintage spoon and fork images to transfer onto the pallet wood sides.  The result is just what she had in mind, and now I want to make one for myself!

SUPPLIES:

Scrap wood (we used wood pallets and old trim)

Chicken Wire

 Ryobi Air Nailer

1 inch brad nails

Kreg jig

1 inch Kreg Screws

Wood Glue

White Tissue Paper

Mod Podge Matte

Printer (laser jet or ink jet printer are fine)

Card stock

Painter’s Tape

Mitre Saw

Drill

Metal Snips

TUTORIAL:

DIY How to Make a Reclaimed Wood Crate Centerpiece

We knew we wanted a square crate.  Starting with the bottom, we used two 5.5 inch wide pieces of pallet wood that we cut to 11 inches long with the mitre saw.

We attached the pieces together with the Kreg Jig Pocket Hole System and 1 inch screws (I showed you how to use that here: How to Use a Kreg Jig).  The blue circles show the Kreg pocket holes.

We cut two pallet wood sides to 11 inches and attached them with pocket holes and .75 inch screws since the pallet wood sides were to thin for 1 inch screws.

Next we lined up the trim pieces we had ripped and marked them, cutting them with the mitre saw to the appropriate length.

How to build a crate

Next we cut the chicken wire with aviation snips to fit the sides of the crate.  We attached the chippy painted trim piece over the chicken wire to hold it in place.

DIY Centerpiece idea and beagle puppy

We thought we were finished, but then Victoria had the great idea of adding the chippy trim to the pallet wood sides where the arrows are in the photo.

DIY Reclaimed Wood Decor

We cut the trim to fit and nailed it into place with the Ryobi nailer.  This is what we were left with at that point.  I decided the wood area at the arrow and the side opposite it were perfect for graphics.  We chose the vintage spoon and fork graphics linked in the first paragraph and used the tissue paper image transfer technique I showed you here: DIY Image Transfer Recycled Glass Bottles.

DIY Fall Centerpiece

Not bad for a couple of hours and $0 spent!

How to Make a Reclaimed Wood Chicken Wire Crate

For more inspiration, visit our  50+ Image Transfer Techniques!

How to Break Down Wood Pallets Video Tutorial


How to Break Down Wood Pallets Video DIY@savedbyloves

It is no secret that I love to create all kinds of things with wood pallets. Why wouldn’t I?  They are readily available and usually one their way to landfills or bon fires by the time I get my hands on them.  Lumber can be expensive, so why not use pallet wood for your projects to save some cash and help the planet in the process?  I have gotten several questions on how I break down my pallets, so I made a quick video of the process to share with you.

YOU WILL NEED:

Crowbar

Hammer

Reciprocating Saw

Safety Goggles

Wood Pallet

Now that you have your pallet broken down, you are ready to build.  Here are some ideas:


Woodworking Project Gallery Page

Powered by CGView

Privacy Policy