Over 50 Amazing DIY Spray Paint Projects to Make

[pinit]Over-50-Amazing-DIY-Spray-Paint-Projects-to-Make-@savedbyloves
[pinit]

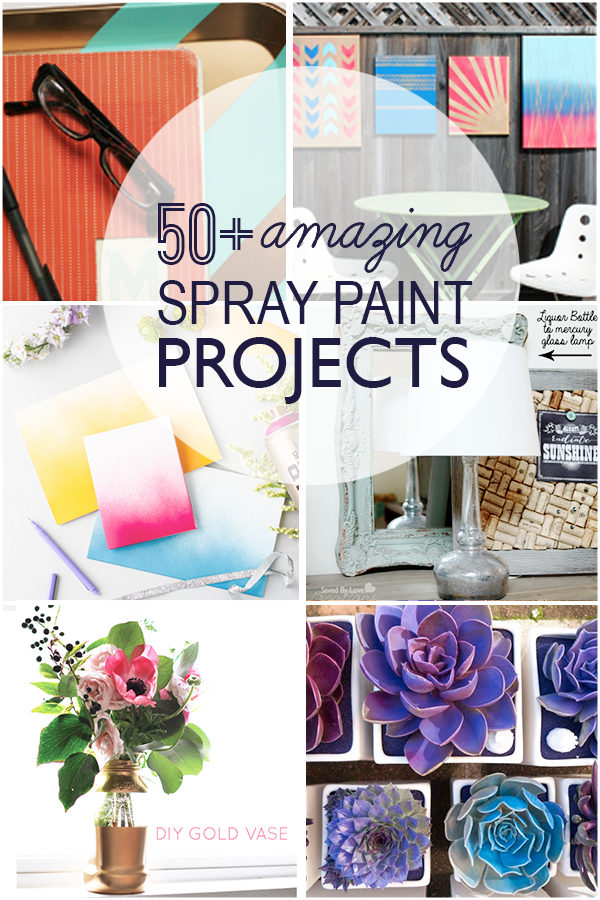
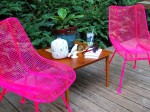
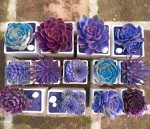
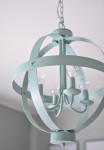
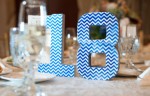
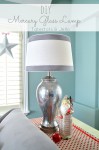
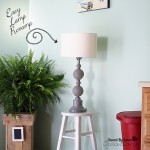
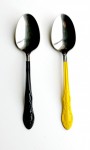
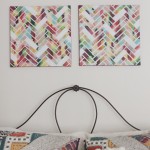
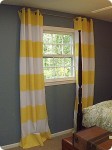
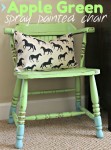
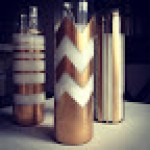
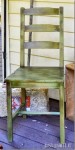
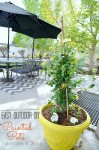
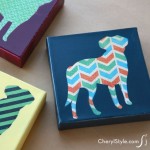
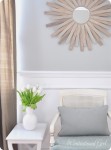
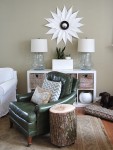
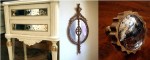
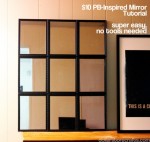
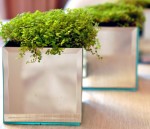
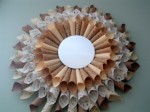
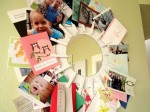
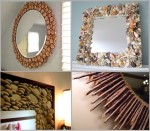
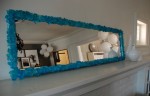
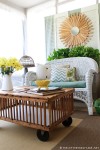
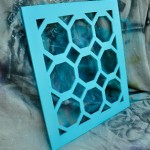
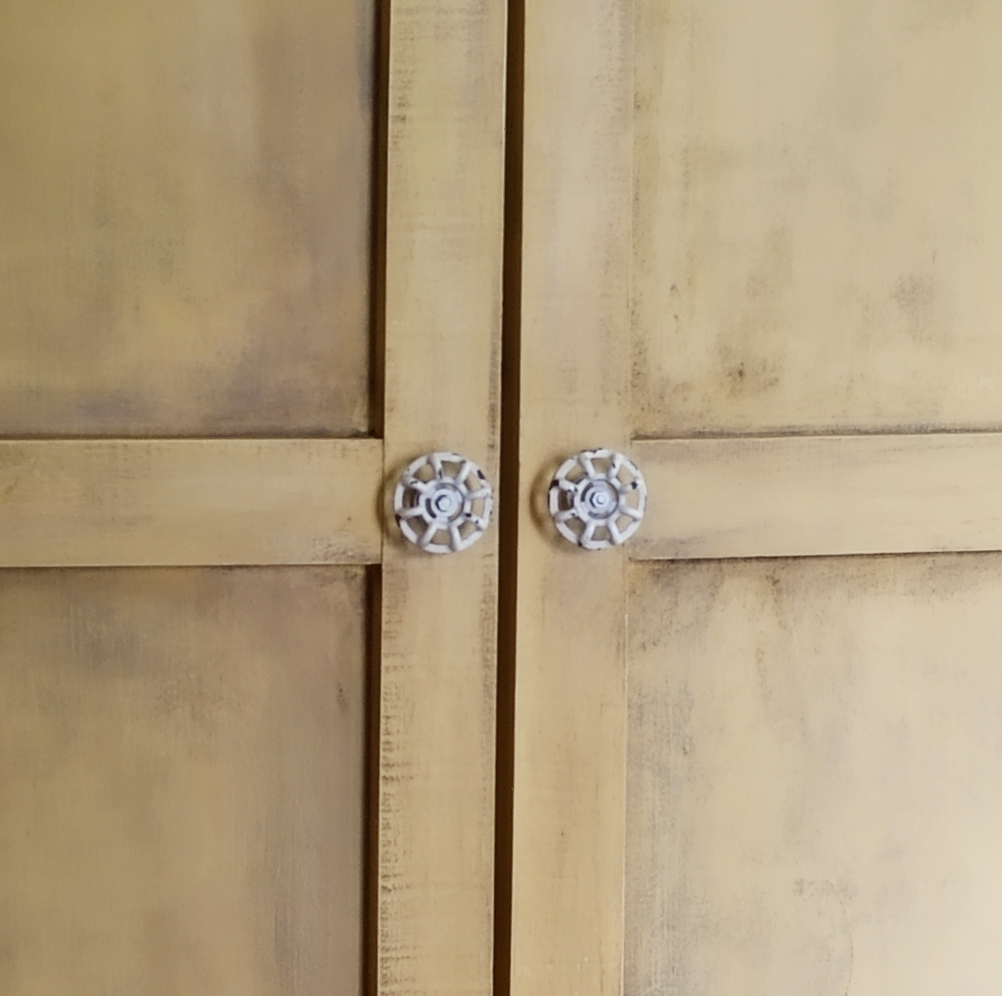
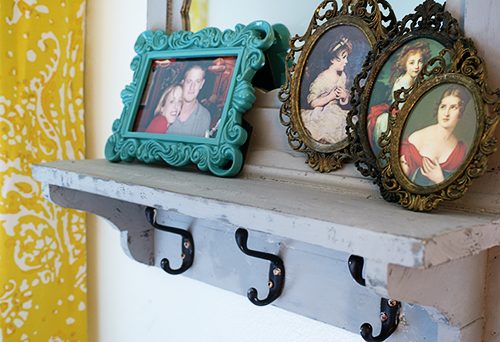
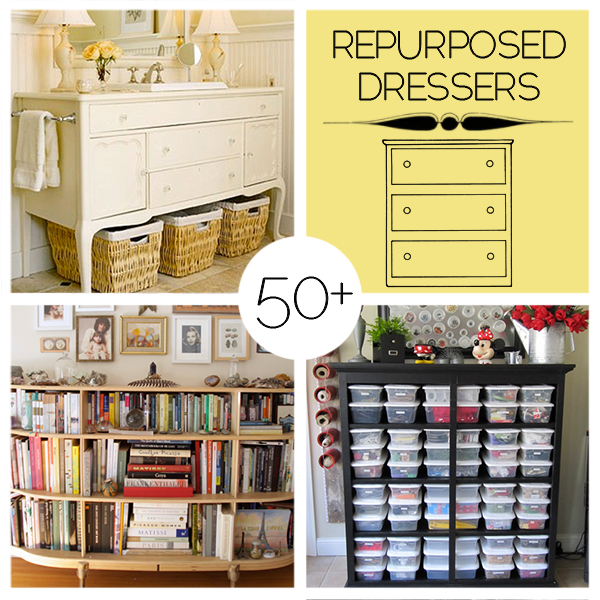
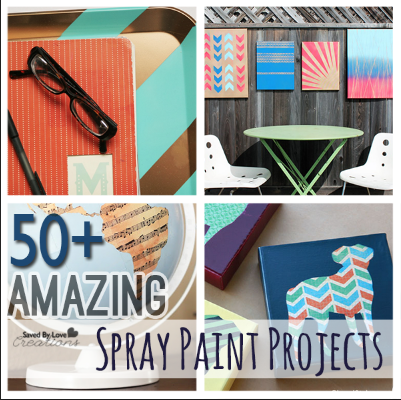
One of my favorite things about the arrival of spring is finally being able to go outdoors and get busy with spray paint projects!  The time is here, and today I am sharing with you my favorite DIY spray paint projects from creatives everywhere.  You will find DIY curtains, home decor, wearables and more.  Be ready to be amazed at what you can do with a little spray paint and inspiration.


Furniture Makeover Chalk Paint a Goodwill Chair

[pinit]

Use chalk paint to revamp a chair

[pinit]

I decided one day to take a little trip to the local goodwill and see if I could find any good finds. Guess what?  I always find something I just think I can’t live without and this time around it was no different. I found a beautiful banker’s chair just waiting for me to take home! I did not even think about it twice and just drove it home.

 How to paint a piece of furniture with Chalk Paint

Once it was home I had to decide what I wanted to do with it. I did not want to spray paint. I choose to do my home made chalk paint and paint it.


The great thing about using chalk paint is that I don’t have to sand the chair and it’s all about just painting and not worrying about all the mess of sanding.

 Goodwill makeover

I made my home made chalk paint with black paint I got at my local hardware store. If you would like to know more about my home made chalk paint you can find it here.

 how to use chalk paint

I applied about two coats of chalk paint and let it dry.  Once it was dried I just used a wet cloth and rubbed off the paint the selected areas. I wanted the chair to look used and I rubbed the chalk paint off in the areas where it would be well used.  Now the chair has a little chic look.

chalk-paint-sealer

I then applied a sealer coat on the chair to make sure they chalk paint will not continue to come off with wear.

What do you think? What will you use your home made chalk paint on?

Stay Crafty!

Don’t miss our roundup of over 75 great projects using Chalk Paint!!

 And how about this DIY custom storage cubby I built for storing my Sizzix Dies?  It is painted with a recipe for chalk paint you can make yourself.  Head over for the DIY woodworking plan and chalk paint recipe!

How to Make a Gorgeous French Typography Lamp from a Liquor Bottle

[pinit]

How to Make an amazing french typography lamp from a recycled glass bottle; Distressed with @decoart Chalky Finish Paint @homedepot @michaelsstores @savedbyloves @graphicsfairy

Make a French Typography Lamp[pinit]

This is a sponsored post written by me on behalf of DecoArt.  All opinions are mine and honest.  This paint rocks!

We are getting ready for a big move, and I am busy with DIY home decor on a shoestring budget!  Today I am sharing a super sweet french typography Chalky Finish Paint lamp that I made from a discarded liquor bottle.  You will see how to drill a hole in the bottle for the cord, how to chalk paint and distress the lamp, as well as how to transfer an image to the painted surface.  This project is easy and cheap.  The biggest expenditure is the $6 bottle lamp kit and the $15 lamp shade I just had to have for it!   The new Americana Decor Chalky Finish paint is now available in Home Depot and Michaels stores. It is also available for purchase online at homedepot.com.

Make a chalk paint lamp from upcycled bottle

SUPPLIES:

Really cool liquor bottle

Drill and 1/2 inch Diamond hole drill bit

Small container of water

Towel or paper towels

Rubbing Alcohol or glass cleaner

Lamp Shade

Light Bulb

 DecoArt Americana Chalky finish paint In Treasure, Inheritance, Everlasting and Primitive

DecoArt Americana Crème Wax in clear and Golden Brown

Medium grit sand paper

Paint brush and wax brush

Bottle Lamp Kit (I got mine at Wal-Mart for $6.47

White Tissue Paper

Cardstock

Masking Tape

Printer

Image to transfer (I used this French Typography Graphic from the fabulous Graphics Fairy)

TUTORIAL:

Begin by drilling a hole in the back at the base of your bottle where you want the cord to exit.  I showed you how to do that HERE:

 Upcycle a Glass Bottle into a Lamp

how to chalk paint on glass

Once your hole is drilled, clean your bottle surface all over with glass cleaner or rubbing alcohol.

Distress painting tutorial

Use a soft, flat brush to paint on a layer of Treasure.  When that is dry, paint on a layer of Primitive.

Upcycle a wine bottle craft

I sanded the gray, revealing the blue base layer.  I decided I wanted a soft yellow top coat, so I mixed Everlasting with Inheritance to lighten and soften the mustard like color.  Then I painted that in a cross hatch, random and messy fashion so that the final piece will have texture and depth.

How to Print on Tissue Paper

To get my image for transfer, I printed some of my favorites from the Graphics Fairy.  There are thousands of free images there to fit any style.  The one I went with is a French Typography file which you can find linked in the supplies section.

Just cut a piece of white tissue paper to fit your card stock and tape it on with masking tape.  Place in printer and print!

How to Image Transfer on Paint

Cut or tear your image from the tissue paper.  I like to tear it so the edges are feathered and not such a straight edge like you get with scissors.  It blends in better.

Apply Clear Creme Wax where you will place the tissue.  Carefully place the tissue and smooth out wrinkles with your finger.

How to Image Transfer


Paint more Clear Creme Wax over that and let dry.

Wine Bottle Craft lamp from upcycled bottle

When the tissue transfer dries, sand entire bottle in areas where you want to bring out the underlying paint colors.  Then apply clear wax over the entire bottle.  Let that dry for at least 30 minutes.

How to Antique Chalk Distress Paint

How to Use Antiquing Wax

Apply Golden Brown Creme Wax as desired and wipe back with soft cloth.  If you use too much brown, you can wipe it away even further using Clear Creme Wax on a rag.

GE Bottle Lamp Kit

Now it is time to use the Bottle Lamp Kit!

How to make a lamp

Follow the included instructions, except for where it says to thread the cord.  It has the cord coming out of the fixture just under the light bulb, but we drilled a hole in our bottle to avoid having an ugly cord running down the lamp from top to bottom!

How to make a lamp from a recycled liquor bottle

I found the burlap lampshade at Wal-Mart for $15.

I love my new lamp!  More than that, I love this line of paint.  You will be seeing it in so many more projects coming up here at SBLC.

Remember this DIY Hand-Painted Sign?  Yep, same paint line.  It goes on beautifully, is easy to distress, and comes in an amazing color palate.  LOVE!

Visit the DecoArt Chalky Finish website for more information.


The 50 Best DIY Mirror Projects Ever Made

[pinit]

50 Best DIY Mirros Upcycled Recycled and Eco Friendly Decor with Mirrors @savedbyloves[pinit]

Have you ever been to a house with no mirrors? Yep, we all use them. Today I am sharing my favorite DIY mirrors, upcycles, hacks and revamps from the most creative people gracing the blog world.  You will be amazed.  It helps you look good, so help it do the same.  If breaking it brings bad luck, maybe beautifying it will land you that winning lottery ticket!  If not, you are left with a cool mirror that you made.  Everyone wins.  Enjoy!


Build an Armoire & Distress it With Chalk Paint

Knobs

Ana White Armoire Plan #woodworking @savedbyloves

DIY armoire woodworking plan from Ana White and how to distress with #chalkpaint #AnnieSloan[pinit]

I am so excited about today’s project.  The closet situation in my new place is less than optimal (totally crappy).  In desperate need of a solution, I searched and landed on this simple armoire building plan from Ana White.  If you have been around here long, you know I am a big fan of Ana’s site.  She introduced me to woodworking and I have been covered in sawdust since that day.  This project was easy to follow.  I made some adjustments since I wanted it larger than the dimensions of the original plan, and I was improvising with salvaged wood I had on hand.

This was my first project using Annie Sloan chalk paint.  Don’t you love the color?!  It is called Arles, and I finished with Annie Sloan Clear Wax, then Dark Wax over the top of that.  Its a bit more “aged” than what I had planned.  Turns out a little of the dark wax goes quite far.  I will keep that in mind for my next project.   I still love it.  If you run into that, you can always paint over the wax.  It wasn’t that big of a deal to me in this case.  We all know I will be painting it a new color when I change my room decor anyway, right?

Annie Sloan Chalk Paint Arles

Here is the Annie Sloan paint.  Yum.

How to build an Armoire from salvaged wood

Sad quality iPhone shot of the armoire before painting.  Hard to get any shots of it really, because of the room size and… oh yeah, I made it huge.

Knobs

Did you check out the knobs I found at Hobby Lobby?  Perfect.

Pin

That’s it.  I love it.  Off to figure out what to build next.

Woodworking Project Gallery Page

Powered by CGView

Over 50 Things to Make from Repurposed Chair Parts

[pinit]

50+ Repurposed Chair Projects to make @savedbyloves #upcycle #furniture #DIY[pinit]

The abundance of curbside discarded chairs in my area has me looking for ways to repurpose old chairs and their parts.  Today’s post brings my favorite finds for DIY upcycling inpsiration.  I truly didn’t anticipate finding a wreath during my searching on this one, but it happened.  Not only that, but it’s pretty cool, I must say.  You will see chair back, legs, spindles, even entire chairs given new purpose in some seriously creative ways.  Enjoy!

Revamp a Mirror into A Coat Rack for Your Entryway

[pinit]DIY Coat rack from Mirror #chalkpaint @savedbyloves[pinit]

With some scrap wood and chalk paint, you can revamp a junky thrift store mirror into this handy, distressed entryway coat rack.  This entire project was pulled off for less than $10!  I am always in need of more shelves for my pictures and knick knacks.  When I saw a similar mirror in Ana White’s book of woodworking projects for the home – “The Handbuilt Home”, I it called to mind a mirror I picked up at a garage sale for $2.

How to Revamp a Mirror

Ana White Wood Working Plan

This is the picture of Ana’s Version from the book.

How to Build a Mirror

All I did was use pallet wood scraps and cut 3 planks to fit the width of my mirror, using my mitre saw.  Two of the planks I placed perpendicular at the bottom and one horizontally at the top for a bonus shelf.  Using my scroll saw, I cut out the decorative shelf brackets for the top and bottom shelves.  To attach the shelving pieces to the mirror, I used my Kreg Jig for pocket holds, and wood glue.  The brackets I placed with my Ryobi Air Strike Nailer and wood glue.  I painted the mirror with Annie Sloan Paris Gray Chalk Paint and sealed with clear wax after sand distressing.  To finish, I added three coat hooks I picked up from the hardware store.

More of SBLC’s woodworking adventures:

Powered by CGView

50 Plus Repurposed Dresser Projects to Make

[pinit]

50+ ways to repurpose old dressers #DIY #HomeDecor @savedbyloves

[pinit]

If you liked last week’s 50+ Ways to Repurpose Old Doors, you are in for a treat today. We have gathered 50+ ways to repurpose dressers! From Vanities to organizers to benches and more, you will see ways to transform that chest of drawers into an entirely new creation. If you have a project you think fits that we missed, send us the link. Enjoy!


Flea Market Vintage Table and Chairs Revamp

[pinit]Flea Market Vintage Table Makeover[pinit]

There’s not much better than a good flea market find revamping, which is what I am sharing with you today.  This fantastic formica topped, chrome legged vintage table cost a whopping $19 at a local flea market.  Why such a steal?  There was some work to be done to reveal the beauty you see before you!

Removing rust from metal table legs

This was the state of the legs to start.  I had never tried to remove rust from chrome.  Off to the hardware store I went.

How to Remove Rust from Chrome

I found this Rust Stain Remover by Whink.  It worked like a charm, and was just a few bucks.  I just wiped the legs to get rid of any loose dirt with a damp cloth.  I squirted a small amount of the Whink on the yellow side of the sponge, which I had dampened with water.  Wipe it on the legs and scrub with green scouring side.  Watch the rust vanish!

How to Get Rust off of Table Legs

I cleaned the top of the table with countertop cleaner and the table was good to go.  Now I needed seating.

Remove Seat Pads

I found these junky gold-ish metal chairs with perfect aqua, sparkly seat pads that would accent my red/aqua kitchen color scheme.  I decided to spray paint them to match the chrome table legs.  First step was removing the seat pads, which was simple with a pair of pliers.  Phew!

Rustoleum Metallic Spray Paint and Metal Primer

Now time to prime and paint.  I went with Clean Metal Primer and Metallic Silver Rustoleum Sprays.

Primer for Metal Chairs

I wiped the chairs down with a damp cloth and sprayed with primer.

How to Revamp Flea Market Chairs

After primer dried (about 15 minutes) I sprayed with the metallic silver, 3 light coats.  When that dried, I replaced the pads to finish.

Formica and Chrome Vintage Table Restoration

I am a little smitten on my flea market mix n’ match dinette set.  It is perfect in my new kitchen, with all of its vintage charm.  All off this cost about $60, spray paint included!  Never bypass a good deal because of rust, or the wrong color.  Use your imagination, and you can make it exactly what you want.

How to Distress Furniture With Vasoline

[pinit]Distressed Painted Table
[pinit]

Did you know that Vasoline petroleum jelly is a fantastic ingredient for distressing furniture?  It is true.  The technique is simple and fast.  Today I am sharing how I took this chevron painted table I shared with you in a previous tutorial, and used Vasoline to create a chippy, funky distressed piece to go with my new living room.

Distressed Furniture Tutorials

I needed a coffee table to go with my urban-modern-distressed-vintage-eclectic decor style in progress.  You will be seeing reveals as I decorate in my new home.  I am into yellow, gray, orange poppy, turqouise, emerald green, navy blue and vintage white these days.  My living room kinda has a little of all of these, with yellow, gray and turquoise dominating the stage.

Paint a Chevron Coffee Table with @DecoArt_Inc @savedbyloves

I revamped this roadside find last week, thinking it would be the perfect coffee table for the living room.  Well, it wasn’t.

Pantone Emerald Green Valspar

I decided to apply Vasoline to the areas of the table I wanted to look “chippy”, then paint with homemade chalk finish paint (see how to make chalk paint yourself in my barnwood frame tutorial).  Valspar’s Pantone Emerald was the perfect color!  I picked it up at Lowe’s.

Distressing Furniture Tutorial

Once the paint dried, I just took my scraper to the areas where I had applied the Vasoline and the it peeled right off, revealing the colors in the chevron stripes.  I love the effect!  It looks so cool with the random colors.

Martha Stewart Decoupage copyOnce I was happy with the amount of scraping, I sealed the piece with Martha Stewart’s Antique Finish Decoupage Medium.  It was my first time using the stuff and it gives a subtle warm antique feel to the piece.

Distressing a Table

Stay tuned for more DIY home decor as I settle into my new place!

Privacy Policy