DIY Wood Pallet Coat Rack

How to Make a Wood Pallet Coat Rack @savedbyloves


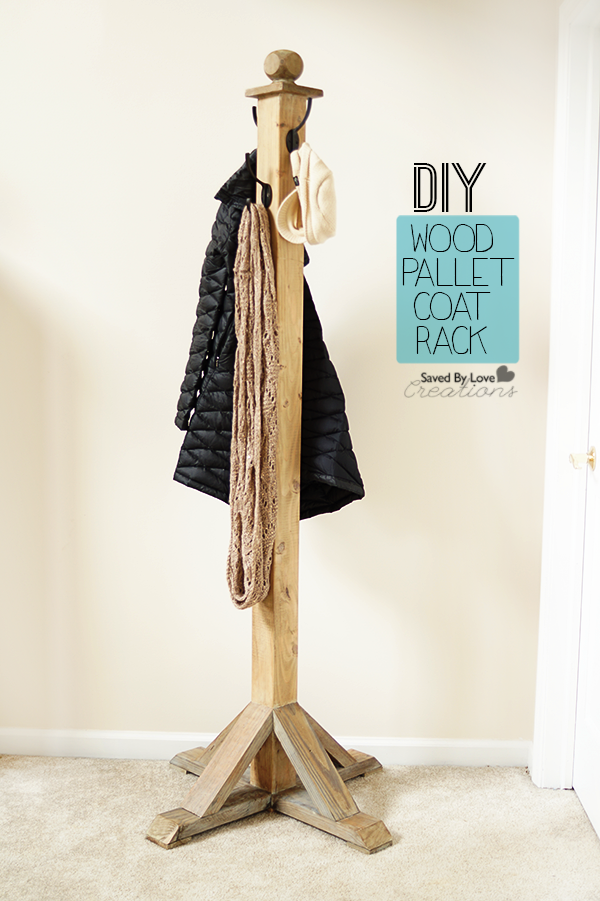
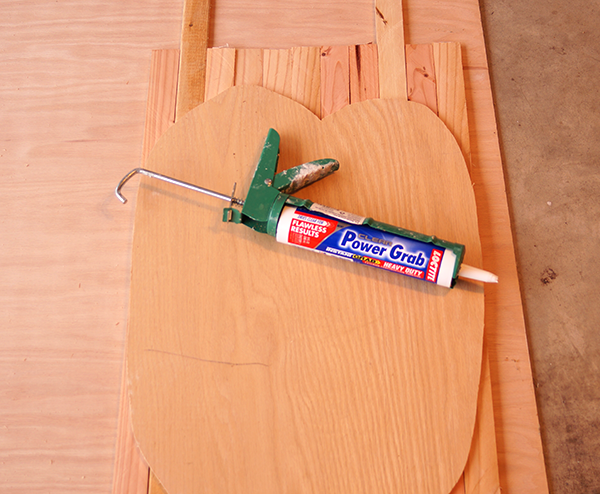
My sweet friend Jordan came over to learn how to build, and we started with this simple DIY Coat Rack from Shanty 2 Chic. I love when people have an interest in learning how to work with power tools, especially women.  It is so much easier than most would think, and there is not much more fulfilling than creating your own beautiful pieces from a pile of wood.  We followed Ashley’s steps, substituting pallet wood everywhere except for the 4×4 and the furniture foot on top of the coat rack.  That made this project super cheap, and Jordan mastered the Kreg Jig, compound mitre saw, drill and air nailer! I think she is addicted, just like I was after My First Woodworking Build.

Wood Pallet Ideas

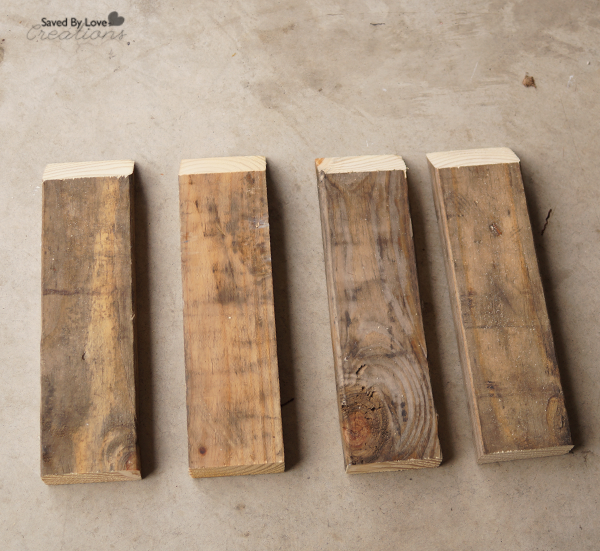
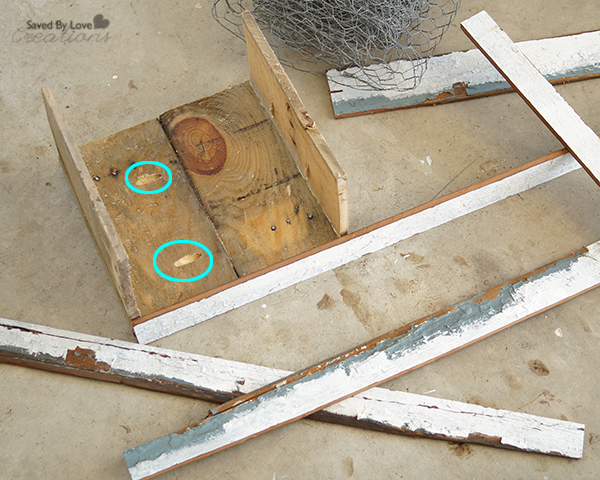
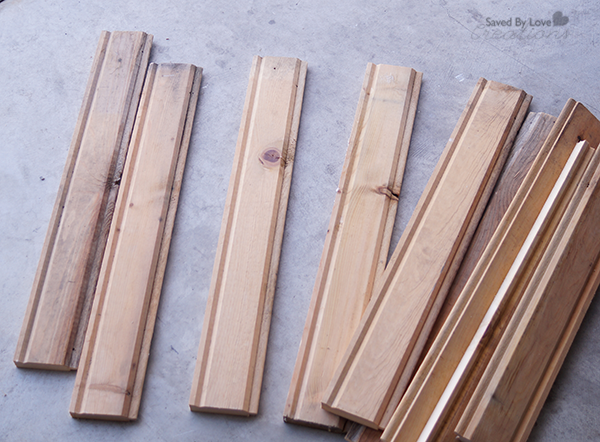
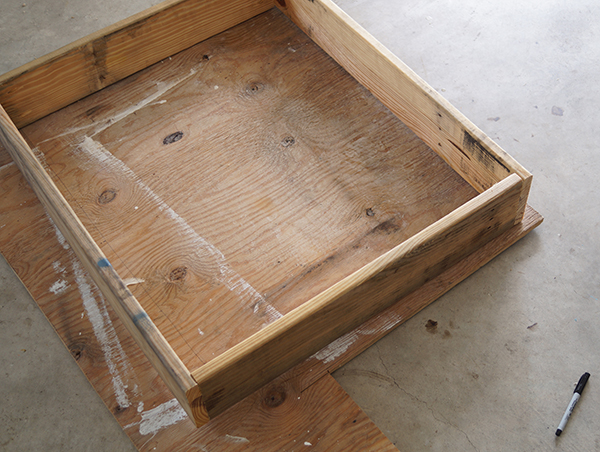
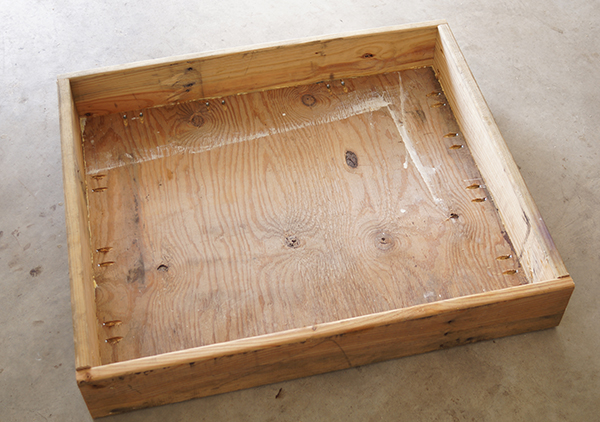
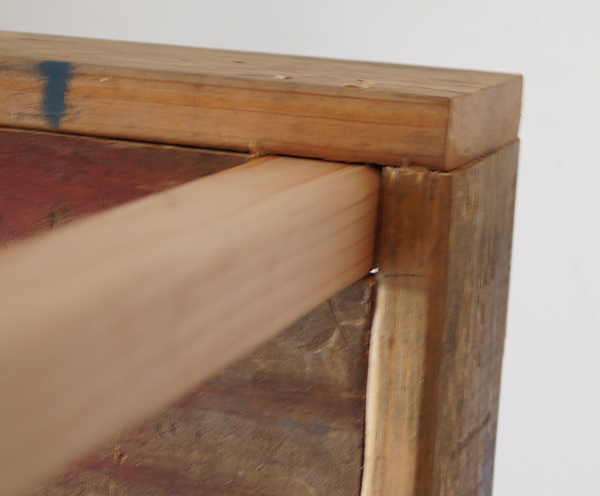
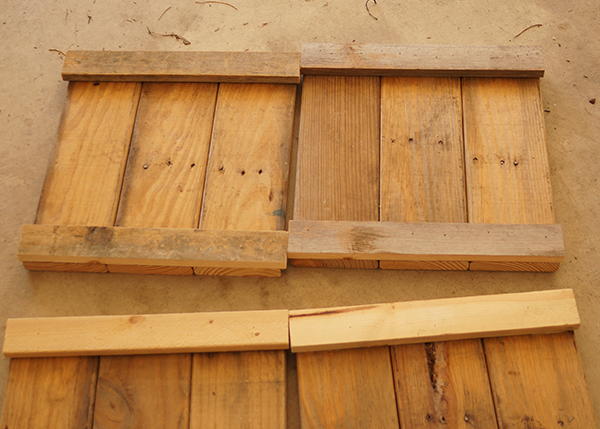
Here are the pallet wood legs that attach perpendicular to the bottom of the 4×4.

DIY Wood Pallet Furniture Plans

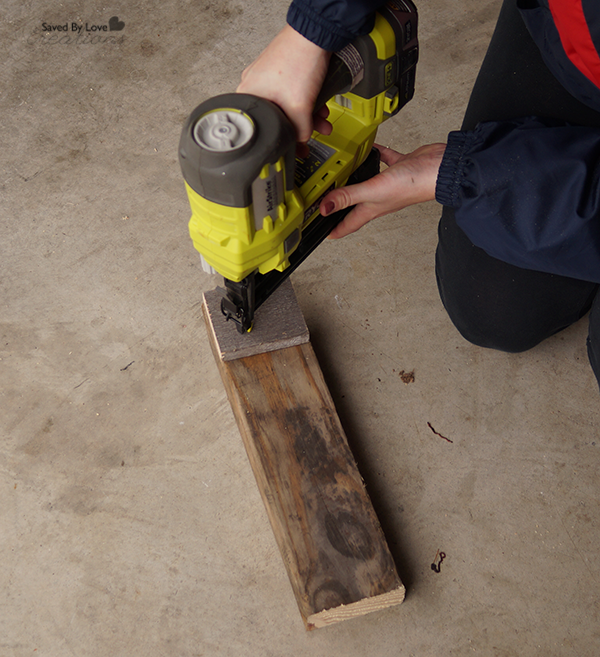
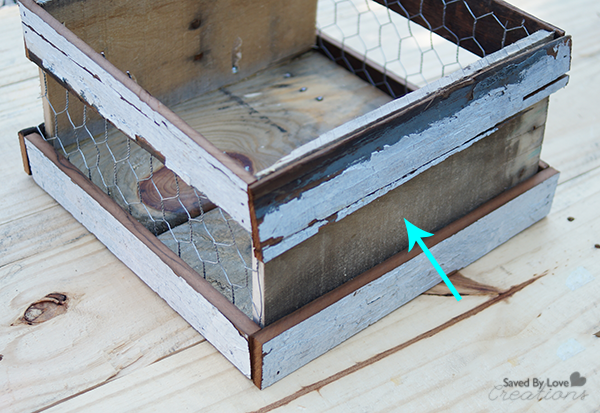
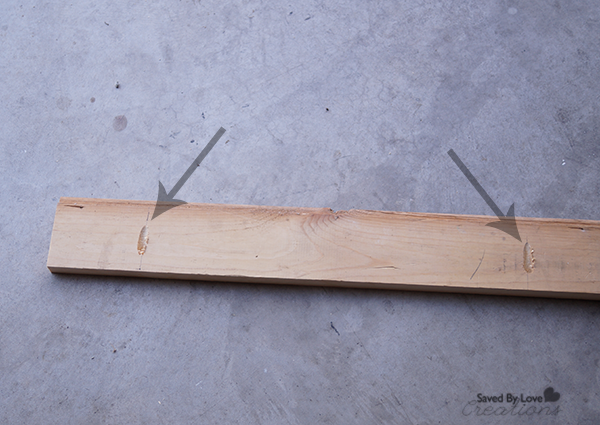
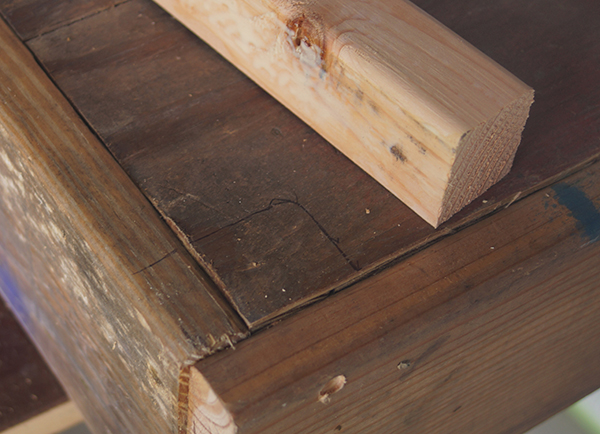
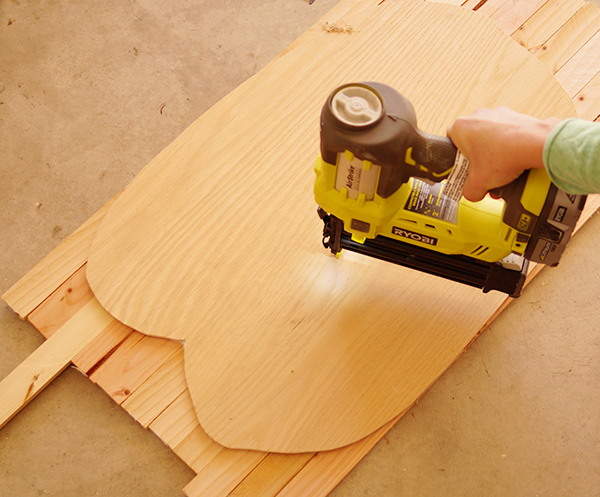
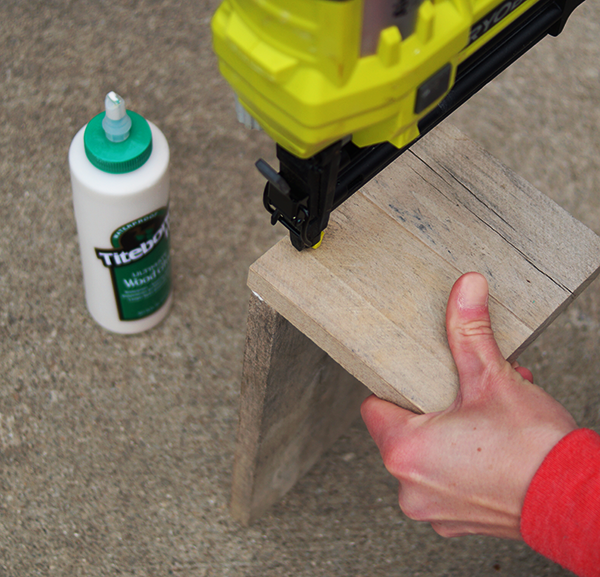
I was so glad the Shanty  2 Chic instructions suggested to make a line around the bottom of the 4×4 using the width of 1×3 scraps attached to the underside of the legs. This made attaching the legs to the 4×4 super simple.  Jordan used the Ryobi Air Strike cordless nailer to attach the pallet scrap “feet” to the underside of the legs. This tool makes building way faster and easier!

Wood Pallet Project Idea

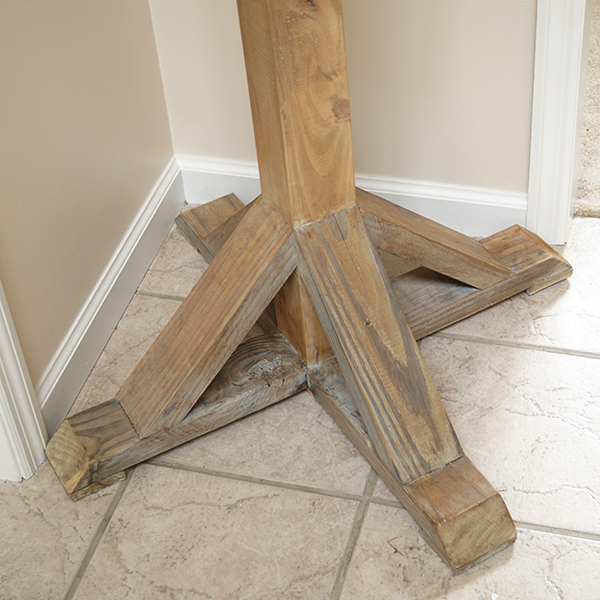
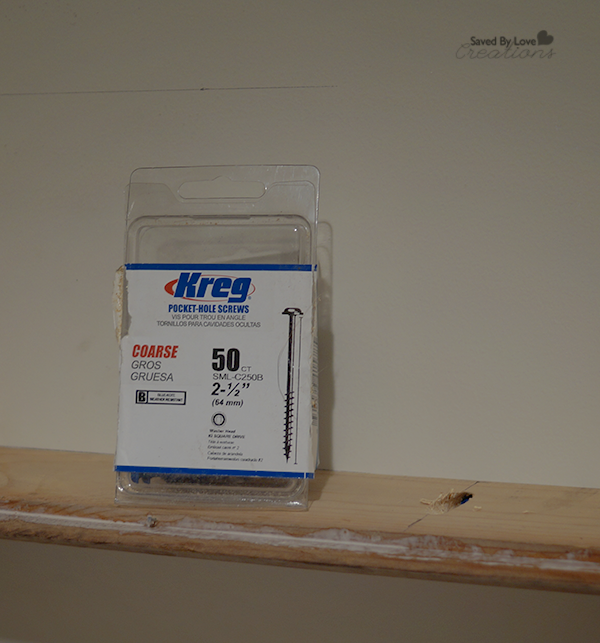
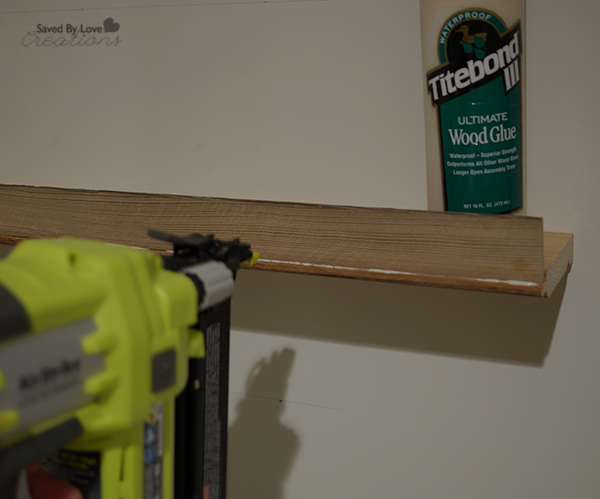
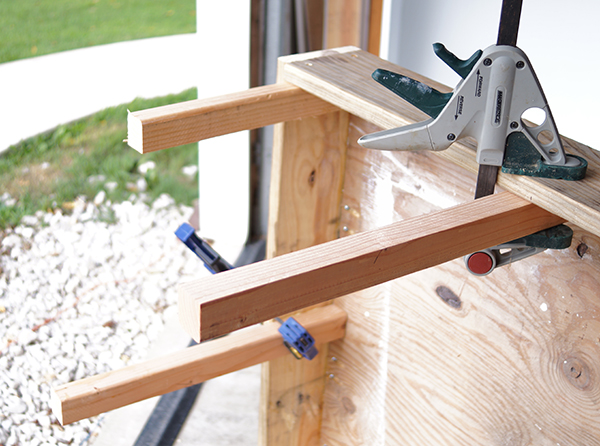
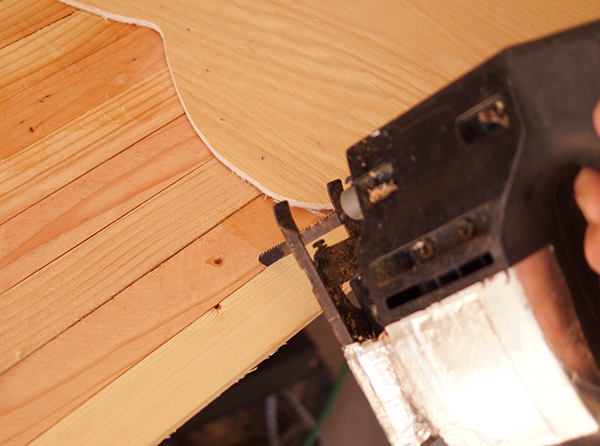
Jordan attached the legs to the 4×4 using pocket holes she created with the Kreg jig, just like Ashley did in the Shanty 2 Chic tutorial.  To attach the angled supports, she used the Ryobi Nailer again.

DIY Furniture Woodworking Pallet Plans

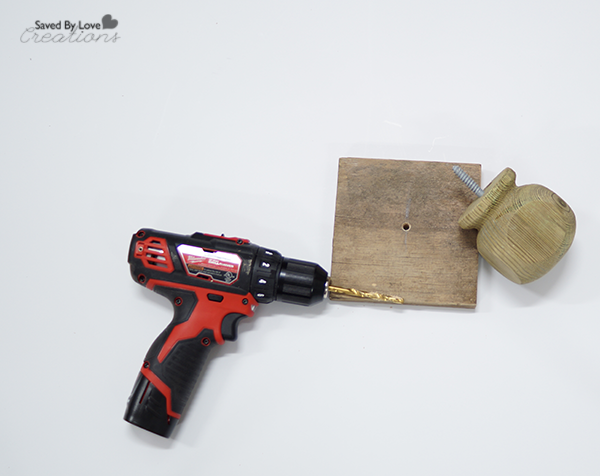
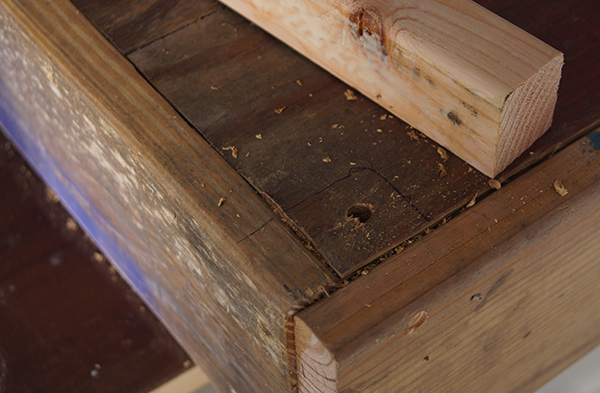
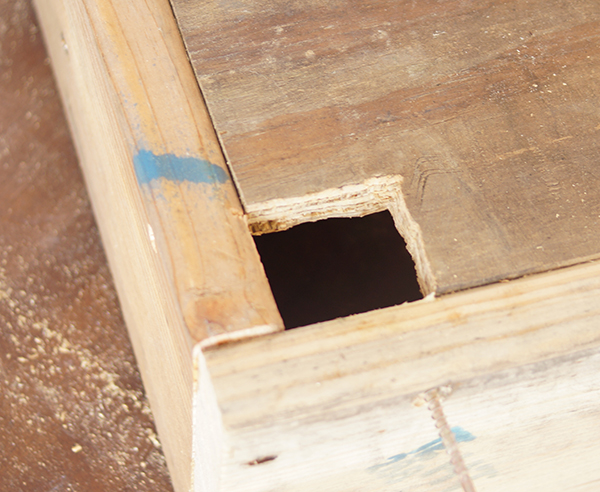
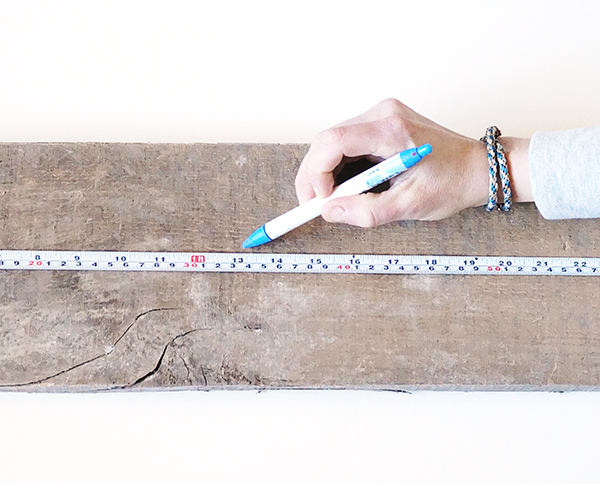
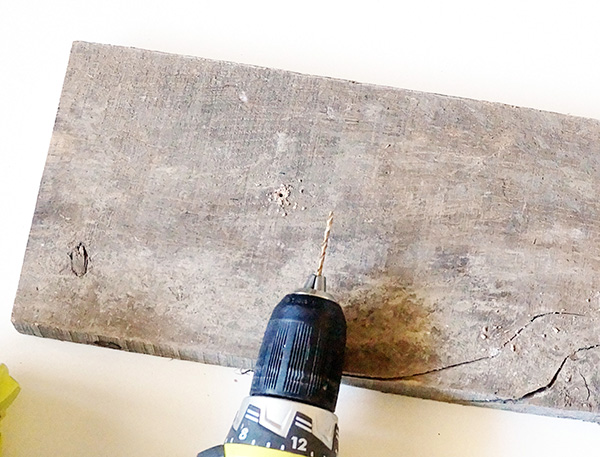
To finish up, I cut a square from pallet wood and drilled a hole in the middle of it, using a bit just smaller than the diameter of the rebar on the furniture foot I picked up at Lowes.  (Jordan had to take off for an appointment, so I finished up the project that took just a couple of hours start to finish).

Mineral Green Stain

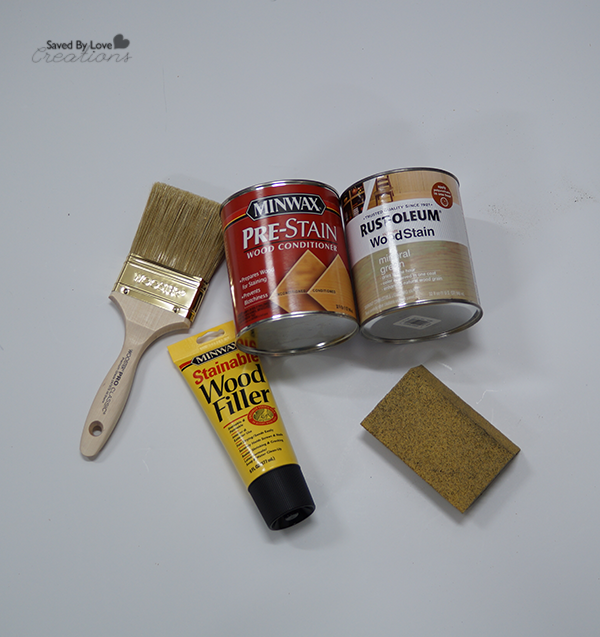
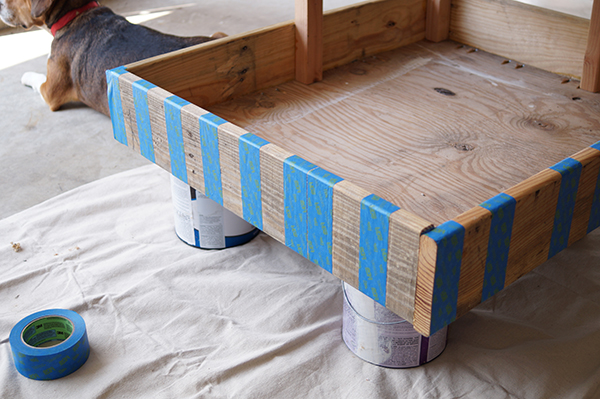
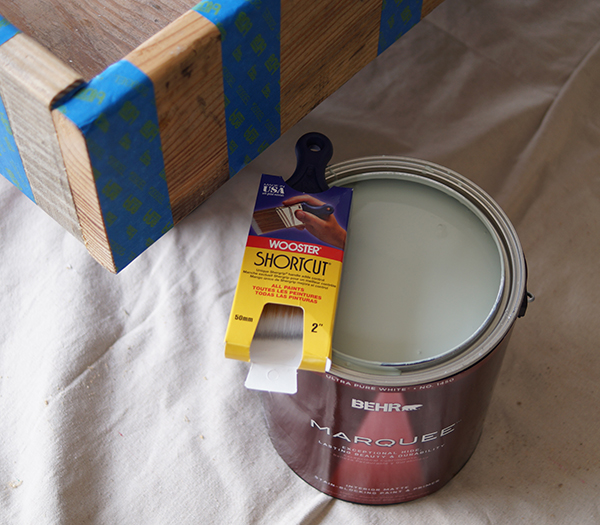
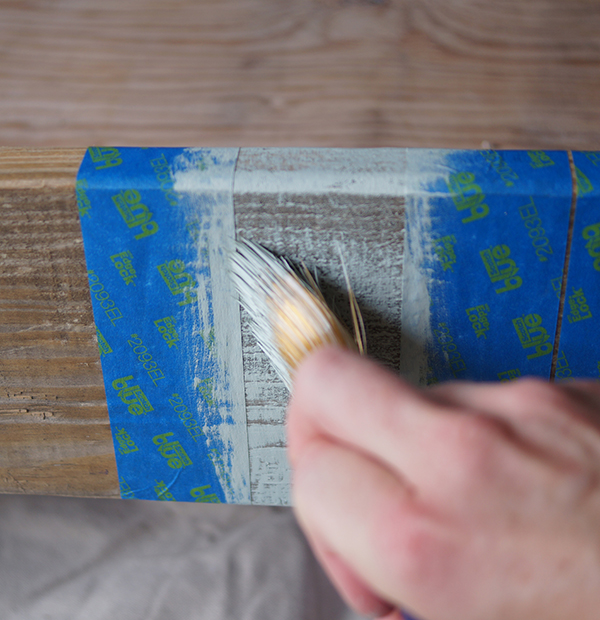
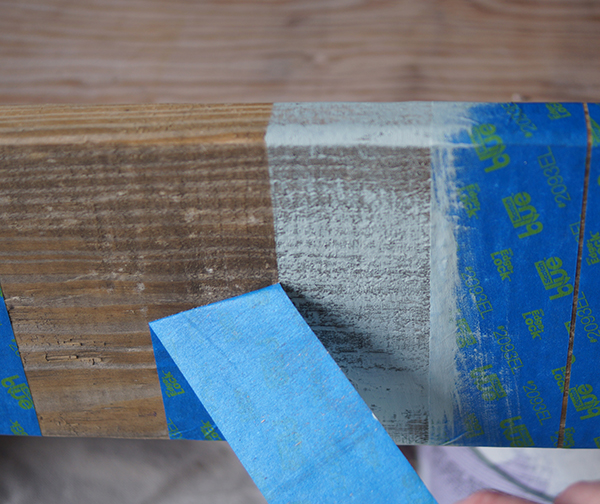
I applied Minwax Wood Conditioner, followed by Rustoleum Wood Stain in Mineral Green. Since I used wood that was different to start (the purchased, unfinished 4×4 and the weathered pallet wood), the stain took differently.  To unify the piece, I went over the stain in aging wax by Plaid.

Wood Pallet Furniture

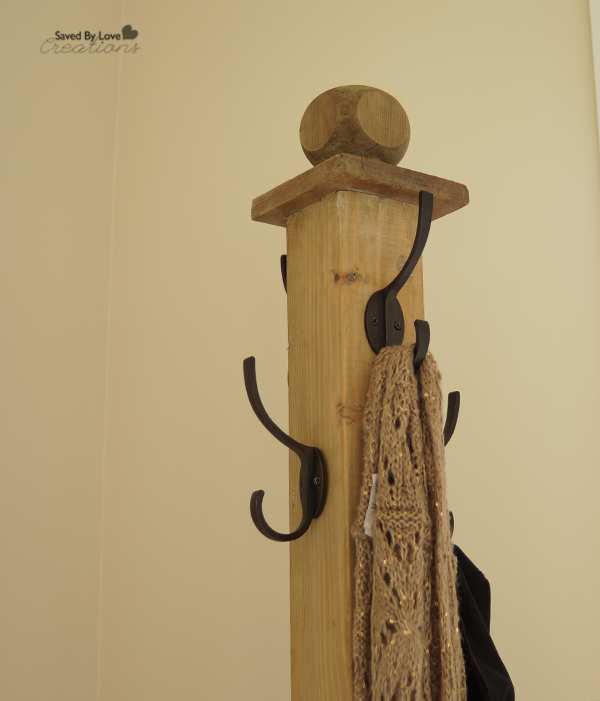
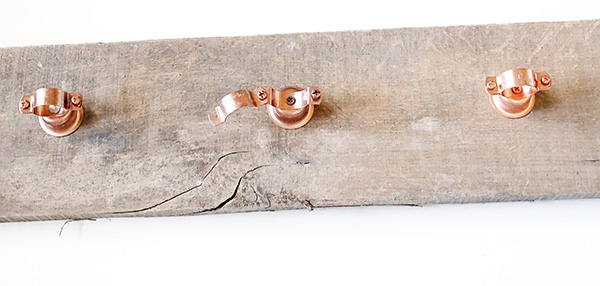
Once that dried, I placed the furniture foot in place on top, and added 4 hooks purchased from Lowes.

DIY Wood Pallet Furniture

The piece stayed at my home for a few days before I took it to Jordan.  I got attached.  That is why I am no building my own!  It is a perk of creating with others… this isn’t a piece I would have thought of for my space, and now I must have it.  Thanks Jordan!

DIY Graphic Centerpiece from Reclaimed Wood

How to Make a Reclaimed Wood Crate Centerpiece


Make a Reclaimed Wood Chicken Wire Crate

Now that I have your attention with a seriously adorable puppy and his one blue eye, I would like to show you how to make this chicken wire reclaimed wood graphic centerpiece! This piece definitely evolved as it was being made.  My friend came over to see if we could come up with a centerpiece for her square kitchen table, and we started at my wood pile.  We ripped some chippy painted trim, and added it to some pallet wood and wire.  We thought we were finished there,  but had the idea to visit The Graphics Fairy where we found the perfect vintage spoon and fork images to transfer onto the pallet wood sides.  The result is just what she had in mind, and now I want to make one for myself!

SUPPLIES:

Scrap wood (we used wood pallets and old trim)

Chicken Wire

 Ryobi Air Nailer

1 inch brad nails

Kreg jig

1 inch Kreg Screws

Wood Glue

White Tissue Paper

Mod Podge Matte

Printer (laser jet or ink jet printer are fine)

Card stock

Painter’s Tape

Mitre Saw

Drill

Metal Snips

TUTORIAL:

DIY How to Make a Reclaimed Wood Crate Centerpiece

We knew we wanted a square crate.  Starting with the bottom, we used two 5.5 inch wide pieces of pallet wood that we cut to 11 inches long with the mitre saw.

We attached the pieces together with the Kreg Jig Pocket Hole System and 1 inch screws (I showed you how to use that here: How to Use a Kreg Jig).  The blue circles show the Kreg pocket holes.

We cut two pallet wood sides to 11 inches and attached them with pocket holes and .75 inch screws since the pallet wood sides were to thin for 1 inch screws.

Next we lined up the trim pieces we had ripped and marked them, cutting them with the mitre saw to the appropriate length.

How to build a crate

Next we cut the chicken wire with aviation snips to fit the sides of the crate.  We attached the chippy painted trim piece over the chicken wire to hold it in place.

DIY Centerpiece idea and beagle puppy

We thought we were finished, but then Victoria had the great idea of adding the chippy trim to the pallet wood sides where the arrows are in the photo.

DIY Reclaimed Wood Decor

We cut the trim to fit and nailed it into place with the Ryobi nailer.  This is what we were left with at that point.  I decided the wood area at the arrow and the side opposite it were perfect for graphics.  We chose the vintage spoon and fork graphics linked in the first paragraph and used the tissue paper image transfer technique I showed you here: DIY Image Transfer Recycled Glass Bottles.

DIY Fall Centerpiece

Not bad for a couple of hours and $0 spent!

How to Make a Reclaimed Wood Chicken Wire Crate

For more inspiration, visit our  50+ Image Transfer Techniques!

DIY Reclaimed Wood Craft Paint Storage Shelves

DIY Craft Paint Storage from Reclaimed Wood @savedbyloves

Paint storage is an issue in my new craft space.  Bookshelves are not a great solution since they are so deep and tall.  I like to be able to see my paints for inspiration, and to get to the colors I need easily.  I decided to make my own shelves that are shallow and closely spaced so that I could fit as many as possible in the allotted area.  This was a quick and easy project, made with reclaimed wood I had on hand, so I spent zero dollars.

SUPPLIES:

Reclaimed wood cut to length and width you want your shelves

Shims cut from 2x wood, the same length as the shelves (mine are 24 inches), 1/4 inch thick

2 1/2 inch Kreg Screws Kreg Jig

Ryobi Air Nailer

Wood Glue

Leveler

Stud Finder

Pencil

Tape Measurer

Straight Edge

TUTORIAL:

How to build wood pallet shelves

Cut shelves to 24 inches.  I used tongue and groove boards that I had on hand and ripped to 3.5 inches to fit my 3.25 inch paint jars.  I cut the groove edge off when I ripped them, so that the tongue edge would create a lip for the wood shims to sit on as the front of the shelf in a later step.

Drill Pocket Holes with Kreg Jig

Find studs and mark shelf boards in 2 spots where you will create pocket holes with Kreg Jig.  Create pocket holes like I showed you here:  How to use a Kreg Jig.  I decided to stagger my shelves, so I created pocket holes four inches from each end on half of my shelves and on the other half, 1 inch from one end and 7 inches from the other end.

Use Kreg Screws to attach shelf to studs

Use tape measurer and straight edge to draw lines on the wall where your shelves will go.  I spaced my shelves 5.75 inches apart.  Use 2.5 inch Kreg Screws to attache shelves into studs on your marked lines.  After placing the first screw, use leveler to level shelf, then place second screw in the other stud.

Attach Shelf Lip with Wood Glue and Air Nailer

Add wood glue to the tongue lip and place wood shim, creating front of shelf.  Nail shim into place with 1 inch brads in air nailer.

Craft Storage Ideas

Attach all shelves and place paint!


DIY Craft Paint Storage from Reclaimed Wood @savedbyloves

So easy, and free, this paint storage solution is tops!

What do you think?  How do you stay organized in your creative space?

DIY Craft Storage from Reclaimed Wood @savedbyloves

How to Break Down Wood Pallets Video Tutorial


How to Break Down Wood Pallets Video DIY@savedbyloves

It is no secret that I love to create all kinds of things with wood pallets. Why wouldn’t I?  They are readily available and usually one their way to landfills or bon fires by the time I get my hands on them.  Lumber can be expensive, so why not use pallet wood for your projects to save some cash and help the planet in the process?  I have gotten several questions on how I break down my pallets, so I made a quick video of the process to share with you.

YOU WILL NEED:

Crowbar

Hammer

Reciprocating Saw

Safety Goggles

Wood Pallet

Now that you have your pallet broken down, you are ready to build.  Here are some ideas:


Woodworking Project Gallery Page

Powered by CGView

50+ DIY Home Decor Projects to Make with a Jigsaw

50 Plus Best DIY Home Decor Projects to Make With a Jigsaw @savedbyloves

The jigsaw is a super versatile tool, and a great place to start the power tool journey. It is handheld, can be fairly inexpensive (like this Corded : Skil Saw. Variable Speed 4290-02), and cuts shapes in a variety of materials, with the appropriate blade.  I did a number of projects with a the above linked Skil Saw I scored at a garage sale for, and only recently splurged on a new one because of a gift card I received. The new one is fancy pants and cordless, but it doesn’t do anything the bare bones version can’t.  You can build the same projects with a basic jigsaw and a little practice.  That is great news, since as you will see below, you can make some seriously stylish and functional pieces for your home with this tool.  Enjoy!


DIY Shipping Pallet Dog Bed

Shipping Pallet Dog Bed Tutorial from @savedbyloves #thehomedepot & #3MPartner

What kind of DIY blogger am I, with my dogs sleeping on a pillow tossed on the floor?  I know.  That is why I thought a striped doggie bunk bed made from shipping pallets would be perfect for the “Get It, Got It, Go” Summer Blog Hop hosted by ScotchBlue™ Painter’s Tape and The Home Depot!  This project is a wonderful upcycle that can be color customized to fit any decor, and requires beginner woodworking skills to achieve.

MATERIALS USED

Shipping Pallet Dog Bed 2

ScotchBlue™ Painter’s Tape Multi-Surface with Advanced Edge-Lock™ Paint Line Protector 2093EL

Behr  Marquee™ Paint in Costal Storm #MQ6-20, Recycled Glass #MQ6-18 and Aquifier #MQ6-8 colors

Wooster® Shortcut 2 in. Nylon/Polyester Angle Sash Brush

Shipping Pallet Dog Bed 3

Shipping pallets

1/2 inch plywood sheets

Reciprocating saw with blade for cutting metal

Kreg® jig

1 1/4 inch Kreg® screws

2 inch wood screws

drop cloth or plastic painters tarp

Wood Glue

jig saw

Drill

Hammer

Crow bar

Table saw or circular saw

TUTORIAL

Shipping Pallet Dog Bed 4

The first step in this, and any pallet wood project, is breaking down the pallets.  My favorite method for this is cutting through the nails holding the wooden slats to the support beams with a reciprocating saw.  Sometimes it is necessary to use the crow bar and hammer to create enough space for the reciprocating saw blade, then you just cut through the nails and free one board at a time.

Here is a quick video showing the pallet breakdown process:

Shipping Pallet Dog Bed 5

To build the bottom bed, I cut two 35 inch pieces and two 28 inch pieces from the pallet wood for the sides.  I picked these measurements based on the dimensions of the pillow I already had on hand. Using my Kreg® pocket hole system (I showed you how to use a Kreg® jig HERE), I attached the four sides together with 1 1/4 inch screws and wood glue. For the top “bunk”, I followed the same process, cutting two sides 20 inches and two sides 18 inches long.

Shipping Pallet Dog Bed 6

To create floors for the beds, I placed the bed frames on a large piece of 1/2 inch plywood and used a marker to outline the inner edges of the frame onto the plywood.  I cut along these lines using my table saw, for a floor that fit right inside each frame.

Shipping Pallet Dog Bed 7

To attach the floors, I placed pocket holes every 5-6 inches around all four sides and screwed the floor into the frame with 1 1/4 inch pocket hole screws/wood glue.

After building the individual beds, it was time to join them.  For this, I created three 2×2 poles by ripping a 2×4 with my table saw.  Two of the poles I cut to 19.5 inches and one to 15 inches in length.

Shipping Pallet Dog Bed 8

I attached the three poles to the bottom bed, using the top bed to guide placement.  The shorter pole goes in the back right corner of the bottom bed, and the top bed rests on top of it (which will become clear in the next step).  The two longer poles will go through the floor of the top bed, nestling up against the right front corner and back left corner of it.  Once they were placed in the correct location on the bottom bed to fit where they needed to on the top one, I used wood glue and 2 inch wood screws to secure them in place.  I placed clamps to hold everything in place until the glue was dry.

Once that dried, it was time to secure the top bunk in place.  I needed to create holes in the floor at the right front and back left corners for the poles.

Shipping Pallet Dog Bed 9

To do this, I took a scrap 2×2 and traced it where I wanted the holes to be.

Shipping Pallet Dog Bed 10

Shipping Pallet Dog Bed 11

I drilled a hole in the middle of the square I just traced, for the jigsaw blade.

Shipping Pallet Dog Bed 12

Using the jigsaw, I cut out the square for the pole.

Shipping Pallet Dog Bed 13

Shipping Pallet Dog Bed 14

To finish the assembly, I just placed the top bed with the poles extending up from the bottom bed in their corresponding corners.  The back right corner was secured in place with a 2 inch wood screw going through the floor of the top bed, into the top of the back right pole.  The other two corners where the poles extended up through the floor were secured with 2 inch wood screws though the side of the top bed, into the poles.

Finishing

Once the bed was built, I decided to paint randomly patterned stripes.

Shipping Pallet Dog Bed 15

Shipping Pallet Dog Bed 16

Shipping Pallet Dog Bed 17

Shipping Pallet Dog Bed 18

I placed the ScotchBlue™ Painter’s Tape and began painting with the first color.  The paint coverage was great!   I wanted a distressed look, so I used the dry brush technique with Wooster® Shortcut Brush.

Once the first color was dry, I taped again and repeated for the 2nd and 3rd colors.  It was no problem to tape over the paint, but keep in mind that Delicate Tape is the recommended tape to use on freshly painted surfaces (24hrs).The lines were perfect, and the tape didn’t remove the paint when I taped over the stripes I had already added.  There was no pattern in the colors, I just painted randomly.

For the top bunk, I dry brushed the entire bed in Aquifier.

Shipping Pallet Dog Bed 19

I love it, and so do my boys!  Way better than the pillow on the floor, right?!

I am proud to be a 3M, Behr®, and Wooster® – sponsored blogger, and, as part of my responsibilities, I get the opportunity to evaluate products. Opinions are my own and additional product used in the project were selected by me.

Find the products used for this project, and tons more inspiration at the following links:

Wooster® Brushes Behr® Paint

The Home Depot

The Home Depot Consumer Program

ScotchBlue™ Painter’s Tape Facebook

ScotchBlue™ Painter’s Tape Twitter

ScotchBlue™ Painter’s Tape Pinterest

The Home Depot Facebook

The Home Depot Twitter

The Home Depot Pinterest

320 Sycamore: Front Porch Project

Simply Designing: DIY Board & Batten

Brooklyn Limestone: Farmer’s Market Display Stand

Fave Crafts: DIY Aztec Planters

Domestic Imperfection: Rusty Metal Shed Makeover

Studio Pebbles: Faux Frame Modern Art

Whipperberry: BBQ Tool Storage

Dukes & Duchesses: Color Block Umbrella Table

HoneyBear Lane: Patriotic Lanterns

Uncommon Designs: Striped Workbench

Better After: Geometric State Art

I Heart Nap Time: Striped Hall & Gallery Wall

The Pinning Mama: Oversized Painted Wall Frame

Love of Family & Home: Grain Sack Table

The Girl Creative: DIY Lemonade Stand

At The Picket Fence: Over-sized Outdoor Checker Board


Wood Pallet Planter DIY

How to make a reclaimed wood planter from shipping pallets @savedbyloves

I picked up some mums recently and decided they needed a planter. Using Ana White’s Cedar Planter For Less than $20 Free Plan, I made just a few adjustments and built this planter using pallet wood and 2×4 scraps I had on hand. 

pallet wood project idea

I just grabbed the cut list from Ana’s plan and hit my scrap wood pile to see if I could make things work without having to buy any wood.  I happened to have 5 1/2 inch pallet wood to use in place of the 5 1/2 inch cedar planks.  Perfect!

To make the 2×2 posts for the four legs, I ripped 2×4 scrap wood into 2×2 pieces.  For the 1×2 horizontal supports, I had a few scraps of 1×2 on hand and ripped pallet wood for the rest.

Shipping Pallet to Planter

The biggest change from Ana’s plan is that I cut the 2×2 legs to 23 inches instead of 23 3/3.  I attached the legs flush with the top of each panel, and added a “frame” to the top of the planter with 1×3 scrap wood that I mitered to fit.

As for the finish, I am just going to leave as is and seal with Polyurethane.  I love the various raw wood pieces.

Pallet Wood Projects

What do you think?  What are you building from pallets these days?

DIY Scrap Wood Halloween Pumpkins

How to make scrap wood pumpkins with @savedbylovesThese three pumpkins were made entirely with materials I had on hand, which is always a plus! With my huge pile of wood pieces from previous building projects, I am pretty excited when I can use up some of the leftovers. I used my table saw to rip scrap 2×4 into what are essentially wood shims.  You can do that, or use purchased wood shims or paint stirrers. Let’s go make some free pumpkins!

MATERIALS:

Plywood (i used 1/4 inch since that is what we had on hand, but you can use thicker)

2×4 scrap pieces and table saw or pre made wood shims or paint stirrers

Wood glue or construction adhesive

Sharpie

Jig saw

Ryobi Air Strike Cordless nailer

5/8 inch brads

TUTORIAL:

Plywood Pumpkins

Use a sharpie to draw pumpkin shapes on your plywood.  I made three of varying heights and widths.  You can print templates and transfer your design to the wood with transfer paper too.  I just wanted rustic looking pumpkins so I went free hand.

Use table saw to rip wood

To make the wood shims, I set the table saw guide to the thickness I wanted using a shim from another project.

How to make wood shims

Then I just cut my 2×4 scraps using that guide setting.

Scrap Wood ProjectsI cut out my pumpkin shapes from the plywood using my jig saw.

Adhere wood to pumpkin with construction adhesive

I placed each pumpkin on top of side by side wood shims and glued them into place with construction adhesive.

Secure wood shims with air nailer

For added strength, I nailed each shim in two places with my cordless nailer and 5/8 inch brad nails.

Let glue dry overnight

I added weight to my pumpkins and let the glue dry overnight.

Cut with jig saw

Once dry, I cut the excess wood shims off, using the plywood pumpkin as my jig saw guide.

Hot glue twigs for stems

To finish, I hot glued twigs to the back of the pumpkin for the stem!

Check out these other great Halloween DIY projects for your favorite bloggers!
12 Halloween Projects from your favorite DIY bloggers


Reclaimed Wood Wine Bottle Vase Trio

Salvage Wood Wine Bottle Wall Vase Trio

Wine Bottle Wall Vase2 copy

 Reclaimed wood and recycled bottles combine with inexpensive copper hardware for this rustic, ecofriendly wall vase set.  Make it in under an hour with just a few dollars for hardware!  This is perfect inexpensive wall decor, and makes a great, unique handmade gift for the holidays.

MATERIALS

Wine Bottle Wall Vase 4

-Scrap wood cut to desired width (The board I had was 25 inches, so I went with that.  Use any number of wine bottles, and cut your wood the appropriate length for that number.)

-Drill

-1 inch copper bell hanger kit (available in plumbing section of most hardware stores for less than $2 each)

-Picture hanging hardware

-Wine bottles (clean and remove labels if desired as described in Techniques)

 DIRECTIONS

 1.  Paint, stain or decoupage your wood any way you like.  I left mine as I found it since it had the weathered look I love.  Same goes for the bottles.  Paint or decorate them to fit your decor or occasion.

Measure for holes

2.  Measure and mark placement of your bottles, leaving even spacing between each and centering them on the board.  Yay math!

Drill hole for clamps

3.  Drill a pilot hole with a drill bit just smaller in diameter than your screw.  If you aren’t using a drill, use a hammer and nail to make a pilot hole.

Wine bottle wall hanging

4. Attach bell hanger using the screw that came in your kit and a drill or screwdriver.

How to make a reclaimed wood wall hanging

5.  Attach a loop for hanging on each side.

Wine Bottle Wall Vase3

6.  Place on wall and add wine bottles.  Time to head to the farmer’s market for some fresh flowers!

Recycle Wine Bottles into Inexpensive Wall Decor with Reclaimed Wood @savedbyloves

DIY Horizontal Succulent Planter Box Display

[pinit]DIY Horizontal Succulent Garden @savedbyloves[pinit]

Decorating with succulents is a top design trend that won’t be going away!  That is why I am thrilled to share how we created this horizontal succulent garden placed above our double deck doors.  I took the easy way out and went with artificial plants, even though succulents are easy as can be to grow and maintain.  I was gifted an excess supply of the fakes from Michaels that a friend had leftover and just went with it.  The project was simple and quick, and cheap!  The planter is (no surprise if you have been around here much) made from reclaimed wood.

Here is how I did it!

I had some tongue and groove wood that I picked up from Habitat Restore.  I ripped it with my table saw to about 4 inch wide pieces, and cut 3 of those to 4 feet in length for the 2 long sides and the bottom of the box.  I cut 2 of them to about 5 inches for the short sides.

Ryobi-Airstrike-Nailer

I nailed all of the pieces together with my trusty Ryobi Airstrike Nailer.  The pic shows the creation of this Stenciled Planter Box, but the process was the sam for today’s project.   If I could have just one tool in the whole “stuck on a desert island” scenario, this would be a top contender.

DIY Succuulent Garden

We used 4 3 inch wood screws to attach the finished box into the studs above the double deck doors.  I found a 12x36x2 inch styrofoam sheet in my stash and cut it to fit tightly in the planter box, all the way a cross.

Then I just hopped on a step stool and arranged my faux succulents, shoving the wire stems into the foam to hold them in place.

DIY Succulent Garden

What do you think?  I am going to be honest… I seriously like it bunches.

It is hard to hang things on the freshly painted walls in our new home.  What if I change my mind, what if it looks dumb… so many holes to patch.  Not in this case.  Totally satisified!

If you want to make live succulent gardens, check out our popular DIY Terrariums and Succulent Plants:

How about our 50+ DIY Terrariums and Creative Planters?


Succulent in Decor DIY Horizontal Planter @savedbyloves

Privacy Policy