Search Results for: bookcase

DIY Wood Shim Bookcase


Image 1


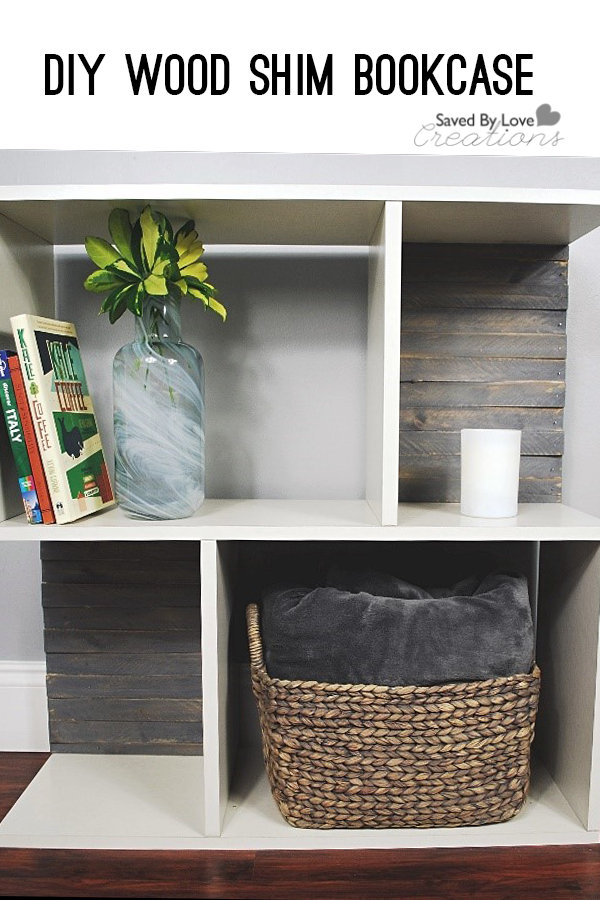
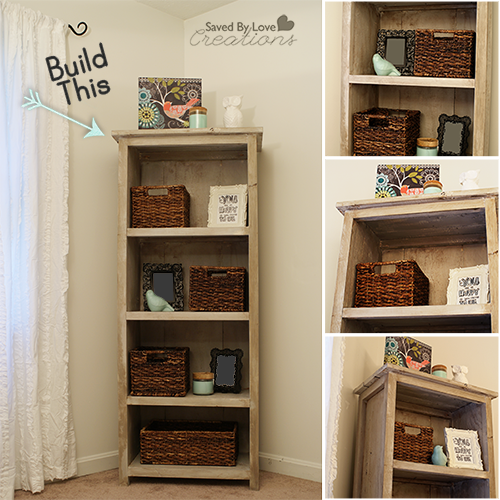
Whether it’s shiplap or pallet wood, rustic farmhouse-inspired accents and furnishings are on trend. But before you head out to find expensive aged wood, try this wood shim tutorial instead. You’ll find out how to incorporate that farmhouse signature look without breaking the bank with this simple, inexpensive and removable DIY for any bookcase.


You’ll only need one tool, a handful of materials and a couple of hours to elevate a plain bookcase into something so much more. Stacked alternating wood shims provide the texture, and a plywood base gives you the option to attach the panels using tape, making this DIY removable and commitment-free.


Supplies

For this project, you’ll need:


  • A bookcase (We choose one in a modern style, but you can use one that matches your home’s decor)
  • (1) 1/4”x 2 x 4 sanded plywood sheet
  • 2-4 packages of 15” cedar shims
  • Wood glue
  • Grey tone wood stain
  • Paintbrush
  • Mounting tape
  • Jigsaw
  • C-clamps
  • Tape measure
  • Pencil


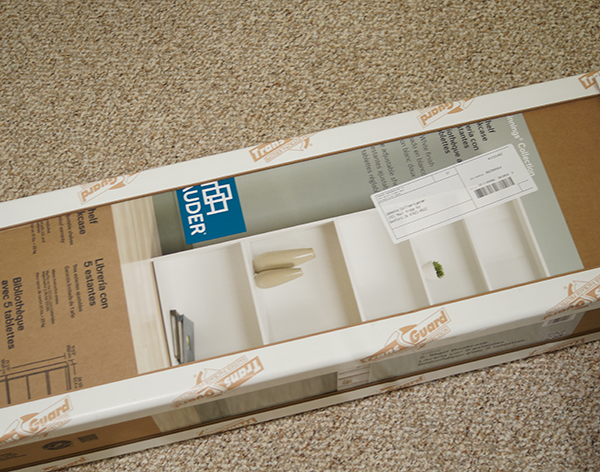
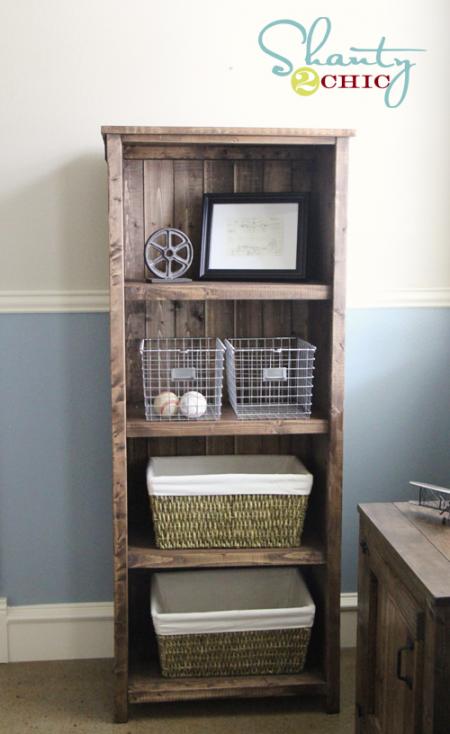
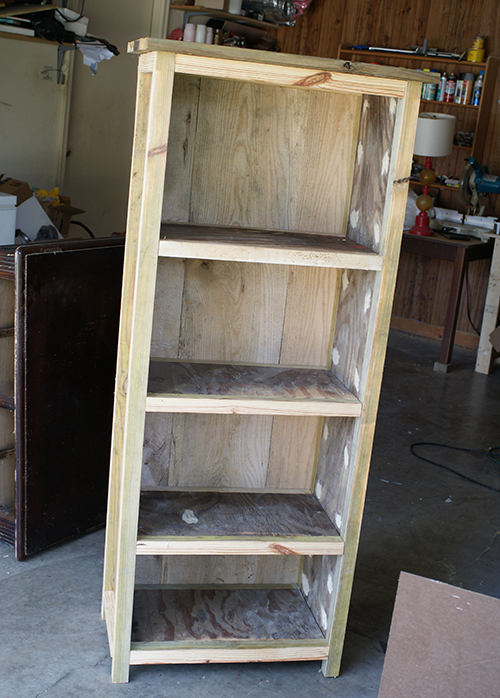
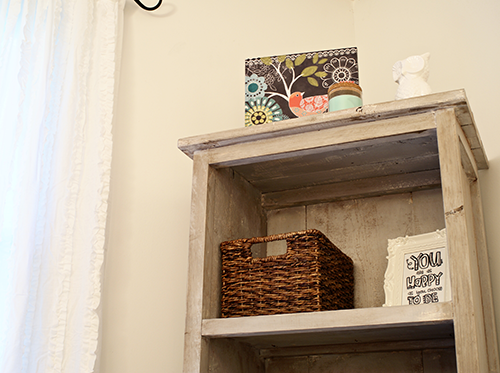
Step One: Pick Up a Modern Bookcase

 
Image 2


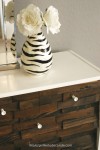
Finding the right bookcase for this project is all about maintaining visual balance. The clean, modern shape of this bookcase is the perfect backdrop to showcase the natural, rustic quality of the cedar shims.


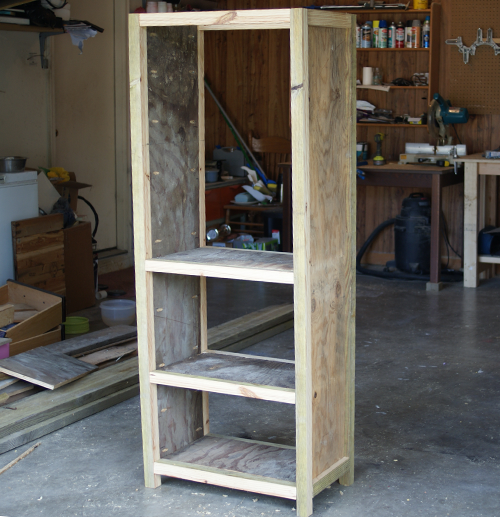
Since this project involves attaching wood panels to your bookcase, you’ll want to make sure that the bookcase you buy can support the amount of wood you want to add without becoming too heavy. It helps to start out with a lightweight bookcase and limit the wood shims to just the back panels of the bookshelf. Assemble your bookcase and measure the size of the space you want to cover using your tape measure.


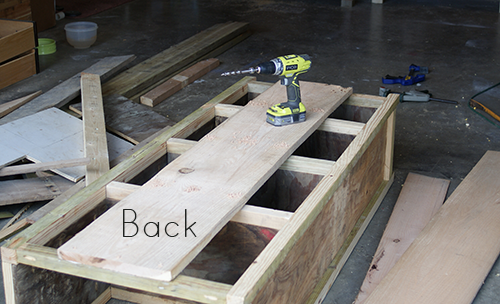
Step Two: Cut the Wood to Size

 
Image 3


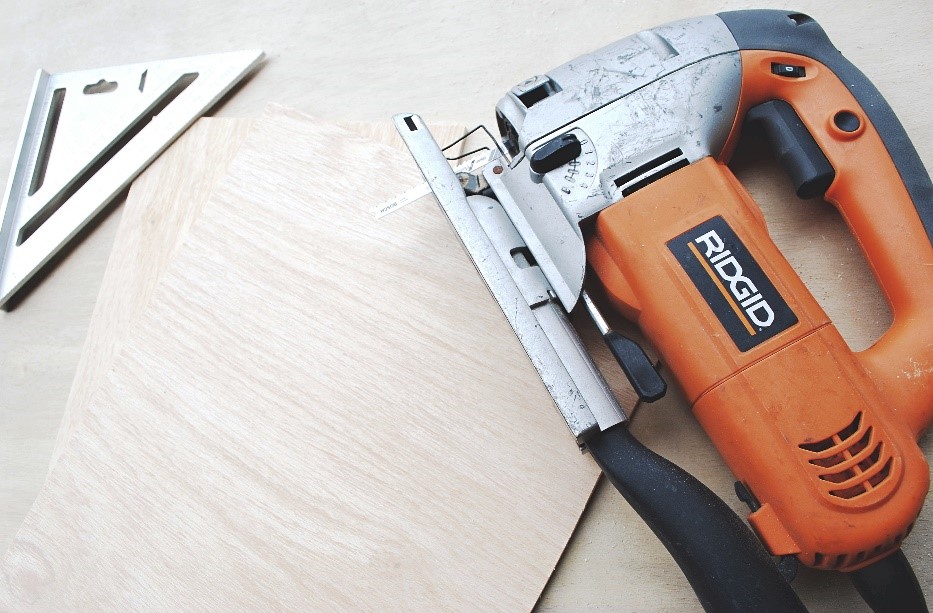
Take that measurement and trace it onto the plywood sheet twice. Cut out both rectangles using the jigsaw and set aside.


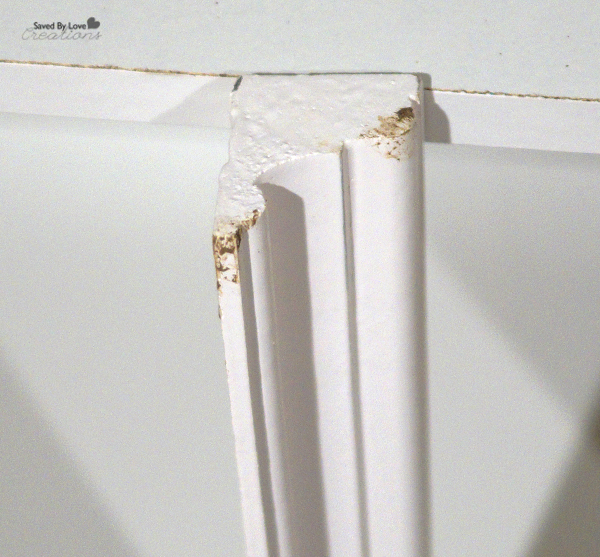
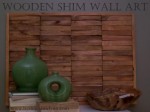
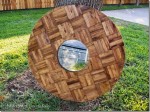
Next, you’ll need to determine the pattern you want for the wood shim accent panels. You can choose a classic brick pattern, basket weaving pattern or a simple alternating stacked pattern. I chose the latter because it followed the lines of the bookcase and provided a higher-quality finish. Mark and cut each cedar shim to match the width of the cut plywood rectangles. You’ll want to alternate thick and thin sides when stacking to maximize the play on texture and the farmhouse feel. You may need to cut the last wood shim lengthways to finish out the space. Go slow when cutting with the jigsaw to reduce any wood splitting or chipping.


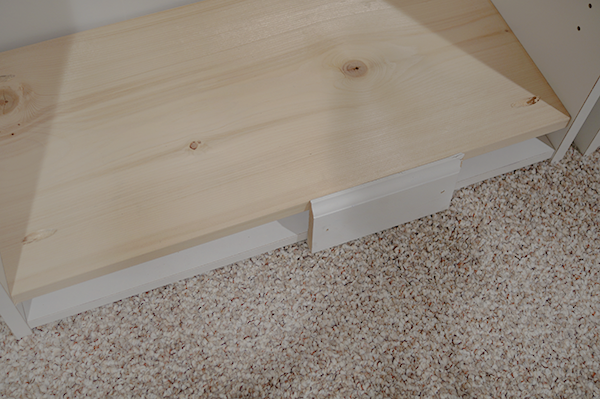
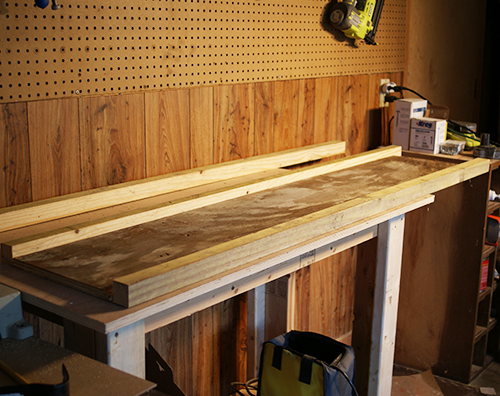
Step Three: Glue and Stain

 
Image 4


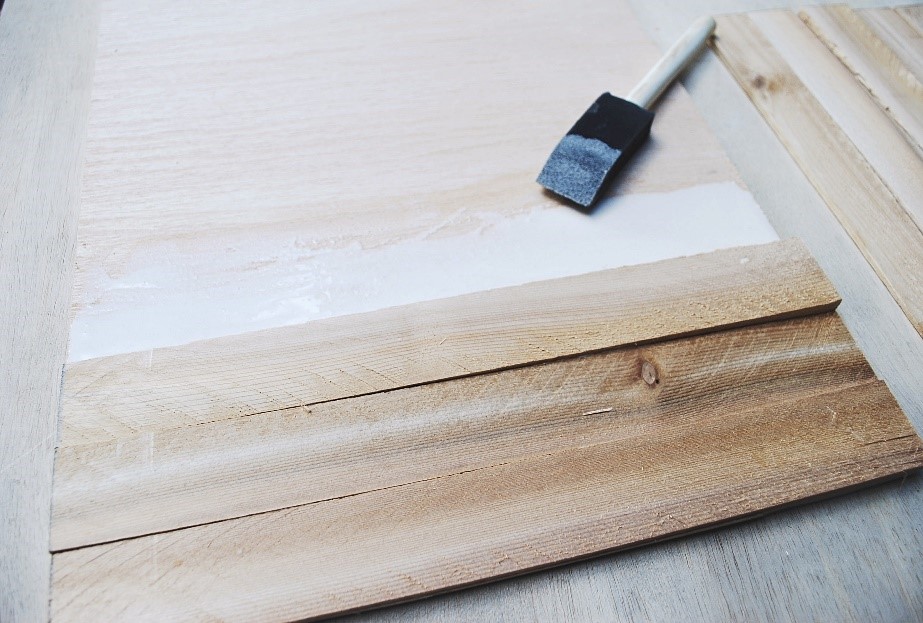
Once you cut all of your wood shims, you can begin adhering them to the cut plywood pieces. Brush a light coating of wood glue onto the back of the shims and press them down onto the wood backing. Be sure to immediately clean up any excess glue that leaks out, as it can affect how the wood stain reacts with the wood. Clamp another piece of wood to the top of the wood panel to provide consistent, even pressure while the glue dries overnight. An optional improvement is to use small finishing nails to secure the wood shims to the plywood base.

 
Image 5


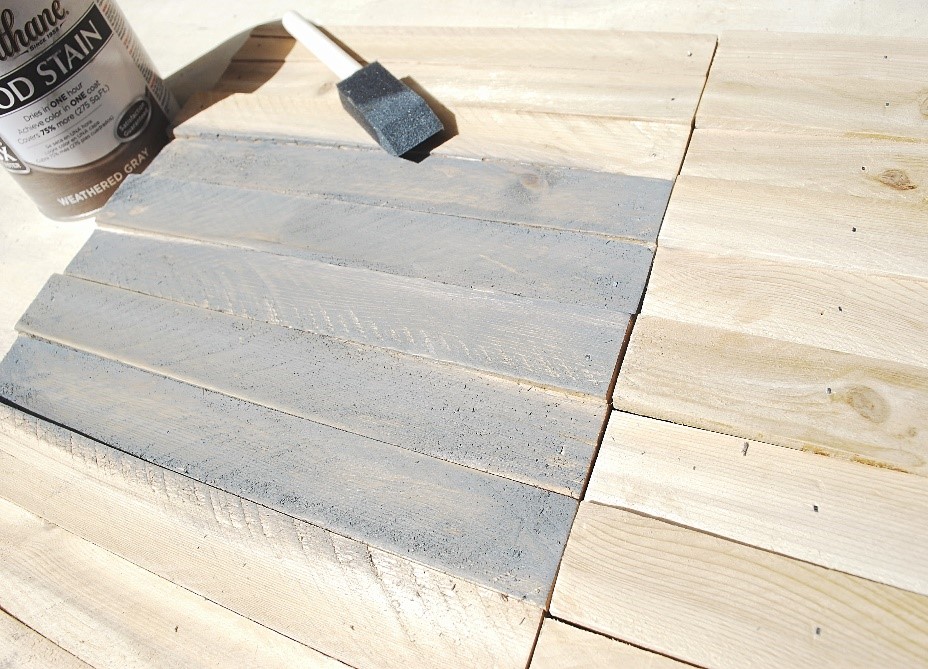
The next day, you can start applying the wood stain to the wood panels in light, even coats. Let the stain sit and penetrate the wood for a few minutes before wiping up the excess stain. I used about two coats to achieve my look. Allowing some of the natural cedar tones to show underneath will give the wood that authentic farmhouse quality. The stain will need to dry for a few hours before you can resume handling.


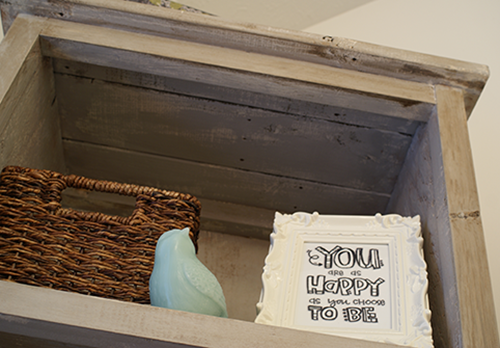
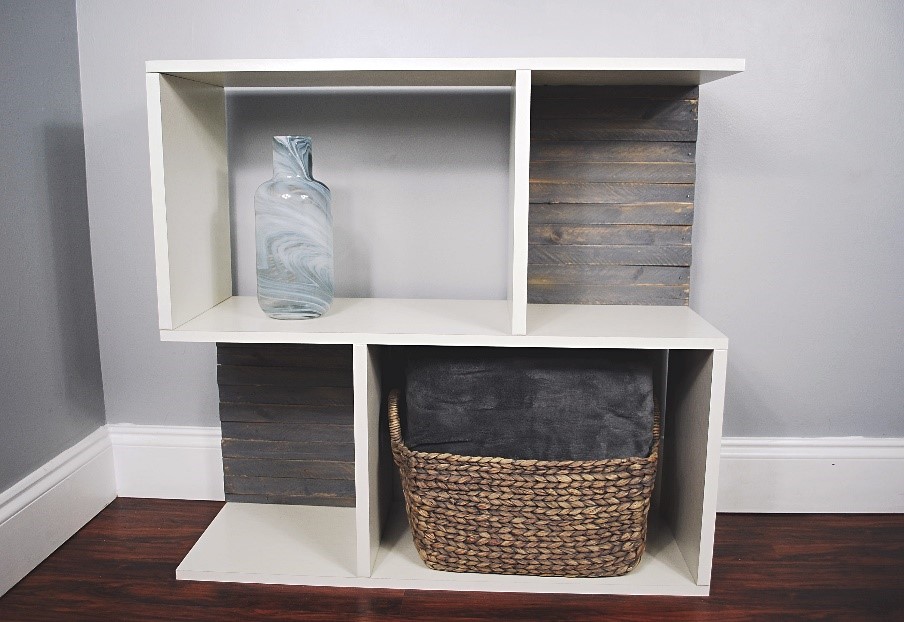
Step Four: Attach the Accent Panels

 
Image 6

 
Image 7
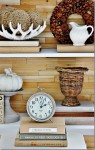
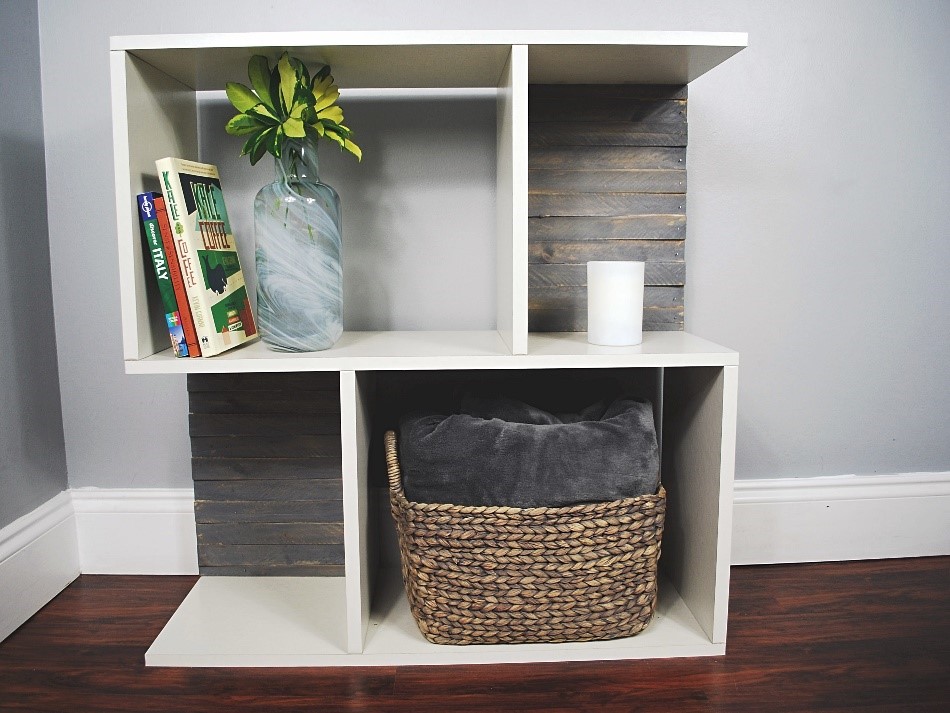
Cut several strips of mounting tape and apply them directly to the bookcase section where the wood panels will sit. Pop in your wood panels and press firmly for a few minutes to ensure a tight bond. Add a few books or decor items, and your farmhouse-inspired bookcase is done!


Mateo Londono is a longtime contributor to the Krrb blog who also writes for The Home Depot. He likes to create DIY projects and provide step-by-step instructions like he did in this article. To find a bookcase that you can add your own personal touch to, visit The Home Depot to see their selection of bookcases.


DIY WOOD SHIM BOOKCASE


Stylish Craft Storage with Sauder Bookcases

[pinit]

Do you love the look of custom built-ins, but not the hefty price tag that comes with them? If you have unlimited funds at your disposal to do with whatever you like, this is not the post for you. This is for those who want the designer look on a tight budget, like us. As you may know from our recent new home tour, we are remodeling and decorating pretty much every room. Today I am sharing a peak into the studio. See how I am using affordable bookshelves from Sauder to help organize the space in style!

The ultimate plan here is to add trim and crown molding to make these bookshelves look like custom built-ins. I ordered four 5 Shelf Bookcases from the Sauder website for under $250. There is a ton of furniture to select from on the site, which is well organized and easy to navigate. The product was on my doorstep in no time!

Assembly was a cinch with easy to follow directions, taking about 30 minutes per bookshelf. If I could change anything, I would add marks where the nails should go in the backing. It was hard to know if I was on the wood or not, but I got better at it as I went along, and was a pro by the fourth bookshelf!

If you are keenly observant you may have noticed that the bottom shelf in the first image I showed you is raised compared to the initially assembled shelves. That is a part of the custom built-in plan. These bookshelves are perfect for such a project, but I needed the bottom shelf to be a few inches higher to be flush with the baseboard we will be adding for the built-in look. I cut a 1×12 to fit and attached it to the assembled piece with pocket holes. You can see the added shelf is perfeclty flush with my baseboard! More on that project to come.

If you aren’t up for tackling the custom built-in project, these bookcases are still a great solution for stylish storage! I love the white, and they are the perfect size for inexpensive storage bins to keep you organized.

Stay tuned for the built-in transformation!

This is a sponsored conversation written by me on behalf of Sauder. The opinions and text are all mine.

BookcaseTurned Jewelry Display

Bookcase Revamp

A recent craft show taught me that I need step up my jewelry display means.  In this project, I took an old bookcase I picked up at a garage sale for $5 and some pegboard I nabbed from someone’s trash, combining them to make a display case.  All it took was a little spray paint, and my trusty jigsaw ($4 garage sale find) – Yay power tools!  Follow along and watch it unfold.

You guys remember this post, where I revamped a bookcase?  Here are the before and after…

Book shelf revamp

Book shelf revamp

Not that I didn’t love the funky, groovy, flower shelf look, but it really kinda stood out amongst my decor.  I had been wanting to do something with it for awhile.  It occurred to me that the piece of peg board I harvested from someone’s curbside trash would make the perfect backing for this case, once I painted it, of course.

I traced the bookcase backing outline onto the pegboard, then cut it with my jigsaw!  I cut on the inside of the lines, to ensure my peg board would not stick out from the back of the case.

Book shelf makeover

Book shelf revamp

Book shelf revamp

Next, I removed the plywood backing from the book case.  After spray painting the book case and pegboard (black and “periwinkle”, respectively) with Krylon Fusion and allowing that to dry, I nailed the pegboard in place.  I sealed with 2 coats of Minwax Polycrylic and that is it.   Who says you can’t revamp a revamp!

Jewelry Display Ideas


DIY Custom Built-ins from Bookshelves

Today I finally get to show you my completed DIY custom built-ins we made using the 5 Shelf Bookcases from the Sauder website Four of the bookshelves cost less than $250, so we ended up getting four more to fill our space! These are perfect for the built-in project we had in mind, and we love the result!

Here are the assembled bookshelves.

I showed you these a few months ago, before we customized them to look like built-ins here: Stylish Craft Storage with Sauder Bookcases. They looked great then, but we wanted to add trim where they meet, and wrap the tops with crown molding and bottom with the room’s baseboard to tie them into the room.

We removed the room’s baseboard on the walls where we would be putting the bookshelves.

There were several things we ran into during this project. The first was we notices the baseboard was higher than the bottom shelf, so we added a new bottom shelf with 1×12 wood to be flush with the top of the baseboard. We attached the shelves with pocket holes using the Kreg jig.

Where the bookshelves meet, we had 1.75 inches to cover, and we found the perfect trim at our local hardware store. On the edges where there was just one bookshelf wall, we put 1×12 wood as shown so the 1.75 inch trim as flush on both sides.

We started with the baseboards and used construction adhesive along with the nailer.

Luckily we found baseboard to match what was already in the room!

We found this molding at our local big box hardware store and I was elated. We didn’t have to figure out any complex angles since the molding was solid to a right angle!! Phew. You can read about our first experience cutting crown molding here: DIY Kitchen Cabinet Upgrade.

For the molding, baseboard and trim, we used construction adhesive and our cordless nailer to attach. We started with the baseboard and molding, then added the trim to cover the seams.


We found corner trim that was perfect for the corners at the hardware store. We used an unfinished cabinet door we scored for free on Craigslist as a desk in between shelves!

Above the desk we placed three 1×6 shelves, attaching them to the wall stud and bookshelves on both sides using pocket holes.

To see how I made the shelves on the left check out this tutorial: DIY Pallet Wood Paint Storage Shelves.

We primed and painted the trim and added wood and that was that!

These bookshelves are great as they come. With just a few supplies and a day’s time, you can customize them for designer built-in style!

Visit Sauder for more than 30 distinct, affordable furniture collections in a full
line of ready to assemble furnishings for your home, including entertainment, home office, bedroom, kitchen and storage!

Visit my Woodworking Pinterest Board for more home decor and furniture ideas!

This is a sponsored conversation written by me on behalf of Sauder. The opinions and text are all mine.

50 Plus Awesome Wood Shim DIY Projects


[pinit]

50 DIY Wood Shim Projects to Make

[pinit]

Wood shims are inexpensive and can be used to create gorgeous DIY home decor.  Make faux pallet art, cover an ugly thrift store dresser, create a designer starburst mirror on a shoe string budget.  Here are 50+ of the best DIY wood shim project tutorials from creatives everywhere.  If we missed your project, send us a link so we can include you!  Enjoy.


Build an Armoire & Distress it With Chalk Paint

Knobs

Ana White Armoire Plan #woodworking @savedbyloves

DIY armoire woodworking plan from Ana White and how to distress with #chalkpaint #AnnieSloan[pinit]

I am so excited about today’s project.  The closet situation in my new place is less than optimal (totally crappy).  In desperate need of a solution, I searched and landed on this simple armoire building plan from Ana White.  If you have been around here long, you know I am a big fan of Ana’s site.  She introduced me to woodworking and I have been covered in sawdust since that day.  This project was easy to follow.  I made some adjustments since I wanted it larger than the dimensions of the original plan, and I was improvising with salvaged wood I had on hand.

This was my first project using Annie Sloan chalk paint.  Don’t you love the color?!  It is called Arles, and I finished with Annie Sloan Clear Wax, then Dark Wax over the top of that.  Its a bit more “aged” than what I had planned.  Turns out a little of the dark wax goes quite far.  I will keep that in mind for my next project.   I still love it.  If you run into that, you can always paint over the wax.  It wasn’t that big of a deal to me in this case.  We all know I will be painting it a new color when I change my room decor anyway, right?

Annie Sloan Chalk Paint Arles

Here is the Annie Sloan paint.  Yum.

How to build an Armoire from salvaged wood

Sad quality iPhone shot of the armoire before painting.  Hard to get any shots of it really, because of the room size and… oh yeah, I made it huge.

Knobs

Did you check out the knobs I found at Hobby Lobby?  Perfect.

Pin

That’s it.  I love it.  Off to figure out what to build next.

Woodworking Project Gallery Page

Powered by CGView

How to Build a DIY Reclaimed Wood Bookshelf

How to build a reclaimed barnwood Bookcase @savedbyloves

How to Build a Bookshelf

I have another reclaimed wood DIY project for you today.  I got a truck load (it probably should have been two truckloads, but we squeezed it into one) of 4×8 plywood sheets, 2×6 and 2×8 boards from a craigslist ad.  It was salvaged from a home that these folks tore down and they were happy to have it hauled off and out of their yard.  This project is made mainly from that wood.  The panels that back the bookshelf were milled by a friend of mine who passed them along to me, where they have patiently waited for me to put them to use.  I came up with this cool bookshelf that i finished with homemade chalkboard paint and sand distressed.  CeCe caldwell Clear Wax then Aging Wax sealed the deal and added just the amount of antiquing to suit my vision.  You can finish this project in a day if you are committed, over a weekend if you have some distractions.

Ana White Kentwood Bookshelf Plans by Shanty2Chic

This fine Kentwood Bookshelf by Shanty2Chic that I spied at AnaWhite.com was my inspiration.  I had just taken a woodworking DIY class by Whitney and Ashley of Shanty2Chic at Haven Conference, and I came home on fire to build.  These girls are amazing!  They shared their journey coming from zero knowledge of building or power tools, to being able to build some amazing furniture for their homes.  I have been building since April, and before I started, I was totally intimidated.  I still am by lots of projects, but I am so glad that I broke into the power tool world.  It is way easier than I thought, and not much is more gratifying than building custom pieces, from reclaimed wood no less.  Go check out Shanty2Chic, walk through some of their detailed tutorials and you can build awesome stuff too!  You really can.

One thing they taught me at Haven was to measure as I go instead of cutting all of my pieces called for in the plan.  I hadn’t been doing that, and my pieces would be off almost every time.  Wood is going to curve and bow and do funky things, especially reclaimed lumber and shipping pallets.  I am so glad they emphasized measuring and cutting based on reality and not on the perfect plan.  I decided to scrap the plan entirely for this shelf, and just go with my own dimensions based on what pieces I had on hand, and the measurements as I built.

Bookshelf DIY Tutorial

I made my own 2×2 pieces by ripping the 2×6 boards from the house demolition that I scored.  This is what I used to frame the side planks, which I cut 11.5 x60 inches from the 4×8 sheets of 5/8 inch plywood also from the house demo.   Shanty2Chic used 1×12 boards for the side panels.  I went with plywood since I had it on hand, and I knew I was going to paint the final piece.

Building Bookshelf With Kreg Jig

How to Build your own furniture

You can see the Kreg pocket holes in the plywood side planks that I drilled to attach 2×2 framing.  Attach shelves and top.

How to Build a shelf from reclaimed wood

I  used 3 pieces of the wood my friend milled for the backing.  They were different thicknesses, but since that would only be visible from the back, I didn’t much care.  I just measured and cut to length the center piece, and ripped what I needed off the 2 side pieces so that they didn’t stick out over the edge.  I counter sank 2 inch wood screws to attach the back panels.

How to distress paint furniture

I love the larger panels for the backing, and that I didn’t have to buy any wood for this piece!  Fill Kreg holes with wood putty, liquid nail or caulking.  It doesn’t need to be something that takes stain if you are painting the piece anyway.

ReclaimedSmall Wood Furniture Tutorial

I sanded the unfinished bookshelf with medium grit paper and painted a base coat of CeCe Caldwell Paint in Vintage White  (You can see my other CeCe Caldwell Chalk and Clay Paint projects by clicking the thumbnails below).  After that was dry (about 1 hour indoors) I made a gray DIY Chalk finish Paint using the Make Your Own ChalkBoard Paint Recipe I showed you in an earlier post.

How to Build Furniture From Reclaimed Wood

For a little more aging, I added a coat of CeCe Caldwell Clear wax, then Aging Wax.  I buffed with a soft cloth an hour later and that was that.

Build your own furniture

LOVE!  Thank you Whitney and Ashley.  Can’t wait to see you again!!

Privacy Policy