50 Plus Awesome Wood Shim DIY Projects


[pinit]

50 DIY Wood Shim Projects to Make

[pinit]

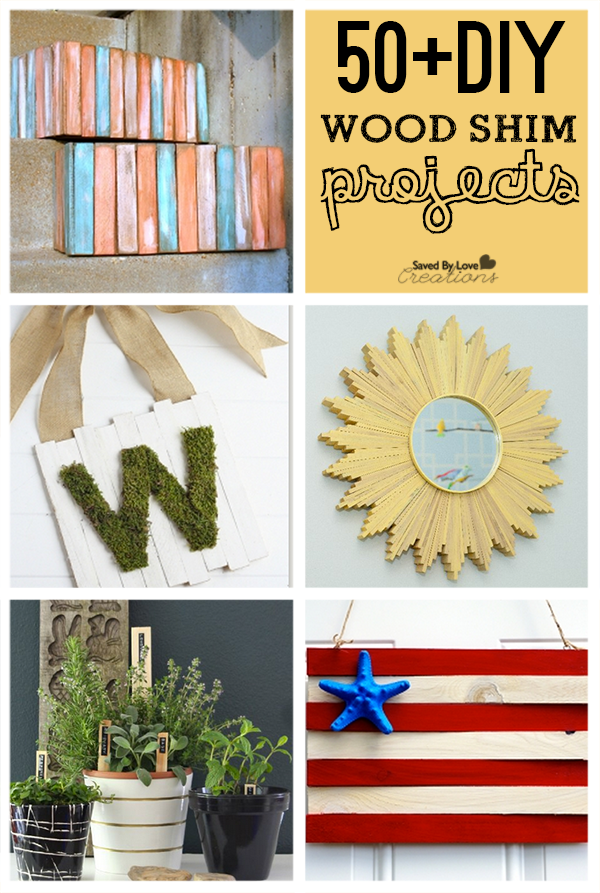
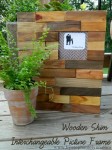
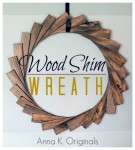
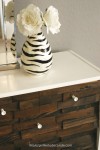
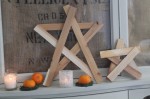
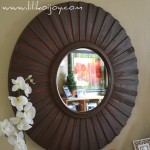
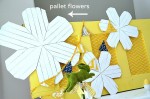
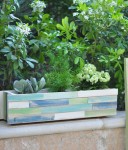
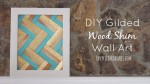
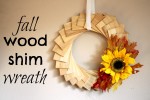
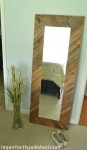
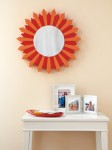
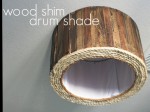
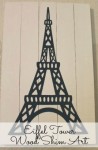
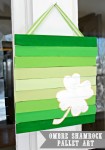
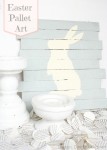
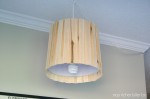
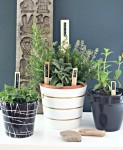
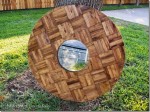
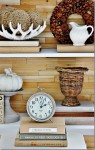
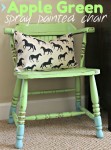
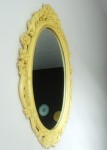
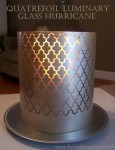
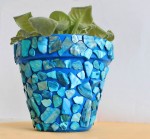
Wood shims are inexpensive and can be used to create gorgeous DIY home decor.  Make faux pallet art, cover an ugly thrift store dresser, create a designer starburst mirror on a shoe string budget.  Here are 50+ of the best DIY wood shim project tutorials from creatives everywhere.  If we missed your project, send us a link so we can include you!  Enjoy.


Easy DIY Mother’s Day Gift Idea

[pinit]

teatime-totebag-723x1024

[pinit]

Hello! Colleen here, with a way to decorate a totebag that will make it worthy of gift-giving. You do realize that Mother’s Day is right around the corner, right? I know! With Easter being so late in April, we have to really move fast if we want to give any handmade gifts to the moms in our lives. No worries because this happens to be a fast project. And cute too.

tea-time-totebag

You only need a few supplies –

  • Tulip Fabric Markers (available at craft stores and Walmart)
  • a paintbrush
  • a totebag (this is a shopping bag from the Dollar Store)
  • a pattern
  • a piece of cardboard to fit inside the tote

While this tutorial is for a totebag you could also use the markers on almost any fabric. Tee shirts are cute too. However, I made this for my own mother who can always use another totebag.

I’ve provided the Hydrangea in a Teacup pattern for you to download. If you’d like, I have other patterns that are free to download too. Most of them would work fine for this project.

tea-time-totebag
After you print your pattern, place it on top of the cardboard and slide it into the totebag. This prevents the markers from seeping to the backside as well as holds the pattern a little more stable.

You could also iron the pattern onto the shiny side of a piece of freezer paper, then iron that to the tote or tee shirt to prevent slipping. However, make sure you do a test for iron safeness on any shopping bags. The one I used above needed a press cloth between it and the iron.

tea-time-totebag

Now all you need to do is outline the pattern with your choice of colors.

tea-time-totebag

You can mix more than one color too.

tea-time-totebag

This was the finished design after outlining with purple, pink, and a few green dots in the center for the hydrangea buds.

tea-time-totebag

Dampen your paintbrush with a little water and go over the marker lines. The more water you use, the more of the markers will blend. The less water, the more defined the lines will be.

tea-time-totebag

You can do a little of both – leave some outlining and blend other parts. There is no right or wrong way to do this.

tea-time-totebag

You can fill in the pattern completely or leave spaces for the totebag to show thru.

It’s a great kids’ project too. If they’re too young to outline, they would still love to grab a paintbrush and “paint” a present for Mom or Gramma, wouldn’t they?

tea-time-totebag

Isn’t this a great craft for Mother’s Day? Or any other day, actually.

If you use the markers on a shirt, they’re washable after drying 24 hours. To be on the safe side, I think I’d heatset them anyway with an iron, although the instructions don’t mention that.

Have fun with this! I hope you’ll stop by Just Paint It and say hi one of these days. I’m always painting . . . or drawing with markers! You can also find me on Facebook, Google+, Pinterest and Instagram too.

Happy Crafting!

Colleen

More SBLC Mother’s Day DIY Inspiration!

Over 60 Mother’s Day Gifts to make for Less than $10!!

60+ DIY Mothers Day Gifts for under $10

Free Printable Chalkboard Mother’s Day Set

[pinit]Mother's Day Free Printable Card by @savedbyloves[pinit]

Head over to Printable Decor for this exclusive Free Printable Chalkboard Mother’s Day Card Set for Mom, Grandma and Aunt!

Over 50 Amazing DIY Spray Paint Projects to Make

[pinit]Over-50-Amazing-DIY-Spray-Paint-Projects-to-Make-@savedbyloves
[pinit]

One of my favorite things about the arrival of spring is finally being able to go outdoors and get busy with spray paint projects!  The time is here, and today I am sharing with you my favorite DIY spray paint projects from creatives everywhere.  You will find DIY curtains, home decor, wearables and more.  Be ready to be amazed at what you can do with a little spray paint and inspiration.


DIY Mother’s Day Sign

Hello friends! It’s Barbara from Chase the Star, and today I’m happy to share another simple DIY project. Mother’s Day is almost here and Moms love it when we make them gifts, right? Well they did when we were kids, so why not continue the tradition?

DIY Mother’s Day Gift

[pinit]

DIY-Mothers-Day-Gift-via-Chase-the-Star-for-Saved-By-Love-Creations-bibleverse-proverbs31-

[pinit]

I love Proverbs 31 and I think verse 28 is perfect for mothers as a reminder of how much she should be cherished and appreciated! Of course it would make a great DIY project, so I headed to the thrift store and picked up this picture:

DIY Mother's Day Gift..update a thrift store picture! via Chase the Star for Saved By Love Creations

It’s the perfect size and the back already has a hanger!

How to DIY a Sign

Materials:

Second hand sign (thrift store, garage sale, etc.)

Sanding block

Spray paint

Die Cut Machine (I used the Cricut Explore)

Adhesive vinyl / Transfer paper

Step 1: This picture is actually a sticker, so I wet the whole thing and peeled it off with a scraper. After it was dry I went over it with a sanding block.

IMG_4464

Step 2: Spray it in the color of your choice; I went with gloss black.

IMG_4468

Step 3: Create the verse on the cutting machine, cut it out, and adhere it to the painted wood (for instructions on how to do that click here). Instead of peeling the lettering and painting, I just kept the white vinyl on there.

IMG_4469

Step 4: Go over the whole piece with the sanding block, carefully! This step is optional but it will reduce some of the gloss (if you used gloss paint) and give it an overall ‘worn’ look.

Since the hardware is already on, all you have to do is wrap it up in pretty paper and give it to the Mom in your life!

DIY Mother's Day Gift Proverbs 3128 via Chase the Star

Play around with the fonts on your machine and choose the one that you like the best. I wanted my sign to be simple, so I went with cursive. I think I will make a few more so I can pass them out to friends, back to the thrift store I go!

For more creative DIY ideas stop by Chase the Star, and follow me on Facebook, Google+, Pinterest, and Instagram!

See you next time!

New Signature

More SBLC Mother’s Day DIY Inspiration!

Over 60 Mother’s Day Gifts to make for Less than $10!!

60+ DIY Mothers Day Gifts for under $10

Watercolor Easter Eggs

Hi everyone! It is Vidya from†Whats Ur Home Story, a home decor/DIY†blog where I share how our family of 4 is turning a cookie cutter into†a unique and interesting home that tells our story.

Has the weather gods been nice to you? We are covered in a foot of snow but that is not stopping me from getting started on Easter crafts. Over the weekend my kiddos and I made these pretty watercolor Easter eggs.

[pinit]

Make gorgeous watercolor Easter eggs in a snap @savedbyloves

[pinit]

They are super easy to make and as I mentioned a perfect craft to get the kids involved. My 8 yr old made the blue ombre one all by herself. All you need are blown out eggs and watercolors. Do keep in mind that†watercolors have chemicals and are not safe to use on eggs that you plan on consuming.

watercolor eggs tutorial

You simply cannot go wrong with these. Here are more that we made;

painted easter eggs, Watercolor Easter Eggs

Tutorial

Blue Ombre Egg – Wait till each layer is dry before you paint the next color.

Orange Ombre Egg – Prop the egg on a skewer and add the horizontal bands before the paint colors dry. Use only very little water on your brush.

Pink Plain Ombre Egg – I just dribbled the paint onto different sides of the egg and let the paints do their thing while propping it on a skewer.

painted easter eggs, Watercolor Easter Eggs, how to make watercolor easter eggs

Purple & Gold Egg – Soak a slightly wet paper towel in paint and dab it onto the egg. When dry, paint with gold paint.

Pink Scroll Egg – Same method as the plain pink ombre egg. I just added the scroll with gold craft paint when the water color was dry.

painted easter eggs, Watercolor Easter Eggs, how to make watercolor easter eggs, Watercolor easter eggs tutorial

Seal your masterpiece with Mod Podge when done.

Wasn’t that as easy as pie? Have you already started your Easter prep? Happy Easter!

For more easy DIY ideas stop by†Whats Ur Home Story†or follow me via†Facebook,†Pinterest,†Twitter,†G+,†Instagram.

Want more? Check out our 75+ Easter DIY Ideas:

Easter Craft Ideas

DIY Party Pom Poms

Hey lovelies! It’s Barbara from Chase the Star and in case you don’t know, I love simple and cheap projects! We recently celebrated my son’s birthday with a fun, yet very ‘DIY’ party at our house. One of the easiest decorations I made was party poms, we skipped the balloons and went with poms throughout and they were a hit!

DIY Party Poms

[pinit]

DIY Party Poms via Chase the Star for Saved By Love Creations #party #handmade #birthdayparty

[pinit]

Sure you can buy party poms at the store, but they are not budget friendly! For a fraction of the cost and just a few minutes you can make your own party poms!

Want to liven up your next party? Here’s how to DIY Party Poms:

Materials:

Pack of gift tissue

Pipe Cleaner

Scissors

Make Your Own Party Pom! via Chase the Star for Saved By Love Creations #party #handmade #birthdayparty

Directions:

Step 1:

Lay the tissue on a flat surface, and smooth the sheets out. Start folding the tissue accordion style from the short side of the batch, until the entire pack is folded.

IMG_4095

Step 2: Tightly wrap the pipe cleaner around the center.

Step 3: Snip the ends of the folded tissue in either a rounded or pointed shape (you can get really creative here!)

Party Poms via Chase the Star for Saved By Love Creations

Step 4: Peel each tissue back towards the center, until you have the shape you like!

DIY POM

Repeat, repeat, repeat! You can make these larger or smaller by adjusting the amount of tissue sheets you use. I also love the look of these to decorate a fun space in the house like a kid’s room or nursery, playroom, or a modern living room!

Our son thought these were ‘way cool’, and so do I!

What do you think? Would you substitute balloons for DIY Party Poms?

Stop by and see the rest of the party and even more DIY projects, crafts, and recipes at Chase the Star! Don’t forget to follow Chase the Star on Facebook, Google+, Pinterest, and Instagram!

See you next time!

New Signature

Over 50 Popcorn Treats to Make

[pinit]50 Plus Best Popcorn Recipes @savedbyloves[pinit]

Popcorn… yum!  This house consumes it’s share of this versatile treat, that is for sure.  Did you know popcorn has only 33 calories per cup?  Well, not when you combine it with things like chocolate, peanut butter and caramel, but it is healthier than other things you might combine with these ingredients!  Here are 50+ tasty popcorn recipes to try.  Enjoy!


Easy Dollar Store Craft – Rosette Framed Dry Erase Board

[pinit]Easy Dollar Store Rose Soap Framed DIY @savedbyloves
[pinit]

Last week I showed you a wreath and bouquet made from these pretty Dollar Tree rose soaps.  You get 9 in a package, and at the store where I live the packs are 2 for $1!  I am having a blast gluing these soaps to various things.  Today I will show you how I made this rosette framed dry erase board with them and a few basic supplies.  Wake up your sweetheart with a personalized message and breakfast in bed this Valentine’s Day!

How to Make a Dollar Store Rose Frame

SUPPLIES:

Dollar Store Craft Idea

Dry Erase Board from Dollar Store

Scrap foam board or cardboard large enough to frame the dry erase board

Utility knife

Straight edge and marker

Glue Gun

Dollar Tree rose soaps

TUTORIAL:

DIY Dry Erase Board

Measure and and mark frame dimensions on foam board using straight edge and marker.  I made mine 2 inches wide and the opening to fit the dry erase board (in this case 6×8 inches).  Cut out with utility knife.

DIY Dollar Store Craft

Apply a thin strip of hot glue around the dry erase board foam frame and place your new frame on top of that.

Make a Rosette Frame From Dollar Store Soaps

Simply glue the rosettes in place with a dot of hot glue.  I went with all white this time.  That way I can use it all year round, not just on Valentine’s Day.

How to Make a Dry Erase Board

The roses made the piece to heavy to hang on the fridge with the 2 magnets that came on the back.  I didn’t really mind since I plan to display mine on a shelf.  If you want to have it on your fridge, add more magnet strips to the back.  You can get rolls of adhesive backed magnet at most craft stores.

Make a Dollar Store Valentine's Day Dry Erase Board

If you want more Dollar Store Craft Ideas, visit our 50+ Dollar Store Craft Round-up:

50+ Dollar Store Crafts to Make @savedbyloves

Easy Faux Stained Glass Mason Jars

[pinit]Martha Stewart Clings Faux Stained Glass DIY;  Easy and beautiful effect @savedbyloves[pinit]

Have you had the chance to use Martha Stewart Paintable Clings?  I have always loved the look of stained glass, and these clings give you that in a few easy steps.  My favorite part is that they are reposition-able, so you can easily remove them and place them on another surface.  Read on to see how to use them for this fun heart themed window scene on mason jars.

Martha Stewart Clings

SUPPLIES:

Martha Stewart Clings Stained Glass Jars

Martha Stewart Paintable Clings Hearts and Flowers

Martha Stewart Liquid Fill in colors of your choice

Glass surface such as windows, mason jars, bottles

Paper towels

TUTORIAL:

Martha Stewart Craft Project Web

Lay out the clings on a flat surface, leaving them on the clear backing sheet.  Paint in the designs using the transparent fill straight from the bottle.  I got lots of air bubbles, which I popped with my finger and wiped onto a paper towel.

DIY Faux Stained Glass Web

Let dry for several hours.  Clean receiving surface with rubbing alcohol and dry with lint free towel.  Apply cling and that is it!  If you don’t like the placement, you can easily remove and reposition.

DIY Faux Stained Glass Window Clings

Privacy Policy