
[pinit]
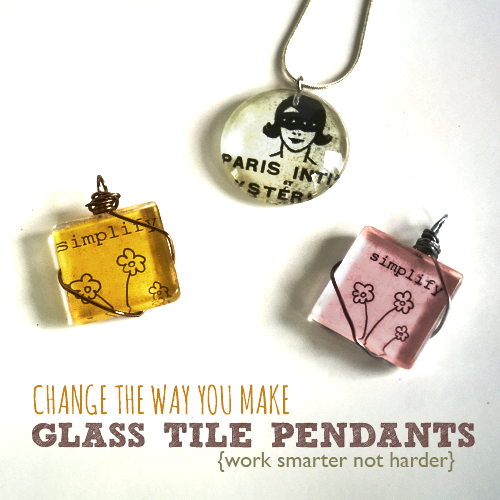
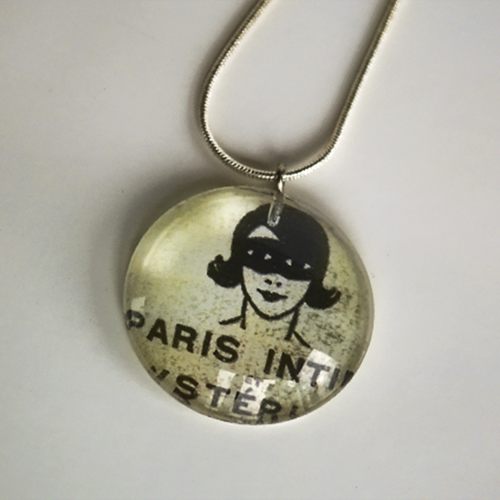
If you have ever made glass or acrylic tile pendants, you probably know that it is more involved than it looks. About 2 years ago, I need to make a slew of these, and decided to run my images that I wanted to adhere to the pendant through Xyron’s Create-a-Sticker Machine. I ran them through oriented so that the image side would be the sticky side, and stuck the tile right on the sticky, as you will see pictured in this tutorial. This eliminates having to glue the images onto the tiles, which is, at least for me, a messy hassle! I wanted to scream this technique from the rooftops when I thought of it, but I decided to wait and see how the pendants held up long term. At last I am here to report that after 2 years, the tiles I made this way look gorgeous. The image has not peeled away from the glass or discolored even slightly. You still have to seal the backs so that the pendants are waterproof, but I have a great tip for that step as well. Read on and you will be busting out gorgeous, durable graphic pendants crazy fast.

SUPPLIES:
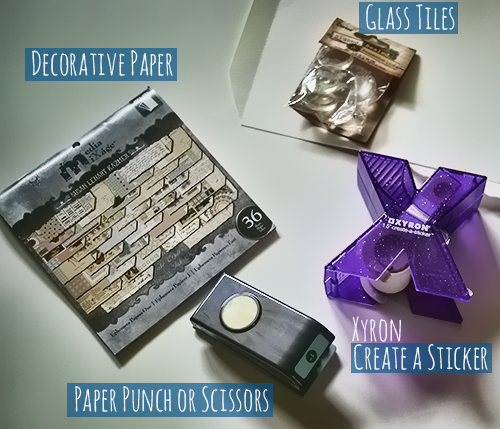
Xyron 1.5 inch Create-a-Sticker with Permanent adhesive cartridge
Printed images for your tiles, or decorative scrapbook paper/artwork – I create collage sheets in Photoshop with images made to fit whatever tiles I am using (round, square, rectangle in various sizes) and print it, or I create backgrounds with spray ink, ink pads, markers, stamps, rub-ons, doodles to use on my tiles.
Detail scissors
Mod Podge (I prefer satin finish to seal my glass tiles)
Small flat paintbrush
Masking tape or contact paper (super cheap at dollar store and works great for the sealing trick you will see later)
Ceramic tile or other flat surface
Sandpaper 150-200 grit (I use Tim Holtz
Glass tiles or Acrylic Tiles (I use Mod Podge Podgeable Shapes and glass tiles)
Glue on bails (my very favorite are aanraku small bails. They are beautiful, the perfect size for 1-2 inch round, square or rectangle tiles and are well worth the cost (about $0.40 each)
E6000 glue for the bails (this stuff would glue a person to the ceiling and hold)
-OR-
Jewelry wire to wrap pendants in a glue free way like I showed you previously:
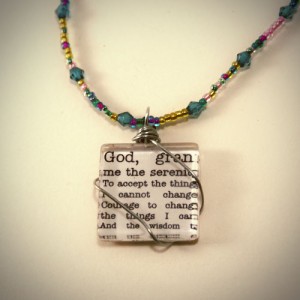
Glue Free, Drill Free Way to Attach Pendants
I love this method for the fancier look compared to the glue on bail. Sometimes people want simple, other times wire is just the special touch that makes them fall in love with a piece.
TUTORIAL:
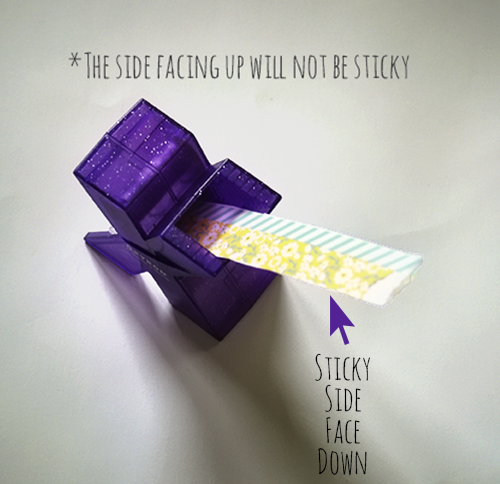
Take the image and cut into a strip that will fit in the Xyron sticker machine. If you have a larger machine, you can run larger sheets through it to create stickers for several tiles at once. Here I am using the 1.5 inch on cardstock covered on both sides with lovely washi tape. Scrapbook paper, photos or whatever you want as your pendant image can be used. Place the image side face down in the machine (this is the opposite of how you make most stickers since you are going to adhere the glass to the sticky image you want to show). It is not really important for this example since my washi covered paper is the same on both sides.
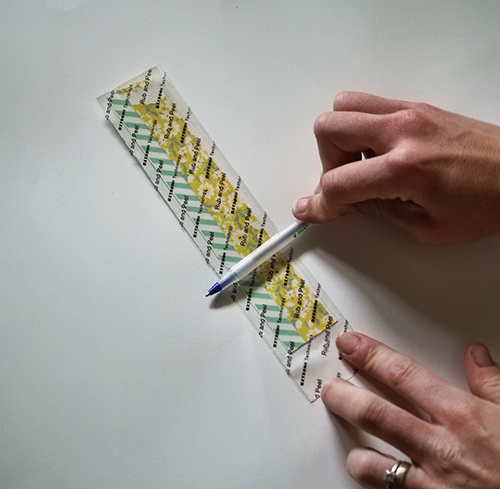
Burnish the image onto the adhesive with a bone folder, credit card or ink pen (yep, I improvised). This assures the maximal adhesive transfers to the paper image.

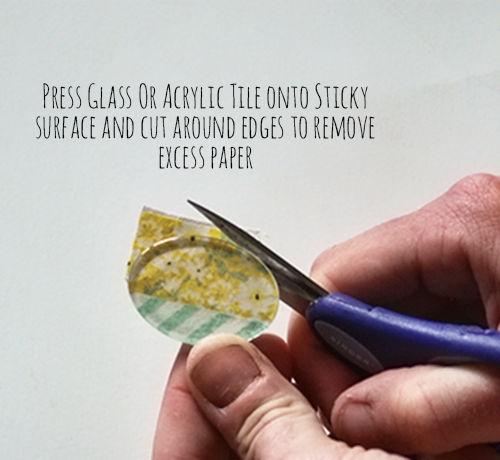
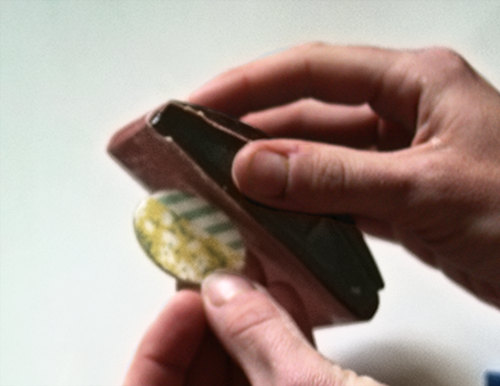
Sand any uneven edges left after cutting to tidy up your piece.
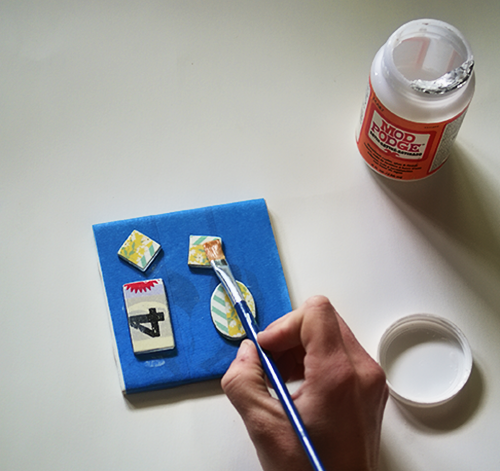
TIP: Lay contact paper with sticky side up, or masking tape sticky side up on a tile or other flat surface. Place your pendants paper side up, glass side down on the tape or contact paper. This keeps the pieces from moving around when you seal the back. I lost hours of my life with sliding pendants that I moved back into place with my fingers, getting glue all over me and fingerprints all over my tiles. No fun. This is the best solution ever.
Apply 3 layers of Mod Podge, drying at least 30 minutes between each. I like to let cure 1 week before sending the pendant off to it’s new home. After 24 hours, I glue on the pendant bail or make a wire wrap bail like I discussed earlier (see above link).
Speaking of Xyron, Feature Product Friday is happening, and the start of the show is Xyron.
What is Feature Product Friday, you ask? It is the brainchild of my friend Amy of Plucking Daisies. If you’ve been here awhile, you have probably seen her rockin contributions to SBLC. I love talking about products with Amy. We are equally obsessed with the next new creative spray ink, paper, design line, gadget and trinket that will help us create what we love and take our imaginations to new places. We want to share our go to products with you, and see what you have come up with using them. Each Friday will be a new product featured. We will show you our projects, as well as a roundup of your best projects using the featured product (see the list below).
Even more good news… Amy is giving away a stash of Xyron supplies, so head over and enter the Xyron Giveaway at Plucking Daisies.
TOP PROJECTS USING XYRON
|
|
