


Today I am thrilled to have Steph from The Silly Pearl here to share with you a fantastic beaded hoop earring tutorial. She is a multi-talented crafter for sure, but I especially love her jewelry tutorials. She was in the handmade bridal jewelry business before her twin girls came along, and her experience shines through her projects. Might I just add that I am all over these earrings. Thanks Steph!
Hello! My name is Steph from the blog The Silly Pearl, where I write about crafting, thrifting, cooking (and a teeny bit of gardening!), along with my 5 year old twin girls. Thank you so much to Johnnie for having me today on your blog. I was so honored when she asked me to guest post for her this week.

Hope you are having a great Labor Day weekend! Though ironically, my tutorial today doesn’t take much work at all! I’m going to show you how I made these Beaded Hoop Earrings.
Here’s what you’ll need:
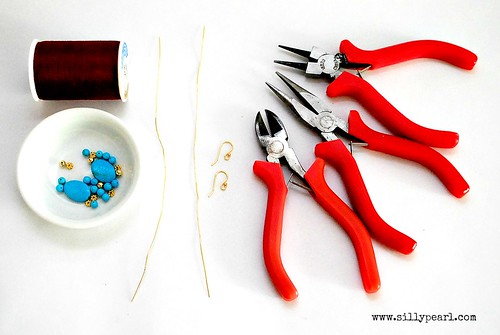
- An assortment of beads. This depends on the look you’re going for. I have a large focal bead in the middle, so I have two of those. Then I have three other types of beads, symmetrically strung on either side. I got all my beads at a local bead store, but you can find similar beads at Michaels or Jo-Ann.
- Two pieces of jewelry wire cut to 6 inches each. I used Beadalon 24-gauge round wire, available at Jo-Ann. I would not go any thinner than 26 gauge or thicker than 22 gauge (too thin…it might break with wear, and too thick…too hard to work with).
- Something cylindrical in shape, like a spool. This will be your template for bending the wire into a round shape. The finished diameter of the earrings is about 1.5 inches, so if you want bigger/smaller, then use a bigger/smaller template.
- A pair of ear wires. I purchased these from Michaels as well.
- Jewelry making tools: Flat nose pliers, Round nose pliers, and Wire cutters.
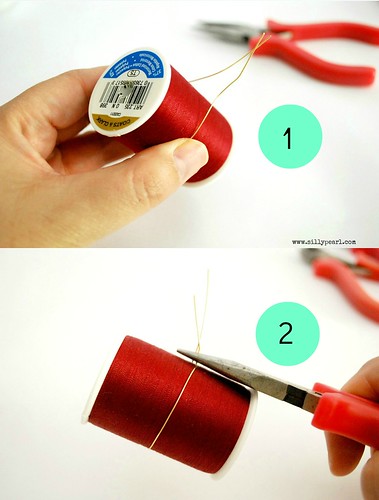
1. Wrap one piece of wire around the spool, so that there is an equal amount of length sticking out, if that makes sense. Then 2. Pinch the wire together so it’s the same circumference as the spool. You’ll be left with a little less than 1 inch of both the ends.
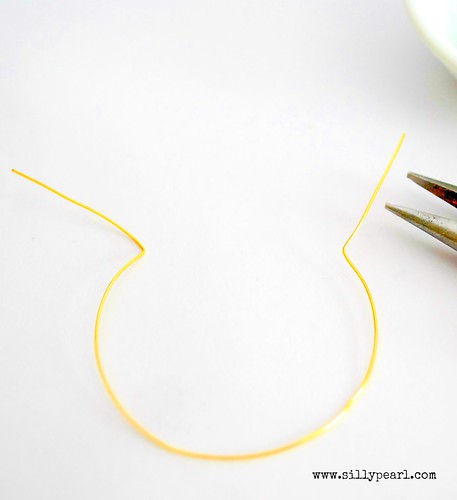
So when you remove the wire from the spool, it will look like this, with two kinks in the wire.
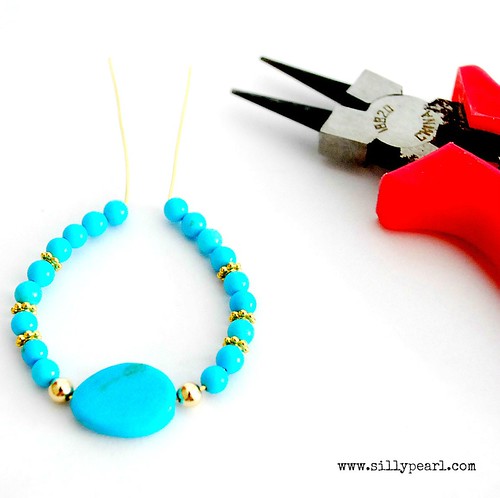
3. Now you’re ready to start threading on the beads. Use your fingers to gently straighten one of the kinks, enough to allow the beads to thread on. If you’re using a focal bead in the middle, thread that on first. Then 4. Thread on the small beads on one side of the focal bead, until there are enough beads to reach the kink. Next, 5. Repeat the same pattern on the other side, again straightening out the kink a little bit so you are able to thread on the beads.

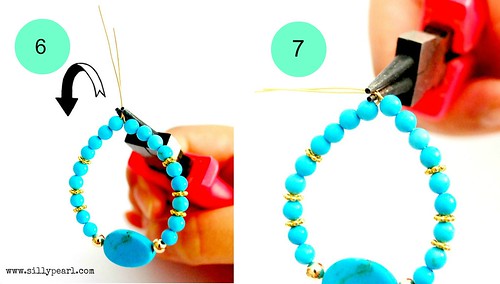
So when you have all your beads threaded on, it will look like this. For the next few steps, get your round-nose pliers ready…now I’ll teach you how to wire wrap, but you’ll be wrapping both those end strands (instead of just one strand as usual). To see a better tutorial on wire wrapping than I could ever do, visit BeadStyle Magazine’s wire wrapping tutorial, or check out the last few pages of every paper issue.
6. Grasp both strands with the round-nose pliers. Then 7. Twist your wrist to one side, bending both wires at 90 degrees.
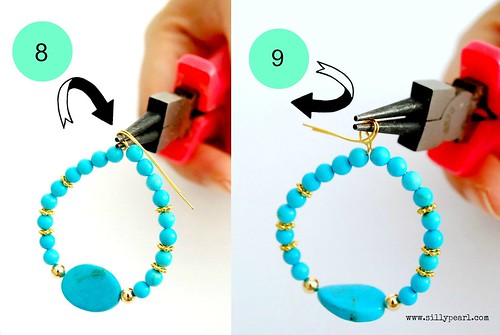
8. Using your fingers, grab both the ends, and loop it around the top of the round-nose pliers. Then, 9. Wrap the wire under the round-nose pliers, remove your pliers from the loop, and insert only the bottom point of the round-nose pliers into the loop.
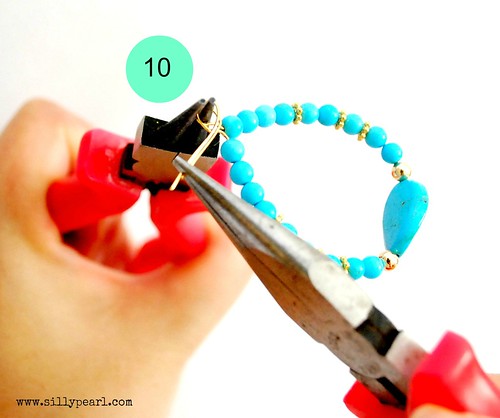
10. Now we’ll start wrapping the ends around the base of the loop to secure the loop. Grasp both ends with flat-nose pliers while you still have the round-nose pliers inside the loop, as described in step 9.
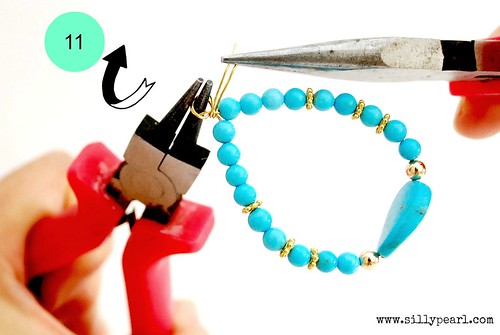
11. Wrap the wire around the base of the loop (there should be a teeny length of vertical wire at the base of the loop, where you formed the kinks earlier, which is where the wire will wrap around).
12. Keep wrapping a few more times until…

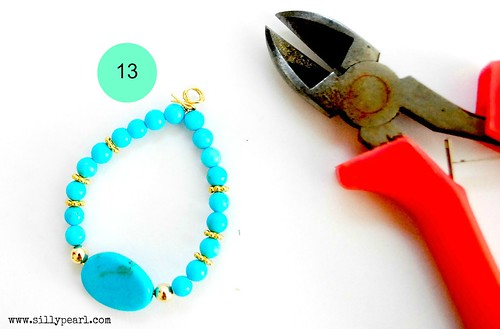
13. You are left with a short length of the wire ends. Next you’ll use your wire cutters…
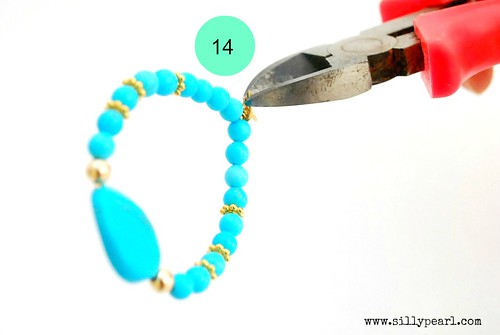
14. …to cut off these ends as close to the base of the loop (i.e. where your wrapped wire is) as possible, without snipping anything else!
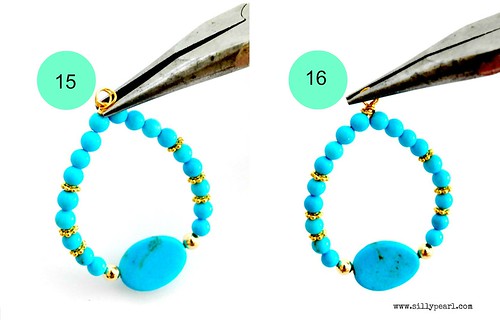
15. Then use your flat-nose pliers to flatten and tuck in those ends so you don’t have anything scratchy or pointy sticking out. 16. You can also use the flat-nose pliers to neaten-up the loops, which you want to try to make as uniform as possible but it doesn’t always happen! It’s ok…it looks rustic, right?
16. Finally, take your earring wires. On the left in the picture below is a closed one. Usually with ear wires, you can open the loop to slide on your finished piece. Slide open the loop with your flat-nose pliers, like you would open a jump ring (see the BeadStyle Magazine link above for another tutorial on how to open jump rings with a sliding motion, which you would also use to open the earring wire loop).

Repeat for the 2nd earring, and you’re done.

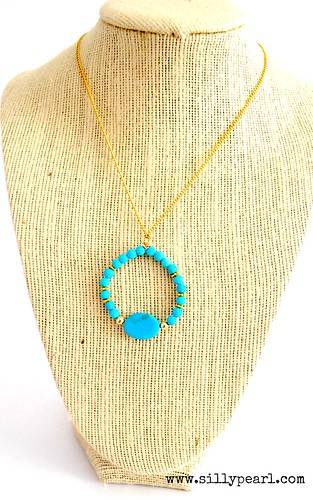
You could also make a pendant…instead of using earwires, just thread a chain through the loop.
If you enjoyed this tutorial, I hope you’ll stop by my blog, The Silly Pearl, for more! I not only make jewelry, but enjoy almost every other type of craft.

Again, thank you so much Johnnie for having me on your lovely blog today!
-Steph-
