50+ DIY Home Decor Projects to Make with a Jigsaw

50 Plus Best DIY Home Decor Projects to Make With a Jigsaw @savedbyloves

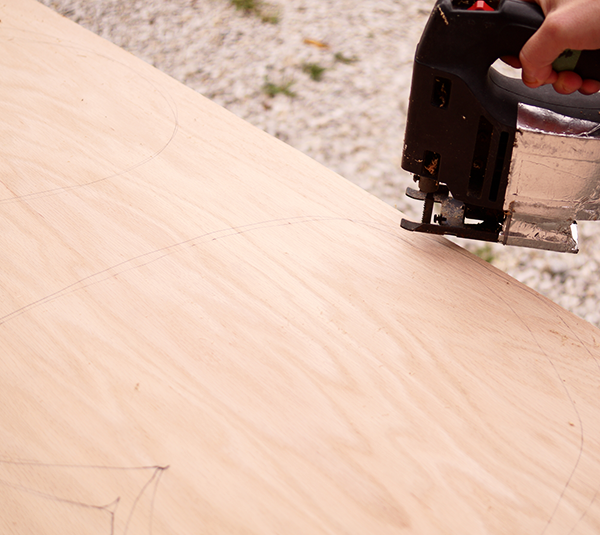
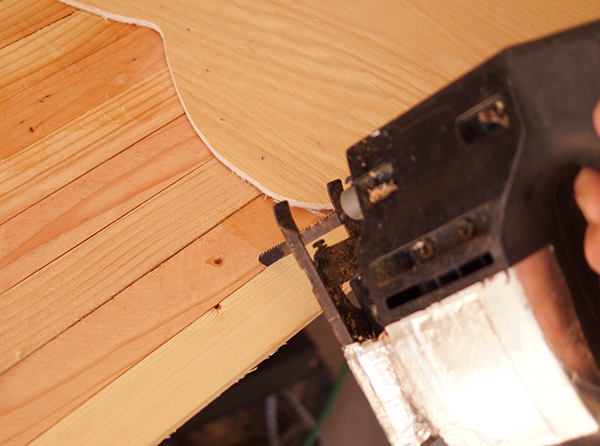
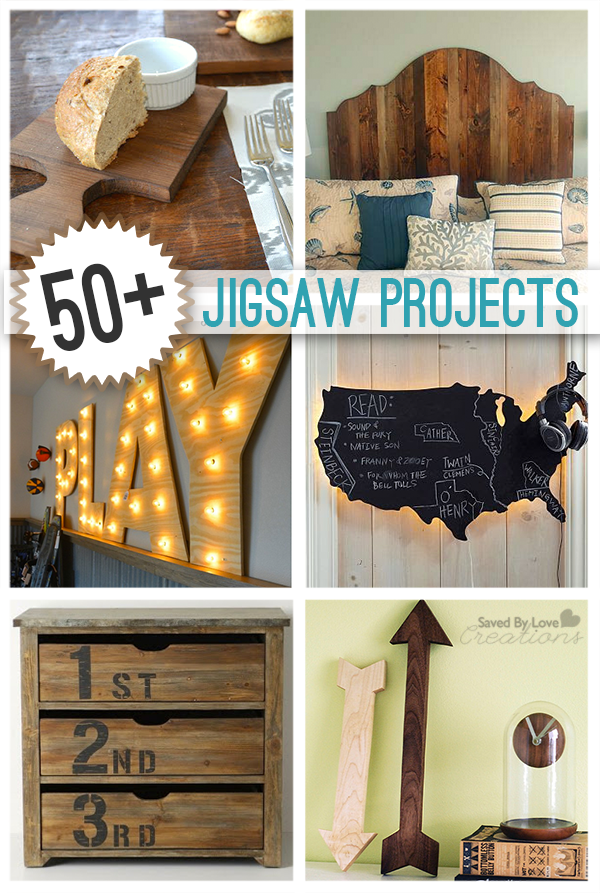
The jigsaw is a super versatile tool, and a great place to start the power tool journey. It is handheld, can be fairly inexpensive (like this Corded : Skil Saw. Variable Speed 4290-02), and cuts shapes in a variety of materials, with the appropriate blade.  I did a number of projects with a the above linked Skil Saw I scored at a garage sale for, and only recently splurged on a new one because of a gift card I received. The new one is fancy pants and cordless, but it doesn’t do anything the bare bones version can’t.  You can build the same projects with a basic jigsaw and a little practice.  That is great news, since as you will see below, you can make some seriously stylish and functional pieces for your home with this tool.  Enjoy!


DIY Scrap Wood Halloween Pumpkins

How to make scrap wood pumpkins with @savedbylovesThese three pumpkins were made entirely with materials I had on hand, which is always a plus! With my huge pile of wood pieces from previous building projects, I am pretty excited when I can use up some of the leftovers. I used my table saw to rip scrap 2×4 into what are essentially wood shims.  You can do that, or use purchased wood shims or paint stirrers. Let’s go make some free pumpkins!

MATERIALS:

Plywood (i used 1/4 inch since that is what we had on hand, but you can use thicker)

2×4 scrap pieces and table saw or pre made wood shims or paint stirrers

Wood glue or construction adhesive

Sharpie

Jig saw

Ryobi Air Strike Cordless nailer

5/8 inch brads

TUTORIAL:

Plywood Pumpkins

Use a sharpie to draw pumpkin shapes on your plywood.  I made three of varying heights and widths.  You can print templates and transfer your design to the wood with transfer paper too.  I just wanted rustic looking pumpkins so I went free hand.

Use table saw to rip wood

To make the wood shims, I set the table saw guide to the thickness I wanted using a shim from another project.

How to make wood shims

Then I just cut my 2×4 scraps using that guide setting.

Scrap Wood ProjectsI cut out my pumpkin shapes from the plywood using my jig saw.

Adhere wood to pumpkin with construction adhesive

I placed each pumpkin on top of side by side wood shims and glued them into place with construction adhesive.

Secure wood shims with air nailer

For added strength, I nailed each shim in two places with my cordless nailer and 5/8 inch brad nails.

Let glue dry overnight

I added weight to my pumpkins and let the glue dry overnight.

Cut with jig saw

Once dry, I cut the excess wood shims off, using the plywood pumpkin as my jig saw guide.

Hot glue twigs for stems

To finish, I hot glued twigs to the back of the pumpkin for the stem!

Check out these other great Halloween DIY projects for your favorite bloggers!
12 Halloween Projects from your favorite DIY bloggers


50 Plus Clothespin Crafts To Make

[pinit]Clothespin Crafts to Make Over 50 Great Tutorials @savedbyloves[pinit]

How have we gone this long without sharing a collection of clothespin crafts? It is a mystery.  Whether you have the one piece wooden peg, or the two piece wood or plastic version held together with a spring, you can use these simple laundry inventions to make some cool stuff.  From home decor, to jewelry, to toys and games for kids, we are all sure to find something we can enjoy in this gallery of things to make from clothespins.

clothespin craft for headphone storage

My personal favorite?  This headphone cord organizer found at Buzzfeed.  

Are you with me on this?

What are your favorite clothespin crafts?  Do you have one we missed?  If so, let us know!

ENJOY!!

DIY Ornaments Christmas in July

[pinit]

DIY Christmas Ornaments with Mod Podge Sheer Colors @savedbyloves Christmas in July

[pinit]

Hi everyone! It’s Colleen, from Just Paint It. You know, every year, it’s the same thing. I tell myself I’m going to do one Christmas project each month so when December comes, I’ll be ahead of the game by eleven projects or so. Every year I fail and right after Halloween the craziness starts and before I know it, the holidays are over and I find myself saying, once again, ‘next year will be different’.

If you’re like me, you’ll enjoy this project. Especially if you like giving handmade presents for the holidays. I love giving ornaments as gifts because it’s something most people will actually use. With this tutorial, you can make a few or more and start checking names off your list before school starts!

So let’s get started!

DIY-Xmas-Ornaments

You’ll need some clear ornaments. These are plastic but glass will work too.

DIY-Xmas-Ornaments

You’ll also need something to ‘tint’ the inside of the ornaments. I used Mod Podge Sheer Colors in aqua and green. It comes in a variety of colors.

You can also tint plain Mod Podge with food coloring and make your own colors.

You just pour the Sheer Color in, swirl it around a bit and turn the ornament upside on a plastic cup or something similar for the excess to drain into.

DIY-Xmas-Ornaments

Now, I won’t lie to you, it takes a long time for this stuff to dry. I even thought I’d done something wrong but no, it just takes a while. I finally took a hair dryer, blew on both the inside and the outside of the ornament. Be careful though. Plastic can soften and glass can get hot!

A friend of mine suggested placing them into a bowl of rice overnight. Apparently the rice will absorb the moisture. Now I wish I’d paid attention in Science class.

DIY-Xmas-Ornaments

Once the color has dried, take a cotton ball moistened with rubbing alcohol and clean the outside to remove any oil from handling them.

If there are any drips around the ornament’s opening, a utility knife will easily remove them. Then put the ornament hanger will fit easily.

DIY-Xmas-Ornaments

You’ll want some place to set the ornaments while you’re painting them. A few split peas or beans in a bowl or the box they came in works great.

Of course, if you use rice to dry the inside then you’re all set.

DIY-Xmas-Ornaments

To decorate the outside of the ornaments, I used Martha Stewart’s Multi-Surface Craft paint in Silver. Since it’s multi-surface, it’ll work fine on glass or plastic. But the other reason I love it is because they make these fine tip tops that screw right on to the paint bottle. Instant puffy paint or paint writer!

I used silver to match the ornament hanger but gold would be lovely too.

DIY-Xmas-Ornaments

Like with anything, you’ll want to practice a bit – even though all we’re doing is basically dots. You still want to get a feel for the flow of the paint thru the tip.

It only requires minimal pressure on the bottle to get the paint to flow. If you have to squeeze it, get a straight pin or needle and remove the clog. Otherwise you’ll wind up with a spurt of paint when and where you don’t want it. Trust me on that.

DIY-Xmas-Ornaments

There’s no right or wrong way to do this. I just start making dots, then I decide if I want to connect them with a line or not.

DIY-Xmas-Ornaments

This is where having a place to set the round ornaments comes in really handy. Although I prefer holding them in my hand while I’m dotting them.

The silver will dry pretty quickly – nothing like the Sheer Colors. The paint will ‘cure’ after 28 days.

DIY-Xmas-Ornaments

That’s all there is too it!

DIY-Xmas-Ornaments

Now you have two less presents to buy. Unless you keep them for yourself.

I won’t tell. I promise.

Thanks so much for hanging out with me today! I hope you’ll come visit me at Just Paint It soon. You can also find me on Facebook, Google+, Pinterest and Instagram. And of course, I’d love for you to drop by my Etsy and Zazzle stores.

signature

Delicious Red White and Blue Easy Salad Recipe

[pinit]Red White and Blue Food Recipes Easy Delicious Salad @savedbyloves[pinit]

Our small group meets weekly for a potluck dinner, with a food theme that determines what we bring.  In light of the upcoming 4th of July holiday, this week’s theme was red, white and blue recipes.  We found a wonderful Red, White, & Blue Watermelon Salad with Watermelon Vinaigrette Recipe at FiveHeartHome.

Fourth of July Recipes

It was super easy and quick to make.  I love the little watermelon stars!  I wasn’t sure how blueberries, watermelon, feta, roasted almonds and the homemade vinaigrette would all hit my tastebuds, but it was wonderful.  It was the “star” of the potluck too.  Head over to the link for the details!

DIY Patriotic Paint Chip Paper Hydrangeas

[pinit]Make Patriotic Paint Chip Craft Paper Hydrangeas @savedbyloves[pinit]

Show your American, upcycling spirit with this patriotic paint chip hydrangea craft!  These make a lovely centerpiece for your summer festivities and Fourth of July party tablescape.  This is a craft the kids can help with for some creative family time during school break.

Patriotic Paper Hydrangea Paint Chip Craft

CLICK HERE TO FOR SUPPLY LIST AND TUTORIAL

50+ Ways to Upcycle CDs and Vinyl Records

[pinit]50 Plus Best DIY Upcycle Vinyl Records and CD projects to make @savedbyloves[pinit]

Since most of us no longer listen to CDs or records, our planet is left with a ton of these seemingly useless items. Today I am sharing with you 50+ upcycle projects that solve this dilemma using some outside of the box creativity. You will think twice before considering old records and CDs to be useless!


Printable Father’s Day Cards Freebie

[pinit]

Free Printable Father's Day Card

Free Printable Father's Day Cards 2014 @savedbyloves[pinit]

I am excited to share with you these fun vintage Father’s Day Card Printables!  Show your dad he is the best ever.  These are sized 5×7 and can be printed on photo paper or card stock, and folded in half as shown.  There are two version.  I hope you enjoy!

Version 1

*Just right click the thumbnail to pull up the full size version and save to your computer, print, or send to your favorite online photo printer.  I used Walmart one hour photo for this and my card with envelope was $0.97!

FathersDay2

Version 2

Fathers Day Printable Card from @savedbyloves

DIY Rustic Home Decor Wooden Cake Stand

wooden-cake-stand-tutorialThe look of wood in the home is something I enjoy having in my home. Especially since I live in an apartment it’s hard to do any change physically to the apartment but adding wood accents help make it homier. I’ve seen wooden cake / cupcake stand in magazines and I just needed to give it a try myself. I decided to go to my favorite place Home Depot and pick up a couple of things to make my rustic cupcake stands.

wooden-slice

I first got the wooden slice of wood from my local craft store. They always have different size woods at the craft store and I always like visiting time to time to find that once piece that is bigger than the rest.

wood-cupcake-stand-sealer (1)

I used sealer to make sure the wood will not dry out or get molding if food or water get on it. Also the sealer will darkened the wood just a little which I really liked.  I used the sealer all around wood slice.

wooden-stand-leg

I got a wooden leg from home depot and sealed it too. They have different varieties but do keep in mind to have something that will keep it balanced.

cupcake-wooden-stand

I attached the wooden leg with wood glue and let it set over night. And now you have your ever own rustic cake stand for you home. I used my cake stand to show off my mother’s day flowers which my little man got for me, he does have good taste.


Stay Crafty!

Dollar Store Craft DIY Mercury Glass Votive Holder From Martini Glass

[pinit]How to Make Mercury Glass Candle Holder[pinit]

I am excited to share with you this Dollar Store Craft, a lovely DIY mercury glass candle holder.  I made it from the stem of a dollar store martini glass and a dollar store candle holder!  Read on to see how I removed the stem and attached it to the holder, and how I created the mercury glass finish with Krylon Looking Glass Spray Paint.

SUPPLIES:

DIY Mercury Glass With Looking Glass Spray Paint

Dollar Store Martini Glass

Krylon Looking Glass Spray Paint

Martini Glass

Glass Cutter

Butane Micro Torch or candle and lighter

Bucket of cold water

Coarse sand paper or grinder with diamond bit for glass

E6000

TUTORIAL:

Make a score line around the stem of the martini glass at its top where the stem meets the upper part of the martini glass.

How to cut glass

Apply heat to score line and submerge in cold water to separate the stem at the score line like I showed you in this DIY Wine Bottle Rings tutorial.

Sand or grind top of separated stem to give a flat surface for gluing to the bottom of the glass candle holder.

Dollar Store Craft

Here is the glass I used to glue onto the stem of the martini glass.  I used E6000 on to attach two pieces, and placed the glued pieces against the wall for support while drying.  Let dry several hours before applying the mercury glass finish in the next steps!

DIY Mercury Glass Tutorial

Mercury Glass DIY

Pour Epson salt into the glass so that to about one inch from the bottom.  It is not important to be exact here.

 In a well ventilated area with protected work surface, spray looking glass paint inside of the glass at the rim. Make sure to follow instructions on label. You want to shake the can vigourously before using.

Shake the glass a snow globe (holding your hand over the top), so that the salt grabs the paint and drags it around. This will create the mercury glass look.

Repeat steps 5 and 6 a few more times, allowing each coat to dry for about 5 minutes before applying the next. Stop when are happy with the look!

Privacy Policy