Valetine’s Day DIY Projects from Plucking Daisies

[pinit]

DIY Handmade Valentine's Day Decor @savedbyloves[pinit]

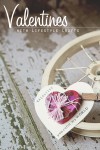
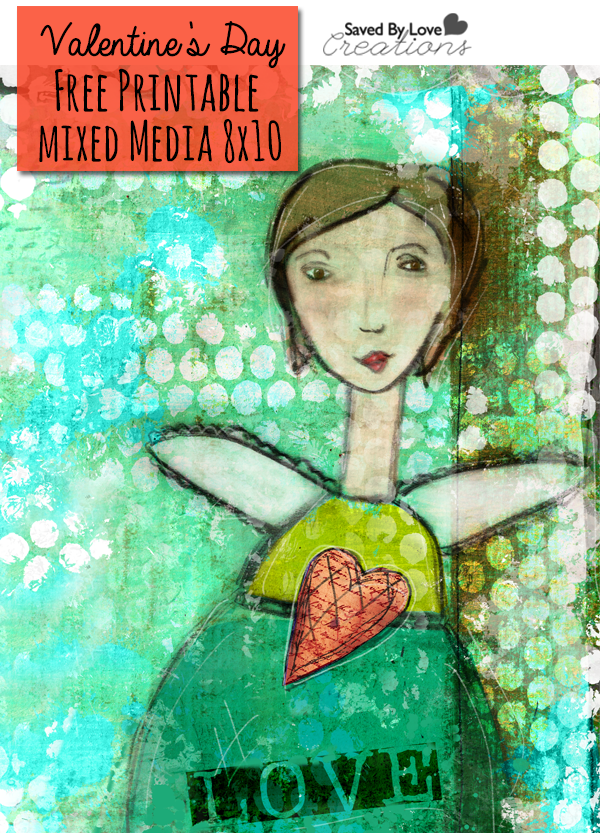
My friend Amy at Plucking Daisies has some fun DIY  Valentine’s Day projects that I want to share with you today.  I have always loved her style.  It all started over Sizzix and paper flowers.  She is my flower hero! The two of us have only spent time together in real life twice but it seems like we’ve know one another since childhood.  She brings me such joy, both through her art and her friendship.  Check out her mad skills and be inspired!


Recycled Cardboard Heart Banner | @PluckingDaisy #AliceInWonderland #Sizzix #RangerInk #DIY

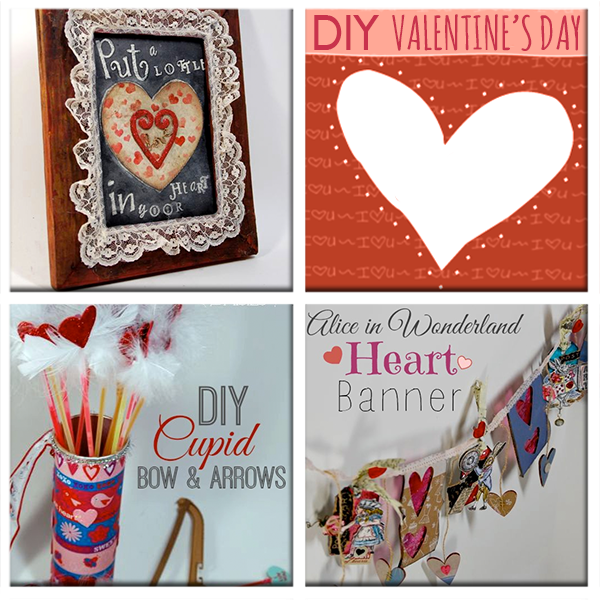
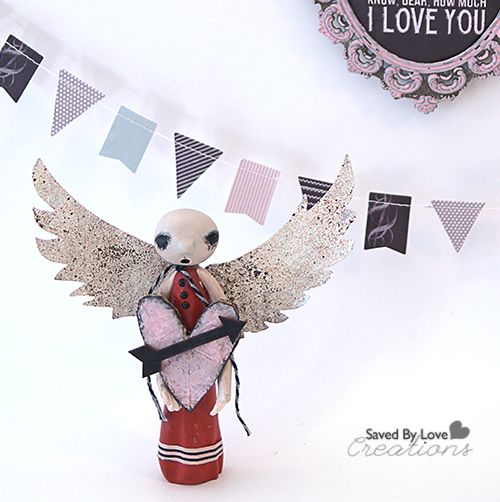
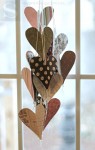
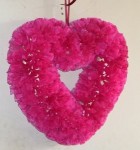
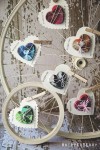
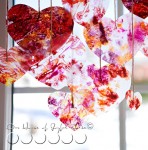
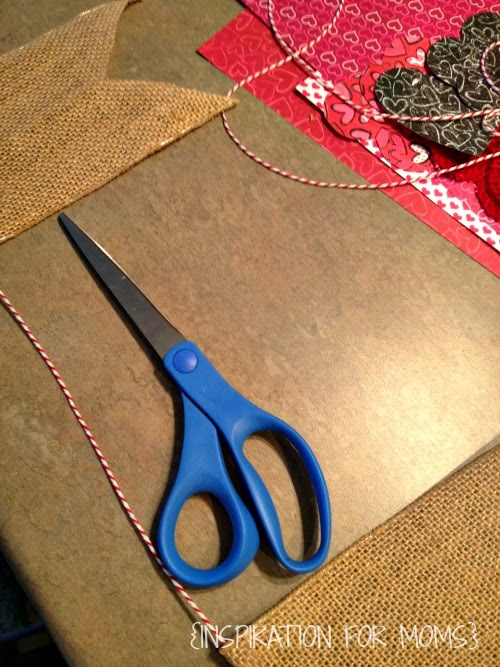
 Recycled Packaging Heart Banner

Cupid's Arrow Valentines | @PluckingDaisy #ValentinesDay #KidsCraft

DIY  Cupid’s Arrow Valentines 

Faux Barn Wood Chalkboard Frame | Pluckingdaisies.com

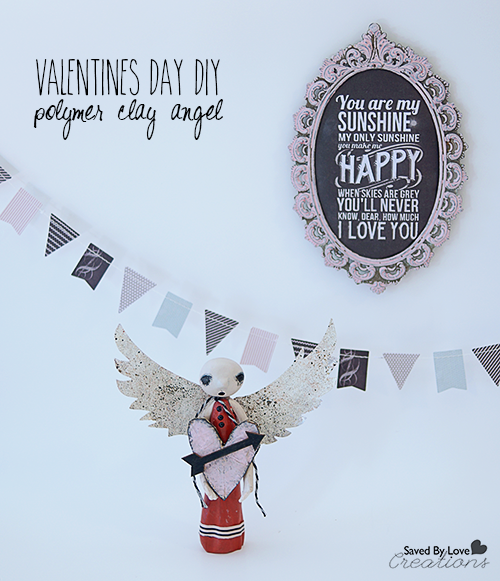
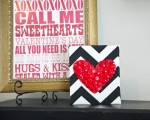
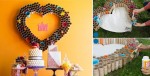
Faux Barnwood Chalkboard Frame

Printable Chalkboard Valentines with Duck Brand Prism Stickers | Pluckingdaisies.com #DuckBrand

Printable Chalkboard Valentines

Bitter Conversation Hearts Valentine's Day Centerpiece | Pluckingdaisies.com

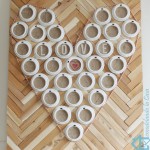
Bitter Coversation Heart Centerpiece

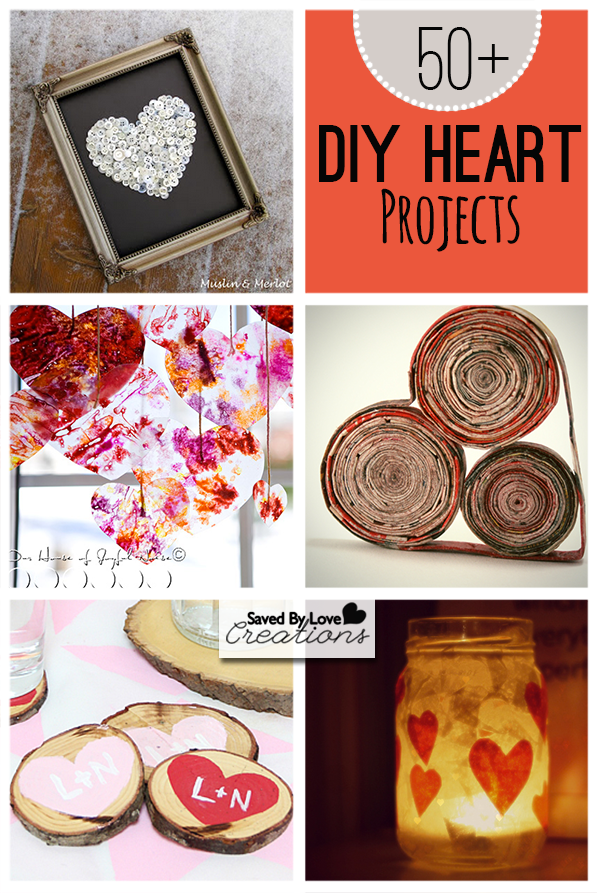
Find over 50 ways to decorate for Valentine’s Day:

50+Valentine’s Gifts to Make

Easy Gift Wrap Image Transfer Valentine’s Day Frame

[pinit]

Valentines Day Gift diy

[pinit]

Today Cyn from Creative Cynchronicity is here to share a super cool image transfer technique using gift wrap and Mod Podge.  I can’t wait to try it out and I think you will feel the same way.  Enjoy!

My daughter is getting married this spring so when it comes to Valentine’s Day, I’m thinking of things that will also work in relation to the upcoming nuptials. Since we have some lovely engagement photos around here in need of framing, I decided that the perfect Valentine gift for my daughter and her fiance would be a pretty heart shaped frame. Not only that, but I’m currently planning the bridal shower and it’s going to be all vintage-y and pink and romantic so this works perfectly for that too.

Easy Image Transfer Using Mod Podge and Giftwrap for a Valentines Day Frame @savedbyloves

SUPPLIES:

Mod Podge

Gift Wrap

Newspaper

Frame or other surface to transfer onto

Foam brush

Acrylic or Chalky finish paint

Sandpaper

Brayer, rolling pin or credit card

 photo valframe6pic_zps3c07250d.jpgI started with one of these simple, inexpensive wooden frames from Michaels and some leftover wrapping paper. You want the paper to be pretty bright because once we transfer it onto the frame, it will come out much duller and lighter. The other supplies you’ll need are: Mod Podge, a foam brush (confession: I prefer to use my fingers!), scissors, scraps of newspaper or book pages, some paint (I’m using Deco Art Chalky Paint because I feel it has just the perfect finish for this vintage feel I’m going for) and a small scrap of sandpaper. A brayer or a rolling pin is great to have on hand too but if you don’t have one handy, you can just use the Mod Podge bottle.

TUTORIAL:

 photo valframe7pic_zps2c6bb7dc.jpgNow, check your frame before you get started to see if there are any little rough edges that could use a bit of a sanding. Spread some Mod Podge all over the front of the frame. Here’s a little hint: If you want to try to get more even coverage, spread a medium layer of Mod Podge on the frame ensuring that you get it all over, including right in the corners and all around the heart shaped opening. I put mine on somewhat sporadically because I really wanted to get a “shabby chic kind of effect” with it. Even if you do get complete coverage, just remember that this is not a perfect transfer process and it will still come out looking somewhat distressed.

 photo valframe8pic_zpsad13d204.jpgLay your paper face down onto the Mod Podged frame and here’s where your brayer or rolling pin can come in handy for getting good adhesion to the frame. Leave the paper on the frame for about a minute or so. You want to be able to remove the paper from the frame – you don’t want it permanently adhered! – but you also want some of the design to be left behind. You can take a peek by carefully lifting up a corner of the paper – as you start to peel it away from the wood, there should be a bit of tension and you should see some of the paper’s design on the wood.

 photo valframe10pic_zps06ee3403.jpgYou’ll have some bits of the white backing of the paper left behind as well as the printed part that you want there. Dampen your fingers and rub gently to take away some of that backing. I left a bit behind, once again to add to that aged quality of the project.

 photo valframe11pic_zps97588b29.jpgTo add to the interest of the design, I used some bits of newspaper in some of the areas where the wrapping paper didn’t really adhere. I followed the same Mod Podge procedure that I did with the wrapping paper.

 photo valframe13pic_zps6e85f25c.jpgOnce I was finished with putting on any of the papers I wanted, I went on to the paint. Now, even if you were using the foam brush for the Mod Podge application, I strongly suggest you use your fingers here. I found I had better control of the paint which is important because I didn’t want it all over the frame. I was strategic in applying small amounts of the paint very lightly to small sections of the frame and then using my finger to spread and blend it out so that it had a lovely transparent quality to it.This was also when I painted the edges of the frame. Once the paint was dry, I used a bit of sandpaper then to go over the whole frame, roughing up and distressing the paint and paper to finish off the aged, vintage look of it.

 photo valframe3pic_zps162c7b86.jpgSeal your project with a top coat of Mod Podge and let it dry. You could write a poem or message in the center of the frame or add a special photograph and you’re all set with a gift for your favourite Valentine!

DIY Wreath & Bouquet from Dollar Store Soaps

[pinit]
Super easy and cheap DIY; Dollar Tree Soap Rose Wreath and bouquet tutorial @savedbyloves[pinit]

Dollar Store Wreath Tutorial


Ok, I will admit, I am pretty proud of this Dollar Store Craft.  I made the rose bouquet and wreath from rose soaps I found at Dollar Tree!  You get 9 in a package and at one of the Dollar Tree stores near me, I found them 2/$1.  It took 12 packages for the wreath and 4 for the bouquet.  Not only are these gorgeous, but they smell good too.  Just don’t put them outdoors.  Rain is not this project’s friend!

Dollar Store Valentine's Day Craft

The soaps come in white, pink and red, perfect for Valentine’s Day!  I plan on making an all white one for year round, since it is just so beautiful!

SUPPLIES:

Wreath Form or foam board and circular objects to trace and cut out a wreath form of your own

Scissors

Hot Glue Gun and sticks

Rose soaps

Additional Supplies for bouquet:

How to Make a Bouquet

Floral Wire

Round nose pliers

Vase

TUTORIAL:

Wreath form DIY

For the wreath, cut out your wreath form if you are making one.  If you have one, skip this step!  I traced a wreath form onto foam board.  I wanted a flat surface instead of the dimensional wreath form.  Cut out with scissors.

DIY Rose Wreath

I decided to go in color block sections.  Lay out your design then glue roses onto wreath form with hot glue gun.

Dollar Store Wreath Tutorial

Hot glue a loop of string on the back and your wreath is ready to hang.

Now for the Bouquet:

How to make a Valentines Day Rose Bouquet

Cut wire 8-10 inches or your preferred stem length.  Start a loop at one end with your pliers.

How to Make a rose Bouquet

Remove wire from pliers and use fingers to continue spiraling as until you get something like the above shot.

DIY Rose Bouquet

Add a dab of hot glue to the base of the flower.

DIY Valentines Day Gift Idea

Glue wire spiral onto flower base.

How to make DIY Rose Bouquet

When you have enough flowers, place in a vase and you are set!

Dollar Tree Soap Rose Wreath @savedbyloves

DIY Chalky Glitter Heart Mason Jar Votive Holders

[pinit]DIY Chalkboard paint Mason Jar Valentines Day Lanterns @savedbyloves [pinit]

Today I am sharing how to make these fun chalk and glitter paint mason jar lanterns.  They are super simple to make, and will compliment your Valentine’s Day decor perfectly.  Let’s get started!

Valentine's Day Mason Jars

SUPPLIES:

Mason Jars

Deco Art Chalky Finish Paint in Everlasting

Deco Art Crystal Glitter Glass Pain in Red

One inch paintbrush or foam brush

Adhesive Jewels

Heart Stickers or Cut out hearts from Foil tape with paper punch or Sizzix Heart Die

Rubbing alcohol

Lint free towel

TUTORIAL:

Mason Jar Lanters

Clean mason jars with alcohol and lint free cloth, then paint with red glitter glass paint by DecoArt.  Let dry completely then place heart stickers where you want your hearts to be.  I used foil tape and my sizzix heart die because The foil sticks well and the paint won’t seep under in the next step.

How to Paint Mason Jars Chalkboard

Use a soft brush to paint on chalky finish paint.  I liked the look of the red showing through a little, so I just did one coat, but you can let dry for 30 min and add another coat of you want a whiter look.  When you have painted on your final coat, use tweezers to carefully remove heart stickers after about 10 minutes.  You don’t want to let your project dry completely with the stencils still adhered.  If you do, you run the risk of peeling away adjacent paint when you remove them.

Mason Jar Valentine's Day Craft DIY

Apply adhesive rhinestones to jar lid as shown in pics, insert candle and that is the end!

DIY Painted Valentine’s Day Coffee Mugs

[pinit]DIY Painted Valentine's Day Mugs
[pinit]

Hi there! My name is Colleen and I’m so excited to be a new contributor here. I blog at Just Paint It and, as you might guess by the name, I do a lot of paint projects.

While I am an artist, I am completely self-taught and nothing brings me more pleasure than helping others create their own ‘masterpieces’. . . even if they are cute l’il painted mugs.

Painted-Mug-A

I picked these guys up at the dollar store. You might not be able to find the exact style but any white mug will work for this project.

Once you’ve cleaned the mugs with soapy water and they’ve dried, take a cotton ball and rubbing alcohol and go over the areas that’ll be painted. Let air dry.

The alcohol removes and traces of oil left by your fingers that would prevent the paint from adhering.

Painted-Mug-B

There are now a few different companies that make “multi-surface” paint. I happen to love Martha Stewart’s for a few reasons:

1) there are different sheens in the same color way, like the Pearl finish I used on these mugs, and

2) she has tips that screw on to the bottles allowing you to use the paint as a writer or for detailing. You’ll see more about that one below.

Painted-Mug-C

Since these mugs already had little oval indentions, I used those as a base for my “pattern”. I used two coats of Satin finish, allowing each one to dry thoroughly.

Painted-Mug-C1

Next, I applied two coats of the Pearl finish in the same color as the basecoat. You could easily leave the Satin as it but the Pearl adds an extra shimmer which is really pretty.

Painted-Mug-D

Since Valentine’s Day is right around the corner, I painted a couple of hearts with the Satin paint – two coats – and followed up with Pearl in the same color.

Now, if you’re a little uneasy about painting the heart freehand, I have a little “secret” that might help. Of course, if you have a stencil, you could always use that too but I like the relaxed look of the hearts not so matchy-matchy.

Painted-Mug-E

Okay, if you’re like me, sometimes it’s hard to ‘stay within the lines’, right?

Here’s a super easy way to “erase” a paint boo-boo:

Painted-Mug-F

Get a clean, slightly damp paintbrush and carefully stroke it once across the paint needing to be removed. Then rinse, blot excess water on paper towel, and repeat as needed.

Painted-Mug-G

This little ‘eraser’ saves loads of time and aggravation, believe me.

Now that you have some blocks of color and a couple hearts painted, you can add some detailing. Don’t panic! This is easy-peasy stuff.

Painted-Mug-H

As I mentioned above, Martha’s craft line includes a set of three different-sized tips that screw right on to the paint bottle. Love that.

If you’re not using Martha’s paint, you can get little squeeze bottles but since you only need a smidgen of paint, it’s not really worth the time and trouble.

Painted-Mug-I

Using the Pearl paint, I outlined the color blocks and then squeezed a few dots here and there. No big deal.

You could also use the end of your paintbrush to “dip-dot” too. Dip dots are so much fun and you can even make flowers with them!

Painted-Mug-J

You’ll want to “cure” the paint so the mugs will be washable – either by hand or top rack in the dishwasher.

You can either let them air dry for 21 days or if you’re impatient like me, use the oven. Set the mugs on a rack in a cool oven, turn it on to 350 degrees and bake for 30 minutes. After 30 minutes, turn the oven off; let the mugs cool completely in the oven. Painted glass should heat up and cool down in the oven. Set aside for 72 hours.

Painted-Mug-K

Aren’t these fun? If you paint two, you’ll either have a set or one to give away and one to keep!

And by all means, feel free to create your own design too! Painting glass and ceramic is great because if you don’t like the way something looks, you can just wipe it off with a damp towel and start over (as long as it hasn’t air cured for 21 days).

Thanks so much for hanging out with me today. I’ll see you again next month with another fun paint project. In the meantime, please drop by Just Paint It and say hi. I’m videotaping Spring classes that should be ready in a few weeks. You can also find me on Facebook, Google+, Pinterest and Instagram too.

signature

Polymer Clay Valentine’s Angel

[pinit]

Polymer Clay Tutorial Valentine's Day Angel[pinit]

It has been awhile since I brought you a polymer clay project, and today’s is a sweet Valentine’s Day angel for you to love!  The inspiration for this project came from Prims, a publication I recently started enjoying.  It is a simple process that requires just a few basic supplies.  Most of the shaping of the clay is done by hand.  Other than the clay, all you need is acrylic paint, and some paper crafting embellishments to create your own whimsical figure!

Prims Magazine

Here is the publication that gave me the idea; Prims Holiday Edition .

Prims

Tina Haller made these adorable Halloween clay dolls.  I went with a Valentine’s Day version!

TUTORIAL:

Polymer clay doll tutorial

Create the head, arms and body in separate parts with conditioned polymer clay.  I used scrap clay for this part.  I wasn’t sure what color I wanted in the end, but it didn’t matter since I knew I could paint the doll whatever color I wanted with acrylic paint.

The arms are long and skinny, which lends to the creepy Tim Burton kind of feel.  I used scissors to cut the fingers.  For the red gown, I used a marker to shape the rolls.  Just use what you have on hand.  The most useful sculpting tools you have are your fingers.

For the eyes and lashes and mouth, use a toothpick or needle tool to etch the lines.  Pinch with fingers to make the nose.   Bake each piece with wire inserted where it will attach.   I bake at 250° for 1 hour.


Polymer Clay Tutorial DIY Valentine's Day Angel mixed media @savedbyloves

Paint the pieces as desired.  Attach together with super glue, which works great for polymer clay.

For the wings, I used aluminum cans and cut them with the Sizzix Angel Wings Die.  I embossed with a dots folder and used ICE enamels by Susan Kazmer.

The heart I cut from corrugated cardboard and covered with washi tape, which I then painted with Distress paint pink.  I outlined the edges with my Black Soot Distress marker.

Polymer Clay Valentine's Day Angel DIY

The sign, bunting, washi tape and bakers twine are all from Rhonna Farrer’s Chalk Studio Collection with My Mind’s Eye.  This is my new obsession.  I love all of the paper, embellishments and washi tape in this fantastic line!  I found it at Joann Fabrics.

That is it.  I hope you enjoyed this little angel!


50+ Heart DIY, Crafts and Jewelry Projects to Make

[pinit]

Heart Crafts Valentine's Day Ideas[pinit]

It’s all about hearts today, with this collection of over 50 DIY heart projects you can make. You will spy jewelry, crafts, wall decor, clothing and more, sure to inspire your Valentine’s Day festivities.


Mixed Media Valentine’s Day Free Printable + iPad Art Journaling App

Procreate and scanned mixed media are used to create this free Valentine's Day 8x10 Mixed Media "Love" printable #mixedmedia #valentinesday #freeprintable @savedbyloves[pinit]

Today at Printable Decor, I am sharing this mixed media LOVE Valentine’s Day Free Printable.  I made it using some hand sketched elements scanned into the computer, then edited in my favorite new art journaling iPad app, Procreate.

scan art for #procreate #digitalartjournaling #artjournal

You can incorporate your own hand drawn elements via your touch screen, using the amazing selection of mediums for any brush stroke or line you would like to create.  This piece was a pencil out line of the woman on white paper I scanned in (see above), placing over a fun background in Procreate, where I changed the blend mode to multiply.  This leaves just the dark outline and gets rid of the white space.  I painted her all in the app, decreasing the opacity of the painted layers so that the background was visible underneath the skin and clothes.

You can save your files as PSD for further editing in Photoshop if you would like.  Procreate also uploads and downloads directly to dropbox.  Love it!  Super addictive and a great way to journal on the go.


DIY Burlap Hearts Valentine’s Day Banner

Hi there! My name is Laura and I’m so excited to be contributing on Saved By Love Creations! Today I will be sharing with you a super easy Valentine’s Day craft.

[pinit]

[pinit]

All you need to make this lovely Burlap Valentine Banner is some scrap book paper, a few burlap hearts, a roll of burlap, some baker’s twine, scissors and a glue gun. Basically any  crafters essentials! 🙂

The first step was to make my hearts. I used my burlap hearts as a guide for tracing my hearts on the scrap book paper.

After I cut out my hearts it was time to make my individual burlap banner. I cut my my first burlap banner at 7 inches long. I then folded it in half and cut at an angle to make the triangle cut. To make sure all the entire banner was cut to the same size, I used this one as a guide for cutting.

After the burlap was cut, I folded the top of each piece over about an inch to create a lip for the twine.

Next it was time to measure my twine. I knew that I wanted to do three rows in a zig-zag type of pattern.  So I decided to even out burlap banners to three per row.

I took the twine an laid it on the counter and placed my burlap pieces on top. I just used my scissors to space them out. (I’m a very hard-core crafter, can you tell?)

When I got everything spaced just right, I placed the twine inside the lip and a little hot glue and then pressed it close. 

I flipped the banner over and then attached my hearts with some hot glue as well.

That’s pretty much it. I just repeated those step to make all three rows.

I love how the banner adds a subtle touch of Valentine decor to my home without going over the top. 

I hope you enjoyed this easy holiday craft. If you would like to see more of my projects or keep up with my latest updates, follow me onFacebookPinterestTwitterGoogle+ or Instagram.

For More Valentine’s Day Crafts, Gifts and Decor, check out SBLC’s 50+ Valentine’s Day DIY Gift Ideas and 50+ Valentine’s Day DIY Decor Ideas!


Quick and Easy DIY Valentine’s Day Gift Idea

This simple and quick Valentine’s Day gift idea from Barbara at Chase the Star is just my kind of project.  It would be great as a centerpiece and teacher gift too!  Welcome the first contribution from this super creative blogger…

Hey everyone! I’m Barbara from Chase the Star, and I’m thrilled to be a brand new regular contributor! At my blog I write about my adventures in decorating, crafting, cooking, parenting, and all things in between. I love to be creative and but I don’t like to spend too much time or money, so a girl’s gotta improvise, reinvent, and repurpose whenever possible!

It’s just about time to start planning for Valentine’s Day! For my very first post I’m sharing an easy and inexpensive DIY gift idea for a special someone in your life!

DIY Gift Idea for Valentine’s Day

Valentines Gift via Chase the Star for Saved By Love Creations #conversationHeart #candyHeart #valentine #modPodge #decoupage #chalkboard #diycraft #craft #gift #repurpose #bucket

A galvanized mini bucket can be used so many ways! Today we’re going to decorate it and use it to hold ‘conversation hearts’ (or ‘candy’ hearts) for Valentine’s Day:

Materials:

A small bucket (mine was from the thrift store)

Paper (gift wrap, craft paper, newspaper, any type of paper will do)

Decoupage medium (such as Mod Podge)

A small brush

A bag of ‘conversation hearts’

Optional:

Chalkboard cupcake toppers

Ribbon

Repurpose a galvanized bucket for a sweet Valentines Gift via Chase the Star for Saved By Love Creations #conversationHeart #candyHeart #valentine #modPodge #decoupage #chalkboard #diycraft #craft #gift #bucket

Step 1:

Cut the paper into pieces that will fit around your bucket.

Step 2:

Decoupage!

Add the paper pieces one at a time by brushing a light coat of decoupage onto the bucket, then gently placing the paper over it, and pressing it firmly with your fingertips. Get it as smooth as possible but don’t worry about it wrinkling, you can fix that later. Let that set for a few minutes, then add another light coat of the decoupage over the entire piece. This time be sure to smooth it out completely with your fingertips, carefully. Allow it to dry for about 30 minutes.

Decoupage a small bucket for a cute Valentines Gift via Chase the Star for Saved By Love Creations #conversationHeart #candyHeart #valentine #modPodge #decoupage #chalkboard #diycraft #craft #gift #repurpose #bucket

Step 3:

Fill it with the candy hearts, and you can add a cute touch by inserting a chalkboard cupcake topper or any other type of topper! I used these from American Crafts:

DIY an Easy Valentine's Day Gift via Chase the Star for Saved by Love Creations

To complete the project I tied some satin ribbon in a bow to the handle.

Easy Valentines Gift via Chase the Star for Saved By Love Creations #conversationHeart #candyHeart #valentine #modPodge #decoupage #chalkboard #diycraft #craft #gift #repurpose #bucket

I love this idea for a teacher’s gift, a nice treat for your neighbor, or even to pass out at work! Kids will love this too!

Have you started to plan your crafting for Valentine’s Day?

For more DIY ideas stop by Chase the Star, and follow me on Facebook, Google+, Pinterest, and Instagram!

See you next time!

signature

Privacy Policy