Upcycle Wine Bottles to Terrarium Wonderlands

Wine-Bottle-Terrarium-Photo 
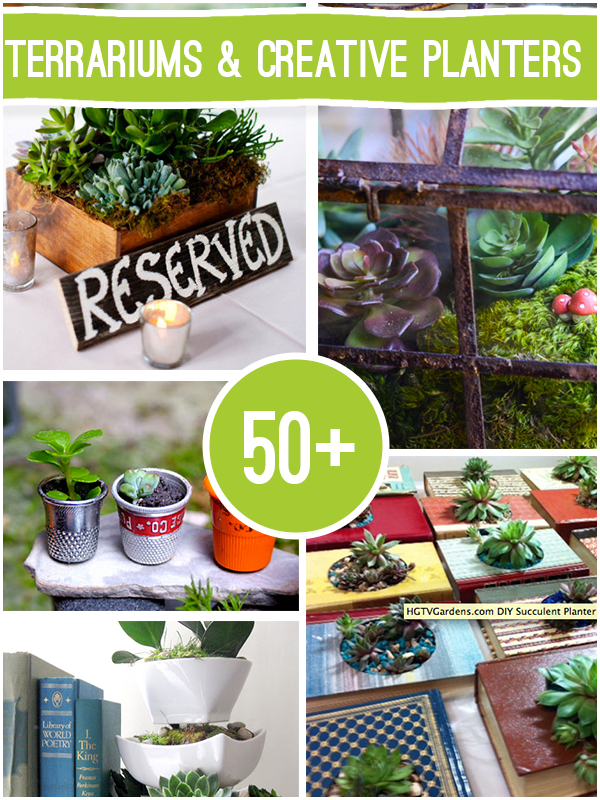
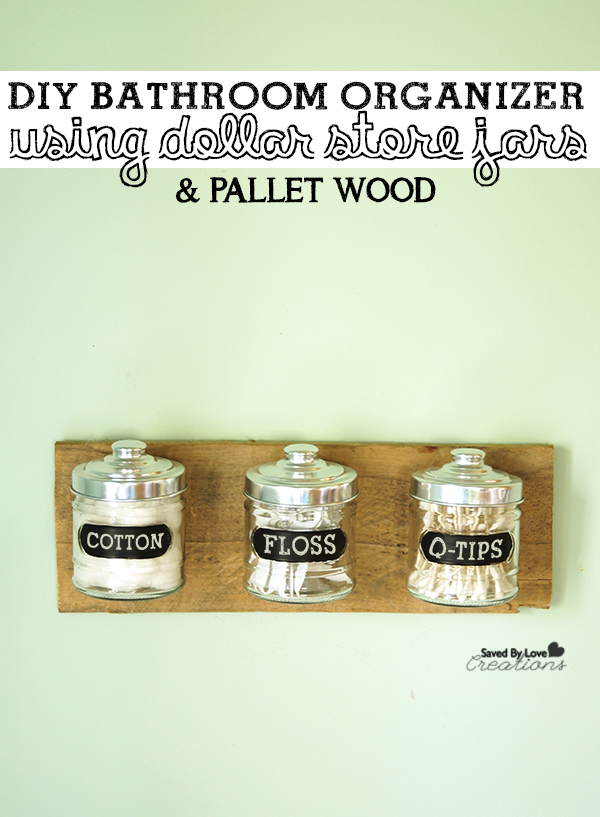
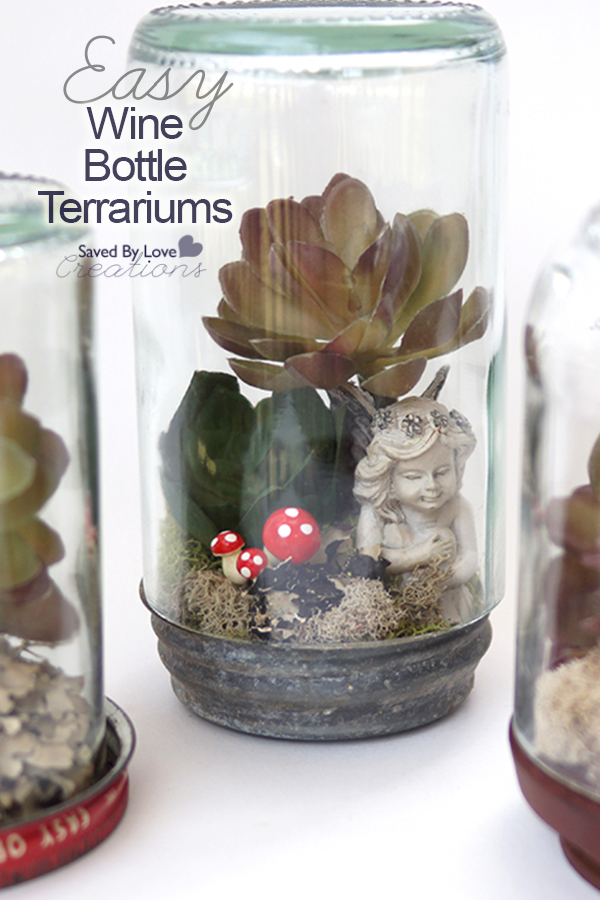
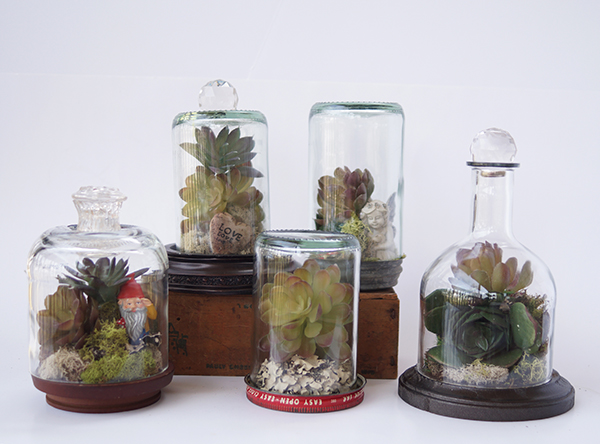
Do you love eco-friendly crafts?  How about succulent plants?  Combine the two by creating your own whimsical land of tiny garden fairies, mushrooms, moss and more with this DIY terrarium wine bottle world.  This project is simple is completed using artificial moss and succulents for those of us with less than a green thumb.  What great gifts, home décor and centerpieces for your woodland themed birthday party these would make!

SUPPLIES:

Wine Bottle Terrarium Photo 1


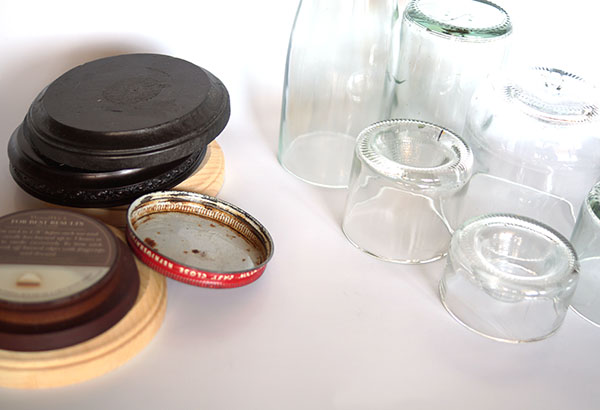
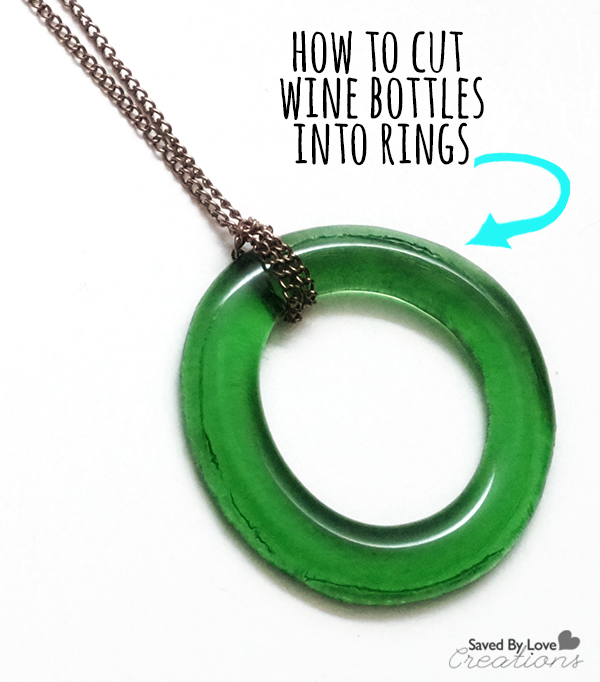
 -Cut wine bottles with varying heights (See How to Cut Wine Bottles)
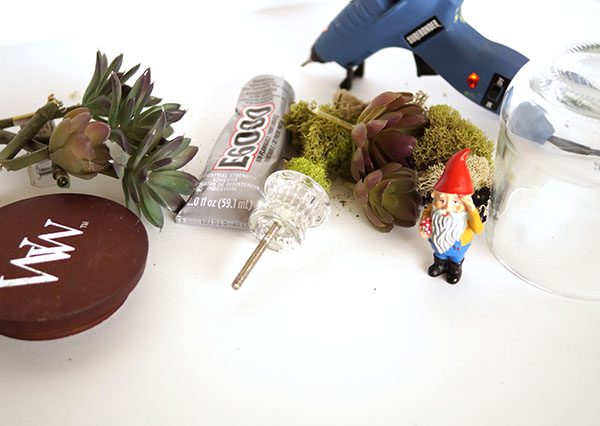
Wine Bottle Terrarium Photo 2

-Artificial Moss

-Various artificial succulents

-Hot glue gun and sticks

-mini mushrooms, fairies and gnomes (found in most hobby stores for doll houses and miniature trains)

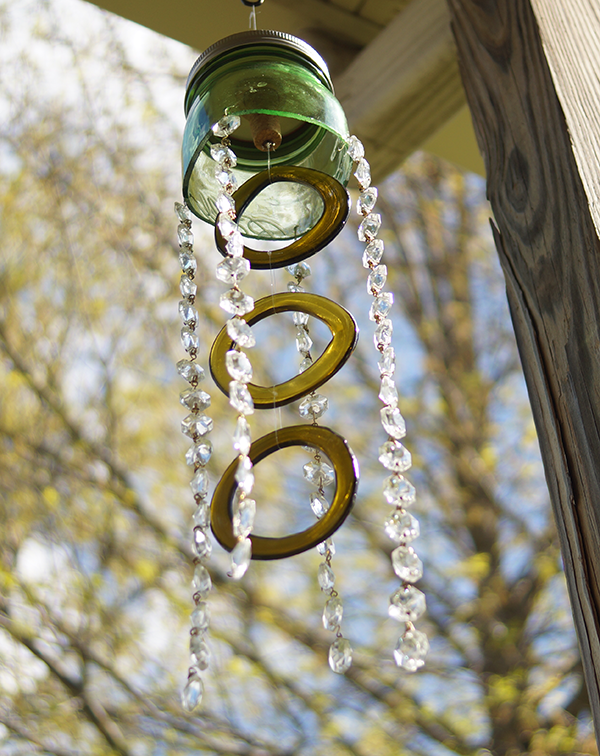
-Glass knobs or big glass prism or crystal beads

-E6000

-Latex or nylon gloves are optional

-Various round objects for the base of your wine bottle cloches; jar lids, candle lids, etc.

 TUTORIAL:

Wine Bottle Terrarium Photo 4

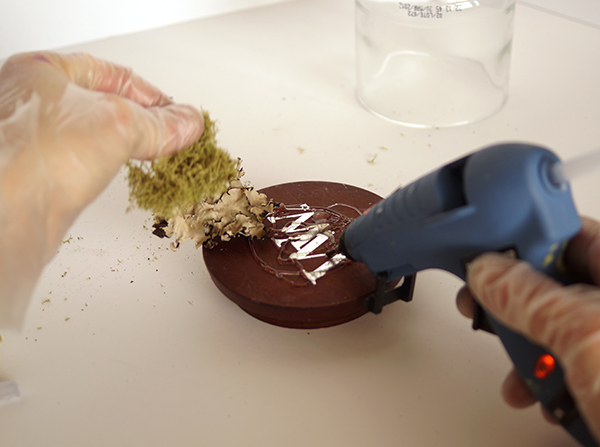
 Clean the surface of your cloche base and begin hot gluing your moss and filler.

Wine Bottle Terrarium Photo 3

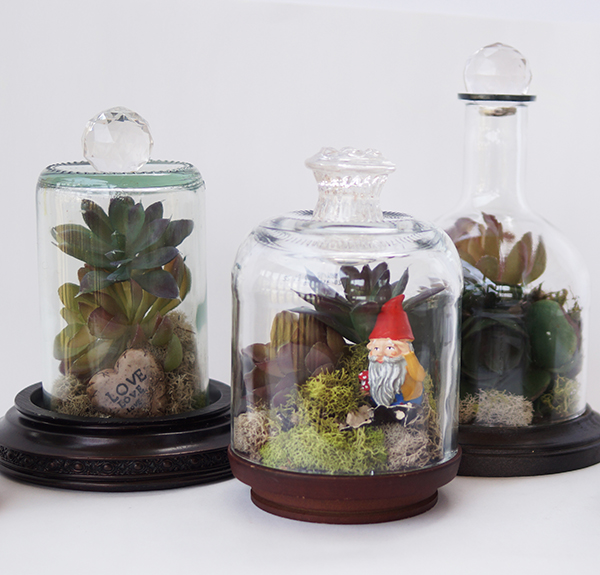
 Build with layers, adding miniatures and succulents.

Wine Bottle Terrarium Photo 5

  When you are satisfied with your scene, place your cut wine bottle cloche top over the tiny world you created.  You can glue this if you would like.  I left mine removable so I could change things later.

 Wine Bottle Terrarium Photo 6

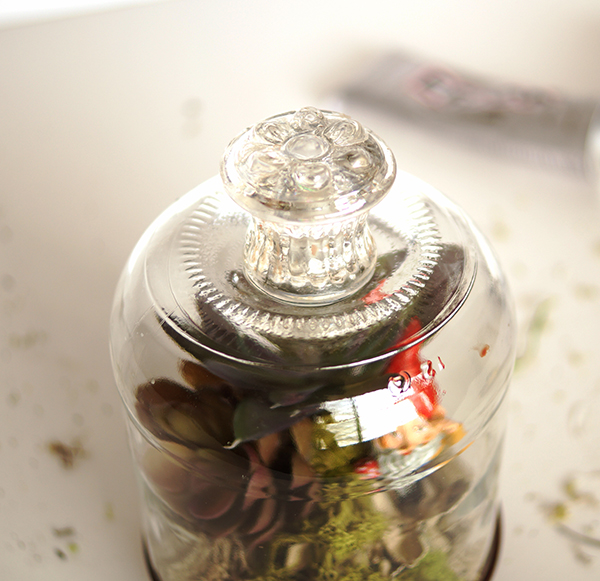
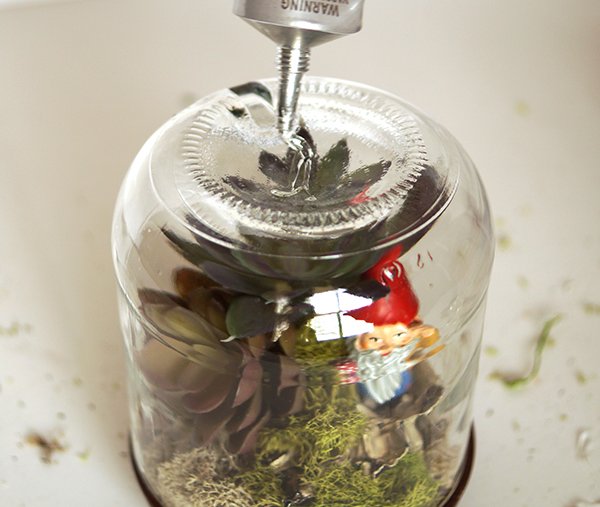
To add a special touch, use E6000 to glue a knob or glass bead to the top.

Wine Bottle Terrarium Photo 10

EXTRA TIPS

○ Cut the metal threading  off of antique flea market drawer pull using bolt cutters, for a flat surface you can glue onto the top of your cloche.

Wine Bottle Terrarium Photo 8

If you like this post, you don’t want to miss:

50+ Wine Bottle Crafts to Make 

50+DIY  Terrarium Projects to Make

DIY Easy Cork Monogram Earrings

[pinit]Mongram Cork Earrings[pinit]

 Did you know that wine corks can be sliced into disks, painted, inked and stamped to create beautiful custom jewelry.  Not only are these monogram stamped earrings stylish and eco friendly, but they are light as a feather.  The customization possibilities are infinite!  Follow the steps below to make your own, or use the same process to make pendants, charm bracelets and wine glass tags!

Monogram Wine Cork Earrings DIY Upcycled Jewelry from @savedbyloves

CLICK HERE FOR MATERIALS LIST AND TUTORIAL


DIY Wedding Gift Art

Hello friends! It’s Barbara from Chase the Star, as always elated to be here!

It’s wedding season! Whether you’re planning a wedding or going as a guest, you can’t deny that new nuptials are all around us.

[pinit]

DIY-Wedding-Art-via-Chase-the-Star-for-Saved-By-Love-Creations-wedding-diyArt-DIYcraft-silver

[pinit]

Although I’m already happily married, I am about to celebrate a milestone anniversary, 10 wonderful years! So many weddings are DIY these days, and they look amazing! For all of the brides to be, I have a pretty and easy to make craft for your wedding decor, that can even be used in your home later on!

DIY Wedding Art

Here’s what you’ll need:

Wood plaque

Wood applique

Wood letters and ampersand

{I picked all of these up at Michael’s}

Glue gun/glue stick

Silver and white craft paint {or any color combination you like}

Make DIY Wedding Art or Gift 550px

DIY Wedding Art 550px

How to Make DIY Wedding Art:

Step 1:

Paint the wood pieces. I used silver on the plaque and letters, and white on the applique.

550px DIY Wedding Art

Step 2:

After all of the pieces have dried, glue the applique to the plaque with the glue gun. Then, glue the letters to the applique in the pattern you like.

Step 3 {Optional}:

Glue a 2 inch strand of jute or heavy string to the back of the plaque, or a saw-tooth hanger for easy hanging!

I bet this would be gorgeous in gold too! Any combination of colors to go with your wedding or home decor makes sense. I also love this idea to use as a family crest, or to give as a gift, there are tons of possibilities.

DIY Wedding Art via Chase the Star for Saved By Love Creations #wedding #diyArt #DIYcraft #silver

This will be up on my bedroom wall just in time for our big anniversary!

Check out my DIY Wedding round up for more ideas. For more crafts, recipes and home decor visit me at Chase the Star, and on Facebook, Google+, Pinterest, and Instagram!

Until next time friends!

New Signature

Stenciled Burlap Bags Vase Wraps

[pinit]Stenciled-Burlap-Bags-DIY @savedbyloves[pinit]

Hello! It’s Colleen and I’m back with a fun paint craft today. Are you a fan of burlap like I am? I saw these little burlap bags in that store that starts with Wal and ends with Mart and couldn’t resist them. A set of 3 for under $3? Oh yeah. I would’ve bought more but I had no idea what I was going to do with them.

They’re not quite large enough for wine bottles so that was out. They’d make cute party favors but I’m not throwing any parties. And I simply couldn’t wait for the holidays – although I did buy another set so I’d have them for Christmas presents.

They are the perfect size for canning jars. But who wants to cover up Mason jars, even with burlap? I just grabbed some regular ol’ jars, filled them with water, slipped them inside the burlap bags and made a cute burlap vase!

However the only thing cuter than burlap is painted burlap so let’s paint!

Stenciled-Burlap-Bags

Supplies:

  • Burlap Bags (available at Walmart and craft stores)
  • Mod Podge peel ‘n stick stencils
  • Sharpie marker
  • Stencil Pouncer or foam brush
  • #8 paint brush
  • piece of cardboard to fit inside the bag
  • painter’s tape (optional)
  • wax paper (optional)

Paint:

  • Folk Art Calypso Sky (for the dragonfly)
  • Folk Art Fresh Cut Grass
  • Folk Art Aqua (for the butterfly)

Stenciled-Burlap-Bags

We’re going to start with stenciling the bags. Usually stenciling burlap is tricky because of the weave and the nubbiness. But Mod Podge just came out with a line of stencils that are self-adhesive that I just love.

Stenciled-Burlap-Bags

These stencils adhere pretty well to the burlap but I found if you lay a piece of wax paper underneath the bag, when you lay the stencil over it, the edges will grab the wax paper and anchor the stencil so it won’t move. I also put some painter’s tape on both sides but that was to protect the burlap from over-stenciling.

Stenciled-Burlap-Bags

After your stencil is placed, load your pouncer or foam brush with the green paint. Then tap it a few times on a paper towel or on your palette plate to ‘off-load’ some of the excess paint. This helps to prevent bleed-thru under the stencil.

Stenciled-Burlap-Bags

Pounce in an up and down motion, making sure you have full coverage with the paint. Rather than pressing hard, tap lightly and repeat the application as needed. I found the coverage to be really good and only had to touch up a couple of areas with one application.

Stenciled-Burlap-Bags

While the paint is still wet, carefully lift the stencil off, place it on the wax paper and wipe the paint off of both sides with a damp paper towel. Even though these stencils are self-adhesive, you can reuse them over and over again. Once the stencil is clean, place it back onto the mylar strip it comes with.

Stenciled-Burlap-Bags

If you’re stenciling more than one bag, toss your foam pouncer (or brush) into a plastic baggy to keep it moist while you’re cleaning the stencil. If you put the foam into water, even with wringing it out thoroughly, you’ll still get an excess of air bubbles in the paint.

Stenciled Burlap Bags

Let the paint dry thoroughly and keep the cardboard inside the bag.

Now we’re going to draw a little dragonfly. If you don’t trust your freehand skills, you can grab a dragonfly pattern here that I drew. There is a butterfly pattern in there too. Since I draw a lot, I make quite a few patterns for my readers. But you can always find clip art on Google too or practice drawing your own. Yes! You can only get better, the more you practice!

draw dragonfly

Okay, to draw a simple dragonfly, start with a dot and a long oblong shape. That would be his head and his body.

Then draw two more elongated ovals, and then under those two more that are a little shorter.

Add a couple of antennae and you’ve just drawn a dragonfly!

Stenciled-Burlap-Bags

Fill in the wings with Calypso Sky using the #8 brush, or any other brush you have on hand.

Allow the paint to dry and then go back over the outline with the Sharpie.

Stenciled-Burlap-Bags

Next, go grab one of your clean jars and fill it with water.

Stenciled-Burlap-Bags

Now I’m gonna share a top secret florist trick! Just kidding. I was a florist but I used floral tape, not scotch tape. (works about the same though, ha!) Criss cross some tape over the mouth of the jar, creating a gridwork. Then gather your flowers in one hand and when you have them arranged how you want, wrap a twisty-tie around the stems. Place the stems thru the centermost opening in the tape grid.

Ta da! You can arrange flowers now!

Stenciled-Burlap-Bags

Then slip the jar with the flowers into your stenciled burlap bag.

Stenciled-Burlap-Bags

Isn’t this a cute way to use some plain ol’ jars? They’d make a pretty gift too!

What else would you use these bags for? I’d love to hear your ideas too!

Thanks so much for hanging out with me today! I hope you’ll come visit me at Just Paint It too. You can also find me on Facebook, Google+, Pinterest and Instagram. And of course, I’d love for you to drop by my Etsy and Zazzle stores.

I’ll see you next month!

signature

Easy Silkscreen Polymer Clay Jewelry Tutorial #ScupleyProjects

[pinit]

How to Make Polymer Clay Jewelry[pinit]

I haven’t had my hands on clay for way too long.  The new Silkscreen Kit from Premo Clay was the perfect way to jump back into the medium.  If you haven’t experimented with polymer clay, stop reading this and go find some.  You will be amazed at the gorgeous pieces you can make right off the bat, from jewelry to home decor and more.  It is a medium that is very forgiving, versatile, and doesn’t require a bunch of expensive tools and equipment to get started.  Today I will show you how I made a lovely necklace, bracelet and pair of earrings that I kinda love a bunch.  You can make your own art jewelry with just a few simple supplies.  Let’s get started!

Premo Clay Jewelry Tutorial

SUPPLIES:

Polymer Clay Silkscreen Kit #SculpeyProjects

Premo Clay and Silkscreen Kit

Jump rings

2 Pairs of flat nose jewelry pliers

Toggle clasp

Earring findings

Necklace chain

Gold paint marker

Cookie cutters in circles and ovals

Bead reamer or toothpicks

Oven

Ceramic tile or flat baking pan dedicated to clay

Rolling pin or smooth bottle or glass

Protective gloves (these are optional but great for keeping clay fingerprint free)

TUTORIAL:

How to mix polymer clay colors

I began by mixing blue clay with pearly white to get my desired color.  Just twist the colors together as shown.  Continue twisting and kneading clay in your hands to mix the colors and warm/condition the clay.  Conditioning is essential when beginning any clay project.  It ensures the components of the clay are evenly distributed and the clay is soft and shapable.  This clay was super easy to condition.  I have worked with clay that is hard and brittle and takes forever to warm up, but this Premo was great!  Continue until the clay is the color and shade you want.

How to condition polymer clay

I used my Sculpey Clay Conditioning Machine to get a flat even sheet.  This costs about $20 and is well worth the investment if you are going to create with clay more than a couple of times.  You can also use a smooth glass, rolling pin or bottle to smooth the clay out on a bake-able surface.  I like to use tiles I pick up at Habitat Restore for a dime.  I have tons of them on hand for just this purpose.  Once the clay is rolled out, you don’t want to have to move it, as it will become distorted and uneven until it is baked and therefore hardened.  Having it on a surface you can just stick in the oven is super handy.

Premo Polymer Clay Silkscreen Kit #SculpeyProjects

The kit comes with silver metallic paint, gold metallic paint, 4 reusable screens (totaling 2 large single patterns and 12 mini patterns) and a squeegee.  Aren’t the designs so fun?!

How to silkscreen

Premo Polymer Clay Silkscreen Kit Jewelry Tutorial #SculpeyProjects

I choose my design, placed a thin line of gold paint, and used the squeegee to pull the color across the screen, lightly so as not to indent the clay.

How to Make Polymer Clay Silkscreen Jewelry

Here is what it looked like after the first try!  So easy and pretty.

TIP:  Make sure to immediately was the screen and squeegee so the paint doesn’t dry on them.  You want to reuse them for as long as possible!

How to Cut Shapes in Clay

TIP:  Spray armor-all onto the cookie cutter inner and outer edge so that the clay won’t stick to it and come up off the surface when you lift the cutter away after cutting.

Easy Free Polymer Clay Jewelry Tutorials

Choose an area and a cookie cutter and press it into the clay to cut shapes.  I used circles large and medium for the pendant an earrings.  For the bracelet I used a small oval cutter.

Pull the “scrap clay” away from the cut shapes and set aside.  You can recondition it and reuse it, even if it has paint on it.  Just mix it in by conditioning it with your hands or pasta machine.

How to attach clay pieces

To create holes for jump rings in your pieces, you can use a toothpick while the clay is still raw, or use a bead reamer or drill after baking the clay.  Manipulating the clay while raw always carries the risk of distorting it, so I usually wait until it is baked before creating holes.  For this project I went ahead and made the holes while the clay was raw since I was going for an organic, imperfect feel.

How to seal polymer clay

I baked my pieces at 260 for 45 minutes and let them cool.  I painted the edges and back with a gold paint marker and sealed the pieces with Matte Mod Podge after the paint dried.Polymer Clay Silkscreen Earrings DIY

I used 2o gauge gold wire to create jump rings, earring findings and a toggle clasp for my finished pieces.  You can save money and get a unique look to your pieces by making your own findings, or purchase pre made findings.

DIY Polymer Clay Easy Bracelet Tutorial

This new kit from Premo has ignited my clay jewelry flame once again!  I have made several more pieces that you will be seeing in the future.  I hope you are inspired to try some clay projects.  It is so easy, inexpensive and you will be amazed at the gorgeous projects you can make from the get go.

For more clay inspiration and product updates, follow Premo Clay on FacebookTwitterPinterest, and Instagram!


Disclosure: I received product and compensation from Polyform and Blueprint Social in exchange for my campaign.  All opinions are honest and mine, as always!

Check out what other bloggers have been up to using Premo Clay Jewelry Products!

Dollar Store Craft DIY Mercury Glass Votive Holder From Martini Glass

[pinit]How to Make Mercury Glass Candle Holder[pinit]

I am excited to share with you this Dollar Store Craft, a lovely DIY mercury glass candle holder.  I made it from the stem of a dollar store martini glass and a dollar store candle holder!  Read on to see how I removed the stem and attached it to the holder, and how I created the mercury glass finish with Krylon Looking Glass Spray Paint.

SUPPLIES:

DIY Mercury Glass With Looking Glass Spray Paint

Dollar Store Martini Glass

Krylon Looking Glass Spray Paint

Martini Glass

Glass Cutter

Butane Micro Torch or candle and lighter

Bucket of cold water

Coarse sand paper or grinder with diamond bit for glass

E6000

TUTORIAL:

Make a score line around the stem of the martini glass at its top where the stem meets the upper part of the martini glass.

How to cut glass

Apply heat to score line and submerge in cold water to separate the stem at the score line like I showed you in this DIY Wine Bottle Rings tutorial.

Sand or grind top of separated stem to give a flat surface for gluing to the bottom of the glass candle holder.

Dollar Store Craft

Here is the glass I used to glue onto the stem of the martini glass.  I used E6000 on to attach two pieces, and placed the glued pieces against the wall for support while drying.  Let dry several hours before applying the mercury glass finish in the next steps!

DIY Mercury Glass Tutorial

Mercury Glass DIY

Pour Epson salt into the glass so that to about one inch from the bottom.  It is not important to be exact here.

 In a well ventilated area with protected work surface, spray looking glass paint inside of the glass at the rim. Make sure to follow instructions on label. You want to shake the can vigourously before using.

Shake the glass a snow globe (holding your hand over the top), so that the salt grabs the paint and drags it around. This will create the mercury glass look.

Repeat steps 5 and 6 a few more times, allowing each coat to dry for about 5 minutes before applying the next. Stop when are happy with the look!

Green Mason Jar and Recycled Wine Bottle Wind Chimes

[pinit]
DIY Wind Chimes from Recycled Mason Jar and Wine Bottles[pinit]

DIY Mason Jar Wind Chimes

Do you love the sound of wind chimes singing?  I have shared with you how to make DIY Wind Chimes from Upcycled Mason Jars in the recent past, and today I am sharing with you my newest addition!

This is the first set I made, which now resides with Pam, a Saved By Love Creations on Instagram follower who won the Instagram only giveaway I ran a few weeks back.  That brings up a good point.  If you are on Instagram, following me results in two things (besides the obvious getting updates on my projects via the pics I share); Exclusive giveaways of the SBLC creations you love and a follow back from me!  Then I can see what you are up to as well.

Repurpose Mason Jars and Recycled Wine Bottles

You can make your own set of these chimes by visiting the link in the first paragraph that teaches you how to cut the mason jar, drill holes in it and string/attach the dangly beads.  The three rings in the middle are created from recycled wine bottles.  I showed you how to make them HERE:  How to Cut Wine Bottles for Perfect Rings:

I Hope you try this project!

Easy DIY Mother’s Day Gift Idea

[pinit]

teatime-totebag-723x1024

[pinit]

Hello! Colleen here, with a way to decorate a totebag that will make it worthy of gift-giving. You do realize that Mother’s Day is right around the corner, right? I know! With Easter being so late in April, we have to really move fast if we want to give any handmade gifts to the moms in our lives. No worries because this happens to be a fast project. And cute too.

tea-time-totebag

You only need a few supplies –

  • Tulip Fabric Markers (available at craft stores and Walmart)
  • a paintbrush
  • a totebag (this is a shopping bag from the Dollar Store)
  • a pattern
  • a piece of cardboard to fit inside the tote

While this tutorial is for a totebag you could also use the markers on almost any fabric. Tee shirts are cute too. However, I made this for my own mother who can always use another totebag.

I’ve provided the Hydrangea in a Teacup pattern for you to download. If you’d like, I have other patterns that are free to download too. Most of them would work fine for this project.

tea-time-totebag
After you print your pattern, place it on top of the cardboard and slide it into the totebag. This prevents the markers from seeping to the backside as well as holds the pattern a little more stable.

You could also iron the pattern onto the shiny side of a piece of freezer paper, then iron that to the tote or tee shirt to prevent slipping. However, make sure you do a test for iron safeness on any shopping bags. The one I used above needed a press cloth between it and the iron.

tea-time-totebag

Now all you need to do is outline the pattern with your choice of colors.

tea-time-totebag

You can mix more than one color too.

tea-time-totebag

This was the finished design after outlining with purple, pink, and a few green dots in the center for the hydrangea buds.

tea-time-totebag

Dampen your paintbrush with a little water and go over the marker lines. The more water you use, the more of the markers will blend. The less water, the more defined the lines will be.

tea-time-totebag

You can do a little of both – leave some outlining and blend other parts. There is no right or wrong way to do this.

tea-time-totebag

You can fill in the pattern completely or leave spaces for the totebag to show thru.

It’s a great kids’ project too. If they’re too young to outline, they would still love to grab a paintbrush and “paint” a present for Mom or Gramma, wouldn’t they?

tea-time-totebag

Isn’t this a great craft for Mother’s Day? Or any other day, actually.

If you use the markers on a shirt, they’re washable after drying 24 hours. To be on the safe side, I think I’d heatset them anyway with an iron, although the instructions don’t mention that.

Have fun with this! I hope you’ll stop by Just Paint It and say hi one of these days. I’m always painting . . . or drawing with markers! You can also find me on Facebook, Google+, Pinterest and Instagram too.

Happy Crafting!

Colleen

More SBLC Mother’s Day DIY Inspiration!

Over 60 Mother’s Day Gifts to make for Less than $10!!

60+ DIY Mothers Day Gifts for under $10

Dollar Tree Pallet Wood Bathroom Organizer Tutorial

[pinit]$3 Dollar Store Craft Idea Reclaimed Wood Organizer @savedbyloves[pinit]

Could you stand to be a little more organized in your bathroom?  I know I could.  I find organizing rather boring, unless I can combine it with creating a cool home decor accent.  Today I am sharing a project fitting that bill- a rustic, chalkboard reclaimed pallet wood bathroom organizer using cute little jars I scored at the Dollar Tree recently!  For only $3 and some supplies I had on hand, this project packs a big punch on the cheap.  You can totally make this.  Give it to Mom for Mother’s Day!

SUPPLIES:

How to make wood pallet bathroom organizer

Pallet wood plank about 15 inches

Amazing Goop or E6000

Saw tooth hanger

Hammer

3 Dollar Tree Jars

Chalkboard Paint

Small Paint Brush

Tape Measurer

Marker or pencil

TUTORIAL:

Begin by hammering the sawtooth hanger in the middle upper back of the wood.  You want to do this before gluing the jars in place.

How to attach jars to wood with Amazing Goop

Measure placement for the jars and mark three evenly space dots on the front of your board with pencil or marker.  This board already had 3 evenly space holes drilled for a project that never happened.  Apply a generous dot of Amazing Goop on the board on the marked spots and on the jars in the middle back.  Let this sit for 2-10 minutes, then place jars, holding gentle pressure on each for about 1 minute.  Let this cure for a couple of hours before the next step.

How to make wood pallet art

Paint the indented area with Chalkboard paint.  This took several light coats, drying 15 minutes between each.

DIY Wood Pallet Dollar Store Craft

Label with chalk and hang on wall!

Do you love it?  I do!

Be sure and visit our 60+ Dollar Store Crafts Roundup:

And our 50+ Wood Pallet Projects Roundup!

Free Printable Chalkboard Mother’s Day Set

[pinit]Mother's Day Free Printable Card by @savedbyloves[pinit]

Head over to Printable Decor for this exclusive Free Printable Chalkboard Mother’s Day Card Set for Mom, Grandma and Aunt!

Privacy Policy