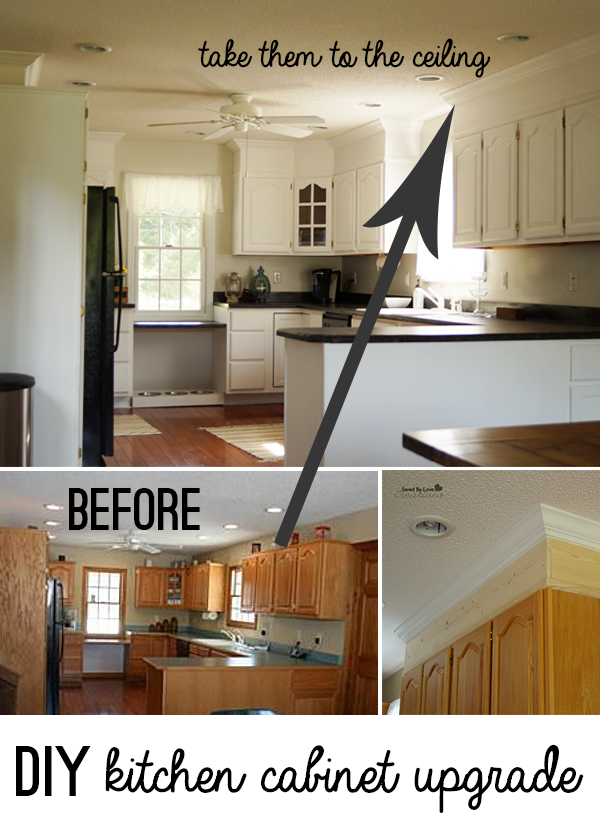
DIY Kitchen Cabinet Upgrade With Paint and Crown Molding

[pinit]Upgrade Cabinet Makeover with DIY crown moulding and chalky finish @DecoArt_Inc @savedbyloves[pinit]

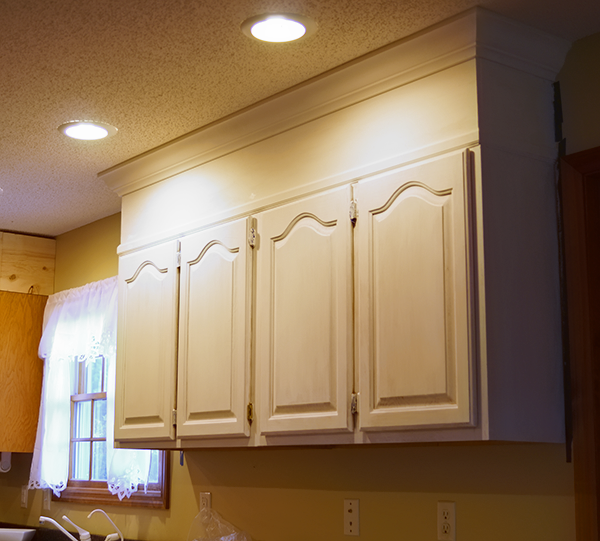
I am thrilled to be sharing our kitchen cabinet upgrade with you today, mainly because that means it is finished!  We moved into a house with, as you can see, outdated oak kitchen cabinets.  Maybe you were here before and saw our DIY countertop transformation with Rustoleum.  To continue the kitchen renovation, we took the cabinets up to the ceiling by boxing them in and adding crown molding to close the 12 inch gap between the ceiling and the tops of the cabinets.  We tied together the new wood and cabinets by painting them with Chalky Finish Americana Decor Paint.  It would have been fairly difficult to stain wood and crown moulding to match the current cabinets perfectly.  This is a great way to add a high end look to your kitchen for cheap, especially if you are going to paint your cabinets anyway.

DIY Kitchen upgrades

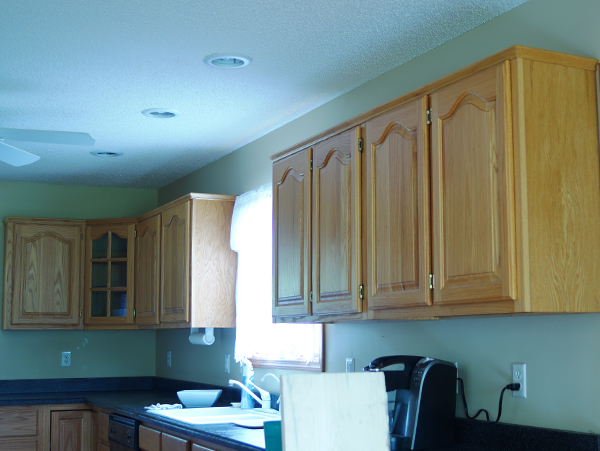
Here is what the cabinets looked like to start.  This was after revamping the countertops to cover that country blue laminate.

diy kitchen cabinets

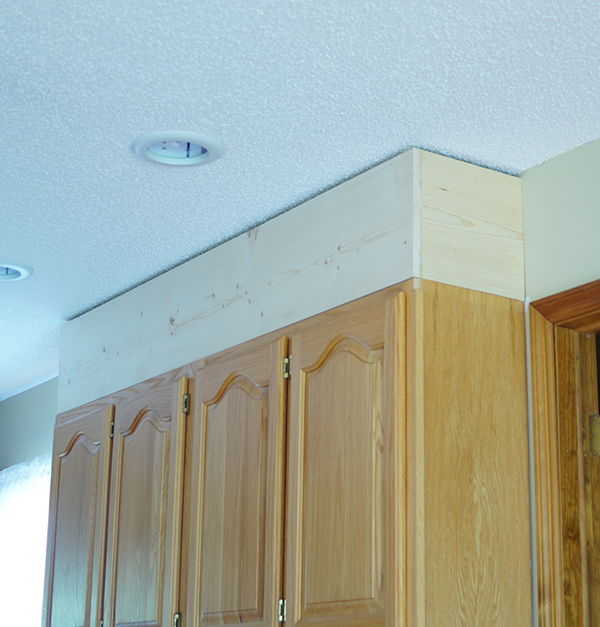
To close the gap between the cabinet tops and the ceiling, we removed the trim on the cabinet tops with a pry bar.  We measured the dimensions of the cabinet tops and built 3 sided boxes from 1×12 boards to fit.  This was perfect for the 12 inch gap.  It left about a half inch (since 1×12 lumber is actually 0.75×11.5 inches… I know).  This was no problem since we knew we would be covering the gap with crown moulding later.  We used construction adhesive to adhere the boxes to the top of the cabinets.  We planned to nail trim to cover the seam where the cabinets met the box, which we would nail into both, adding extra security.

take cabinets to ceiling with crown moulding

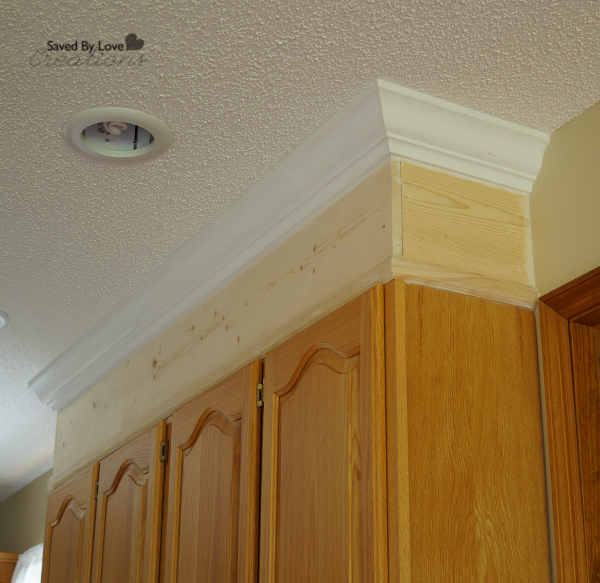
Here you see the trim (we used pine mullion) and the crown moulding.  This was my first time cutting crown molding.  Save yourself a ton of wasted materials and heartache by visiting Sawdust Girl’s How to Cut Crown Molding Tutorial.  My little brain thought it would be as easy as cutting trim… ha!  Not the case.  Sandra didn’t touch on how to cut angles molding for angles that aren’t 90°…

tips for installing crown moulding

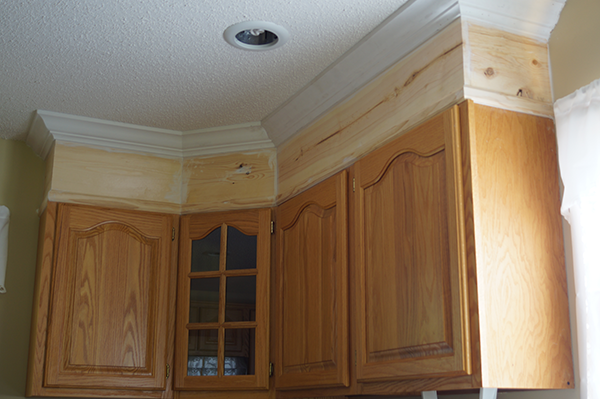
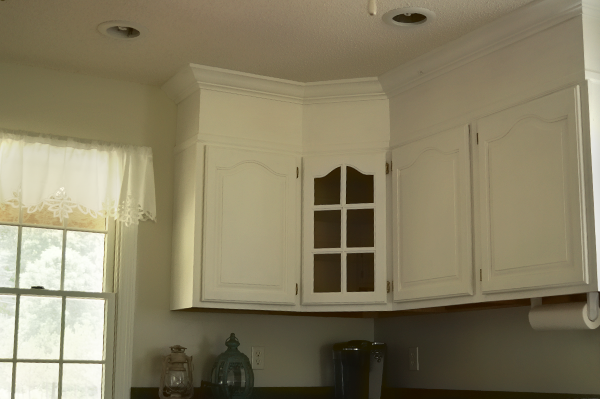
We ran into that fun conundrum as you see in the above photo.  There are charts on how to do this for every angle and every position on your saw.  We finally ended up using this Bench Dog Polymer Crown-Cut Crown Molding Cutting Jig I picked up from Amazon.  It was pretty helpful.  We the 2 odd angles above the glass window containing cabinet were 135°, so we set up our molding on the saw exactly like it would siton the cabinet, which was only possible to maintain for cutting with the use of the jig.  This is a process you are just going to have to go through in order to get to the good stuff!  Sandra points out that she has to go back to her templates every time, even though she does this often.  I found that to be the case everyday during this project!

DecoArt Americana Chalkyfinish Paint

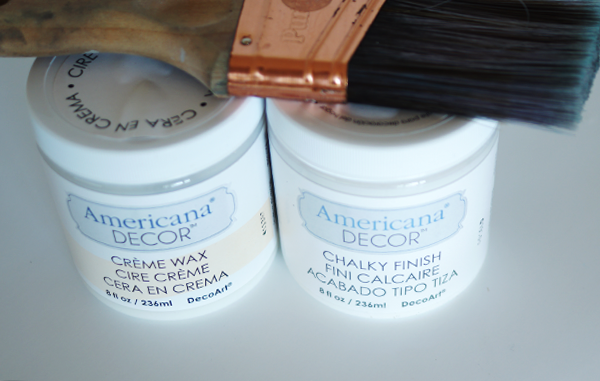
Big thanks to DecoArt for providing the paint and wax for this project!  We used Americana Decor Chalky Finish in “Everlasting” to paint everything from the bottom of the cabinets up to and including the crown molding.  The best thing about using this paint was not having to sand or prime the cabinets!

kitchen makeover DIY

We started by taping over the hinges with painter’s tape and painting the cabinets without removing the doors.  This ended up in paint on the hardware anyway, so we decided to remove the doors for the rest of the cabinets.

How to Paint Kitchen Cabinets

All in all, we used 17 8 oz jars of the paint.  If you are going to go this route, make sure you have plenty of paint for your project before you start.  Waiting on more to come while you have no cabinet doors is less than fun.  Ask me how I know.

DIY Farmhouse Kitchen

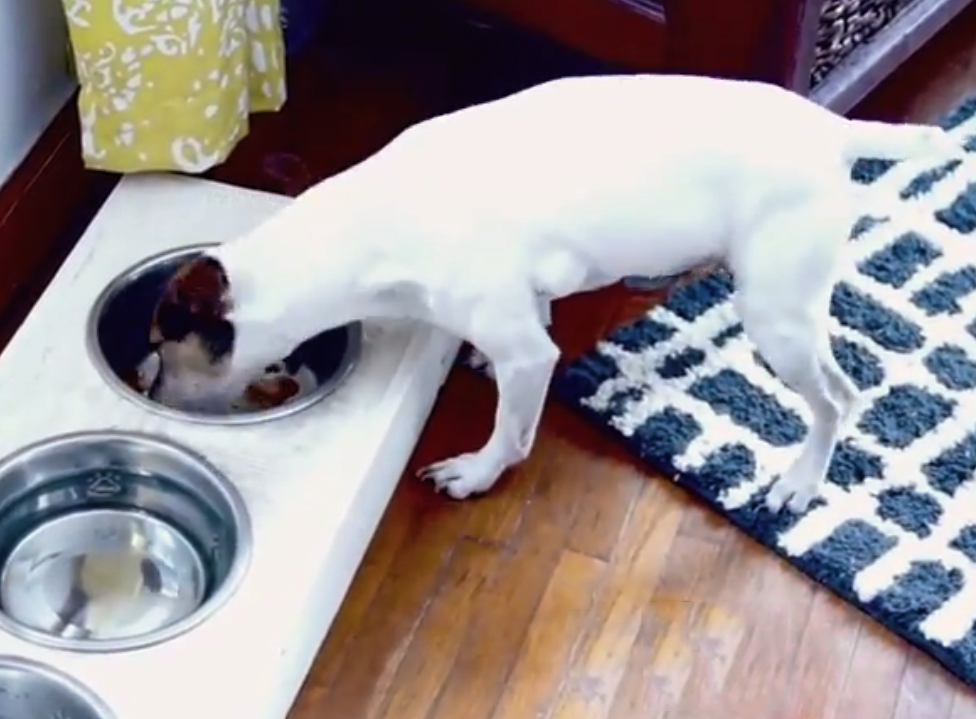
Remember when I built the DIY Dog Feeding Station from Shipping Pallets?  It fits under the window in our new house like a glove!

Painting the cabinets took 4 coats.  We applied the clear wax and that was it.  We were without cabinet doors for 2 weeks while we continued moving into the house and painting cabinets as time would allow.

What do you think?  I love the high end look we achieved with little cost!

Delicious Red White and Blue Easy Salad Recipe

[pinit]Red White and Blue Food Recipes Easy Delicious Salad @savedbyloves[pinit]

Our small group meets weekly for a potluck dinner, with a food theme that determines what we bring.  In light of the upcoming 4th of July holiday, this week’s theme was red, white and blue recipes.  We found a wonderful Red, White, & Blue Watermelon Salad with Watermelon Vinaigrette Recipe at FiveHeartHome.

Fourth of July Recipes

It was super easy and quick to make.  I love the little watermelon stars!  I wasn’t sure how blueberries, watermelon, feta, roasted almonds and the homemade vinaigrette would all hit my tastebuds, but it was wonderful.  It was the “star” of the potluck too.  Head over to the link for the details!

DIY Patriotic Paint Chip Paper Hydrangeas

[pinit]Make Patriotic Paint Chip Craft Paper Hydrangeas @savedbyloves[pinit]

Show your American, upcycling spirit with this patriotic paint chip hydrangea craft!  These make a lovely centerpiece for your summer festivities and Fourth of July party tablescape.  This is a craft the kids can help with for some creative family time during school break.

Patriotic Paper Hydrangea Paint Chip Craft

CLICK HERE TO FOR SUPPLY LIST AND TUTORIAL

Low Carb Chicken Parmesan With Spaghetti Squash

[pinit]

Low Carb Recipes Chicken Parmesan With Spaghetti Squash @savedbyloves

[pinit]

I am so excited to share with you my version of Low Carb Chicken Parmesan with Spaghetti Squash.  This has got to be one of my favorite dishes ever.  I love every bite, and can’t believe it weighs in at only 400 calories per serving.  This recipe serves 2.  If you aren’t full and satisfied, you are insatiable!

LOW CARB CHICKEN PARM SPAGHETTI SQUASH

Ingredients:

CHICKEN PARM
(2) chicken breasts, raw
1 egg white
¼ cup unsweetened almond milk
¼ cup Fiber One Cereal
1 tablespoon Italian seasoning herb blend
½ tsp garlic powder
½ cup pastasauce (w/ approx. 60 calories)
¼ cup shredded parmesan or mozzarella

SPAGHETTI SQUASH
1 small spaghetti squash
1 tsp olive oil
¼ cup minced onion
salt & pepper, to taste

Directions:

1. Preheat oven to 375° . Cut spaghetti squash in half lengthwise remove pulp and seeds (just like to do with a pumpkin)!  Bake 35 minutes with rind up on baking pan.  While that is baking, prepare the chicken as follows.

2. Add Fiber One cereal to food processor and blend until breadcrumb like consistency (if you don’t have a food processor, you can put in a plastic bag and crush with the back of a heavy spoon).

3. Put Fiber One crumbs into a Ziploc bag and add the Italian seasoning and garlic powder. Set aside.

4. In a small bowl, whisk the egg white and almond milk until well blended.

5. Dip each chicken breast, both sides into egg mixture then put into Ziploc bag. Seal annd shake the Ziploc bag until both chicken breasts are evenly coated with the Fiber One mixture.

6. When squash is done cooking, turn oven down to 350°.  Place the chicken breasts onto the baking pan and put into oven for 25 minutes, turning once halfway through cooking.
7. While chicken is cooking, coat a skillet with cooking spray and add 1 tsp olive oil and onion over med-high heat. When onion is tender and slightly browned (approximately 5 mins), add the prepared spaghetti squash (run a fork from stem to stern to remove the spaghetti center of the cooked squash right into the skillet).
8. Cook squash, stirring every few minutes, for 15 minutes.  Turn off heat and let sit.
9. Remove the chicken from the oven.  Evenly layer half of the pasta sauce then half of the cheese onto each breast.
10. Put back into the oven and broil for about 5 minutes, or until cheese is fully melted.
11. Place half of the spaghetti squash and one chicken breast onto a plate for each serving.

Low carb healthy recipes Chicken Parmesan


Healthy & Low Carb Buffalo Wing Cauliflower Recipe

[pinit]Low Carb Cauilflower Buffalo Wing Recipe @savedbyloves[pinit]

Our whole family is on a big health kick, so low carb recipes are on the dinner menu each and everyday!  Today I am sharing with you my version of an Atkins Low carb Buffalo Wing Cauliflower Recipe!  It was such a hit, we had it two nights in a row, but I varied it the second time and got it down to taste perfection.  This is the perfect recipe if you are like me, and chicken wings freak you out a bit.  My husband loves wings, especially my Best Ever Hot Wings Recipe, but I just can’t get on board.

Low Carb Delicious Recipes

INGREDIENTS

  •  
  •  
  •  
  • Celery sticks

DIRECTIONS

  1. Preheat oven to 375°F.
  2. Cut cauliflower into florets and sprinkle 1 tablespoon olive oil over them.  Roast on middle rack on a baking sheet for 40 minutes.
  3. While roasting, pour hot wing sauce and siracha into a small sauce pan.  Heat to a boil, then reduce heat and simmer about 10 minutes.  Add 1 tablespoon olive oil, stir, remove from heat and cool to room temperature.  Heat a large sauté pan with remaining olive oil.  Add roasted cauliflower and sauté about 5 minutes.  Add the hot sauce and cook for 1 additional minute, tossing until cauliflower is fully coated.
  4. Garnish with celery and serve with blue cheese sprinkled on top.

Upcycle a Rusty Grate Into a DIY Photo Display

[pinit]Repurpose Photo Display Idea @savedbyloves [pinit]

Today I am happy to share with you this rustic, quick & easy upcycle to display your favorite Instagram photos – all while saving a rusty old grate from a tragic dumpster demise!  This particular grate is from an fire pit that is no longer.  I just couldn’t part with it.  Round objects have a hard time getting away from me since I love the challenge of using them to create unique repurposed wreaths.

Such as this repurposed hubcap wreath

I digress.  Back to the grate.

Upcycled Grate to Photo Display

Here is the old thing.  It has sat on my porch for months, begging for inspiration to strike me.  Along came Susan.

If you haven’t been to Homeroad, you need to remedy that.  Susan is a junker with an eye for upcycling that always inspires.  When I saw her Barrel Strap Photo Holder, I knew what I had to do.

Upcycle home decor DIY rustic decor

Find something old, rusty and round, and you can do it too, within just a few minutes!

How to make a Rustic Photo Holder

Photos

Photos – Use your Instagram photos or other photos and apply a fun vintage filter!

Scrapbook ephemera

I used ATC backgrounds I found at Hobby Lobby in a fun yellow, blue, vintage yet modern, geometric patterned, grungy style.  you know that style, right?

The flowers are from Prima .  I grabbed them at Hobby Lobby, but you can find them with my Amazon link too.

I used silver and white baker’s twine with the intention of clipping the photos with tiny cute clothespins.  While digging through my stash I found the perfect Gator clips from 7 Gypsies.  Their little hook fit perfectly over the rods in the grate.

Easy Photo Display

I threw this piece together in under 10 minutes, and I will cherish it for years to come!

Over 50 Popcorn Treats to Make

[pinit]50 Plus Best Popcorn Recipes @savedbyloves[pinit]

Popcorn… yum!  This house consumes it’s share of this versatile treat, that is for sure.  Did you know popcorn has only 33 calories per cup?  Well, not when you combine it with things like chocolate, peanut butter and caramel, but it is healthier than other things you might combine with these ingredients!  Here are 50+ tasty popcorn recipes to try.  Enjoy!


Beagle Vs. Jack Russell for the ALPO® Chop House Prize

This is a Sponsored post written by me on behalf of ALPO® Brand Dog Food for SocialSpark. All opinions are 100% mine.

ALPO® Chop House 5.5 Oz Cans Funny Dog Video

ALPO’s variety dog food sure does bring excitement to mealtime for my boys, and I must say that I am highly entertained by the experience. Maybe you remember the first video I shared with you of my boys devouring the stuff! Well today I am sharing video number 2, equally cute and funny. This time they have their way with the smaller 5.5 oz cans. This was the perfect amount for my little guy…

As you will see in the video, the beagle destroyed all 5.5 ounces at a rate of 1 ounce per second. It's true. He would have liked a larger serving, or 10.


It is clear they can't get enough, which is fine by me. ALPO® delivers nutritious great taste in a variety of flavors your dogs will love. Every can is 100% complete and balanced, containing quality ingredients. They come in small cuts or finely ground, great for mixing with dry food (wonder if that would slow the Beagle down a bit).

ALPO T-Bone photo bc9fa0c1-a09c-4ce4-ae35-ac008ab07386_zpsa6baba3a.png

ALPO Filet Mignon photo 2a6bde0a-ab21-4760-85ca-f96533ebce64_zps6a5aec0a.png

ALPO® Chop House 5.5 oz. is a compact can great for small dogs and comes in unique flavors, such as T-Bone Steak Flavored Cuts, Tender Cuts With Lamb, Filet Mignon Flavor, and Rotisserie Chicken Flavored Cuts. Healthy proteins, wholesome grains and vegetables, combine to give your dog a complete and balanced diet for every stage of it's precious life. ALPO dog food supports a happy, healthy life, shiny coat, strong teeth and bones and wagging tail at the sound of the can opening! A healthy dog is a happy dog.

For more cuteness and information, follow ALPO® on Instagram. You can also follow ALPO’s Facebook Page.  


Visit Sponsor's Site

Over 50 Superbowl Party Recipes

[pinit]50+ Super Bowl Appetizer Recipes @savedbyloves[pinit]

Are you ready for the Superbowl?  I will be honest, I couldn’t really care less about the game, but parties are my thing.  This collection of over 50 superbowl appetizer and game night recipes will help make yours a hit!  Enjoy.


Quick and Easy DIY Valentine’s Day Gift Idea

This simple and quick Valentine’s Day gift idea from Barbara at Chase the Star is just my kind of project.  It would be great as a centerpiece and teacher gift too!  Welcome the first contribution from this super creative blogger…

Hey everyone! I’m Barbara from Chase the Star, and I’m thrilled to be a brand new regular contributor! At my blog I write about my adventures in decorating, crafting, cooking, parenting, and all things in between. I love to be creative and but I don’t like to spend too much time or money, so a girl’s gotta improvise, reinvent, and repurpose whenever possible!

It’s just about time to start planning for Valentine’s Day! For my very first post I’m sharing an easy and inexpensive DIY gift idea for a special someone in your life!

DIY Gift Idea for Valentine’s Day

Valentines Gift via Chase the Star for Saved By Love Creations #conversationHeart #candyHeart #valentine #modPodge #decoupage #chalkboard #diycraft #craft #gift #repurpose #bucket

A galvanized mini bucket can be used so many ways! Today we’re going to decorate it and use it to hold ‘conversation hearts’ (or ‘candy’ hearts) for Valentine’s Day:

Materials:

A small bucket (mine was from the thrift store)

Paper (gift wrap, craft paper, newspaper, any type of paper will do)

Decoupage medium (such as Mod Podge)

A small brush

A bag of ‘conversation hearts’

Optional:

Chalkboard cupcake toppers

Ribbon

Repurpose a galvanized bucket for a sweet Valentines Gift via Chase the Star for Saved By Love Creations #conversationHeart #candyHeart #valentine #modPodge #decoupage #chalkboard #diycraft #craft #gift #bucket

Step 1:

Cut the paper into pieces that will fit around your bucket.

Step 2:

Decoupage!

Add the paper pieces one at a time by brushing a light coat of decoupage onto the bucket, then gently placing the paper over it, and pressing it firmly with your fingertips. Get it as smooth as possible but don’t worry about it wrinkling, you can fix that later. Let that set for a few minutes, then add another light coat of the decoupage over the entire piece. This time be sure to smooth it out completely with your fingertips, carefully. Allow it to dry for about 30 minutes.

Decoupage a small bucket for a cute Valentines Gift via Chase the Star for Saved By Love Creations #conversationHeart #candyHeart #valentine #modPodge #decoupage #chalkboard #diycraft #craft #gift #repurpose #bucket

Step 3:

Fill it with the candy hearts, and you can add a cute touch by inserting a chalkboard cupcake topper or any other type of topper! I used these from American Crafts:

DIY an Easy Valentine's Day Gift via Chase the Star for Saved by Love Creations

To complete the project I tied some satin ribbon in a bow to the handle.

Easy Valentines Gift via Chase the Star for Saved By Love Creations #conversationHeart #candyHeart #valentine #modPodge #decoupage #chalkboard #diycraft #craft #gift #repurpose #bucket

I love this idea for a teacher’s gift, a nice treat for your neighbor, or even to pass out at work! Kids will love this too!

Have you started to plan your crafting for Valentine’s Day?

For more DIY ideas stop by Chase the Star, and follow me on Facebook, Google+, Pinterest, and Instagram!

See you next time!

signature

Privacy Policy