Old Window turned Jewlery Display

Old Window Crafts

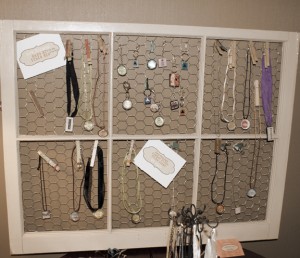
Need to display your jewelry in an economic, yet affordable way?!  Necessity + creativity + old window + chicken wire + staple gun = a nifty display with giant functionality.

Supplies:

  • Old window
  • Chicken wire (available at hardware store – $5.99 for a big ol’ roll)
  • Sand paper (medium grit)
  • Spray paint in color of your choice for window frame
  • Staple Gun
  • Clothes pins decorated with scrapbook paper

Instructions:

old window art

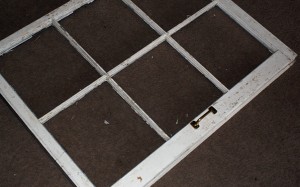
  • I am blessed to have friends that save things like old windows for me, knowing I will put them to use somehow in a process usually involving spray paint and power tools!  This is a window from one of those friends.  Cost… $0.  Saweeeet!  I removed the hardware, knocked out the glass with a hammer (be extremely careful – I am not responsible for any lacerations that result from following these instructions)!  I must say, I quite enjoyed that part.  Sometimes one just needs to shatter glass.  Try it before you judge me!
  • Sand with medium grit sand paper (I used 150) and wipe away debris with damp rag.  I didn’t go crazy on this part.  I wanted the surface to look old and crackled after spray painting it, so if you are going for new and pristine, you probably want to put some more time into stripping off the old paint.
  • Using Krylon Fusion, I spray painted the window frame in a cream color.  This stuff is just the right paint for me.  It sticks to anything, and requires no primer.  It is marketed specifically for plastic.  I use it all the time on everything.
  • Cut chicken wire to fit window, and staple gun it to the back of your window.  Like magic, a perfect spot for your wares, bank account unharmed!

I would love to hear the creative ways you display your pieces.


Anthropologie Wall Art Knock Off

Anthropologie Wall Decor

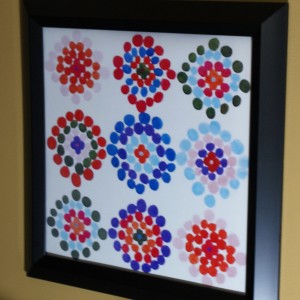
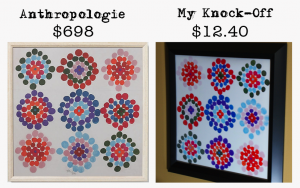
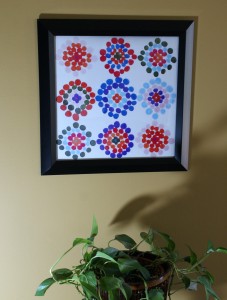
I saw this on Anthropologie’s wall decor product page, and wanted it for my mustard wall in the family room.  Then I looked at the price tag ($698) and knew I was going to have to recreate it if it were going to be on my wall.  This was so very simple you guys.  I opened up Photoshop,  used watercolor brushes to mimic the print, uploaded it to Snapfish, and picked it up at my local Miejer Store a couple of hours later!

Anthropologie Decor Knock OffI ordered a 16×20 print cause that is the biggest I can get same day for the price ($6.98).  When I am not in a hurry, I use Short Run Posters for my large format printing, cause they rock (see this post).  I could go on and on about them, but that is a different topic.  Suffice it to say, SUPER cheap, great quality large format prints.

Anthropologie Wall Decor

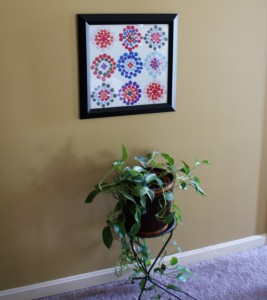
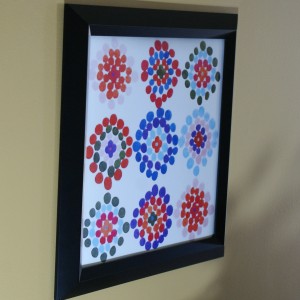
After I picked up my print, I hit my local Goodwill and found a perfect square frame for $5.  I removed the pic that was in it, cut mine to fit and that is that. It looks as awesome as I thought it would against the yellow wall, and I spent very little time and money.  Mine is 16×16 versus the Anthropologie version, which is 29×29 in, but did you see the price difference???  16×16 inches is perfect for the space.

Anthropologie Decor Knock Off

Sometimes, I really must get messy with paints and gel medium, but digital art has its perks.  Instant gratification being my favorite!  There are debates on what is right and wrong in terms of copyright, something I have been pondering lately.  Here is why I have no problem knocking off this wall art; I am not selling it.  It is for my personal enjoyment, and to hopefully inspire others to decorate beautifully for less.  More importantly, giving credit where credit is due is just the only way to make being a copycat o.k.  All art is inspired by other art, or nature (God’s art, in my opinion).  Very little is truly original  I in no way came up with this design.  It was all Paule Marrot, the artist of the original piece, and Anthropologie.  I full on copied it, adding some vibrancy, and going with a black instead of white frame.  So, what do you think?

Anthropologie Decor Knock Off

Pottery Barn Organizer Knock-Off

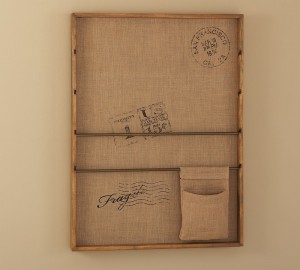
Pottery Barn Wall Organizer


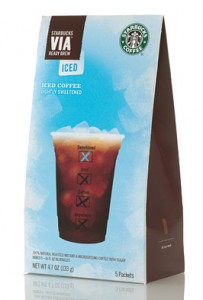
This is my debut Pottery Barn knock off project.  The inspiration for the project actually came from Starbucks Via instant coffee cartons.  What?? Yeah.  They look like this…

Starbucks Via Iced CoffeeMight I just say that I am 100% addicted to these drinks, but anyway – I was looking at the empty carton and thought surely I could make something cute out of the little shape.  I was initially thinking I would make a faux metal wall pocket and stick some adorable paper flowers in there.  I began searching images for wall pockets when I came across this Pottery Barn piece for $149.

Pottery Barn Wall Organizer

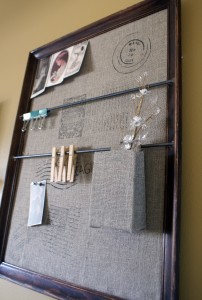
I knew I could make this with supplies I had on hand, and I would still get to use my empty Starbucks Via box.  Check out the step by step and make your own Pottery Barn knock-off wall organizer.  I spent a total of $1.26 on dowel rods, and probably about $10 if you include the garage sale picture frame and bulletin board I used.  The project took undert 2 hours from conception to completion.

Supplies:

  • Old bulletin board
  • Picture frame (mine is 18×24 inch
  • Burlap cut to fit frame and enough to make pouch
  • Super 77 or other mounting adhesive
  • Empty carton (Starbucks Via box works well
  • Dowel rods
  • Drill
  • Chrome or other metallic spray paint
  • Stencils (I  cut mine with Cricut)
  • Black Paint marker or permanent marker like Sharpie
  • Rubber stamp with handwriting (optional)

Instructions:

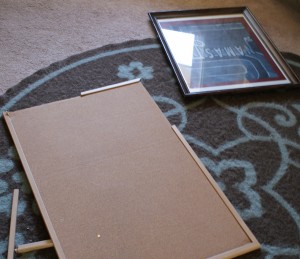
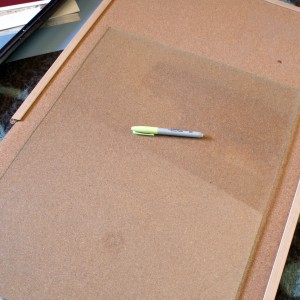
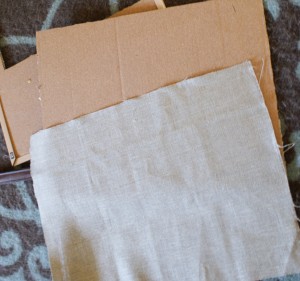
  • Cut bulletin board to fit frame.  I outlined the glass that was in the frame to use as a guide to cut the bulletin board to fit.  I cut on the inside of the outline, taking into consideration the thickness of the burlap that I would be folding over the edges of the bulletin board later.

Pottery Barn Wall Decor

Pottery Barn Knock-off

  • Cut burlap to fit with 1/2 inch overlap on all sides.

Pottery Barn DIY

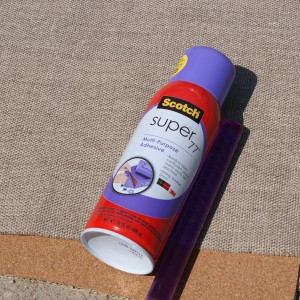
  • Spray Super 77 onto cork side of bulletin board, covering it completely,  and immediately place the burlap on top, smoothing it down with your hand.

Pottery Barn Wall Organizer

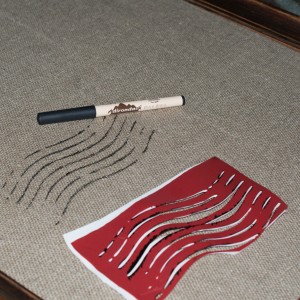
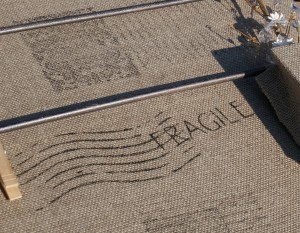
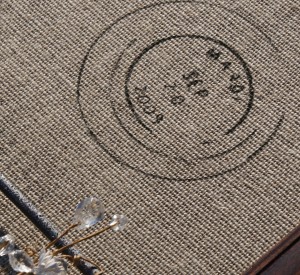
  •  Now place your stencils on the burlap and stencil away.  I used vinyl stencils I cut with Cricut, which I love because the vinyl stays in place, even on burlap.  I used a paint marker to fill in the stencil openings.   I also used a rubber stamp and black ink pad to add old handwriting for the vintage postcard feel.

Pottery Barn Wall Organizer


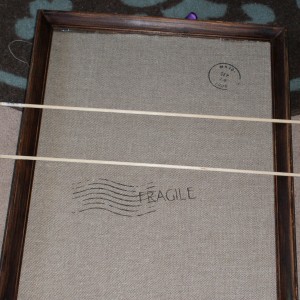
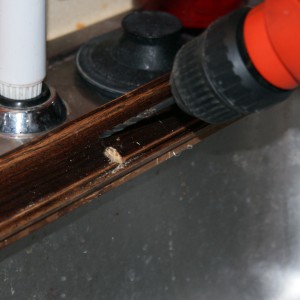
  • Drill small holed in frame for dowel rods to sit in as shown.


Pottery Barn TutorialPottery Barn Decor


  • Cut your dowel rods to fit using a utility knife.  Shave the ends to taper them like a pencil if need be to fit into the holes you drilled.  Spray paint them your desired color.  I used a chrome effect spray paint that I had on hand.
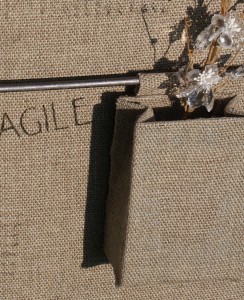
  • Pottery Barn Bulletin BoardTo make the pouch, spray your empty carton with Super 77 and adhere burlap you have cut to fit.  For the loop to attach the pouch to the dowel rod, fold over a rectangle scrap of burlap and spray the touching edges, then spray and adhere it to the back of the pouch.  That is it!!

Pottery Barn Wall Organizer

Burlap stenciling

Pottery Barn Burlap Decor

Pottery Barn Wall Organizer

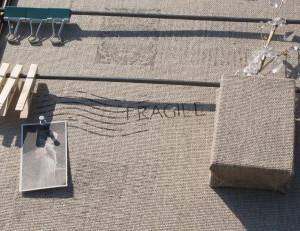
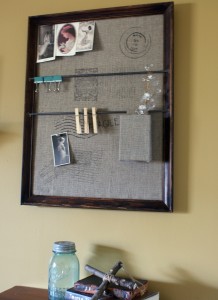
Grab some antique images, flowers, clothespins and dress up your new organizer.  What do you think?

Faux Tile Kitchen Backsplash

Faux tile kitchen backsplash

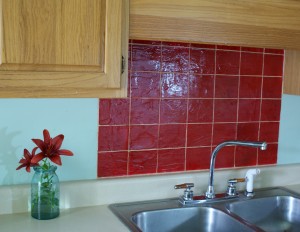
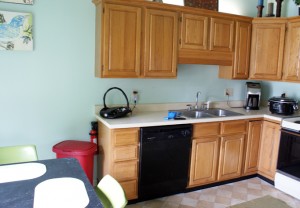
Look at this textured faux tile backsplash I made for $5.  So excited to tell you about this.  It made a huge difference in my kitchen.  Here it is before…

Kitchen backsplash ideas [Read more…]

80’s Heart Shelf Makeover

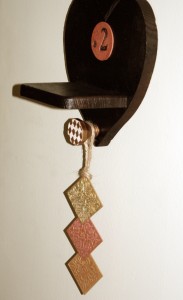
Polymer clay tile adorned shelf
Do you guys know about the Goodwill 50% off day each month?  Here in my hood, it happens the first Saturday of every month.  You will see me, hubby in tow, lined up and waiting for the store to open.  I leave with carts of things, usually wooden, that I plan to craft upon eventually.  This is one of those things.  I didn’t really have a plan.  I ended up doing a makeover on this three tiered heart shelf that involved spray paint, polymer clay (big shocker) and a harlequin decorative knob.  I made the polymer clay tags with “26.2” since my husband and I are marathon training, and every lil bit of motivation helps.  The shelf hangs in our bedroom, so we see in the morning before training runs.  This tutorial will cover spray painting, stamping in polymer clay and making more polymer clay tiles.

[Read more…]

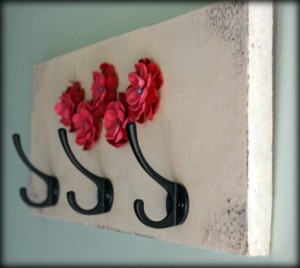
Clay Flower Embellished Key Holder Tutorial

I have had this project in the back of my mind for months.  It has finally materialized, and I love it.  Today, I will cover how I created the distressed, wall mounted key holder.  The making of the polymer clay flowers will be covered in a near future post, so come back and hear the ending.

[Read more…]

Dollar Tree Spring Wreath

SpringWreath2
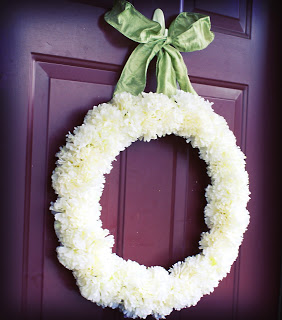
I needed to bring some spring to the ol’ front porch and decided a wreath would be the way to go.  Off I went to the Dollar Tree.  I loved the fall wreath (here) I made from Dollar Tree supplies so much that off I went to the Dollar Tree, where I found some off white carnations and a wreath form…
I removed the flowers from the stems and hot glued them to the wreath form.  That is it.  I used 7 bunches of the flowers, the wreath form and some green ribbon I had in my stash.  Spent a whopping $8.  Well worth it.  Fast, easy, frugal… it’s a good day.

Bird Faux Oil Painting Frugal Wall Art DIY With Tutorial

Birds1
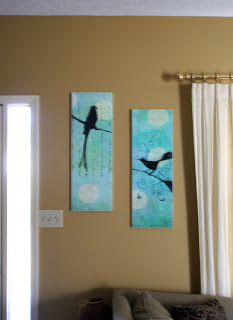
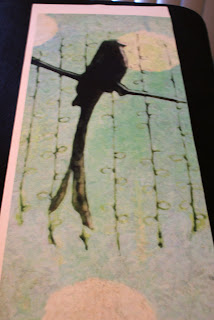
I am obsessed with Mod Podge Brushstrokes these days.  My walls are slowly but surely filling up with what appear to be oil paints on canvas, but are actually art prints on MDF, painted over with the Mod Podge.  These are 12’x34′ and cost me about $10 each total.  I love how they turned out and especially the blue against the wheat colored walls!  You may have seen my earlier post featuring this technique using some Valentine’s Day prints I made in photoshop.  This is a great way to have awesome art for cheap.  You can use old photos, posters, thrifty store finds or any image to create a canvas painting.
I made these prints in photoshop, giving them a painterly effect since I knew I was going to use them in this project.
At Lowes, I picked up a discounted 1x12x72′ board and had them cut my 2 pieces of backing board from it.  The total cost was $8.47.  I even have a little piece of board left over, which I am sure will be used for something!
I sprayed both the board and the back of the print with Super 77, lined up the print with the board and pressed them together, using my hand to flatten the print down and make sure there were no air bubbles.  This stuff is crazy sticky, so make sure you are lined up before laying the print on the board.  No redo is going to happen without ripping the print.
Next, I flipped it over and cut off any excess print with an exact knife.
I lightly sanded the edges to blend and make the print flush with the board.
This is what it looked like after sanding.  Now I put on the Mod Podge Brushstroke.
After this was dry, I primered and painted the edges of the board white to give the canvas look to it.  I attache a wire for hanging on the back, as detailed in my previous post, here.  SImple and lovely!

Vinyl Wall Happiness; Frugal & Fast, With Flair

Happiness3

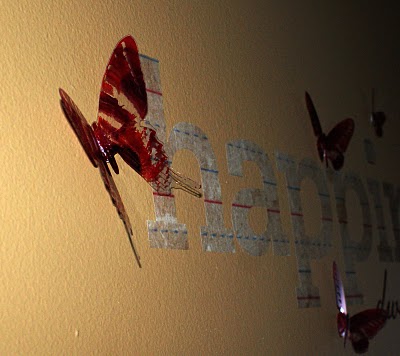
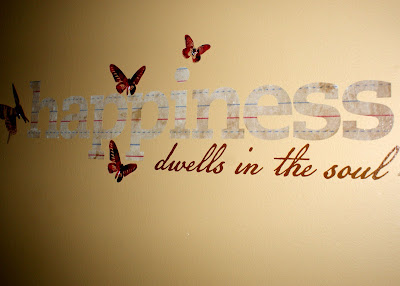
I found another cheap solution to my barren wall space. I haven’t lived in this house for long, and spent the first few months here painting walls and getting settled. You know I am a fan of vinyl wall decor if you have read this post, this one or this one… I could go on for awhile.

I am a big proponent of cutting my own designs with my Cricute, however, this deal at Joanne’s was just too good to pass up. I love the text, with its inspirational message. Not to mention the 3D embellishment butterflies. The colors coordinate perfectly with my living room. The price tag… less than $15 with my Joanne’s 40% off coupon. Can’t beat it. It would cost me a few dollars for the vinyl to cut it myself, and with the time investment it would take, $15 wins! A great way to bring an element of style to your home on a budget! 

DIY Fabulous Frugal Faux Canvas Painting Tutorial

Create an oil paint effect on prints, using Mod Podge Brushstrokes.
These prints were mounted on plywood and painted with Mod Podge to create beautiful faux oil paintings! Read on for full tutorial…

tut12I am so excited about the way this project went! As mentioned in the prior post, here, I created these prints in Photoshop with the idea in mind that I would try something similar to the project over at Infarrantly Creative (see this post).

I had the images printed at 12×12′ on glossy stock. At Michael’s, I picked up 1/2x12x12′ birch plywood squares. Since I wanted the pictures mounted on 1′ backing, I used Gorilla Glue to adhere 2 pieces of birch plywood together for each of the 3 prints. You could also use MDF in for the backing, cut to the size of your prints. I used the plywood because it was already cut to the size I wanted, and it was cheap.

Once the gorilla glue was dry, I was ready to adhere the prints to the wood. Super 77 has minimal overspray, but make sure you cover your work surface, cause this stuff is sti-iii-cky, for real. Spray a thin coat on both the back of the print and on the wood surface and lay the print in place, smoothing flat with your hand. This holds big time and bonds immediately, so make sure you have the pic lined up before placing it. I turned the piece over on a flat surface and applied pressure to the back to ensure I hadn’t missed any air bubbles. This part was really much easier than I thought it would be. I had no problem with air bubbles.

Next, the fun step using Mod Podge Brushstrokes. I just recently ran across a post using this medium and I am in love. I used a 1 inch foam bruse and small texturizing brush. I read that if you are painting the Mod Podge onto photo paper, you should use an acrylic sealer before applying. This was just glossy stock, and I had no problem with ink bleeding. You may want to test a small area before painting your entire work. I just applied strokes randomly. There wasn’t a lot of strategy. The prints themselves I made with a painted effect in photoshop, so I kinda followed along the strokes in the images, but mostly it was just random. Look how cool they are. They look like for real oil paintings!

After the Mod Podge dried for about 30 mintues, I applied gesso to the sides of the wood (you could also use primer), then painted with white acrylic over that.

I used thick tacks (U-shaped) and wire for the hanging mechanism.

 
Here they are on the wall…


You can do this with your own images, posters or garage sale finds. The Mod Podge brushstroke effect looks particularly impressive with photos that have been digitally altered using paint effects. That is a photoshop lesson for another day.

Privacy Policy