Upcycled Frap Bottle Frosty Heart Lanterns

Frosty HeartsDIY Upcycled Frap Bottle Votive Holders @savedbyloves

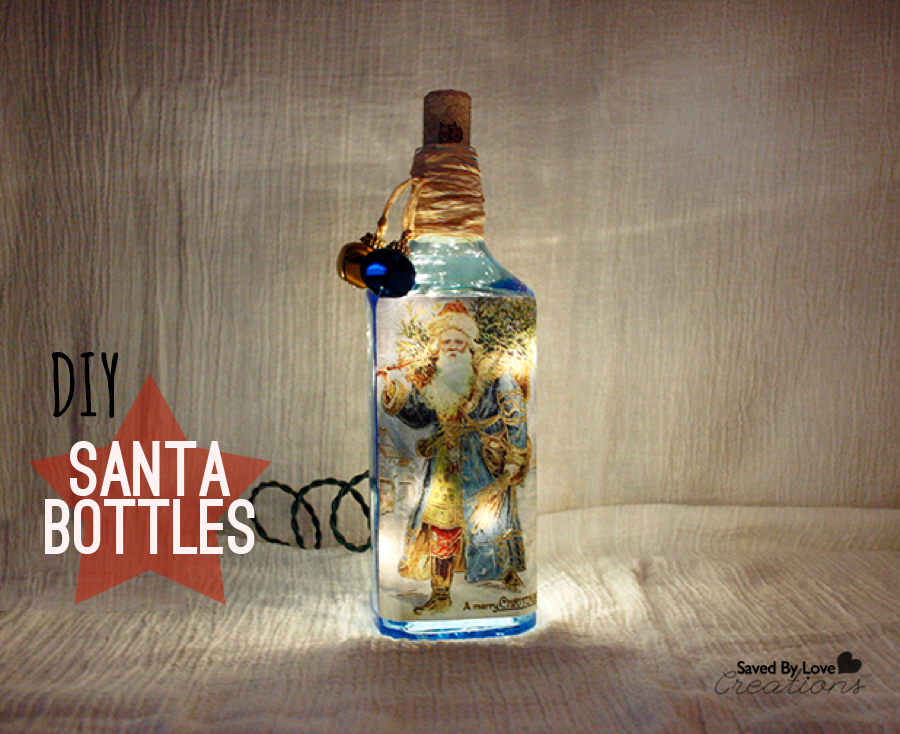
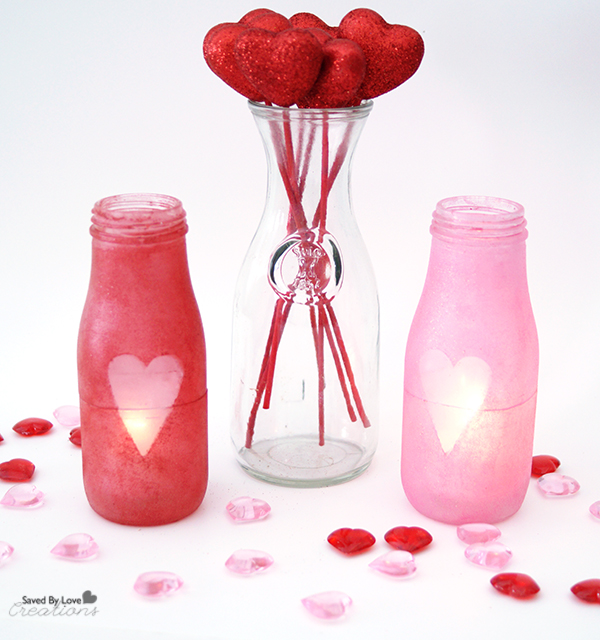
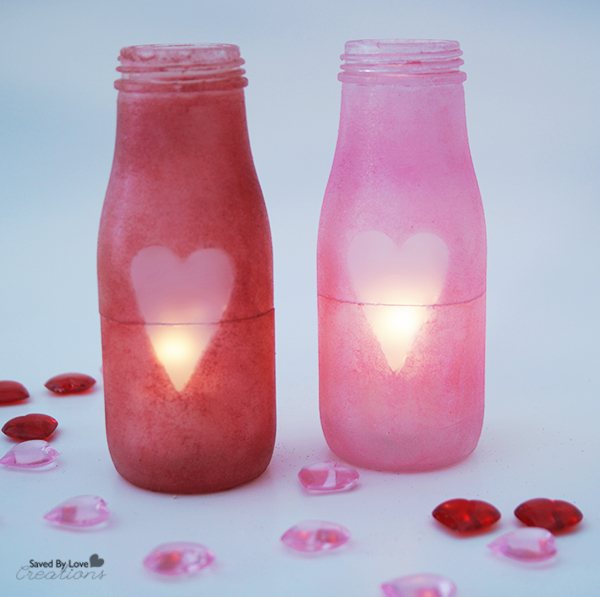
Handmade lanterns are all the rage. With adhesive stencils and paints made just for glass, creating fun designs on bottle is easier than ever. This project involves cutting the bottles roughly in half. Frost and glitter paint are used with heart stickers in a masking technique, so that light from the candles shines through the frosty heart shapes. Create a warm glow for your Valentine’s Day dinner at home!


Frosty Hearts Frap Bottle Votive Holders 7


MATERIALS

– Frappuccino bottles

–Martha Stewart frost glass paint in white

– glitter glass paint in red and pink

– heart stickers cut from foil tape or adhesive vinyl

– cosmetic sponge

– Rubbing Alcohol

– Lint free dry cloth

– Protective gloves

– heart stickers that adhere well to glass

-Surface protector such as newspaper or craft sheet

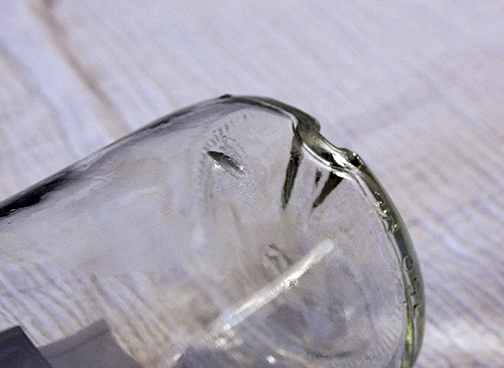
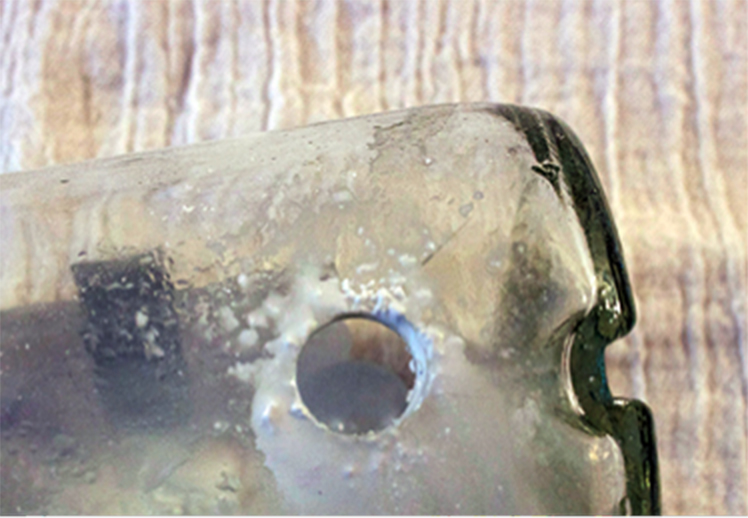
-bottle cutting supplies (See How to Cut Glass Bottles)

DIRECTIONS

  1. Remove labels with soapy water or Krylon Adhesive Remover. Clean and dry bottles.

Frosty Hearts Frap Bottle Votive Holders 2


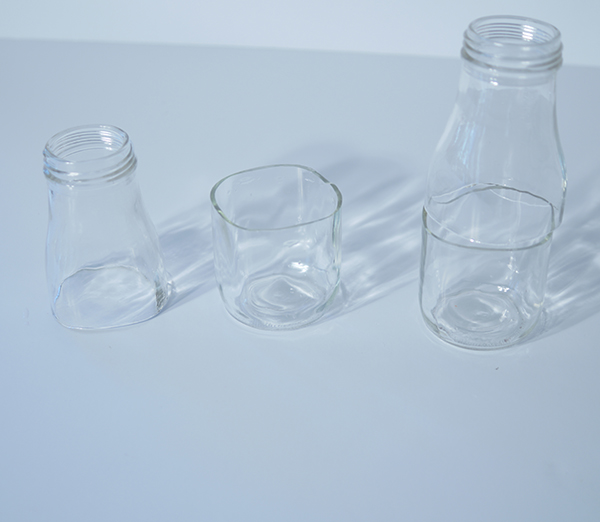
  1. Cut bottles roughly in half. You don’t have to be exact. You just want to be able to lift off the top and place a votive candle inside when you are finished.
  2. Protect your work area with newspaper or craft sheet.

Frosty Hearts Frap Bottle Votive Holders 1


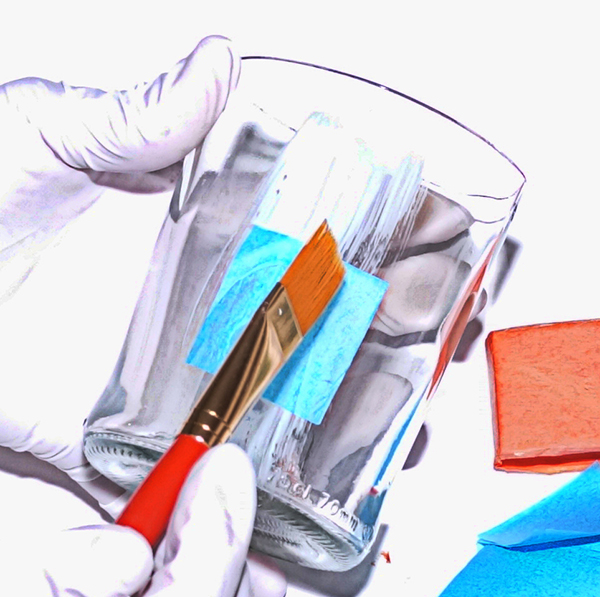
  1. Paint bottles by dabbing thin layer of frosty glass paint in white with a cosmetic sponge. Don’t go over the same area more than once. It is best to apply several light layers, allowing 10-15 minutes of dry time between to achieve the look you want. Applying too heavily leads to streaks and splotches that you won’t like. Once you are happy with coverage (1-3 coats should do it) let dry for about 30 minutes before moving onto the next step.

Frosty Hearts Frap Bottle Votive Holders 3


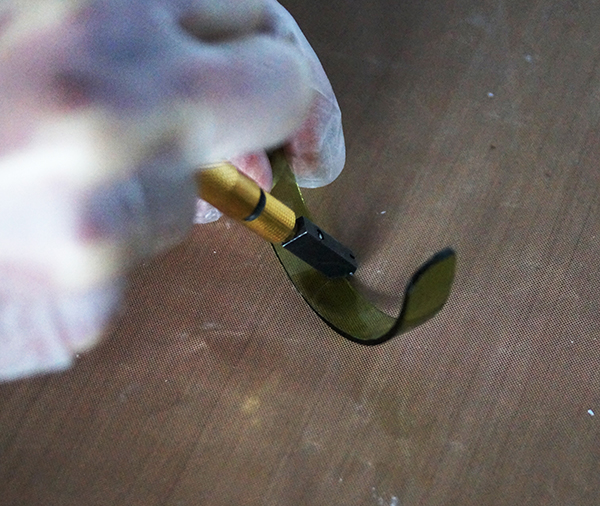
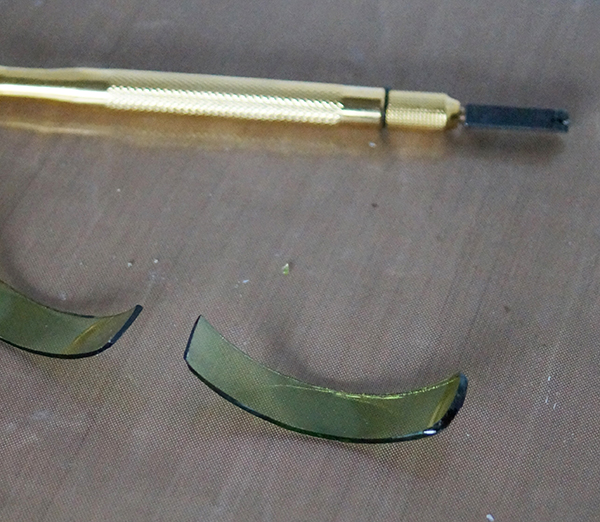
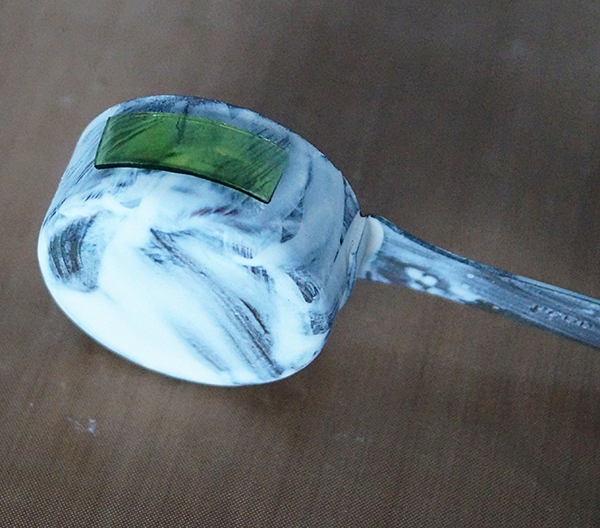
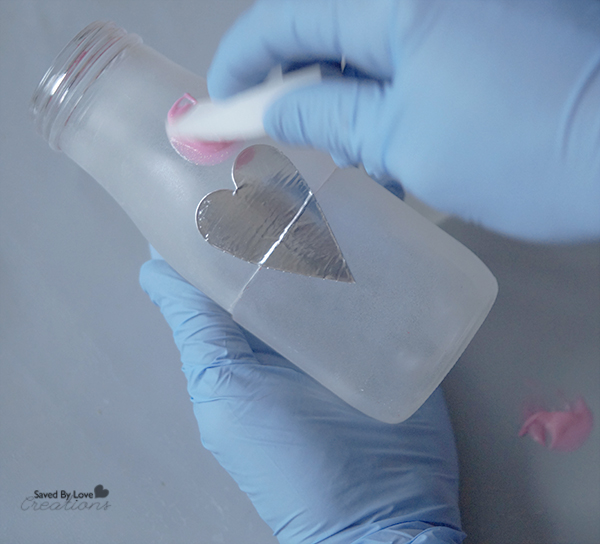
  1. Vinyl and foil tape work well for heart stickers. Cut out hearts using die cut machine, freehand or template (see Hearts page ?)
  2. Apply Heart stickers where you want light to come through the frosty heart. I went for almost center, spanning the cut seam.

Frosty Hearts Frap Bottle Votive Holders 4


  1. Paint one jar with glitter pink, and the other with glitter red. Several light layers with 10 minutes or more dry time in between is best.
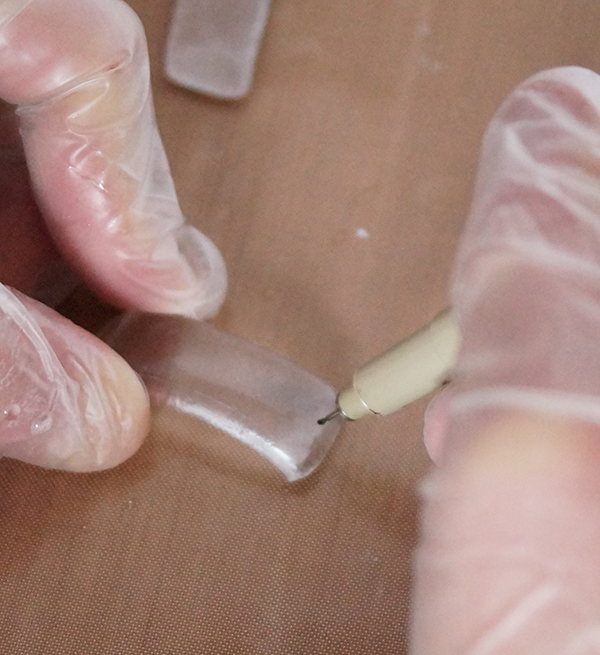
  2. After your final layer, remove the heart stickers with tweezers or a craft knife, being careful not to smudge adjacent paint.
  3. Let dry overnight, with top and bottom apart so that they don’t dry stuck together.
  4. Lift off top and place candle.
  5. Light and enjoy!


EXTRA TIPS

○ Masking Tips – Foil tape in the electrical section at the hardware store works great for these projects. It adheres well so that the paint doesn’t seep underneath, but doesn’t disturb any base layers of paint when removed. A large roll of it is under $8 and lasts years. Don’t leave the stickers on overnight, or the surrounding paint will peel away with them upon removal. You want to remove them soon after your last coat of paint.


DIY Upcycle Lighted Santa Bottles

DIY Santa Light Bottle Upcycle Project @savedbyloves


This handmade Santa light-up bottle adds a warm and cozy feeling to any space for the Christmas season. This project requires a recycled bottle and drilling a hole in the lower backside of the bottle. Also required is a fun search for a Santa image. The choices are endless, ranging from recycled Christmas cards, magazines, printed images, and the imagination goes on. Most importantly don’t forget a strand of Christmas lights. Now let’s get started and enjoy the fun.


Materials for drilling a hole in glass

  • Drill
  • Drill Bit
  • Safety Glasses
    • Facemask
  • Spray Bottle With Water


image 1 Drilling Materials


Directions

  1. Drill a hole in the bottle. Through my research I found that using a 1/2 inch hole saw diamond grit drill bit works best for drilling a hole in a bottle. You can find this type of drill bit in most hardware stores and online.


  1. Safety first: Wear safety glasses and a facemask to prevent eye injury and inhaling glass dust.
  2. Starting on the backside and lower end of the bottle place the drill bit at an angle. This will allow you to start a groove in the bottle. Once you have the groove started you will begin to slowly bring the drill to an upright position. Apply pressure but not too much as this will cause the bottle to break. Periodically stop drilling and spray the drill bit and bottle where you are drilling the hole to keep the drill bit and bottle cooled off. This also keeps the glass dust level down while you are drilling.

image 2 drill at angle

image 3 b groove started

image 2b Drill Perpendicular

image 3c spritz with Water

image 3d Hole Drilled


Tip: I have also seen websites online where you can purchase predrilled bottles from suppliers.


Materials for Santa bottle


  • Empty Bottle (most types of bottles will work for this project)
  • Cork (optional)
  • Strand of Christmas Lights (20-30 bulb strand with a one-ended plug)
  • Santa Image (of your choice)
  • Raffia
  • Christmas Bells (two)
  • Glue
  • Water
  • Paintbrush

Santa Bottle DIY


  1. Removing labels from the bottle. Soak bottle in warm soapy water until the label is saturated with water. Use a putty scraper or a scraper with a razor blade on the end. Once the bottle is clean allow it to dry.

Tip: If the inside of the bottle has any residue from the drilling process you can tear off a small piece of a cleaning cloth and swish it around with the water in the bottle and that will help to rid of it.


  1. Apply the Santa image. I prefer to make a mixture of Elmers glue and ¼ water. If the image is on thick paper this mixture will work well. If the image is on a thinner paper use a thicker consistency of glue (less water). Note: Other types of glue or Mod Podge products will work. Check your local craft stores to see what products they carry.


Measure the Santa image up to the bottle to insure the placement of the image will be where you want it. Using your paintbrush brush glue on the area where the image will be placed. Starting from the center of the image place your image on the bottle and gently glide your fingers from the center to outer edges of the image. Once you have the image glued down brush some more glue over the top of the image. Start this from the center working your way out as well. If any bubbles occur on the image you can smooth them out with your fingers from center to outer edges. Allow image to dry. Note: Once dry you can add glitter or a coat of crafting varnish on the Santa image.


Santa Bottle DIY 2Santa Bottle DIY 3


  1. Wrap raffia around neck of the bottle. Two or three strands of raffia will cover the neck of this size bottle. More strands may be required if your bottle is taller. Start by tying one end of the raffia around the neck of the bottle leaving a little excess on one end to tie off in the end of the wrapping process. Begin wrapping it fairly tight around the neck of the bottle. If your strand starts to run out tie the next strand to the one you started with and keep going until you have covered the neck of the bottle. Now tie off with the excess. Note: Twine, yarn, or ribbon can be used in place of the raffia.


Wrap Raffia around bottleWrap Raffia around bottle 2 

  1. Tying on the Christmas bells. Using another strand of raffia, tie the raffia around the top of the bottles neck, leaving a generous amount on both ends so that you can tie one bell on each end.Tying on Bells

 Tying on Bells 2

  1. Place a cork in the top of the bottle. (Optional)Place Cork
  2. Inserting the strand of Christmas lights. Turn the bottle upside down to insert lights (this helps the light strand to flow more evenly throughout the bottle). Starting from the bulb end of the light strand insert each bulb individually into the bottle. Once you have your strand of lights in it is time to plug in and enjoy.Insert Lights

Insert Lights 2

DIY Liquor Bottle to Mercury Glass Bracelet Storage

Liquor Bottle Upcycle to Mercury Glass Bracelet Storage @savedbyloves

Bottle Bracelet Storage

 I am always looking for unique and decorative ways to organize my jewelry. Pretty up a long necked bottle to suit your style and display your bracelets for all to see. It doesn’t get much more straightforward than this project!

DIY Liquor Bottle Upcycle to Mercury Glass Bracelet Storage @savedbyloves

MATERIALS

-Long Necked Bottle

Screen Shot 2014-09-29 at 11.32.26 AM

-Glass Bottle of your choice

Krylon Looking Glass Spray Paint

Krylon Spray Adhesive Remover

-Epson Salt

-Kraft paper, plastic or other work surface protector

Bracelets galore

DIRECTIONS


1.  Remove any labels from your bottle with adhesive remover.  I love Krylon’s Spray Adhesive Remover.  Saves loads of time for wine bottle upcyclers like me!

2.  Pour Epson salt into bottle so that to about one inch from the bottom.  If your bottle is smaller, you can use less.  It is not important to be exact here.

 3.  In a well ventilated area with protected work surface, spray looking glass paint into mouth of bottle.  Make sure to follow instructions on label.  You want to shake the can vigourously before using.  If your bottle mouth is small in diameter like this genie bottle, you will have paint pooling in one spot and running down the neck.  That is fine.

4.  Shake the bottle like a snow globe, so that the salt grabs the paint and drags it around.  This will create the mercury glass look.

Repeat steps 3 and 4 a few more times, allowing each coat to dry for about 5 minutes before applying the next.  Stop when are happy with the look.

2. Place your bracelets and admire.

Wine Bottle Bracelet Storage 1

EXTRA TIPS

Decoupage the bottle or paint it with glass paint and stencils for a look other than mercury glass.  The customization possibilities are infinite!

Does DIY Jewelry Storage excite you?  Visit our 50+ Clever Jewelry Storage DIY Ideas!

Need some bracelets now that you have a stylish, eco friendly bracelet display?  We have you covered with 50+ DIY Bracelets to Make:

Wine Bottle Candle Holder Tutorial

How to Upcycle Wine Bottles into Candle Holders @savedbyloves @proteawines


Magnify and reflect candlelight in these gorgeous green wine bottle tiered holders.  This project involves cutting bottles and gluing bottoms to tops, giving you luxury style on a dime in no time. Tiered candle holders make great mantle décor and centerpieces for all occasions.

Protea Wine Bottle Upcycle ProjectI was given these beautiful Protea Wine Bottles to use.  They have the coolest designs, don’t they?  Sadly, I shattered one of them, but the other survived! Here is how I did it…

MATERIALS

-Bottle cutting supplies (I use Creator’s Bottle Cutter)
–E6000 Industrial Glue
-green wine bottles
-Rubbing alcohol or glass cleaner
-Paper Towels

DIRECTIONS

1. Remove labels
2. Clean glass bottles with rubbing alcohol or glass cleaner before cutting.
3. For detailed bottle cutting instructions, see How to Cut Wine Bottles. Cut wine bottles in three heights from the bottom of the bottle to the cut line. You can eyeball it, or measure with a rule and mark with a sharpie. The smallest bottle could be four inches, the middle five inches, then six to get an equal gradient in height for your final candle holders.  Use the top of the wine bottle for your candle holder base, or cut beer bottle necks for the base.  That is what I did for this project.

Tiered Trio Candle Holders 2

5. Gather the tops of the beer bottles and the bottoms of the wine bottles, and make sure they are clean.
Tiered Trio Candle Holders 3

6. Apply E6000 to the mouth of the beer bottle and place on flat surface.
7. Place and center cut wine bottle on top of the glue.
8. Let dry overnight.
Recycled Wine Bottle Candle Holder Tutorial @savedbyloves
9. Add filler and candles. Flameless LED tea lights are shown here, on top of filler sand.

Wine Bottle Glass Holder DIY

Bottle to Wine Glass Carrier 1

It doesn’t get much cheaper or easier than this reclaimed wood to bottle/glass holder and display! Power tools are involved, but fear not; even the novice can pull this off beautifully. Impress your date on your next romantic evening with wine for two!

MATERIALS


-Scrap wood

-¼ inch Drill bit

-1.5 inch hole saw

-Jig saw

-Medium grit sand paper

DIRECTIONS

1. Sand the edges of your wood down so it looks a little worn and smooth.

Bottle to Wine Glass Carrier

2. Using the 1.5 inch hole saw drill a hole precisely in the center of the board.

DIY Wine Glass Holder from Reclaimed wood and Wine Bottle 

3. Then using the ¼ inch bit drill a hole in the middle of the board approximately ½ inch back from each end.

Bottle to Wine Glass Carrier 3 

4. Use a jig saw or saber saw to then slot these holes to the end of the board.

Bottle to Wine Glass Carrier 4

 5. Plop it onto your favorite bottle of vino and let your stem ware hang freely.

 EXTRA TIPS

○ Paint your board to match your home or party décor. Etch monograms or other custom text like I showed you in the glass tumblers and doily bottle projects. Give these away as neighbor gifts for picnic season, or as easy, inexpensive holiday gifts!

Tissue Decoupaged Recycled Wine Bottle Lanterns

DIY Decoupaged Recycled Wine Bottle Lanterns

Hanging lanterns in the trees goes a long way towards setting a lovely scene.  With some tissue paper squares and a few wine bottles, you are on your way to  create beautiful, eco-friendly lighting to add ambiance to your outdoor space or party.

 MATERIALS

Decoupage Lanterns Supplies

 -Clear wine bottles

-Bottle Cutting Supplies (See How to Cut Wine Bottles)

-Tissue squares in a variety of colors

-Glass drilling supplies with 1/8 inch diamond hole bit

-metal chain

-jewelry pliers

 -Mod Podge

 -Foam brush or flat paint brush

 DIRECTIONS


1.  Clean bottle and remove any labels.

 2.  Cut bottles to 4-5 inch height and sand any rough edges (See How to Cut Wine Bottles).

3.  Drill 2 holes about 1/8 inch from the top on opposite sides of the bottle (For how to drill in glass, See DIY Mason Jar Chimes).

4.  Clean the cut bottles with alcohol or glass cleaner (I put on gloves at this point to avoid fingerprinting the glass).

Decoupage Lanterns 5

Decoupage Lanterns 7

5.  Paint a strip of Mod Podge down the side of the glass and add a tissue squares.  Overlap them as desired for different effects.

6.  Paint layer of Mod Podge over each strip as you finish, smoothing out wrinkles in the paper with your paint brush as you go.  Don’t over do it as the paper is easily torn.

7.  Once entire glass is covered, go over it with another layer of Mod Podge.  You can use the outdoor formula if you are leaving the lanterns outside long term.

Decoupage Lanterns 1

8.  Add chain by opening link the end link with pliers, inserting it into the hole near the top of the glass and closing it back with the pliers.  Insert the other end of chain in hole on the opposite side.

For more inspiration, visit our 50+ Glass Bottle Crafts:

Reclaimed Wood Wine Bottle Vase Trio

Salvage Wood Wine Bottle Wall Vase Trio

Wine Bottle Wall Vase2 copy

 Reclaimed wood and recycled bottles combine with inexpensive copper hardware for this rustic, ecofriendly wall vase set.  Make it in under an hour with just a few dollars for hardware!  This is perfect inexpensive wall decor, and makes a great, unique handmade gift for the holidays.

MATERIALS

Wine Bottle Wall Vase 4

-Scrap wood cut to desired width (The board I had was 25 inches, so I went with that.  Use any number of wine bottles, and cut your wood the appropriate length for that number.)

-Drill

-1 inch copper bell hanger kit (available in plumbing section of most hardware stores for less than $2 each)

-Picture hanging hardware

-Wine bottles (clean and remove labels if desired as described in Techniques)

 DIRECTIONS

 1.  Paint, stain or decoupage your wood any way you like.  I left mine as I found it since it had the weathered look I love.  Same goes for the bottles.  Paint or decorate them to fit your decor or occasion.

Measure for holes

2.  Measure and mark placement of your bottles, leaving even spacing between each and centering them on the board.  Yay math!

Drill hole for clamps

3.  Drill a pilot hole with a drill bit just smaller in diameter than your screw.  If you aren’t using a drill, use a hammer and nail to make a pilot hole.

Wine bottle wall hanging

4. Attach bell hanger using the screw that came in your kit and a drill or screwdriver.

How to make a reclaimed wood wall hanging

5.  Attach a loop for hanging on each side.

Wine Bottle Wall Vase3

6.  Place on wall and add wine bottles.  Time to head to the farmer’s market for some fresh flowers!

Recycle Wine Bottles into Inexpensive Wall Decor with Reclaimed Wood @savedbyloves

DIY Upcycle Liquor Bottle to Mercury Glass Lamp

How to make Mercury Glass

Get the look of expensive mercury glass with a can of spray paint and some Epson salt!  This simple project takes a genie lamp shaped liquor bottle to an elegant mercury glass lamp for way less than the purchase price you see in stores.

Mercury Glass Lamp Tutorial

MATERIALS

Mercury Glass Lamp 5 

-Glass Bottle of your choice

–Krylon Looking Glass Spray Paint

–Krylon Spray Adhesive Remover

-Epson Salt

-Kraft paper, plastic or other work surface protector

-Drill and 1/2 inch Diamond Hole Drill Bit

-Lint free towel and rubbing alcohol

-Dust mask

-Protective Gloves

-Protective Eyewear

-Container of water with a a soaked towel or rag

–Bottle Lamp Kit

-Lamp Shade

-Light Bulb

DIRECTIONS


1.  Clean bottle and remove labels; to do this, soak bottles in hot, soapy water and remove labels.  Rubbing alcohol in a lint free cloth will remove residual adhesive.  My personal favorite technique is Krylon Adhesive Remover.

Mercury Glass Lamp 3

2.  Drill a hole where you want the cord to exit the lamp, in the back near the base.  For that technique, see my previous tutorial:  How to Make a Lamp From a Glass Bottle. Follow safety precautions!

3.  Clean away debris from drilling, dry bottle with a lint free cloth and tape over the hole you just drilled.  You will see why!

4. Pour Epson salt into bottle so that to about one inch from the bottom.  If your bottle is smaller, you can use less.  It is not important to be exact here.

5.  In a well ventilated area with protected work surface, spray looking glass paint into mouth of bottle.  Make sure to follow instructions on label.  You want to shake the can vigourously before using.  If your bottle mouth is small in diameter like this genie bottle, you will have paint pooling in one spot and running down the neck.  That is fine.

6.  Shake the bottle like a snow globe, so that the salt grabs the paint and drags it around.  This will create the mercury glass look.

7.  Repeat steps 5 and 6 a few more times, allowing each coat to dry for about 5 minutes before applying the next.  Stop when are happy with the look.

Mercury Glass Lamp 6

8.  Follow instructions on your lamp kit to assemble.  The one used here was super simple to and cost $6.

9.  Use a thrift store or new lampshade to fit your décor.

EXTRA TIPS

○ The salt will stick to the wall of the bottle in spots, giving a lovely crystal effect.  You can pour as little or as much of the salt out as you want after painting.

Use this technique for recycled glass bottle vases, votive holders, wind chimes and more.  Keep in mind this only works when the sprayed surface is inside.

DIY Wine Bottle Candles

How to make Wine Bottle Candles @savedbyloves

Scented with your favorite fragrance, these beeswax and soy candles are easy to make and great for all occasions!  We will be cutting wine bottles and using the bottom section as a container for pouring our candles.  Get started now and give these inexpensive, eco-friendly, handmade treasures as Christmas gifts that are sure to impress!

 MATERIALS


Wine Bottle Candles 1

Beeswax or Soy Wax

Scented Oil

Soy wicks on metal tabs

Double sided adhesive

Melting Pot and large sauce pan for boiling water

Cut wine bottles for candle containers (See How I Cut Wine Bottles)

Bamboo Skewer or pencil

Craft wire or rubberbands

Scissors

Lint free cloth

Soap and water or glass cleaner

 DIRECTIONS

 1.  Melt wax per instructions.  I used an aluminum melting pot placed in a large sauce pan of boiling water.  Add scent if you are going to do that.

Wine Bottle Candles 2

2.  While that is melting, prepare container and wick. Clean container well and dry with a lint free cloth.  Adhere wick tab to double sided adhesive, and stick other side into container.

Wine Bottle Candles 3

  1. Wrap excess wick around dowel rod, centered so that wicks are straight up and down.  Use wire or rubber band to attach a second dowel rod to the first, sandwiching the wick in place.

Wine Bottle Candles 4

4.  Pour in wax until container is as full as you would like.  Let sit overnight, trim wicks and enjoy!

Wine Bottle Candles 5

EXTRA TIPS

○ Use printable labels to customize your candles for gifts and holidays.  Etch monograms and patterns like I showed you in the Monogram Tumblers project!

For more inspiration, visit our 50+ Glass Bottle Crafts:

Cut Wine Bottle Bracelets

Create Bracelet From Wine Bottle Glass

Your friends will be amazed when you tell them these bracelets use to be wine bottles!  This project involves cutting glass and firing in a kiln, but you could do a version without the kiln too.  Use rub on transfers and alcohol inks to create a piece of wearable art!

MATERIALS

-glass bottle label removing and cleaning supplies (see techniques)

-glass bottle cutting supplies (see techniques)

-stainless steel measuring cup

-kiln

-kiln wash

-glass drilling supplies

-jewelry chain

-jump rings

-toggle clasp

-two pairs of jewelry pliers; flat and or needle nosed

-alcohol inks and felt pad applicator

-non stick craft sheet

-rub on transfers

-beads and charms for embellishing as desired

-permanent marker

 DIRECTIONS

 1.  Cut a ring from your chosen bottle (See How to Cut Wine Bottles)

Make jewelry from wine bottles

Wine Bottle Bracelets 3

2.  Carefully score ring with glass cutter and tap to break score, leaving you with a half circle.  Score this to the size you would like your bracelet to be, about 2.5 inches.

 Wine Bottle Bracelets 4

3.  Place bracelet piece on kiln washed stainless steel mold or measuring cup as shown and fire to full fuse (see techniques).

Wine Bottle Bracelets 5

4.  Once the bracelet is cool, remove it from the kiln.  Mark for placement of holes where chain will be attached with a jump ring.

Wine Bottle Bracelets 6

5.  Drill the holes using small diamond bits (see How to Drill Holes in Glass).  I use this diamond tipped micro engraving drill bit kit for my small holes.

Wine Bottle Bracelets 7

6.  Begin drilling at the mark, coming in at an angle to start your hole, then moving to 90 degrees as described in the techiques.  Make sure to cool the drill bit in water every 30 seconds or so to prevent glass from shattering due to heat.

Wine Bottle Bracelets 10

7.  Apply rub on transfer per instructions to the front surface of the bracelet.

Wine Bottle Bracelets 12

8.  Use felt applicator or brush to apply alcohol inks to back surface of bracelet.

 Wine Bottle Bracelets 14

9.  Open jump ring using two sets of pliers to twist each end in opposite directions.  Do not pull ends apart to open, rather twist open as shown.

10.  Attach the appropriate length of chain to get desired bracelet length and close jump ring by twisting ends back together.  Keep in mind the closure will add about ½ inch to the length of the bracelet.

Wine Bottle Bracelets 15

11.  To finish, attach toggle clasp ring to one end and bar to the other, using a jump ring for each.

 Bracelet on Fire

EXTRA TIPS

○ Create custom bracelets, earrings and pendants using this technique.  Use blank rub on transfer paper made for inkjets to transfer your own designs to your recycled glass jewelry!

Privacy Policy