DIY Cut Wine Bottle Table Number Centerpiece

Cut wine bottle wedding centerpiece table numbers tutorial @savedbyloves

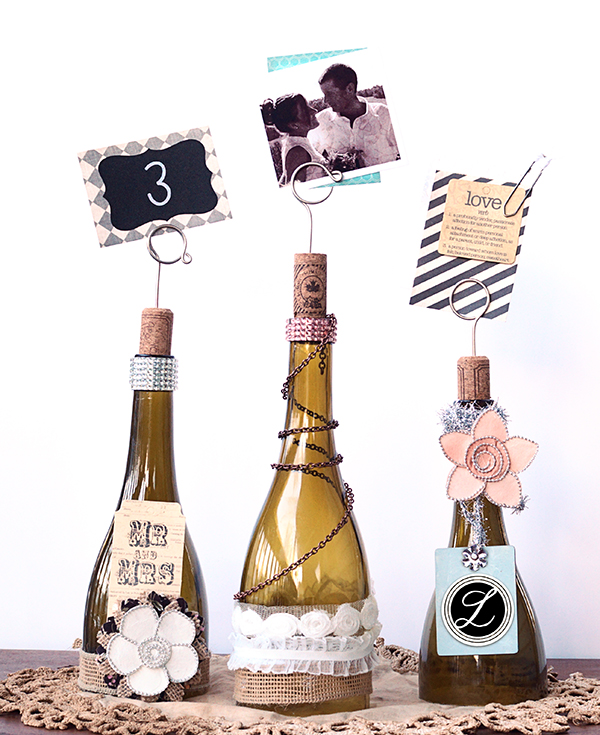
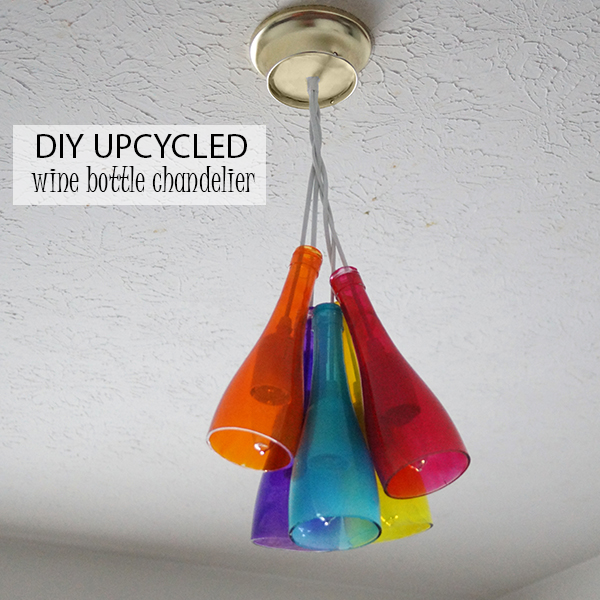
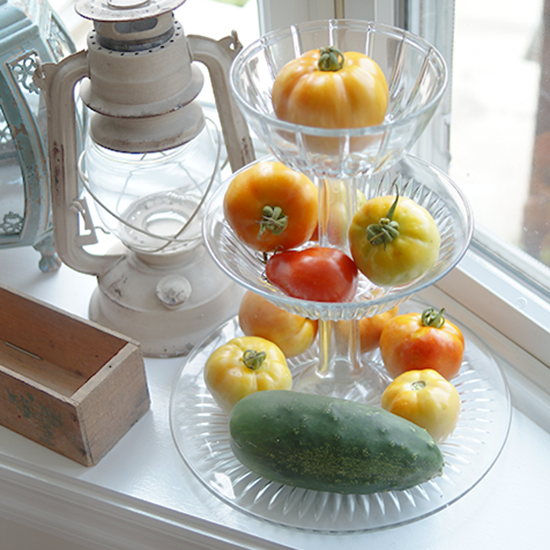
With just a few simple supplies, you can make this charming wedding reception table number centerpiece for that special day.  Not only that, this can be used for an eco-friendly centerpiece for any occasion!

MATERIALS

DIY Wedding

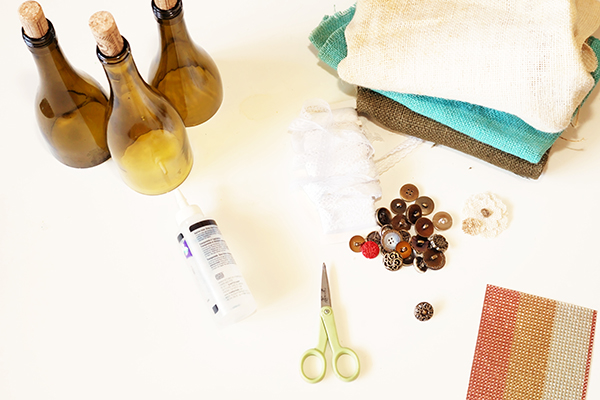
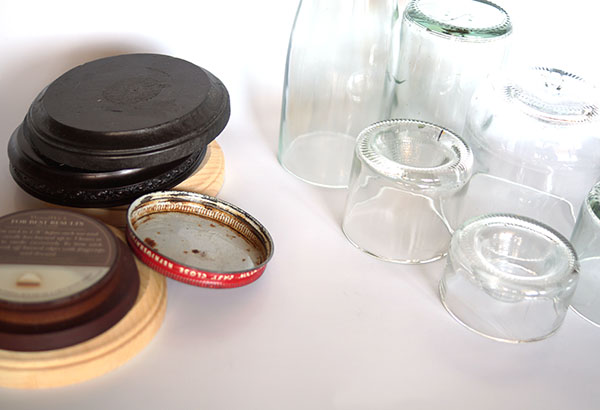
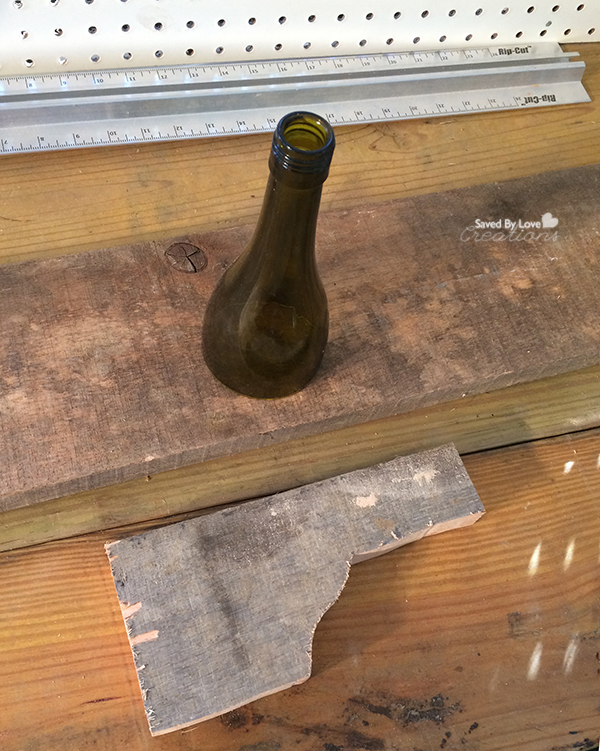
-Three Green Wine Bottles with corks
-Burlap ribbon
-Lace
-flower embellishments (die cut, hand cut or buy in the scrapbook section of your local craft store)
-18 gauge craft wire
-Antique finish metal chain
-Blingy metallic and other ribbons
-Wedding themed paper craft embellishments
-Adhesive crystal sheets
-Chalkboard tags
-Decorative brad
-Monogram sticker
-Photograph of couple
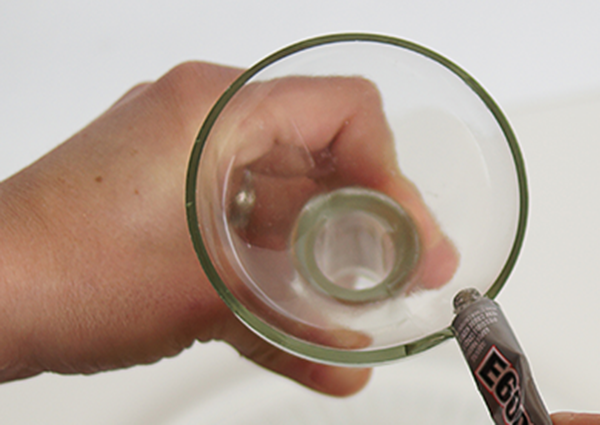
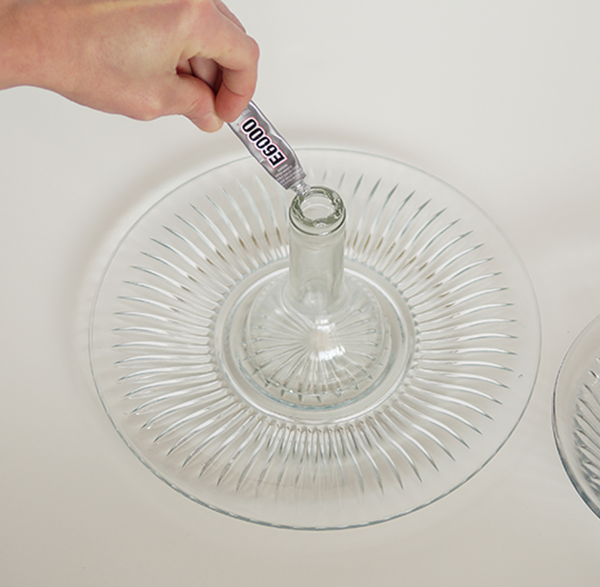
-Quick grab craft glue or hot glue
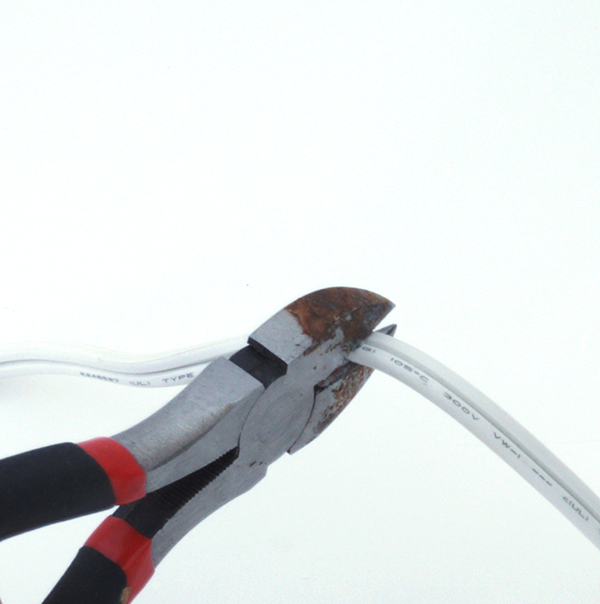
-Wire cutter

TUTORIAL

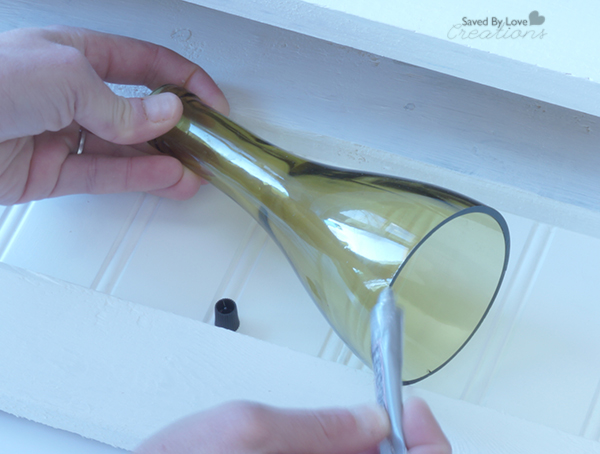
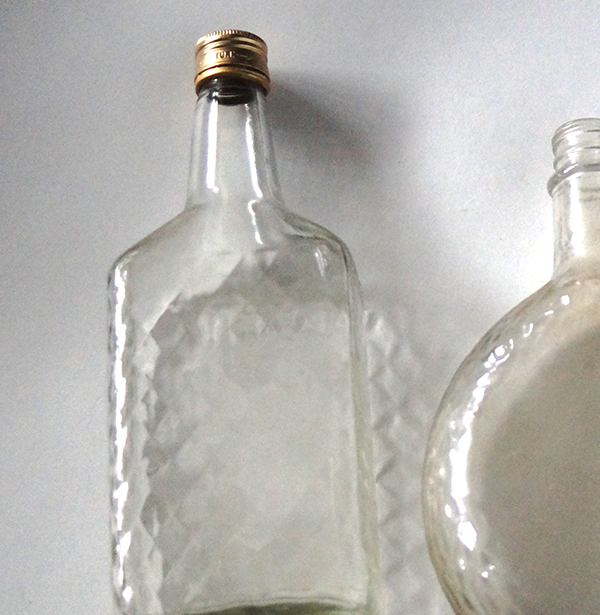
1. Cut your wine bottles to 3 different heights (See How to Cut Wine Bottles)
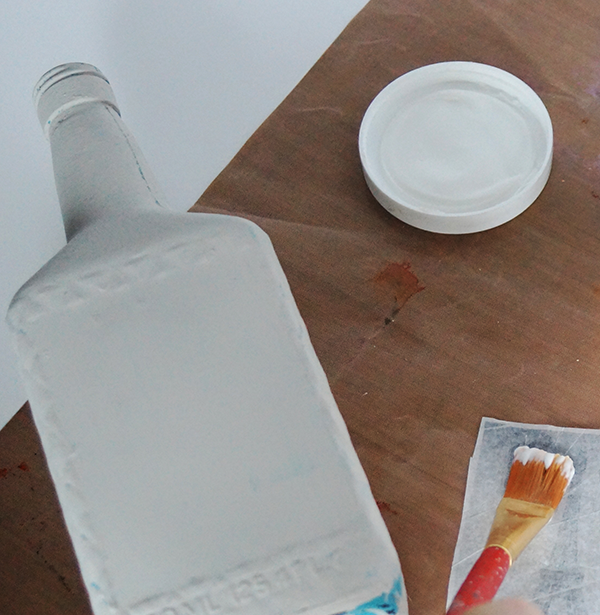
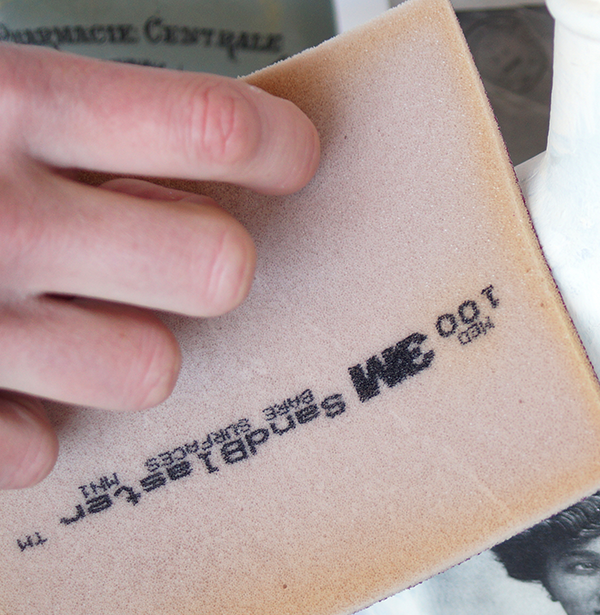
2. Smooth out any pointy edges with grinder or sand paper.
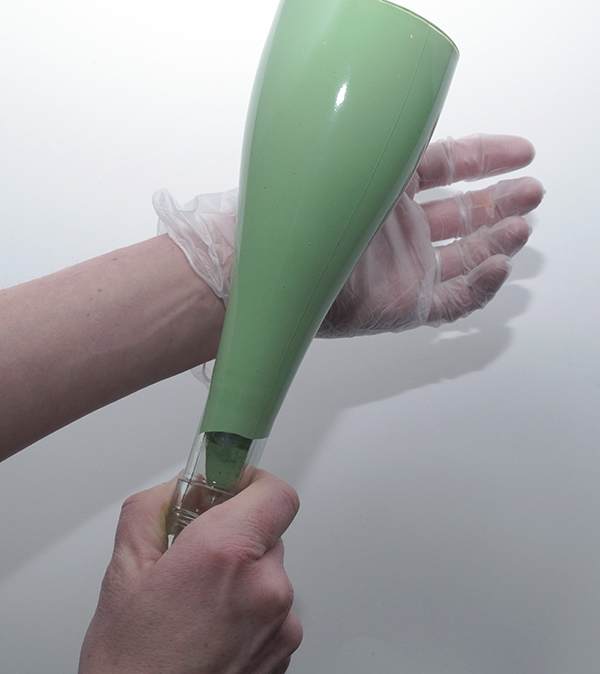
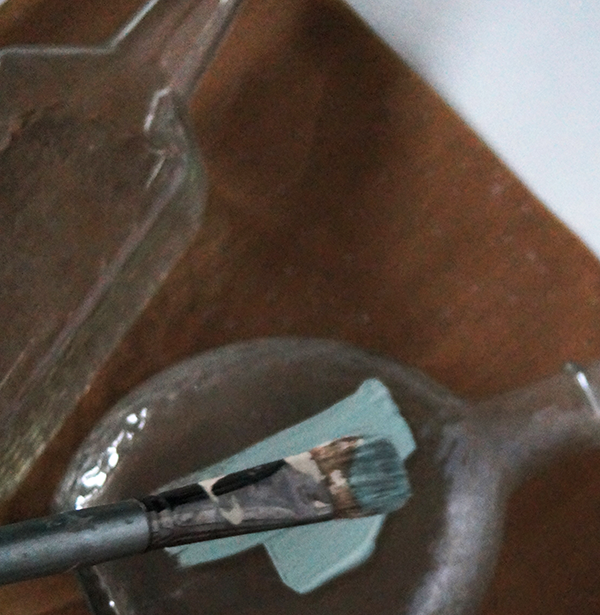
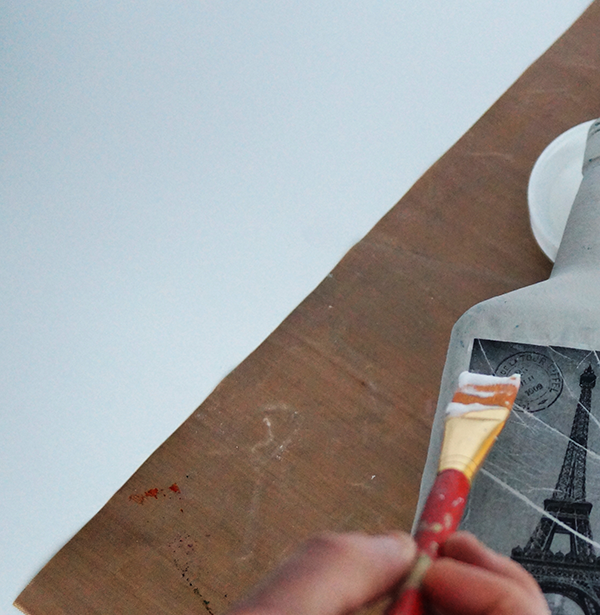
3. Clean the bottle with alcohol or glass cleaner. I like to wear gloves after cleaning the bottle to avoid fingerprints.
How to cut wine bottles

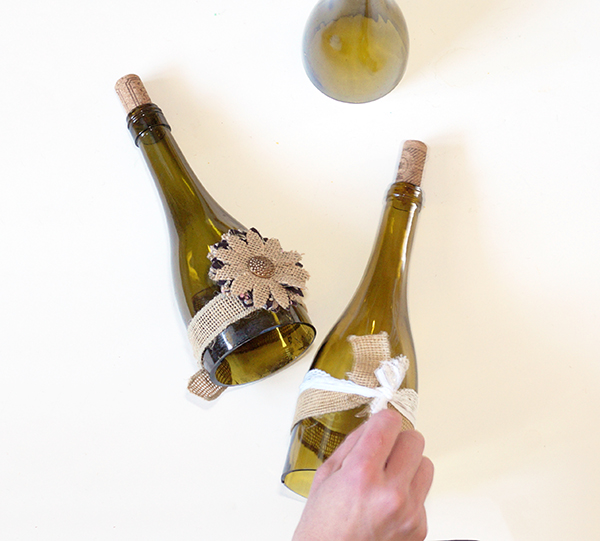
4. Tie burlap ribbon and lace around two of the bottles near the base.
5. Wrap sparkly twine or ribbon around neck of the remaining bottle and dangle a chalkboard tag with the couple’s monogram from it. Place a decorative brad at the top of the tag.
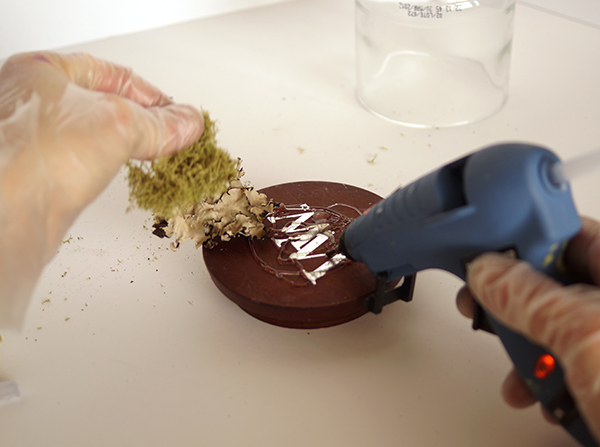
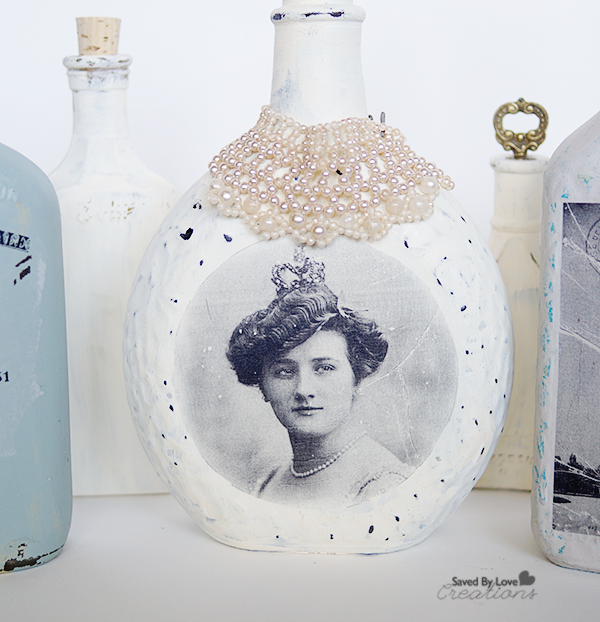
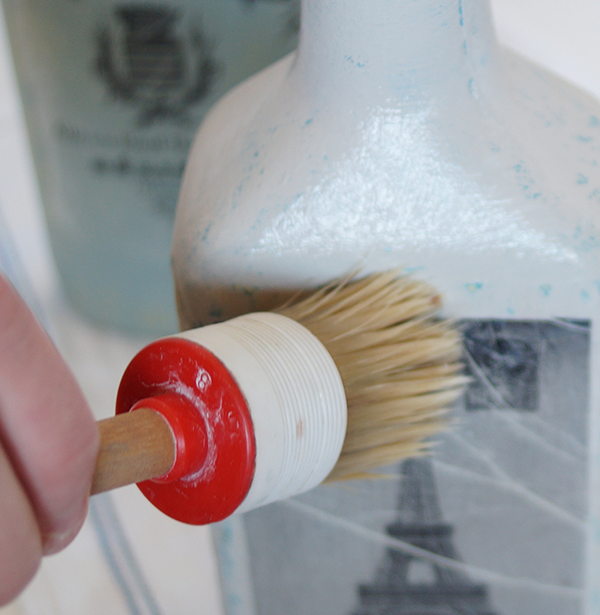
6. Embellish bottles by gluing on flowers, placing adhesive crystals and draping metal chain as shown.
Wedding Table Number Bottles5

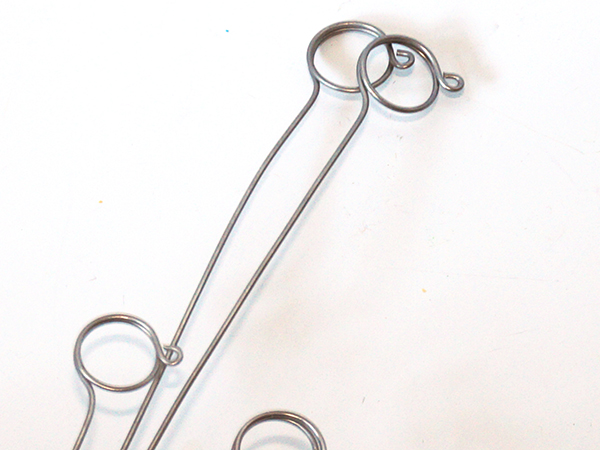
7. Make the wire place card/photo holder. I picked up a picture display at a garage sale and cut the wire holders from that. You can easily make your own with 16-18 gauge wire. Cut a piece of wire about 5 inches and wrap one end around a cylinder shaped object a few times (Highlighter markers or small prescription bottles work well for this.). Bend wire at the base of the circle you just made. You can use round nose pliers to make the little loop on the circle part or just leave as is.
DIY Wedding Centerpiece

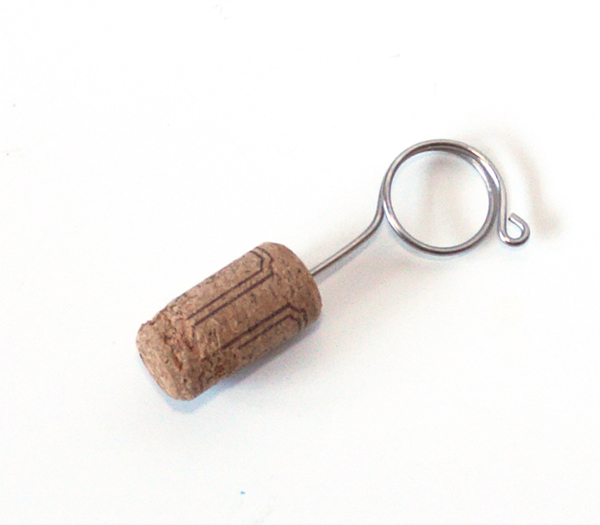
8. Insert wire into cork. Create a pilot hole in the cork with a needle tool, small nail or straight pin. Insert wire holder into pilot hole and add a dab of hot glue to secure.
Wedding Table Number Bottles7
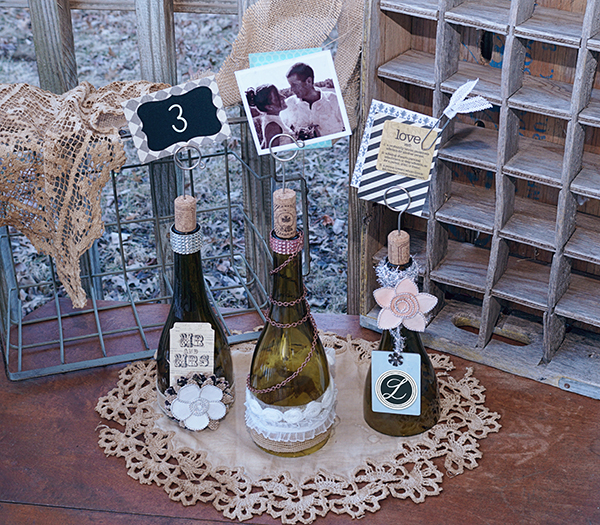
9. Place table number, sentiments and photos as shown.

EXTRA TIPS

○ Use this concept for holiday centerpieces, photo displays, anniversaries and other occasions by changing embellishments to match the theme.

DIY Wine Cork Bulletin Board

How to Upcycle Wine Corks into Home Decor

Stay organized, eco-chic style with this cork board made from… corks!  This project is simple, functional, stylish and can be super inexpensive with a thrifted frame.  Start saving those wine corks, ask your friends to save them, and hit your local recycle center to see if they can hook you up with some.  You are going to need quite a few, especially if you have a large frame.

SUPPLIES

Framed Cork Bulletin Board

-Wine Corks

-Utility Knife

-Hot glue gun and sticks

-Frame without glass 

TUTORIAL

1.  Remove glass from frame, leaving just the backing.

Framed Cork Bulletin Board2

2.  Decide on a pattern for your corks.  Simple and repeating looks best.

Framed Cork Bulletin Board3

Framed Cork Bulletin Board4

3.  Starting in the center, begin gluing corks in your chosen pattern directly onto the frame backing.

4.  When you come to the edges where full corks no longer fit, cut the corks where necessary to create the appropriate shape to fit the space.  Continue until the entire frame is full.

Framed Cork Bulletin Board5

EXTRA TIPS

Seal corks after they are all placed for a glossy finish if desired!  These would be great for displaying bride and groom photos for your wine themed wedding reception.

For more inspiration, visit our 50+ WINE CORK CRAFTS:

Rainbow Recycled Wine Bottle Chandelier

Make a rainbow chandelier from recycled wine bottles @savedbyloves Hi there, recycled wine bottle decor lovers!  Today I am sharing a project that will add color to and illuminate any space.  Get your rainbow on with this wine bottle chandelier or match it to your style. You can make this light to go with your home decor using your favorite Mod Podge Sheer color, or use as many as you can get your hands on, like I did.  The project involves cutting wine bottles, which is easier than you may think, so let’s get started!

SUPPLIES:


Wine bottles cut to the size you want (I have showed you how to cut them HERE:  How to Cut Wine Bottles)

Mod Podge Sheer Colors

Mod Podge Sheer Colors

Wax paper or non stick craft mat

Craft Knife

Pendant light kits (I used these 12′ Hanging Lantern Cords I found on Amazon)

TUTORIAL:

Coloring the cut wine bottles

Pour Tinted Mod Podge

Squeeze a generous amount of Mod Podge Sheer Colors into the cut end of your bottle.

Upcycle Home Decor Wine Bottle Crafts

Twirl Bottle to disperse color all over the inside of the bottle.

DIY Wine Bottle Crafts

If you are having a hard time getting it to flow, you can tap the bottle against your wrist as shown.

Let the excess Mod Podge drip into back into the product bottle to save as much as possible for your next project!

I placed my bottles on my kitchen table, on a non stick craft sheet, with the ceiling fan on.  Place them with the mouth down so they dry faster.  This will be an overnight process.

Wiring the lights

How to make a pendant lamp

For this project I used a standard E27 base pendant light kit available at almost any Walmart or big DIY store.  The one I used actually had an in-line switch between the plug and the socket base.  I didn’t have a need for the switch or the plug since I was going to be direct wiring it to an existing switched circuit.

Step 1

Wine Bottle Pendant Lamp tutorial

I cut the wire using wire cutters at the socket side of the switch.  I left about 2 ft. of wire to the socket base but you should test and see what distance looks best in your application.

Step 2

DIY Lights from wine bottles by saved by love creations

Run the cut end up through bottle and out the neck of each of the six colored bottle shades.  The sockets will fit snuggly up in the taper of the neck of the shade.

Step 3

Wine Bottle Pendant Lamp 6

Wine Bottle Pendant Lamp 7

Bare the ends of each of the wires using your wire cutters to peel away the plastic coating (there will be 12 wires, hot and a neutral for each lamp or 18 if the kit is wired for a ground).

Step 4

I chose a room that already had a simple ceiling light on a wall switch. This made it easy to take down and I just used the existing junction box and cover plate from the old light.

Step 5

With wall switch OFF ( throw the service breaker for extra safety) take down the old ceiling light and find the white(neutral), black(hot), and green (ground) wires.  Pull them down out of the box and make sure you have enough room to go back with the new wire bundle you’re going to create.

Step 6

DIY Rainbow Chandelier

Combine all the neutral wires from the lamp kits together into one pigtail. DO the same for the hot and the ground if present. Use some electrical tape to help hold them all together while you get ready to connect them to the junction box.

Step 7

Using an appropriately sized wire nut, connect the white pigtail of the lamp kit to the white (neutral) wire from the ceiling. DO the same with the Black (hot) and ground( green, if present).

Step 8

Carefully push the wires up into the junction box and allow the weight of the lamps to be carried by the bundled lamp cords over the junction box support bar.

Step 9

Slide the fixture cover you used from the old light up into place to cover everything.

DIY upcycled lighting tutorial

Step 10

DIY upcycled lighting

Flip the breaker and the switch on. Put bulbs in the lamps. Let there be light !!!

***Extra tip: Use Mod Podge Rocks Adhesive Stencils and Glitter Spouncers to add your favorite pattern for added sparkly goodness, like I did with this Upcycled Bottle Lamp:

Not up for electrical wiring?  Use your colored bottles to create Upcycled Rainbow Lanterns:

Recycled Wine Bottle Tiered Veggie Stand

Recycled Wine Bottle Tiered Display[pinit]

Do you love Dollar Store Crafts?  How about making things from recycled materials?  Make an all occasion display in just a few simple steps, using dollar store dishes and cut wine bottles!  This project is perfect for displaying your garden harvest, letting tomatoes ripen in a window sill, filling with holiday themed candies and filler, or  for storing your favorite jewelry in a fashionable way.

 MATERIALS

Dollar store supplies and recycled wine bottles

-2 wine bottles and bottle cutting supplies – See How I Cut Wine Bottles

-E6000 or other industrial adhesive

-3 plates or dishes in varying sizes

 DIRECTIONS


Tiered Candy Display 2

1. Place largest plate or dish on a flat surface and glue a wine bottle top to it as shown.

Tiered Candy Display 3

2. Glue the top of the same bottle and place middle sized dish on top of that. Continue in this fashion until your stand is constructed.

Tiered Candy Display 4

3. Let dry 24 hours before using!

Recycled Glass Art CG

Do you love it?

What are your favorite wine bottle crafts?

Would you like to see more?

VISIT OUR 50+ Dollar Store Crafts:

 And our 50+ Glass Bottle Crafts:

DIY Image Transfer Recycled Glass Bottles

[pinit]

Image Transfer Recycled Glass Bottle Tutorial @savedbyloves

[pinit]
Bring a touch of vintage chic into your décor with this chalk finish image transfer technique. This project works particularly well on bottles with texture, as you can sand after painting to remove the paint from raised areas for a chippy, old world feel.  Head to The Graphics Fairy for  thousands of free images to transfer to your bottles with this simple tissue paper transfer  technique I am sharing today!

How to Upcycle Wine Bottles

MATERIALS:

-Textured glass liquor bottles
-Chalk paint in several colors
-Printer (inkjet or laserjet is fine)
-White Tissue Paper
-Decopauge medium
-Medium Grit Sandpaper
-Flat paint brush
-Wax brush or lint free cloth
-Rubbing alcohol or glass cleaner and towel
-Clear wax or other sealer
-Images for transfer (I got all the images used in this post from www.graphicsfairy.com)
-masking tape
-cardstock or photo paper

DIRECTIONS:


Image Transfer Bottles 1

1. Remove any labels from the bottles and clean the glass with hot soapy water or use Krylon Spray Adhesive Remover.  This stuff works great!

Paint on chalky finish
2. Paint on chalk paint layer. This can be cross hatched and messy since we are going for a distressed look. Do several layers in different colors if you want different the sanding in a later step to reveal base colors. It is also fine to just do one layer.
Image Transfer Bottles 5
3. Prepare image transfer by using masking tape to adhere tissue paper to a piece of cardstock or photo paper sized for your printer and image.
Image Transfer Bottles 6
4. Print images, making sure you have sized them to fit your bottles.
How to transfer image to glass
5. Cut out image and apply a thin layer of decoupage medium to the back of it with your flat brush or sponge brush. Be careful not to rip the tissue. If the medium is too thick, you may need to thin it with a small amount of water.
Image Transfer Bottles 7
6. Apply a thin layer of decoupage medium to the painted bottle and carefully place your image, ink side up. Smooth out any wrinkles with your fingers and apply a thin layer of the medium over the top of the image.
Sand to distress
7. Once the decoupage medium is dry, lightly sand distress the texture areas of the bottle until you are happy with the degree of distressing.
Apply wax with wax brush
8. Wipe away the sanding debris with a lint free cloth and seal entire bottle with clear wax using your wax brush. Another option is to seal the piece with the decoupage medium. I prefer clear wax with chalk paint. I love the unique shine it brings, and the fact that you can buff it to a shine when it dulls.

EXTRA TIPS

○ Use antiquing wax after clear wax to create more of an aged look. This project would be great with photos of family made to look aged in photo editing software, like I showed you in the “Photo in a Bottle” project.

For more inspiration, visit our 50+ Wine Bottle Upcycle Projects and 50+ Image Transfer Techniques!

Upcycle Wine Bottles to Terrarium Wonderlands

Wine-Bottle-Terrarium-Photo 
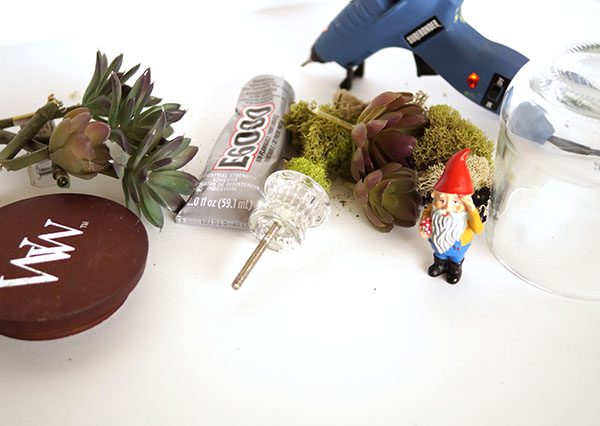
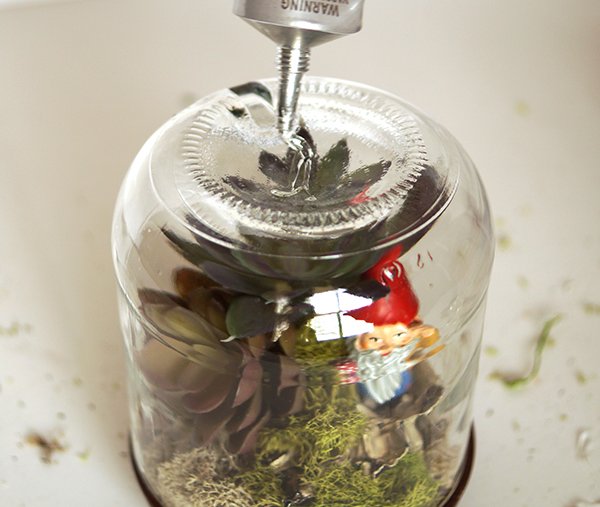
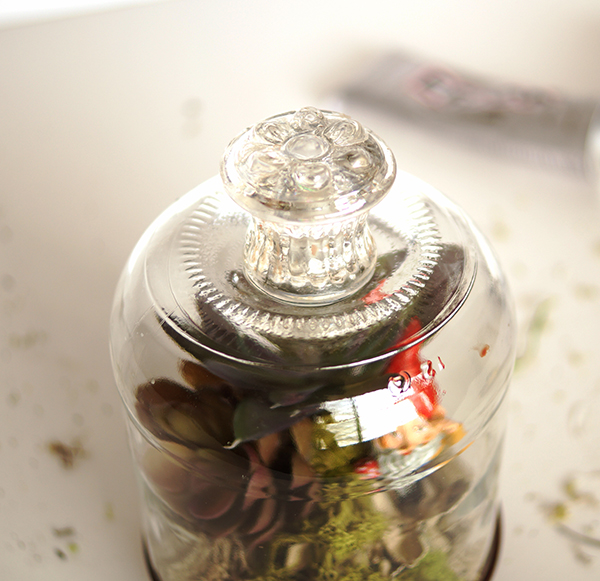
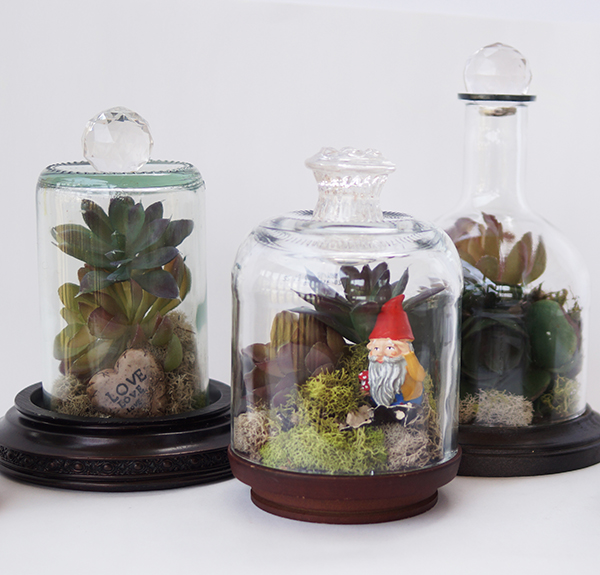
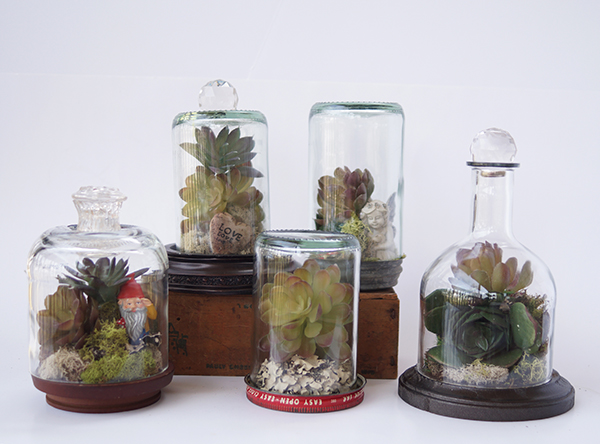
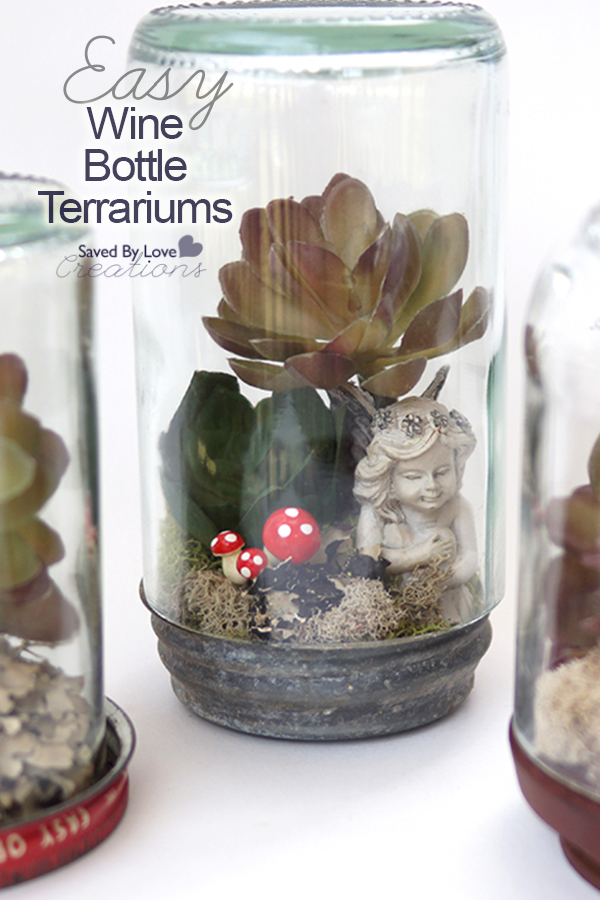
Do you love eco-friendly crafts?  How about succulent plants?  Combine the two by creating your own whimsical land of tiny garden fairies, mushrooms, moss and more with this DIY terrarium wine bottle world.  This project is simple is completed using artificial moss and succulents for those of us with less than a green thumb.  What great gifts, home décor and centerpieces for your woodland themed birthday party these would make!

SUPPLIES:

Wine Bottle Terrarium Photo 1


 -Cut wine bottles with varying heights (See How to Cut Wine Bottles)

Wine Bottle Terrarium Photo 2

-Artificial Moss

-Various artificial succulents

-Hot glue gun and sticks

-mini mushrooms, fairies and gnomes (found in most hobby stores for doll houses and miniature trains)

-Glass knobs or big glass prism or crystal beads

-E6000

-Latex or nylon gloves are optional

-Various round objects for the base of your wine bottle cloches; jar lids, candle lids, etc.

 TUTORIAL:

Wine Bottle Terrarium Photo 4

 Clean the surface of your cloche base and begin hot gluing your moss and filler.

Wine Bottle Terrarium Photo 3

 Build with layers, adding miniatures and succulents.

Wine Bottle Terrarium Photo 5

  When you are satisfied with your scene, place your cut wine bottle cloche top over the tiny world you created.  You can glue this if you would like.  I left mine removable so I could change things later.

 Wine Bottle Terrarium Photo 6

To add a special touch, use E6000 to glue a knob or glass bead to the top.

Wine Bottle Terrarium Photo 10

EXTRA TIPS

○ Cut the metal threading  off of antique flea market drawer pull using bolt cutters, for a flat surface you can glue onto the top of your cloche.

Wine Bottle Terrarium Photo 8

If you like this post, you don’t want to miss:

50+ Wine Bottle Crafts to Make 

50+DIY  Terrarium Projects to Make

DIY Wine Bottle Craft Coat Rack

[pinit]

WIne Bottle Shelf Rack3


[pinit]
WIne Bottle Shelf Rack1


Scrap Wood Shelf With Wine Bottle Hooks

This project involves building a simple shelf from scrap wood and adding cut wine bottle tops to act as “hooks”.  It is perfect for the entryway or mudroom, as the ultimate upcycle and conversation piece.

MATERIALS

– Scrap wood in lengths and widths you want for your shelf

-One of the following; Table Saw, chop saw, miter saw, circular saw

-Jig saw

-Hammer

-Pencil

-Tape Measurer

-Wood Glue

-1 ½ inch finishing nails

-Medium grit sandpaper

 -Glass Cutting Supplies (see techniques page )

-Rubbing Alcohol

-Lint Free Cloth

-3 Wine Bottles

-E6000

-2 Sawtooth hangers

-Chalky finish paint or paint of your choice

-Sealant such as wax or polyurethane

DIRECTIONS

WIne Bottle Shelf Rack6

This was a project I made up as I went along, based on the scrap wood I had on hand.  You can adjust the plan according to your materials. For most of the cuts I used a table mount chop saw but a handheld circular saw would be fine to.

The only cut that isn’t a straight cut is the one used to cut the shelf brackets. For this I used a scroll saw:  I drew a shelf bracket shape sized to fit my shelf onto a piece of wood, cut out the bracket and traced it onto another piece of wood as a template for cutting out the second bracket.  This is covered in step 2.

1.  Cut board for shelf surface.  For this I used an old piece of barn wood I had that measured 1 X 6.5 by 55 inches. I cut it to one 46 inch long piece and one 9 inch long piece. The 46 inch piece will be for the top and the 9 inch piece will later be used to cut the two shelf brackets.

WIne Bottle Shelf Rack9

2.  Cut shelf rails. There are three of them (see pic). They are 1 x 3 inch boards cut to 40 inches in length.

WIne Bottle Shelf Rack7 

3.  Cut shelf brackets.  Taking the 9 inch long piece of the old barn wood from above ( 1 X 6.5 X 9 inch ) I free handed a pattern onto the board that looked somewhat decorative but had fairly simple curves. I included the drawing I used as a template.  Using the scroll saw I cut out the two identical shelf bracket pieces. Tracing one line for two pieces was easier than trying to make two identical individual pieces.

Sand all rough edges.  Medium grit sanding by hand or with an orbital sander will do.

*Clamping the two shelf brackets together while sanding them ensures that they will remain identical to one another.

WIne Bottle Shelf Rack8

5.  Using wood glue and 1 ½  inch finishing nails attach the shelf rails to the shelf bracket on the inside face (see pic). This made the over-all length of the shelf support unit 42 inches. (40 inch rails plus the thickness of the two 1 inch brackets).

6.  Mount the shelf support unit on the 46 inch top board, centering it along the length dimension ( 4 inch overhang on each end) and flush at the back edge of the top board.  Use 1.5 inch wood screws and wood glue to attach the top to the support rails.  Make sure to square the support unit as best you can before you attach to the top( a quick check to make sure the long diagonal measurements are equal will tell you).

7.  The last addition to the unit is for the back board. I used 1/8 inch hard board that has one side grooved. You can purchase a 4 x 4 ft piece that will be much easier to handle than a full 4 x 8.  I laid the shelf unit onto the board and traced the outline. I positioned the unit on the board so that the grooves run vertically.  Cut the back out using a jig saw, table saw or circular saw. The cut is hidden so just be sure to cut a little inside the line so that you don’t have any over-lap and you don’t see the back hanging over the edges. I attached using 1/2 brads and wood glue. Make another quick check of the diagonals to verify the square of the unit before you attach the back.

8.  Allow the glue to set for 24 hours and then caulk all the seams using standard white caulk.

9.  Sand any rough spots and paint.  I went with chalk paint in antique white for the entire shelf except for the top surface board.  I like the weathered wood with the chalk finish.

10.  Seal with Wax or desired sealant.  I applied clear wax with a lint free cloth.  Let cure per instructions before handling.

11.  Measure your shelf and mark with a pencil where your bottles will go so that they are evenly spaced.

WIne Bottle Shelf Rack10

12.  Attach cut wine bottles tops (see How to Cut Wine Bottles) by placing a generous amount of industrial strength glue such as E6000 around the cut rim where it will contact the shelf

13.  Attach a sawtooth hanger on the back with hammer, a couple of inches in from the edge of the shelf top.

WIne Bottle Shelf Rack2

Make a shelf from reclaimed wood and recycled wine bottles @savedbyloves

EXTRA TIPS

○ Power tools can be intimidating.  They don’t need to be though!  I started at ana-white.com and found everything I needed to know to be successful and safe.  You can too!

Check out craigslist for used tools, or see if your town has a makerspace where you can pay a small membership fee and have access to the tools you want to try.


Privacy Policy