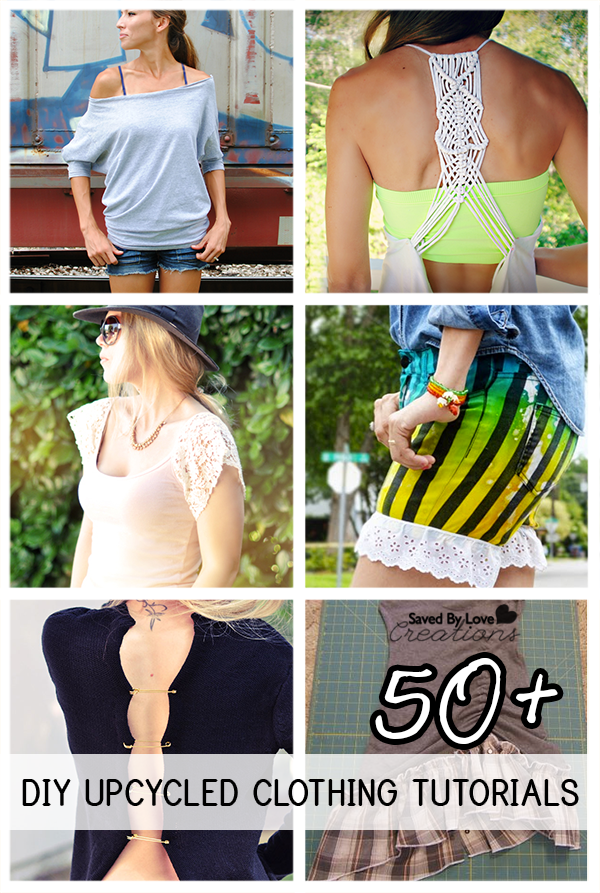
50 Plus Awesome Ways to Upcycle Clothing

[pinit]50 Plus Best DIY Upcycled Clothing Tutorials to make @savedbyloves[pinit]

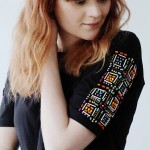
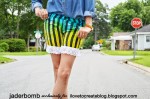
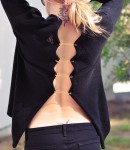
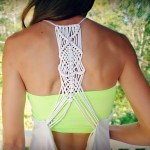
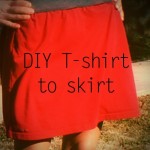
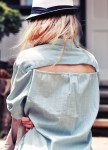
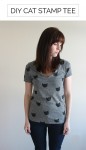
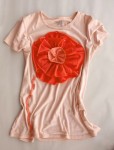
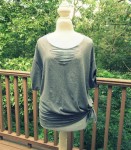
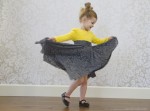
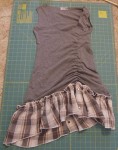
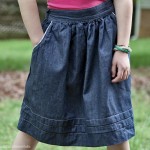
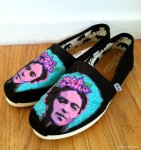
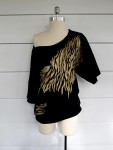
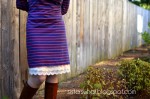
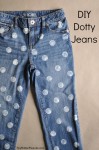
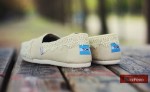
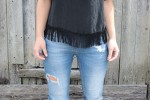
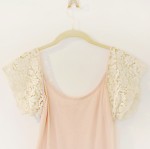
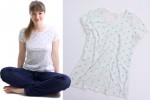
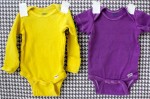
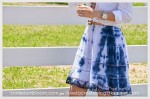
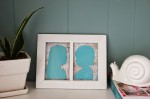
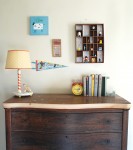
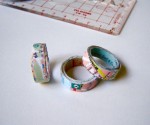
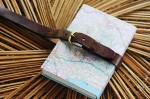
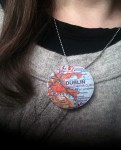
Before you haul that pile of old clothes off to Goodwill, you may want to check out this collection of 50+ awesome upcycled clothing tutorials! Up the style of your wardrobe with some simple and inexpensive creative ideas to refashion those old clothes. Did we miss your favorite? Let us know. We love a good clothing upcycle!


How I Maintain My Wellness with 5 Healthy Habits

I am a member of the Collective Bias®  Social Fabric® Community. This shop has been compensated as part of a social shopper amplification for Collective Bias and its advertiser.

Are you a woman with an active lifestyle, approaching her 40’s?  How is your health awareness?   Have you noticed that things like your memory, digestive health and energy level have changed since the twenty year old you was in town?  It is impossible to think that5 years ago I ran two full marathons, and all of the training that goes with that endeavor.

FirstMarathon


As a full time DIY blogger, wife, step mom, doggie momma and caretaker of my grandparents, and avid runner to name a few things, I need all the help I can get maintaining a healthy lifestyle.  As I age, I have to supplement my diet to stay on top of things physically, mentally and emotionally.
Walgreens Women's Health

Thankfully, Walgreens is just the spot for my women’s health needs.  I can score my vitamins and supplements in a snap, for great prices.


#HerHealth #CollectiveBias

[pinit]

#HerHealth #CBias #shop #CollectiveBias[pinit]


 My top 5 habits for staying energetic, alert, focused and healthy are:

1.  Lots of water.  So much water.  My mom got me on a water kick recently.  Before she stepped in, I was all about coffee and diet soda.  Now I am drinking 70-80 ounces of water daily.  At first, I would just chug from my water bottle and get it over with, but now I enjoy and even crave the stuff.  I feel more energetic and have better skin!  I am sure my kidneys are happier too.
Fish Oil Supplements copy

2.  Omega-3-Fatty Acids.  I swear that can see a notable increase in my ability to remember things, like names of people I meet, when I consistently take daily fish oil supplements.  These essential fatty acids are not made by the body and therefore must be ingested.  We need them for optimal health!


3.  Women’s Daily Vitamin – Ok, so they are gummies.  Don’t judge.  They still contain vitamin D and Calcium for women’s bone health.  These help me cover all bases when I may be skewed one way or another with my diet.

4.  Digestive Health Probiotic Supplement – Years of eating like a rabbit and on the go have decreased the “good bacteria” in my stomach that aid in digesting what I need from my food.  The result is super unpleasant and includes bloating, irregularity and poor nutrition.   It is important for us ladies with crazy schedules to get the most out of those times we do stop to eat.  That is where probiotics come to the rescue.  They replace the helpful bacteria and improve digestion of nutrients and regularity.  Bye bye bloating!

5.  Sweat, everyday.  Get my heart rate up for at least 30 minutes.   For me, this comes from running, which I wouldn’t feel like doing much at all without 1-4!


No marathons are in my calendar this year, but I am tackling an obstacle, muddy 5k, which is a first for me!  What are your healthy habits?   Do you participate in races?

DIY Countertop Transformation With Rustoleum

[pinit]

Rustoleum Countertop Transformation Review @savedbyloves

[pinit]

If you have outdated laminate countertops and dream of granite, the look can be yours without breaking the bank!  We just revamped our country blue laminate countertops with Rustoleum’s Countertop Transformation Kit, and are thrilled with the outcome.  The process was super easy and far less expensive than replacing our existing surfaces.

DIY Countertops

The kits come with a DVD tutorial, giving detailed accounts of each step.

Sanding with included diamond sanding pad

We began by de-glossing the existing clean countertops by sanding them with the included diamond coated sanding pad.

Degloss countertop surface

Wiping away the debris from sanding and making sure all areas were de-glossed came next.  We weren’t sure what to do about the wood “lip” edging on our tops, since the video example showed a fully laminated top that curved over the edge smoothly.  We decided to sand and treat the edging like the rest of the countertop.  So glad we did.  It looks great!

Apply adhesive basecoat

How to make laminate countertops look like granite

Next we applied the adhesive base coat.   In our case it was black since we went with the Charcoal kit.

DIY Countertop Idea

Using the handy dispenser that came with the kit, we spread the flecks over the wet base coat and let that dry 12 hours.  This stuff was everywhere!  That is why it is important to tape off areas and use drop cloths.

How to cover old countertops

After 12 hours, we shop vacuumed the loose chips with a brush attachment.How to revamp countertops

We sanded the surface with the diamond coated sanding pad, being careful not to remove the base coat.  Included in the kit is an example of what your countertops should feel like when you have sanded enough.

DIY Countertops

Before applying the glossy top coat, we vacuumed away the sanding debris and wiped the countertops clean with a lint free clothFor the last part, we mixed the 2 part top coat together and applied with a brush and roller, per the instructions on the video.  This was a breeze.

We had to wait one week before being able to use our countertops, and it was totally worth it!

Our Countertop DIY Makeover

Faux Granite Countertops

 I love how the countertop edge goes all the way over instead of being edged with wood.  It looks way nicer.  I would recommend this kit for sure.  Such a huge difference!!

Stay tuned for the cabinet makeover that is soon to come.

Disclaimer:  I received the countertop kits for this project from Rustoleum.  That affected my review none whatsoever!  All opinions are mine and honest.

Printable Father’s Day Cards Freebie

[pinit]

Free Printable Father's Day Card

Free Printable Father's Day Cards 2014 @savedbyloves[pinit]

I am excited to share with you these fun vintage Father’s Day Card Printables!  Show your dad he is the best ever.  These are sized 5×7 and can be printed on photo paper or card stock, and folded in half as shown.  There are two version.  I hope you enjoy!

Version 1

*Just right click the thumbnail to pull up the full size version and save to your computer, print, or send to your favorite online photo printer.  I used Walmart one hour photo for this and my card with envelope was $0.97!

FathersDay2

Version 2

Fathers Day Printable Card from @savedbyloves

50 Plus Awesome DIY Curtains & Other Window Treatments

[pinit]50 Plus Best DIY Window Treatments @savedbyloves

[pinit]

If you are looking for budget friendly, DIY window treatment ideas, this week’s 50+ is for you! You will find a variety of beautiful options to dress your windows to suit your taste, without emptying your wallet. No sew, sew, blinds, curtains, valances are all in there. Enjoy!


Easy Silkscreen Polymer Clay Jewelry Tutorial #ScupleyProjects

[pinit]

How to Make Polymer Clay Jewelry[pinit]

I haven’t had my hands on clay for way too long.  The new Silkscreen Kit from Premo Clay was the perfect way to jump back into the medium.  If you haven’t experimented with polymer clay, stop reading this and go find some.  You will be amazed at the gorgeous pieces you can make right off the bat, from jewelry to home decor and more.  It is a medium that is very forgiving, versatile, and doesn’t require a bunch of expensive tools and equipment to get started.  Today I will show you how I made a lovely necklace, bracelet and pair of earrings that I kinda love a bunch.  You can make your own art jewelry with just a few simple supplies.  Let’s get started!

Premo Clay Jewelry Tutorial

SUPPLIES:

Polymer Clay Silkscreen Kit #SculpeyProjects

Premo Clay and Silkscreen Kit

Jump rings

2 Pairs of flat nose jewelry pliers

Toggle clasp

Earring findings

Necklace chain

Gold paint marker

Cookie cutters in circles and ovals

Bead reamer or toothpicks

Oven

Ceramic tile or flat baking pan dedicated to clay

Rolling pin or smooth bottle or glass

Protective gloves (these are optional but great for keeping clay fingerprint free)

TUTORIAL:

How to mix polymer clay colors

I began by mixing blue clay with pearly white to get my desired color.  Just twist the colors together as shown.  Continue twisting and kneading clay in your hands to mix the colors and warm/condition the clay.  Conditioning is essential when beginning any clay project.  It ensures the components of the clay are evenly distributed and the clay is soft and shapable.  This clay was super easy to condition.  I have worked with clay that is hard and brittle and takes forever to warm up, but this Premo was great!  Continue until the clay is the color and shade you want.

How to condition polymer clay

I used my Sculpey Clay Conditioning Machine to get a flat even sheet.  This costs about $20 and is well worth the investment if you are going to create with clay more than a couple of times.  You can also use a smooth glass, rolling pin or bottle to smooth the clay out on a bake-able surface.  I like to use tiles I pick up at Habitat Restore for a dime.  I have tons of them on hand for just this purpose.  Once the clay is rolled out, you don’t want to have to move it, as it will become distorted and uneven until it is baked and therefore hardened.  Having it on a surface you can just stick in the oven is super handy.

Premo Polymer Clay Silkscreen Kit #SculpeyProjects

The kit comes with silver metallic paint, gold metallic paint, 4 reusable screens (totaling 2 large single patterns and 12 mini patterns) and a squeegee.  Aren’t the designs so fun?!

How to silkscreen

Premo Polymer Clay Silkscreen Kit Jewelry Tutorial #SculpeyProjects

I choose my design, placed a thin line of gold paint, and used the squeegee to pull the color across the screen, lightly so as not to indent the clay.

How to Make Polymer Clay Silkscreen Jewelry

Here is what it looked like after the first try!  So easy and pretty.

TIP:  Make sure to immediately was the screen and squeegee so the paint doesn’t dry on them.  You want to reuse them for as long as possible!

How to Cut Shapes in Clay

TIP:  Spray armor-all onto the cookie cutter inner and outer edge so that the clay won’t stick to it and come up off the surface when you lift the cutter away after cutting.

Easy Free Polymer Clay Jewelry Tutorials

Choose an area and a cookie cutter and press it into the clay to cut shapes.  I used circles large and medium for the pendant an earrings.  For the bracelet I used a small oval cutter.

Pull the “scrap clay” away from the cut shapes and set aside.  You can recondition it and reuse it, even if it has paint on it.  Just mix it in by conditioning it with your hands or pasta machine.

How to attach clay pieces

To create holes for jump rings in your pieces, you can use a toothpick while the clay is still raw, or use a bead reamer or drill after baking the clay.  Manipulating the clay while raw always carries the risk of distorting it, so I usually wait until it is baked before creating holes.  For this project I went ahead and made the holes while the clay was raw since I was going for an organic, imperfect feel.

How to seal polymer clay

I baked my pieces at 260 for 45 minutes and let them cool.  I painted the edges and back with a gold paint marker and sealed the pieces with Matte Mod Podge after the paint dried.Polymer Clay Silkscreen Earrings DIY

I used 2o gauge gold wire to create jump rings, earring findings and a toggle clasp for my finished pieces.  You can save money and get a unique look to your pieces by making your own findings, or purchase pre made findings.

DIY Polymer Clay Easy Bracelet Tutorial

This new kit from Premo has ignited my clay jewelry flame once again!  I have made several more pieces that you will be seeing in the future.  I hope you are inspired to try some clay projects.  It is so easy, inexpensive and you will be amazed at the gorgeous projects you can make from the get go.

For more clay inspiration and product updates, follow Premo Clay on FacebookTwitterPinterest, and Instagram!


Disclosure: I received product and compensation from Polyform and Blueprint Social in exchange for my campaign.  All opinions are honest and mine, as always!

Check out what other bloggers have been up to using Premo Clay Jewelry Products!

DIY Paper Hydrangeas

[pinit]

how to make paper hydrangeas[pinit]

What is better than a bouquet of fresh hydrangeas?  A bouquet of paper hydrangeas that don’t ever wilt!  Today I am sharing with you this easy, however time consuming, paper hydrangea tutorial.  I am going to be upfront here… this project to me way longer than I expected.  That said, it is a perfect way to keep creative while chilling in front of your favorite t.v. series.  I used a Sizzix die for my project, but Lia Griffith has a great Paper Hydrangea Printable Template and DIY that I featured at Printable Decor recently.

How to make paper flower bouquet

I used wonderful filter paper that I got from Materials for the Arts in Bloomington.  If you are a crafter/artist and don’t have a relationship with your local recycling center, you could be missing out big time!

imageI die cut the petals with my Sizzix Lilac Die and colored them with distress markers. For a watercolor effect I painted over the marker with a wet paintbrush. You could use watercolor or acrylics too.

image

I followed Lia’s tutorial linked above to assemble my flowers. Holy ninjas, that took forever. It was totally worth it though.
Papercrafting tutorial paper hydrangeas

For more paper flower tutorials and awesomeness, visit our 50+ DIY Paper Flowers Roundup;

Free Printable Vintage Camper Art

[pinit]

Free Vintage Camper Printable by Colleen @JustPaintIt @savedbyloves

[pinit]

Hi there, Saved By Love readers! This month I have a little different type of project to share with you and I hope you like it. I love crafting and I especially love sharing craft tutorials but I realized I hadn’t shared any of my artwork with you yet.

With Father’s Day coming up, along with summer vacations getting started, I thought you might enjoy a fun printable that I made from one of my watercolor paintings. I have links to the downloads at the bottom of the post, but first I wanted to show you some of the steps I go thru for a watercolor.

camper-sketch

I start with a sketch, of course.

No, that’s wrong. I actually start by gathering loads of visual references. Google makes it so easy now.

When I started painting in the ’90’s, I was a magazine ripper. I had binder after binder of cataloged photos. When I’d paint a mural at someone’s house, their wall would be covered with magazine photos, held up with blue painter’s tape. Now I just keep photos in folders on my computer. Much, much easier.

When it comes to sketching, there are lots of techniques and methods out there. (I think YouTube has quite a few.) I don’t know any, however. I pretty much eyeball everything. Good erasers are a must!

For drawings like this vintage camper, I sketch in pencil pretty lightly until I’m satisfied that everything is in proper relation to everything else. Then I’ll grab a ruler to draw the straight lines. When the pencil sketch looks about right, I go over the pencil markings with a black marker, usually a Prisma .03. I don’t use a ruler with the marker, however, because if the ruler isn’t lined up perfectly, the whole drawing is shot. That’s happened a couple of times.

I’d rather freehand the lines and have a few bumps here and there. It also adds to the ‘charm’ of a freehand illustration. There are so many great digital artists now, and I love their work, but there’s something pleasingly ‘organic’ to a handdrawn or handpainted piece. At least, I think so.

Another drawing tip I have is to turn the paper (or canvas) upside down and all around while sketching, both with pencil and the marker. This is particularly helpful for curves and circles. Although another reason to turn the sketch upside down is you’ll see imperfections more clearly and, therefore, can fix them.

Try turning your paper upside down the next time you draw something. You’ll be surprised at what you see!

Finally, after everything is inked in – and it has dried (!) – I erase all of the pencil markings. That’s important before the painting starts otherwise you’ll get some graphite smeared into the paint.

camper-watercolor

With the sketch inked in, it’s time to lay down the colors. I’m new to watercolors so bear with me if you’re a watercolorist because I don’t really have any idea what I’m doing. Although I am having a lot of fun with them!

I still need a lot of practice with highlighting and shading but for simple illustrations like this camper, I just add layers of color until I get the depth I want. If you haven’t painted with watercolors since . . . well, since you were a kid, then you ought to give them a whirl again. It’s a great medium and the results are beautiful without a huge time investment, for the most part.

camper-watercolor

Sometimes I’ll leave the painting right there and call it finished, just with the initial inked sketch and color over it.

camper-watercolor

But going back over everything with a marker again helps sharpen the details, I think.

Either way, you wind up with a cute little painting that you can turn into a fun printable.

Home Printable

Click the above photo or here to download this 8 x 10 printable.

I thought this might be nice for a Father’s Day gift or just keep it for yourself!

Home-Camper-blank

Click the above photo or here to download this 8 x 10 printable.

Or you can download this camper and add your own text with PicMonkey or any other photo editing program.

Ever since I started painting, (nearly 20 years now) my goal has been for people to use my art. Sure, if you want to hang it on a wall, that’s great too. But I always wanted my paintings to be on everyday items. Now, with sites like Zazzle, that’s possible!

I also noticed that some artists were making their own digital clipart. After some research, I jumped into that pool too and opened a shop on Etsy where all of my art will be available as downloads. Clip art is in the works and will be in the shop soon. Not only does this keep my prices down, it means that people can use my art to make their own creations, including their blogs and web sites. So exciting for me!

I hope you like these camper printables! And I hope you’ll use them for other creations, besides just printing. I’d love to see what you come up with!

I’ll be back at the end of June with another fun project. In the meantime, drop by Just Paint It for more paint projects. You can also find me on Facebook, Google+, Pinterest and Instagram too. And of course, I’d love for you to drop by my Etsy and Zazzle stores.

Before too long, this camper will be in both. Not yet though. Right now, it’s just for Saved By Love Creations readers.

Happy Summer!

Colleen

DIY Rustic Home Decor Wooden Cake Stand

wooden-cake-stand-tutorialThe look of wood in the home is something I enjoy having in my home. Especially since I live in an apartment it’s hard to do any change physically to the apartment but adding wood accents help make it homier. I’ve seen wooden cake / cupcake stand in magazines and I just needed to give it a try myself. I decided to go to my favorite place Home Depot and pick up a couple of things to make my rustic cupcake stands.

wooden-slice

I first got the wooden slice of wood from my local craft store. They always have different size woods at the craft store and I always like visiting time to time to find that once piece that is bigger than the rest.

wood-cupcake-stand-sealer (1)

I used sealer to make sure the wood will not dry out or get molding if food or water get on it. Also the sealer will darkened the wood just a little which I really liked.  I used the sealer all around wood slice.

wooden-stand-leg

I got a wooden leg from home depot and sealed it too. They have different varieties but do keep in mind to have something that will keep it balanced.

cupcake-wooden-stand

I attached the wooden leg with wood glue and let it set over night. And now you have your ever own rustic cake stand for you home. I used my cake stand to show off my mother’s day flowers which my little man got for me, he does have good taste.


Stay Crafty!

Over 50 DIY Projects Using Old Maps

[pinit]
50 Best DIY Projects to Make Using Old Maps @savedbyloves[pinit]

Do you love old maps?  Well if so, today’s round-up is going to make you dance and celebrate.  If not that, you will at least find some inspiration in super cool things to make with old maps.  Here is a collection of over 50 of the best projects “on the map”!  Enjoy, and as always, if you have a tutorial you would like included in the collection, send me the link for consideration.


Privacy Policy