Search Results for: upcycle

Martha Stewart Mother’s Day Etched Glass Pendants

[pinit]
@savedbyloves DIY Etched Glass Tile Pendant #MarthaStewartCrafts #mothersday
[pinit]


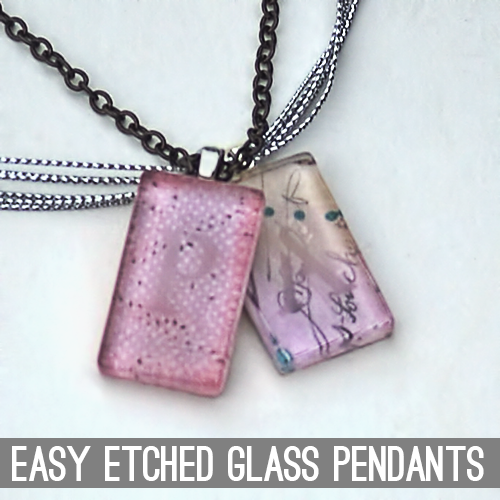
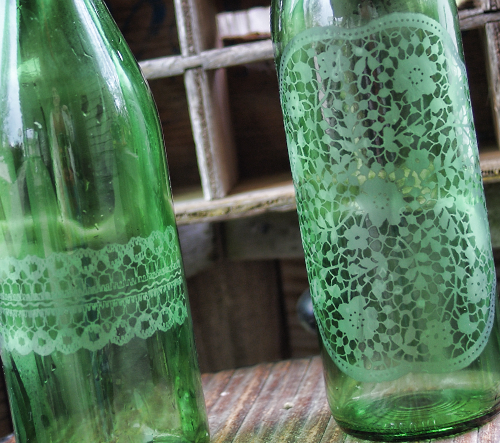
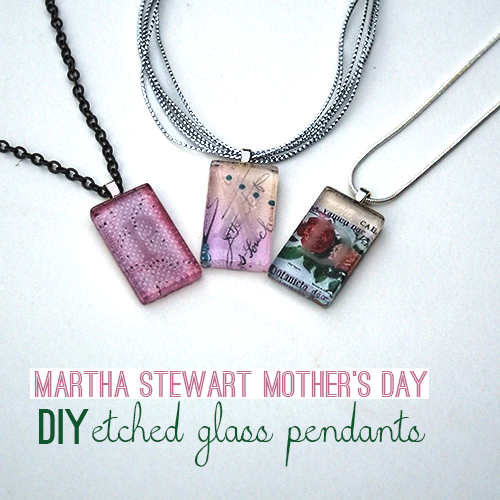
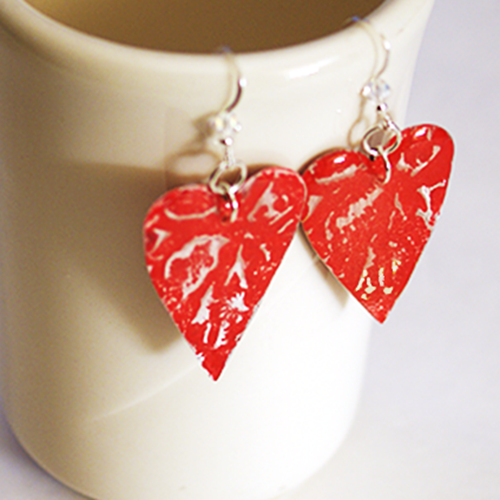
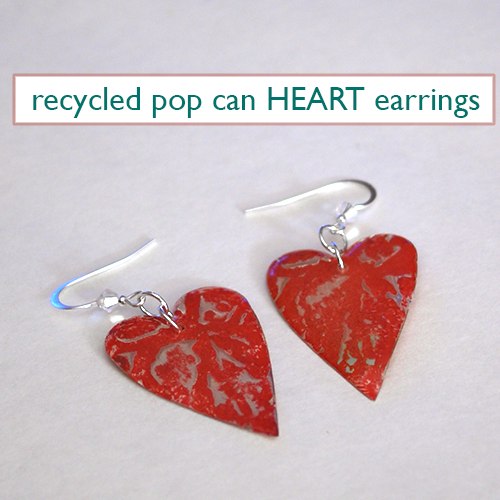
Today brings a fun, simple Mother’s Day gift DIY using Martha Stewart Crafts glass etching cream to create customized glass tile pendants!  As I mentioned Monday when I showed you my doily etched wine bottles, this etching cream is simply amazing.  No glass is safe around me now!  Read on to see how to make these lovely pendants in no time!
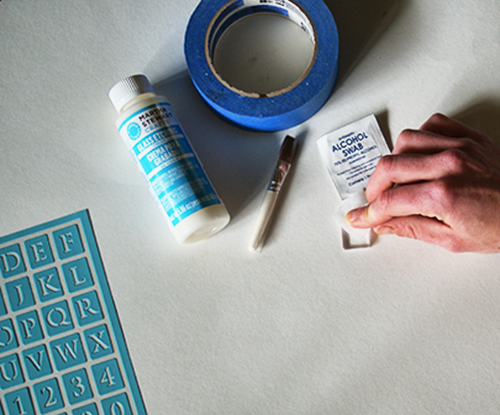
#marthastewartcrafts #mothersday

SUPPLIES:

#MarthaStewartCrafts

Glass tiles (I ordered mine on Etsy – size 1 7/8 x 7/8 inch

Martha Stewart Etching  Cream and included brush

Martha Stewart Adhesive Stencils

Rubbing alcohol

Pendant Bail (I use aanraku small silver bails from Etsy or Ebay)

Pretty Patterned Paper

Mod Podge Dimensional Magic and Antique (optional)

Sandpaper (150 grit)

E6000

Chain or cord of choice

Masking Tape

Protective gloves

TUTORIAL:

EtchGlassPendants7

Clean glass tiles with rubbing alcohol.

#MarthaStewarCrafts #Mothersday

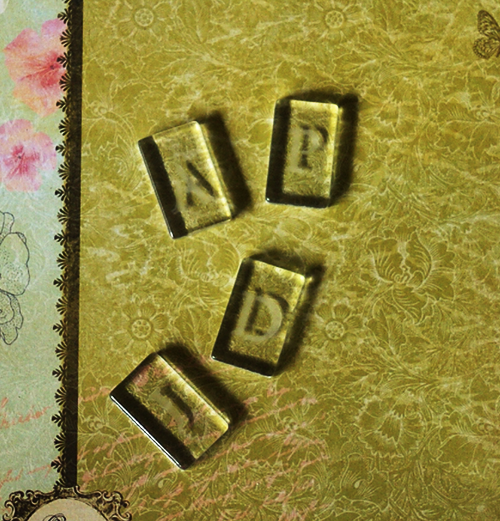
Place adhesive stencil.

#MarthaStewarCrafts #Mothersday

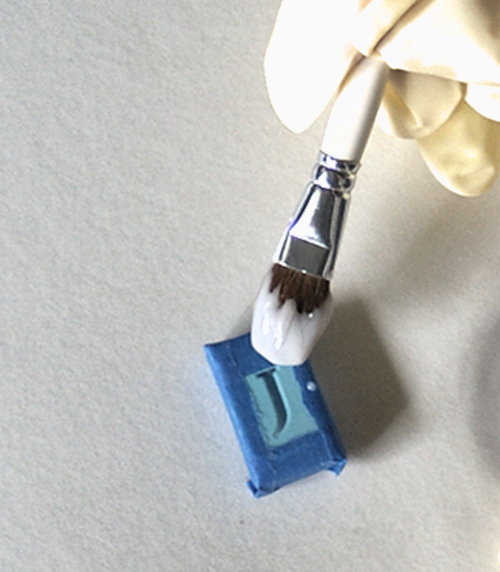
Tape off area you don’t want etched and apply thick layer of etching cream.

#MarthaStewarCrafts #Mothersday2

Wait 15 minutes and then rinse cream away under faucet.  Make sure to clean stencils well.

#MarthaStewarCrafts #Mothersday3

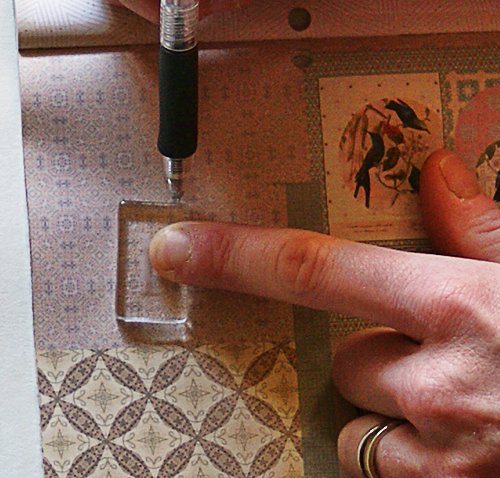
Find area of paper you want as background.  Trace pendant and cut out paper for backing.  Using double sided paper gives the back of your pendant a pretty, finished look.

#MarthaStewarCrafts #Mothersday4

Use your favorite decoupage medium to adhere backing to tile.

#MarthaStewarCrafts #Mothersday5

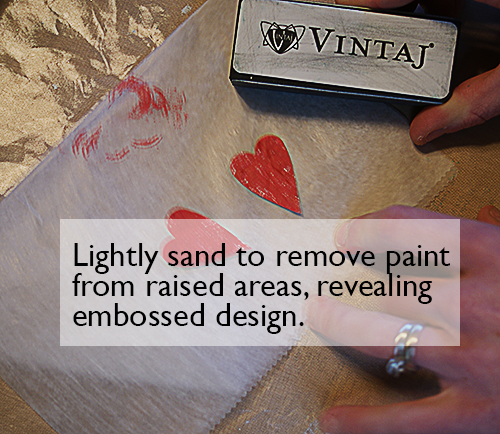
When that is dry, sand edges to even things up a bit.

#MarthaStewarCrafts #Mothersday7

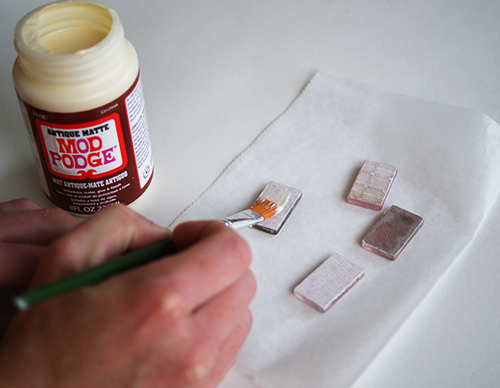
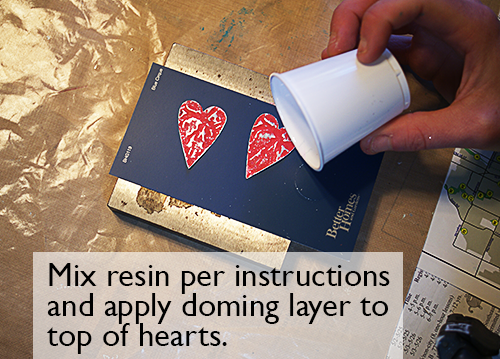
Seal paper backing with your favorite medium.  I love the antique Mod Podge.  Apply 2-3 coats, allowing 30 minutes dry time between each.

#MarthaStewarCrafts #Mothersday8

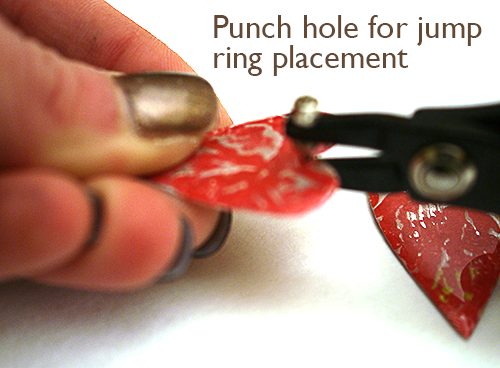
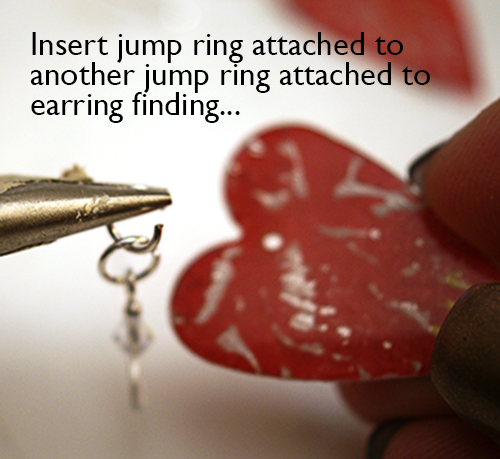
Adhere pendant bail using E6000 or other industrial strength adhesive.

@savedbyloves DIY Etched Glass Tile Pendant #MarthaStewartCrafts #mothersday

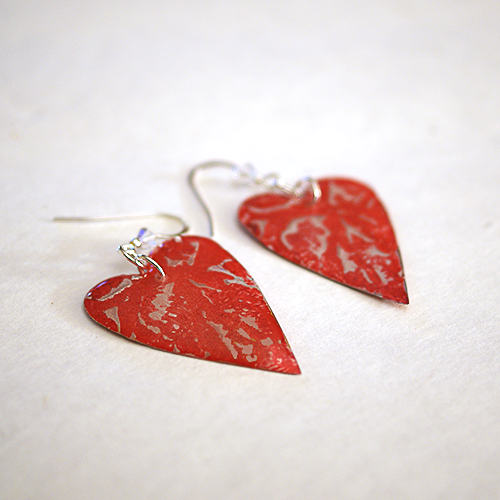
Let your bail set overnight and add your chain to finish!

EtchedGlassTilePendant4

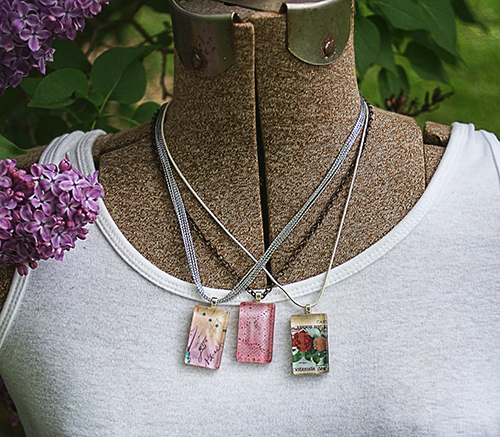
I love them!  I made one for my grandma, mom and sister.  What a cool way to add a special touch to customize glass tile pendants.  Use a meaningful photo instead of scrapbook paper as an alternative.  Make them as wedding/anniversary gifts with the couple’s wedding date!  The possibilities are endless.

 Be sure to check out the other Mother’s Day and Father’s Day projects my cohorts are making with Marth Stewart Crafts in the list below this post.

FOLLOW PLAID CRAFTS WITH ME!!

Website :: Facebook :: Twitter :: Pinterest

Disclosure: I wrote this post as part of a sponsored campaign with Plaid and The Blueprint Social.  All opinions are honest and mine!


Make Terrariums Galore in Under 1 Hour

Terrariums3

How to Make a terrarium, DIY @savedbyloves

How to Make a terrarium, DIY @savedbyloves

Today I am excited to share my first terrarium project (aside from the pendant I made in Cynthia’s class that I told you about yesterday’s 50+ Terrarium Projects to Make).  Since I have a habit of hoarding random glass containers from my junkin adventures, I had just the collection to whip up 5 different succulent planters.  The project was done in under 1 hour, and cost about $20 total!  I am giving some as gifts, and adding some to my own display in progress.

How to Make a terrarium, DIY @savedbyloves

On this $1 glass bowl from the dollar store, I etched “GROW” using Martha Stewart’s Glass etching cream that I showed you in this doily etched wine bottle post from Monday.  Perfect for a terrarium!

DIY Terrarium Supplies

SUPPLIES

Various succulents from your local nursery – I even found some at Walmart

Succulent Soil

Activated Charcoal

Little Rocks

Moss

Thrifted glass containers, jars, etc

How to make a terrarium

TUTORIAL

Terrariums9

Put some small rocks at the bottom.  These drain the water from the soil.

If you are working in a closed container, you want to put a layer of charcoal next.  This prevents mold from forming in the closed vessel.  If you are working in an open container, this is not necessary.

Next put a layer of moss (I found the bright purple, green and white in a variety pack at Michaels).

Put an inch or 2 of soil next, then stick in succulent cuttings as you like.  You can cover the soil with moss, pebbles or other embellishments as desired.

How to Make a terrarium, DIY @savedbyloves

Your succulent will take root if all goes as planned.  As Cynthia Bee pointed out, if it dies, just start over.  You are out just 1-2 bucks.  Watering frequency will depend on your local environment.  It is better to underwater than to over water, as the latter leads to root rot.  Spritz with water once a week or so, and place in indirect sunlight.  Too much direct sun will burn your plant!

How to Make a terrarium, DIY @savedbyloves

 Easy DIY Terrariums

Repurpose Fan Blades to Dragonflies

#DIY #Repurpose fan blades to Dragonflies @savedbyloves

Since the first time I saw Lucy’s fan blade/table leg dragonflies, I have been dying to make my own.  Today, I will show you how I used ceiling fan blades and spindles for this fun, cheap, and easy to create upcycled decor project.

[pinit]

Make #upcycled dragonflies from fan blades #tutorial @savedbyloves

[pinit]

SUPPLIES:

Dragonflies8

Fan blades (I found some at Goodwill and Habitat Restore for just a few dollars)

Table leg or spindles for body (I found a box of these at Habitat Restore and snatched them up, knowing I would find a use for them)

Sandpaper

Lint free cloth

2 hinges per dragonfly

Hardware for eyes and antennae

Paint in colors desired for wings and body

DIY #upcycledDecor

  TUTORIAL:

How to repurpose fan blades

Lightly sand your fan blades and body (table leg, spindles or whatever you find).  Use a permanent marker to draw the shape you want on your wings.


Scroll Saw DIY project

Cut along line with scroll saw or jig saw.  Clamp 2 or more fan blades together to cut more than one wing at a time if you want them all exactly the same.


#Recycledcrafts, upcycle project idea

Wipe the debris and dust away from blades with damp cloth.  Let dry and apply coat of gesso or primer.


Martha Stewart Craft Paint project

After gesso dried, I painted Martha Stewart Craft Paint satin finish, color Carrot.

I painted haphazardly to let the gesso show through on purpose.  This dragonfly was going for a distressed look.


Color Box pigment ink

Using Color Box pigment ink, color sweet melon, I stamped over The Crafter’s Workshop Cosmic Bubbles template to create the design on the wings.

I went around the wing edges with the sweet melon ink pad and blended the stamped design into the edges with my finger.

I used my heat tool to dry the pigment ink, then sealed the wings with Mod Podge Clear acrylic sealer.


DIY upcycle crafts

I used Liquitex heavy body acrylic paint in raw umber for the base
coat on one body, dry brushing lime green acrylic paint and aqua acrylic paint randomly for  a distressed feel.   The other body was sprayed with Rustoleum in metallic silver.


Make #upcycled dragonflies from fan blades #tutorial @savedbyloves2

I used a hinge to join the wings to each other, and to the body.


Dragonflies4

Make #upcycled dragonflies from fan blades #tutorial @savedbyloves


 The eyes are drawer pulls on the orange dragonfly, and washers with screws on the blue one.  Leftover antenna strap from my hubby’s stash and craft wire were used for the antennae.


DIY #outdoordecor repurposed dragonflies


 Hang them inside or outside!

#Upcycle #repurpose

What do you think?  Do you have any fan blade repurpose ideas?

DIY Pendant From Aluminum Can

[pinit]How to make an aluminum can embossed chevron pendant #Upcycle #DIY #Jewelry @savedbyloves

[pinit]

I gave a teaser of this pendant on my Facebook fan page awhile back, and asked you to guess what I used to make it.  There were several guesses, and one of them was right.  It is an aluminum can.  The process was pretty simple.  I used Vintaj Patina metal paints and a chevron embossing folder in my Sizzix.   Use any image or photo for your custom, eco-friendly pendant.   This post shows you how…

How to make an aluminum can embossed chevron pendant #Upcycle #DIY #Jewelry @savedbyloves

I showed you how to cut aluminum cans in this video:

Use a heart paper punch to punch a heart in the middle of what will be the front of your pendant, then emboss front and back triangle with chevron or desired embossing folder:

AluminumCanResinHeartPendant2

how to emboss metal

I used aged bronze Vintaj paint, then aqua over that, and sanded to give a distressed look.  Seal with Vintaj Glaze.

For the image, I printed it on cardstock with laserjet, hand doodled with Pitt Pen and added Tim Holtz word sticker with Glossy Accents.  I sealed the entire image with Mod Podge and sandwiched it between front and back pendant rectangle.  Then I used my metal punch to place holes in top on both sides and the center of all 3 layers (hammer and nail would work too).

The middle hole is for the jump ring to attach the pendant to the chain.  Using the side holes, I riveted the pieces together like this video from Beadaholique shows:

That is it!
How to make an aluminum can embossed chevron pendant #Upcycle #DIY #Jewelry @savedbyloves

While you are here, don’t forget to check out our Aluminum can craft roundup:

AluminumCan50plus copy

50+ Ways to Repurpose Utensils

50+ Ways to Repurpose Silverware Utensils @savedbyloves #Upcycle

Did you know there are tons of ways to repurpose forks, knives and spoons?  I had no idea until putting this list together, which consists of everything from jewelry to home decor and more.  If you have a utensil repurpose that didn’t find its way onto the round-up, just leave a comment with the link.

Here are few of my faves, then the complete 50+!

[pinit]

50+ Ways to Repurpose Silverware Utensils @savedbyloves #Upcycle[pinit]


Old Socks to Fingerless Gloves

old Socks To fingerless Gloves @savedbyloves

Have your worn your favorite socks to the point of holes and you are just not ready to part with them?  Why not turn them into fingerless gloves, with this simple DIY?  You will have your own unique custom gloves for next to nothing, and you will have saved your holy socks from being tossed in a landfill!

Upcycle old socks to fingerless gloves in this EASY diy @savedbyloves

You will need:

Fabric scissors or rotary cutter and mat

old socks

sewing machine

chalk pencil

Tutorial:

Cut off socks above ankles at length you want your gloves.

Turn Socks inside out.

Sew three “Vs” on raw edge for 4 fingers (see photo).

Cut between stitched V’s to create fingers.

Put on glove and mark where thumb is.

Cut 1/2 inch slit for thumb.

Wear!

[pinit]

Turn old socks to Easy fingerless gloves @savedbyloves

[pinit]

{if you don’t want frayed edges, whipstich them}

Make Fabric Scrap Bracelets

[pinit]

Easy DIY Scrap Fabric Bracelets

[pinit]

Today I am excited to share a simple scrap fabric project that leaves you with a gorgeous braided bracelet.  If you can braid and glue, you can make this!  I used leftover scraps and a white tea towel which I sprayed with Dylusions ink.  The great thing about these bracelets is you can use any fabric and go crazy with colors to fit your style.  T-shirts, old sheets, vintage hankies, lace, ribbons  would work great.  Make several for gifts.  They work up quickly and easily!

Let’s get started…

ScrapFabricBracelet1

SUPPLIES:

Fabric scraps

Fabric scissors or rotary cutter and mat

End caps or wire and cones (see link in tutorial for what to do if you don’t have end caps)

Industrial strength glue (pictured in tutorial is Fabri-Tac, which did not hold, so I ended up using E6000 which holds about anything to anything but is stinky)

Jewelry findings: Jump rings and toggle clasps

Sewing thread

Easy Scrap Fabric Bracelet DIY from @savedbyloves #DIY #Jewelry #Upcycle

TUTORIAL:

Cut fabric into strips about 10 inches long and 1-3 inches wide (depending on how thick your fabric is and how chunky you want your bracelet).

Using three strips per bracelet  :Gather the strips and tie knot at one end with 15 inches of thread, leaving an inch tail of the fabric strands.

Wrap thread around several times at the top of the braid and double knot, then trim excess thread. (For a detailed photo tutorial of this part, see my kumihimo tutorial)

Braid the three strands until bracelet is about one inch shorter than you want the finished piece to be.

Wrap thread around 10-15 times like you did at the top, then knot and trim excess thread.

Put a dab of glue on the thread for added security and cut off each end of fabric braid right up to the thread. (NOTE:  if you want to use wire and cone beads instead of end caps, see the kumihimo tutorial I mentioned previously).

Put glue in end caps and insert each end of braided strand into an end cap.

Attach toggle clasp with jump rings.  You can add charms if you like.

The End!

ScrapFabricBracelet4

Tiered Stand From Dollar Store Dishes

Dollar Store Tiered Dish Tutorial #DIY home decor @savedbyloves

[pinit]

All the talk of repurposed dishes in this week’s 50+ ways to upcycle dishes roundup got me thinking.  I was at my local dollar store and scooped up three glass dishes in small, medium and large.  In a project that took all of 5 minutes, I created a fun tiered display stand with them.  This is great for decorating seasonally since I can fill it with various colored stones and decor to go with the holidays.  Now I have it filled with plastic hearts (also from the dollar store) and ceramic hearts from the local fair trade store.

Dollar Store Tiered Dish Tutorial #DIY home decor @savedbyloves

The spindles I scored at Habitat For Humanity Restore… a whole box of them!  I wasn’t sure what I would do with them, but I knew I would use them somehow.  I have like 40 more of them, so this is not the last project they will appear in!

TUTORIAL

Glue spindles to dishes, with largest dish on bottom, working up to smallest dish.

Dollar Store Tiered Dish Tutorial #DIY home decor @savedbyloves

I used Flora Bond that I got at Joann Fabrics.

Flora Bond

DollarStoreTieredDish7

Dollar store craft repuroposed upcycled dishes @savedbyloves

If you like Dollar Store Crafts, check out our roundup of over 60 of them:

More repurposed dish crafts can be found in that 50+ roundup:

50+ Things to Make From Old Dishes

Over 50 Projects to Make from Repurposed Dishes @savedbyloves

[pinit]

Old dishes are everywhere, and there are tons of ways to repurpose them.  This roundup will inspire you to raid the cabinets and thrift stores for some upcycle fun.  Enjoy!


Recycled Pop Can Heart Earrings

[pinit]

#DIY #Upcycled Recycled aluminum can heart earrings by @savedbyloves

Need some earrings to show your Valentine’s Day spirit?  Give these recycled Coke can heart earrings a try.  They are super cheap to create, and your friends will be amazed that they came from a can.  You can used a paper punch or a die cut machine for the heart shape.  The embossing can be done with a die cut machine or embossing folder and rolling pin, like I showed you in my recycled can heart bezel pendant tutorial.

#DIY #Upcycled Recycled aluminum can heart earrings by @savedbyloves

SUPPLIES

Aluminum can

4 4mm jump rings

Earring wires

Metal hole punch

Texture embossing folder

ICE resin

Vintaj relief block

Red acrylic paint and sponge brush

Metal primer

2 pairs of flat nose jewelry pliers

TUTORIAL

Cut aluminum can and primer

See recycled can heart bezel pendant for more details on preparing the can.

Emboss and cut heart shapes

I showed you in the heart bezel pendant tutorial  (linked above) how you can emboss without an embossing machine.  Emboss first, then cut shape (aren’t you proud, Amy?)!

vintaj reliefing block

apply ICE jeweler's grade resin

To dome the resin, pour in middle and pull out to edges with toothpick or needle tool.  Don’t pour too much.  You can always add more resin if needed.  Having resin run over the edges of your piece is no fun.  Seriously.

doming resin instructions

When resin is dry, paint the other side of the earring and hole punch for jump ring placement.

metal hole punch tutorial

punch holes for jump ring placement

Use pliers to open jump ring and attach it to another jump ring and an ear wire.  Close, then open end ring an attach to heart.

inserting jump rings into earring holes

That’s it!

Make upcycled aluminum can jewelry @savedbyloves

Privacy Policy