Mod Podge Transfer Instagram Photos to Canvas & Text Embellish

Mod Podge Transfer

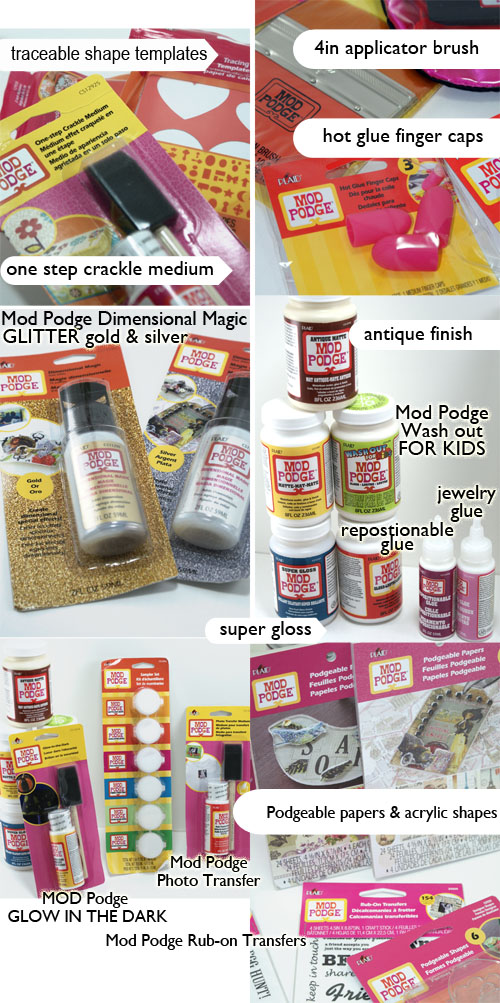
I have been busting at the crafty seams to tell you about this new product line from Mod Podge by Plaid Crafts.  It includes Podgeable collage papers, Podgeable Shapes, a bunch of new Mod Podge formulations, finish sprays and tools!  I could not believe when I opened the box and saw all of the shiny new supplies:

Mod Podge Product Line

Mod Podge Products By Plaid


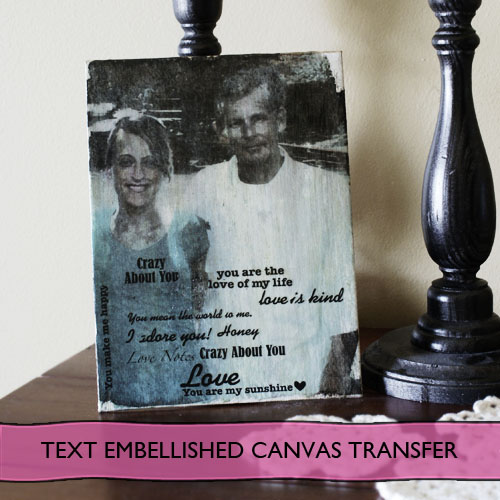
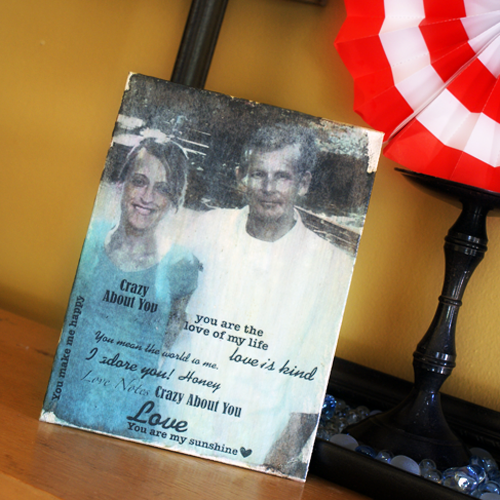
I have used many of the products since getting the package in the mail and will show you a round up at the end of this post.  Today’s project uses the same image transfer to canvas I showed you last week, using Mod Podge Glossy for the transfer and Mod Podge Antique for the finish coat, with a couple of tweaks –   I used Photoshop to create an Instagram effect on the photo before printing it for the transfer.  After the photo transfer, I used Mod Podge Rub-On transfers to embellish the final canvas with text.

You will need:

  • Your photo printed on laser jet
  • Mod Podge Glossy Finish
  • Mod Podge Antique Finish
  • Mod Podge Rub on transfers
  • Foam brush or other paint brush
  • Canvas to fit your print (the print used here is 11×14)
  • Bowl of water
  • Dry towel
  • Mod Podge brayer or squeegee
  • Mod Podge Silicone mat, or other non stick work surface

Follow the instructions I showed you previously, using your photo.  I used these free Photoshop actions by Daniel Box to edit my photos with Instagram effects in PS before having them laser printed at my local Office Depot.

Instructions:

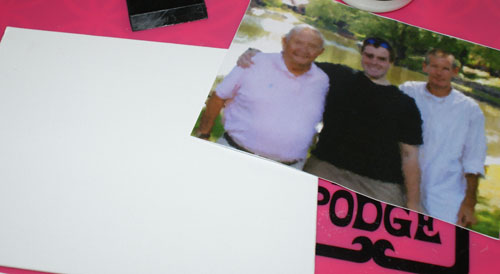
  • Cut Photo to fit canvas, and coat canvas and photo with generous layer of glossy Mod Podge.
  • Flip image (print side down) over onto canvas, making sure to center it where you want it before placing, and smooth out any air bubbles with Mod Podge brayer, squeegee or with your hand from the center out.

Transfer instagram photo to canvas

Let that dry for a minimum of 2 hours.  I let mine dry overnight.

Mod Podge Image Transfer

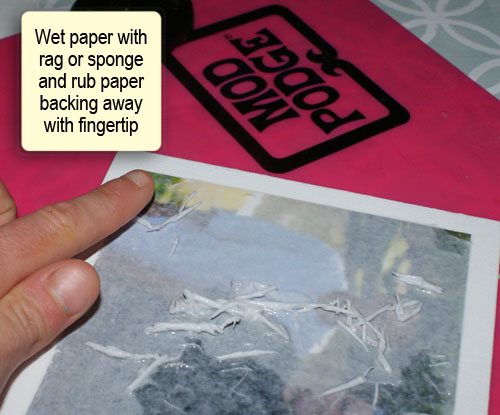
  • You will may need to re-wet with a mister or sponge brush and continue rubbing away paper backing until you are satisfied with the image.  It doesn’t need to be perfect.  You are going for a vintage feel, and you are going to use Mod Podge Antique and rub-ons on top,  so a distressed look is ok.  Just try not to remove too much of your image when you are rubbing away the back.
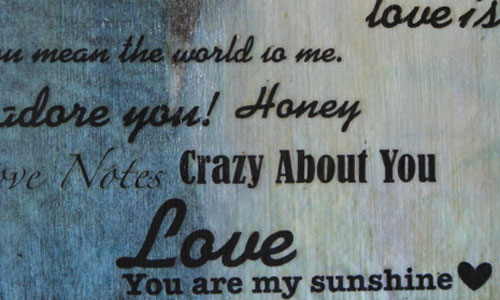
  • Once you are happy with your image, Coat with Mod Podge Antique, as many coats as you need to get the antiqued effect you desire.  Let dry 30 min between each coat. I applied my the text after the first coat of Mod Podge Antique, then coated twice more to lessen the contrast between the rub-on transfers and the image.  Apply Mod Podge rub on transfers per package instructions.

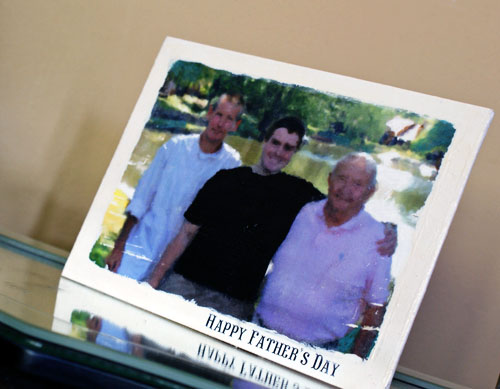
These are fantastic.  They come in phrases for family, love, seasons, holiday, and pretty much anything you can think of.  I used the love theme for the image of my husband and I.  The Father’s Day theme was perfect for the picture of my husband with his father and son.  Application was easy with the included craft stick.

Mod Podge Image Transfer

Mod Podge Image Transfer

Mod Podge Image Transfer

  • Here you can see the image for the Father’s Day Gift I used is slightly smaller than the canvas, giving a white border in my finished piece.  I wanted that look, and I brushed around the edges with white acrylic paint.

Here are all of the projects I have done with the new Mod Podge line, and which product I used in each (click images to go to full photo tutorials):

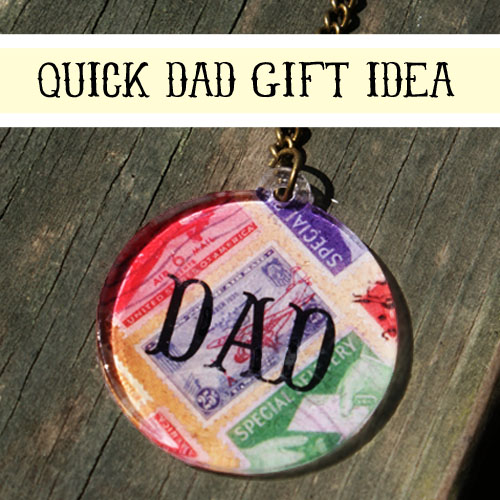
Mod Podge Dad Keychain Using Podgeable Paper and Shapes

PODGEABLE PAPERS AND ACRYLIC SHAPES

MOD PODGE DIMENSIONAL MAGIC

MOD PODGE RUB-ON TRANSFERS

MOD PODGE GLOSS

MOD PODGE GLOSSY

MOD PODGE ANTIQUE

MOD PODGE TRACEABLE SHAPE TEMPLATES

MOD PODGE GLOSSY

MOD PODGE ANTIQUE

MOD PODGE PEARLIZED ACRYLIC SEALER

I am so excited about this line.  Everything I have used has been wonderful.  It is no secret I love me some scrapbook paper jewelry, and the Podgeable Papers are scaled to fit those clear acrylic Podgeable Shapes perfectly.  I have big plans there.  My favorite new product is the Mod Podge Antique.  I love the effect, and that it is produced by a product that also seals. These products are now available at your Michael’s Craft Stores.

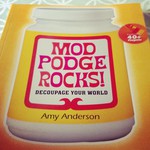
If you want to learn step by step how to use all of these different formulations, and be inspired by over 40 how to photo tutorials, make sure you check out Mod Podge Rocks, the book  It is a steal on Amazon.  I have it, love it, refer to it often, and reviewed it here.

Mod Podge Rocks, the book

Join me in keeping up with the exciting products and projects using them by following Plaid Crafts:

Plaid Crafts on Pinterest: http://pinterest.com/plaidcrafts
Plaid on Facebook: http://www.facebook.com/InspiredByPlaid
Plaid on Twitter: http://twitter.com/plaidcrafts/

Disclosure:  I received product and payment for this post.  All opinions expressed in this post are honest and mine.

Check out these amazing projects using this rockin’ line of Mod Podge products!


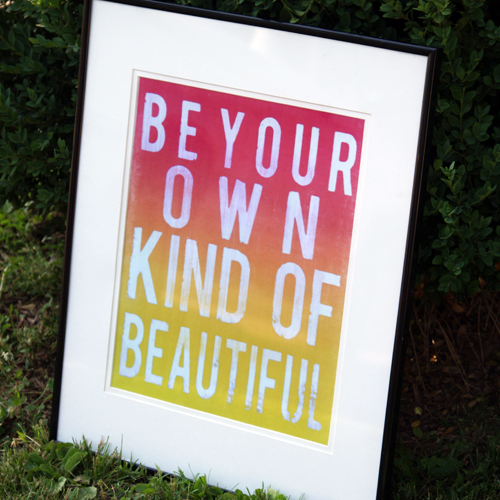
Be Your Own Kind of Beautiful Subway Art

Beautiful Subway Art

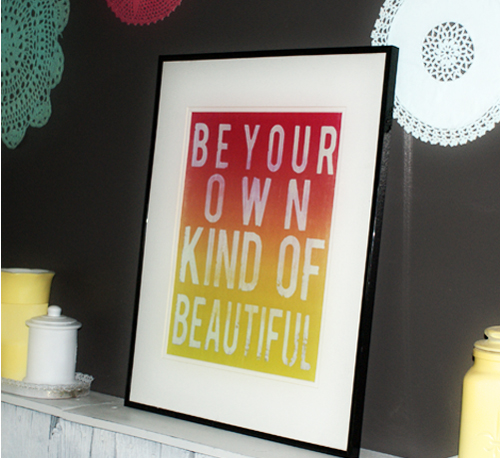
This print is now hanging in my stepdaughter’s bedroom and she loves it!  I made it in Photoshop and you can download the full res 11×14 at Printable Decor; Be Beautiful Subway Art Printable.  I had mine printed on regular paper at Staples for less than $1, and put it in a frame I had on hand.

Be Beautiful Printable

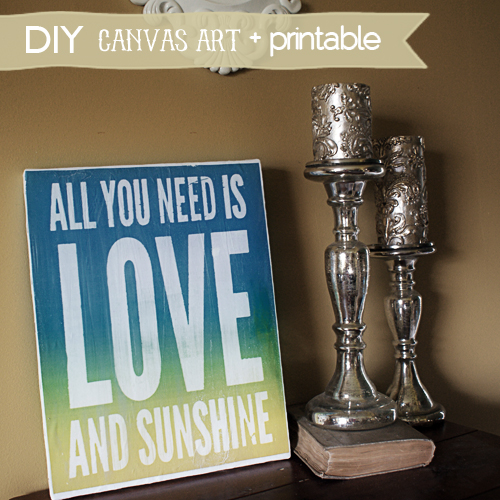
Sunshine Printable Subway Art On Canvas

DIY Canvas art with printable

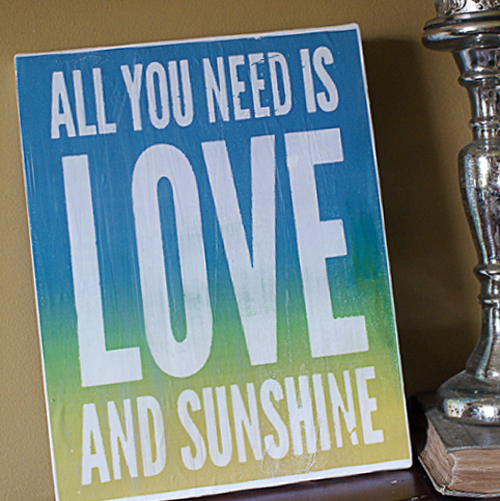
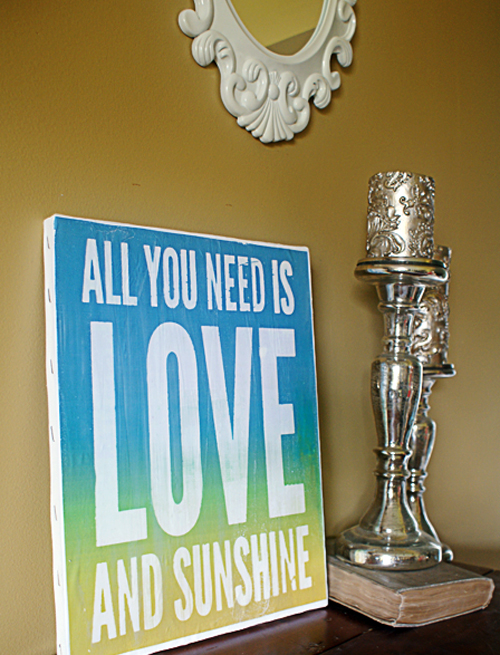
Love and Sunshine Printable

I needed to bring some summer into my decor, so I created this love and sunshine subway art printable to fit an 11×14 canvas I picked up from a recent garage sale.

I had the print done at Staples; 2 for just over $1.

Canvas $0.75.

I cut the print to fit the canvas, covered the back of the print and the canvas with a light coat of matte gel medium, then placed the print onto the canvas.  I smoothed out wrinkles with my hands from the center of the print out to the edges, then went over it with a brayer to make sure there were no bubbles left.

I went over the entire canvas with a layer of matte gel, let dry and that is it!

Subway art printable

For less than $2, I am loving it.

The link at the beginning of the post takes you to the printable at Printable Decor.

Enjoy!

Photoshop Tutorial and Free Printable Spring Subway Art


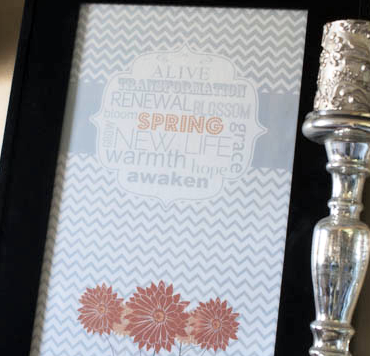
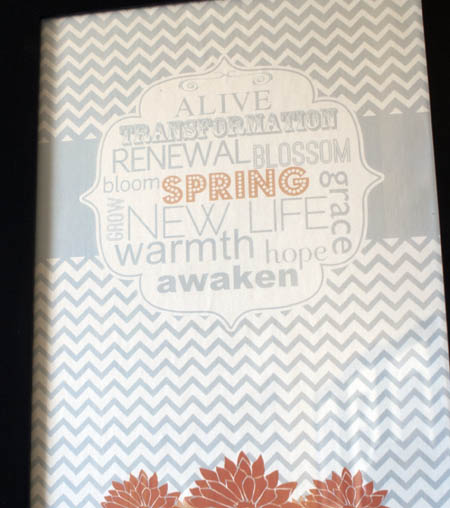
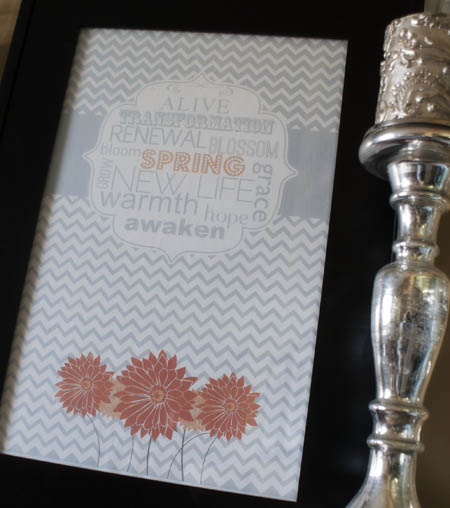
Head over to Printable Decor for this spring subway art printable and Photoshop tutorial detailing how you can easily change the color scheme and size to fit right in with your spring decor.

I cover using crop to quickly resize, as well as altering the hue of the entire photo, of just the blue, and turning the image into a monochrome.

Exciting stuff, I know!  You can use what you learn to alter freebie printables and your own images to complement your style.

Spring Chevron Subway art printable

Spring Chevron Subway art printable

If you like subway art and Photoshop tutorials, check out this detailed post on how to make your

own subway art.

TIP: Improve Your Photos With Photoshop Filter

Improve you blog photos

While taking in your favorite projects from your fellow craft bloggers, do you sometimes feel like the photos you see are above and beyond what you are capable of with your current camera and lens?  I have felt that way for awhile.  With the massive amount of photos I see daily as pins, I decided it was time to take action.  But what kind?

I am not a photographer.  I know very little.  I bought a DSLR when I got serious about blogging, and have never manually adjusted anything.  For close ups, I turn the dial to the macro flower icon, for portraits, the face silhouette.  That was all I needed for awhile.  Now my blog is my baby, and I want to make it beautiful.  The standard lens set that comes with my particular DSLR takes great shots, but I notice blur when I zoom in using Photoshop for a close ups of my jewelry and other projects.  From my research, I deduced I needed to buy a macro lens… not cheap.  I decided to stop in my local camera shop and ask someone more knowledgeable what they recommend.  That is when I learned this about the Photoshop high pass filter.

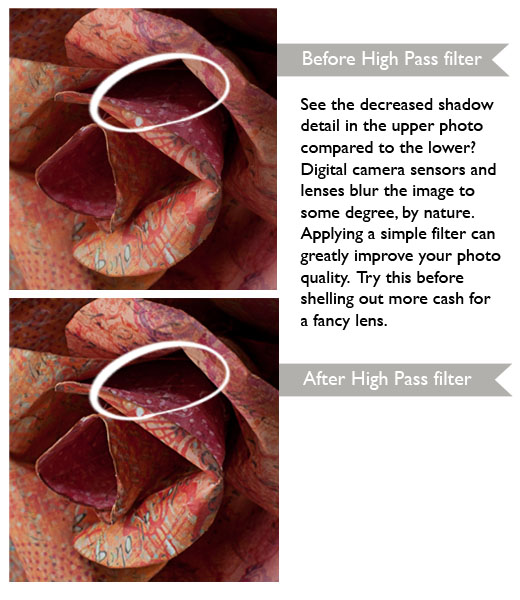
Digital camera sensors and lenses blur the photo.  They just do.  The effect is negligible to many, but when you want that perfect shot with pristine detail to grab your reader’s eye, it is significant. You can easily resharpen using the high pass filter if you have Photoshop.

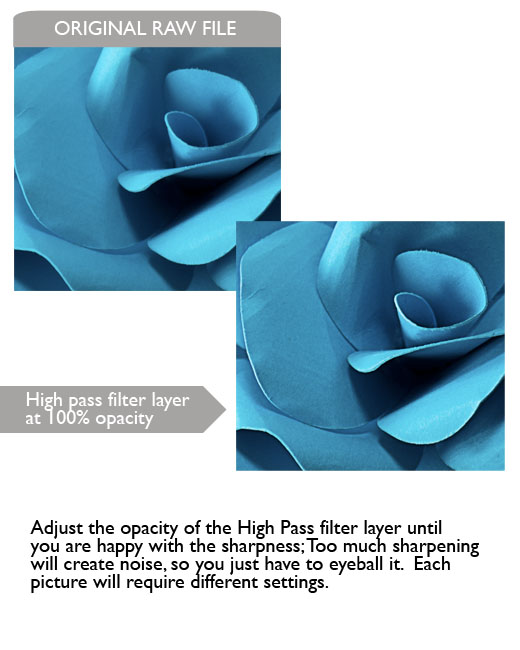
Here is an image I shot on my DLSR’s macro setting in my lightbox, before and after correcting the blur with the high pass filter.
Take Better Jewelry PhotosPretty big difference for a few simple editing steps.  According to the camera guy, this fix can be more profound than a high end lens.

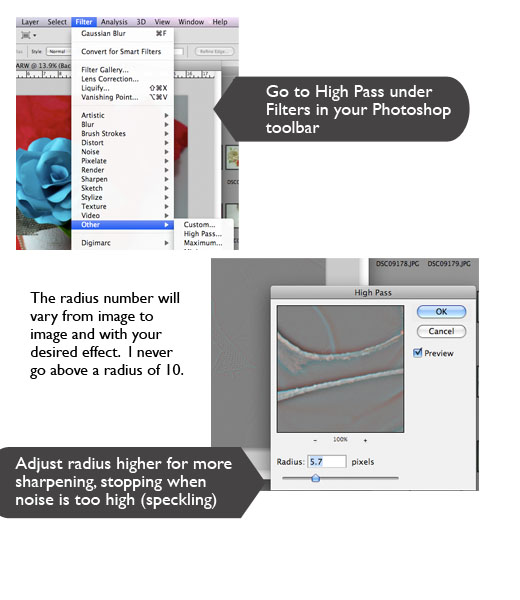
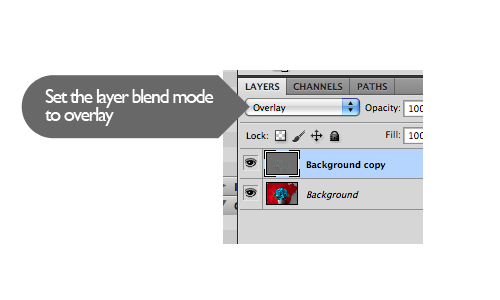
It is easy as pie.  Just duplicate your background layer in Photoshop, then follow the steps below.

Sharpening your images

This works best if you shoot in RAW vs. shooting in jpg, as there is more information in the RAW file, so more detail to work with when sharpening.  Most DSLRs have the option to shoot in RAW or jpg.  Shooting RAW with take up more space on your card, and requires software capable of handling the file type (which Photoshop is).  From what I have read, even if you don’t shoot RAW, you can still see improvement with this filter.Craft blog photo tips
I am impressed with the difference and no longer feel the need to invest in a new lens.  Yay!  Thank you camera guy.

What are your favorite photo editing tricks?

If you want to learn more about this filter, and other sharpening methods, check out this informative guide to image sharpening at Cambridge in Colour.

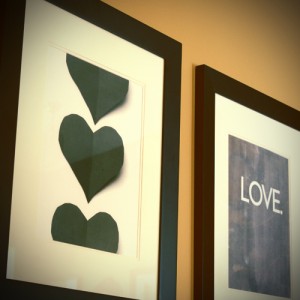
Valentine’s Day Printable Wall Art

Valentine's Day Printables

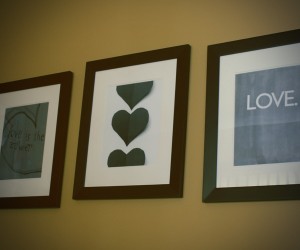
It is time to clear out the Christmas decor and what better to replace it than love themed prints?  These three 11×14 inch frames stay up year round, and I change the prints with the seasons.  I stick to black and white, which I have printed at Office Max for $0.20 per 11×14.  I spent a whopping $0.64 on these three.  I have provided them for you to download over at printable decor.  Get your free Valentine’s Day printables now.

Free Valentine's Day Printable

Free Valentine's Day Printable

Free Valentine's Day Printable

DIY Painted Pop Art

Photo to Pop Art

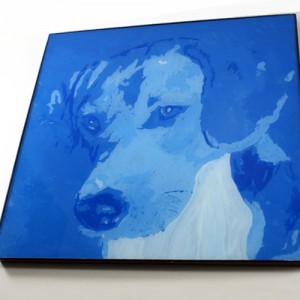
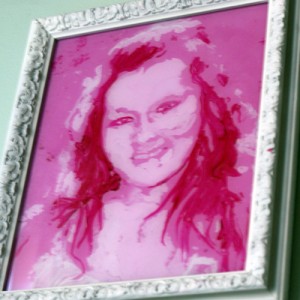
{This post was originally shared at Infarrantly Creative}.  One of my very favorite things to do is design in Photoshop.  In fact, I picked it up way before ever tackling painting… you know, with actual paint and a brush, in hand.  Today we are going to do a bit of both, in this acrylic painting right on the glass from a picture frame.  So, grab your favorite photo, lets tweak it a little Photoshop (beginner level, I promise), and use it to guide us in painting our own Warhol style pop art portrait.

Supplies:

  • Photoshop
  • Digital image file
  • Picture frame with glass
  • Rubbing alcohol
  • Acrylic paint in white and a deep, vibrant color of your choice
  • Fine paint brush for detailing, larger brush for dabbing (sponge or stencil brush) and one in between
  • Masking tape
  • Newspaper to protect surface
  • mixing palette for acrylics (paper plate or cardboard)
  • Heat tool (optional)

Instructions:

How to make pop art

Free tutorial for Photoshop

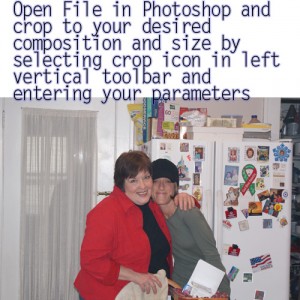
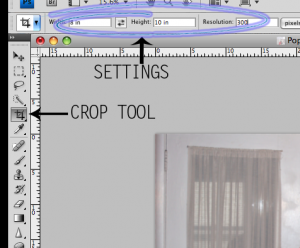
For width and height, you want to put in whatever your frame size is, which needs to be a size your printer can print.  Here, I went with 8×10 inch.  For the purpose of this project, set resolution to 300 ppi (field shown in above pic after width and height).

pop art with photoshop

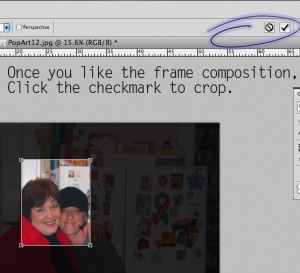
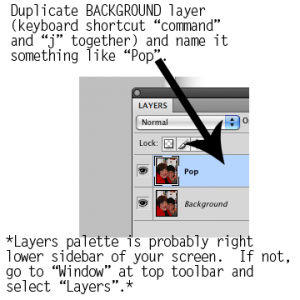
After cropping, duplicate the background layer (I don’t like to directly edit the background layer in case I need to go back to it).  You can select duplicate from the layers palette window, or better yet, hit Command (Control for Windows) and the letter j at the same time…

pop art

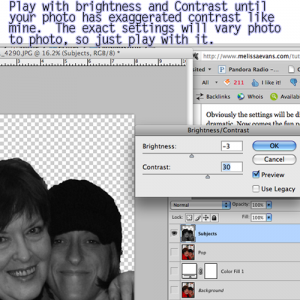
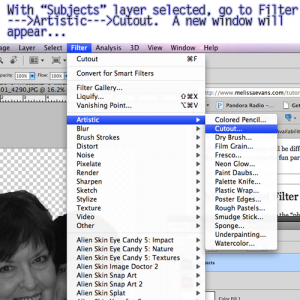
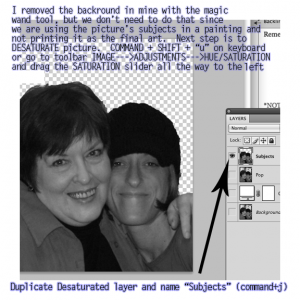
Now desaturate the image (turn to black and white) with keyboard shortcut Command (Cntrl on windows) + Shift + the letter u.  I removed the background layer out of habit.  We don’t need to do this since the digital image is not our final piece of art.  Just leave it in and ignore it in the painting part (which will make sense soon).  After you desaturate, duplicate (control + J) the layer and rename it “Subjects”.

pop art tutorial for photoshop

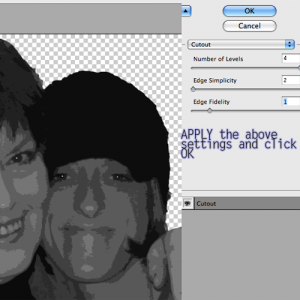
photoshop tutorials pop art

Free photoshop tutorial

Photoshop beginner tutorial

pop art in photoshop

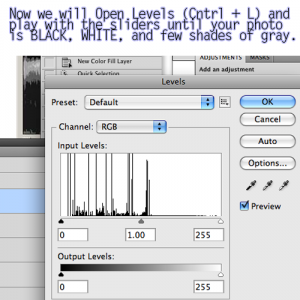
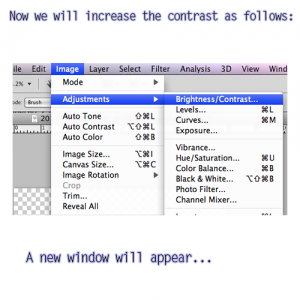
Open the Levels adjustment window and move the white and gray triangles around to get a photo with white, black and 2-3 shades of gray.  The black triangle on the left can stay put…

andy warhol pop art

photo shop tutorials

Now you are ready to print your image on just regular copy paper.

*NOTE:  If having the final portrait in the same orientation as the digital file is important to you, you will want to horizontally flip the image before printing it.  You can do this in Photoshop by going to the top left of the screen in the horizontal toolbar;  Go to EDIT—>Transform—>Flip Horizontal.

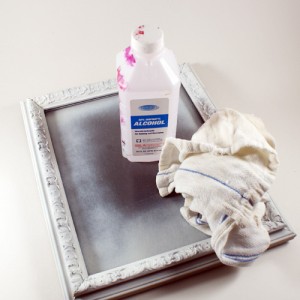
Remove the glass from the frame and clean it with rubbing alcohol and a lint free towel.

pictures pop art

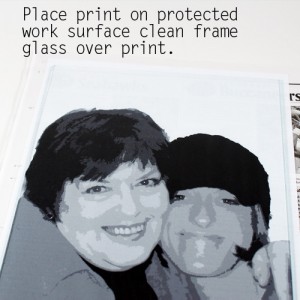
On protected work surface, place print face up, then line up the glass on top of this…

tutorials on photoshop

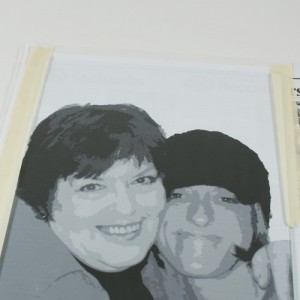
Tape glass to print to keep it from shifting while you paint.

tutorials on photoshop

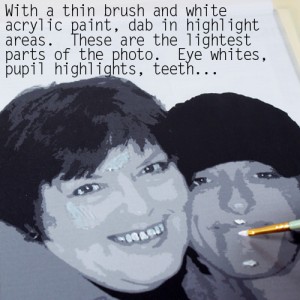
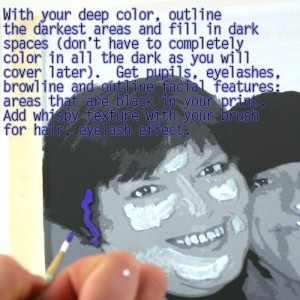
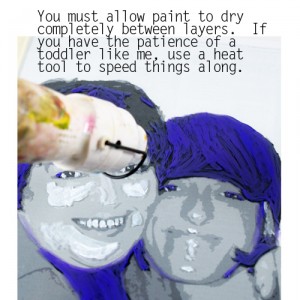
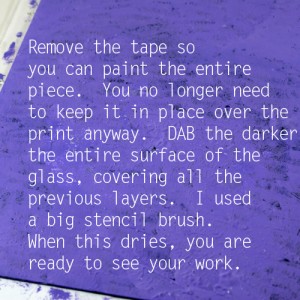
Now you are going to paint right on the glass, in layers – one color at a time.  First with white, then your color, then a light shade of your color and finally a darker shade of your color.  You must let each layer dry completely before moving on to the next to avoid unwanted blending.  I use a heat tool fot this, but you can let it air dry if you want.

First, the white…

Painting on glass

Now the color, as is, you will shade in the darkest areas.  These are the areas that are black in the print.  Use a light weight, taper point brush and create texture where hair frames the face and at the eyelashes and brows.

glass painting

le pop art

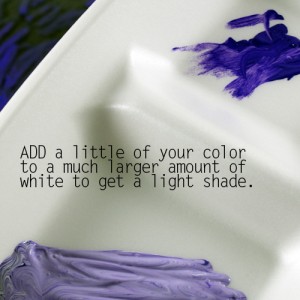
Now the light shade of your color, which you make by adding a couple of drips of your color to about a tablespoon (really… a tablespoon?) of white…

paint glass

Reminder to dry between layers…

Warhol a photo

And now that the paint is dry…Painting portrait

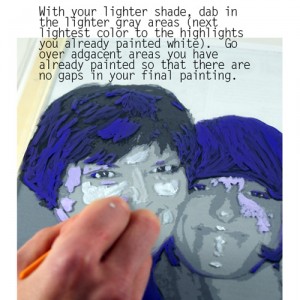
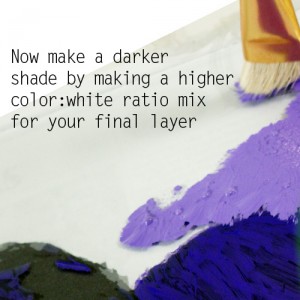
Now for your final layer.  This is a darker shade of your color (darker than the light shade, but not darker than the original color), made by mixing less white, more color than you did above.

Painting with Acrylics

Acrylic painting

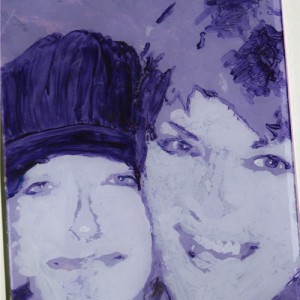
Finally!  Flip the glass over and check out your masterpiece…

Pop art painting

See how it is reversed horizontally from the image?  Something to keep in mind, especially if there is text in the image you are painting.  Frame it and you are done.

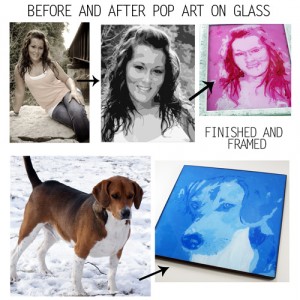
Here are a couple more I did with the same technique.

DIY pop art pictures

Photo to Pop Art

These are a big hit, quite inexpensive to make and work up in less than an hour (especially if you use a heat tool to dry between layers).  I grab frames to have on hand while at thrift stores and flea markets for just this kind of thing.  Photos to pop art digitally is fun, but there is a different kind of  satisfaction that comes with getting paint all over the place once in awhile, right?  I love that you don’t have to be at all skilled in painting to get a cool effect (I am living proof)!

Another great idea to do with a photo is to have a photo mug made, which you can do inexpensively and without the mess of acrylics!  Find out more.
Thanks for checking out my project.  I hope you are inspired to create your own.

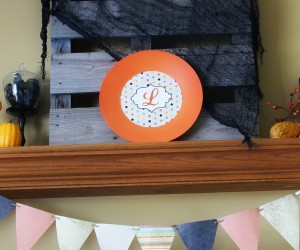
Monogram Plate Tutorial

Painted Plate

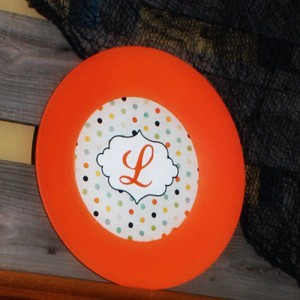
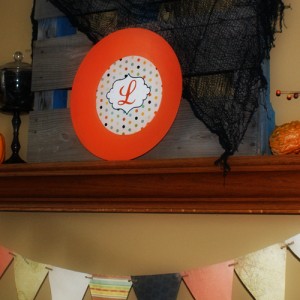
Ready to add a quick splash of color to a room, while celebrating the family name with a lovely monogram?  This project is super simple, and you most likely have all of the supplies on hand.  All you need is a plate or candle holder, a printer, and some craft paint, and you are on your way.

Supplies:

  • Image made in photoshop to fit plate center: Click here to download blank version
  • Super 77
  • Orange craft paint
  • Paint brush

Instructions:

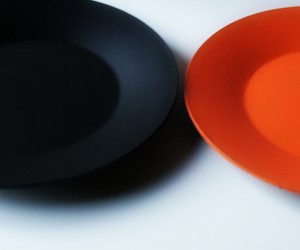
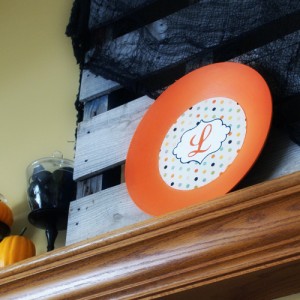
  • Paint plate desired color:  You may want to use a coat of primer.  I used folk art Enamel (color Orange Poppy) paint and just painted the orange directly onto the black plate.  It took 2 coats.

How to paint plate

  • Open the above free download in you favorite editing program and add your monogram letter.  Size to fit your plate, and print on glossy photo paper.
  • Cut out circle and spray Super 77 on back (liberally), then press onto plate.  That is it!
Monogram Decor

Monogram Plate

Monogram Plate

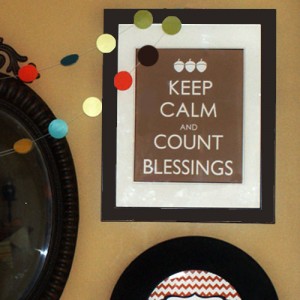
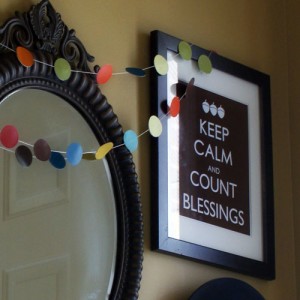
Fall Printable: Keep Calm Count Blessings

Keep Calm Free Printable

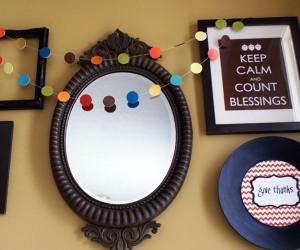
Fall decorating with printables is inexpensive, quick and easy, especially if you can just use your home computer.  This is an 8×10, framed in a garage sale frame that I picked up for a couple of bucks and spray painted black.  Jumping on the “Keep Calm” bandwagon, here is a Thanksgiving themed version for you to print.  I plan to display it until Christmas, and switch it out with a holly jolly version.

Keep Calm Free Printable

To download, Click here and “Save Image As”.

For the chevron “Give Thanks” printable, click here.

Fall Free Printable

I would love to hear about your fall decor!

Customizable Monogram Wedding Printable With Tutorial

How to make a monogram

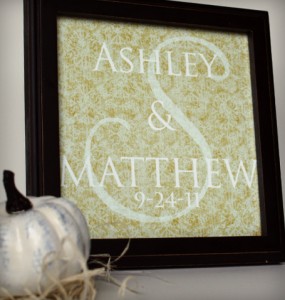
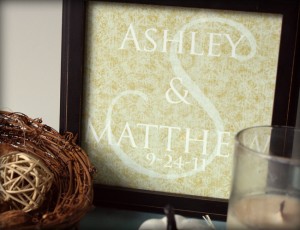
Do you want to skip the registries and opt for a unique, personalized wedding gift that is sure to stand out as a treasured token of the special day?  In this article you will find a free digital download of the layered photoshop file used to make the framed monogram you see here, as well as a simple, detailed photo tutorial showing you how to personalize the text for your bride and groom.

You will need:

  • Photoshop and a basic understanding of how it works.
  • A color printer and glossy photo paper, or a printing service
  • Square picture frame

DIY Wedding Monogram

Tutorial:

  • Download the file I created in photoshop, here.  Unzip and open the file in photoshop.
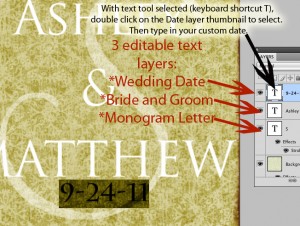
  • Select the text tool in photoshop either by clicking the T in the vertical toolbar on the right, or by hitting ‘t’ on your keyboard.  The text of the image is separated into 3 layers as shown in the picture below.  Double  click the top text layer thumbnail to select the date text, then type in your desired text.  Repeat for the remaining 2 text layers.

Photoshop Monogram Tutorial

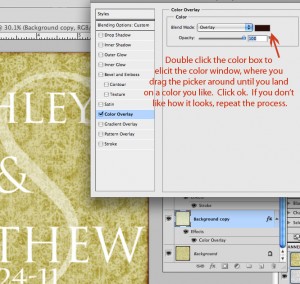
  • Now you have changed the date, the couple’s names and the large surname initial layer in the background.    You can further customize to your liking by changing the color of the overlay effect under layer “Background Copy” as shown below.

Photoshop Text Tutorial

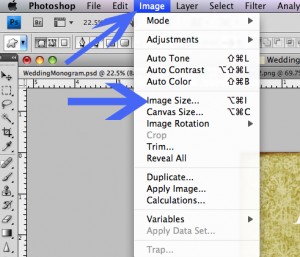
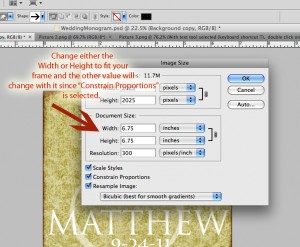
  • Now you will need to size the image to fit your frame.  The original size is 6.75 x 6.75 inches at 300ppi resolution (optimal resolution for highest picture quality).  To do this, click on “Image”, then “Image Size” in the photoshop horizontal toolbar.  Change the size to fit your frame in the window as shown below.  Photoshop text tutorial

Photoshop text tutorial

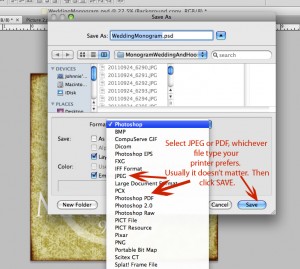
  • Now you are ready to save the file; In toolbar, go to “File” then “Save As”.  You will get the following window.  Save as jpg or pdf as shown.

Photoshop text tutorial

Print at home or use your favorite printing service.  I absolutely love how this turned out, and it took no time at all.


Privacy Policy