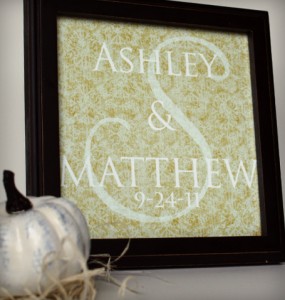
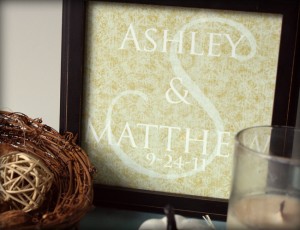
Do you want to skip the registries and opt for a unique, personalized wedding gift that is sure to stand out as a treasured token of the special day? In this article you will find a free digital download of the layered photoshop file used to make the framed monogram you see here, as well as a simple, detailed photo tutorial showing you how to personalize the text for your bride and groom.
You will need:
- Photoshop and a basic understanding of how it works.
- A color printer and glossy photo paper, or a printing service
- Square picture frame
Tutorial:
- Download the file I created in photoshop, here. Unzip and open the file in photoshop.
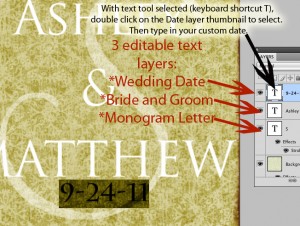
- Select the text tool in photoshop either by clicking the T in the vertical toolbar on the right, or by hitting ‘t’ on your keyboard. The text of the image is separated into 3 layers as shown in the picture below. Double click the top text layer thumbnail to select the date text, then type in your desired text. Repeat for the remaining 2 text layers.
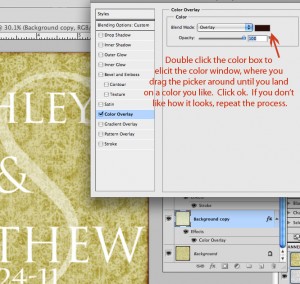
- Now you have changed the date, the couple’s names and the large surname initial layer in the background. You can further customize to your liking by changing the color of the overlay effect under layer “Background Copy” as shown below.
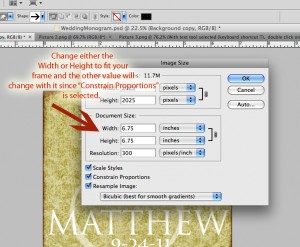
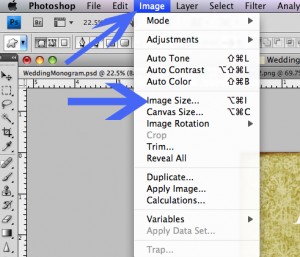
- Now you will need to size the image to fit your frame. The original size is 6.75 x 6.75 inches at 300ppi resolution (optimal resolution for highest picture quality). To do this, click on “Image”, then “Image Size” in the photoshop horizontal toolbar. Change the size to fit your frame in the window as shown below.
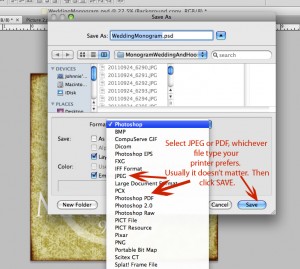
- Now you are ready to save the file; In toolbar, go to “File” then “Save As”. You will get the following window. Save as jpg or pdf as shown.
Print at home or use your favorite printing service. I absolutely love how this turned out, and it took no time at all.

