Awesome Subway Art DIY


Photoshop Beginner Tutorials

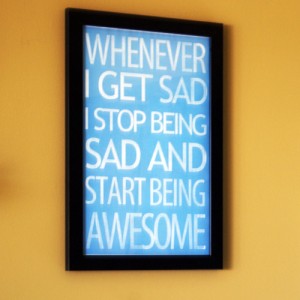
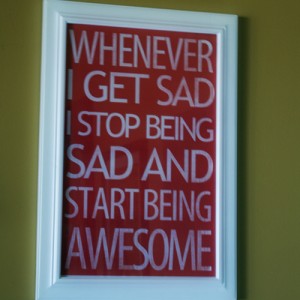
Don’t you just love the subway are that is so big in the blog decor world these days?  I ran into an example on a Pinterest board  that inspired me to create my own.  Here is the original.  This quote is a line from “How I Met Your Mother” – Neil Patrick Harris’s character coined it.  I cracked up when I heard it and loved the idea of it hanging in my stepdaughter’s college dorm room.  It is created in Photoshop, which is wonderful, because you can easily change colors and fonts to suite your needs.  Follow along step by step as I guide your through the CS4 Photoshop process, a rare event here at SBLC!

UPDATE:  Get free printables of all 3 colors at Printable Decor.

Subway art tutorial

Instructions:

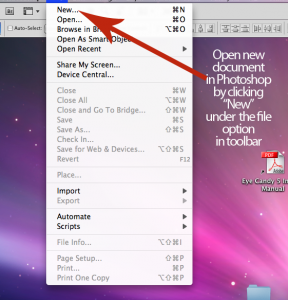
  • In the Photoshop toolbar, click  “New” to open a new document

Photoshop Subway art tutorial

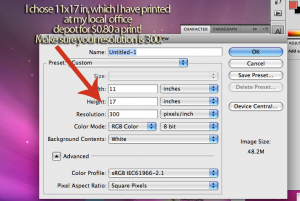
  • Set your document size.  I chose 11×17.  Set your resolution to 300 ppi…

Photoshop Tutorials

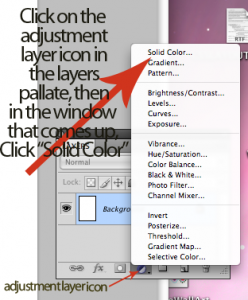
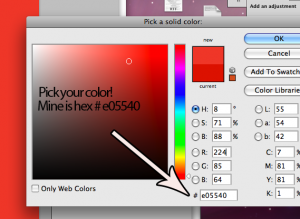
  • Select your background color by clicking the adjustment layer icon in the layers palatte (labeled below), and choosing “solid color”.  A color picker window will appear, where you can pic your color.  Click on your desired color, or enter the hex code.  This will leave you with a color fill layer that you can easily change  (see second pic below).

Photoshop Subway art tutorial

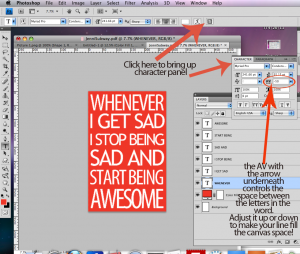
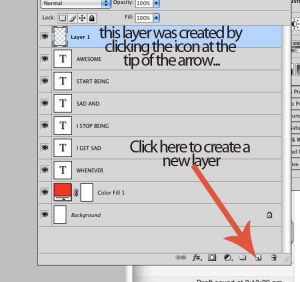
  • Grab the text tool (shortcut is “T” on the keyboard) and select your font.  You want it to be a blocky font if your are going for the subway art feel.  I used 2 fonts here; Myriad Pro Condensed and Trebuchet MS Regular.  You want to keep each line of text a different layer, so that you can adjust each line individually without affecting the font settings on the other lines.  To make your words fit, adjust the font size, as well as the space between the letters.  This requires opening the character panel (pictured below) and changing the AV setting.  A smaller number means the letters are closer together…

Photoshop Subway art tutorial

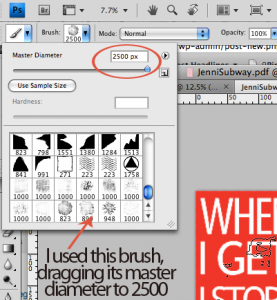
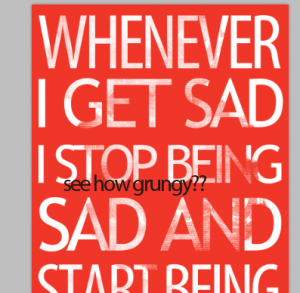
  • When you are happy with the letters, grab a grunge paintbrush (keyboard shortcut B, then choose your desired brush)  and in a new layer, paint over the letters in the same color as the background.  I downloaded this awesome high res grunge brush set for free, here.  BIG thank you to digitalrevolution.  This gives a nice distressed look to the piece.

Photoshop Subway art tutorial

Beginner Photoshop Tutorials

Photoshop Tutorials

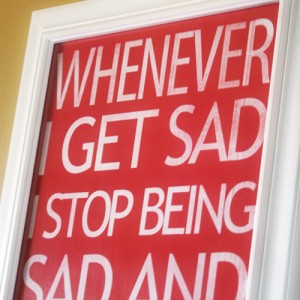
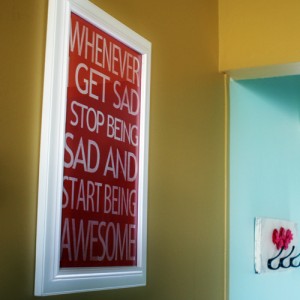
Remember the adjustable color layer I had you make for your background?  Perfect for if you have 2 stepdaughters both in college, that have different color preferences.  I changed the bright pink to blue for the print you saw in the teaser.  Love how they look.  I have seen several tutorials for these done with paint and stencils on canvas, but this is literally a 5 minute Photoshop endeavor.  No mess, $0.80 per print, frames I had on hand from my obsessive garage sale frame purchasing.

I got an extra print in with a black background that I have in mind for a gift.  It would be really cute made into a faux canvas print by mod podging it onto painted mdf board, like I showed you here.  What do you think?  I would love to hear your feedback on this tutorial.  I know it assumes some comfort with Photoshop.  Did you find it helpful, easy to follow, or did it give you a headache?  I rarely do these and am always looking to see what you all want more or less of here at SBLC.  Thanks!

Photoshop Tutorials

Photoshop Subway Art Tutorials

The Chris Bateson Experience; T-Shirt Transfer Project

Inkjet Tshirt Transfers

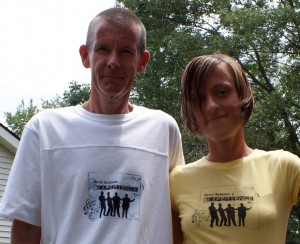
You know when a crafty blogger posts a project tutorial, but it is clear that the real purpose of the post is to drive home how talented and amazing her family happens to be?  This is one of those.  Yes, you will see how I made a custom t-shirt using HP inkjet t-shirt transfer sheets, but what I hope you walk away with is the knowledge that my stepson rocks, and so does the barbershop quartet to which he belongs.

[Read more…]

Free Easter Printable

This is my absolute favorite time of year… Easter.  I made this watercolor from a photo in photoshop and put it with the beautiful verse, Hebrews 11:1.  You can download the full resolution file by clicking here.  

DIY Fabulous Frugal Faux Canvas Painting Tutorial

Create an oil paint effect on prints, using Mod Podge Brushstrokes.
These prints were mounted on plywood and painted with Mod Podge to create beautiful faux oil paintings! Read on for full tutorial…

tut12I am so excited about the way this project went! As mentioned in the prior post, here, I created these prints in Photoshop with the idea in mind that I would try something similar to the project over at Infarrantly Creative (see this post).

I had the images printed at 12×12′ on glossy stock. At Michael’s, I picked up 1/2x12x12′ birch plywood squares. Since I wanted the pictures mounted on 1′ backing, I used Gorilla Glue to adhere 2 pieces of birch plywood together for each of the 3 prints. You could also use MDF in for the backing, cut to the size of your prints. I used the plywood because it was already cut to the size I wanted, and it was cheap.

Once the gorilla glue was dry, I was ready to adhere the prints to the wood. Super 77 has minimal overspray, but make sure you cover your work surface, cause this stuff is sti-iii-cky, for real. Spray a thin coat on both the back of the print and on the wood surface and lay the print in place, smoothing flat with your hand. This holds big time and bonds immediately, so make sure you have the pic lined up before placing it. I turned the piece over on a flat surface and applied pressure to the back to ensure I hadn’t missed any air bubbles. This part was really much easier than I thought it would be. I had no problem with air bubbles.

Next, the fun step using Mod Podge Brushstrokes. I just recently ran across a post using this medium and I am in love. I used a 1 inch foam bruse and small texturizing brush. I read that if you are painting the Mod Podge onto photo paper, you should use an acrylic sealer before applying. This was just glossy stock, and I had no problem with ink bleeding. You may want to test a small area before painting your entire work. I just applied strokes randomly. There wasn’t a lot of strategy. The prints themselves I made with a painted effect in photoshop, so I kinda followed along the strokes in the images, but mostly it was just random. Look how cool they are. They look like for real oil paintings!

After the Mod Podge dried for about 30 mintues, I applied gesso to the sides of the wood (you could also use primer), then painted with white acrylic over that.

I used thick tacks (U-shaped) and wire for the hanging mechanism.

 
Here they are on the wall…


You can do this with your own images, posters or garage sale finds. The Mod Podge brushstroke effect looks particularly impressive with photos that have been digitally altered using paint effects. That is a photoshop lesson for another day.

Pet Pop Art Prints From Your Favorite Photos

It has been awhile since I have had any “photo to art” business, so I am taking the opportunity to promote this service.

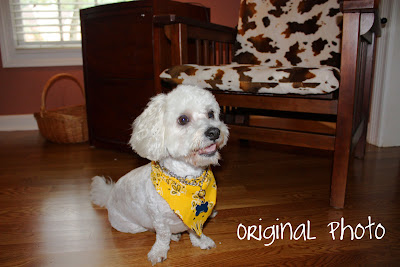
You can see the customer’s original photo and the pop art portrait I created from that. How it works: send me the photo you would like as art, pick out a style from my “Custom Photos to Art” Gallery, here, and I will provide you with 3 proofs from which you can choose. If you want something different than what you see in my gallery, just talk to me. I am happy to customize to your specs. Once you are happy with a proof, I will have it printed and sent to you (price varies depending on size). You can also buy the high res electronic file for $10 and have it printed as you wish, instead of or in addition to purchasing a print from me. This customer chose 11×14 for $20 total (for the artwork and final print).

My prices are pretty awesome compared to other sites that offer similar services (usually starting at $100). The reason I am able to provide this service at such a low cost is because… Photoshop is amazing, really. I put in the hours of photo editing for each of the styles you see available 2 years ago and saved the steps in Photoshop as “Actions”, which I can apply to your photos with a click. I end up doing some tweaking, as each photo is obviously different, but what would normally take several hours per pic is achieved in a fraction of the time. You can see an example of my work on child portraits at Infarrantly Creative, here.

I would very much like to get the word out about this great deal. If you are a blogger and would like to trade, I am open to doing work in exchange for a review/feature, or a giveaway on your site. Lets work together!

Free Shipping and 40% Discount on Photo to Canvas

Just thought I would pass along this deal. My friend Shannon asked me to doctor her photo before having it printed by Canvas People. She is taking advantage of this holiday deal. You probably have seen the free 8×10 canvas deal floating around blog land. Seems like they have some kind of deal going on all the time at Canvas People. I have not personally ordered one since I am still drooling over Infarrantly Creative’s Z-Gel technique she did on the photographs I transformed into pop art for her. Awesome tutorial here that I eventually plan to tackle.

Shannon had me edit photos of her youngest 2 children (shown here), which she ordered from Canvas People. There was a green tint when she got one of them in the mail, which CP replaced without question at no cost to Shannon. She is happy with the outcome of her first 2, and sent me this photo of her oldest…


I edited the original in photoshop to this…


Take advantage of this great deal, and turn your memories into canvas art. Or, if you are a diehard DIYer, give Beckie’s tutorial a shot over at IC. If you need your photo edited, I am happy to do it to your specifications for $10. Just contact me, or leave a comment and we can get started. Happy New Year!!!!!

Speechless Saturday

Ripley the innocent beagle…I will be back in full gear Monday. All is well. Just taking a lil break to chill with my peeps. Happy Holidays!

Speechless Sunday; My Babies

Color Photos to Retro BW With Photoshop; And Free Canvas Print WIth Shipping

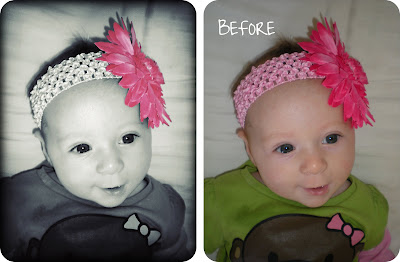
Whenever Shannon contacts me to do photo editing, I know it is going to turn into a blog post because her kids are crazy adorable. Today, she asked me to take color photos to black and white, leaving Madelyn’s flower pink. She is opting to take advantage of this offer over at Canvas People where you can get a free photo to canvas print when you pay shipping and handling.

I used photoshop to adjust the contrast, change to black and white, and to give the pics a retro feel. For the flower, I selected it before desaturating the pic, and made it into a new layer, which I blended of the black and white version using color mode. A whole bunch of stuff that only makes sense to you if you are familiar with photoshop. There are loads of tutorials out there. Play with your photos and get your free canvas print while you can.
I leave you with a yesterday’s wreath project, spray painted white, and photo edited…

Wedding Gift Custom Photo Art From Photograph

MysteryWeddingBordered

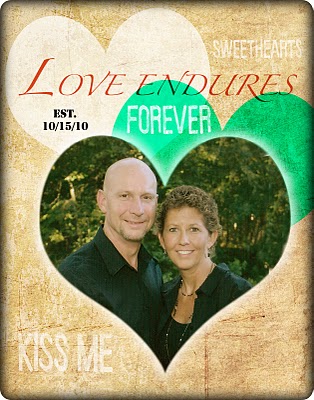
Here is what I worked on today. My client gave me the picture on bottom, and I made the 11×14 inch top pic in photoshop. Photo collage in graphic design software is limitless. I was given instruction to go “lightly retro”. The print will be framed in a simple black frame, no matting. I have several wedding/ anniversary custom photos on the burner right now. It is making me itch to do one for John and I. You know I have already started 🙂
I would LOVE your feedback. Blessings…

Photobucket

Photobucket

Privacy Policy