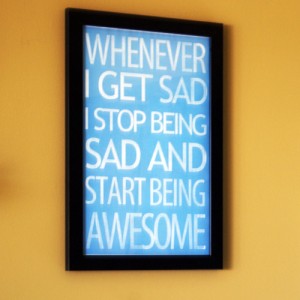
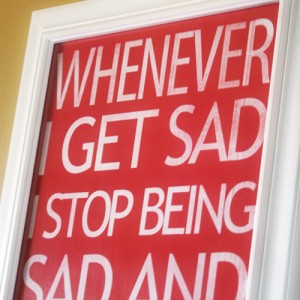
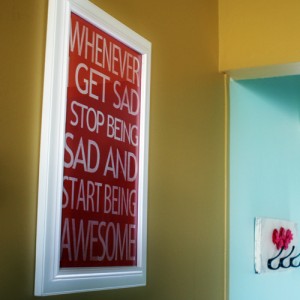
Don’t you just love the subway are that is so big in the blog decor world these days? I ran into an example on a Pinterest board that inspired me to create my own. Here is the original. This quote is a line from “How I Met Your Mother” – Neil Patrick Harris’s character coined it. I cracked up when I heard it and loved the idea of it hanging in my stepdaughter’s college dorm room. It is created in Photoshop, which is wonderful, because you can easily change colors and fonts to suite your needs. Follow along step by step as I guide your through the CS4 Photoshop process, a rare event here at SBLC!
UPDATE: Get free printables of all 3 colors at Printable Decor.
Instructions:
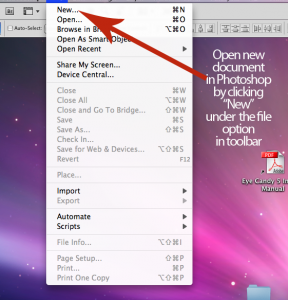
- In the Photoshop toolbar, click “New” to open a new document
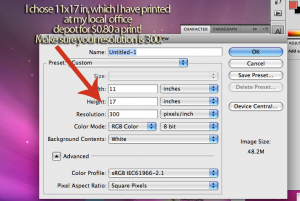
- Set your document size. I chose 11×17. Set your resolution to 300 ppi…
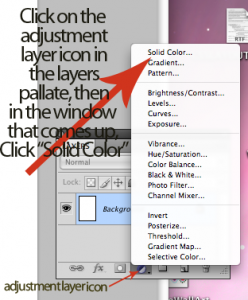
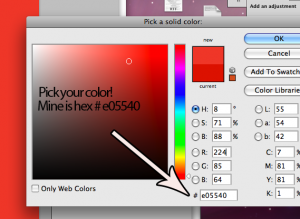
- Select your background color by clicking the adjustment layer icon in the layers palatte (labeled below), and choosing “solid color”. A color picker window will appear, where you can pic your color. Click on your desired color, or enter the hex code. This will leave you with a color fill layer that you can easily change (see second pic below).
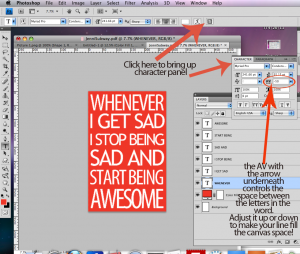
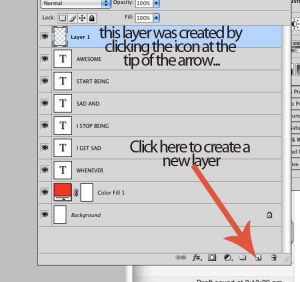
- Grab the text tool (shortcut is “T” on the keyboard) and select your font. You want it to be a blocky font if your are going for the subway art feel. I used 2 fonts here; Myriad Pro Condensed and Trebuchet MS Regular. You want to keep each line of text a different layer, so that you can adjust each line individually without affecting the font settings on the other lines. To make your words fit, adjust the font size, as well as the space between the letters. This requires opening the character panel (pictured below) and changing the AV setting. A smaller number means the letters are closer together…
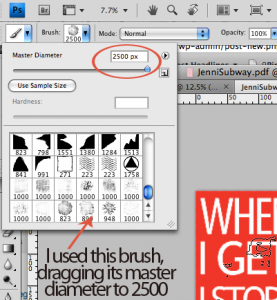
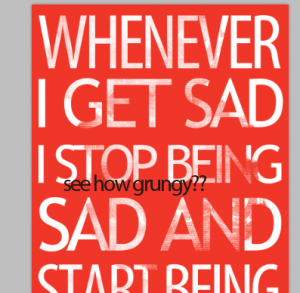
- When you are happy with the letters, grab a grunge paintbrush (keyboard shortcut B, then choose your desired brush) and in a new layer, paint over the letters in the same color as the background. I downloaded this awesome high res grunge brush set for free, here. BIG thank you to digitalrevolution. This gives a nice distressed look to the piece.
Remember the adjustable color layer I had you make for your background? Perfect for if you have 2 stepdaughters both in college, that have different color preferences. I changed the bright pink to blue for the print you saw in the teaser. Love how they look. I have seen several tutorials for these done with paint and stencils on canvas, but this is literally a 5 minute Photoshop endeavor. No mess, $0.80 per print, frames I had on hand from my obsessive garage sale frame purchasing.
I got an extra print in with a black background that I have in mind for a gift. It would be really cute made into a faux canvas print by mod podging it onto painted mdf board, like I showed you here. What do you think? I would love to hear your feedback on this tutorial. I know it assumes some comfort with Photoshop. Did you find it helpful, easy to follow, or did it give you a headache? I rarely do these and am always looking to see what you all want more or less of here at SBLC. Thanks!

