Customizable Monogram Wedding Printable With Tutorial

How to make a monogram

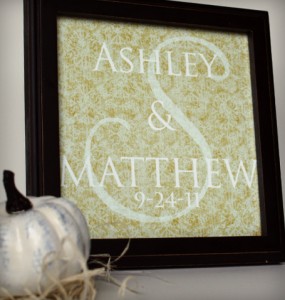
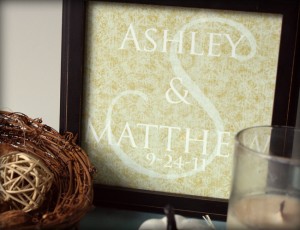
Do you want to skip the registries and opt for a unique, personalized wedding gift that is sure to stand out as a treasured token of the special day?  In this article you will find a free digital download of the layered photoshop file used to make the framed monogram you see here, as well as a simple, detailed photo tutorial showing you how to personalize the text for your bride and groom.

You will need:

  • Photoshop and a basic understanding of how it works.
  • A color printer and glossy photo paper, or a printing service
  • Square picture frame

DIY Wedding Monogram

Tutorial:

  • Download the file I created in photoshop, here.  Unzip and open the file in photoshop.
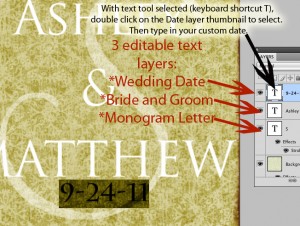
  • Select the text tool in photoshop either by clicking the T in the vertical toolbar on the right, or by hitting ‘t’ on your keyboard.  The text of the image is separated into 3 layers as shown in the picture below.  Double  click the top text layer thumbnail to select the date text, then type in your desired text.  Repeat for the remaining 2 text layers.

Photoshop Monogram Tutorial

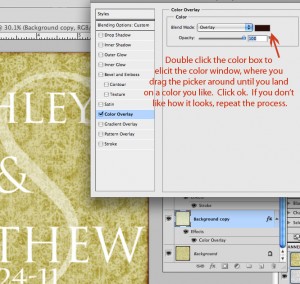
  • Now you have changed the date, the couple’s names and the large surname initial layer in the background.    You can further customize to your liking by changing the color of the overlay effect under layer “Background Copy” as shown below.

Photoshop Text Tutorial

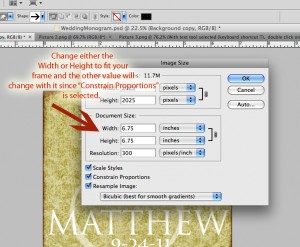
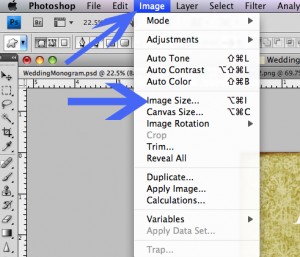
  • Now you will need to size the image to fit your frame.  The original size is 6.75 x 6.75 inches at 300ppi resolution (optimal resolution for highest picture quality).  To do this, click on “Image”, then “Image Size” in the photoshop horizontal toolbar.  Change the size to fit your frame in the window as shown below.  Photoshop text tutorial
Photoshop text tutorial

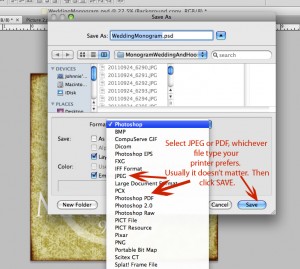
  • Now you are ready to save the file; In toolbar, go to “File” then “Save As”.  You will get the following window.  Save as jpg or pdf as shown.

Photoshop text tutorial

Print at home or use your favorite printing service.  I absolutely love how this turned out, and it took no time at all.


Spray Painted Chevron Stencil Rug


How to Make Chevron Rug


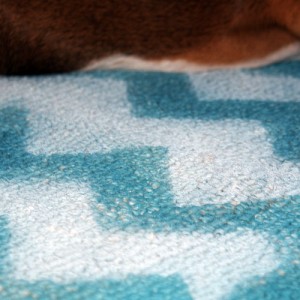
Have you been wanting to jump on the chevron home decor wagon?  This simple spray painted rug is just the way to do it.  I picked up a light colored throw rug from a garage sale, and with some spray paint and a vinyl stencil, transformed it into the blue and white beauty you see here!  Follow along as I show you the step by step.

Supplies:

  • Lightly colored rug
  • Vinyl Chevron Stencil (I created the pattern in photoshop and cut it with my cricut)
  • Spray paint in 2 contrasting colors
  • Painters tape and old newspaper

Instructions:

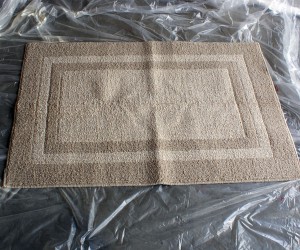
  • Protect your work surface and spray paint the base coat color.  I used Valspar in a shade of blue.

How to Make Chevron Rug

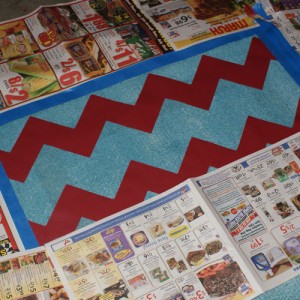
  • Once your base coat is dry (I had to do 2 coats to get the coverage I wanted), you are ready to stencil.  Here is the jpg image I made in photoshop and opened in Sure Cuts Alot to create a cut file for my cricut.  Feel free to use it!  I cut 2 zig zags and did my rug in segments, taping off the areas I didn’t want painted as I went along.

How to Make a Chevron

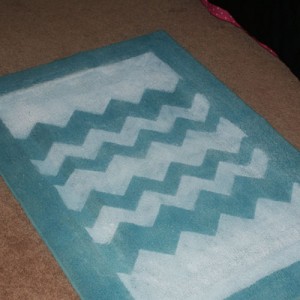
  • That is all!  I placed my stencils varying distances apart, in such away as to get this result…

How to Make Chevron Rug

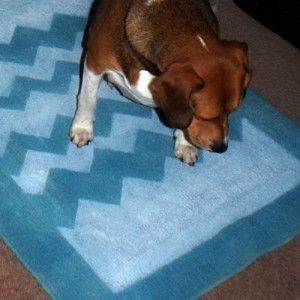
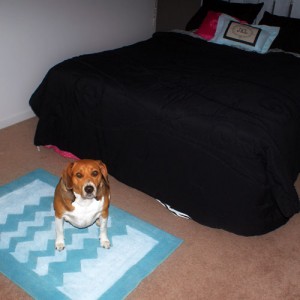
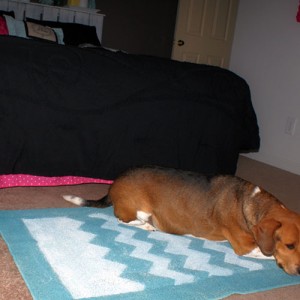
My beagle likes the new addition to the room, or maybe he just wanted some camera time!

How to Make Chevron

How to Make Chevron

How to Make ChevronOh joy!  I love how this room is coming together.  What do you think?

Crochet Flower Bracelet

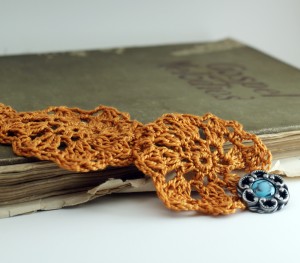
CrochetOrangeBracelet3-300x263

Traveling brings the opportunity for me to settle down with my crochet hook and whip up some crochet goodies.  Today, I will share with you the pattern I created to make this lacy flower bracelet.  Going on a road trip?  Print this to take with you.  Total time for this project; just over 1 hour.

[Read more…]

Free Easter Printable Round 2

The cross… the single greatest act of love in history.  Click here to download the full resolution 5×7.  Glory to God.

Free Easter Printable

This is my absolute favorite time of year… Easter.  I made this watercolor from a photo in photoshop and put it with the beautiful verse, Hebrews 11:1.  You can download the full resolution file by clicking here.  

Spring Inspired Crochet Headband With Free Pattern

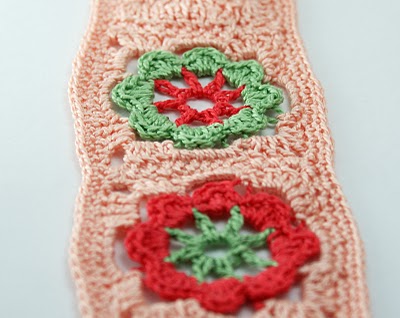
crochet headband pattern
 

I am on a spring headband kick these days. In fact, spring everything, really. Just got back from a sunny, warm vacation and now I am doing all I can to deny what is left of winter here in Indiana.

 
Here is the pattern I designed for the above headband, composed of three granny squares and two triangles made in the round, with slip stitch ties. This beauty works up quick. I used DMC thread size 5, and a size D crochet hook
 
 
Materials:
3 colors of DMC size 5 (Color A=bright pink, B=Green, C=light pink in the above pictures)
Size D crochet hook
Tapestry needle for finishing
 
Instructions: (For a Crochet Abbreviation Glossary, click HERE)
Flower Square Motif (Make 3 total—> 2 using A as center and 1 using B as Center)
Foundation Ring: Using A (B), ch 6, join with sl st to form a ring
Round 1(RS): Chain 5 – this counts as first dc and ch 2; (dc in ring, ch 2) 7 times; join with sl st in 3rd chain of beginning chain 5—8 dc and 8 ch-2 loops.
Round 2: With RS facing, join B (A) with sl st in next ch-2 sp, ch 1, in same sp work sc, hdc, 2 dc, hdc and sc; join with sl st in first sc. Fasten off.
Round 3: With RS facing, join C in back lp of same sc as last sl st, ch 5; working in back loops, (sl st in first single chain of next petal, ch 5) 7 times; join with sl st in first ch of ch-5.
Round 4: Sl st into next ch-5 sp, ch 1, 6 sc into same sp; *work 3 dc, ch 2, and 3 dc in next ch-5 sp**, 6 sc in next ch-5 sp; rep from*twice and from*to**once again; join with sl st into first sc. Fasten off.
 
Triangle Motifs (make 2 using color C)

Foundation Ring: Ch 3, join with sl st to form ring.

Rnd 1:Ch 3 (counts as first dc), 11 dc into ring, sl st in top of turning ch—12 dc total.

Rnd 2: Ch 3(counts as first dc), 2 dc in each st around and in same st as beginning chain 3, sl st in top of beginning

ch—24 dc.

Rnd 3: Ch 3, *(2 dc, tr, 2 dc) all in next st, dc in each of next 7 sts;

rep from * 2 times, sl st in top of turning ch—33 dc plus 3 ch-2

corner spaces. Fasten off.


Finishing:

Seam one triangle motif, 4 flower square motifs and 1 triangle motif

together, either by sewing, slip stitching, or single crocheting. When

seaming tog the last square and triangle, at the end of the seam

turn the work and sc along the edge of the joined motifs. Cont

down to the point of a triangle. To make tie: Sl st into st at point

of triangle, then ch 50. Skip first ch st and sl st in rem ch, then sl

st into the st at the point of the triangle again. Cont to sc along

the edge of the joined motifs to the point of the second triangle

and make a second tie. Sc to beg of sc edge and fasten off. Weave

in all ends.


Here are some more of my favorite spring colors you will see all headband-tastic in the near future!


Crafty Hippo Designs Free Blog Makeover; Hurry!

Did you see my post from last week, the one where I threw my hands up and cried out to the blogosphere… “HELP”? I was in the midst of attempting to turn a design I made in photoshop into my actual website. Yeah, it was humbling and frustrating – next time I will reach out for help sooner. Really, I was just venting, I certainly didn’t expect what happened as a result of my post…

Jeannette over at Crafty Hippo Designs left me a comment saying maybe she could help. A few emails and a couple of days later, I had my new design, just the way I wanted it. It turns out Jeannette is launching her design services business, and was looking for some sites to revamp for FREE to build her portfolio. How cool is that? The stars aligned, we connected, and I am thrilled with my new design. I will be asking for help more often!

She was a pleasure to work with, very accommodating, thorough and quick. You need to head over to her site and jump on this chance to have your blog redone for FREE. She is only taking two more, so hurry up now. No WordPress at this time, just Blogger. Sign up to follow her new blog and help spread the word. She does great work, and even if it is too late for a freebie, I have a feeling she will be quite reasonable.

Happy Valentine’s Day Free SBL Prints

LoveRedSquare

It has been a rewarding first year of blogging. I have been exposed to such talented and generous fellow artsy bloggers. It would take me two lifetimes to do all the wonderful projects I have bookmarked. I love how supportive the blogosphere can be. As a thank you to all I have met, and all of my loyal followers, I have provided these prints I created for Valentine’s day.

Full resolution downloads:
“Love” (top pic)
“Home”(bottom pic)

Very soon, you will see a detailed post on a project I have in mind for these guys. They are 1212 inch squares, resolution 300 ppi.
You can do whatever you want with them. I would appreciate all who download to sign up to as an email subscriber to SBLC. Have a happy day!

The Graphics Fairy For a Host of Beautiful Images…

Someone tweeted something… I ended up on a site that referenced images from the Graphics Fairy, and I became aware of this treasure cove of free vintage images. Couldn’t sleep well knowing I hadn’t done my part in spreading the word. I bring you…

The Graphics Fairy
Take a look at Karen’s comprehensive list of creative sites, free printables and tutorials.

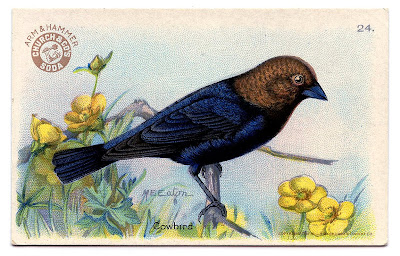
Here are some of my favorite graphics. My mind is whirling with ideas for projects involving these (and many more, but you get the idea)…


Amidst the useful links, I found information detailing copyright laws and links to more info on the topic. Did you know that images prior to 1923 are public domain. I did not. Most of Karen’s images are, therefore, pre 1923. Pretty cool. I love it when I get schooled. I foresee some new pendants utilizing this source. Thanks, Karen!!

Knit Cat Ear Hat With Pattern


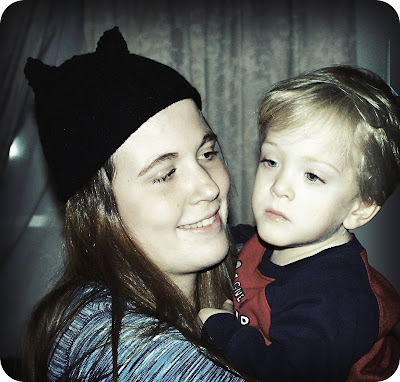
This project was inspired by my niece, who has always adored cats. I knew she would rock this look and I was right! Read on for pattern.

I knitted on long circular needles (size 10) for the hat part, and used “full o’ sheep” yarn in black.
For the ears, I used Size 7 needles.
Please read pattern before starting. I felted the final project lightly in the washer on hot because I like the look of the felted stitches. If you plan to skip this part, or use non felting yarn, take that into consideration when sizing, as the hat will be bigger than the one pictured and you may want to change needle size.

HAT
Cast on 66 sts Using DPN or Long Circular Needles and join in the round being sure not to twist cast on row
Rows 1-4: Purl.
Rows 5 and 6: work in St st (which, when working in the round means knitting each row). Continue until piece measures about 6 in. from beg.
Shape Crown
Next (Dec) Row:
K7, k2tog, *pm, k2tog, k12, k2tog; rep from * 2 more times, pm, k2tog, k to end – 58 sts remain at end of row.
Next Row\: Knit.
Next (Dec) Row: *K to 2 sts before marker, k2tog, sm, k2tog; rep from * 3 more times, k to end – 50 sts at end of row.
Next Row: Knit
Rep last 2 rows 5 more times.
Cut yarn, leaving a long tail. Thread tail through rem 10 sts and pull together.

EARS

Left ear:

using the size 7 needles (or size desired – not crucial to be exact gauge here)

pick up 13 sts along

decrease seam, in desired position beginning with the WS:

Rnd 1-3 knit in seed st pattern to end. (11 sts)

Rnd 4 (RS) ssk, seed st pattern to last 2 sts, k2tog. (9 sts)

Rnd 5 and al l WS rows knit in established seed st pattern.

Rnd 6, 8, 10 (RS) as Row 4.

Rnd 12 (RS) k3tog.


Right ear:

using the size 7 needles (or size desired – not crucial to be exact gauge here) , pick up 13 sts along

decrease seam, beginning with the WS, continue as for the left.


FInishing:

Weave in all loose ends. Lightly felt my machine washing in HOT water. Let air dry. This tightens up and neatens the stitches. *IMPORTANT* If you used wool, from this point on, hand wash in cold water only, air dry.


Privacy Policy