{Guest Post} Easter Cards With Fabric

Easter Crafts DIY

Today, I am thrilled to bring you this adorable Easter craft from Paula at Sweet Pea.  I love the gingham fabric she chose, and using cookie cutters to create templates is brilliant.  Check out her fun projects and tutorials, fitness tips, and her current series on Glogging (I learned a ton from the first lesson).  Thank you for being here, Paula, and for sharing with us!
Hello, I’m Paula from Sweet Pea. I enjoy blogging about crafting, cooking, gardening, decorating, travel, and exercise. I’m excited to guest post today for Johnnie at her wonderful blog, Saved By Love Creations.

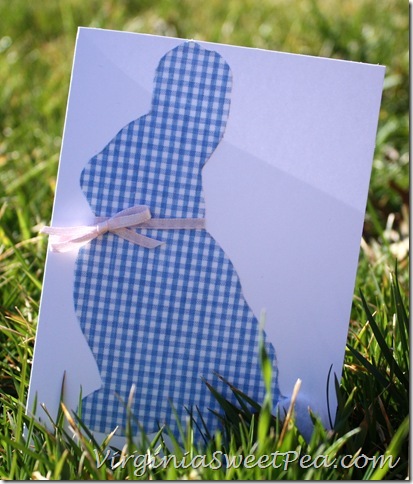
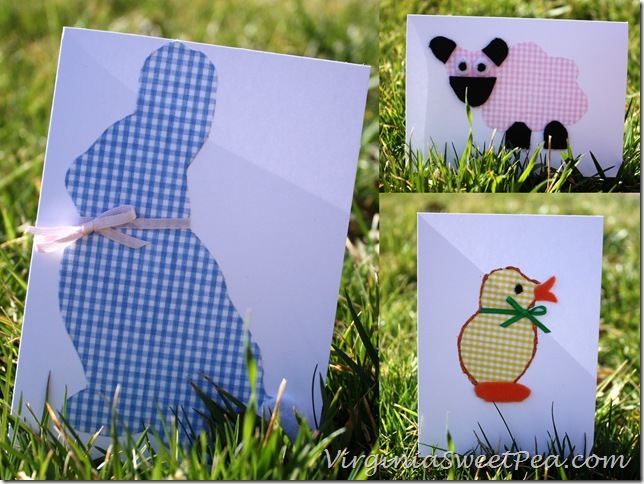
Easter is coming up quickly and I thought it would be fun to make cards to send to friends and relatives.

EasterCollage1

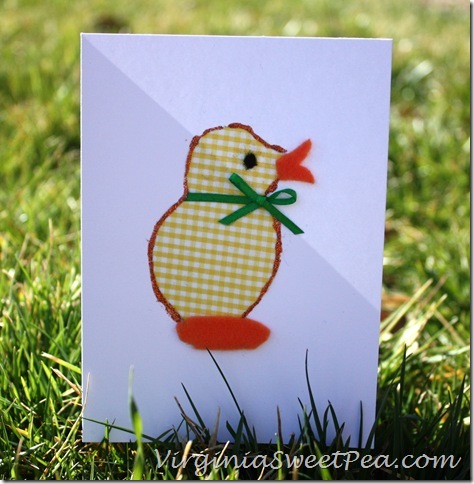
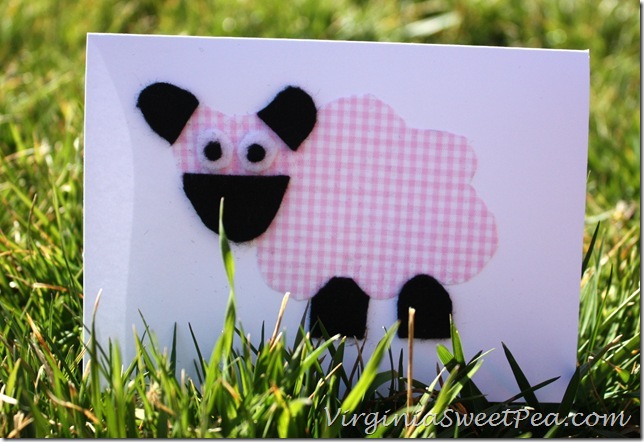
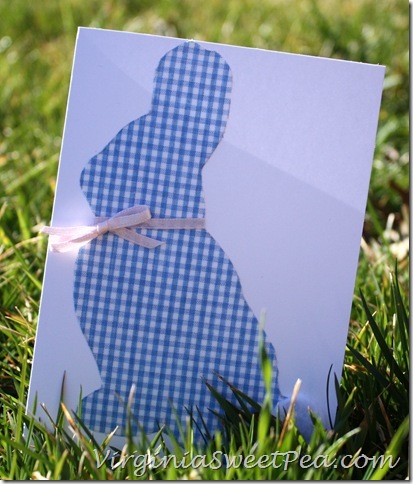
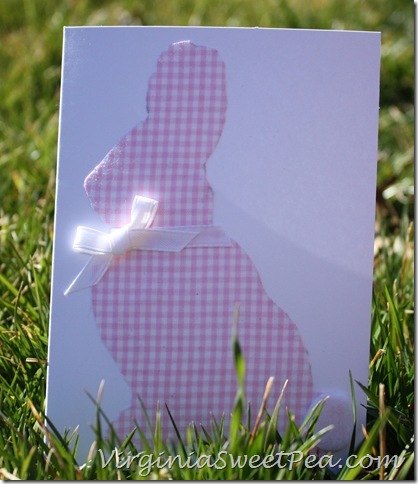
Aren’t these cute?  They are easy to make and require materials that you probably already have around your house.

Supplies:

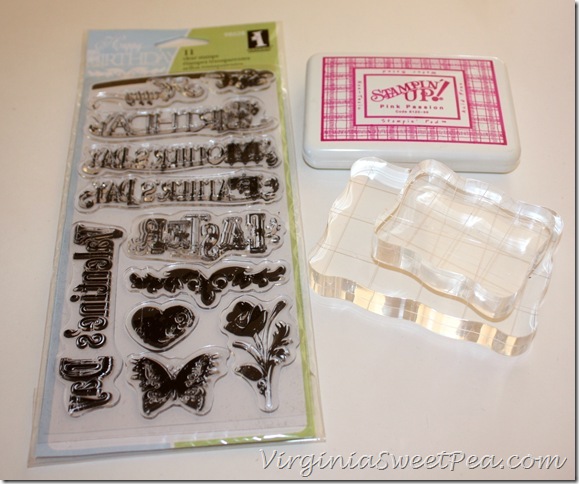
Easter themed cookie cutters, fabric, felt, scrap cardboard, pen, pencil, scissors, spray adhesive, craft glue, Easter stamp and stamp pad, and cards with envelopes.

Step 1:

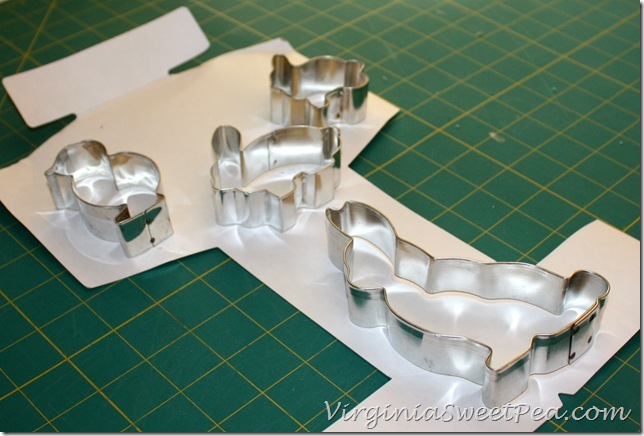
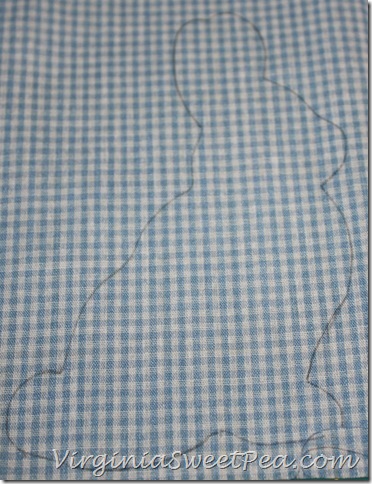
Trace the cookie cutter onto a scrap piece of cardboard.  I used a piece that was part of the packaging for a dress shirt.

CookieCutterCard1

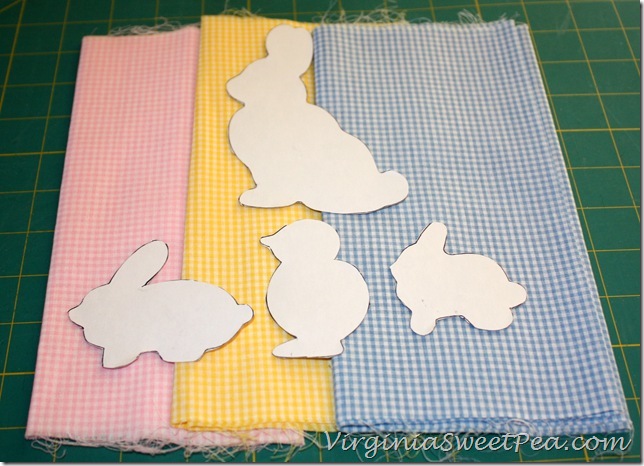
Cut out the pieces and decide on a fabric choice for each piece.

CookieCutterCard2

Step 2:

Trace each design onto fabric using a pencil and cut out.  Be sure to cut inside the pencil line if you are using light colored fabric.

CookieCutterCard3

Step 3:

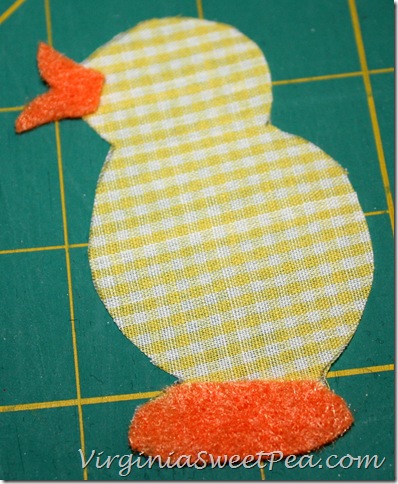
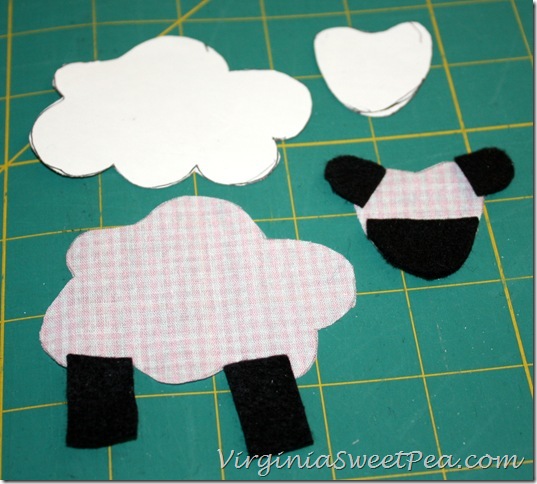
Cut out felt embellishments to add character to each design.

CookieCutterCard5

I didn’t have a sheep cookie cutter but wanted a sheep card so a drew a pattern onto the cardboard to make one.

CookieCutterCard4

Step 4:

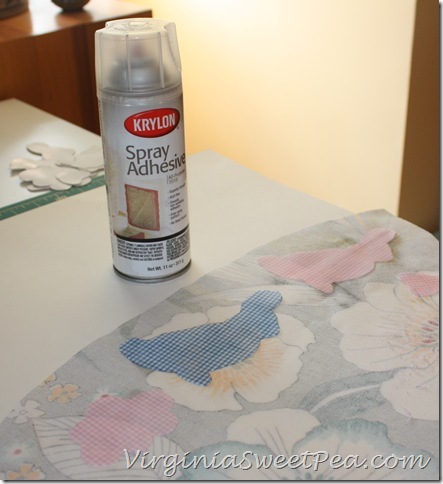
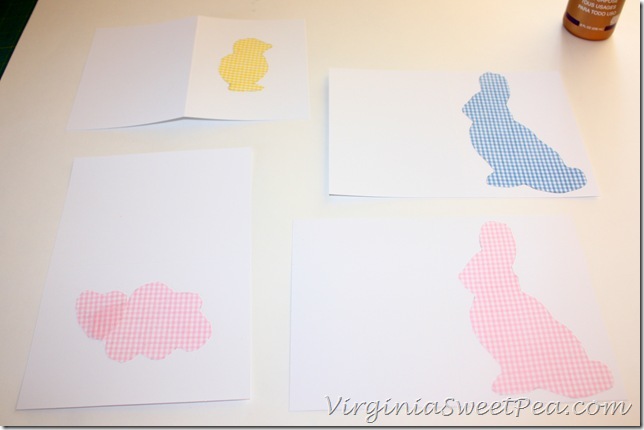
Spray the back of each fabric piece with spray adhesive.  Wait a minute or two until it is tacky before applying to your cards.

CookieCutterCard6

Step 5:

Apply to cards.  Press down firmly.

CookieCutterCard7

Step 6:

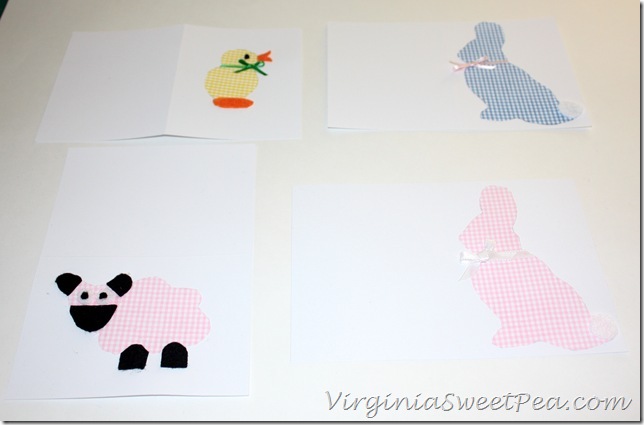
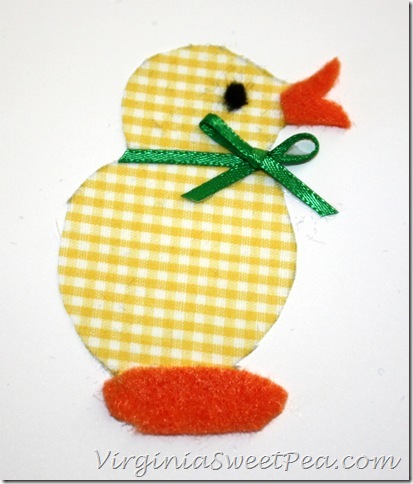
Add felt and ribbon embellishments.  Let dry.

CookieCutterCard8

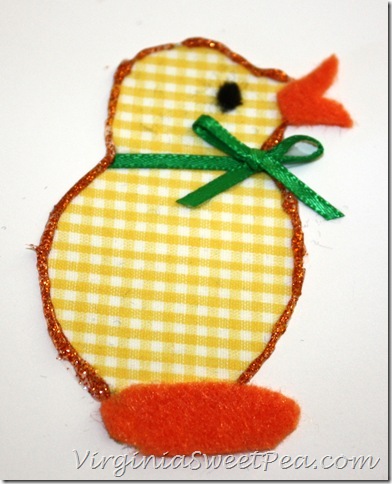
My little chick had pencil marks showing on his sides.

CookieCutterCard9

To cover this, I edged with orange glitter glue.

CookieCutterCard10

Step 7:

Stamp “Happy Easter” in each card.

CookieCutterCard11CookieCutterCard12

That’s it!  Enjoy your new cards.

I know I’d rather receive a handmade card any day over a store bought one.

CookieCutterCard13CookieCutterCard14CookieCutterCard15CookieCutterCard16

I’m not sure which is my favorite and it’s going to be hard to decide the recipient of each card.

Thanks so much to Johnnie for having me today.  I’d love it if you’d stop by my blog, Sweet Pea, for a visit.&nbsp

PAPER ROSE DIY WITH TEMPLATE

Paper crafts

As promised, here is the paper rose tutorial I teased you with at the end of

Monday’s rose embellished frame tutorial.  You can use any decorative scrapbook paper you want,

but it should have print on both sides.  I like to ink the edges of the petals and

leaves with distress ink pads.  The possibilities are endless, so raid those scrapbooking

supplies and lets make some gorgeous roses!

SUPPLIES:

SCRAPBOOK PAPER (double sided)

CRAFT GLUE

FLORAL WIRE

FLORAL TAPE

PETAL & LEAF TEMPLATE (PRINT AND CUT OUT)

SCISSORS

BAMBOO SKEWER


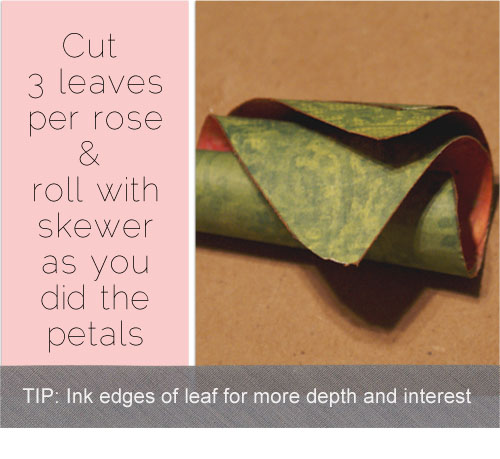
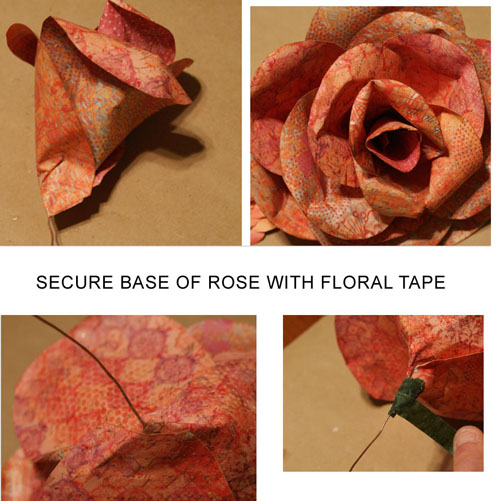
WHEN YOU ROLL THE PETALS, DO 3 AT A TIME BY STACKING THEM

AND ROLLING THEM TOGETHER.  SLIDE THE BAMBOO STICK OUT,

LEAVING A “TUBE” OF ROLLED UP PETALS.

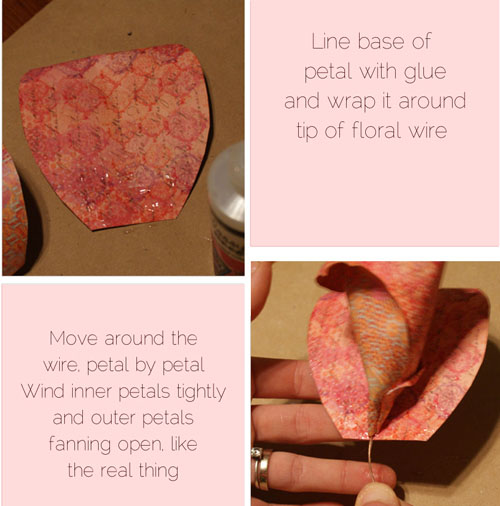
STRAIGHTEN THEM OUT TO GLUE BASE AND FOLD

AROUND FLORAL WIRE IN NEXT STEP.


ADD LEAVES IN DESIRED POSITION

DOWN STEM WITH FLORAL TAPE


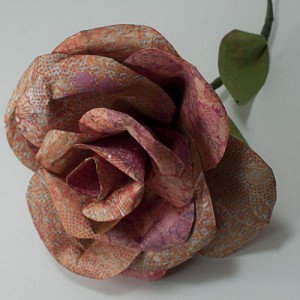
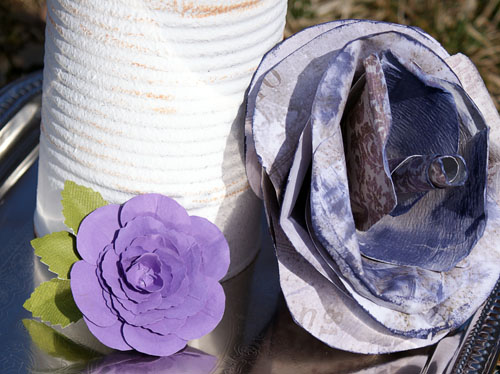
Aren’t they FABULOUS?

Mother’s Day gift… check.

PURPLE? 

Absolutely.

Best part… they live forever!

Paper rose tutorial

Upcycle Cans into Vases

Repurpose tin cans

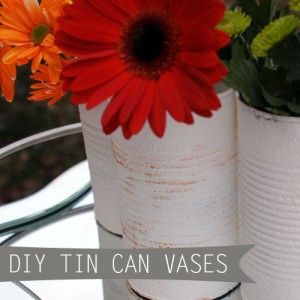
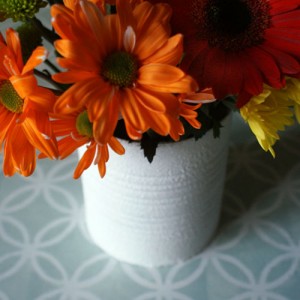
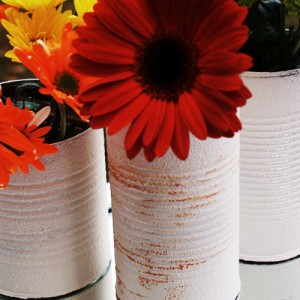
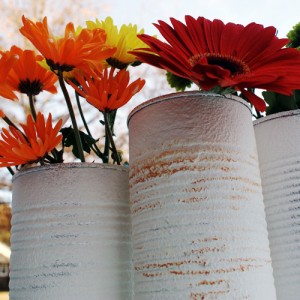
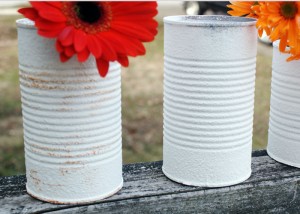
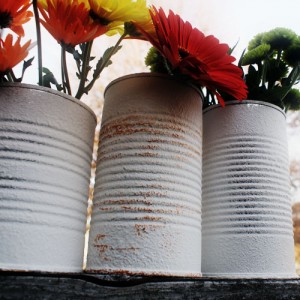
Wait!  Don’t take out the recycling just yet.  Did you know you can turn your empty tin cans into lovely flower vases in a snap?  In just a couple of easy steps, you will be on your way to gorgeous, simple, chic decor. I think these would make great mother’s day gifts, filled with her favorite fresh florals.  How about centerpieces for that upcoming dinner party or summer barbecue?

Recycled Craft projects

When I say easy, I mean easy.

Supplies:

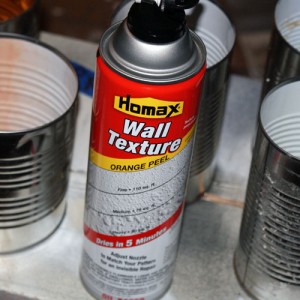
  • Wall texture spray; I got mine at the local hardware store in the paint section
  • Tin cans
  • Distress Ink Pad by Ranger in Rusty Hinge

Instructions:

  • Remove labels from cans and clean inside and out will with soapy water.  Rinse and dry with lint free cloth
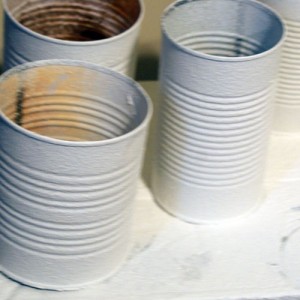
  • Spray cans with wall texture per can instructions on protected work surface.  I did mine with the nozzle set to fine.  I don’t think it really matters.  When you are happy with the coverage, let dry.  I let mine dry overnight.  Tin can crafts
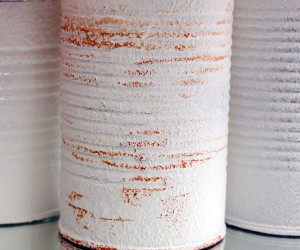
  • If you want the rusty look, run your distress inkpad lightly over the surface of the can, randomly to achieve the desired effect.   I did this on one can, and love the look…

The End!  This is my first time ever using spray wall texture, and it was pretty darn cool.  You have not seen the last of it around here.

Have you upcycled your tin cans another way?  I would love to hear your ideas!

Recycled Craft projects

DIY centerpiece ideas

DIY centerpiece ideas

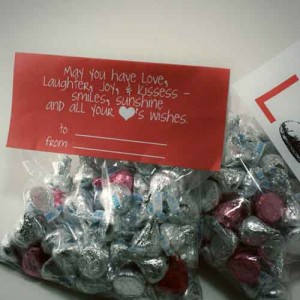
Valentine’s Day Kisses Bag Topper

Valentine's Day gift printable

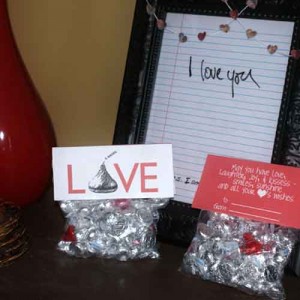
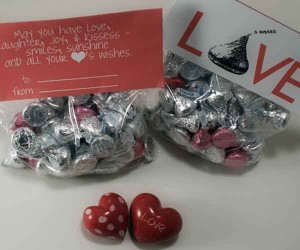
Here is a great last minute Valentine’s Day gift you can put together in minutes, with a sandwich bag, some kisses, tape and a printer.  Who doesn’t love chocolate kisses?  There is a sweet poem too accompany the chocolate on this 2 sided bag topper.  Here is the free printable, sized to fit a ziploc sandwich bag.

Just print it on 8.5×11 inch white cardstock or photo paper, fold in half and adhere to kiss filled baggie using double sided tape.

Valentine's Day gift printable

Valentine's Day gift printable

Valentine's Day gift printable

Picture Frame From Rolled Newspaper “Reeds”

recycled newspaper crafts

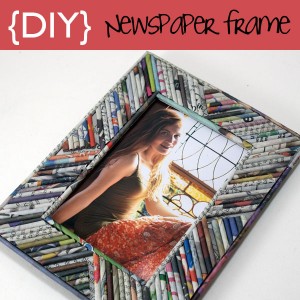
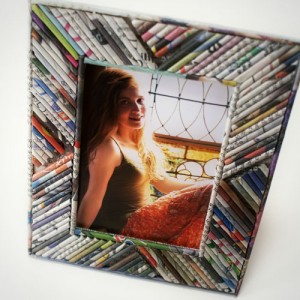
If you love the idea of recycling newsprint into beautiful handmade home decor accessories, keep reading.  This is a picture frame from newspaper pages rolled into reeds.  Essentially free, green and functional, these picture frames make wonderful gifts for all occasions.

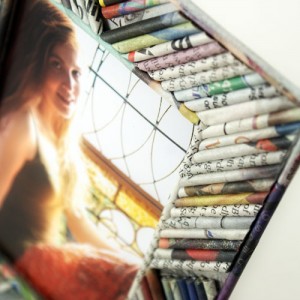
For how to roll pages into reeds, visit the Craft Stylish magazine reed box tutorial.  I just cut a piece of cardboard for the overall frame size, and cut out an opening for the picture in the middle.  Then I outlined the inner rectangle and outer rectangle with reeds, and cut smaller reeds to fill in the rest of the frame as shown in the photos.

Newspaper picture frameFor the back, just cut a piece of cardboard slightly smaller than the front and cover it in newspaper.  Line its perimeter with a border of reeds, then adhere the backing by applying a thin line of hot glue, or whatever craft glue you prefer, to the reed border then placing that onto the backside of the front piece (I use Glossy Accents for almost all of my paper projects).   Sorry no pics for this part.   When I make the next one, I will add some.  It is pretty easy to figure out by just looking at the finished piece.

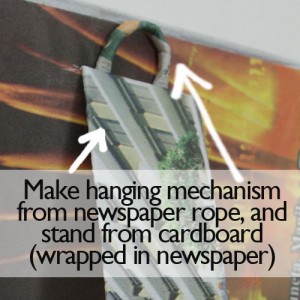
make newspaper reed picture frameI wanted the option of hanging and stand alone for this frame, so I made a loop to hang and a leg to stand as shown.

make newspaper reed picture frame

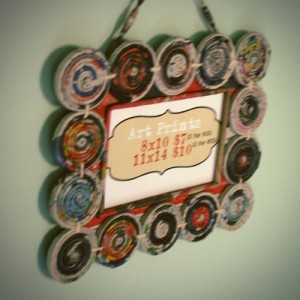
I love it!  Here is the newspaper frame I showed you awhile back…

Newspaper coil picture frame

Have you delved into the world of recycled paper crafts yet?  If so, do share.  I would love to see what you have done!

Resin Rings With Plaid Ring Bling

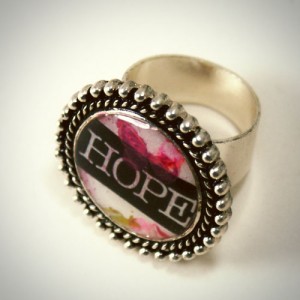
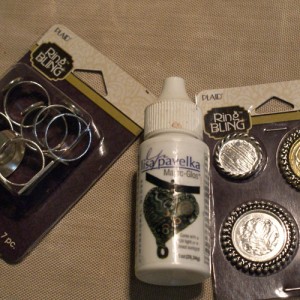
Resin jewelry tutorialMake your own customized ring using Plaid Ring Bling bezels and ring forms.  These are simple, quick and inexpensive, and the possibilities are endless.  Follow along and you will have your own image immortalized in bling form in no time.

Supplies:

  • Plaid Ring Bling forms and bezels (I got mine a Joanne’s)
  • Magic Glos resin (shown in this tutorial), or Diamond Glaze, or Dimensional Magic
  • Glossy Accents
  • Image to place in bezel (I used a sheet of paper I stamped for the colorful background and ran through my inkjet printer for the words
  • Sunlight or UV curing lamp if using Magic Glos resinusing resin with inkjet images

Instructions:

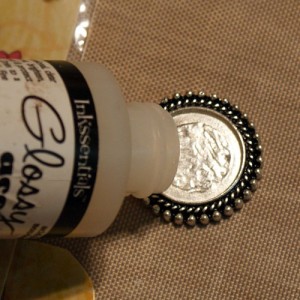
  • Cut out your images to fit the bezels, and glue them into place using Glossy Accents inside the bezel.  Glossy accents by Inksentials
    making photo jewelry


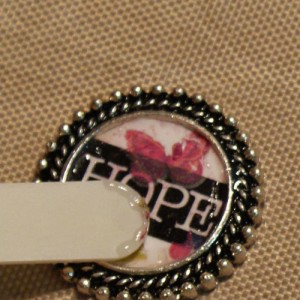
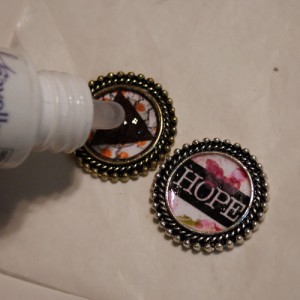
  • Burnish image to make sure in is secure using a popsicle stick or toothpick.  Use your finger to spread the excess Glossy Accents over the top of the image.  If you need to add more to completely cover the top, do so.  This seals the paper and prevents the resin from discoloring it.  how to make your own photo jewelry

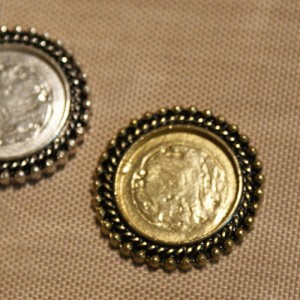
  • Let this dry completely before applying Magic Glos, otherwise the Glossy Accents will interfere with curing.  I use a heat tool to speed this up.  If you do not use a heat tool, about 20 minutes dry time will do.
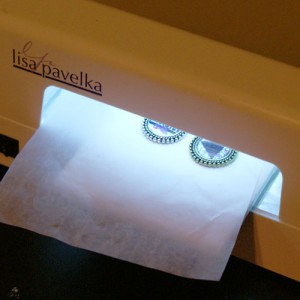
  • Apply Magic Glos and cure under your UV lamp or in direct sunlight.  Magic glos jewelry

    Lisa Pavelka UV curing lamp

I use Lisa Pavelka’s 9 watt curing lamp, which works great for Magic Gloss.  My pieces cure in 10 minutes or less.
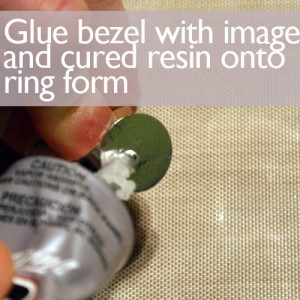
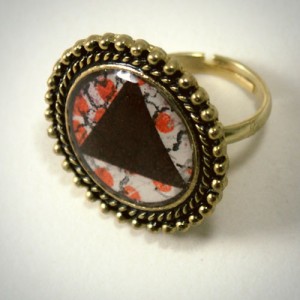
  • Now just glue the bezel with image and cured resin onto the ring form using E6000.  Let that dry and you are finished.  I love the bezel and ring form being separate so that the bezel is easier to set completely flat while the resin is curing.  It makes using the UV lamp way easier for making these rings. 
    Resin jewery


I am planning to make a ring using the Valentine’s Day sprinkles and resin I showed you a couple of weeks ago…

Valentine's day sprinkles jewelry


What have you submerged in resin lately?

Make Charms With Resin and Paper

how to make resin charm
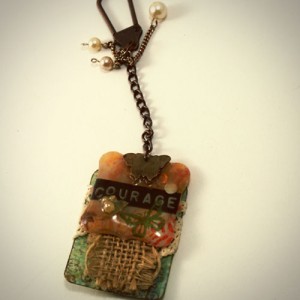
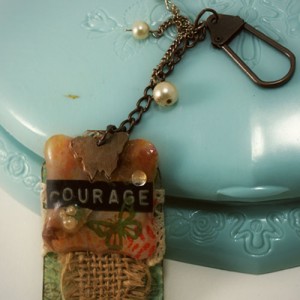
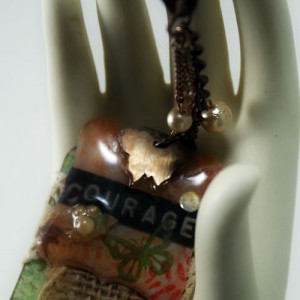
No need for a bezel or pendant blank.  You can make charms with a simple paper shape and resin.  Here, I used my paper punch to get the shape of this orange courage charm, decorated it with word label and rub-ons, and layered Magic Glos resin.

How to make resin charmsTo hang, I just puched a hole in the top and added a jump ring.  I placed it on top of a paper tag wrapped in lace, with a burlap strip on top.  Add a key fob and some dangly pearl charms, and you have a gorgeous mixed media keychain.

mixed media resin jewelry

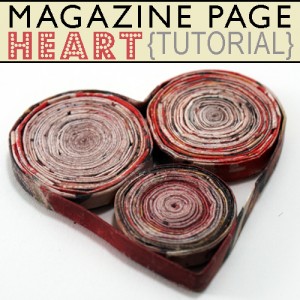
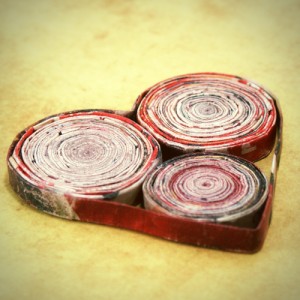
Coiled Magazine Page Heart Tutorial

Recycled Paper Heart from magazine pages by @savedbyloves

[pinit]

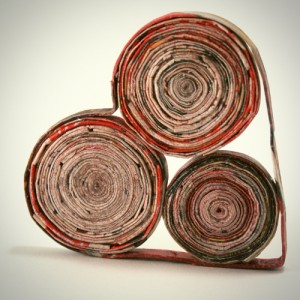
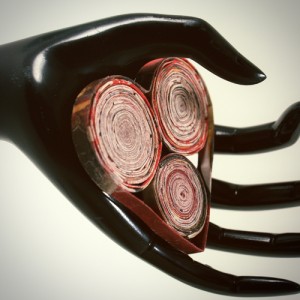
You saw this coming, right?  Valentine’s Day is approaching, and a coiled newsprint heart tutorial is all but mandatory here at SBLC.  This would be a great craft for Valentine’s Day decor or gifts.  The technique is pretty much the same I have shown you in other coiled projects, with the addition of the best paste option I have found so far.  I will share with you the step by step, including the glue recipe that is key in strengthening the strips and neatly coiling/shaping them.

Recycled paper crafts

Supplies:

  • Magazines pages in colors you love
  • Paper cutter or scissors
  • Toothpicks
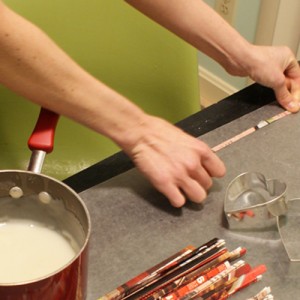
  • Paper mache paste (recipe below)
  • Wax paper
  • Heart shaped cookie cutter
  • Craft glue (I prefer Crafter’s Pick for these projects because it sticks to the wet strips, grabs fast and dries clear)

Instructions:

  • Fold strips as shown in this magazine page coiling tutorial.  I use a 1/4 magazine page for each strip.  Some tutorials show 1/2 page or full page.  I like 1/4 because I think the end projects look much nicer (less bends and crinkles in the strips).
  • Make your paste as follows:
    4 tbsp. flour
    1 c. cold water
    1 c. boiling water
    1 1/2 tbsp. sugar
    Mix flour + cold water then add boiling water and bring to boil. Add sugar, stir constantly until thick. Makes 2 cups.
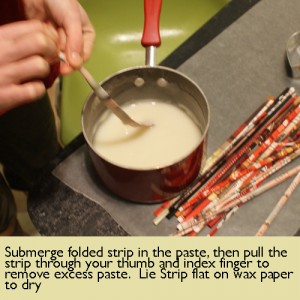
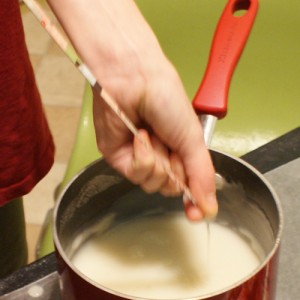
  • Dip each strip in the paste as shown, then lay on wax paper to dry.

    Removing excess glue
    Lay strips on wax paper


  • Let strips dry; I usually prepare a bunch of strips and make the piece the next day. I am sure a couple of hours would suffice.
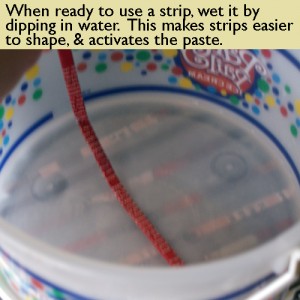
  • When you are ready to being shaping your strips, wet each one, one at a time as you are using it.  The paper mache paste makes the strips stronger and wetting them makes them easier to shape,  The paste becomes a little sticky again, helping the strip to stay where you place it.  Wet the strips before use
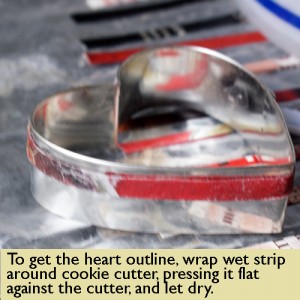
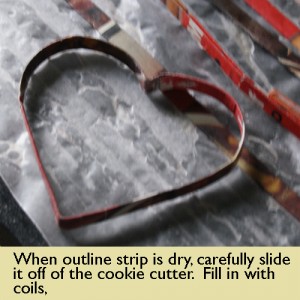
  • To get the heart shape outline; wrap strip around cookie cutter.  If you are using a larger cutter, you may need more than one strip to go around.  No problem.  Just overlap the strips about 1/4 end to beginning and continue wrapping.  When you come to the beginning of your first strip, overlap the current strip with it about 1/4 inch and trim off any remainder of the end strip.  When that dries, slide heart shape off of cookie cutter.  Making heart from magazine page.Magazine page crafts
  • To make the inside coils, I just start coiling (using strips i have re-wet) and use the outline as a guide to help me figure out what size and how many coils I need.  Place the coils inside the outline, and using a toothpick, place a dab of glue at each contact point (where the coils touch one another and where the touch the outline).  Let your piece dry completely and cover with a couple of coats of mod podge or sealant of choice for durabilityRecycled paper art
    Recycled paper crafts.

The possibilities are endless.  I would love to see what you come up with, and am happy to answer questions!

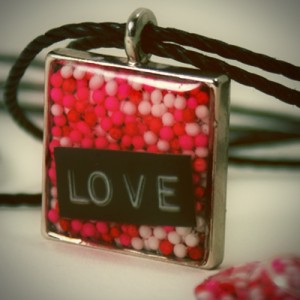
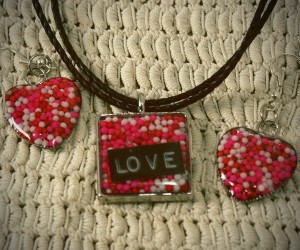
Valentine’s Sprinkles and Resin Jewelry

Resin jewelry tutorial Love text & candy sprinkles from @savedbyloves

[pinit]

Looking for a quick and easy gift for Valentine’s Day?  This project fits the bill.  Remember this post on patriotic resin jewelry?  The process is the same, except I used Valentine’s Day sprinkles instead of red, white and blue.  I also used heart shape bezels which I found with the polymer clay at Hobby Lobby.   Follow along for the step by step, and you will be on your way to your very own LOVE jewelry.

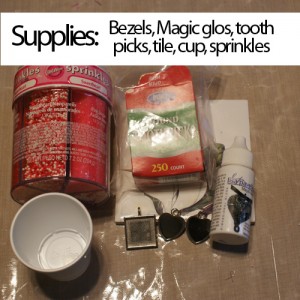
Supplies:

  • Magic Glos
  • Pendant and earring bezels and desired jewelry findings
  • A sunny day, or UV curing lamp; I use Lisa Pavelka’s and it works like a charm
  • Toothpicks
  • Tile small enough to fit into lamp to cure your pieces on
  • Sprinkles
  • small mixing  cupResin jewelry supplies

Instructions:

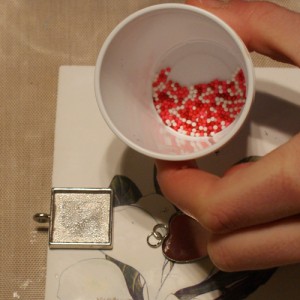
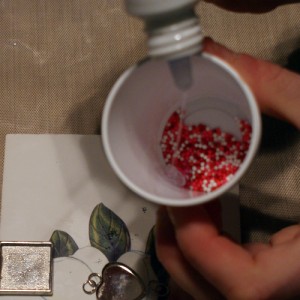
  • Pour some sprinkles into the cup, along with a few drops of Magic Glos and using toothpick, mix resin and sprinkles so that sprinkles are coated.

resin jewelry

Valentine's Day crafts

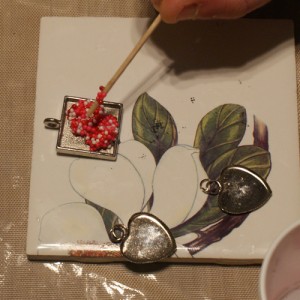
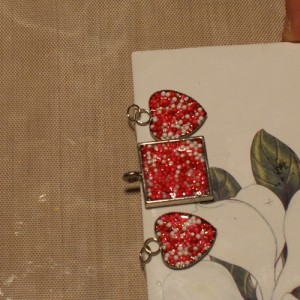
  • Use toothpick to pick up a clump of sprinkles/resin and spread into bezel.  You don’t want the sprinkles to go higher than the lip of the bezel.  When you are happy with the coverage, put a drop or two of Magic Glos in the middle and expose to UV to cure (either outside on a sunny day, or under a UV lamp.  Valentine's Day crafts
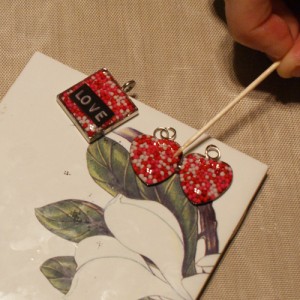
  • Once cured, add another layer of resin to get the dome effect and cure again. You can add embellishments, stickers or whatever you can think of at this point too. I used my label maker to make this love sticker. I put it on top of the cured layer, then put resin over it, then cured.

Valentine's Day crafts

TIP:  Use toothpick to “pull” resin from middle of piece out to the edges

Valentine's Day crafts

I just love this UV resin.  There is another, way less expensive brand called UltraDome, which is being shipped to me soon.  I hope I love it as much as I love Magic Glos.  I will keep you posted!

How to Make Resin jewelry


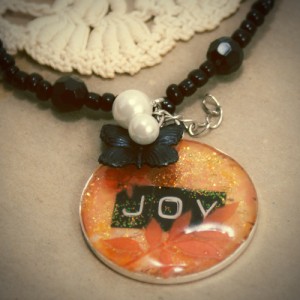
Charmed Joy Butterfly Resin Pendant

Resin pendant with image

This pendant is made from decorative paper, adhesive “JOY” punch stickers, rub-ons, Magic Glos resin and some charm embellishments (a black butterfly and a couple of pearls I got from some old costume jewelry).  I have been on a resin kick as of late, making pieces for an upcoming show.  I am happy with how this one turned out.  I love how versatile scrapbooking supplies are… home decor, jewelry, all kinds of altered art, and even scrapbooks.

How to make resin pendants

Here, I traced the bezel on scrapbook paper and cut out the circle to fit.  I adhered the letters to spell joy, added some Stickles (glitter glue), then a thin layer of Magic Glos, which I cured under my UV lamp.  Then I did the orange leaves from a rub-on pack I had in my stash.  A  couple of more layers of resin with curing in between, and that was that.  Using a jump ring, I added the pearls from old costume jewelry, and the black butterfly charm I had on hand.  I paired the pendant with a black beaded strand for the finished necklace.

How to make resin pendants

How to make resin pendants

resin jewelry tutorial

Privacy Policy