Archives for August 2011

Thrifty Thursday Week 36


Thank you so much for stopping by Thrifty Thursday. My goal is to have this hop be a wonderful resource for project inspiration, with a focus on spotlighting newer creative blogs each week.  I am asking that you only link DIY home decor and craft projects.  No giveaways, shops or links to your main blog, please.  That way we know when we come to Thrifty Thursday, we will only encounter DIY projects and not end up sifting through a bunch of other links.  Entries not related, or to main blog pages/shops/giveaways will be deleted.
Other stuff:
* Please follow Saved By Love Creations, your host!
*Add the Thrifty Thursday button to your link directory or to your post.
*I will choose 2 participants to feature the following Thursday, Please drop by and follow the features! Their links are in the post where their projects are featured.
*Please visit the at least the 2 blogs above you and shower them with comment love.
*Leave me a comment and let me know you were here. I love hearing from you.
*Have fun and be inspired!
*Stop by and say hello to Nikki and link up to her thrifty party too…

Weekly featured projects:

  • Rhiannon at My Handcrafted Home made a very thoughtful hand stamped wedding gift for her brother.  I am so making this.  Go check out her detailed tutorial here.

Pottery Barn Wall Decor

  • Look at this outdoor oasis created from a curbside patio furniture rescue.  So very impressive.  I love love love the mirror, and am kicking myself for passing on a very similar one for next to nothing earlier today!  Strong work, Angie and Debbie.

Furniture revamp


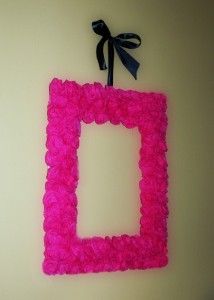
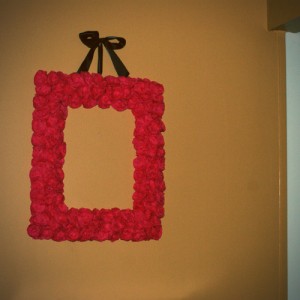
Crepe Paper Rosette Wreath DIY

Crepe Paper Rosette Wreath

Rosette paper wreaths are a beautiful addition to about any decor style, and couldn’t be simpler to create.  They could be faster to create, but they are easy.  Set aside a good chunk of time, settle in with your hot glue gun, streamers and a good (long) movie and start twisting.  Below are some tips and tricks I learned along the way…
Supplies:

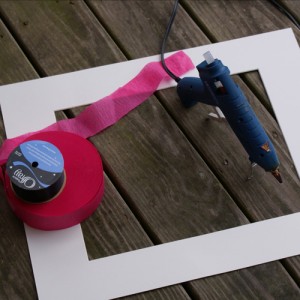
  • Hot glue gun with plenty of sticks
  • Crepe Paper in color of your choice
  • Scissors
  • A wreath form – here I used an old photo matte 16×20 inches with 8×10 opening
  • Ribbon for hanging mechanism

Crepe Paper Rosette WreathInstructions:

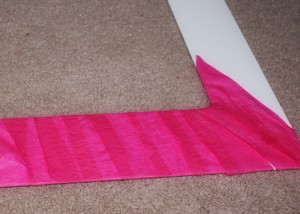
  • Wrap your wreath form completely with the crepe paper (streamer roll).  This prevents white from showing through and is only necessary if your wreath form and paper are contrasting colors.  This step is optional, but I don’t like the white peaking through.
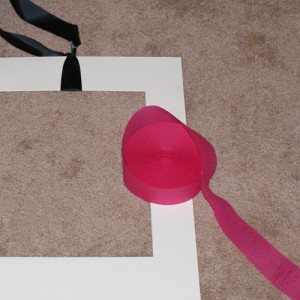
  • Crepe Paper Rosette WreathTie your ribbon hanging mechanism on the wreath form.  You will cover it with rosettes to conceal it later.Crepe Paper Rosette Wreath
  • Cut strips of crepe paper to make your rosettes.  I cut them to about 30 inches.  Make a big ol’ pile cause you are gonna need them.  I am not exaggerating when I say this project took a good 6 hours of work.  Obviously it will depend on what size you make your wreath, but plan on devoting a day, or breaking the project up over several days.  Otherwise, you will be writing a post at 10:30 pm that you had hoped would be published a good 10 hours ago.  Ask me how I know… Anyway, here is the tutorial I followed for the rosettes, over at Eat Pray Love & Craft.  I ended up throwing my first few attempts away, but caught on pretty quickly.  I made a few at a time, then glued them onto the wreath.  MANY hours later, this I had my lovely finished wreath.

Crepe Paper Rosette Tutorial

Crepe Paper Rosette Wreath


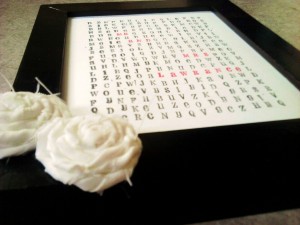
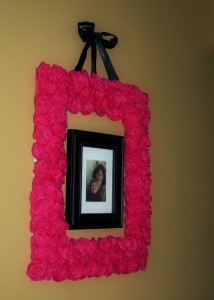
My original plan was to cut a black vinyl monogram using my cricut.  Not gonna happen today, but look how cute this framed pic looks inside.

Crepe Paper Rosette Wreath

I absolutely love it.  At $5 in crepe paper and supplies I had on hand, I can’t complain Would I do it again?  Not soon.  Maybe a smaller version, after my hot glue charred fingertips heal!  What are your favorite DIY wreaths?

The Vegetable That Does it All

13 tips for cucumbers

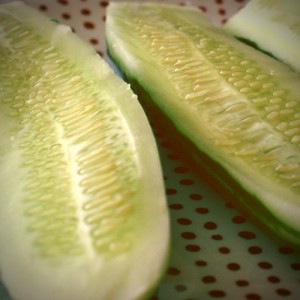
Are your cucumber plants providing you with such an abundance that you are out of ideas for using them?  Look no further.  These magical veggies (or fruits, depending on who you poll) can be used for everything from defogging your bathroom mirror to instant diminishing of cellulite problem areas, really!!  Read on for 13 tips to help you get the most out of the amazing cucumber!


1. Cucumbers contain most of the vitamins you need

every day, just one cucumber contains Vitamin

B1, Vitamin B2, Vitamin B3, Vitamin B5, Vitamin

B6, Folic Acid, Vitamin C, Calcium, Iron,

Magnesium, Phosphorus, Potassium and

Zinc.


2. Feeling tired in the afternoon,

put down the caffeinated soda and pick up a

cucumber. Cucumbers are a good source of B

Vitamins and Carbohydrates that can provide that

quick pick-me-up that can last for

hours.


3. Tired of your bathroom mirror

fogging up after a shower? Try rubbing a

cucumber slice along the mirror, it will

eliminate the fog and provide a soothing,

spa-like fragrance.


4. Are grubs and slugs ruining your planting beds? Place a few

slices in a small pie tin and your garden will

be free of pests all season long. The chemicals

in the cucumber react with the aluminum to give

off a scent undetectable to humans but drive

garden pests crazy and make them flee the

area.


5. Looking for a

fast and easy way to remove cellulite before

going out or to the pool? Try rubbing a slice or

two of cucumbers along your problem area for a

few minutes, the phytochemicals in the cucumber

cause the collagen in your skin to tighten,

firming up the outer layer and reducing the

visibility of cellulite. Works great on wrinkles

too!!!


6. Want to avoid a hangover or

terrible headache? Eat a few cucumber slices

before going to bed and wake up refreshed and

headache free. Cucumbers contain enough sugar, B

vitamins and electrolytes to replenish essential

nutrients the body lost, keeping everything in

equilibrium, avoiding both a hangover and

headache!!


7. Looking to fight off that

afternoon or evening snacking binge? Cucumbers

have been used for centuries and often used by

European trappers, traders and explores for

quick meals to thwart off starvation.


8. Have an important meeting or job interview and

you realize that you don’t have enough time to

polish your shoes? Rub a freshly cut cucumber

over the shoe, its chemicals will provide a

quick and durable shine that not only looks

great but also repels

water.


9. Out of WD 40 and need to fix a squeaky hinge? Take a

cucumber slice and rub it along the problematic

hinge, and voila, the squeak is gone!


10. Stressed out and don’t have time for a massage,

facial or visit to the spa? Cut up an entire

cucumber and place it in a boiling pot of water,

the chemicals and nutrients from the cucumber

will react with the boiling water and be

released in the steam, creating a soothing,

relaxing aroma that has been shown to reduce

stress in new mothers and college students

during final exams.


11. Just finish a business lunch and realize you don’t have gum or

mints? Take a slice of cucumber and press it to

the roof of your mouth with your tongue for 30

seconds to eliminate bad breath, the

phytochemcials will kill the bacteria in your

mouth responsible for causing bad breath.


12. Looking for a ‘green’ way to

clean your faucets, sinks or stainless steel?

Take a slice of cucumber and rub it on the

surface you want to clean, not only will it

remove years of tarnish and bring back the

shine, but is won’t leave streaks and won’t harm

you fingers or fingernails while you clean.


13. Using a pen and made a mistake? Take the outside of the

cucumber and slowly use it to erase the pen

writing, also works great on crayons and markers

that the kids have used to decorate the walls!!


Pass this along to everybody you

know who is looking for better and safer ways to

solve life’s everyday problems..

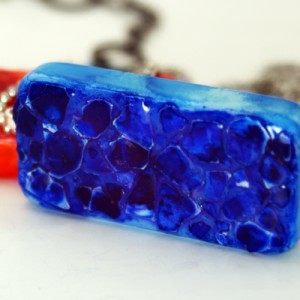
Eggshell Mosaic Domino Pendants

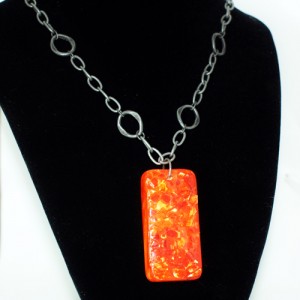
Eggshell Mosaic Domino Pendant

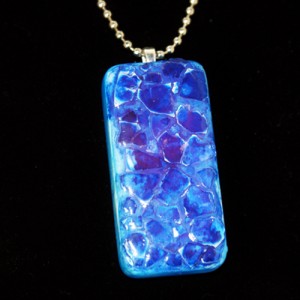
How cool is it to make a wearable piece of art from eggshells and domino game pieces?!  I ran into an eggshell mosaic bracelet tutorial while stumbling in Stumble Upon and have been saving eggshells ever since (By that, I mean I commissioned my grandmother to save eggshells for me, since we just never eat the suckers.  What would I do without her.  She folds magazine pages into strips for me, for crying out loud…).  Ok, I am back.  This project is easy and quick.  Come see my take on eggshell mosaic jewelry.

Supplies:

*Eggshells (soak them overnight and remove the membrane from the interior, then let dry before use)
*Glossy Accents or adhesive of your choice
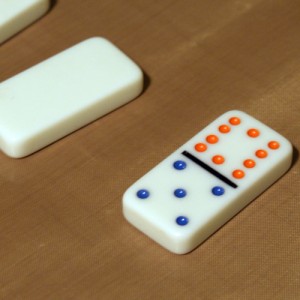
*Substrate for the eggshell mosaic. I used domino
pieces. Any flat bead would work, like polymer clay or wood. Needs to be a light shade, and a surface that accepts alcohol inks for this method. In the tutorial that inspired this project, resin jewelry blanks were used.
*Alcohol inks

Instructions:

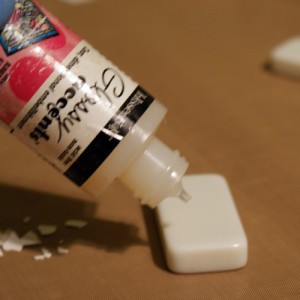
*Apply glossy accents or other clear drying adhesive to pendant blank (domino or other)

Eggshell Mosaic Tutorial

Eggshell Mosaic Pendant Tutorial

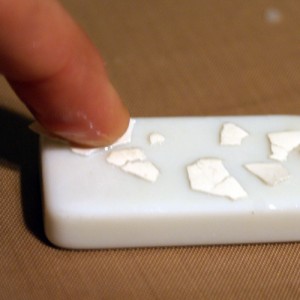
*Place  small piece of eggshell on  top of glue and press with fingertip to crack into pieces.  Move Pieces around to your liking with tip of your fingernail or tweezers.

Eggshell Mosaic Tutorial

*Once eggshell is all in place, let dry completely.  I used my heat tool to speed this along.  In the bracelet tutorial, she recommended leaving to dry overnight.  No way.  Couldn’t do it.  I dried with heat tool and 10 minutes later moved on to the next step…

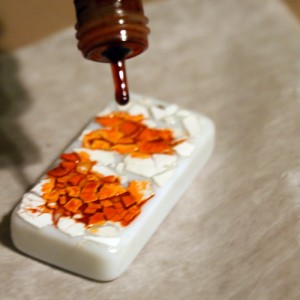
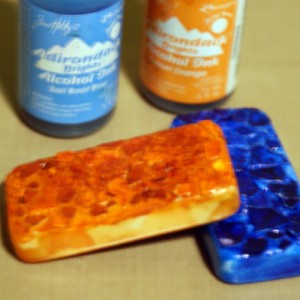
*Break off any eggshell sticking out over the edge of your pendant surface and apply alcohol ink straight from dropper to surface top.  More alcohol ink = more saturated finished project.  Let the top dry and apply alcohol ink to sides with felt applicator.  You can apply to back surface as well.  I didn’t.

Eggshell Mosaic Domino Pendant Tutorial

Eggshell Mosaic Jewelry Tutorial

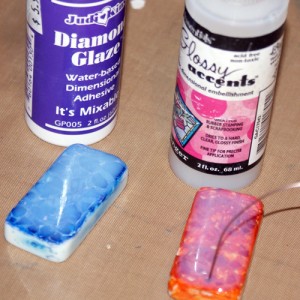
*I applied glossy accents to the top surface for glass like finish.  You could also use Judkins diamond glaze,  dimensional magic by Plaid, resin, or glaze.

Eggshell Mosaic Tutorial

*Let dry  for several hours and glue on pendant back or drill hole for jump ring.  I used E6000 to glue on pendant bail on one, and dremel to drill hole for jump ring on the other.

Altered Art Domino Tutorial

Mixed Media Jewelry Tutorial

Mixed Media Pinterest Board Love

Mixed media tutorialsWe have built quite the collection of amazing mixed media pieces that i want to share with you.  Come see the Saved By Love Creations Mixed Media Board!

Thrifty Thursday Week 35


Thank you so much for stopping by Thrifty Thursday.  I have decided to make some changes to the hop.  Yikes… change, I know!  My goal is to have this hop be a wonderful resource for project inspiration, with a focus on spotlighting newer creative blogs each week.  I am asking that you only link DIY home decor and craft projects.  No recipes or links to your main blog, please.  That way we know when we come to Thrifty Thursday, we will find projects only without sifting through other links.  Entries not related, or to main blog pages will be deleted.
Other stuff:
* Please follow Saved By Love Creations, your host!
*Grab my “Thrifty Thursday” button above and throw it on your lovely site. Let’s grow this!
*I will choose 2 participants to feature the following Thursday, Please drop by and follow the features! Their links are in the post where their projects are featured.
*Please visit the at least the 2 blogs above you and shower them with comment love.
*Leave me a comment and let me know you were here. I love hearing from you.
*Have fun and be inspired!
*Stop by and say hello to Nikki and link up to her thrifty party too…

Weekly featured projects:

  • Jamie over at The Creative Imperative made this hip (stole your word, Jamie) and meaningful personalized subway art for her children and nephew.  I love the idea of personalizing the words to each child.  Look at how she dry brushed over the print (created in Illustrator) to give a distressed look.  What a powerful message to send to a child!

Inspiriational Subway Art

  • Amy at the Mombot provided us with a lovely free printable, incorporating a Winnie the Pooh quote.  The graphics and quote complement each other perfectly.  Head on over to the Mombot and snatch your download.  Thanks, Amy!

Free Printable Winnie the Pooh

Let’s get creative!

Awesome Subway Art DIY


Photoshop Beginner Tutorials

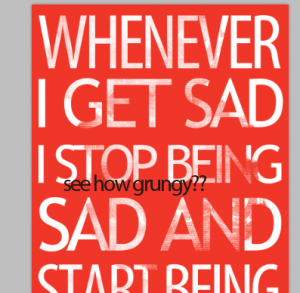
Don’t you just love the subway are that is so big in the blog decor world these days?  I ran into an example on a Pinterest board  that inspired me to create my own.  Here is the original.  This quote is a line from “How I Met Your Mother” – Neil Patrick Harris’s character coined it.  I cracked up when I heard it and loved the idea of it hanging in my stepdaughter’s college dorm room.  It is created in Photoshop, which is wonderful, because you can easily change colors and fonts to suite your needs.  Follow along step by step as I guide your through the CS4 Photoshop process, a rare event here at SBLC!

UPDATE:  Get free printables of all 3 colors at Printable Decor.

Subway art tutorial

Instructions:

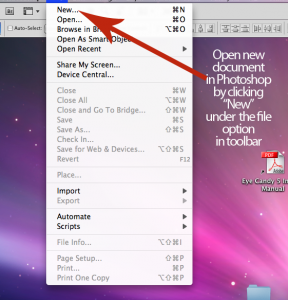
  • In the Photoshop toolbar, click  “New” to open a new document

Photoshop Subway art tutorial

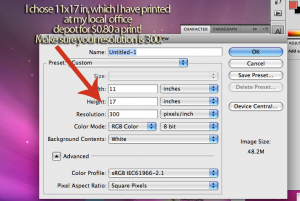
  • Set your document size.  I chose 11×17.  Set your resolution to 300 ppi…

Photoshop Tutorials

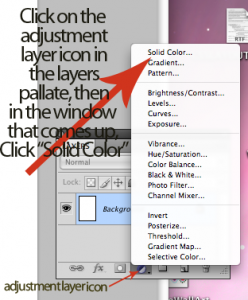
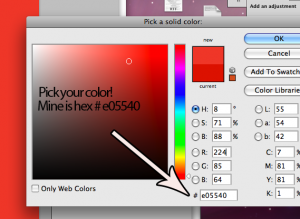
  • Select your background color by clicking the adjustment layer icon in the layers palatte (labeled below), and choosing “solid color”.  A color picker window will appear, where you can pic your color.  Click on your desired color, or enter the hex code.  This will leave you with a color fill layer that you can easily change  (see second pic below).

Photoshop Subway art tutorial

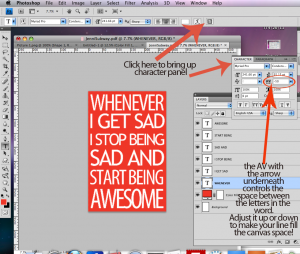
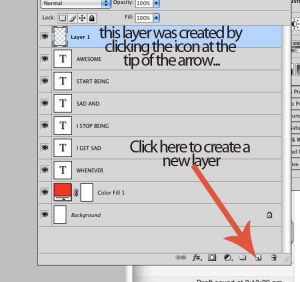
  • Grab the text tool (shortcut is “T” on the keyboard) and select your font.  You want it to be a blocky font if your are going for the subway art feel.  I used 2 fonts here; Myriad Pro Condensed and Trebuchet MS Regular.  You want to keep each line of text a different layer, so that you can adjust each line individually without affecting the font settings on the other lines.  To make your words fit, adjust the font size, as well as the space between the letters.  This requires opening the character panel (pictured below) and changing the AV setting.  A smaller number means the letters are closer together…

Photoshop Subway art tutorial

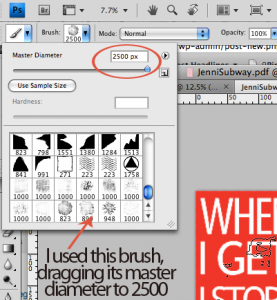
  • When you are happy with the letters, grab a grunge paintbrush (keyboard shortcut B, then choose your desired brush)  and in a new layer, paint over the letters in the same color as the background.  I downloaded this awesome high res grunge brush set for free, here.  BIG thank you to digitalrevolution.  This gives a nice distressed look to the piece.

Photoshop Subway art tutorial

Beginner Photoshop Tutorials

Photoshop Tutorials

Remember the adjustable color layer I had you make for your background?  Perfect for if you have 2 stepdaughters both in college, that have different color preferences.  I changed the bright pink to blue for the print you saw in the teaser.  Love how they look.  I have seen several tutorials for these done with paint and stencils on canvas, but this is literally a 5 minute Photoshop endeavor.  No mess, $0.80 per print, frames I had on hand from my obsessive garage sale frame purchasing.

I got an extra print in with a black background that I have in mind for a gift.  It would be really cute made into a faux canvas print by mod podging it onto painted mdf board, like I showed you here.  What do you think?  I would love to hear your feedback on this tutorial.  I know it assumes some comfort with Photoshop.  Did you find it helpful, easy to follow, or did it give you a headache?  I rarely do these and am always looking to see what you all want more or less of here at SBLC.  Thanks!

Photoshop Tutorials

Photoshop Subway Art Tutorials

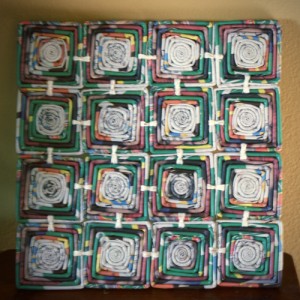
Recycled Newspaper Coasters

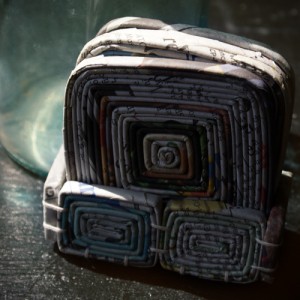
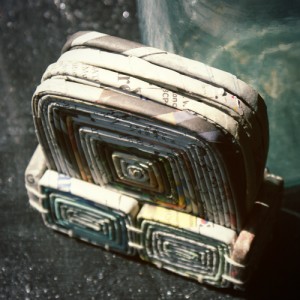
recycled paper coastersIf you read the end of my last post, you had to know that coiled newspaper coasters were next, right?!  These are quite simple to create.  Not quick, as folding the paper into strips is time consuming, but easy and essentially free.  For my tutorial on creating the strips, click here.

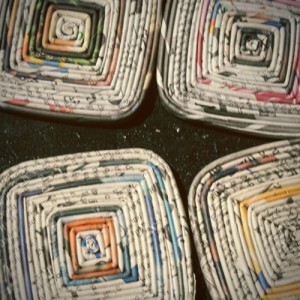
Begin coiling your strips like you are making a circle and morph into square as shown below.  Or you could make round coasters!


recycled paper projects
recycled magazing page decor

To make the handy little coaster holder, make rectangles and attach them using hot glue and or crochet string.  Don’t forget to waterproof your coasters by sealing with Mod Podge (I prefer Matte finish for these) or your sealant of choice!

recycled newspaper coasters

Hmmm… what will I make out of coiled paper next???

Coiled Newspaper Trivet

Upcycled Newspaper Crafts

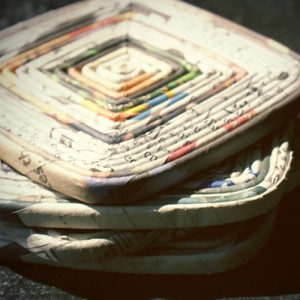
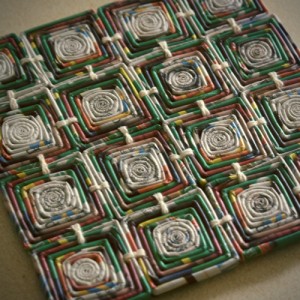
Beautiful addition to my growing upcycled newspaper/magazine decor projects… a trivet.  I must admit, it began as a place mat project, but stopped trivet sized once I realized it was going to take for  freaking ever to make four big ol’ place mats out of coiled squares.

Coiled Newspaper Projects

Instructions:

Coiling the paper is no different from my tutorial here, but after the first few coils from the center, bend the strips into corners to morph the circle into a square shape.  See in the pics how it starts as a circle coil, then gradually turns into a square?  Just play with it, and you will get the feel for how to do this.

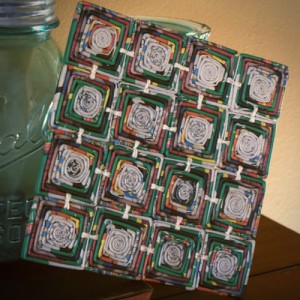
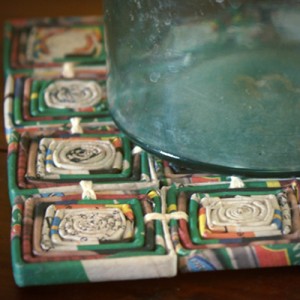
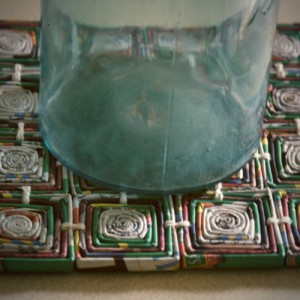
Join the squares using crochet thread, and or hot glue.  Seal with Matte gel medium, mod podge or polycrylic, which should stand up to heat if you use them as hot mats.  I would recommend wiping away any water/liquid that gets on them during use, to make sure none seeps into the paper coils.

Upcycled Newspaper Crafts

Recycled Newspaper Crafts

Coiled Newspaper Trivet

You could make these smaller and use them as table top coasters.  Or even make coasters out of one square, just making it bigger than the pictured individual square building blocks pictured here.  What other ideas come to your mind?  I have stacks of folded paper strips, just waiting for me to coil and construct.  I would love to hear your thoughts!

Paper Embellished Clay Pendants

Polymer Clay Pendant Tutorial

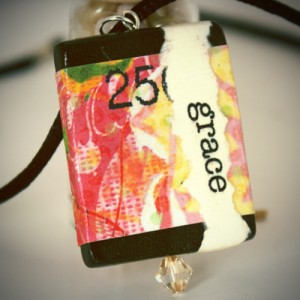
These beautiful paper adorned clay pendants are simple to make, and easily customizable for special keepsakes.  Whip up several in an afternoon and use up your paper scraps and stray beads in the process.  Follow my step by step tutorial, adding you own twists!


Supplies:

  • Black Polymer Clay
  • Pasta machine or acrylic roller
  • Clay blade
  • Scrap decorative paper
  • Wire (I used 22 gauge silver)
  • Needle nose pliers
  • Mod Podge (I used glossy)
  • Size 6 seed beads for wire wrapping over surface of pendant
  • Larger crystal or bead for bottom of pendant

Instructions:

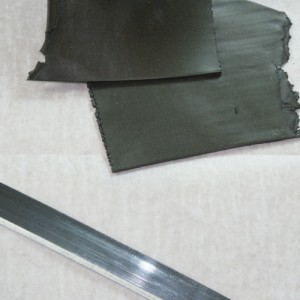
  • Condition your clay and roll at a thickness of 2 (1 being thickest) in your pasta machine.  Cut sheet in half and place one half on top of the other.  This creates a thicker sheet, which I like for the pendant beads.  It makes a pretty pendant at this thickness, and is easy to pierce with a needle to create hole for looped wire hanging mechanism later on.

Polymer Clay Pendant Tutorial

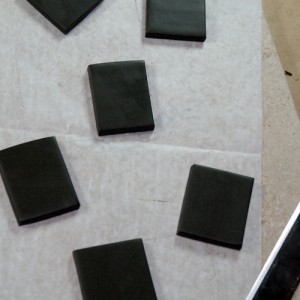
  • Cut rectangles out of your double stacked clay sheet.
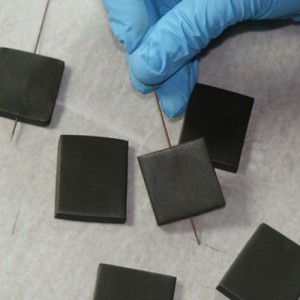
  • Polymer Clay Pendant TutorialPierce each pendant from top to bottom along the length of the pendant.  I use these long needles that came with my bead baking tray.  I have seen them sold separate in the clay section at Michael’s and other craft stores.  Be careful piercing the raw clay.  You can get fingerprints and other nicks in the clay, but imperfections are not to big of an issue with this project since the majority of the piece will be paper covered.
  • Polymer Clay Pendant TutorialBake per package; usually 275° for 25 min.
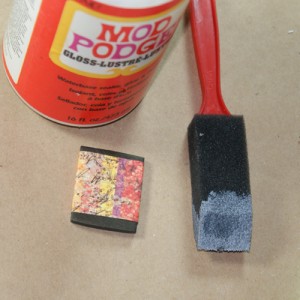
  • After baking and letting cool, you can wrap with paper strips.  I paint the back of the paper surface with mod podge using a foam brush.  Wrap the adhesive coated paper around pendant, smoothing out any wrinkles with fingers.

Polymer Clay Pendant Tutorial

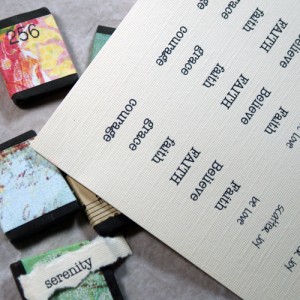
  • Print out a sheet of typed words to run along the length of the pendant.  Rip the word from the page if you like the torn edge look, or cut for a clean edge.  Adhere with Mod Podge.  Let dry.

Wire wrapped polymer clay pendant

  • To finish decorating your pendant, wrap a piece of small gauge silver wire around, adding a seed bead every other wrap.  I added three to mine.  Put wire through where your needle hole was made and loop the top end.  Place a bead or crystal at the bottom end, bending the leftover wire to keep the bead in place.  You could also solder the end or use and eye pin to hold the bead in place.

Polymer Clay Pendant Tutorial

Polymer Clay Pendant Tutorial


Privacy Policy