Archives for August 2011

Thrifty Thursday Week 38


Thank you so much for stopping by Thrifty Thursday. I look forward to the creative projects shared each week! I am asking that you only link DIY home decor and craft projects. No giveaways, shops or links to your main blog, please. That way we know when we come to Thrifty Thursday, we will only encounter DIY projects and not end up sifting through a bunch of other links. Entries not related, or to main blog pages/shops/giveaways will be deleted.
Other stuff:

*Totally unrelated to this linky, if you are a fan of SBLC please follow my new FB page. I started over since the original page I opened when I started blogging just doesn’t fit anymore. Now I have a handful of followers, and am feeling deflated.

*Please add a link or my button to your post!
*I will choose 2 participants to feature the following Thursday, Please drop by and follow the features! Their links are in the post where their projects are featured.
*Please visit the at least the 2 blogs above you and shower them with comment love.
*Leave me a comment and let me know you were here. I love hearing from you.
*Have fun and be inspired!
*Stop by and say hello to Nikki and link up to her thrifty party too…

Weekly featured projects:

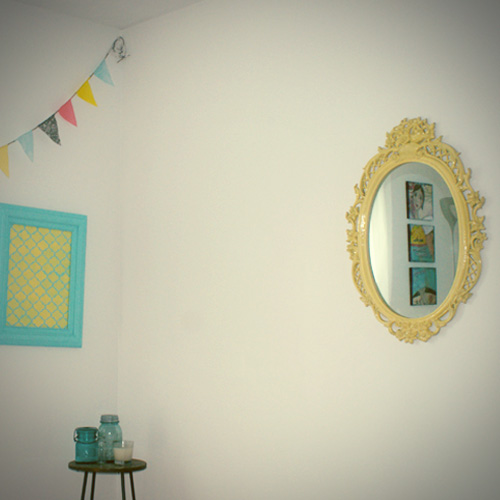
  • I love this turquoise desk and chair makeover at Simply Chic Treasures.  Go on over and see it, as well as other amazing furniture transformations!
  • Furniture makeover Look at this quick and easy adorable bird art over at Vintage Afterthoughts.  Under $5 and 5 minutes… the best!

Bird art

Enjoy the projects and ideas!!


Stenciled Hanging Light Revamp

Stenciled Hanging Lamp

I mentioned this project to you when I showed you the quatrefoil stenciled cork board created with Martha Stewart’s new paint line by Plaid.  You are going to see a lot of stenciling around here in the coming weeks.  For this project, I took an old red hanging lamp I have had for years and made it new using acrylics and stencils.  Today I will detail that process…

Supplies:

  • Old hanging lamp
  • Acrylic paints in desired base coat and stencil colors
  • Stencils
  • Stencil Spray Adhesive
  • Sponge brush
  • Stencil brush or sponge applicator


Instructions:

  • Clean lampshade, removing any dust/debris

Stenciling on Lampshade

  • Paint on base layer using one inch sponge brush.  I used a metallic black craft paint for the base coat.

Stenciling on Lampshade

  • Once that dries completely, plan your stencil placement.  Spray the stencils with the adhesive and place on lampshade.  Lightly load your stencil brush and apply paint in a swirling motion over the stencils.  This was kinda tricky since the surface was curved, and not supported underneath.  My stenciling was not perfect, but I was satisfied.

Stencil Lampshade

Stenciling on Lampshade

  • Remove the stencils while the paint is still wet.  Let dry before overlapping stencil areas, if that is a part of your design.  That’s it.  Completely new look, with little investment!

Decorative Lampshade Tutorial

Lampshade Makeover

Here it is in the room that inspired it.  Love it with the doilies!

Lampshade Makeover

Painted Pillow With Monogram Print Canvas

DIY Monogram Pillow
Wow, I “made” a pillow.  You may have noticed, there aren’t sewing projects here at SBLC.  I don’t do that.  I think about doing it occasionally, but it doesn’t happen.  Here is a project, sans sewing, that includes printing on canvas drop cloth material, painting a pillow with fabric paint, and attaching fabric to fabric using liquid stitch.  Easily and quickly make yourself a beautiful, custom, decorative pillow!

Graphics Fairy Pillow DIY


Supplies:

  • Old Pillow (Mine is a Goodwill score)
  • Martha Stewart Decorative Paint by Plaid and Fabric Medium
  • Drop Cloth Canvas cut to 8.5×11
  • Graphic image (I used frame image from Graphics Fairy, and put the letters in with Photoshop)
  • Inkjet Printer
  • Spray Adhesive
  • Paintbrush
  • Ribbon
  • Stitch Witchery
  • Liquid Stitch or other fabric glue

Monogram Painted Pillow

Instructions:

  • Mix paint with fabric medium as directed and paint your pillow!  It felt kinda cool to be painting a pillow.  I got some strange glances from family members wandering by,  but who has a an awesome pillow now?

Martha Stewart Fabric Paint

TIP:  The instructions for the fabric paint medium said to let dry for 24 hours.  I needed to add another coat over the black area of the pillow, so I dried the pillow immediately after the first coat with my heat tool.  Then I added the second coat and let dry overnight.

  • While your pillow is drying, you can prepare your image on your canvas piece.  Go on over to Graphics Fairy, and get yourself a lovely free image (I used this image).  Cut it to fit your printer, and using spray adhesive, adhere the canvas piece to a piece of photo printer paper or to cardstock.  A regular old thin piece of printer paper isn’t sturdy enough.  Insert the piece into your inkjet printer, fabric side down, and print your image.
  • Cut your image to the desired size, fuze ribbon to frame it with Stitch Witchery, then glue the piece onto your dried pillow using Liquid Stitch.  Let dry overnight.  You are done!

No Sew Monogram Pillow DIY

What do you think.  I love it.  The pillow is a little “crunchy” from the paint, but let’s face it, it isn’t meant to be functional.  Not bad for a new sew project!

6 Quick and Easy Girls Night Crafts


My little studio was full of busy hands, Pandora tunes and laughter on Saturday, my first ever group craft night.  In preparation for this fun filled evening, I needed to pick a quick project, with some bang for the buck.  Here, I will share with you the project we ended up creating, and some other ideas I picked up in the planning for this week’s “Six on Sunday.”

Altered Journal

1.  Altered Compostion Notebooks; These are super easy and fun.  Not only that, you get a journal for tracking your creative ideas, and a momento of the evening.  For these, we used decorative paper, Mod Podge and embellishments to spruce up the well known marbled cover of these inexpensive notebooks.  In preparation for the evening, I printed off laser jet copies of sayings and images for each guest and taught them the contact paper transfer method I showed you here.  Project was a hit!

Craft Night Altered Journals

Altered Composition Notebook

Altered Compostion Notebook

2.  Washer Pendants;  I had this project in mind for the evening as well, but we never go to it.  Next time!  I love it because of it’s low cost and ease, and your guests will leave with wearable art handmade by them.  I have not tried this yet, but I have me a box of washers and there are tons of tutorials out there.

Washer Pendant

Picture Courtesy of Erin at Paper Sweets

3.  Shrinky Dink Jewelry;  This would be a great craft for ladies night.  I showed you my adventure with the project here.

Group Craft Ideas

4.  Coiled Magazine Page Jewelry;  Doesn’t get much cheaper than free.  This project would be perfect for group craft night. Here is where I showed you the process.  You could make earrings and bracelets too.  There are tons of ideas, so get googling.

Craft Night Projects

5.  Decorative Box;  Why not decorate a box with paper and embellishments?  These make wonderful God boxes to store your concerns and blessings.

Decorative Box

6.  Eggshell Mosaic Pendants;  Beautiful and cheap!  For a step by step tutorial, click here.

Eggshell Mosaic Pendant

I would love to hear your craft night project ideas and activities.  I can’t wait to do this again.  One of the girls brought me a big ol’ tub of craft supplies that I am loving!  Another wore rollers in her hair the entire evening.  Hysterical!

Group Crafts

Quatrefoil Stenciled Corkboard – New Martha Stewart Decorative Art Paints!

Quatrefoil Stencil Home DecorI have been a busy girl since opening my box of crafty goodness from the new Martha Stewart Crafts Decorative Paint Line by Plaid.  You all are going to go crazy with this stuff, just warning you.  I am delighted to share this line with you.  You will see an entire bedroom revamp that was inspired by these gorgeous paint colors, as well as a detailed tutorial showing how I made the quatrefoil stencil decorated framed corkboard.

Imagine my excitement when this showed up on my doorstep!  Thank you Martha Stewart and Plaid Crafts.

Martha Stewart Decorative Paints

This line is available exclusively at Michaels in the US and Canada starting this week.  It is already in my local store.  I stopped by to get a peak at the whole line and here is what I found.

Martha Stewart and Plaid Crafts

160 paint colors are available in five finishes (Satin, High Gloss, Glitter, Pearl, Metallic).  All come in 2 oz. bottles, are non-toxic and range in price from $1.99-$2.99.  These paints are formulated to work on all craft surfaces, including glass, fabric, metal, ceramic, terra-cotta, wood.  You can use them both indoors and outdoors.  They are even dishwasher safe!

Martha Stewart and Plaid Crafts Stencils

The stencils range in price from $6.99-$16.99 and come in a variety of themes and sizes.  I had never successfully stenciled until this project.  It is so much easier than I was making it and I am having a blast with it now!

Martha Stewart and Plaid Crafts Tools and Applicators

Look at all the tools and applicators there are!

Martha Stewart and Plaid Crafts TransfersThese are foil, flock and glitter transfers!  I haven’t tried them yet, but I am giddy at the thought of using them on polymer clay.

Now for the bedroom reveal.  I had no intention of doing this until digging into the paints.  We have lived in this home for 1 year, and painted/decorated the entire house when we moved in, with the  exception of 2 bedrooms rarely used by our college girls.  The dingy walls and country blue trim have been bugging me forever and the colors in this line gave me the motivation to finally get going.  The before and after…

Martha Stewart and Plaid Crafts Paint LineThe “Surf” light blue and “Jonquil” yellow were begging to be used together in the stenciled cork board I had in mind.  I also used these paints on the stenciled the black hanging lamp, which you will see in an future tutorial, and on the wall doilies pictured above.

Quatrefoil Stenciled Bulletin Board

To make the quatrefoil stenciled framed cork board, I used:

  • Surf and Jonquil Martha Stewart Decorative Paint by Plaid, satin finish
  • Empty frame
  • Cork board cut to fit frame, and cardboard backing same size
  • Quatrefoil stencil by Martha
  • Roller Sponge applicator tool

Instructions:

  • I cut the cork board and cardboard backing to fit the frame opening, then adhered the self adhesive cork piece to the backing.

Painted Frame Corkboard Tutorial

  • Using the sponge roller applicator and the “Surf” paint, I painted the base coat on the mounted cork board.   The applicator just twist onto the top of the paint bottle and you are good to go.  Coverage was great with the roller,  I did one coat and that was sufficient.  I did have to go over a couple of areas where I made lines with the roller (yep, I do the same thing when painting walls).

Martha Stewart Decorative Arts Paint

  • While the cork board was drying, I painted the frame using the same color.  I started out with the roller, but couldn’t get into the depressed areas of the frame.  I switched to a paintbrush from the Martha Stewart line to get the full coverage I was going for.  The paint goes on smooth, no bubbles and is definitely the high quality you would expect from Martha Stewart.  Not to mention, no other line comes close in terms of available colors.

Painted Frame Corkboard Tutorial

Martha Stewart Decorative Arts Paint

Martha Stewart Decorative Arts Paint

Martha Stewart Decorative Arts Paint

  • Stenciling:  I couldn’t resist these stencils, despite my history of failure in this realm.  It was so easy!  I didn’t use spray adhesive or tape for this.  The accompanying instructions recommend using adhesive, but I was in a mood to wing it.  You will have to figure out what works for you, and it probably varies depending on the surface you use.  I know Beckie over at Infarrantly Creative had a poor result using tape with these stencils, and tried stencil spray adhesive with splendid results.  Holding the stencil in place with my fingertip did the trick for me. Using the sponge applicator that came in my box, I ended up with crisp lines for a beautiful final piece.


Martha Stewart Plaid Craft Stencils

Martha Stewart Decorative Arts Paint

  • Dabbing and swirling the sponge til I was pleased with the coverage…

Martha Stewart Stencil

  • When I finished one section, I just moved the stencil to the adjacent area, overlapping one row to keep the design straight.

Martha Stewart Quatrefoil Stencil

I am so pleased with the result, and excited to have overcome my losing streak with stenciling.

Martha Stewart Decorative Arts Paint


Jenni absolutely loves her new room, and can’t wait to start pinning notes and memories on her new quatrefoil bulletin board.  I had a blast with these paints!  Go check out your local Michaels and look for this fantastic new line.

***Grab your 40% off coupon here.

Want to hear it from Martha?  Check out her description of the new line in this video.

Keep your eyes peeled for posts from many crafty bloggers using these paints and accessories.  Some of my favorites so far:

This is a sponsored post.  See full disclosure here.

Linking to this party!

Thrifty Thursday Week 37


Thank you so much for stopping by Thrifty Thursday.  I look forward to the creative projects shared each week!  I am asking that you only link DIY home decor and craft projects.  No giveaways, shops or links to your main blog, please.  That way we know when we come to Thrifty Thursday, we will only encounter DIY projects and not end up sifting through a bunch of other links.  Entries not related, or to main blog pages/shops/giveaways will be deleted.
Other stuff:

*Totally unrelated to this linky, if you are a fan of SBLC please follow my new FB page.  I started over since the original page I opened when I started blogging just doesn’t fit anymore.  Now I have a handful of followers, and am feeling deflated.

*Please add a link or my button to your post!
*I will choose 2 participants to feature the following Thursday, Please drop by and follow the features! Their links are in the post where their projects are featured.
*Please visit the at least the 2 blogs above you and shower them with comment love.
*Leave me a comment and let me know you were here. I love hearing from you.
*Have fun and be inspired!
*Stop by and say hello to Nikki and link up to her thrifty party too…

Weekly featured projects:

  • Look at Nikki’s bathroom cabinet upstyle.  She took plain old standard cabinets and made them fabulous using beadboard wallpaper.  Impressive transformation!
  • Cabinet makeoverThis front porch makeover at Sugar and Dots is amazing!  The colors, the wreath, birdcage, yarn pom pom garland… I could go on and on.  You must pop over there and see the before picture to get the full impact.  Big ol’ thumbs up!

Porch Makeover

  • Normally I only feature 2 projects, but I just couldn’t decide between my 3 favorites this time.  For the second time today, I am posting about the decor divas over at Tres Chere.  I wouldn’t be true to myself if I didn’t share this striking hand painted  zebra print dresser.  Want, want, want!  Keep it coming, ladies.

Let’s link:

Mirror Spray Paint Revamp

Spray Paint Furniture

I have been obsessed with finding an ornate oval mirror since running into this post over at Tres Chere.  Angie and Debbie are so talent when it comes to interior decor.  I do not have that gift and I find it amazing the budget finds these two throw together so elegantly.  Here is the mirror that started my mission to score one for the bedroom I am redecorating.  Will you look at the lovely accessories?!  Oh dang.  I just became fixated on the chandelier.  New obsession.

After scavenging all the thrift stores and garage sales scaling three cities, I finally found this little jewel for $15!  I was just about to give up when I stopped at a small town flea market overflowing with well priced vintage goods.

Mirror Revamp

I brought her home, took the mirror out of the frame.  Then I cleaned the empty frame  with soap and water.  Sprayed on a coat of primer, let that dry and spray painted the lovely yellow (Krylon Indoor/Outdoor “Bright Idea”) you see in the final piece.  Super fast, cheap, way cool.


Spray Paint Mirror

Off to find a chandelier.  Suggestions?

Doily Spray Starch Wall Applique


Doily Wall Art DIY

Do you want to add a splash of color and design to your walls that you can easily remove without leaving behind damage?  When planning my teen stepdaugther’s  bedroom, I decided to go with a dark grey accent wall, keeping the decor such that I could easily change the color scheme by switching out the accessories.  One day she will be out of the house, and I will likely be ready to move on from zebra print and hot pink.  Here is a simple, inexpensive, removable applique tutorial, using spray starch to adhere painted doilies directly to the wall surface.

Supplies:

  • Doilies
  • Spray paint in colors to coordinate with your decor
  • Spray starch (I used heavy spray starch)
  • Bowl of water
  • Sponge
  • Damp towel for clean up

Instructions:

  • I stiffened my doilies with spray starch and ironing before spray painting them.  Just follow the directions on the starch can.

Crafts with doilies

  • Spray paint your doilies in a well ventilated area.  I went over them with 3 good coats to saturate them well.

Doily Wall Art

Doily Wall Art

Doily Wall Art Tutorial

  • Figure out where your placement, and make sure the surface is clean before moving on.  Once the doilies are dry,  grab the sponge and water bucket, as well as some plastic to protect your surface from starch over spray.  I laid my doilies out on a trash bag to spray them.  Before spraying, use the sponge to dampen the back surface of the doily.  I initially dipped the entire thing in the water, but that was just no good.  Wringing out a wet doily really distorts and wrinkles it.  Once it is damp, generously spray the back with the starch, making sure to cover it completely.

Spray Starch Wall Applique

  • Press the sprayed doily onto the wall, using your hands to smooth it out and pressure to make sure it sticks.  If they are too wet, they will fall due to weight.  Another reason not to dip the entire thing into the water.  Have a towel handy for any runaway drips that may run down the wall.  I wiped the wall down underneath the doilies with soap and water to remove drip marks.

Doily Wall Art

Removable wall decor

Teenage Bedroom Decor Ideas

I love how it turned out, and can’t wait to show you the rest of this room!  I will let you know how removal goes when I decide to change the decor again.  What fun things do you do with doilies?

Linking to Tutorials and Tips Tuesday

Wood Pallet Headboard DIY

Wood Pallet Headboard


If you read yesterday’s post, this wood pallet headboard project is no surprise to you!  I am so very excited about this.  I have never done anything like it, and I am plain proud.  There is a rustic, shabby look with an interesting texture for a unique feel, and a price tag that can’t be beat.  The inspritation came from the Sprig by Mia post I showed you previously, here.  Get ready for a quick, easy, cheap DIY headboard tutorial from a happy crafter.

Supplies:

  • Wooden shipping pallets; I nabbed mine from a dumpster behind a local home improvement store.  I grabbed 2 of them, as each one was 48 inches wide, and I needed 60 inches (the width of my queen size bed).
  • Saber saw or hand saw if you need to cut one of your pallets to get the exact size you want.
  • Krylon Dual Spray Paint Black Flat and White Flat
  • Wood Screws
  • Hammer
  • Krylon clear coat or sealant of your choiceDIY Headboard Ideas

Instructions:

  • Clean your pallets with hot water and let dry.
  • Determine your desired headboard width.  If one pallet is not wide enough, cut the needed width from the second pallet using a saber saw or hand saw.  See picture.  Loving some power tools…DIY Headboard Ideas

DIY Headboard Ideas


    • I used a three  pieces of board from the leftover segment of pallet to scab the two pallet pieces together, attaching them with wood screws.  In the Sprig post, she used 2x4s, which is great too.  I just didn’t want to go to the hardware store, and I wanted this to be all free (except for the spray paint later).  No pics of this.  I was too excited.  I drew it in to show you what I did…

Frugal Headboard Ideas


  • Flip it over and spray paint your base coat.  I did flat black Krylon Dual, which has primer built in and is amazing.  Such great coverage.  I let the black coat dry, then went over that with flat white Krylon Dual.  I also screwed three shelves from a previous  project along the top edge of the headboard to give a finished look and to have a ledge to decorate if I want.  Really I just did it because I was so thrilled that they fit perfectly along the width of the piece!DIY Headboard Tutorial


DIY Headboard Tutorial

DIY Headboard Tutorial

  • I distressed the edges by lightly sanding with medium grit sand paper to bring out the black base layer.  Then coat with finish of your choice.  I used Krylon clear coat (and no, they are not reimbursing me for this post)!

DIY Headboard Tutorial

That is all.  SO gratifying.  I just set it against the wall and put the bed in place.  What do you think, dear readers?

DIY Headboard Tutorial


Wood Pallet Headboard
I am linking to: Home Stories A to Z

6 DIY Headboard Ideas

DIY headboard

Vintage Hanky Headboard From Better Homes and Gardens

Searching for bedroom revamp inspiration, many DIY headboard ideas have come my way.  There is no need to ever purchase one of these, with all the creative, frugal, beautiful solutions out there.  Saved By Love Creations’ inaugural “Six on Sunday” brings you 6 outstanding creative headboard projects.

  • Over at Oh Lovely Oil is a double door headboard, made from doors scored at the Habitat Restore (LOVE this place).  She added some vintage hardware for a nice finishing touch.

DIY headboard ideas

DIY Headboard Ideas

  • Check out this unique and simple ribbon headboard project over at Shelterness.  All you need is a lightweight frame and some ribbon.

DIY headboard ideas

  • Look at this super cool shipping pallet headboard at Sprig by Mia.  Adds interesting texture and green living to the bedroom.  You may just be seeing a SBLC version of this in the upcoming days.

Wood Shipping Pallet Headboard

  • No DIY home decor list is complete without a vinyl decal, am I right?  I found this decal headboard in this custom decal store on Etsy.  Immediately I thought of my Cricut!

Headboard Decal

I would love to see your favorite DIY headboard ideas!  Check back this week for my bedroom makeover reveal!

Privacy Policy