Search Results for: upcycle

Green Mason Jar and Recycled Wine Bottle Wind Chimes

[pinit]
DIY Wind Chimes from Recycled Mason Jar and Wine Bottles[pinit]

DIY Mason Jar Wind Chimes

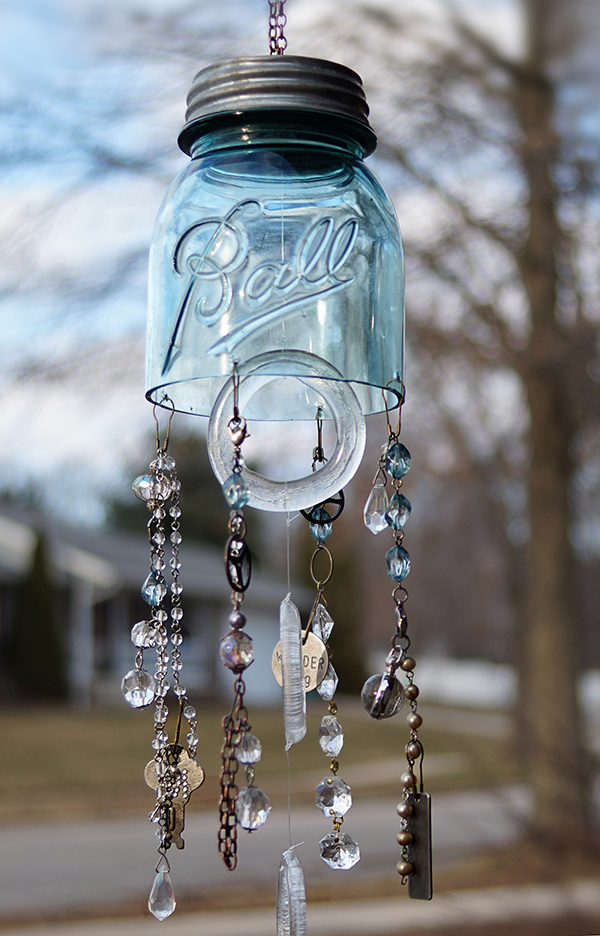
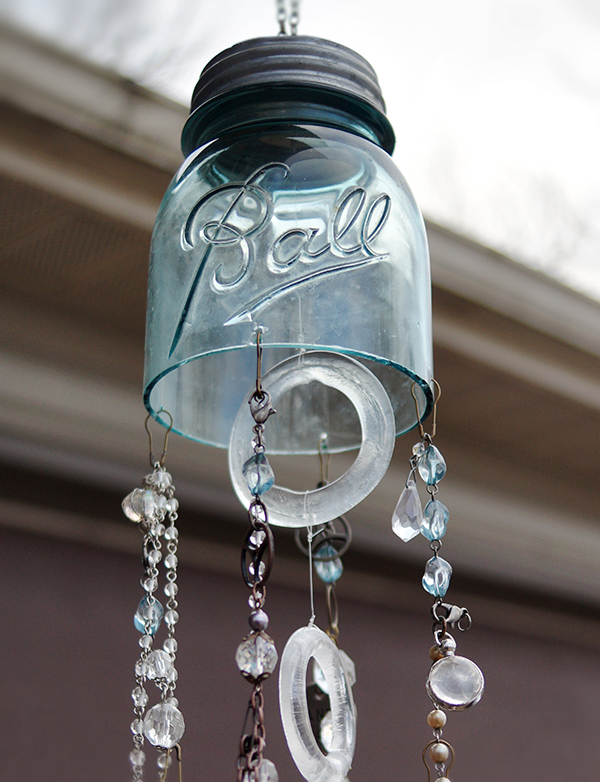
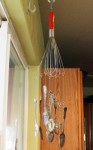
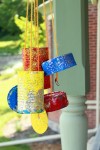
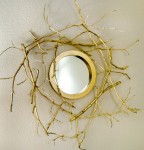
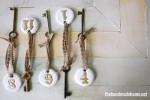
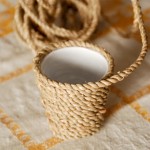
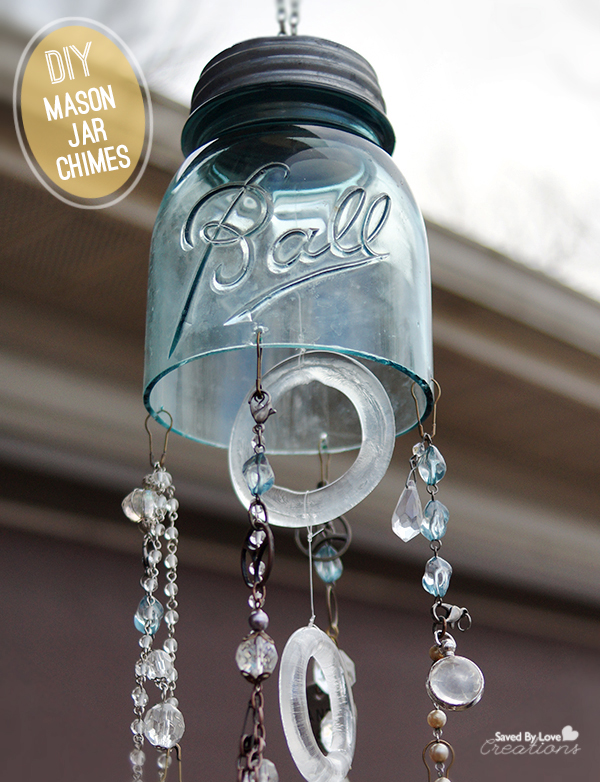
Do you love the sound of wind chimes singing?  I have shared with you how to make DIY Wind Chimes from Upcycled Mason Jars in the recent past, and today I am sharing with you my newest addition!

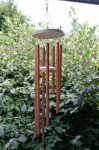
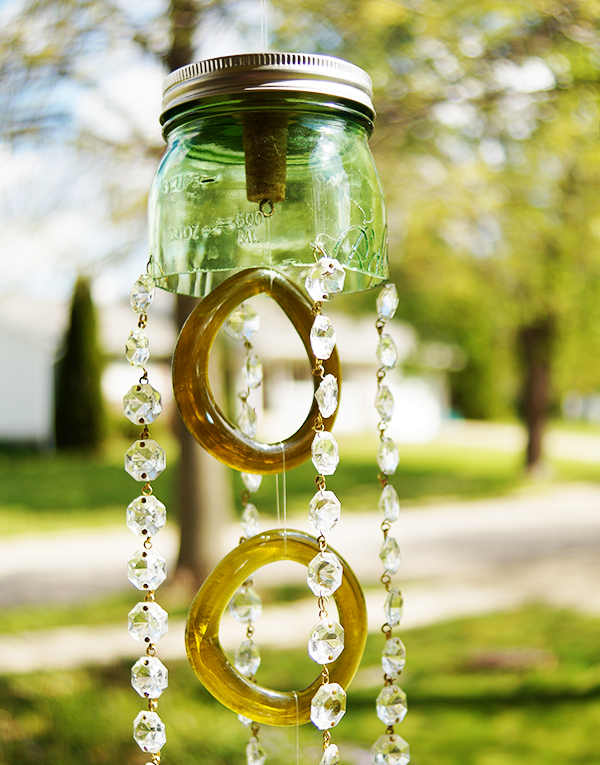
This is the first set I made, which now resides with Pam, a Saved By Love Creations on Instagram follower who won the Instagram only giveaway I ran a few weeks back.  That brings up a good point.  If you are on Instagram, following me results in two things (besides the obvious getting updates on my projects via the pics I share); Exclusive giveaways of the SBLC creations you love and a follow back from me!  Then I can see what you are up to as well.

Repurpose Mason Jars and Recycled Wine Bottles

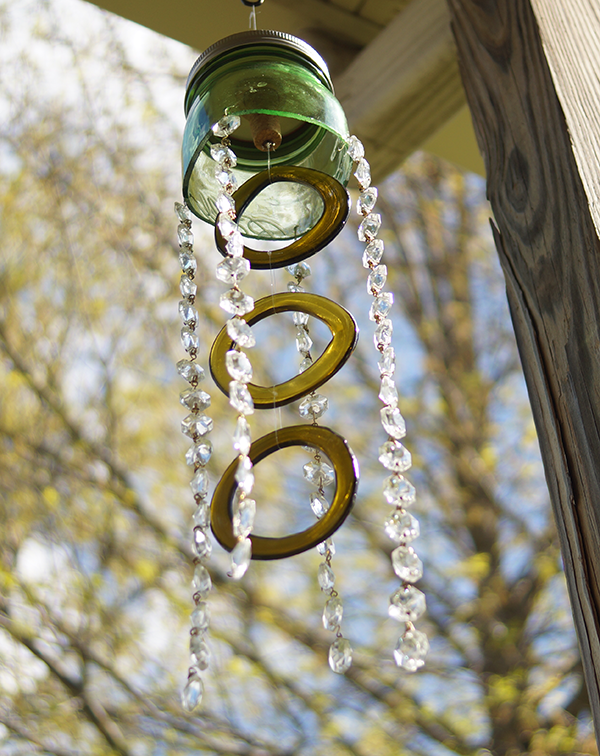
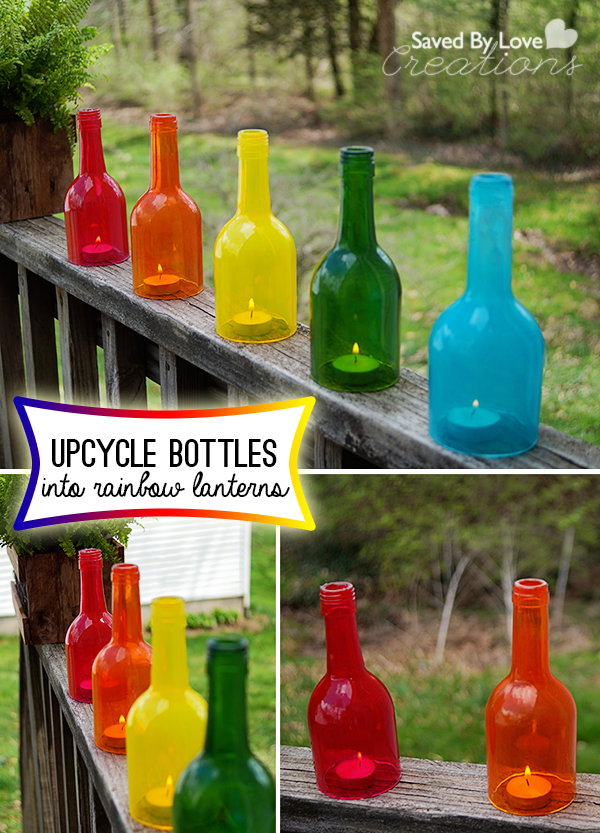
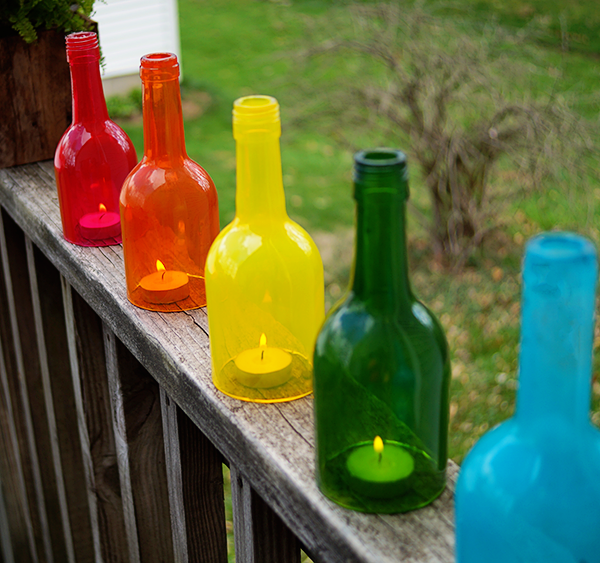
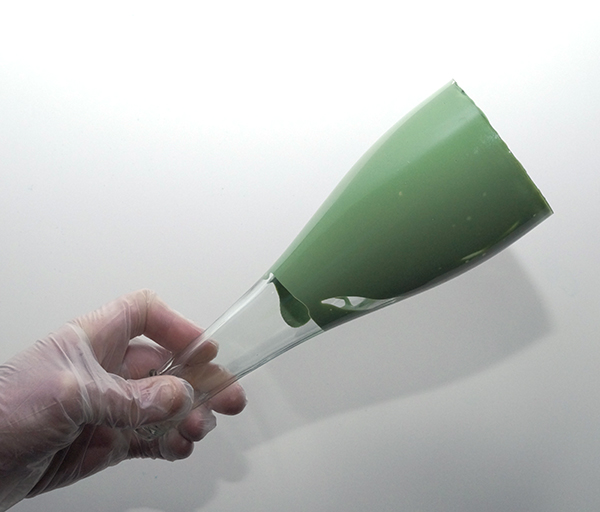
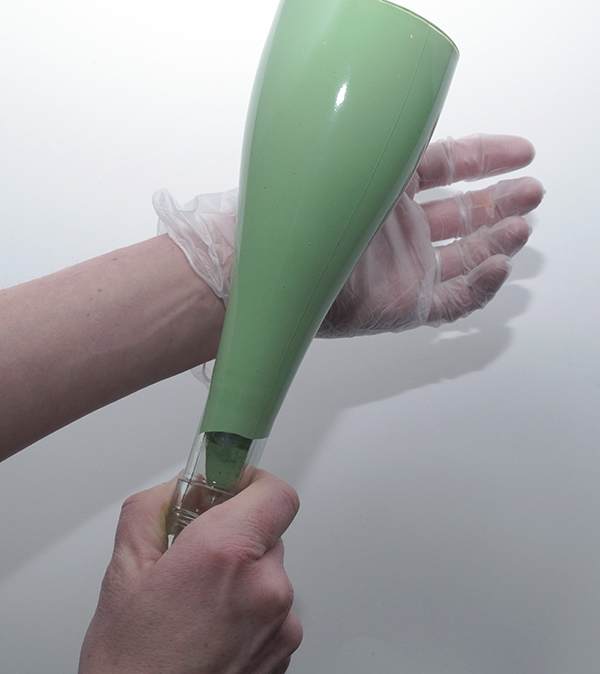
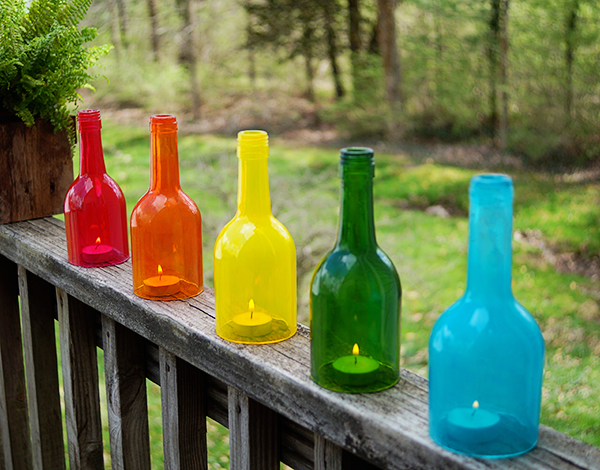
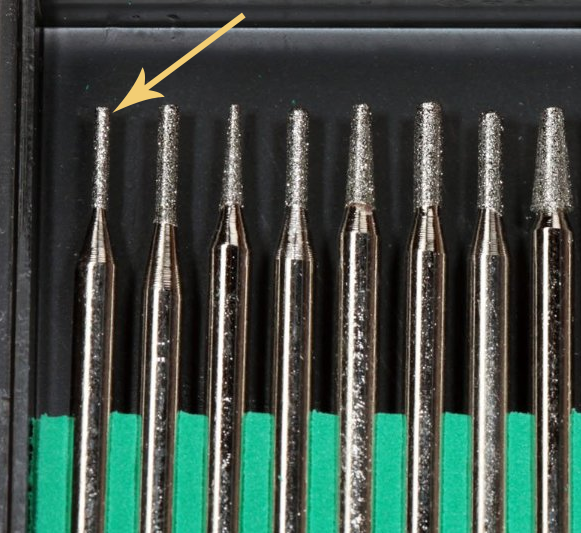
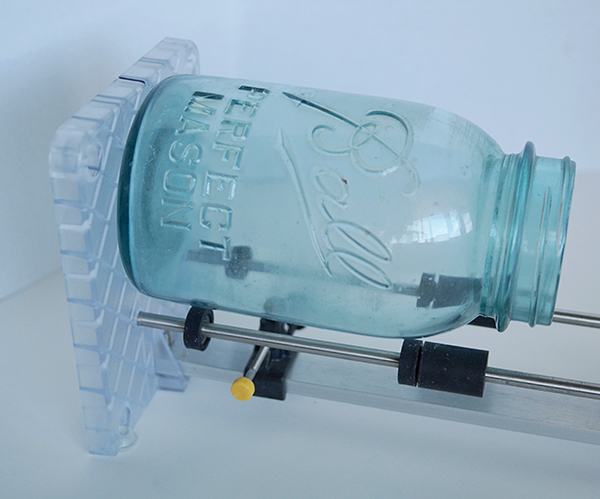
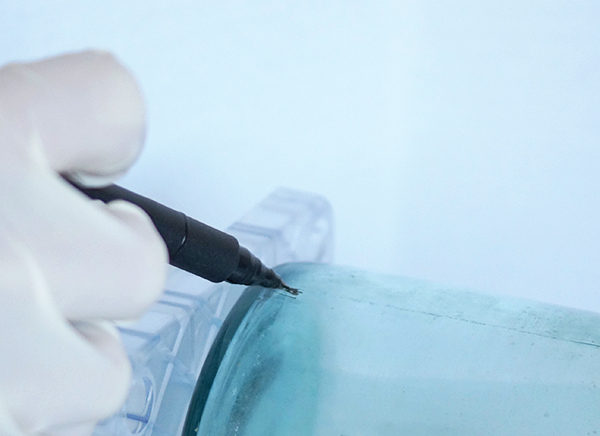
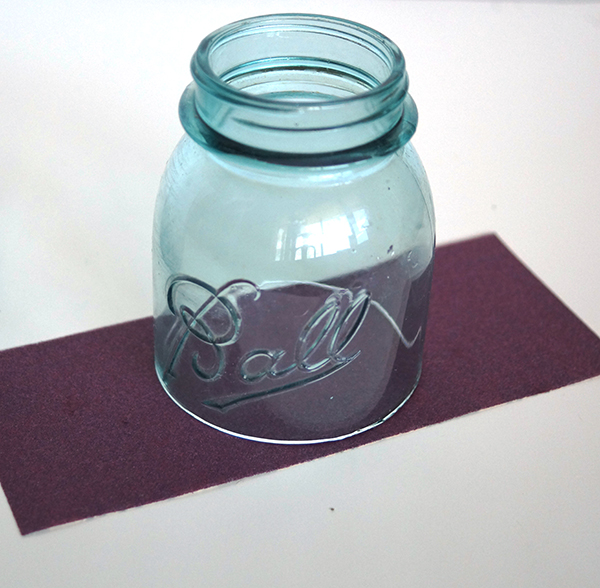
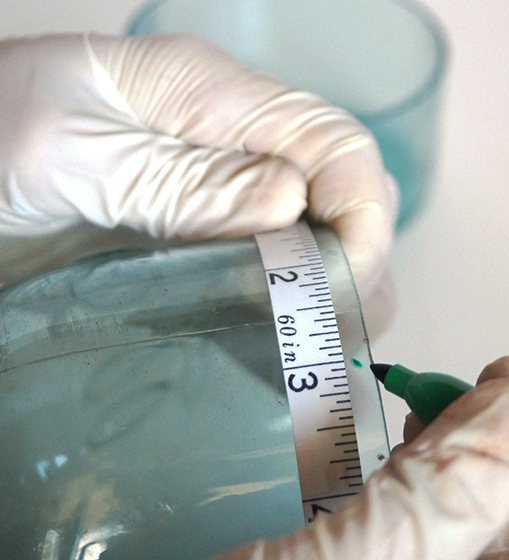
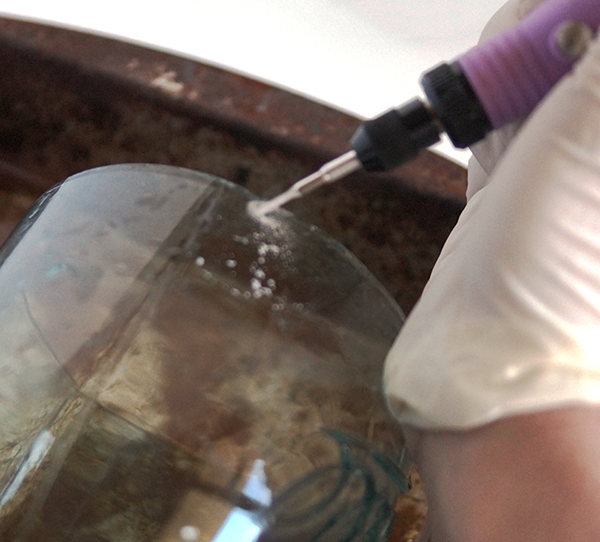
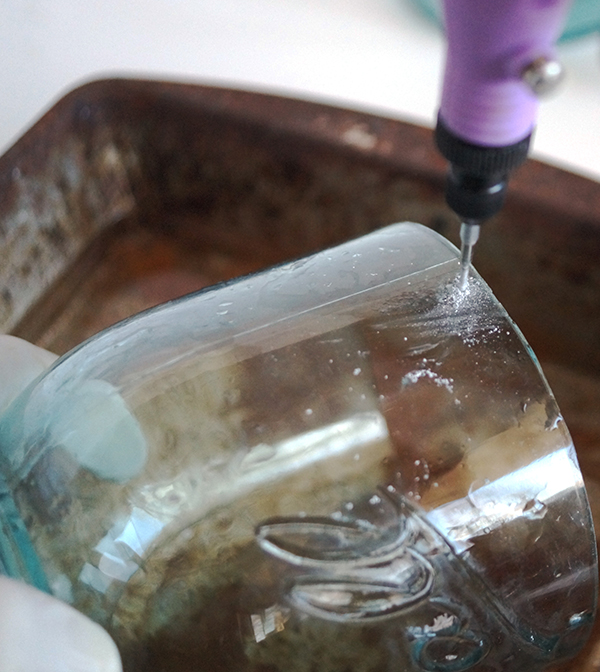
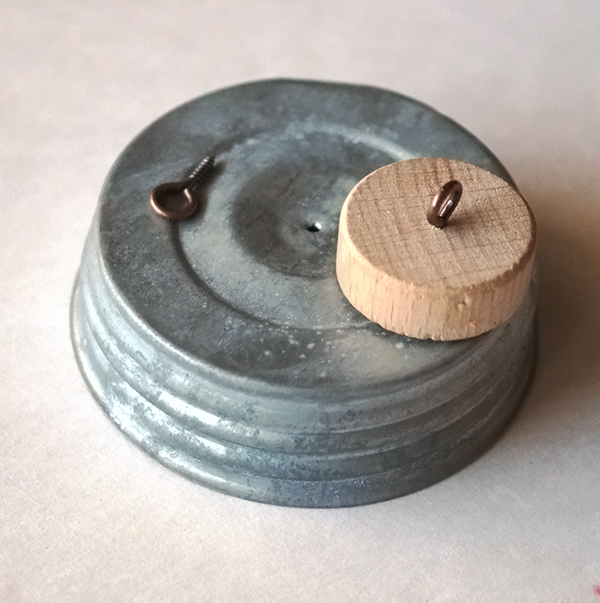
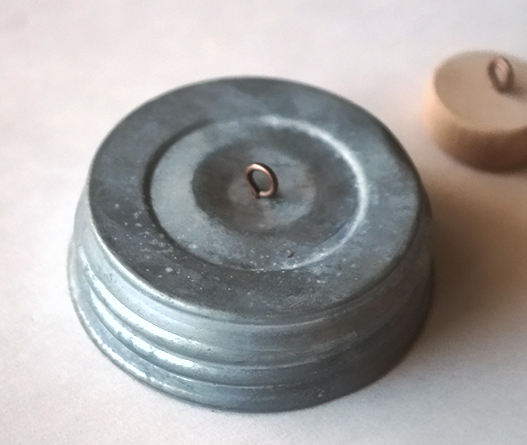
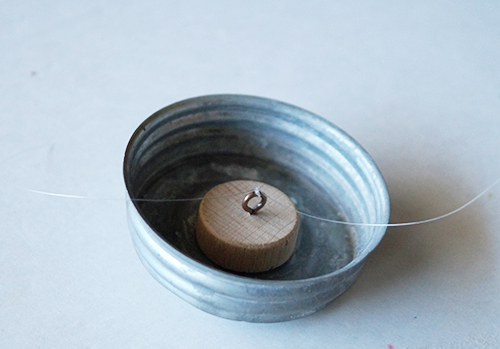
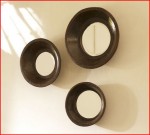
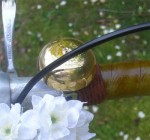
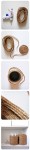
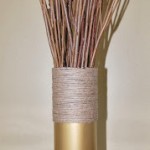
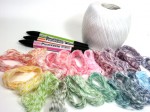
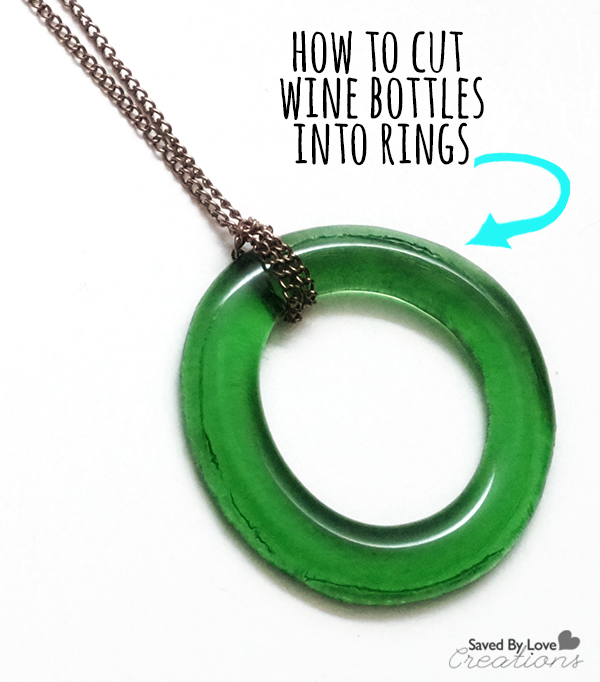
You can make your own set of these chimes by visiting the link in the first paragraph that teaches you how to cut the mason jar, drill holes in it and string/attach the dangly beads.  The three rings in the middle are created from recycled wine bottles.  I showed you how to make them HERE:  How to Cut Wine Bottles for Perfect Rings:

I Hope you try this project!

How to Make a Gorgeous French Typography Lamp from a Liquor Bottle

[pinit]

How to Make an amazing french typography lamp from a recycled glass bottle; Distressed with @decoart Chalky Finish Paint @homedepot @michaelsstores @savedbyloves @graphicsfairy

Make a French Typography Lamp[pinit]

This is a sponsored post written by me on behalf of DecoArt.  All opinions are mine and honest.  This paint rocks!

We are getting ready for a big move, and I am busy with DIY home decor on a shoestring budget!  Today I am sharing a super sweet french typography Chalky Finish Paint lamp that I made from a discarded liquor bottle.  You will see how to drill a hole in the bottle for the cord, how to chalk paint and distress the lamp, as well as how to transfer an image to the painted surface.  This project is easy and cheap.  The biggest expenditure is the $6 bottle lamp kit and the $15 lamp shade I just had to have for it!   The new Americana Decor Chalky Finish paint is now available in Home Depot and Michaels stores. It is also available for purchase online at homedepot.com.

Make a chalk paint lamp from upcycled bottle

SUPPLIES:

Really cool liquor bottle

Drill and 1/2 inch Diamond hole drill bit

Small container of water

Towel or paper towels

Rubbing Alcohol or glass cleaner

Lamp Shade

Light Bulb

 DecoArt Americana Chalky finish paint In Treasure, Inheritance, Everlasting and Primitive

DecoArt Americana Crème Wax in clear and Golden Brown

Medium grit sand paper

Paint brush and wax brush

Bottle Lamp Kit (I got mine at Wal-Mart for $6.47

White Tissue Paper

Cardstock

Masking Tape

Printer

Image to transfer (I used this French Typography Graphic from the fabulous Graphics Fairy)

TUTORIAL:

Begin by drilling a hole in the back at the base of your bottle where you want the cord to exit.  I showed you how to do that HERE:

 Upcycle a Glass Bottle into a Lamp

how to chalk paint on glass

Once your hole is drilled, clean your bottle surface all over with glass cleaner or rubbing alcohol.

Distress painting tutorial

Use a soft, flat brush to paint on a layer of Treasure.  When that is dry, paint on a layer of Primitive.

Upcycle a wine bottle craft

I sanded the gray, revealing the blue base layer.  I decided I wanted a soft yellow top coat, so I mixed Everlasting with Inheritance to lighten and soften the mustard like color.  Then I painted that in a cross hatch, random and messy fashion so that the final piece will have texture and depth.

How to Print on Tissue Paper

To get my image for transfer, I printed some of my favorites from the Graphics Fairy.  There are thousands of free images there to fit any style.  The one I went with is a French Typography file which you can find linked in the supplies section.

Just cut a piece of white tissue paper to fit your card stock and tape it on with masking tape.  Place in printer and print!

How to Image Transfer on Paint

Cut or tear your image from the tissue paper.  I like to tear it so the edges are feathered and not such a straight edge like you get with scissors.  It blends in better.

Apply Clear Creme Wax where you will place the tissue.  Carefully place the tissue and smooth out wrinkles with your finger.

How to Image Transfer


Paint more Clear Creme Wax over that and let dry.

Wine Bottle Craft lamp from upcycled bottle

When the tissue transfer dries, sand entire bottle in areas where you want to bring out the underlying paint colors.  Then apply clear wax over the entire bottle.  Let that dry for at least 30 minutes.

How to Antique Chalk Distress Paint

How to Use Antiquing Wax

Apply Golden Brown Creme Wax as desired and wipe back with soft cloth.  If you use too much brown, you can wipe it away even further using Clear Creme Wax on a rag.

GE Bottle Lamp Kit

Now it is time to use the Bottle Lamp Kit!

How to make a lamp

Follow the included instructions, except for where it says to thread the cord.  It has the cord coming out of the fixture just under the light bulb, but we drilled a hole in our bottle to avoid having an ugly cord running down the lamp from top to bottom!

How to make a lamp from a recycled liquor bottle

I found the burlap lampshade at Wal-Mart for $15.

I love my new lamp!  More than that, I love this line of paint.  You will be seeing it in so many more projects coming up here at SBLC.

Remember this DIY Hand-Painted Sign?  Yep, same paint line.  It goes on beautifully, is easy to distress, and comes in an amazing color palate.  LOVE!

Visit the DecoArt Chalky Finish website for more information.


DIY Wine Bottle Craft Rainbow Lanterns

[pinit]Wine Bottle Craft Upcycle into Rainbow Decor @savedbyloves[pinit]

Who doesn’t love a good rainbow theme decorated space?  This project is that, and so much more.  For little to no cost, you can create gorgeous rainbow lanterns for your next party, or for every day spring and summer decor!  Upcycle wine bottles by cutting them, pouring in some tinted Mod Podge, letting them dry and putting them over tea light candles.  I am just the DIY blogger to show you how to pull it off, so lets go!

Recycled Wine Bottle Crafts

SUPPLIES:

Wine bottles cut to the size you want (I have showed you how to cut theme HERE:  How to Cut Wine Bottles)

Tea light candles (I used flammable, but battery operated will work as well)

Mod Podge Sheer Colors

Mod Podge Sheer Colors

Wax paper or non stick craft mat

TUTORIAL:

Pour Tinted Mod Podge

Squeeze a generous amount of Mod Podge Sheer Colors into the cut end of your bottle.

Upcycle Home Decor Wine Bottle Crafts

Twirl Bottle to disperse color all over the inside of the bottle.

DIY Wine Bottle Crafts

If you are having a hard time getting it to flow, you can tap the bottle against your wrist as shown.

Let the excess Mod Podge drip into back into the product bottle to save as much as possible for your next project!

I placed my bottles on my kitchen table, on a non stick craft sheet, with the ceiling fan on.  Place them with the mouth down so they dry faster.

Rainbow Themed Decor Craft With Wine Bottles

The color will be opaque in spots, and you may get discouraged, but fear not.  They will dry beautifully.  Once they do, you can cut any of color over the mouth of the bottle with a craft knife to open the bottle top.

Place over your tea lights and enjoy your gorgeous rainbow!

How to Make Mason Jar Chimes

[pinit]Tutorial DIY Chimes from Mason Jar @savedbyloves upcycle repurpose[pinit]

It was only a matter of time before I tried out my bottle cutter on a mason jar.  Today I am sharing how I pulled off this mason jar to wind chimes upcycle, just in time for spring and outdoor decor.  This project is a great stash buster for those beads and charms you’ve been stockpiling.  There will be some cutting and drilling of glass, but don’t fear, you can do this!

Mason Jar Upcycle Repurpose

SUPPLIES:

Mason Jar with lid

2 eye screws

piece of scrap wood about 1/2 inch thick and smaller than lid

fishing line or other clear string

scissors

beads, chain, charms and connectors of your choice

Bottle cutter (Creator’s Cutter used in this tutorial)

Butane micro torch or candle and lighter

Dremel or other Rotary tool – I used Beads Landing Rotary Tool

measuring tape

Shallow container with cold water for drilling your jar (this will make sense later)

Bucket of cold water deep enough to submerge jar

Protective mask and goggles

E6000

Diamond Drill Bit for drilling glass

Diamond Bits for glass; I used a bit from this set

Permanent marker

Medium Grit Sand Paper

Glass beads or wine bottle rings (see my Wine Bottle Rings tutorial)

TUTORIAL:

How to Cut a Mason Jar Web

I place the mason jar on the cutter (My wine bottle cutting tutorial has a video on using this specific cutter).

Mason Jar Upcycle

Mark the jar so you know when you have made a complete rotation.

Mason Jar Upcycle Mason Jar Crafts

Once the score line is made, it is time to apply heat/cold to it.  I like to do this with a butane micro torch while rotating the bottle on the cutter jig.  I have moved the blade out of the way and am just using the cutter jig to hold the bottle and give me a way to rotate it easily with one hand while holding the torch with the other.

If you are using a torch, one minute is plenty of time for applying heat.  Sometimes this is enough to break the score line.  If not, submerge jar into cold water, covering score line.  That is all it took for me on this mason jar.  If yours doesn’t separate, repeat the heat/cold until it does.

If you are using a candle, watch the video linked above for instructions.

How to make Mason Jar Decor Chimes

 This is what my break looked like.  Not bad!  Now it is time to sand and smooth the edges.

Mason Jar Upcycle 4

Sand lightly with medium grit paper.  Get the inner and outer edges of the break.  This is pretty quick.

You will notice after a minute or 2 of sanding that the edge is smooth to the touch and won’t cut you.

Mason Jar Craft Idea

I measured the diameter of my jar and it was 12 inches.  I marked every 3 inches for drilling a hole.  This gave me 4 holes evenly spaced around the jar for stringing beads and charms.

How to drill a hole in mason jars

Before drilling, put on eye gear and mask!!

Place jar in shallow container of cold water.  I use a square baking tin.

To begin drilling, come in at an angle to start an indentation.

How to drill a hole in glass

Once the indentation is started, move drill to 90°.  Every 30 or so seconds, stop drilling and rotate jar so that hole gets rinsed out and glass where your were drilling gets cooled.  This prevents the glass from breaking due to high heat.  Continue until you have drilled all the way through.

Do this at each mark around the jar.

Use fishing line or beading string to string various beads, charms, found objects and chain to your liking in each hole.

how to upcycle a mason jar

I wanted to use the old lid that was on this jar in the design, so I needed to have a way to hang the chimes by it.  I used a hammer and small nail to make a hold in the top center.

Mason jar crafts

Next I screwed in the eye screw as pictured.

how to make mason jar chimes

I screwed into the wooden disk and screwed the remaining eye pin to the other side as shown.  I later added E6000 to the wooden disk on the side that contacts the jar lid for added strength.  It gets pretty gusty around here in the spring!

I cut a length of fishing line to the eye screw and tied the other end to a wine bottle ring, tied another ring to that one, and another ring to that one for a total of 3 hanging down from the middle of the jar.

DIY Chimes from Mason Jar

To finish, put the lid on the jar and add chain to the eye screw on top for hanging.  Hang and enjoy!

For more mason jar crafts, visit our Collection of 75+ Mason Jar Projects

For more DIY Chimes, visit our 20+ DIY Chimes post!

20 DIY Wind Chimes @savedbyloves outdoordecor

20 DIY Wind Chimes to Make

[pinit]20 DIY Wind Chimes @savedbyloves outdoordecor[pinit]

Spring is here and it time to get busy on your DIY outdoor decor.  Today I am sharing 20 great DIY wind chime ideas you can make.  We are busy making our own as we speak!  If you have made wind chimes you are proud of, send us a photo so we can include you.  Enjoy!


Easy Side Table from Wooden Crate

[pinit]Make a side table that doubles as storage from a crate in this easy upcycle DIY @savedbyloves[pinit]

Hi, I am Loren from Pandora’s Craft Box and I don’t know about you but I hate having my magazine lying around everywhere in my home. All of us have subscription that my wonderful mother in-law has gotten us, so I really needed to find a place for our magazine where they could be displayed nicely. I like to keep my magazine at hand because I love using them as inspiration.

mud-room-storage-out-of-crates

The first thing that came to mind was using a crate that I had lying around the apartment.

Repurpose a crate into rolling end table and storage with this easy DIY @savedbyloves

I love the color of dark wood and decided to stain the crate a dark mahogany. The funny thing about staining is it has to be perfect weather. It can’t be too humid or cold because it will take that much longer for the stain to dry. I used a brush to apply the stain to the crate.

Remember to wipe any extra stain off the crate as you stain. The crate will dry faster if you do.

After the crate has dried overnight, I took a little trip to the hardware store and got wheels to attach to the bottom of the crate. Now I am able to move the crate with ease anywhere I wanted to go in my home.
Now the crate can be used as a side table and magazine storage to keep all of my HGTV magazines ready at hand for when I need inspiration!

What will you be using your crate side table for?

Stay Crafty!

Loren

Don’t miss our 50+ Repurposed Crates for more creative upcycle ideas!

The 50 Best DIY Mirror Projects Ever Made

[pinit]

50 Best DIY Mirros Upcycled Recycled and Eco Friendly Decor with Mirrors @savedbyloves[pinit]

Have you ever been to a house with no mirrors? Yep, we all use them. Today I am sharing my favorite DIY mirrors, upcycles, hacks and revamps from the most creative people gracing the blog world.  You will be amazed.  It helps you look good, so help it do the same.  If breaking it brings bad luck, maybe beautifying it will land you that winning lottery ticket!  If not, you are left with a cool mirror that you made.  Everyone wins.  Enjoy!


60+ Ways to Decorate Your Home With Letters and Numbers

[pinit]60+ Ways to Use Numbers and Letters in Home Decor @savedbyloves[pinit]
Numbers and letters in decor are everywhere, and there is a good reason. They look awesome. That simple. Today I am sharing over 60 ways to incorporate handmade and vintage letters & numbers of all styles into your living space.  As always, if I missed a project you think would fit into this collection, send me a link!  Enjoy.


50+ Heart DIY, Crafts and Jewelry Projects to Make

[pinit]

Heart Crafts Valentine's Day Ideas[pinit]

It’s all about hearts today, with this collection of over 50 DIY heart projects you can make. You will spy jewelry, crafts, wall decor, clothing and more, sure to inspire your Valentine’s Day festivities.


Over 50 Projects to Make Using Twine

[pinit]Over 50 Things to make with Twine #bakerstwine #twinecrafts @savedbyloves[pinit]

About two years ago, I discovered baker’s twine and fell a little in love.  Today I am sharing some of the best twine crafts out there, using all kinds of twine, including my precious baker’s!  You will find home decor, jewelry, paper craft tutorials and more.  If we missed a favorite of yours, let us know!  Enjoy and try *knot* to tie yourself to anything!


Privacy Policy