Thrifty Stashy SNAP! Swap

[pinit]SNAP! 2013 Swap for attendees @savedbyloves @snapconf @pluckindaisy

[pinit]

My friend Amy at Plucking Daisies  and I are so excited to be attending SNAP! this year, that we have come up with a way for us all to have some fun and get to kn0w each other before the April event.  If you are attending, this post is for you.  Just sign up in the link list below to participate.  Participate in what, you ask?  A chance to get to know, create with and promote one another before the big event.

WHAT:

Each participant will be randomly paired with another SNAP attendee.  Pairs will be announced  March 1st, so make sure you sign up below by then.

When you find out who your partner is, shoot them an email and let them know what your favorite crafting supplies are, and what you look for when you go junkin’, and your mailing address.

Raid your stash for anything you may want to send your new buddy, and head to the thrift store with them in mind.  Spend a max of $15 on junk, box it up with what you may have found in your stash, and mail to your partner no later than March 8th.

When you get your box of take pictures, create and share on your blog.  You can do a tutorial or whatever you like, and make sure to mention and link to the blogger who sent you your box.  Everyone will receive code for the linky to include at the end of their posts.  That way we are promoting each other both by linking to our partner, and by a link list of everyone’s final posts!

Link to your blog homepage, and include your name and email!


Amazing Hot Wings Recipe

#Recipe for easy to make, AMAZING hot wings from @savedbyloves

[pinit]

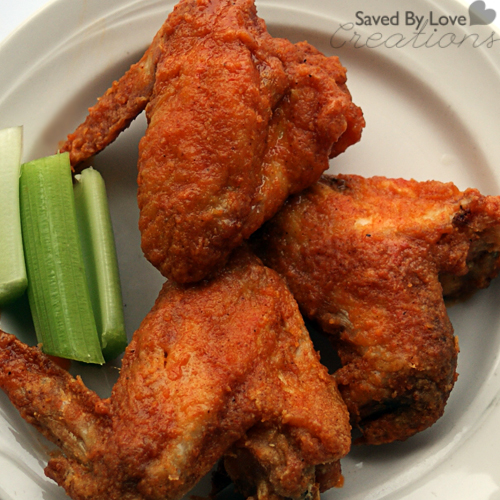
My husband is a chicken wing fanatic to say the least.  I decided I wanted to do something unexpected for him, and one thing he has learned not to expect from me is… well, cooking in general really.  When I do take on the kitchen, it usually involves tossing frozen meat into the crock pot, turning the knob to low, and coming back 8 hours later to retrieve the result.  Ever noticed you don’t see many recipes on here?  There is a reason.  Not my area of expertise or interest.  Usually if I attempt something new, it doesn’t come out exactly photograph and share worthy.  This chicken wing recipe, however, did.  I don’t even like wings normally, and I couldn’t get enough of these.  The aficionado was quite impressed too…

How to make amazing #ChickenWings

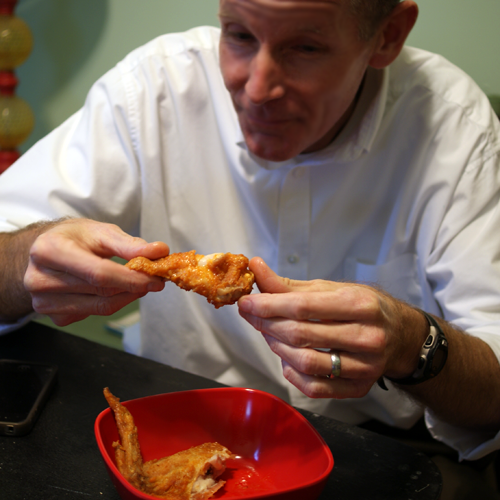
That is his “Oh my goodness, there better me 20 more of these” face.  I was delighted to see how pleased he was with the outcome.  I actually went out and bought this deep fryer (yep, had never used one) for the recipe.  It was only 29.99 at my local Kohl’s, down from $59.99.  The house smelled like a county fair, but it was totally worth it, and we will be having these frequently.

Here is how I did it…

INGREDIENTS

3/4 cup all-purpose flour
1/2teaspoon paprika
1/2 teaspoon cayenne pepper
1/2 teaspoon salt
15 chicken wings
oil for deep frying
1/2 cup butter
1/2 cup Frank’s hot sauce
1 dash ground black pepper
1 dash garlic powder

INSTRUCTIONS

  1. Mix together flour, paprika, cayenne pepper and salt. Place chicken wings in a casserole dish and evenly coat them with flour mixture.  I just sprinkled one side, flipped over and sprinkled other side.  Lots of the mixture will be in the bottom of your dish.  That’s fine. Cover dish with aluminum foil and refrigerate for 60 to 90 minutes.
  2. Heat oil in a deep fryer.  I used Vegetable oil in the Presto Cool Touch deep fryer and filled it to the max line.  This allowed me to cook five wings at a time in the basket in the next step.  I heated the oil for 15 min per instructions with the deep fryer.  There is no temp gauge on this model.  It automatically knows like magic.
  3. To make the wing sauce, combine butter, hot sauce, pepper and garlic powder in a small saucepan over low heat. Stir together and heat until butter melts. Remove from heat and put to the side.  Move on to cooking the wings.
  4. Fry coated wings in hot oil for 15 minutes, or until parts of wings begin to turn brown. Carefully remove from deep fryer.  The Presto has a cool hook that you can sit the basket on to let the grease drain.   Place wings in serving bowl, pour on hot sauce mixture and stir together. I served with celery and blue cheese.

Just writing this post makes me want more!  Now that John knows I can do this, BW3’s isn’t going to cut it anymore.  What are your favorite wing recipes?

Amazing Chicken Wing Recipe from @savedbyloves

[pinit]

Calling all Paper Crafters and Givers

One of my very favorite things about being a blogger is the amazing community and sense of belonging it brings.  I have become so close to so many talented, giving, compassionate and downright good people through this journey.  When someone is in need, we all ban together and do what we can, which is a lot.  With social media amplification of posts, word spreads far and fast, and the result is often overwhelming to the recipient.  That is what I am going for by sharing this story today.  A friend, Rhonda, is in need.  This story tugged at my heart strings in a huge way because my grandmother is my very best friend.  I will give it to you in Rhonda’s words, the way I got it.  The request is so simple.  Just a handmade Christmas card to a woman who is likely about to see her last Christmas here on Earth…

Friends, it is with a heavy heart that I ask you all for a favor this holiday season. This is a picture of my grandma taken at last year’s family Christmas gathering. Grandma was recently diagnosed with lung cancer, news that shook our family. Today the news took a turn for the worse as we found out that her cancer is stage 4 and she has only a couple of months left.

She is understandable depressed going into this holiday season. And I don’t think the reality of it has hit grandpa yet. Knowing that this will be grandma’s last Christmas makes it a melancholy affair. In order to lift her spirits, my mother is trying to get as many people as possible to send my grandparents a Christmas card. I thought it would be lovely for her to receive a whole bunch of handmade cards as well. Th

ere is just something about a handmade card makes it special to open and to possess. I know it’s a busy time of year, but could you perhaps take a moment to make and send a card to my grandmother, to bring some smiles to her last days? And if you see fit, I would be very grateful if you shared this story with your readers, in the hopes that my grandparents’ mailbox is overflowing with love this Christmas. Cards can be sent to: Ed and Betty Vogel
425 E. Coleman Rd.
Clare, MI 48617

Thank you everyone for helping to make my grandma smile!

Friends, it is with a heavy heart that I ask you all for a favor this holiday season.  </p>
<p>This is a picture of my grandma taken at last year's family Christmas gathering.  Grandma was recently diagnosed with lung cancer, news that shook our family.  Today the news took a turn for the worse as we found out that her cancer is stage 4 and she has only a couple of months left.</p>
<p>She is understandable depressed going into this holiday season.  And I don't think the reality of it has hit grandpa yet.  Knowing that this will be grandma's last Christmas makes it a melancholy affair.  In order to lift her spirits, my mother is trying to get as many people as possible to send my grandparents a Christmas card.  I thought it would be lovely for her to receive a whole bunch of handmade cards as well.  There is just something about a handmade card makes it special to open and to possess.  I know it's a busy time of year, but could you perhaps take a moment to make and send a card to my grandmother, to bring some smiles to her last days?  And if you see fit, I would be very grateful if you shared this story with your readers, in the hopes that my grandparents' mailbox is overflowing with love this Christmas.  Cards can be sent to:</p>
<p>Ed and Betty Vogel<br />
425 E. Coleman Rd.<br />
Clare, MI 48617</p>
<p>Thank you everyone for helping to make my grandma smile!
Won’t you join me in sending a simple card?  Let’s spread Christmas cheer where it is desperately needed.  Here is the Facebook Event page, which you can send to your facebook friends to help us get as many involved as possible.  Thank you for reading, and for being a part of this.

Comfort Zone® Products & My Dog

This is a Sponsored post written by me on behalf of Comfort Zone® products for SocialSpark. All opinions are 100% mine.

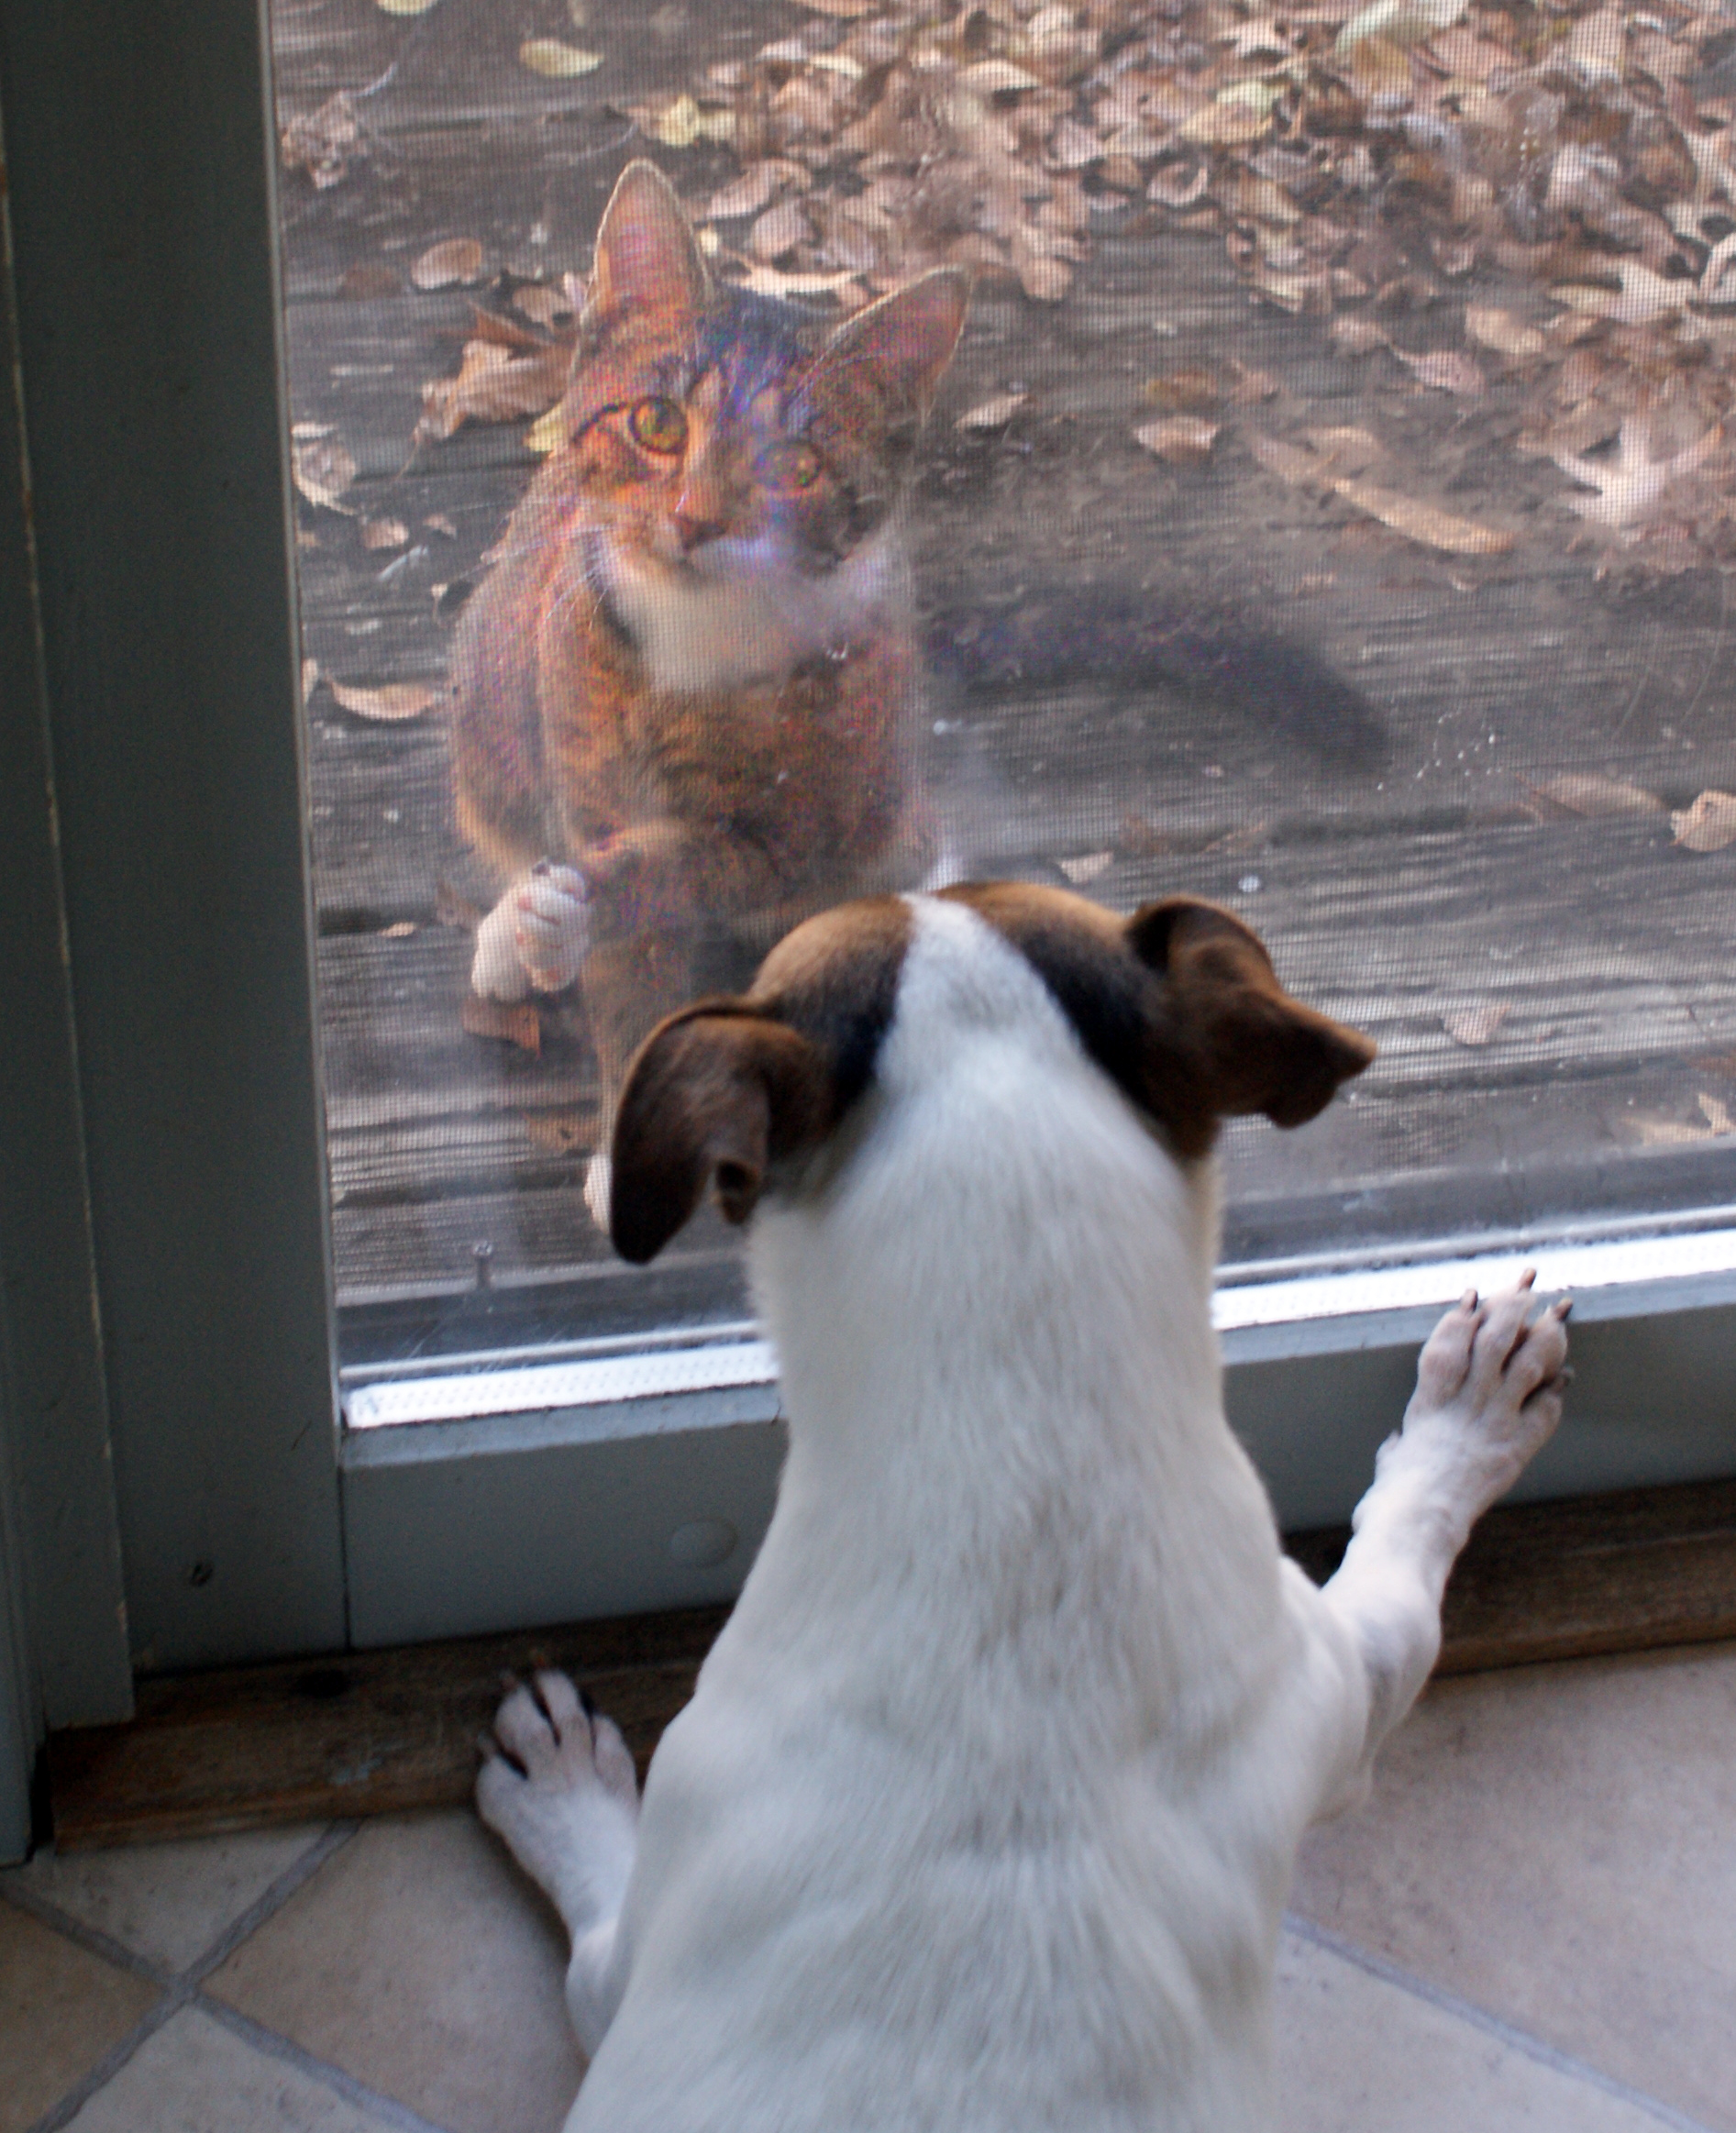
If you have ever spent time with a Jack Russell, you just know they are “energetic” and quirky.  My 9 year old male, Bovie, is no exception to that rule.  He minds well in general, but absolutely never tires, and is on a relentless pursuit to rid the world of cats, skunks, squirrels – pretty much all woodland creatures.  He will wine and pace for hours if a squirrel runs along the fence, scratching at the sliding door with astonishing persistence.  There was the day a kitty wondered onto our porch and just hung out there, watching Bovie freak out…

Oh yeah, and there is something he is convinced lives just behind the baseboard at the bottom of my stairs.  He will scratch and dig at it every chance he gets, until one of us hears the sound of our trim being destroyed and stops him.  I won’t even go into the neighbors that he traumatized when he pulled a Houdini, freeing himself from his collar and cornered their poor cat.    Finally, thunderstorms and fireworks… big time stress for Bovie.  He whines and barks and tries to claw his way out of his crate.  No sleep for anyone on July 4th around here.

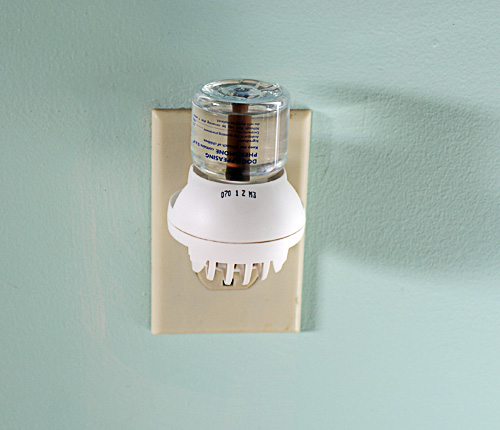
Needless to say, I jumped at the chance to try out Comfort Zone® with D.A.P.® (Dog Appeasing Pheromone).  Stress causes pets to act out with these annoying and sometimes destructive behaviors.   Comfort Zone® products mimick the natural pheromones of cats (there is a feline version) and dogs, which helps them feel calm and comfortable in their space.  This reduces stress-related behavior like digging and excessive barking.

I plugged the diffuser in near the baseboard that my dog thinks is hiding a creature.  You are supposed to have 90 days for full effect, but I have definitely noticed decreased digging behavior, and will be continuing to use the diffuser.  When the next thunderstorm rolls around, I will use the pheromone spray in his crate and let you know if it was helpful.

To learn more about Comfort Zone® Products, visit them on Facebook.

Visit Sponsor's Site

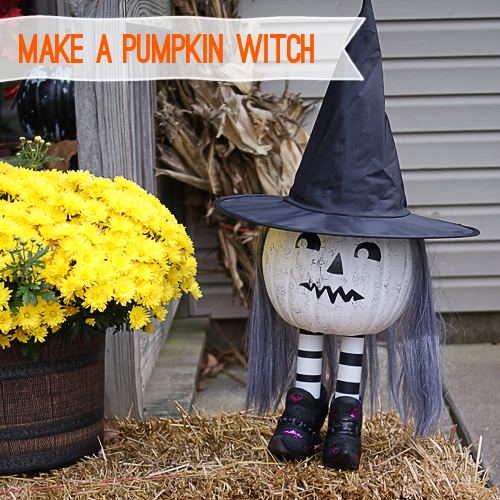
Make a Pumpkin Witch

#HalloweenDIY #outdoor decor; make this easy, adorable pumpkin witch @savedbyloves

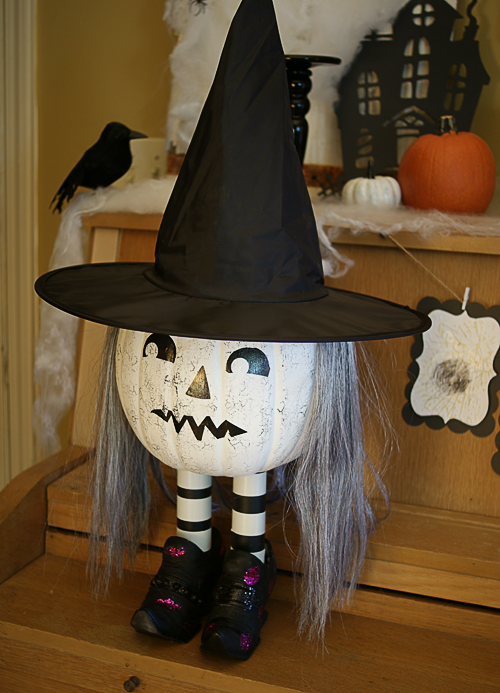
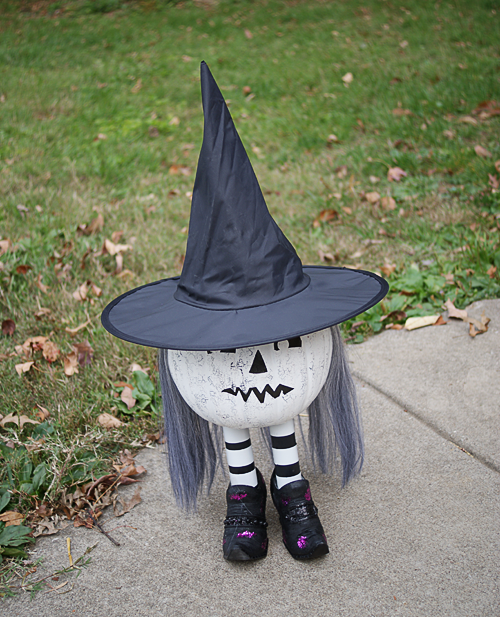
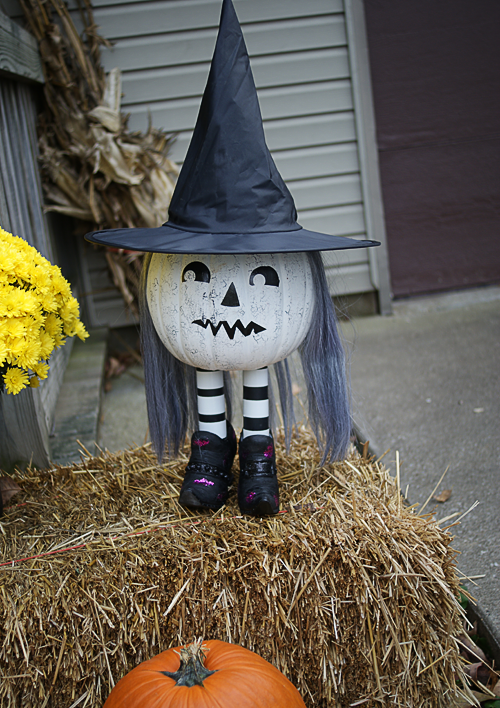
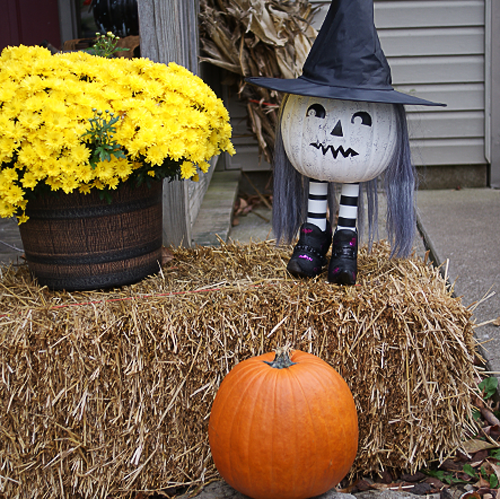
It is time for some outdoor Halloween decor fun.  Last year, I shared with you this harvest bomb.  We surprise decorated my stepdaughter’s house for fall.  We are at it again this year, which is where the pumpkin witch idea was born.  I kinda want to keep her, but that defeats the entire purpose, right?  Read on to see how to make your own!

#HalloweenDIY #outdoor decor; make this easy, adorable pumpkin witch @savedbyloves

SUPPLIES:

Witch Shoes – found on clearance at Michaels

Black vacuum attachment tube, or other tube to fit in shoes

White duct tape for stripes on black “legs”

E6000 industrial glue

Plastic pumpkin, medium size

Martha Stewart Pumpkin Transfers

Witch hat – purchased with hair attached at Walmart for $1.97

#HalloweenDIY #outdoor decor; make this easy, adorable pumpkin witch @savedbyloves

TUTORIAL:

#HalloweenDIY #outdoor decor; make this easy, adorable pumpkin witch @savedbyloves

Super easy!  I can’t wait to complete the Halloween/Harvest bomb and show you the full reveal.  I love her…

#HalloweenDIY #outdoor decor; make this easy, adorable pumpkin witch @savedbyloves

#HalloweenDIY #outdoor decor; make this easy, adorable pumpkin witch @savedbyloves

Curbside Chaos Yard Makeover Results!

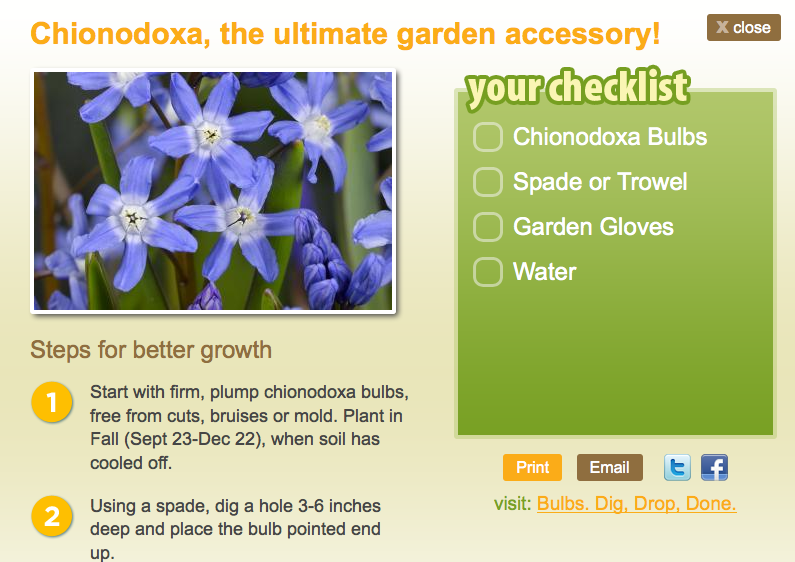
This is a Sponsored post written by me on behalf of Bulbs. Dig, Drop, Done. for SocialSpark. All opinions are 100% mine.

Curbside Chaos, a cool site about all things gardening, picked one lucky winner to recieve a $5,000 yard makeover.  Watch as Ruth from Fairfax, Virginia gets a backyard transformation.

Oh how I would have loved to have won that outdoor revamp.  If only you could see how badly we need it.  I should have entered!  Please Taniya Nayak, come on over anytime.  I love that they incorporated bulbs of several different flowers to bring color pops to the yard.  Bulbs are so simple, just dig, drop, done, and viola… beautiful blooms year after year.

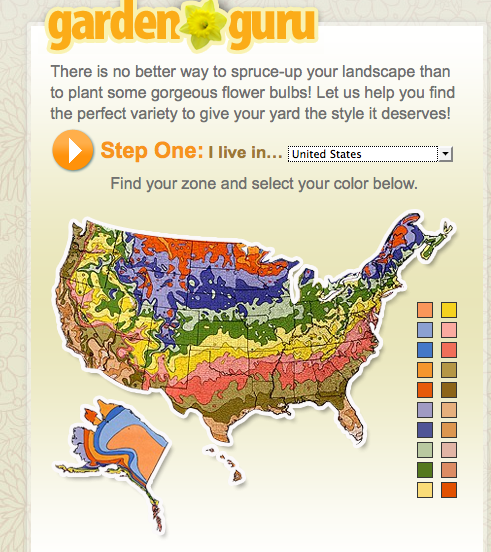
I would be all for that with my makeover.  How about you?  There is a handy tool you can use called the Garden Guru advises you on what bulbs are best for your part of the country and how/when to plant them to bloom when you want.

Here is how it went for me:

Step 1:  Pick your area

Garden Guru Tool

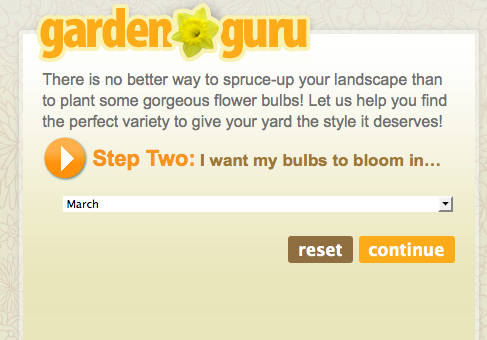
Step 2: Pick when you want Blooms:

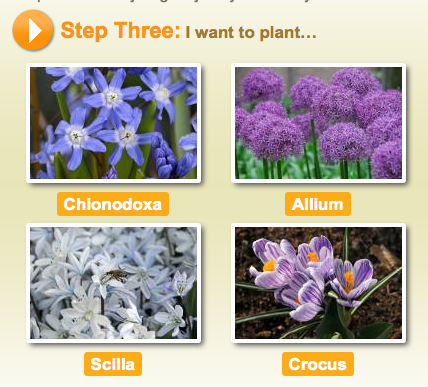
Recommended Bulbs:


You can click on each of the four recommendations for instructions and shopping list!

See how simple?  I am no gardener, and I could definitely handle bulbs.  Besides, bulbs are not just for the gard.  They have so many creative uses to, such as gifts and home decor. 

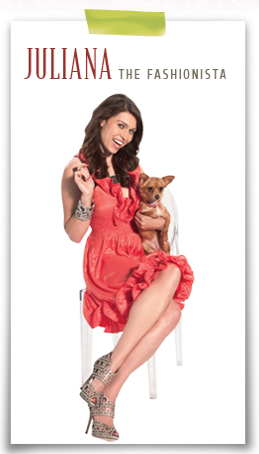
Dig. Drop. Done. has put together a campaign to motivate you to plant bulbs and make your world more beautiful.  There are three characters; Marcy the supermom, Juliana the fashionista and Evelyn the empty nester. I can relate the most to Juliana, who is new to gardening and doesn't want to chip a nail.  I love that her bulbs were so easy to plant that she forgot she did it, and was surprised to see the blooms that spring.  That totally sounds like a "me" moment.  She shows how you can even spruce up your apartment balcony by planting bulbs.  No need for a yard!  The ladies all have tips and tricks, delivered in entertaining, informative, hilarious videos;  visit www.digdropdone.com to learn more

Did you know:  Every Twitter share with the hashtag #CurbsideChaos, "Bulbs. Dig, Drop, Done." donates $1.00 to Rebuilding Together.  This is the nation’s leading nonprofit, working to preserve affordable homeownership and revitalize communities.  Lets tweet this as much as possible and contribute to an awesome cause with a simple click!

Visit Sponsor's Site

Dollar Store Wrapped Bangle Bracelet

Dollar store bangle bracelet #neon #DIY #jewelry #crafts at savedbylovecreations.com

Dollar store bangle bracelet #neon #DIY #jewelry #crafts at savedbylovecreations.com

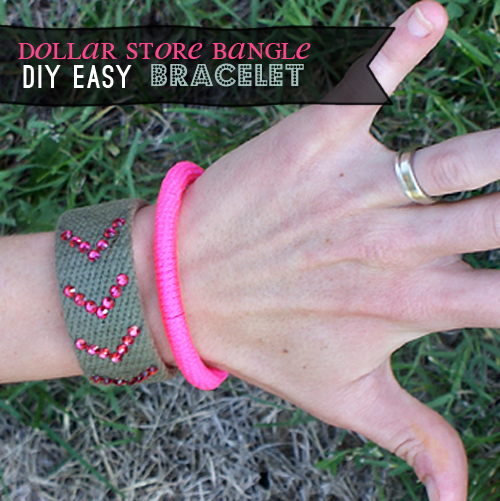
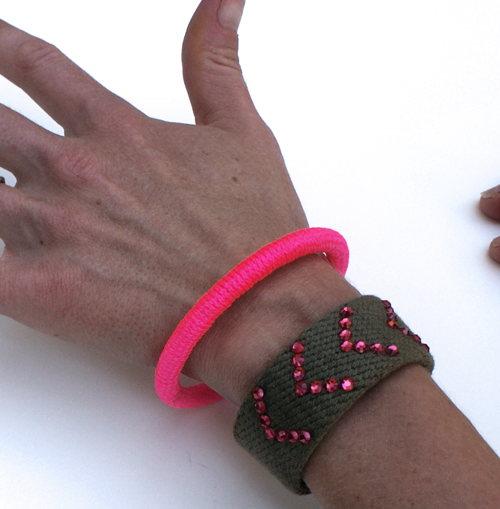
It has been a minute since I made a bracelet to share with you, so here is a neon bangle bracelet for you to make.  This project is all of the things I love; easy, fast, dollar store craft (way cheap).  I got the bangles at the Dollar Tree, 4 in a pack for $1.  The pink neon cord is mason line from Lowe’s.  Seriously, you will be wearing this bracelet 10 minutes after you start making it. Stack em’ together or with different bracelet styles, give them as handmade gifts to your friends, have a girls craft night and crank these pretties out like mad.

Supplies:

Dollar Tree Bangle Bracelets

Mason line in your favorite colors

Scissors

Crafter’s Pick or other strong glue

Tutorial:

Wrapped Dollar Tree Bracelet Tutorial

Stay tuned to see how I made a loom and used it to weave the yellow bracelet!

Guest Post: Beaded Hoop Earrings

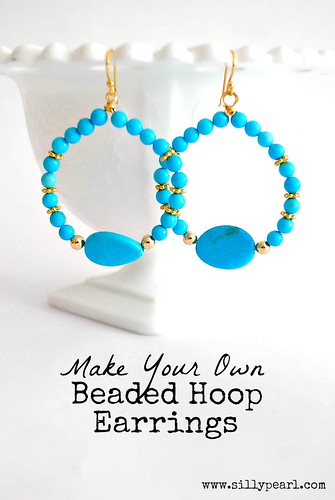
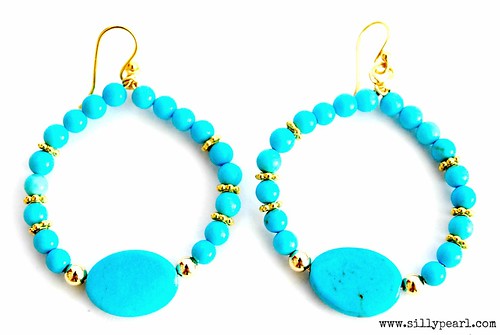
DIY Beaded Hoop Earrings by The Silly Pearl

Today I am thrilled to have Steph from The Silly Pearl here to share with you a fantastic beaded hoop earring tutorial.   She is a multi-talented crafter for sure, but I especially love her jewelry tutorials.  She was in the handmade bridal jewelry business before her twin girls came along, and her experience shines through her projects.  Might I just add that I am all over these earrings.   Thanks Steph!

Hello! My name is Steph from the blog The Silly Pearl, where I write about crafting, thrifting, cooking (and a teeny bit of gardening!), along with my 5 year old twin girls. Thank you so much to Johnnie for having me today on your blog. I was so honored when she asked me to guest post for her this week.

Hope you are having a great Labor Day weekend! Though ironically, my tutorial today doesn’t take much work at all! I’m going to show you how I made these Beaded Hoop Earrings.
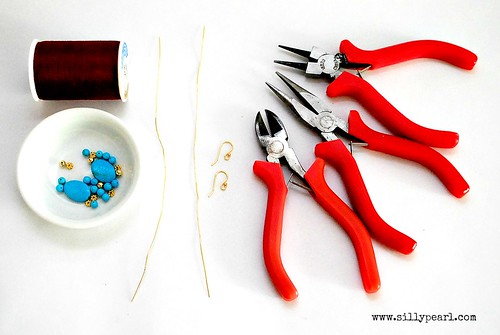
Here’s what you’ll need:

BeadedHoopEarrings1

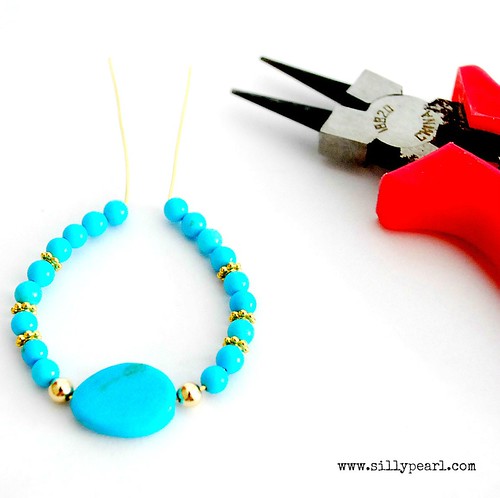
  • An assortment of beads. This depends on the look you’re going for. I have a large focal bead in the middle, so I have two of those. Then I have three other types of beads, symmetrically strung on either side. I got all my beads at a local bead store, but you can find similar beads at Michaels or Jo-Ann.
  • Two pieces of jewelry wire cut to 6 inches each. I used Beadalon 24-gauge round wire, available at Jo-Ann. I would not go any thinner than 26 gauge or thicker than 22 gauge (too thin…it might break with wear, and too thick…too hard to work with).
  • Something cylindrical in shape, like a spool. This will be your template for bending the wire into a round shape. The finished diameter of the earrings is about 1.5 inches, so if you want bigger/smaller, then use a bigger/smaller template.
  • A pair of ear wires. I purchased these from Michaels as well.
  • Jewelry making tools: Flat nose pliers, Round nose pliers, and Wire cutters.

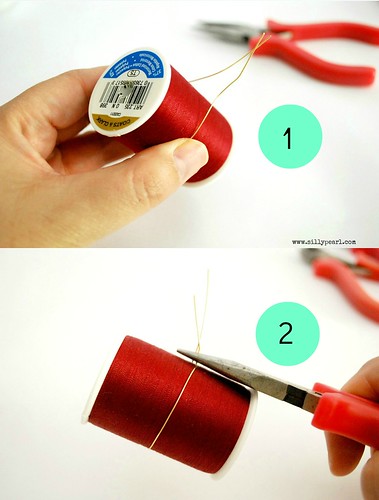
1. Wrap one piece of wire around the spool, so that there is an equal amount of length sticking out, if that makes sense. Then 2. Pinch the wire together so it’s the same circumference as the spool. You’ll be left with a little less than 1 inch of both the ends.

BeadedHoopEarrings2

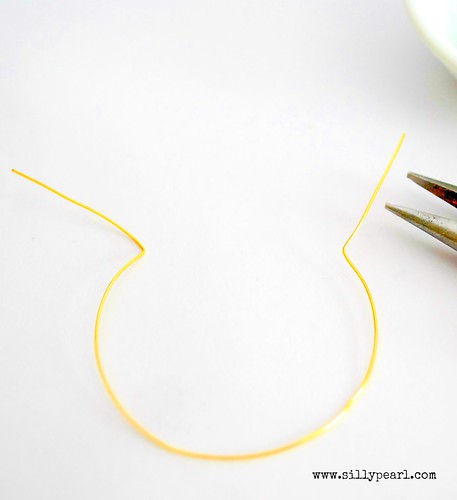
So when you remove the wire from the spool, it will look like this, with two kinks in the wire.

BeadedHoopEarrings3

3. Now you’re ready to start threading on the beads. Use your fingers to gently straighten one of the kinks, enough to allow the beads to thread on. If you’re using a focal bead in the middle, thread that on first. Then 4. Thread on the small beads on one side of the focal bead, until there are enough beads to reach the kink. Next, 5. Repeat the same pattern on the other side, again straightening out the kink a little bit so you are able to thread on the beads.

BeadedHoopEarrings4

So when you have all your beads threaded on, it will look like this. For the next few steps, get your round-nose pliers ready…now I’ll teach you how to wire wrap, but you’ll be wrapping both those end strands (instead of just one strand as usual). To see a better tutorial on wire wrapping than I could ever do, visit BeadStyle Magazine’s wire wrapping tutorial, or check out the last few pages of every paper issue.

BeadedHoopEarrings5

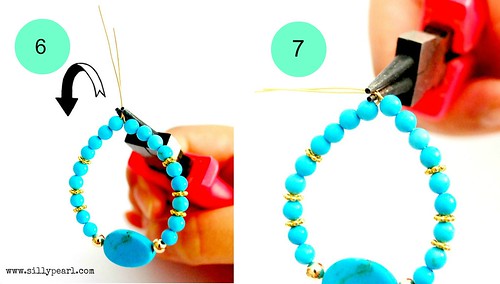
6. Grasp both strands with the round-nose pliers. Then 7. Twist your wrist to one side, bending both wires at 90 degrees.

BeadedHoopEarrings6

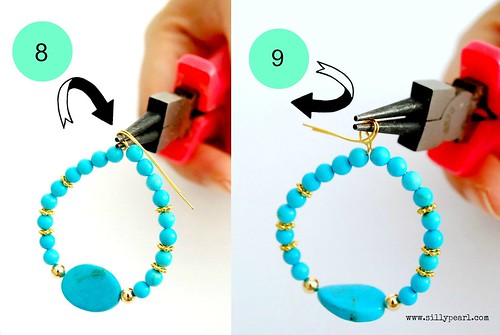
8. Using your fingers, grab both the ends, and loop it around the top of the round-nose pliers. Then, 9. Wrap the wire under the round-nose pliers, remove your pliers from the loop, and insert only the bottom point of the round-nose pliers into the loop.

BeadedHoopEarrings7

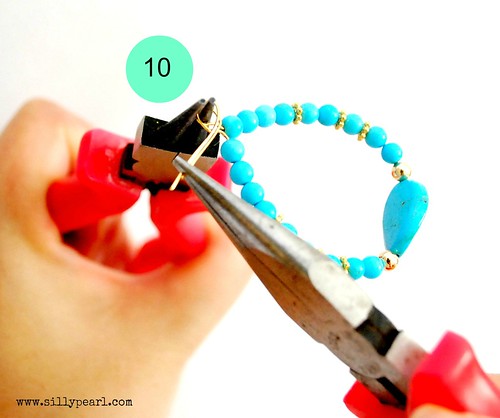
10. Now we’ll start wrapping the ends around the base of the loop to secure the loop. Grasp both ends with flat-nose pliers while you still have the round-nose pliers inside the loop, as described in step 9.

BeadedHoopEarrings8

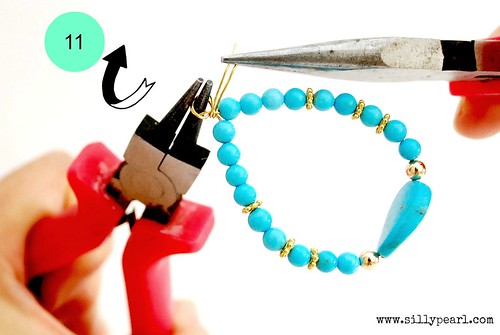
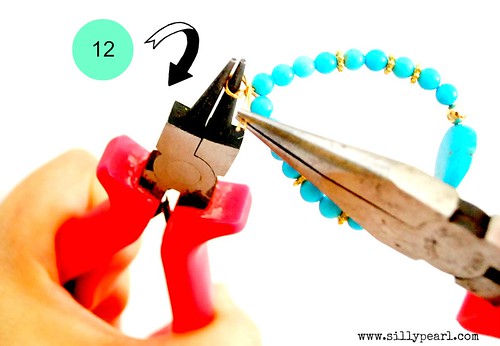
11. Wrap the wire around the base of the loop (there should be a teeny length of vertical wire at the base of the loop, where you formed the kinks earlier, which is where the wire will wrap around).

BeadedHoopEarrings9

12. Keep wrapping a few more times until…

BeadedHoopEarrings10

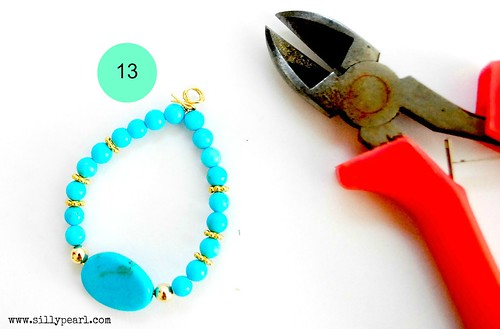
13. You are left with a short length of the wire ends. Next you’ll use your wire cutters…

BeadedHoopEarrings11

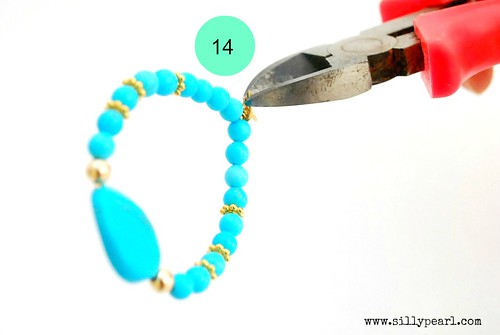
14. …to cut off these ends as close to the base of the loop (i.e. where your wrapped wire is) as possible, without snipping anything else!
BeadedHoopEarrings12

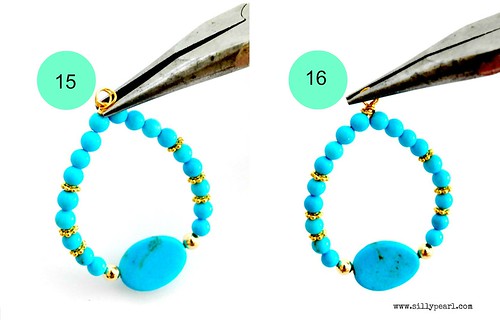
15. Then use your flat-nose pliers to flatten and tuck in those ends so you don’t have anything scratchy or pointy sticking out. 16. You can also use the flat-nose pliers to neaten-up the loops, which you want to try to make as uniform as possible but it doesn’t always happen! It’s ok…it looks rustic, right?

BeadedHoopEarrings13

16. Finally, take your earring wires. On the left in the picture below is a closed one. Usually with ear wires, you can open the loop to slide on your finished piece. Slide open the loop with your flat-nose pliers, like you would open a jump ring (see the BeadStyle Magazine link above for another tutorial on how to open jump rings with a sliding motion, which you would also use to open the earring wire loop).

BeadedHoopEarrings14

Repeat for the 2nd earring, and you’re done.

Beaded Hoop Earrings

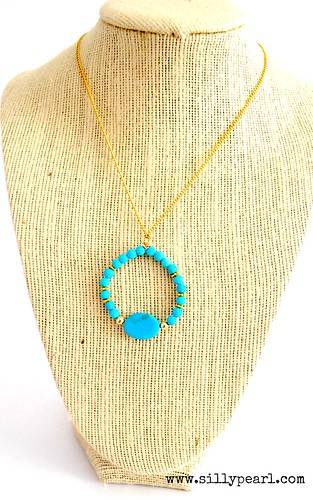
You could also make a pendant…instead of using earwires, just thread a chain through the loop.

Beaded Hoop Necklace

If you enjoyed this tutorial, I hope you’ll stop by my blog, The Silly Pearl, for more! I not only make jewelry, but enjoy almost every other type of craft.

TheSillyPearl

Again, thank you so much Johnnie for having me on your lovely blog today!

-Steph-

Motivating Facebook App by Tom’s of Maine

This is a Sponsored post written by me on behalf of Tom’s of Maine for SocialSpark. All opinions are 100% mine.

Tom's of Maine

Do you tend to make plans to be more eco-friendly, healthy, kind, giving, hard working, & productive, but find it difficult to carve out a spot in each day for all these aspirations?  If so, you are not alone.  Finding balance in this world of constant stimulation is not easy.  I am a fan of anything that can encourage me to be a better version of myself.  Every little bit helps.  That is why I appreciate Tom’s of Maine Good First application on Facebook.

This app begins by posing the question “What did you put first today that made you feel especially good?”  You answer by choosing from the following 5 options;

  • Helping People
  • Helping Animals
  • Healthy Eating
  • Healthy Living
  • Caring for Mother Earth

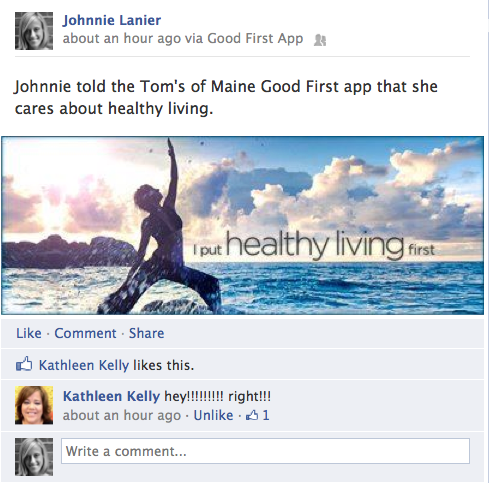
What I like about this is that when I see the list of 5 categories of positive actions, it gets my mind going in the right direction for the day.  Not only that, but it keeps me accountable to my FB family by sharing my answer on my timeline.  The first time I used it, I had a friend comment and share with me that seeing the "put healthy living first" photo posted by the app on my timeline gave her the boost she needed to get off the couch and go for an evening run.  The app will also show you any friends who have chosen the same category.  How cool! 

Here is what the post looks like on my timeline.

Good First App Tom's of Maine


This is a fantastic tool to help keep attributes you want to manifest at the forefront of your mind throughout the day, while inspiring and learning more about your Facebook friends. 

What are you doing to be your best?  I would love to hear your stories.  You inspire me! 

To keep up with Tom's and all they are doing to create a healthy, happy Earth, join me in following them here:

Tom's of Maine on Twitter

Tom's of Maine on Pinterest


Visit Sponsor's Site

Video: DIY Beaded Macrame Bracelets With Mod Podge Charms

Beaded Macrame Charm Bracelet Tutorial

Make Beaded Macrame Charm Bracelets

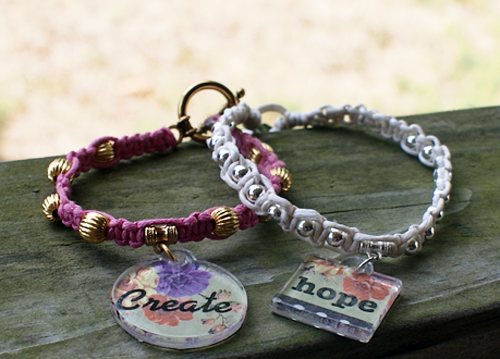
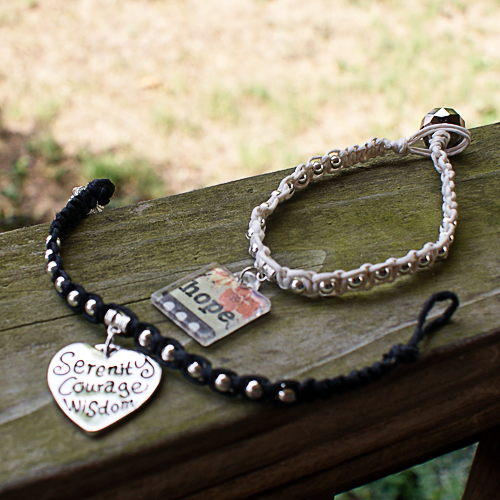
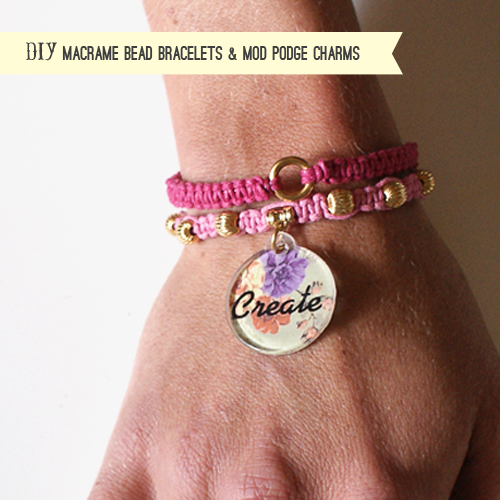
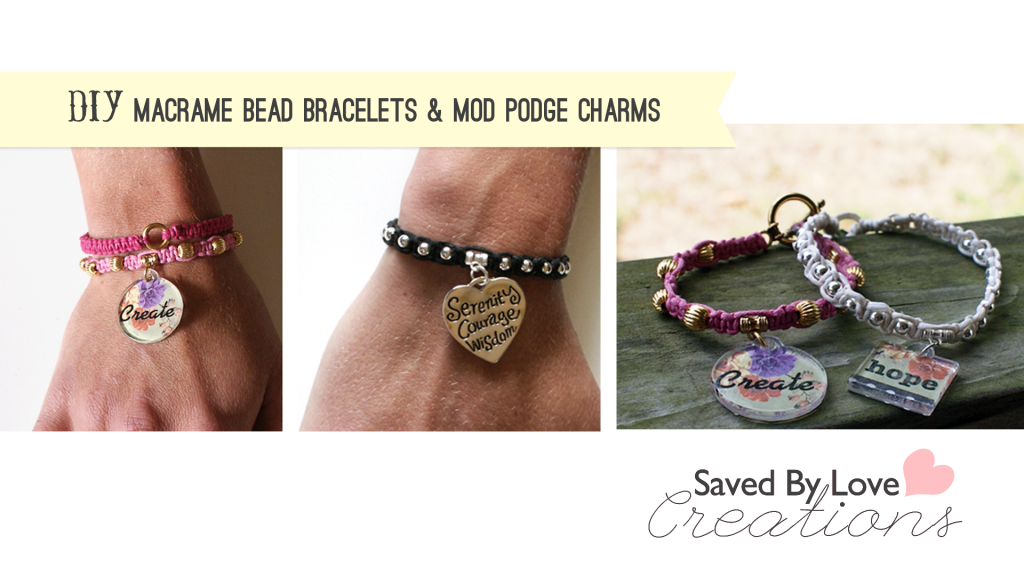
Have you had a chance to play with Mod Podge’s new Podgeable Papers and Shapes?  I used the nature pack to create these cute charms, which I attached to beaded macrame bracelets I made.  This video tutorial shows you how to make the charm ready bracelets and the charms.  Attach a clip to the jump ring to make them interchangeable and swap them out to fit your mood.

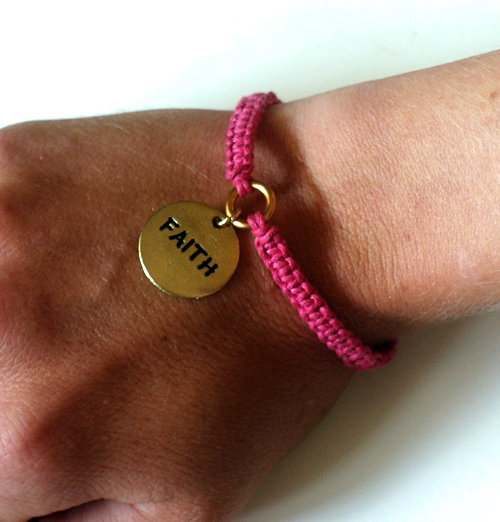
Any kind of charm will work, if you aren’t interested in making custom pieces.  Here are a couple of metal charm macrame bracelets:

On to the video:

Macrame Beaded Charm Bracelet Tutorial

Privacy Policy