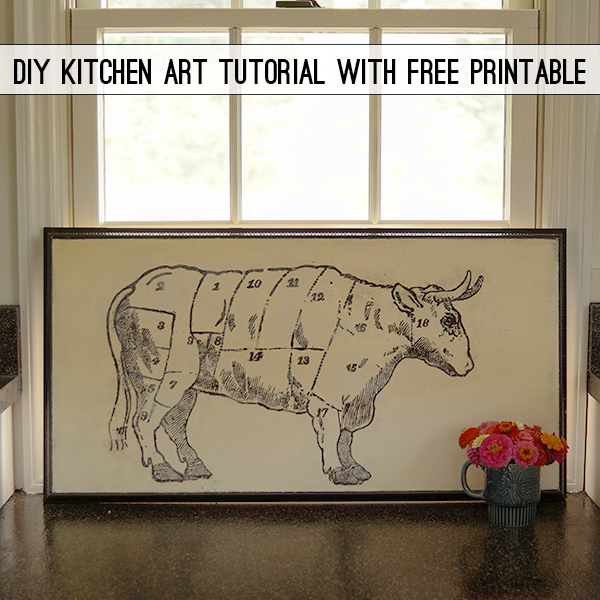
DIY Butcher’s Chart Cow Vintage Kitchen Art With Free Graphic

[pinit]DIY Kitchen Art Tutorial With Free Printable Butcher Cow Art @savedbyloves[pinit]

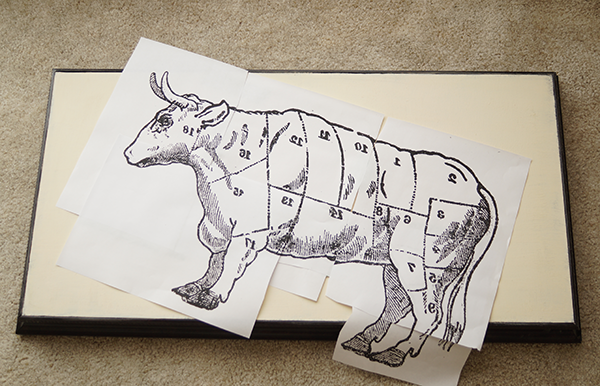
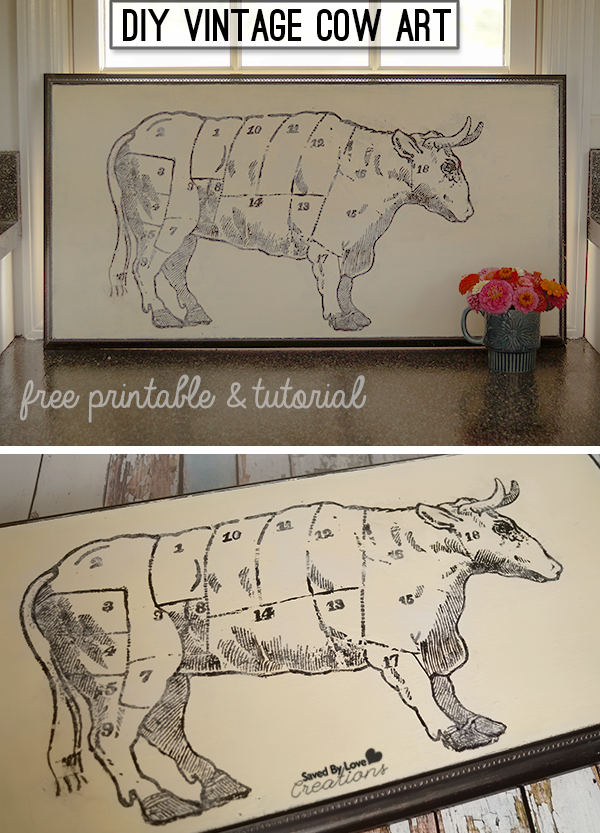
Vintage kitchen art in the form of the butcher’s beef chart is tops in the design world these days.  That is why I was thrilled to score a cookbook from 1898 with the perfect image for such a piece!  I scanned it in, cleaned it up in Photoshop and enlarged it to fit a 28 in x 14 in piece of art scored from a garage sale.  This tutorial shows you how to transfer a large image to a chalky finish surface, and provides the butcher beef chart cow art for you to download for use in your own projects!

SUPPLIES:

Vintage Butcher’s Beef Chart Image  (Click link for image download page)

Image transfer kitchen cow art

Paint brush

Chalky Finish Paint by DecoArt in Whisper

Image Transfer Medium

Clear Wax DecoArt

Laser Printer and Photoshop or other editing software

Painter’s Tape

Spray bottle with water or cup of water

Image Transfer Cow Butcher Art

TUTORIAL:

Image Transfer Vintage Cow Butcher Art

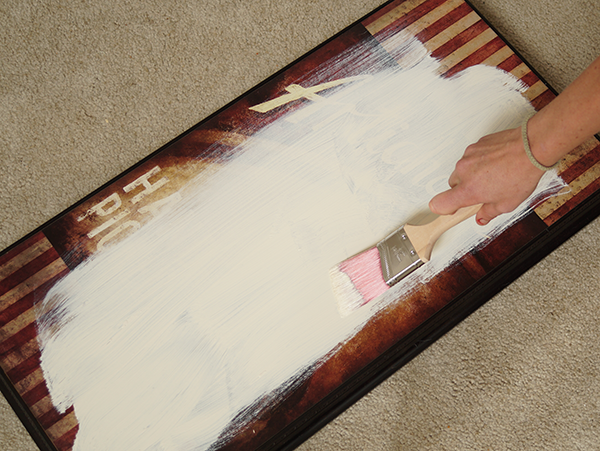
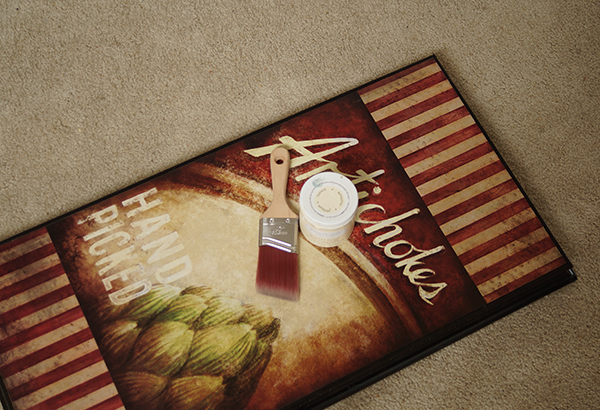
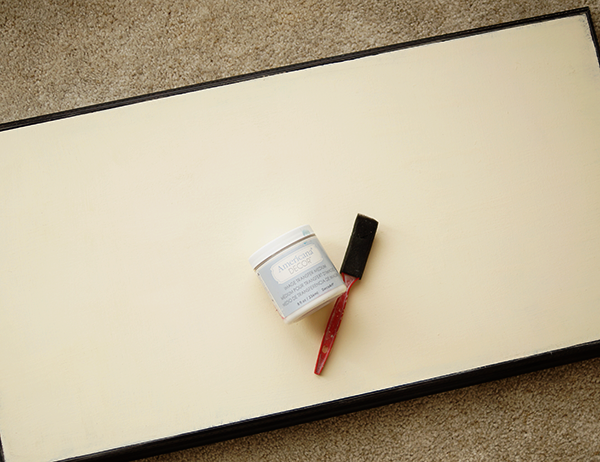
Prepare the surface for the image transfer by painting with Chalky Finish in your choice of color.  I used Whisper.  It took 3 light coats with 15 minutes of drying in between to cover the image on the garage sale art.

While that is drying, prepare your image.  I resized mine in Photoshop to fit the 28×14 inch recipient surface.

 Make sure you reverse the image before printing it so the numbers won’t be backwards in the transfer!

If you are making art larger than your printer will print, you will need to print it in sections and tape it together like I showed you in the video found here:

DIY Rustic Sign Tutorial Using DecoArt Chalky Finish Paint

How to Make Vintage Wall Art

Print the sections, align them and tape together on the back with painter’s tape.

Chalky Finish Home Decor Project Vintage Kitchen Art

Large Art Image Transfer Tutorial

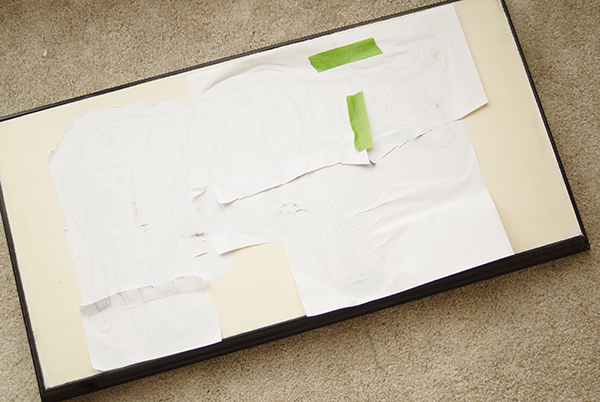
Paint the surface with a thin layer of Americana Image Transfer Medium, and paint the ink side of the image to be transferred with the medium too.  For more detail on using this product, see my Vintage Image Transfer Coaster Tutorial shared at Printable Decor.

How to do an image transfer

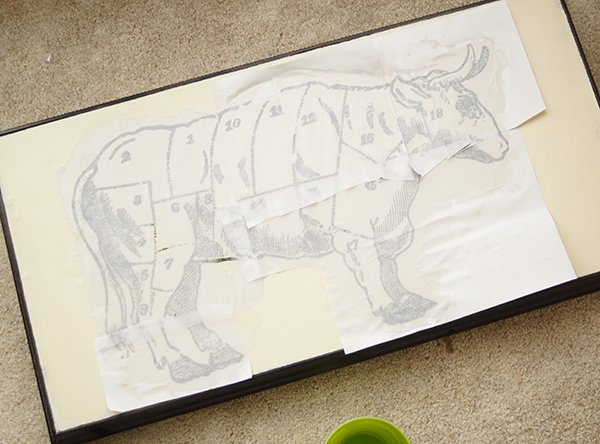
Spray water on the back of the printed image and let soak for 3-5 minutes.

Rub paper backing away with your finger tips (there are detailed pictures of this in the graphic coaster tutorial linked above).

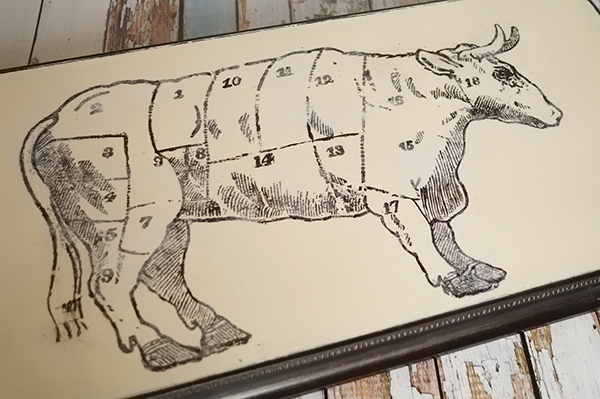
Seal the piece with clear wax and you are all set!

DIY Kitchen Cow Art Tutorial With Free Printable Butcher Cow Art @savedbyloves

Check out more cool ideas in our 50+ Image Transfer Projects

Easily Screen Print Custom Designs with Lumi Inkodye; Video Tutorial

[pinit]How to Make a Custom Print Tshirt with @lumi inkodye @savedbyloves[pinit]

How to Screenprint

This year at CHA, I saw so many amazing new products that I am busting at the seams to tell you about, and this is one of my favorites!  Watch the video to see how you can use Lumi Inkodye to make prints on natural materials.  I found this white cotton t-shirt at Walmart for $4.88 and came knew it would be perfect to try out this cool product.

Inkodye Lumi Screenprint

I made this negative in Photoshop and printed it on Lumi’s transparency film.

Lumi

Using the DIY Printing Kit in Blue, I followed the steps in the video below to make my custom logo tshirt!

Lumi Inkodye Tutorial

I used a baking pan as my flat surface and pinned my negative on top of the area coated with the solution.

Lumi Inkodye Tshirt

After 10 minutes in the sun, I had a great print. Make sure you wash in the detergent after bringing inside, so the developing stops!

This was so easy.  Look at the detail in the text!  Super impressive.  I am doing more prints as we speak.

Now for the video DIY straight from the Lumi Booth at CHA 2014…

How to Make a Custom Print Tshirt

DIY Hand Painted Christmas Sign with Printable

[pinit]
Merry and Bright DIY Sign with printable template and video[pinit]

These hand painted rustic signs are a little addictive, and pretty easy to make.  Pam from Little Red Porch came over and showed us her technique in this  DIY Rustic Wood Sign .  I made a video showing you how to use Photoshop to print your text in sections so you can tape them together for transferring large art to wood in this Americana Chalky Finish Paint Sign Tutorial.  Today I am sharing this Merry and Bright sign, as well as the text file for you to print off to create your own like I showed you in the links above mentioned.

Merry And Bright Handpainted Christmas Sign


To download the printable, right click the thumbnail and the full resolution file will pop up for you to print.

 Merry and Bright Printable Template


Instagram Photo to Uprinting Rolled Canvas

Instagram to Canvas

Do you wish you could have your Instagram filtered photos on a big canvas to display, with0ut spending big bucks?  UPrinting canvas prints are the way to go.  You apply a free Instagram Photoshop action to your photo, upload it to the UPrinting site to get a rolled canvas print for half the cost of a stretched canvas print, and mount it on a garage sale or thrift store painting with Mod Podge!

Here is how I did it:

Download and install Daniel Box’s free instagram Photoshop Actions

Instagram Canvas Print

Photo to Canvas Print

How great is this?!  When I got my rolled canvas print, I was absolutely amazed with the quality.   The canvas is thick and tough, the print just like the file I uploaded.   The user interface and ordering process at UPrinting.com are super user friendly and hassle free.   At such reasonable price, I will be ordering  more.

Join me in following UPrinting on Facebook, Twitter, and Pinterest.

Disclosure:  I received product and payment for this post.  All opinions expressed in this post are honest and mine.  I believe in everything I promote.  My readers are first.

See what others are doing with these great rolled canvas prints:


Photoshop Tutorial and Free Printable Spring Subway Art


Head over to Printable Decor for this spring subway art printable and Photoshop tutorial detailing how you can easily change the color scheme and size to fit right in with your spring decor.

I cover using crop to quickly resize, as well as altering the hue of the entire photo, of just the blue, and turning the image into a monochrome.

Exciting stuff, I know!  You can use what you learn to alter freebie printables and your own images to complement your style.

Spring Chevron Subway art printable

Spring Chevron Subway art printable

If you like subway art and Photoshop tutorials, check out this detailed post on how to make your

own subway art.

DIY Painted Pop Art

Photo to Pop Art

{This post was originally shared at Infarrantly Creative}.  One of my very favorite things to do is design in Photoshop.  In fact, I picked it up way before ever tackling painting… you know, with actual paint and a brush, in hand.  Today we are going to do a bit of both, in this acrylic painting right on the glass from a picture frame.  So, grab your favorite photo, lets tweak it a little Photoshop (beginner level, I promise), and use it to guide us in painting our own Warhol style pop art portrait.

Supplies:

  • Photoshop
  • Digital image file
  • Picture frame with glass
  • Rubbing alcohol
  • Acrylic paint in white and a deep, vibrant color of your choice
  • Fine paint brush for detailing, larger brush for dabbing (sponge or stencil brush) and one in between
  • Masking tape
  • Newspaper to protect surface
  • mixing palette for acrylics (paper plate or cardboard)
  • Heat tool (optional)

Instructions:

How to make pop art

Free tutorial for Photoshop

For width and height, you want to put in whatever your frame size is, which needs to be a size your printer can print.  Here, I went with 8×10 inch.  For the purpose of this project, set resolution to 300 ppi (field shown in above pic after width and height).

pop art with photoshop

After cropping, duplicate the background layer (I don’t like to directly edit the background layer in case I need to go back to it).  You can select duplicate from the layers palette window, or better yet, hit Command (Control for Windows) and the letter j at the same time…

pop art

Now desaturate the image (turn to black and white) with keyboard shortcut Command (Cntrl on windows) + Shift + the letter u.  I removed the background layer out of habit.  We don’t need to do this since the digital image is not our final piece of art.  Just leave it in and ignore it in the painting part (which will make sense soon).  After you desaturate, duplicate (control + J) the layer and rename it “Subjects”.

pop art tutorial for photoshop

photoshop tutorials pop art

Free photoshop tutorial

Photoshop beginner tutorial

pop art in photoshop

Open the Levels adjustment window and move the white and gray triangles around to get a photo with white, black and 2-3 shades of gray.  The black triangle on the left can stay put…

andy warhol pop art

photo shop tutorials

Now you are ready to print your image on just regular copy paper.

*NOTE:  If having the final portrait in the same orientation as the digital file is important to you, you will want to horizontally flip the image before printing it.  You can do this in Photoshop by going to the top left of the screen in the horizontal toolbar;  Go to EDIT—>Transform—>Flip Horizontal.

Remove the glass from the frame and clean it with rubbing alcohol and a lint free towel.

pictures pop art

On protected work surface, place print face up, then line up the glass on top of this…

tutorials on photoshop

Tape glass to print to keep it from shifting while you paint.

tutorials on photoshop

Now you are going to paint right on the glass, in layers – one color at a time.  First with white, then your color, then a light shade of your color and finally a darker shade of your color.  You must let each layer dry completely before moving on to the next to avoid unwanted blending.  I use a heat tool fot this, but you can let it air dry if you want.

First, the white…

Painting on glass

Now the color, as is, you will shade in the darkest areas.  These are the areas that are black in the print.  Use a light weight, taper point brush and create texture where hair frames the face and at the eyelashes and brows.

glass painting

le pop art

Now the light shade of your color, which you make by adding a couple of drips of your color to about a tablespoon (really… a tablespoon?) of white…

paint glass

Reminder to dry between layers…

Warhol a photo

And now that the paint is dry…Painting portrait

Now for your final layer.  This is a darker shade of your color (darker than the light shade, but not darker than the original color), made by mixing less white, more color than you did above.

Painting with Acrylics

Acrylic painting

Finally!  Flip the glass over and check out your masterpiece…

Pop art painting

See how it is reversed horizontally from the image?  Something to keep in mind, especially if there is text in the image you are painting.  Frame it and you are done.

Here are a couple more I did with the same technique.

DIY pop art pictures

Photo to Pop Art

These are a big hit, quite inexpensive to make and work up in less than an hour (especially if you use a heat tool to dry between layers).  I grab frames to have on hand while at thrift stores and flea markets for just this kind of thing.  Photos to pop art digitally is fun, but there is a different kind of  satisfaction that comes with getting paint all over the place once in awhile, right?  I love that you don’t have to be at all skilled in painting to get a cool effect (I am living proof)!

Another great idea to do with a photo is to have a photo mug made, which you can do inexpensively and without the mess of acrylics!  Find out more.

Thanks for checking out my project.  I hope you are inspired to create your own.

Customizable Monogram Wedding Printable With Tutorial

How to make a monogram

Do you want to skip the registries and opt for a unique, personalized wedding gift that is sure to stand out as a treasured token of the special day?  In this article you will find a free digital download of the layered photoshop file used to make the framed monogram you see here, as well as a simple, detailed photo tutorial showing you how to personalize the text for your bride and groom.

You will need:

  • Photoshop and a basic understanding of how it works.
  • A color printer and glossy photo paper, or a printing service
  • Square picture frame

DIY Wedding Monogram

Tutorial:

  • Download the file I created in photoshop, here.  Unzip and open the file in photoshop.
  • Select the text tool in photoshop either by clicking the T in the vertical toolbar on the right, or by hitting ‘t’ on your keyboard.  The text of the image is separated into 3 layers as shown in the picture below.  Double  click the top text layer thumbnail to select the date text, then type in your desired text.  Repeat for the remaining 2 text layers.

Photoshop Monogram Tutorial

  • Now you have changed the date, the couple’s names and the large surname initial layer in the background.    You can further customize to your liking by changing the color of the overlay effect under layer “Background Copy” as shown below.

Photoshop Text Tutorial

  • Now you will need to size the image to fit your frame.  The original size is 6.75 x 6.75 inches at 300ppi resolution (optimal resolution for highest picture quality).  To do this, click on “Image”, then “Image Size” in the photoshop horizontal toolbar.  Change the size to fit your frame in the window as shown below.  Photoshop text tutorial

Photoshop text tutorial

  • Now you are ready to save the file; In toolbar, go to “File” then “Save As”.  You will get the following window.  Save as jpg or pdf as shown.

Photoshop text tutorial

Print at home or use your favorite printing service.  I absolutely love how this turned out, and it took no time at all.


Privacy Policy