DIY Winter Felt Tree

Hi, I’m Vidya from Whats Ur Home Story. Very excited to be a monthly contributor at SBLC. I blog about how our family of 4 is turning a cookie cutter into a unique and interesting home that tells our story. I believe that no project is too small to try be it home decor, DIY, crafts, gardening, sewing, or organizing.

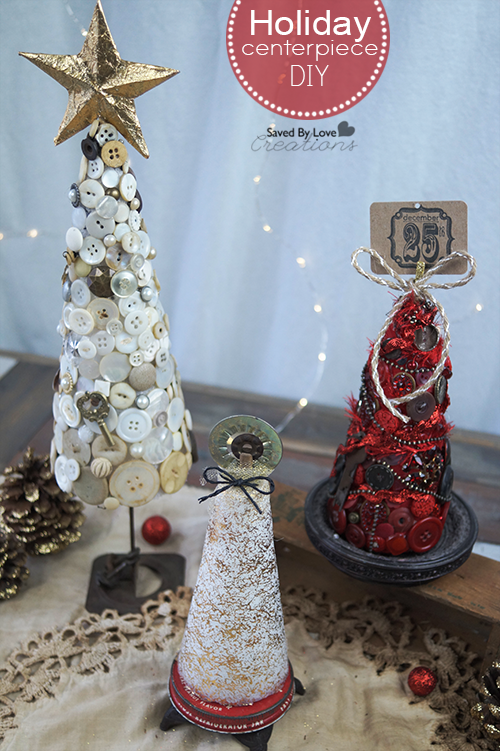
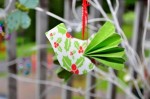
Today I would like to share with you an easy winter craft, a winter felt tree.

[pinit]

Winter felt tree, diy paper cone trees tutorial, paper cone Christmas tree @savedbyloves

[pinit]

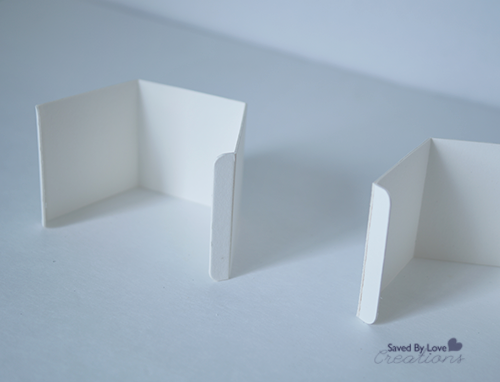
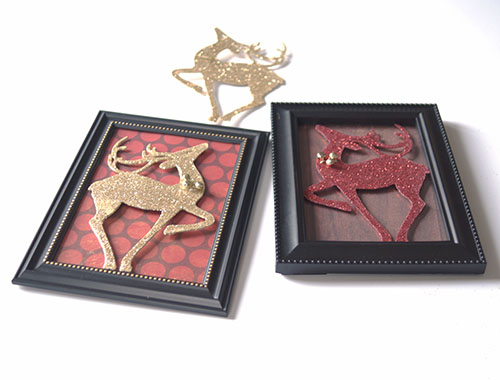
I made both the trees myself but the one on the right is by far the easiest and most forgiving project I’ve done.
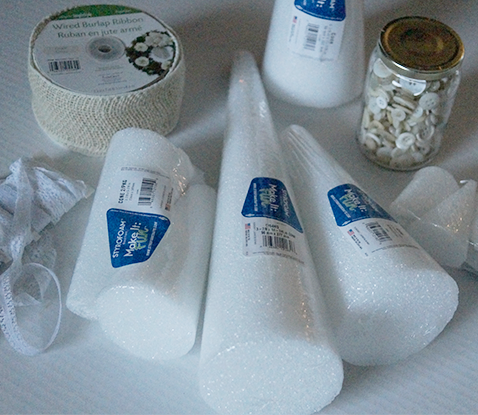
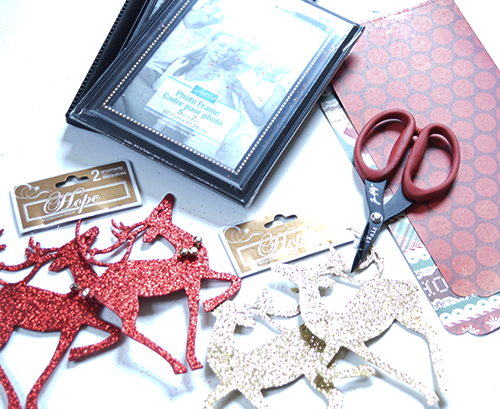
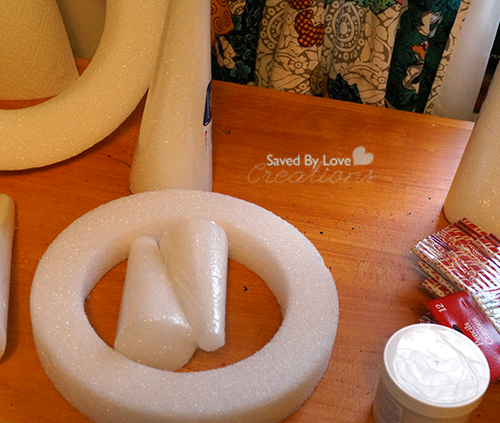
Materials

 
White Felt
Paper mache cone or you could make a cone out of poster board
Scissors
Glue gun
White craft paint and brush – not necessary but if you are a sloppy crafter like me you’ll need it.

Winter felt tree, diy paper cone trees tutorial

Tutorial

 
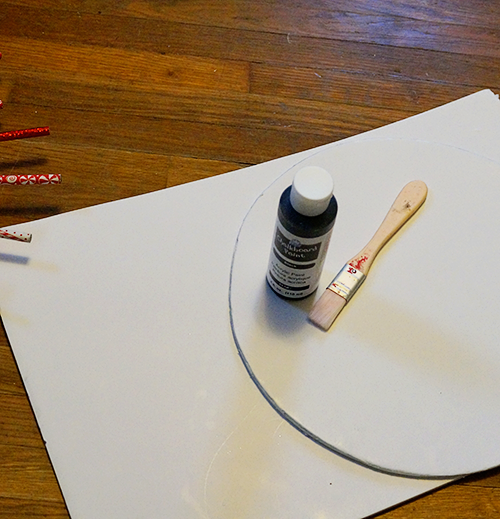
  • Start by painting your brown paper mache cone white with the acrylic craft paint. This way the brown base will not show through any hot glue misses later on.††If you are using a poster board cone, skip this step.
  • Cut felt strips in varying widths. My cone was 14″ tall. So I ended up using four 1 inch strips, two 3/4″ strips, two 1/2″ strips, and a small 1/4″ strip. It is important to lower the width of the strip as you go up the tree to simulate the look of smaller leaves on the top and wider leaves on the bottom. These are not exact measurements, I just eyeballed them.
  • Cut out triangles on one side of the strip as shown below. Take care not to cut all the way through. Again no need to be precise here, just free hand.

Winter felt tree, diy paper cone trees tutorial

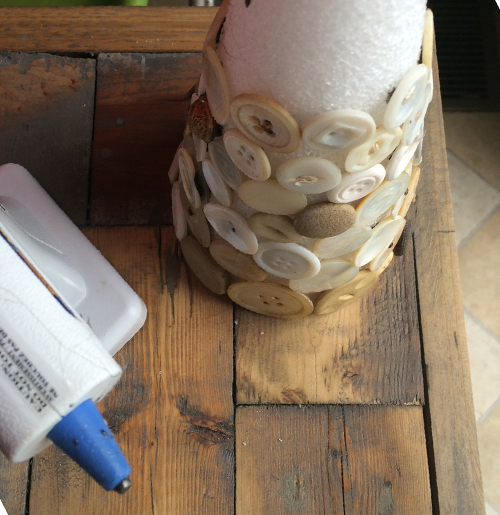
  • When you make these you will end up with a lot of felt triangles (the parts that you remove from your strip). I didn’t want to waste these so for my first layer on the tree I hot glued each of these to the base. If you are not a fan of gluing each petal down you can start with the strip instead.

Winter felt tree, diy paper cone trees tutorial

  • From then on hot glue each strip around the tree making sure there is some overlap between the layers.

Winter felt tree, diy paper cone trees tutorial, paper cone Christmas tree

  • Remember to switch to the thinner strips as you go up the tree. When you reach the top cut the extra felt off and carefully hot glue the felt to cover the pointy top.

Winter felt tree, diy paper cone trees tutorial, paper cone Christmas tree

  • No worries if there are any empty spots where the paper cone base is visible. You can use the extra triangles that you removed when you made the strip intially to cover up these spots.

Winter felt tree, diy paper cone trees tutorial, paper cone Christmas tree

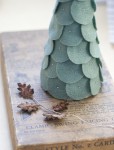
  • Gently fluff up the ‘leaves’ and you are done!

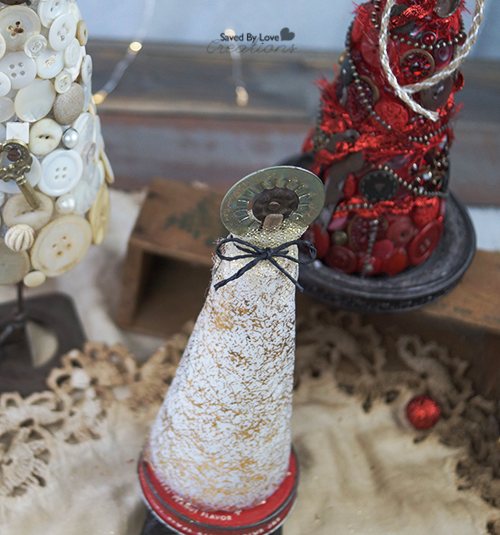
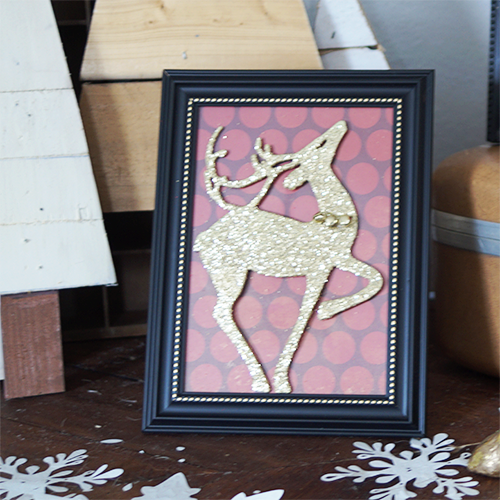
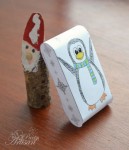
Here’s it is adding glam to my rustic winter mantel.

Winter felt tree, diy paper cone trees tutorial, paper cone Christmas tree, rustic winter mantel

Hope y’all enjoyed this fun wintery craft. For more easy DIY ideas stop by Whats Ur Home Story or follow me via Facebook, Pinterest, Twitter, or Instagram.

How to make Christmas Stockings from Recycled Tea Towels

[pinit]

Sew Stockings Burlap[pinit]
Bringing you back a blast from the past.  I am not a seamstress, it’s no secret.  You will be able to whip up these adorable burlap, lace, tea towel stockings even if you are scared of your sewing machine!  Enjoy.

These Christmas stockings are made from canvas tea towels from Target, the same towels I used to make this stenciled pillow a few posts ago.   Two of the towels made all seven.  If you are looking for a quick, easy, inexpensive sewing machine project for your stockings this year, you are in luck.

Supplies:

  • Tea towels or canvas drop cloth
  • Fabric Scissors
  • Stocking Template (click here for the one I used)
  • Pencil for marking fabric
  • Straight Pins
  • Jute or twine
  • Embellishments of your choice

Burlap Christmas Stocking Pattern

Instructions:

  • Print stocking on to heavy paper and cut out
  • Iron fabric and trace stocking onto towel folded in half.  I used the seams already in the towels as the top of my stockings.  Cut shape from front and back halves at same time.

Christmas Stockings Pattern

Christmas Stockings tutorial

  • With right sides together, pin in place.  Loop a 2 inch piece of jute on the top at the heel side for hanging your stocking and pin in place.  Double back over the twine while sewing to make it extra sturdy.

DIY burlap stockings

  • Turn stockings right side out and embellish as desired.  I printed on burlap for the text, pieces of scrap towel and lace on mine.

Christmas Stockings Pattern

Handmade Christmas Decorations

Christmas Stocking Pattern

DIY Vintage Holiday Centerpiece With @Floracraft Foam Trees

[pinit]Holiday Centerpiece using found objects and vintage buttons on @floracraft Styrofoam trees @savedbyloves[pinit]

Styrofoam Christmas Tree Centerpiece Vintage Buttons DIY

The holidays are here, and many of you are busy planning decorations and meals.  Today I am sharing with you an easy DIY holiday centerpiece using vintage buttons, found objects and Styrofoam™ cones.  This is the perfect project for using up those antique embellishments I can’t resist buying every chance I get!

This post is sponsored by Make it Fun: Crafts and Crafts ‘n Coffee!  All opinions are mine.

SUPPLIES:

Floracraft Christmas Centerpiece Using Stryrofoam

Styrofoam™ cones in 3 sizes

Hot glue gun

Vintage buttons, twine, lace, ribbon, doilies, hardware

Decorative eyelets, pearl and jewel stickers in creams, whites, golds and reds

Gold and white tissue paper

Mod Podge

TUTORIAL:

how to make a vintage button christmas tree

For the white button tree, I randomly hot glued buttons from the bottom to the top.  I made a paper foil star with my Tim Holtz 3D star die  and attached it to the top of the tree with a bamboo skewer.  The end.

Vintage button crafts

For the red tree, I did the same thing, but wrapped the tree in red organza before attaching the buttons and hardware.  This was to prevent the white foam from showing.

I placed it on a candle holder as the stand.  Using a gold sparkly mini clothespin, I attached a Christmas tag to the top and tied a bow around that with twine.

DIY christmas centerpiece ideas

For the white and gold tree, I decoupaged gold and white tissue paper onto the cone using Mod Podge.  I added a random piece of hardware with a vintage clothespin, and wrapped that with gold organza and black twine.  It sits on an old jar lid (same jar that use to hold all those vintage buttons)!

Led mini lights strands

Those pretty, warm lights you see in the background are Design it:® LED Light Strands, which I love because they are light weight and ready to go out of the package.  No outlet needed or batteries to buy is always a plus in my book!

Vintage Styrofoam Centerpiece Holiday @floracraft

I hope you enjoyed this project as much as I did, and are inspired to make the old new again!

DIY Reclaimed Wood Christmas Tree and Advent Artist Blocks

[pinit]DIY Advent Calendar Reclaimed Wood Tree #stencilGirl #Christmas with @eileenhull @artistsontheblock @Sizzix_US @savedbyloves[pinit]
Make a Reclaimed Wood Advent Calendar Christmas Tree

Today’s project is a rustic, reclaimed wood Christmas tree advent calendar that you can make for little to no cost!  Building from salvaged wood and paper crafting all in one project! I created the blocks using Eileen Hull’s (soon to be released) Scoreboards Block dies.  The die makes blocks in three sizes, for tons of creative potential.  Think about artist trading cards, but 3-D!  Last Christmas I showed you how to make an advent calendar from wooden blocks, and that is the first thing I thought of when I saw this die.  Read on to see how I used stencils from Stencil Girl, spray ink, number stickers and washi tape to decorate my mat board cubes.  Watch the video to make your own tree, or display your blocks freestanding.  These would make great Christmas gifts and decor for your holiday get togethers.

How to Make a Reclaimed Wood Advent Calendar

SUPPLIES:

For the Blocks

Mat Board

Heidi Swapp Spray ink Gold, Green, Red

Stickles in red, green, gold

Washi Tape in Christmas Patterns

Stencils (I used Stencil Girl)

Mod Podge Antique

For the Tree

Scrap wood

Mitre Saw

Nailer or hammer and nails

Wood Glue

E6000

5 gallon paint stirrers

TUTORIAL:

ADVENT BLOCKS

You may want to decorate your cubes before assembling them into the 3D shape.  First I will show you assembly, then how I decorated my cubes.

Artists on the Block


I chose the smallest of the three cubes for my calendar.  This is what the mat board looks like after it is cut with Eileen’s awesome new die!

Paper Craft DIY Christmas

Fold cubes along score lines.  Two of the scored rectangles are needed for each cube.  Place them together to form the cube.  You can glue the tabs in place if you would like, but I didn’t find it necessary with the mat board.  I haven’t tried other paper.

Stencil Girl Stencils

Place stencils over blocks and spray.

How to Make an Advent Calendar

Clean up excess ink that’s on the stencils for a reverse image on the blocks, and you waste less ink!

How to make Paper Advent Calendar

I used red, gold and green sprays, allowing about 10 minutes dry time between each color.

Mixed media Artist Blocks

Once that dried, I adhered washi tape to some blocks, the black sticker numbers and coated with the front surface with Mod Podge Antique for an aged look.  I thought it needed some sparkle, so I added stickles in red, green and gold.

RECLAIMED WOOD CHRISTMAS TREE

I made the tree like I showed you in this  DIY wood pallet Christmas Tree post, and in the video at the end of this post.  The only difference is I used chippy, weathered 2×4 scrap wood I found at a demolition site.  I determined the dimensions of my tree based on the 1.5 inch advent cubes.  The base is 19 inches, and the height is 20 inches without the frame.

I made the five shelves from paint stirrers, cutting them with the mitre saw to lengths that allowed 2 inches for each block.  So the first one is 2 inches, then 6 inches and so on, 10 inches, 14 inches and finally 18 inches for the bottom shelf.  I laid the tree flat and added a thin line of E6000 to the back of the paint stirrer and placed them on the tree where I wanted the shelves.

DIY Advent Blocks Pallet Christmas Tree

I decided to use scrap wood strips to frame the tree, just cutting to length with my mitre saw and using my Ryobi nailer to attach.

I hope you enjoyed the project and the blocks as much as I did!  Visit Artists on the Block for more news, updates and projects as artist trading blocks take over the mixed media community!

Be sure and visit other projects using the blocks in the Stencil Girl and Sizzix Artist Trading Blocks Hop

Blog Hop Order

SGSIZZIXBLOGHOP

Dollar Store Framed Reindeer Silhouettes

Reindeer Crafts


[pinit]


Reindeer Dollar Store Christmas Craft @savedbyloves #quickcrafts #christmascrafts

[pinit]

This Dollar Store Christmas Decor DIY is super fast, cheap and pretty awesome looking.  If you are looking for a quick way to create a festive Christmas feel for your holiday get together, this is your project!

Dollar Store Christmas Craft Idea

All you need:

The sparkly, glittery reindeer come in 2 a pack for $1

Grab as many 5×7 frames as you will need

Foam Mount Stickers

Scissors

Christmas Patterned Paper

Instructions:

Cut out the paper to fit the frames and stick inside just like you would a photo.

Dollar Store Framed Reindeer Quick Christmas Craft

Tape the reindeer to the outside of the glass with foam mount stickers, which you can get at any craft store and most department stores.  You are ready to display!  See, I told you it was fast and easy.

Dollar Tree Christmas Craft DIY

50 Plus Christmas Kid’s Crafts to Make

DIY Starburst Dollar Store Pencil Wreath With @Floracraft

[pinit]DIY Starburst Christmas Wreath with Dollar store supplies and @FloraCraft @savedbyloves[pinit]

I am a member of the Make It: Fun® Team. This DIY Starburst Christmas Wreath is sponsored FloraCraft® Make It: Fun® Foam. All opinions are honest and mine, like always.

Incorporate the chalkboard craze into a fun starburst Christmas wreath made with dollar store Christmas patterned pencils and a FloraCraft® Make It: Fun® Foam wreath form!  This project is easy, quick and cheap.  Use it for gift lists, holiday greetings or a letter for santa!

SUPPLIES:

Flora Craft Dollar Store Christmas Wreath DIY


FloraCraft® Make It: Fun® Foam wreath form

Dollar Tree Christmas Pencils

Hot Glue Gun and Sticks

Cardboard cut in a circle the size you want your chalkboard

Burlap Wire Ribbon

Black chalkboard paint

one inch foam or paint brush

TUTORIAL:

How to make a Christmas Wreath

 Put a dab of hot glue on the end of the pencils and shove them into wreath at varying depths.  It doesn’t matter if the eraser comes through to the center of the wreath because you are covering the hole with your chalkboard later.

Make a starburst wreath

Continue all the way around the wreath.

Make a Chalkboard Wreath

Paint your cardboard with chalkboard paint and let dry.  I did 2 coats, sanding lightly between.

How to make a chalkboard Christmas Wreath

Tie your burlap ribbon in place, then hot glue your chalkboard circle.  Hang and enjoy!

Dollar Store @FloraCraft Starburst Wreath DIY

For more inspiration on creating with FloraCraft® Make It: Fun® Foam, please also check out Crafts n’ Coffee or follow the hashtag #MakeitFunCrafts.

DIY Hand Painted Christmas Sign with Printable

[pinit]
Merry and Bright DIY Sign with printable template and video[pinit]

These hand painted rustic signs are a little addictive, and pretty easy to make.  Pam from Little Red Porch came over and showed us her technique in this  DIY Rustic Wood Sign .  I made a video showing you how to use Photoshop to print your text in sections so you can tape them together for transferring large art to wood in this Americana Chalky Finish Paint Sign Tutorial.  Today I am sharing this Merry and Bright sign, as well as the text file for you to print off to create your own like I showed you in the links above mentioned.

Merry And Bright Handpainted Christmas Sign


To download the printable, right click the thumbnail and the full resolution file will pop up for you to print.

 Merry and Bright Printable Template


DIY Dollar Tree Halloween Door Bats & $100 Giveaway

[pinit]Printable Bats[pinit]

As you may know, Dollar Tree is one of my favorite places to go for creative project supplies.  I love wandering through the aisles letting my imagination run wild with ideas.  Just recently, I discovered Dollar Tree Value Seekers Club, which is packed with crafts, recipes, décor, tips, contests, insider information, frugal fun ideas, and other awesomeness.   You can join too, for free, and get a chance to win a $20 Dollar Tree gift card!   You will never run out of seasonal inspiration, as the creative content changes each month.  Just pick out a project, print the project sheet or save it to your phone, and then use it as your shopping list in the store!  Today I am sharing how I created this bat door using Dollar Tree supplies and a bat template I found while browsing the fun Halloween projects.  It is super simple and it cost just $3.

***I received compensation for this post.  All opinions are mine and honest!

DOLLAR STORE SUPPLIES:

Dollar Tree Craft Halloween

You can use Dollar Tree black poster board, construction paper or foam sheets for your bats; For the number of bats I made, I used 2 sheets of poster board

Scissors or Die cut machine with software you can use to cut imported images

Bat Template Available at Dollar Tree Value Seekers Club

Printer unless you are using die cut machine

Clear tape


TUTORIAL:

Dollar Tree Crafts

Download and print the bat template from Dollar Tree Value Seekers Club “Front Door Bat Printable” project, or download and open in your die cut machine’s software.  I used Sure Cuts A Lot (which I don’t think is available anymore) and my Cricut machine.

DIY Dollar Store Bat Silhouettes

If not using die cut machine, cut out the bats on the free template with scissors,tape to your black poster board and cut around them to create your bats.

How to Decorate for Halloween

Tape your bats to the door and enjoy!

I love the look and the simplicity of this project.  Join Dollar Tree Value Seekers Club for it, and tons more inspiration!

$100 Dollar Tree gift card giveaway

Want to win $100 from Dollar Tree?  Sign up for Dollar Tree Value Seekers Club and leave me a comment below this post telling me which project you want to try if you win!  Good luck.

Here are some other great projects inspired by Dollar Tree Value Seekers Club:


50+ Awesome Things To Make From Wire

[pinit]

50+ Wire Crafts to Make @savedbyloves

[pinit]

Calling all creatives out there, today’s 50+ roundup is going to feed your inspiration banks. We gathered over 50 super awesome things to make from wire. You can get craft wire for pretty cheap, and as you will see, you can even use wire hangers! From Christmas, Halloween and Valentine’s Day projects, to jewelry to home decor and gifts, you can find a wire project for about any occasion. If you have a wire project we didn’t find, send it to us. Enjoy!


Privacy Policy