[pinit]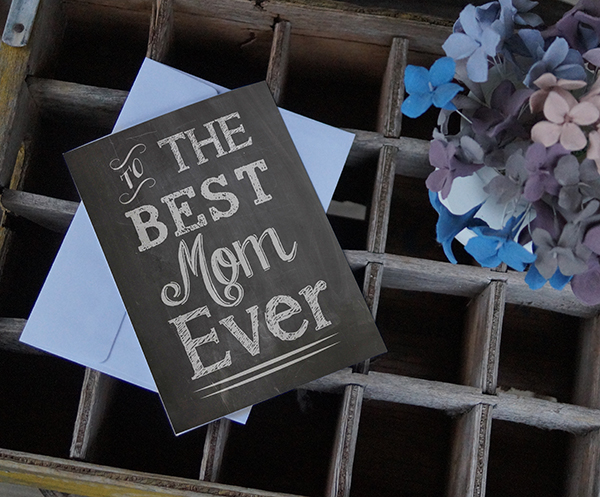 [pinit]
Head over to Printable Decor for this exclusive Free Printable Chalkboard Mother’s Day Card Set for Mom, Grandma and Aunt!
Upcycling DIY home decor, woodworking and Crafts

[pinit][pinit]
Head over to Printable Decor for this exclusive Free Printable Chalkboard Mother’s Day Card Set for Mom, Grandma and Aunt!
[pinit]
[pinit]
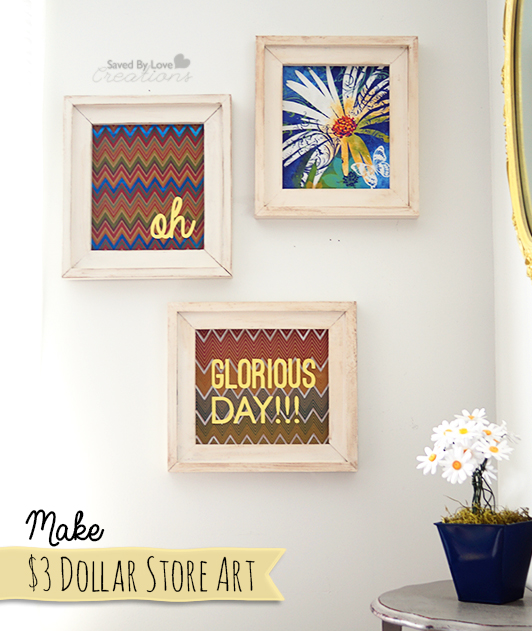
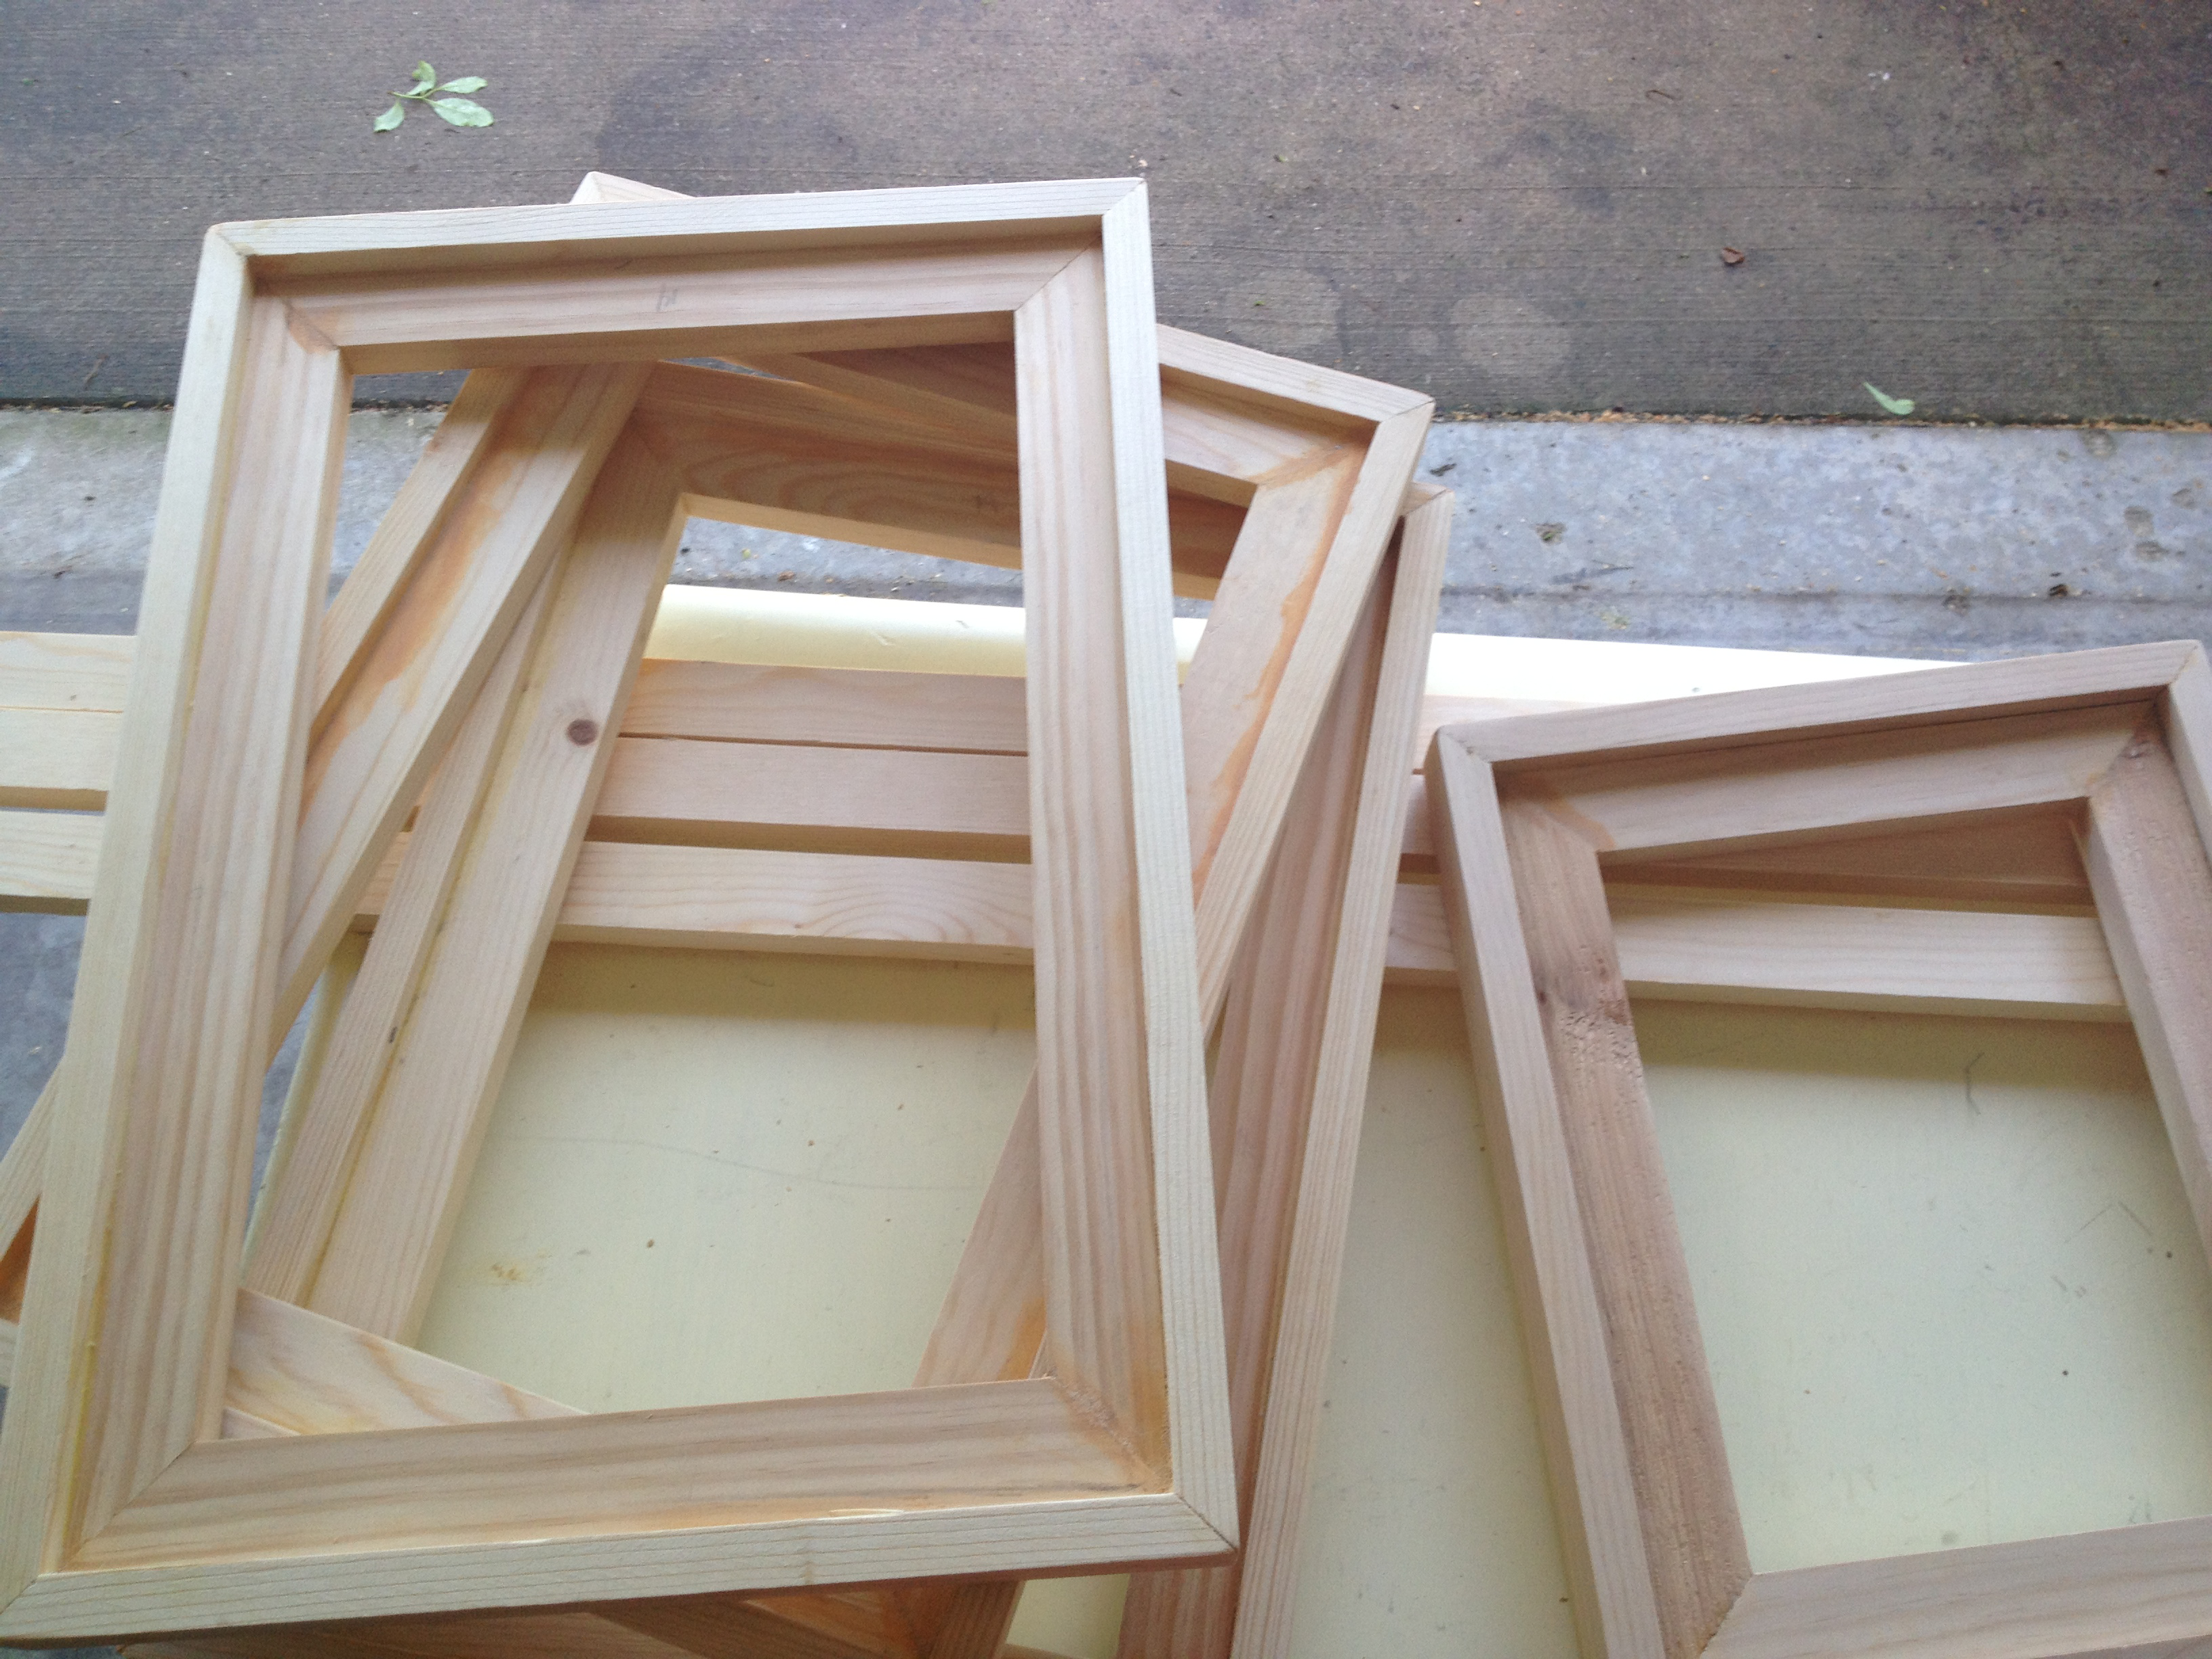
I am so excited to share with you this great Dollar Tree wall art project that you can make for $3! I found some adorable spring/summer print gift bags on my most recent trip there and decided to bring them home and make barn wood frames from scrap wood for them. While there, I also grabbed the coordinating navy blue planter, knowing I would put the DIY Paper Daisies I showed you last spring in there to go with the daisy on one of the cute gift bags. Once I got the three bags framed, I decided there needed to be text on the chevron backgrounds, so I cut out “Oh Glorious Day” using my Cricut. You can get the cut file too!

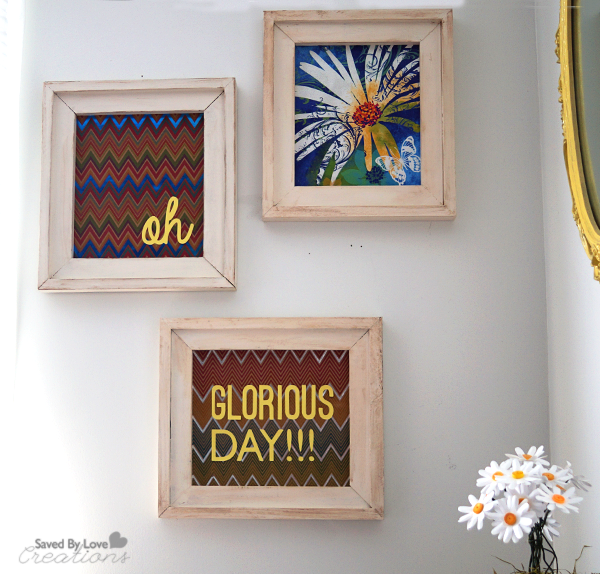
Here are the three bags. I loved the daisy and the chevron prints in coordinating colors on the other bag.
I measured the bags to see how big to make my frames. I decided I wanted the opening to be 9×10 inches.
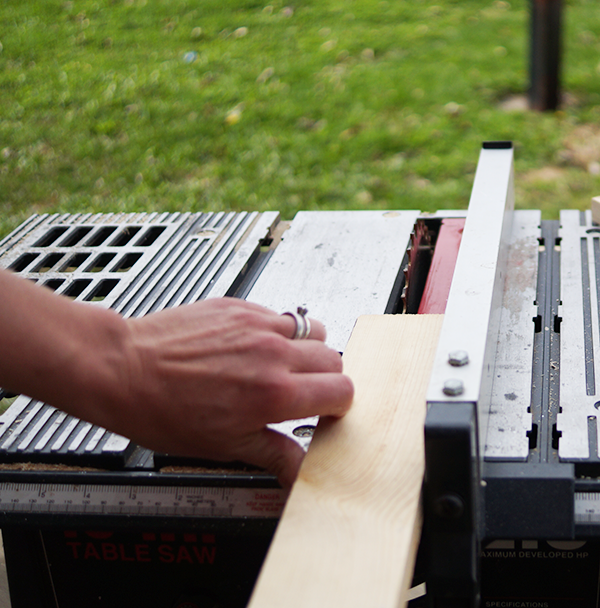
I shared an Ana White Barnwood Frame Plan in this DIY Barnwood Frame Tutorial with Free Printables. For this project, I wanted different dimensions and learned a couple of tricks I want to share along the way. I wanted to use 1×2 inch boards, but didn’t have enough of that dimension on hand, so I ripped 1×4 scraps with my table saw by setting the guide arm at 1.5 inches (which is the actual width of a 1×2 board). I

Next I set my miter saw to 45º and cut one end of my homemade 1×2.
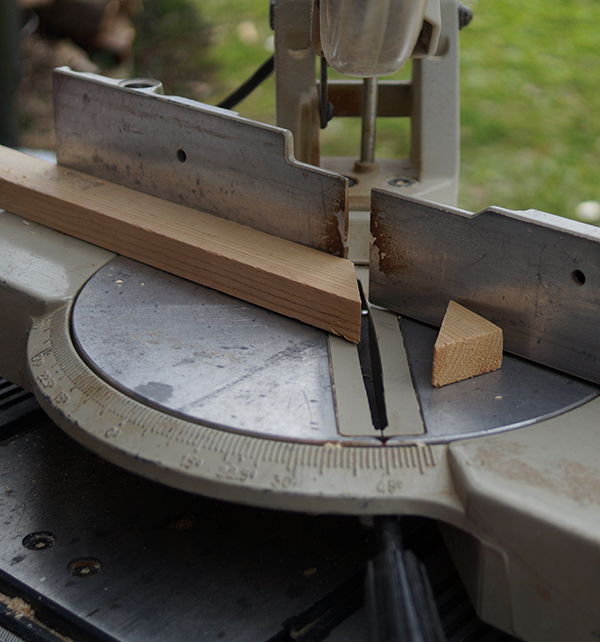
I measured from the short inner point of the angle 9 inches over and cut the other side going the opposite direction (so I moved my miter saw 45º to the left).
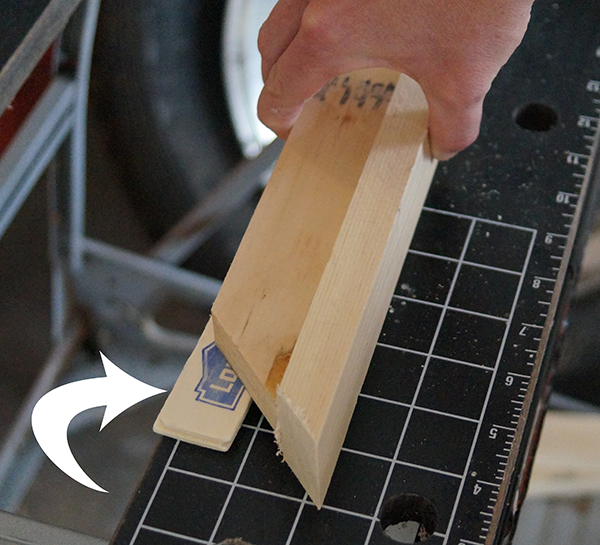
I lined the inner frame up with 1×2 flipped up on its side to know where to make the 45º cuts for the outer frame. This was easier and quicker than measuring! I used 2 paint stirrers to give me the thickness for attaching the inner frame to the outer so that the back of the frame would be recessed for my foam mounted gift bags (foam mounting happens after the frames are made, see below).
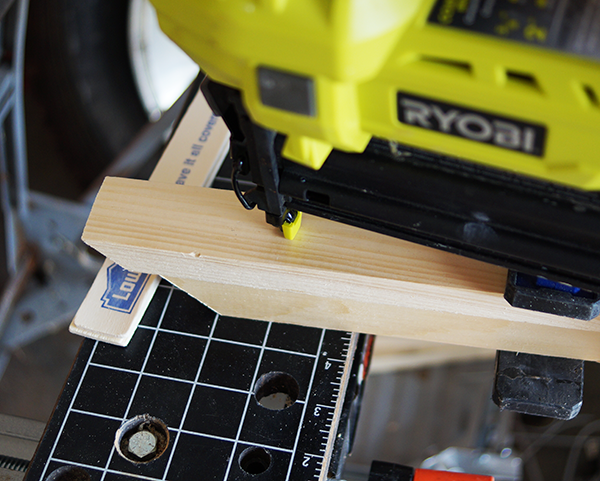
Use wood glue at the join and clamp the inner and outer frame together. Nail in place with 2 inch nails. Did I ever tell you I love this Ryobi AirStrike cordless nailer? I do. It is a go to tool for me. So easy to use, CORDLESS, goodbye hammer and nails.
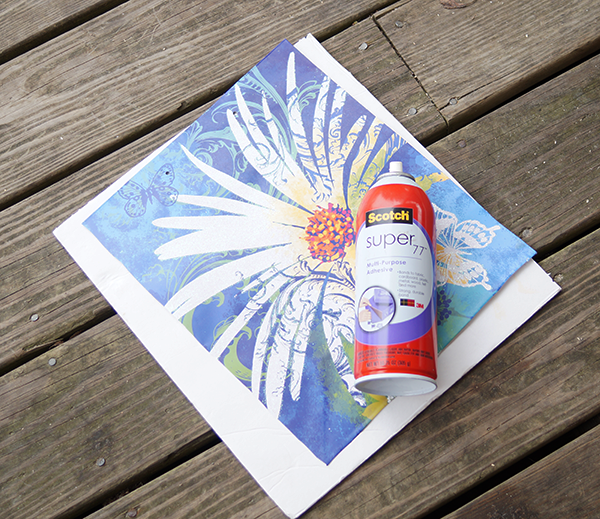
Cut foam board to fit in the back of the recessed frame. Cut the desired image area off of the gift bag and adhere it to the foam board with Super 77 or other mounting adhesive.
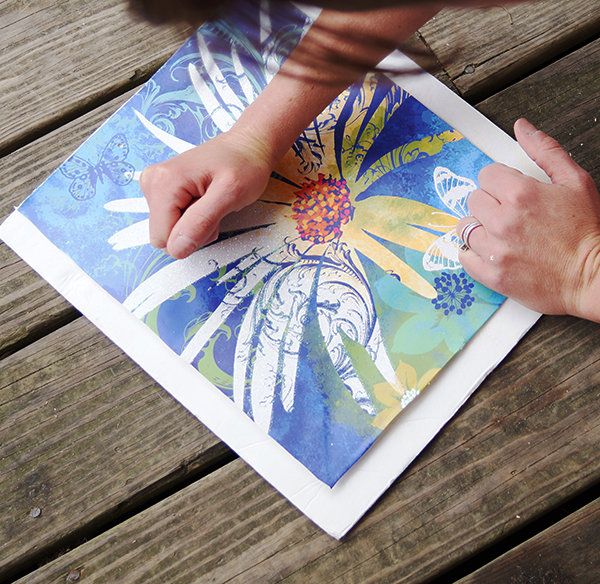
Smooth wrinkles from the center out with your hand.
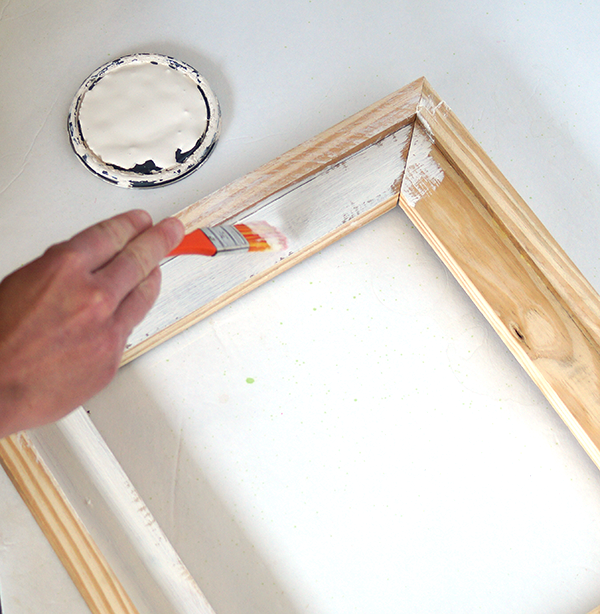
Paint frame with color of choice. I used white chalk paint and antiqued the edges with FolkArt Antiquing Medium . I sealed with Krylon Clear Coat Matte Finish because it was nice outside and I was excited that I could use spray sealer after such a long winter! Wax or varnish would be fine too.
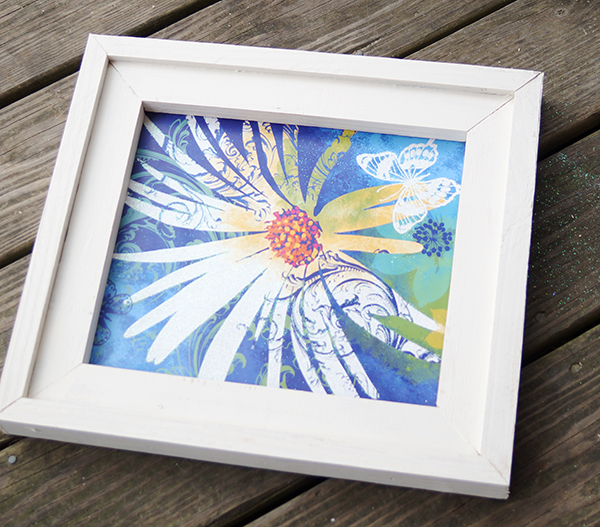
Since the foam board is cut to the same dimensions as the recess in the back of the frame, the picture pretty much fits and stays. I used clear packing tape to secure it in place.
I used Coordinations adhesive cardstock in yellow and my Cricut with SCAL software to cut out the text, which I created in Photoshop (“oh” is “Always in My Heart” font and “GLORIOUS DAY” is Ostrich Sans Black). Since the paper was adhesive I just peeled off the letters and put them on the chevron patterned framed backgrounds like you see in the photo. You could use the cut file to make a stencil and paint the letters on, or print them in your favorite color and cut them out by hand too.
Attach sawtooth hanger or wire to the back to hang!
[pinit]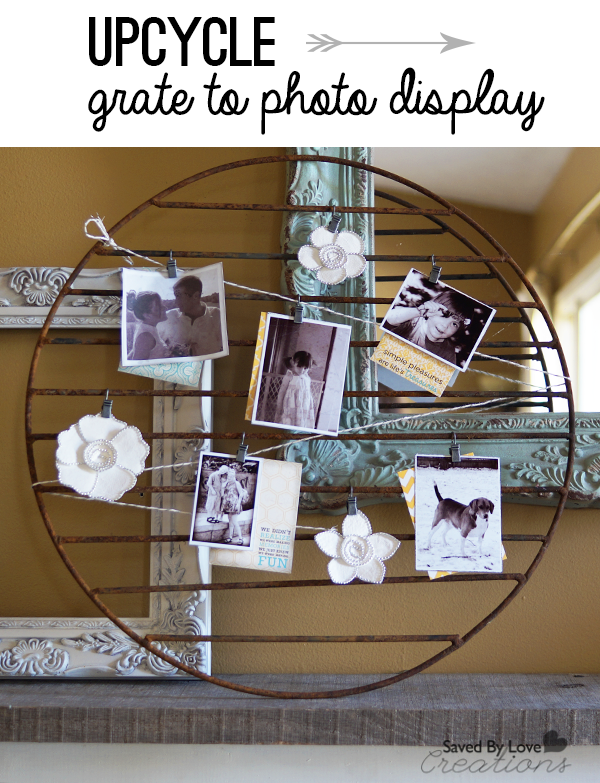 [pinit]
Today I am happy to share with you this rustic, quick & easy upcycle to display your favorite Instagram photos – all while saving a rusty old grate from a tragic dumpster demise! This particular grate is from an fire pit that is no longer. I just couldn’t part with it. Round objects have a hard time getting away from me since I love the challenge of using them to create unique repurposed wreaths.
I digress. Back to the grate.
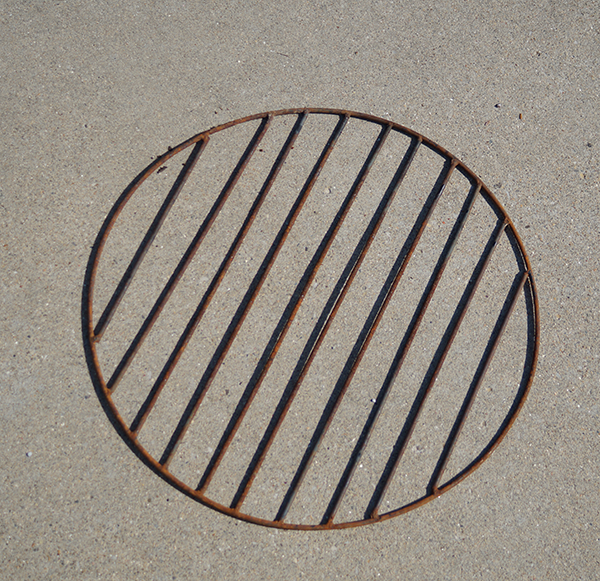
Here is the old thing. It has sat on my porch for months, begging for inspiration to strike me. Along came Susan.

If you haven’t been to Homeroad, you need to remedy that. Susan is a junker with an eye for upcycling that always inspires. When I saw her Barrel Strap Photo Holder, I knew what I had to do.
Find something old, rusty and round, and you can do it too, within just a few minutes!
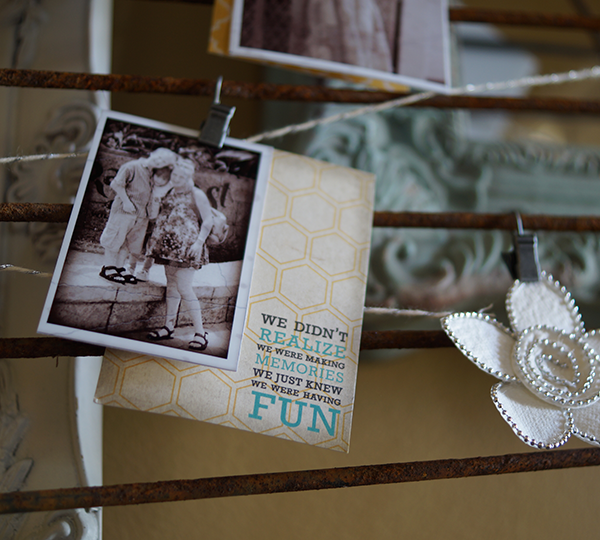
Photos – Use your Instagram photos or other photos and apply a fun vintage filter!
I used ATC backgrounds I found at Hobby Lobby in a fun yellow, blue, vintage yet modern, geometric patterned, grungy style. you know that style, right?
The flowers are from Prima . I grabbed them at Hobby Lobby, but you can find them with my Amazon link too.
I used silver and white baker’s twine with the intention of clipping the photos with tiny cute clothespins. While digging through my stash I found the perfect Gator clips from 7 Gypsies. Their little hook fit perfectly over the rods in the grate.
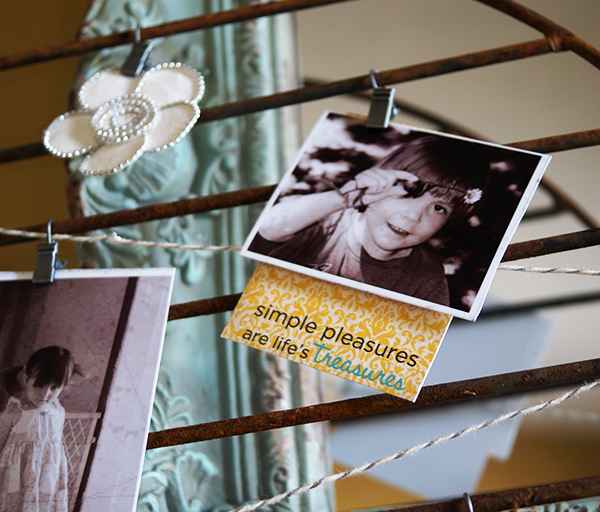
I threw this piece together in under 10 minutes, and I will cherish it for years to come!
[pinit]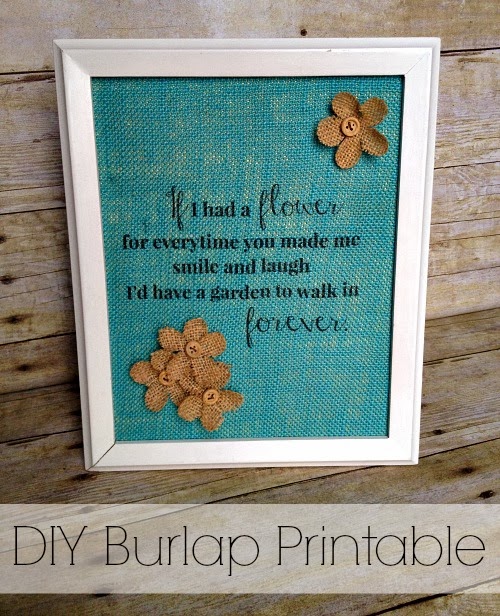 [pinit]
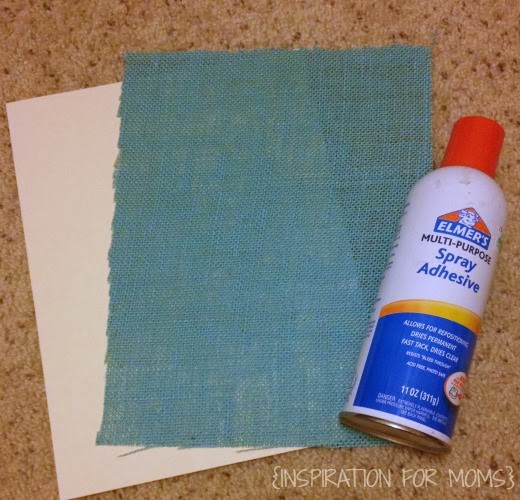
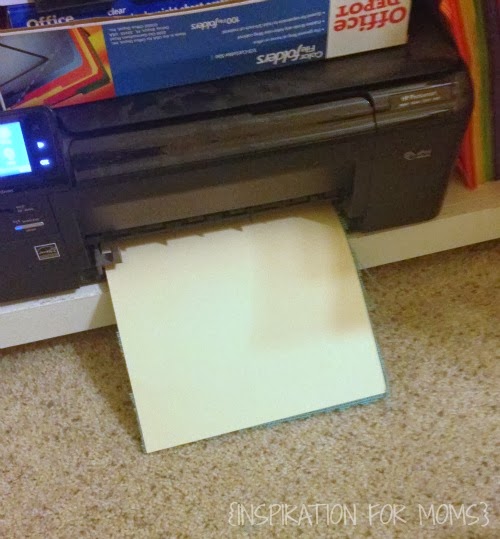


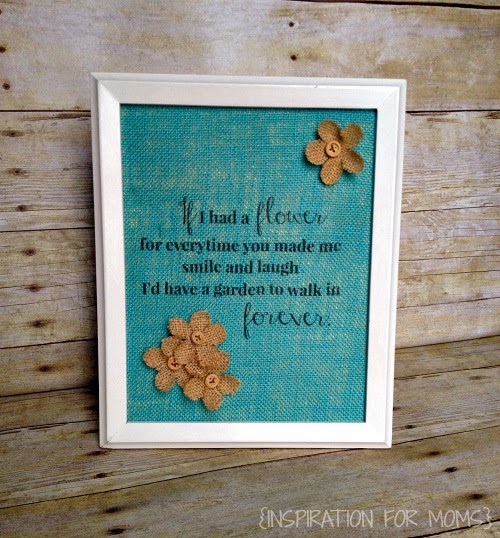
I hope you enjoyed this easy burlap craft.
If you would like to see more of my projects or keep up with my latest updates,
follow me on Facebook, Pinterest, Twitter, Google+ or Instagram.

[pinit] [pinit]
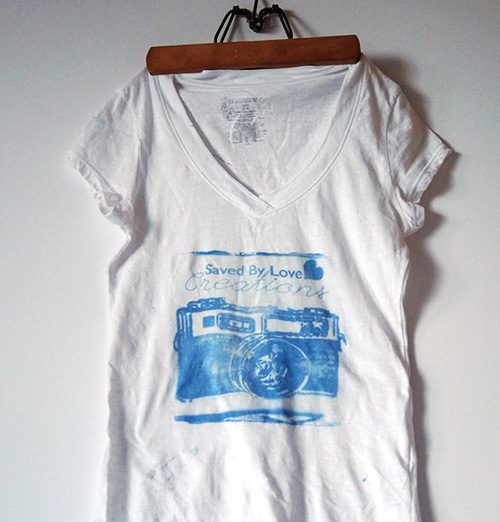
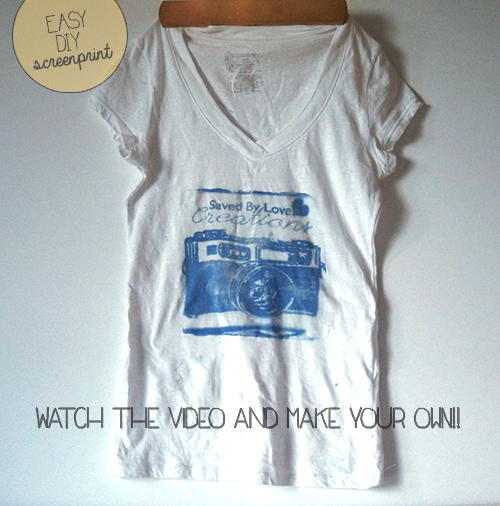
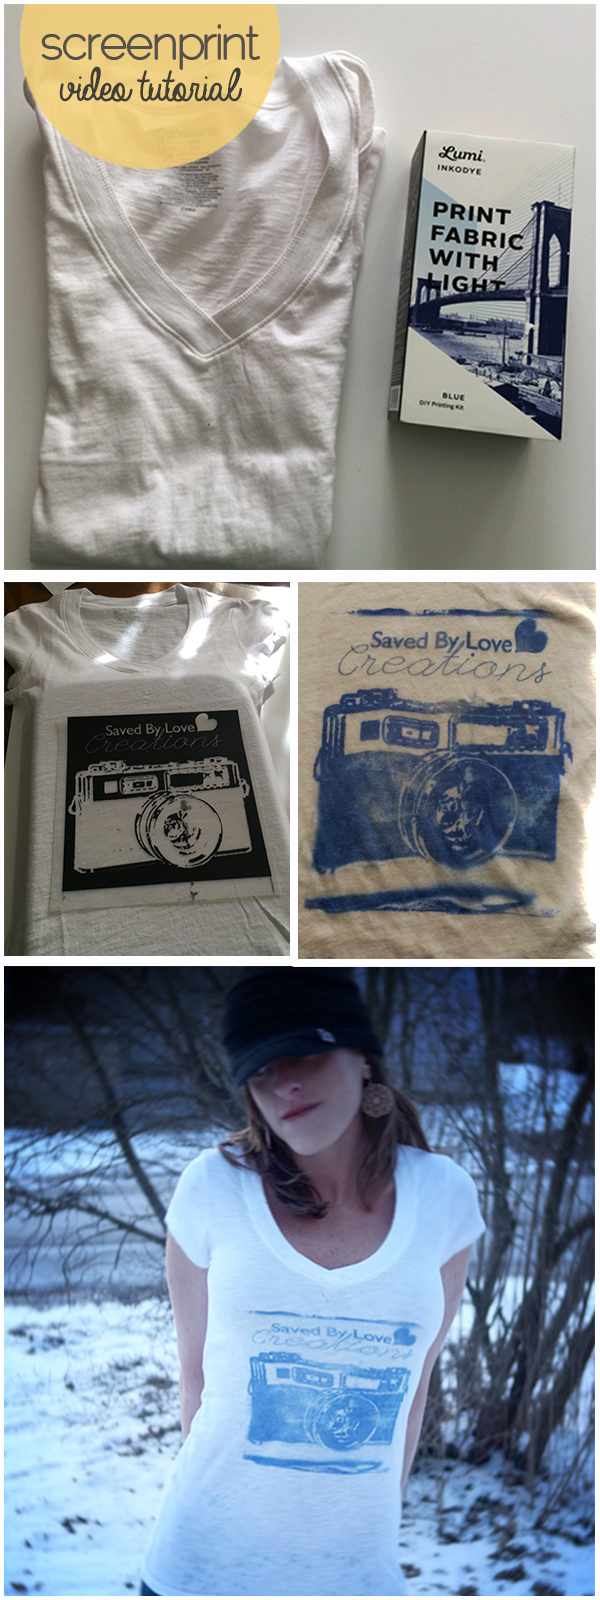
This year at CHA, I saw so many amazing new products that I am busting at the seams to tell you about, and this is one of my favorites! Watch the video to see how you can use Lumi Inkodye to make prints on natural materials. I found this white cotton t-shirt at Walmart for $4.88 and came knew it would be perfect to try out this cool product.
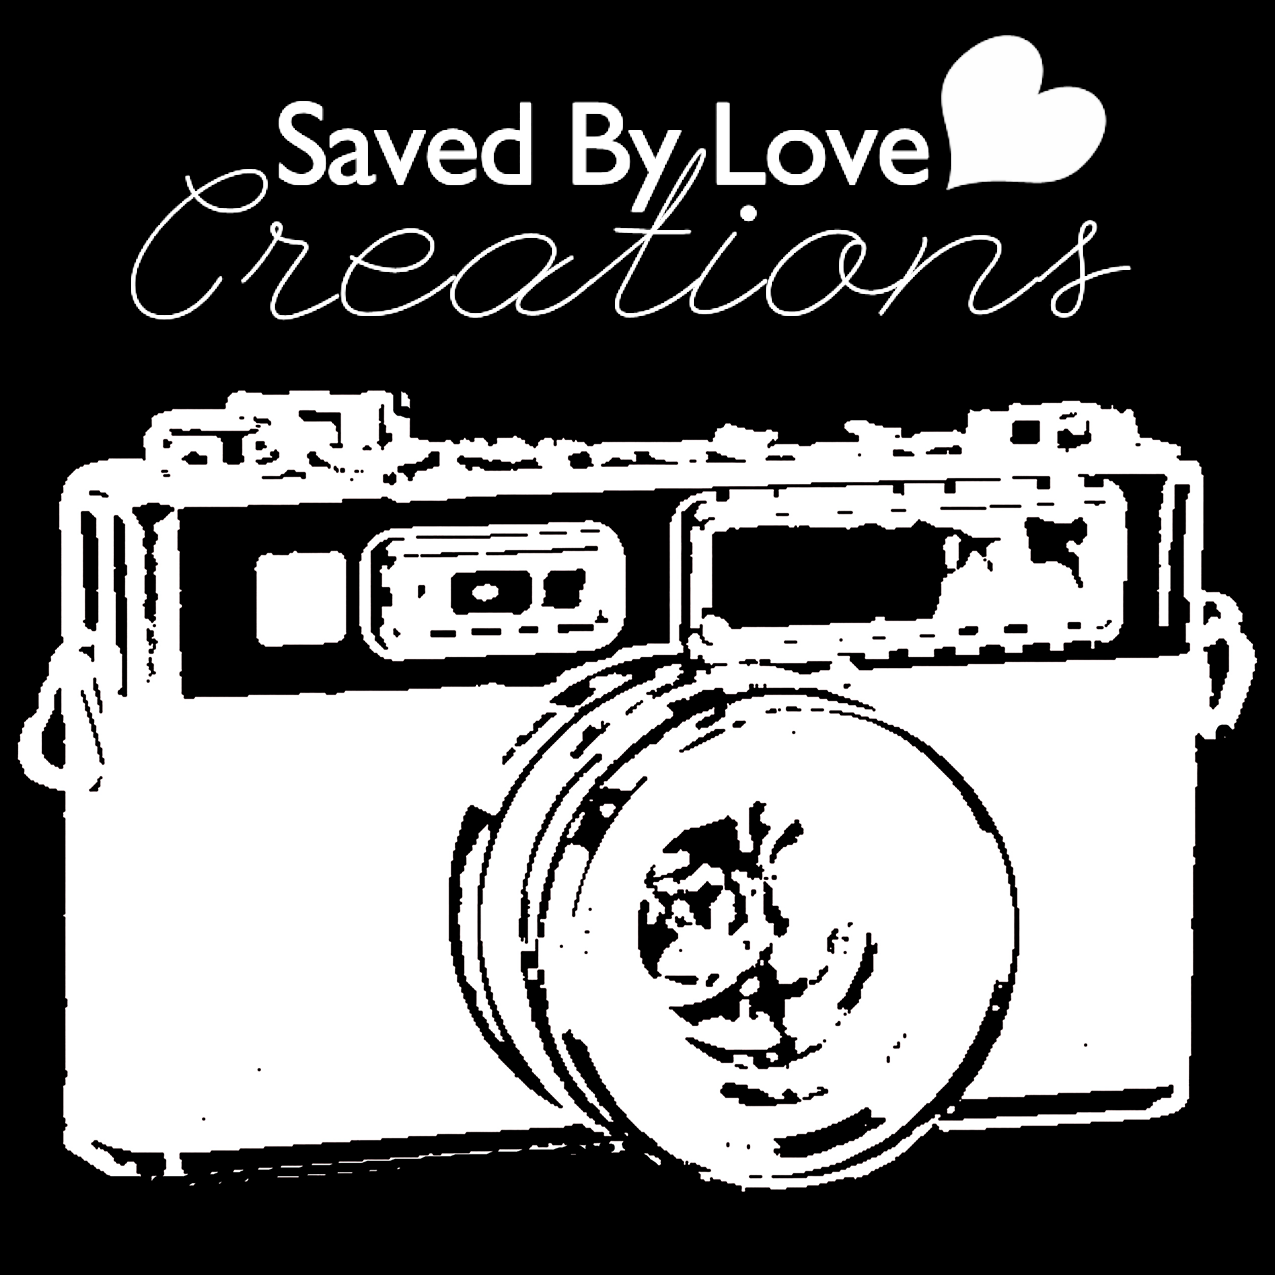
I made this negative in Photoshop and printed it on Lumi’s transparency film.
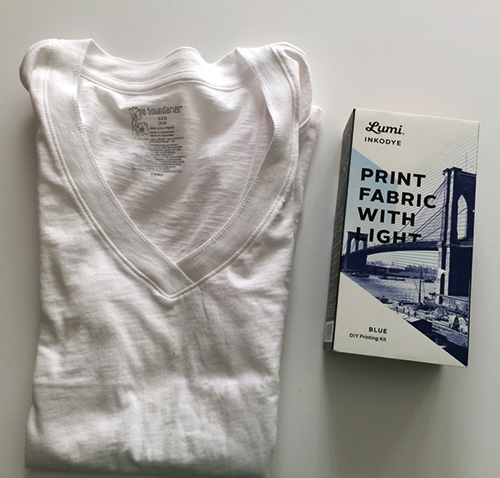
Using the DIY Printing Kit in Blue, I followed the steps in the video below to make my custom logo tshirt!
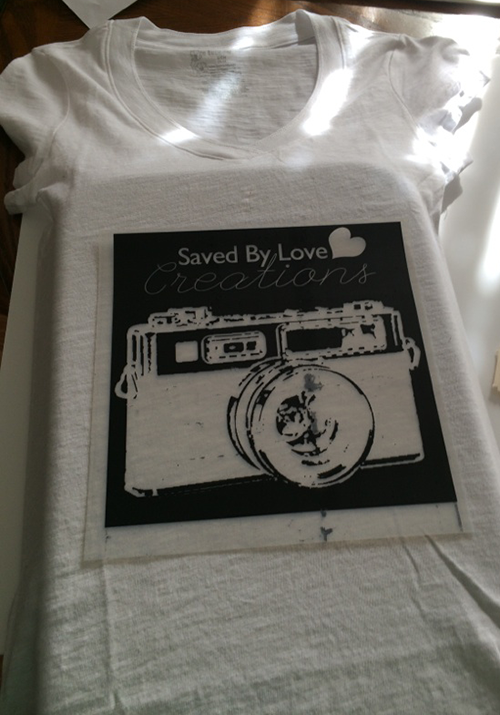
I used a baking pan as my flat surface and pinned my negative on top of the area coated with the solution.
After 10 minutes in the sun, I had a great print. Make sure you wash in the detergent after bringing inside, so the developing stops!
This was so easy. Look at the detail in the text! Super impressive. I am doing more prints as we speak.
 [pinit]
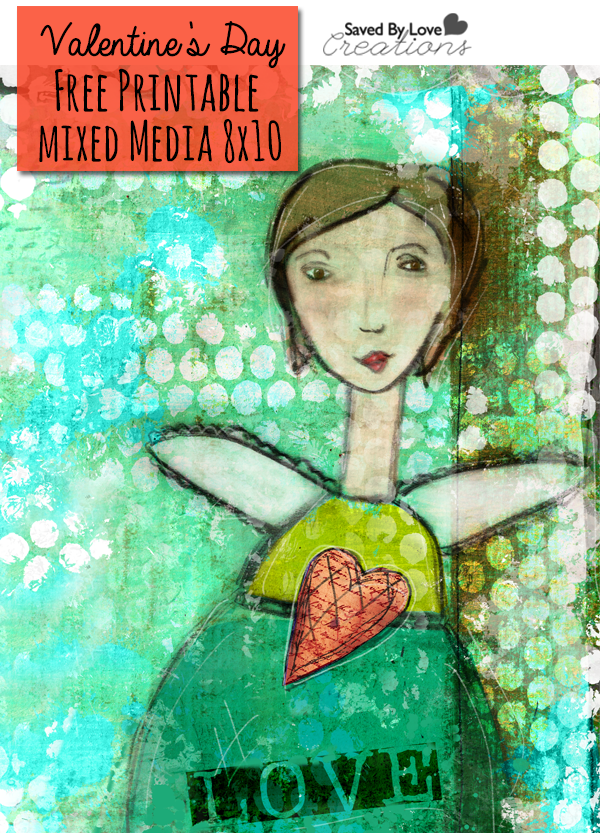
Today at Printable Decor, I am sharing this mixed media LOVE Valentine’s Day Free Printable. I made it using some hand sketched elements scanned into the computer, then edited in my favorite new art journaling iPad app, Procreate.
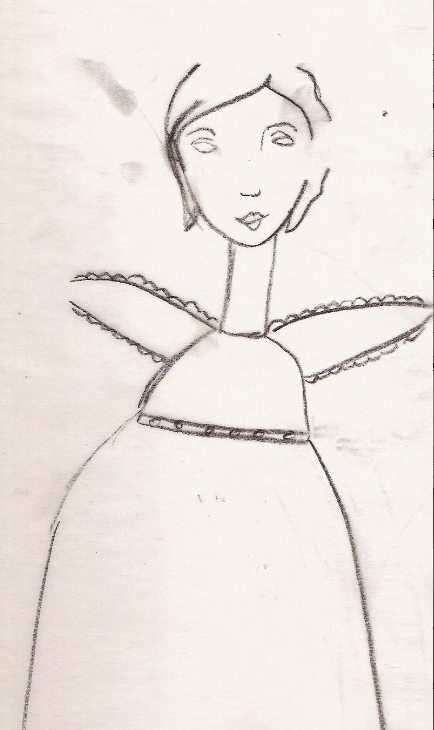
You can incorporate your own hand drawn elements via your touch screen, using the amazing selection of mediums for any brush stroke or line you would like to create. This piece was a pencil out line of the woman on white paper I scanned in (see above), placing over a fun background in Procreate, where I changed the blend mode to multiply. This leaves just the dark outline and gets rid of the white space. I painted her all in the app, decreasing the opacity of the painted layers so that the background was visible underneath the skin and clothes.
You can save your files as PSD for further editing in Photoshop if you would like. Procreate also uploads and downloads directly to dropbox. Love it! Super addictive and a great way to journal on the go.
[pinit]
[pinit]
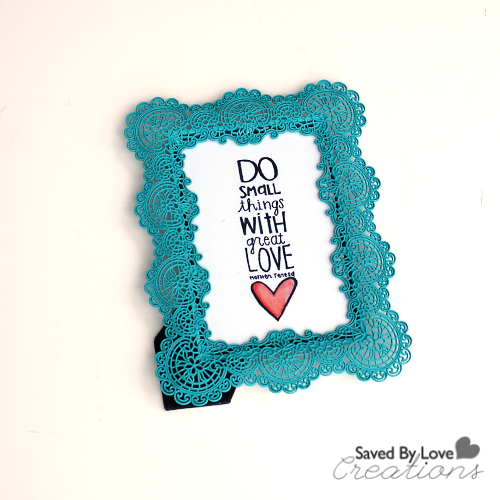
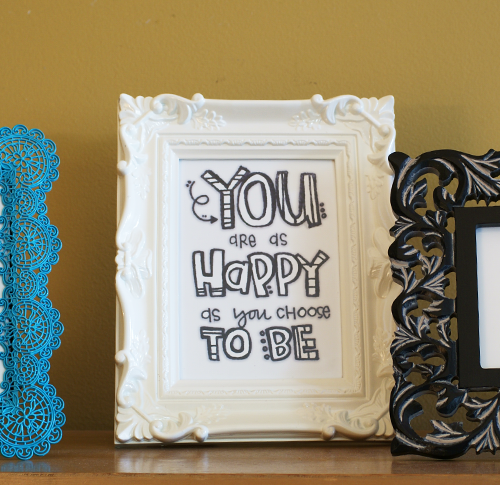
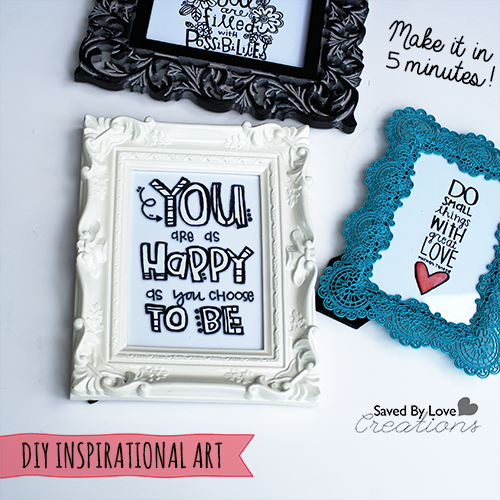
How excited was I to discover that Unity Stamp Company has a new line of stamps designed by Stephanie Ackerman?! The answer is very… much… tons. I ordered several from this line and others. They are full of inspiring words and I couldn’t wait to get creating with them. Today I am sharing the easiest project out there. Just stamp, scan, enlarge, print, cut out and frame!


You can color with copic markers if you want, or scan and open in Photoshop to color digitally.
For this one, I added shading in Photoshop with the drop shadow function. Stephanie has a great class (several great classes, actually) teaching you how to shade the letters. I told you all about it my Marker Art post over the winter:
 This was my first class from Stephanie, and I would take them all if I had time! She has a wonderful way of explaining her techniques so that about anyone can create lovely art in no time.
I love the Mother Teresa quote! I colored the heart with red copic markers in 3 shades before scanning and enlarging.
 This one I scanned in without color and added the yellow/blue-green in Photoshop. Pretty cool because I can just change it if I don’t like the outcome. That is the biggest perk of digital art in my opinion!
I think next I will go the other way with these designs and shrink them down for creating a soldered pendant, or shrink film jewelry!
This is not a paid post! I just wanted to share Unity Stamps and Stephanie’s new line because I love them.
[pinit]
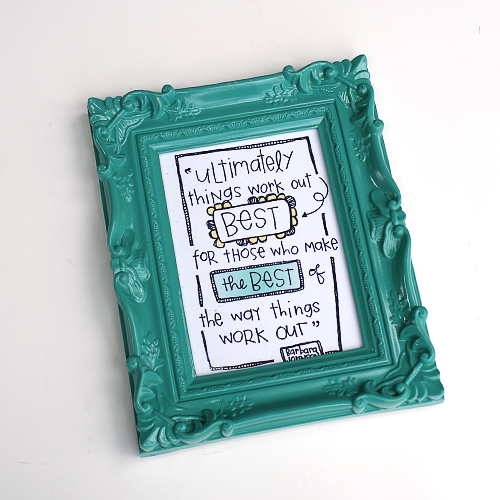
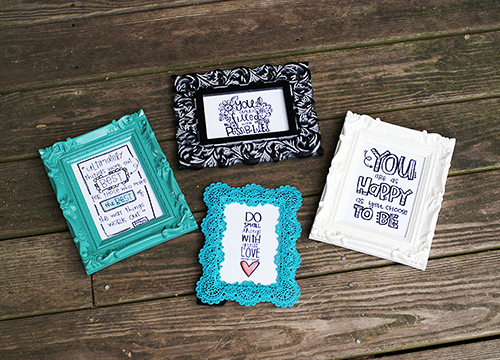
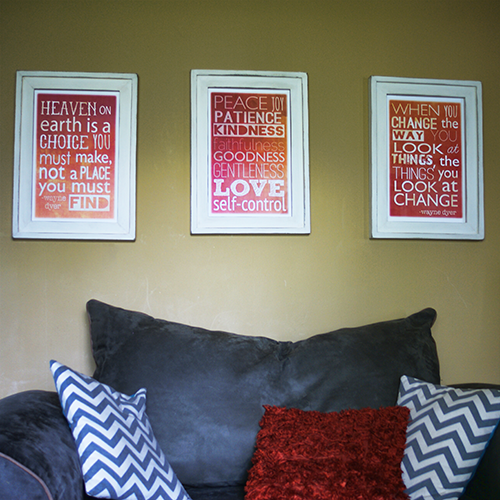
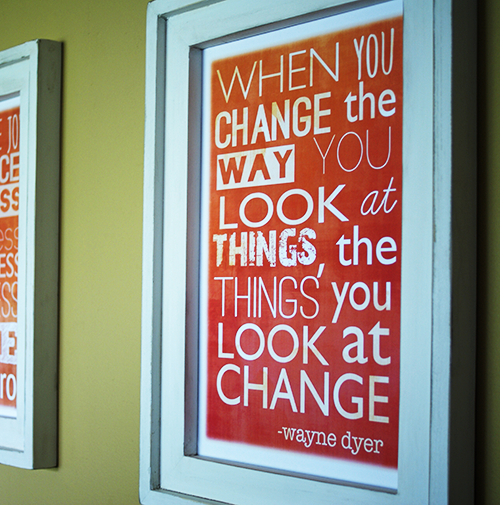
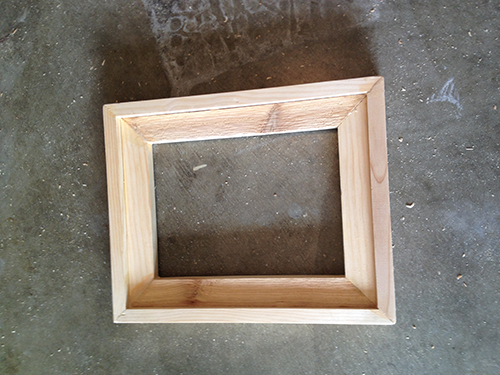
I have always wanted to make my own frames. It was time for some new printables so I finally gave it a go, using this Barnwood Frame plan from Ana White as my starting point. You can read on to see how I tweaked Ana’s plan to get 11×17 inch frames and to download your free Wayne Dyer and fruit of the spirit printables.
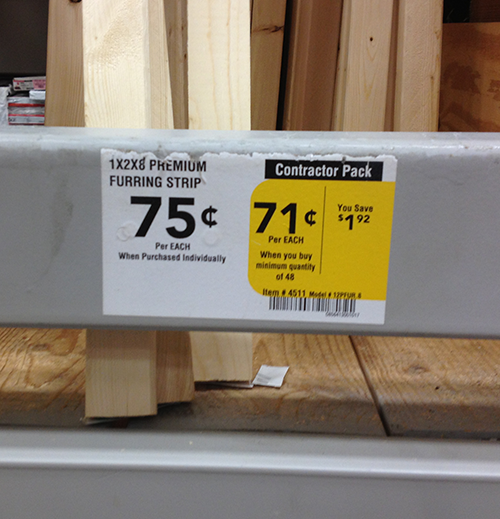
This project is fantastic because the frames look awesome, and are super cheap. I found 1×2 in 8′ strips for $0.75 at Lowes.
Follow Ana’s Plan linked above, but change your cut list as follows to get 11×17 frame openings:
2– 1x2s @ 14, 1 1/2″ flat side mitered so the shortest length is 11″
2– 1x2s @ 20, 1 1/2″ flat side mitered so the shortest length is 17″
2 – 1x2s @ 15 1/2″, edge side mitered so the shortest length is 14″
2 – 1x2s @ 21 1/2″, edge side mitered so the shortest length is 20″
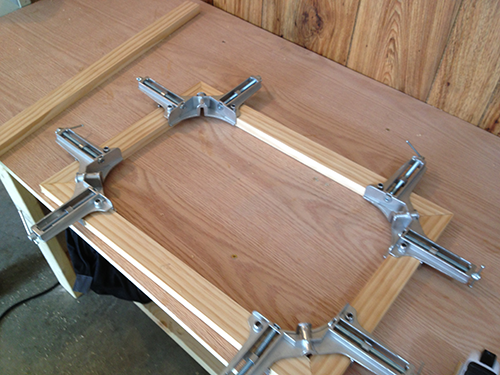
Corner clamps are super helpful!
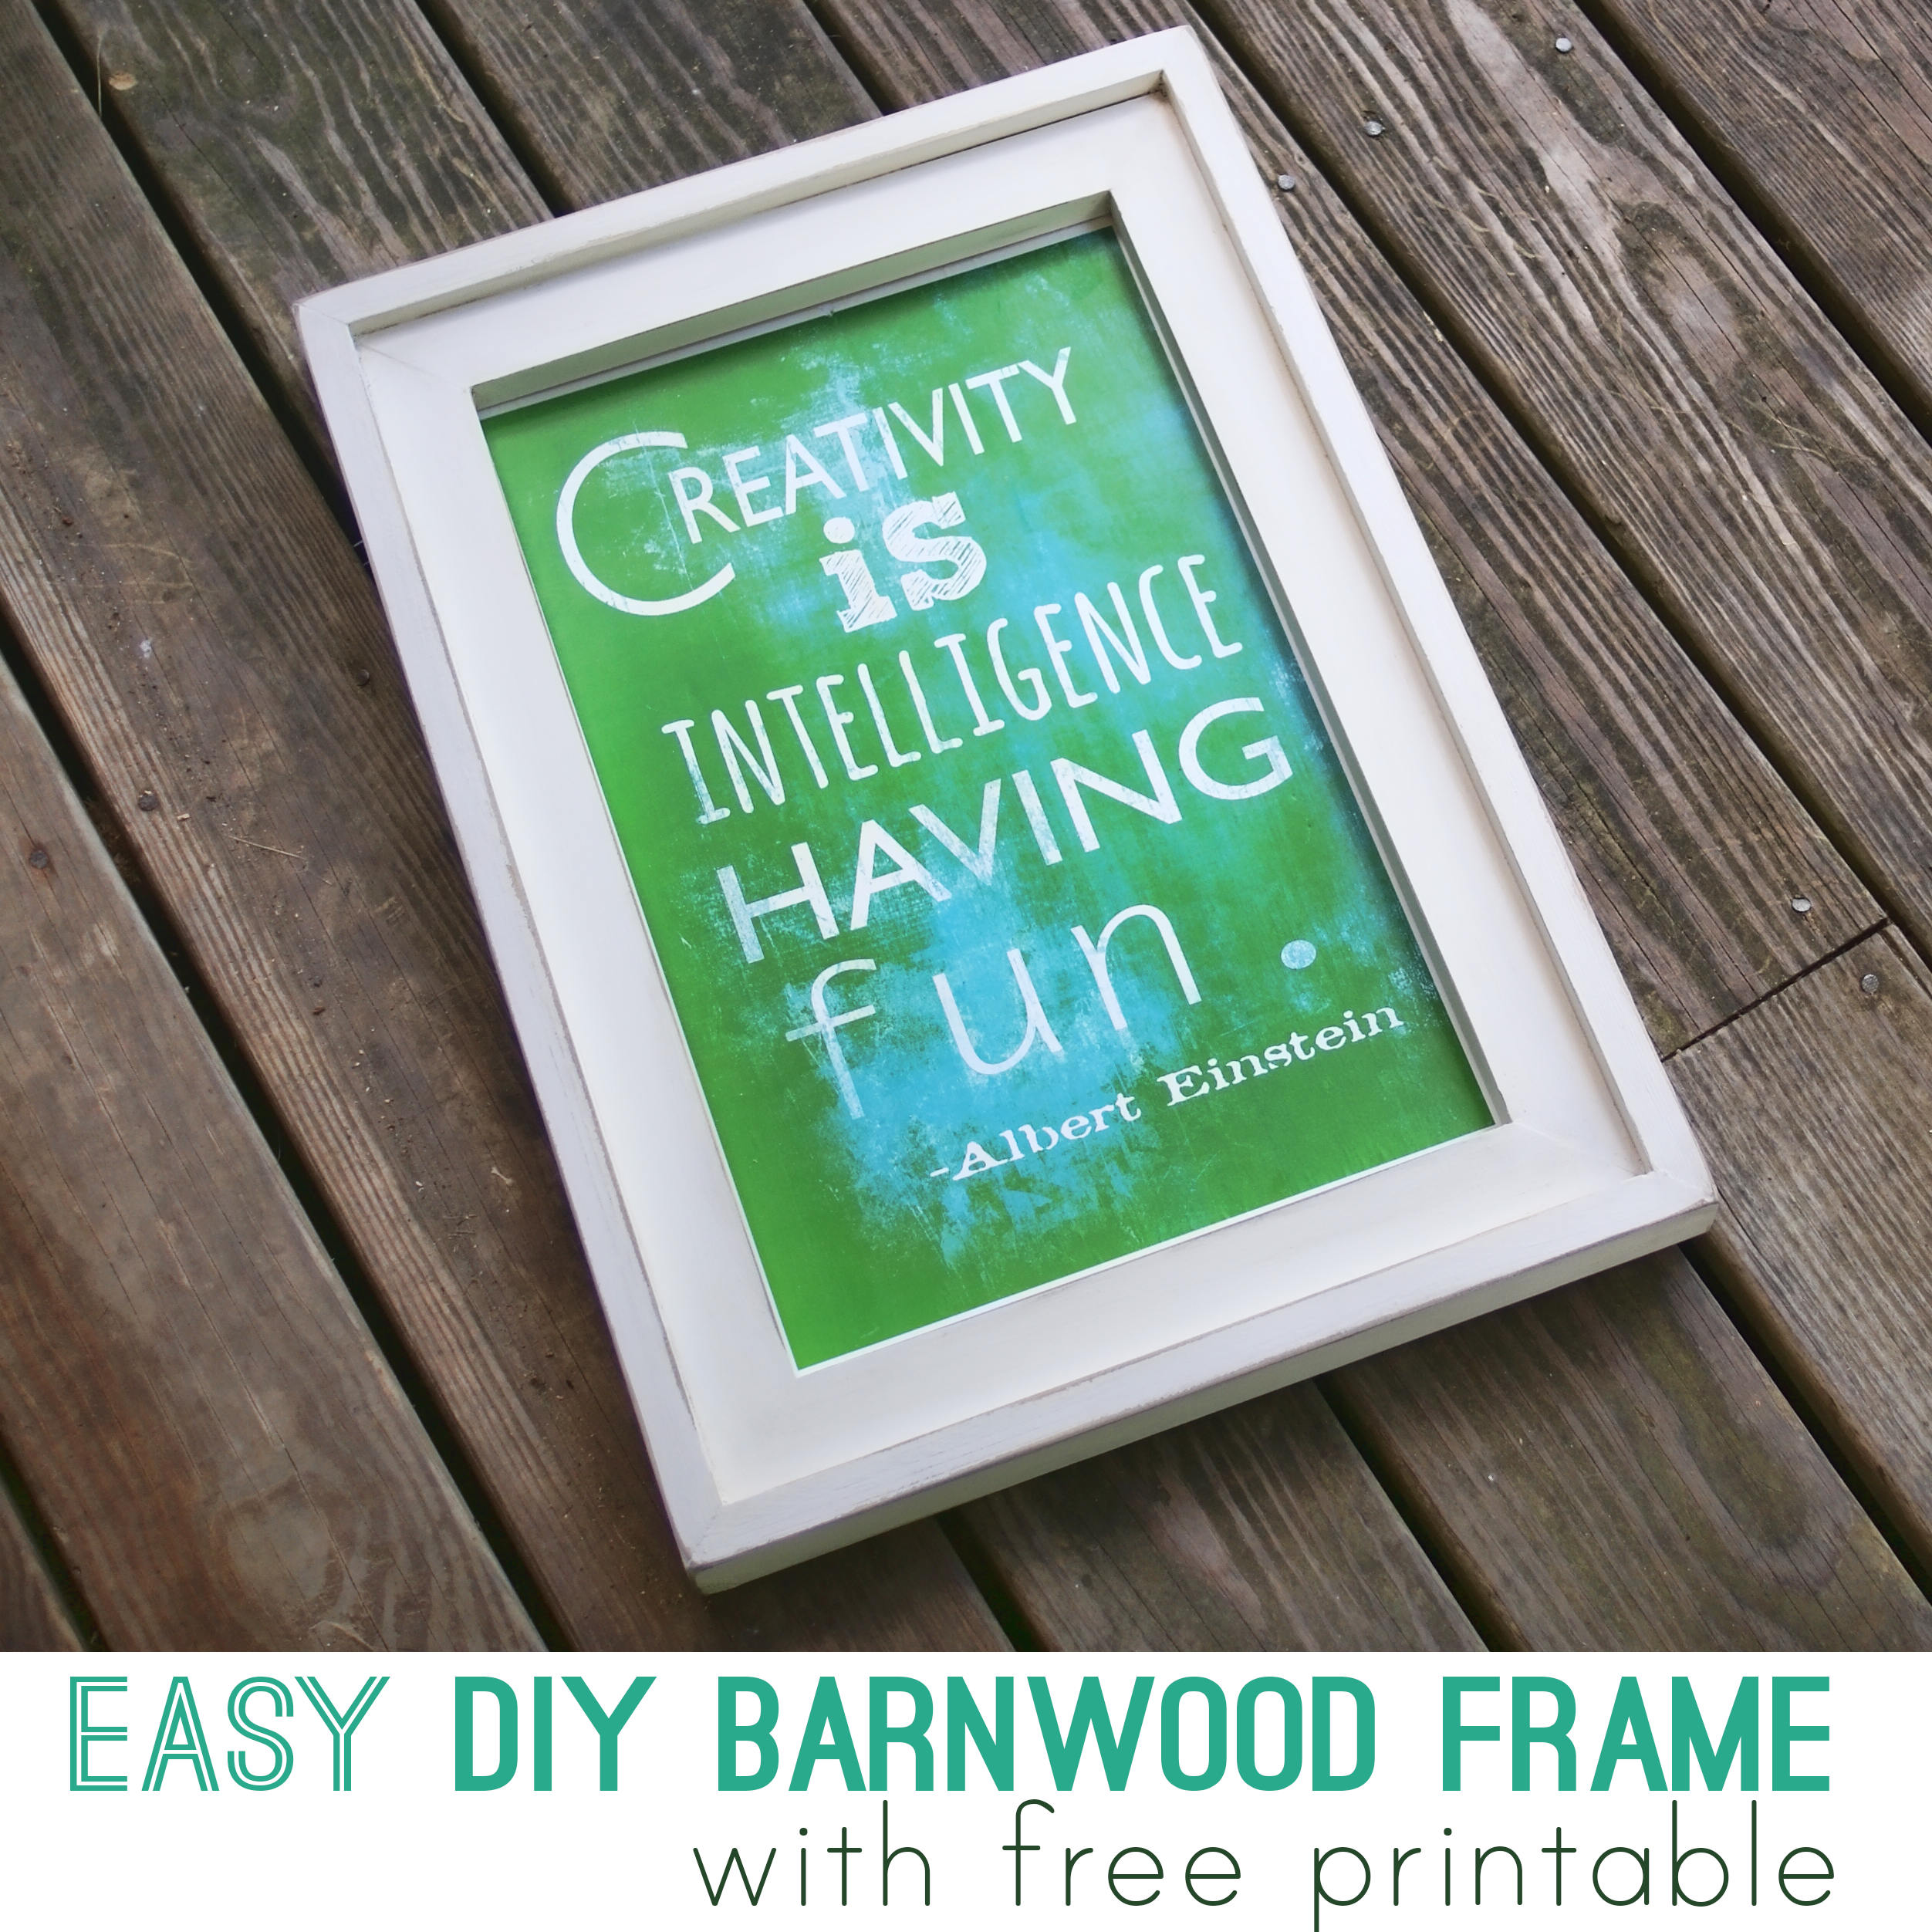
Here is an Albert Einstein Printable in a different color scheme that you can also download below…
I made a smaller frame for print in 8×10. I finished with homemade chalk finish paint I made from this chalk finish paint DIY.
I printed my 11×17 prints on regular copy paper and mounted them to white foam board with spray mount. I cut the foam to fit the frame opening and secured the mounted image to the frame with thumbtacks.
I hope you enjoy the printables, and give making your own frames a go. It is super rewarding!
Instagram is a wonderful way to document life in photo form. I love looking back and remembering all of the moments, and checking in to see what my friends are up to. Not only do pictures say it all, they are also great for some super awesome DIY projects. That brings me to today’s post, 50+ DIY Instagram crafts that rock!
Today I am sharing with you over 50 ways to craft with your special photos. There are projects from home decor to jewelry and more. What better gift idea than a custom photo handmade treasure? If you have photo crafts that I missed, leave a comment with the link!
