DIY Handpainted Signs With New Americana Decor Chalky Finish Paint

[pinit]DecoArt Chalky Finish Paint Tutorial[pinit]

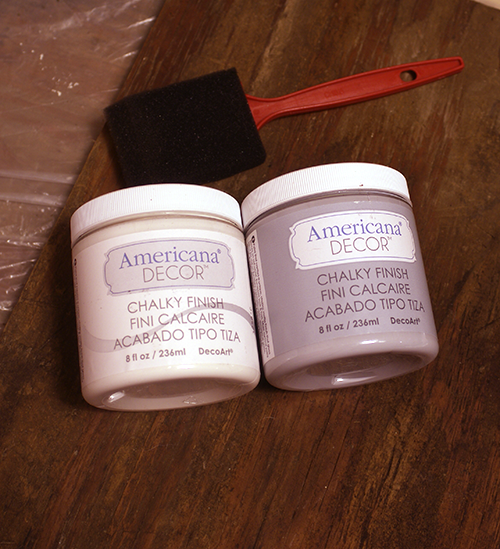
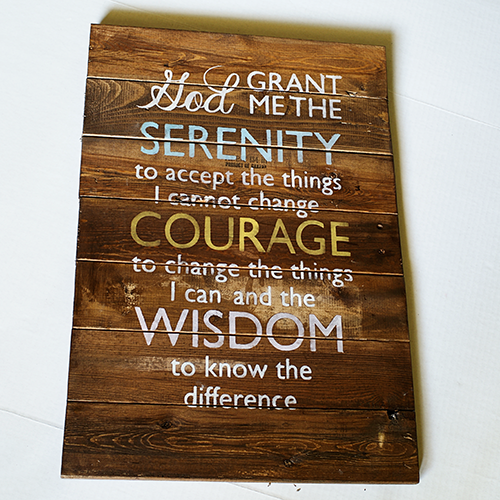
I had the wonderful opportunity to try out the new Americana Decor Chalky Finish paint, available online at Home Depot.  You can have it shipped to your home, or to your local Home Depot for free pick-up!  This product is perfect for creating distressed signs, which is what I am sharing with you today.  I am most impressed by the huge color palette, the high quality of the paint, the ease of distressing and the variety of mediums and finishing options.  There are so many things I plan to do with this stuff, but for now…

Diy Rustic Sign tutorial at saved by love creations

The technique is the same as this rustic sign DIY from guest artist Pam of The Little Red Porch, using the chalky finish paint.  I also added a video illustrating how to use Photoshop to print sections of your sign for taping together and transferring onto the wood.  We had several questions on that part in the first post, so hopefully things will be clearer, at least for those of you who use Photoshop.

DIY Chalk Painted Sign

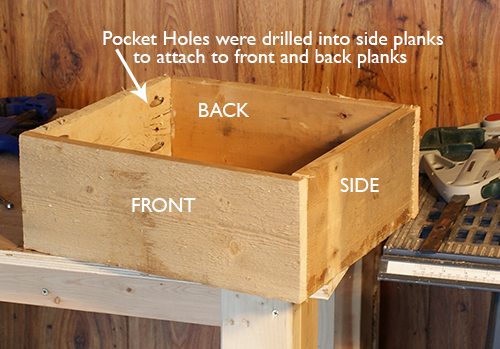
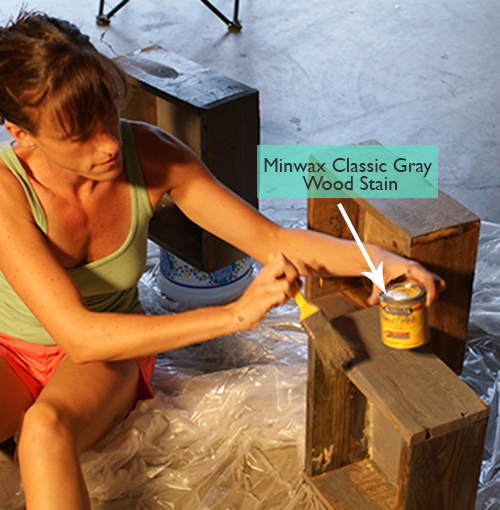
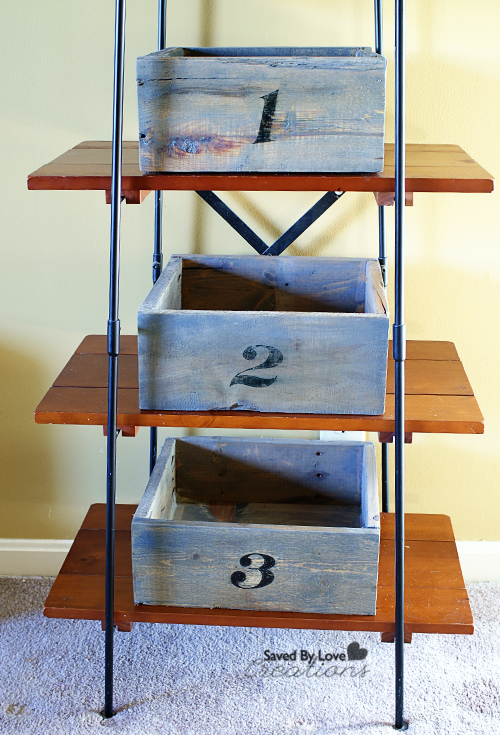
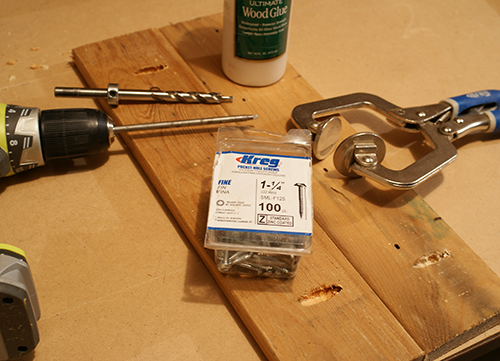
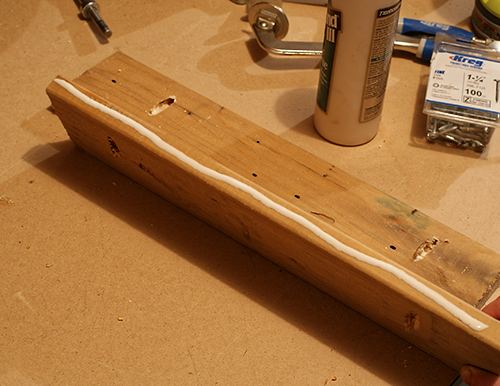
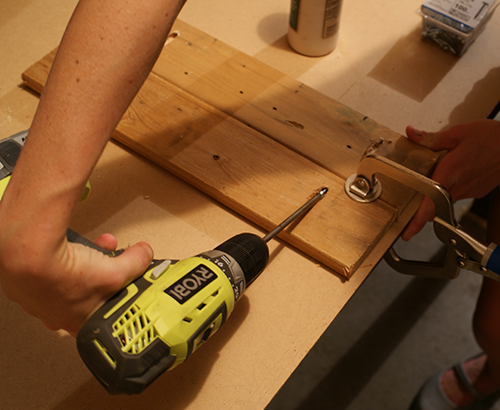
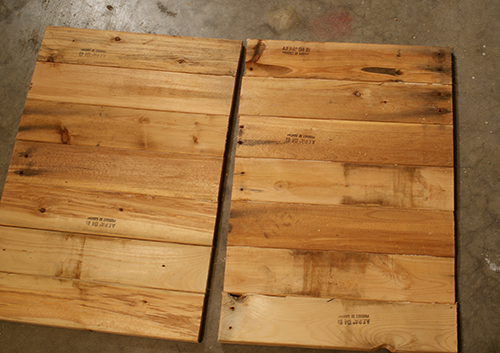
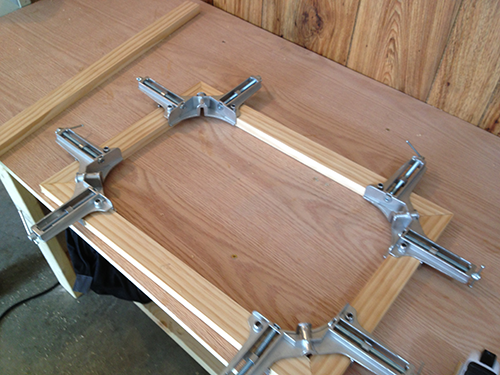
Begin with a piece of scrap wood in the size you want your sign.  I have tons of the stuff lying around here.  The 2 signs I am using for this tutorial are on very different wood.  The Proverbs verse is on rough MDF, and the other is on smooth ply wood.  Both have their place, depending on the look you are trying to achieve.  I prefer the smoother, I discovered.

Chalky Finish Paint Primitive

My cheap foam brush worked great for the background.  I used the chalky finish paint in “Primitive” for my background.  Great coverage, especially on this chippy, rough surface!  While that is drying…

DIY Tutorial Signs

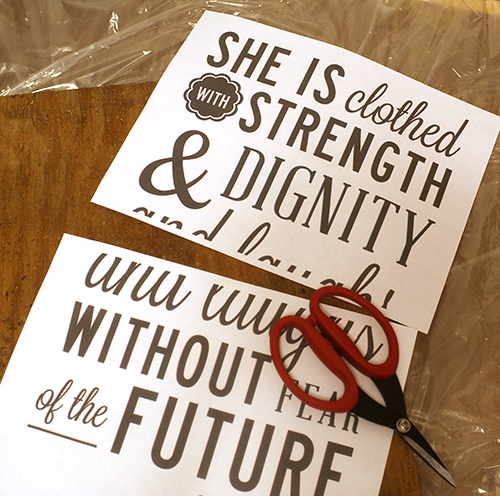
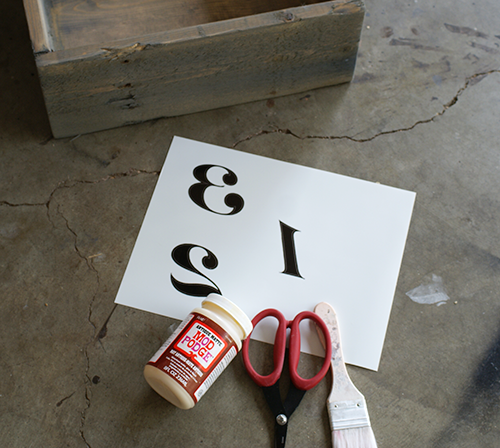
Create your text using your favorite software.  Print your artwork in sections if your sign is larger than your printer will print.  Here is how to do that with Photoshop:

DIY sign with chalky paint


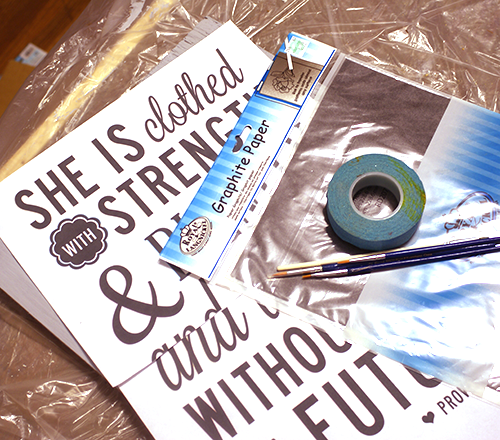
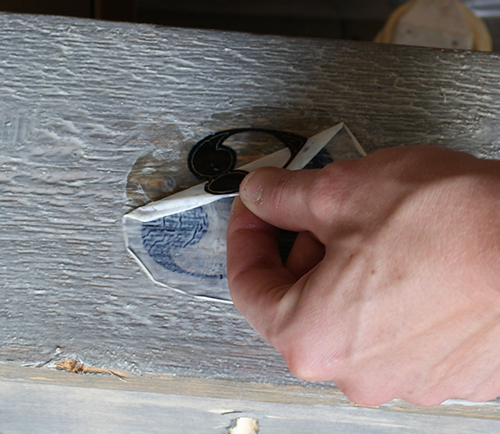
Tape image sections together.  You may need to cut off any border your printer added where the sections meet.

Transferring image to wood

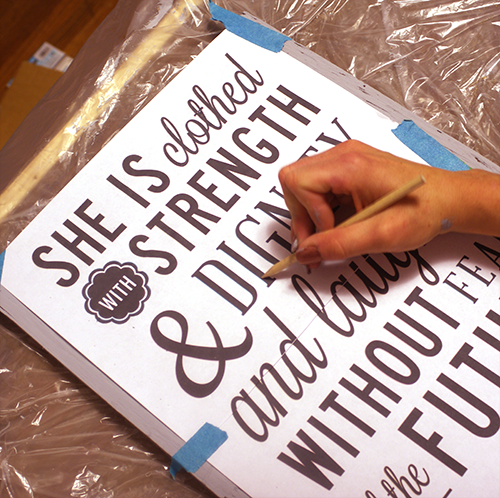
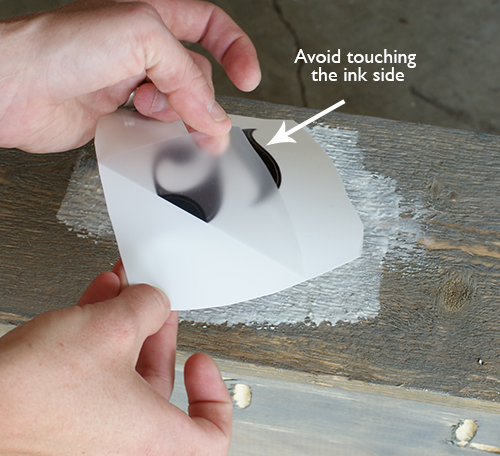
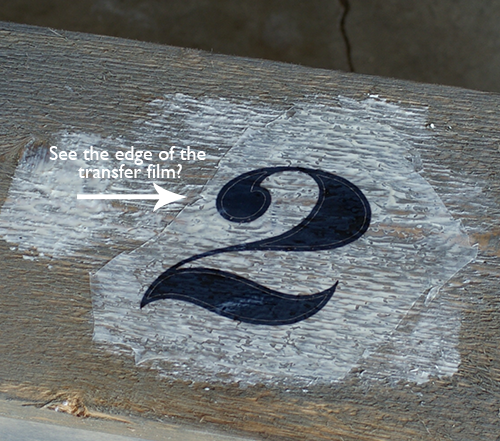
Place transfer paper between text and wood and trace letters with stylus or pen.

DIY tutorial using chalk paint

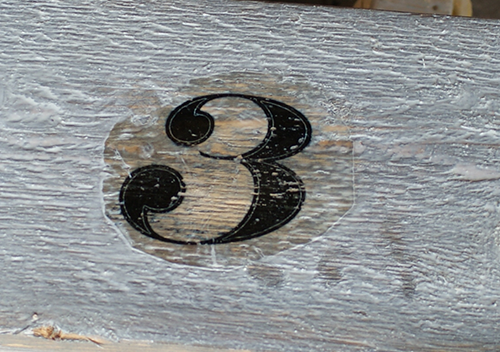
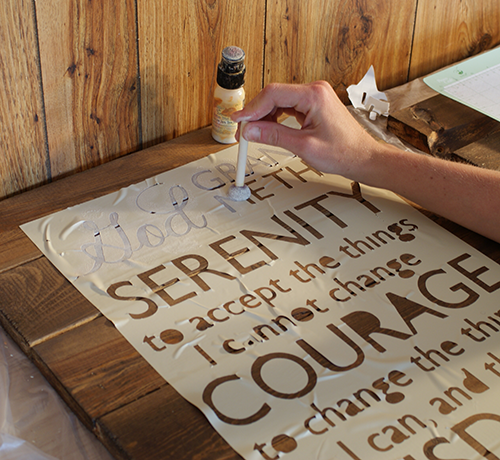
Once your text is transferred, fill it in with your color of choice.  I used Carbon for the black, Everlasting for the white, and a mixture of Romance and Innocence for the pink color.

DIY painting letters

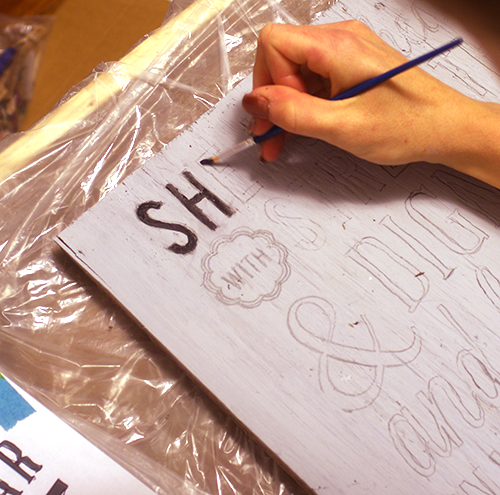
Just use a small round paintbrush.  I like to use watercolor brushes for hand lettering with paint.  I wet them first and it seems to help the flow.  Play around until you figure out what works best for you.
DIY how to make wood signs

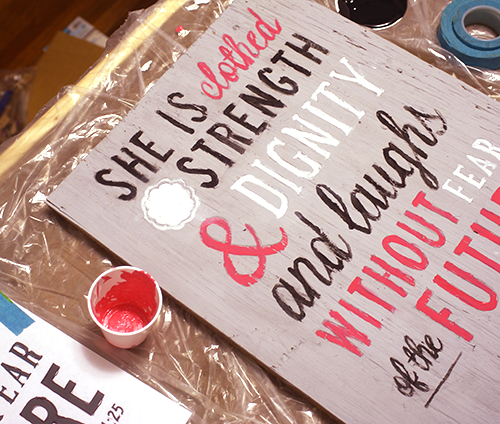
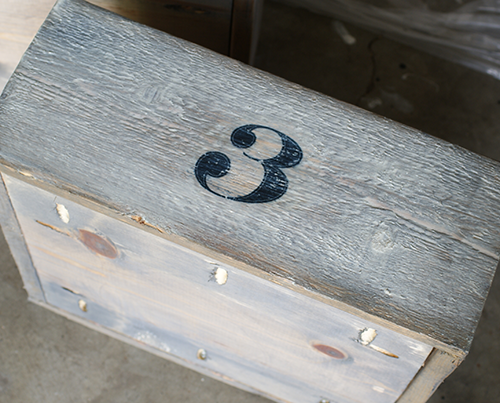
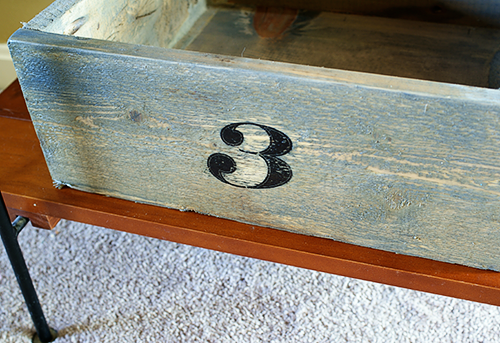
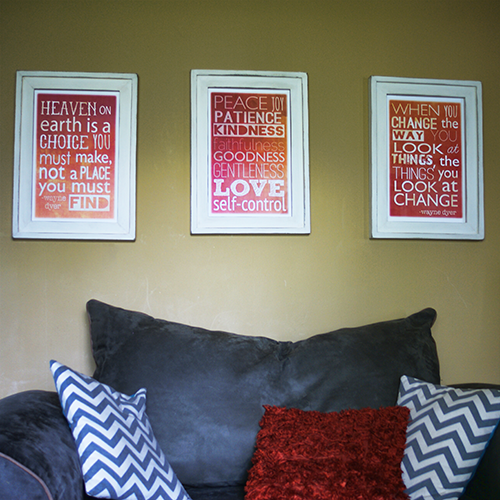
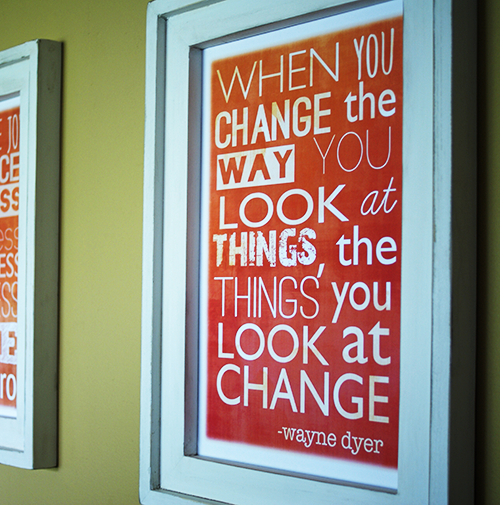
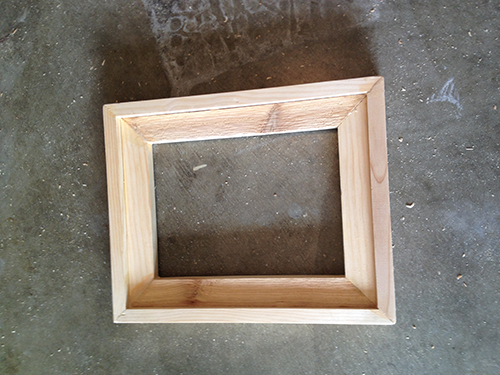
Once you are happy with your lettering, you may want to sand distress the piece, and frame your sign like we showed you in Pam’s DIY sign tutorial previously.

Clear wax for chalky finish paint

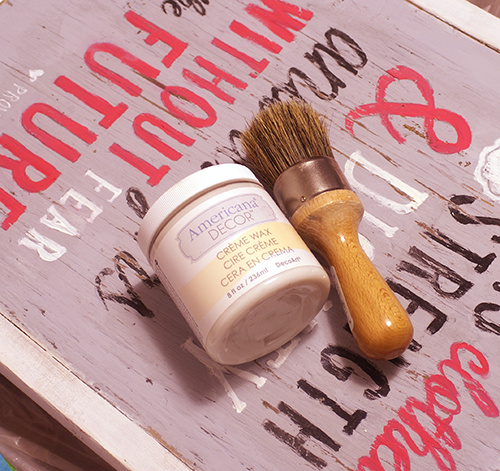
I applied clear wax and let that dry for about one hour.

Dark aging wax
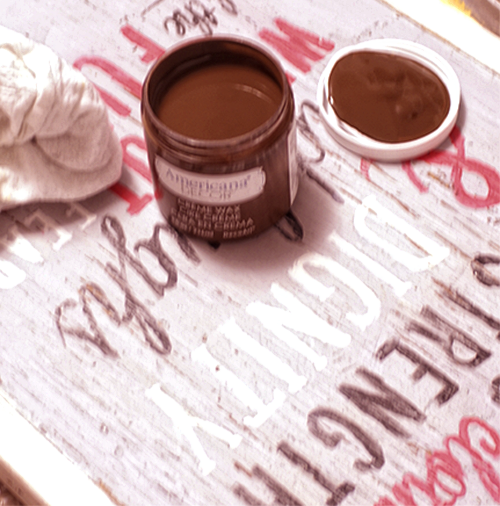
I applied the dark brown creme wax over the top of the clear creme wax, with a lint free cloth.  Wipe back to remove excess, working in a few inch sections at a time.  If you find you have overdone it with the dark and can’t wipe away enough, you can use the clear wax to pull it up.  Just dip a clean cloth in the clear and wipe the area that is too dark.

SONY DSC

For the “Awesome” sign, I cut the text out and made a stencil with my Cricut.  Also, I painted it on smooth ply sheets.  I used the soft varnish finish instead of wax, and it is velvety fabulousness.

I heart it so much I want to make a thousand more.

DIY subway art on wood

Decoart chalky finish Awesome sign

Visit DecoArt for more chalky finish project ideas.

Stay tuned as I am planning projects using the Americana Chalky finish image transfer and crackle mediums.
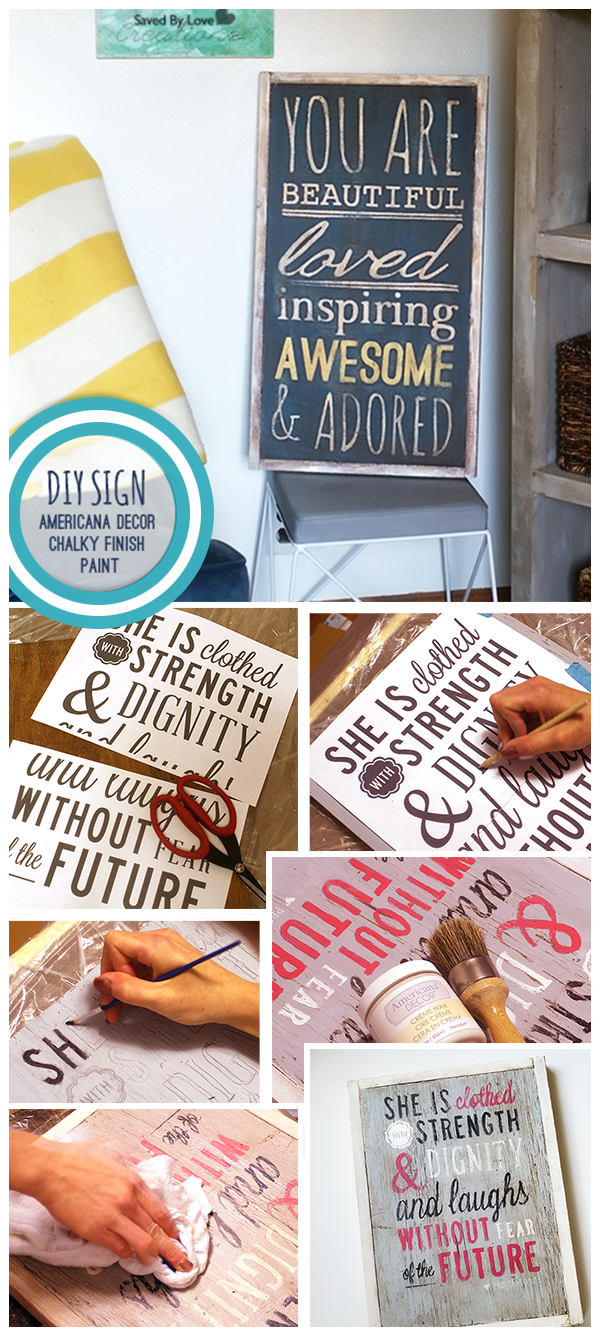
@DecoArt_IncChalky finish handpainted rustic sign DIY with video tutorial on printing sections of large artwork with Photoshop

Make Quick & Easy Inspirational Doodle Art

[pinit]

Mother Theresa artwork


[pinit]

How excited was I to discover that Unity Stamp Company has a new line of stamps designed by Stephanie Ackerman?!  The answer is very… much… tons.  I ordered several from this line and others.  They are full of inspiring words and I couldn’t wait to get creating with them.  Today I am sharing the easiest project out there.  Just stamp, scan, enlarge, print, cut out and frame!

Inspiring artwork tutorial

Inspiring art tutorial

You can color with copic markers if you want, or scan and open in Photoshop to color digitally.

Stamping techniques

For this one, I added shading in Photoshop with the drop shadow function.  Stephanie has a great class (several great classes, actually) teaching you how to shade the letters.  I told you all about it my Marker Art post over the winter:

This was my first class from Stephanie, and I would take them all if I had time!  She has a wonderful way of explaining her techniques so that about anyone can create lovely art in no time.

Make your own stamp art with Unity Stamps @savedbyloves @unitystampchick

I love the Mother Teresa quote!  I colored the heart with red copic markers in 3 shades before scanning and enlarging.

Framed Scrapbook Paper Art TutorialThis one I scanned in without color and added the yellow/blue-green in Photoshop.  Pretty cool because I can just change it if I don’t like the outcome.  That is the biggest perk of digital art in my opinion!

Framed stamp artwork

I think next I will go the other way  with these designs and shrink them down for creating a soldered pendant, or shrink film jewelry!

How do you use stamps in your artwork?

This is not a paid post!  I just wanted to share Unity Stamps and Stephanie’s new line because I love them.

DIY Storage Boxes from Recycled Pallets

DIY Numbered shipping pallet crates

Wanna make cool DIY storage boxes from old shipping pallets?  That is what you will find here.  This project came about because I have never really loved my tapered bookshelf and decided it was time to make it lovable.  I found these DIY storage crates from pallets at Ana White, and came up with a plan to make small, medium and large ones to custom fit to my shelves.  During the process of getting the numbers on there, I found a cool, accidental image transfer to wood technique.  I finished the three boxes over 2 days, including letting stain sit overnight.  Keep reading to see how.

reclaimed wood storage boxes

SUPPLIES:

Wood from shipping pallets – (There are 1000 ways to break down pallets.  I use a pry bar and circular saw.  Google it to find videos.)

Kreg jig and screws (My wood was .75 inches thick so I used 1.25 inch Kreg screws)

1×12 board for bottoms of crates

Wood Glue

Clamps

Mod Podge (I used Antique Mod Podge)

Wood Stain and Conditioner or preferred finish

Scrapbooking Attitude or materials for your preferred transfer technique

TUTORIAL:

How to make a storage box from recycled wood pallets

Based on my 3 shelf sizes, I decided to make three boxes sized as follows: 12×12.5 inch, 13×12.5 inch and 14×12.5 inch.  To do this, I cut 6 sides from pallets, each 11 inches for the box sides.  I cut a front and box in 12, 13 and 14 inches for each box.  The bottom of the box I cut from 1×12 board to 1.5 inches shorter than the front/back pieces of each box (to account for the width of the sides).  See all the pieces above.

Use Kreg Jig Pocket holes to join pallet wood

Here you can see that I drilled pocket holes on each edge of the inner surface of the side boards for each box (to see how to use Kreg Jig and join wood with it, go to my Pallet Sign Tutorial)

Drill pocket holes in the bottom of the box

Drill pocket holes in the bottom of the box for attaching it to the front, back and side box boards as pictured.

PalletCrates7

Start by attaching side to bottom using holes you drilled in bottom.

How to screw in kreg screws in tight space

PalletCrates12

Here it is with all the boards attached.  I used wood glue in addition to the screws.  I always do.  I learned that from Ana.

Sand before wood conditioner

I sanded with 80 then 120 grit paper.

How to use Minwax Wood Conditioner

Clean away debris from sanding with damp lint free towel, then apply wood conditioner.  Let sit 15 min, wipe away excess.

Stain wood after wood conditioner

I stained with Minwax Classic Gray Wood Stain.  I did an extremely quick and dirty finishing job on these since the wood is rustic and uneven anyway.  That is one of the many things I love about pallet wood projects.  I get to move quick and messy fits right in with the look.

How to image transfer onto wood

I used these free cool vintage numbers from The Graphics Fairy.   To get them filled in, I just pulled them into Photoshop and painted the open spaces black.  I flipped them backwards and printed them onto Scrapbooking Attitude, an image transfer product you can read all about in my Image Transfer Halloween DIY using the product.

How to use Scrapbooking Attitude for Image Transfer onto Wood

Cut out around number. Set aside and go to next step.

Apply Mod Podge to area for image transfer

Apply a thin layer of Mod Podge where the image will be placed.

How to transfer images onto wood

Peel film away from backing and place image, ink side down, onto the surface.  Smooth out any wrinkles and press into Mod Podge/wood with fingers.

How to make a wood pallet storage box

O.k.  Here is where the happy accident starts.  You can see the transfer film where you cut out the number and the clear “paper” around it.  At this point I would just mod podge over everything, hoping that hid the edge of the film to an acceptable degree.  What happened here was I realized I accidentally put the 2 on the largest box, where I really wanted the three.  So, I tried to remove it, and the film came away leaving the ink behind!  Yay!  I did sanded it off the box so I could put the 3 on there, but removed the film for the rest of the numbers.  I love how it looks!

remove film, leaving ink behind for the image transfer

PalletCrates24

Here you can see me removing the film, and the ink staying behind!

Seal with Antique Mod Podge

Brush a coat of Mod Podge over the entire surface, and the entire box to seal.  I used Antique for an aged effect.  Let dry and you are done!

DIY wood pallet storage boxes

DIY storage from wood pallets

So, they are awesome, am I right?

Wanna make everything under the sun from wood pallets?

Check out our 50+ Wood Pallet Project Round-up!

We also have 50+ Image Transfer Projects to inspire your creativity!

Easy Pallet Sign Using Kreg Jig

[pinit]

SerenityPallet2

[pinit]

I have been a long time fan of making signs from reclaimed wood.  If you have tried to make a pallet sign, you may have run into the same dilemma as I have.  How do you attache the wood pieces together?  Some people use the pallets as they are and just paint on them.  I prefer each plank to be the touching edge to edge.  Before I discovered the Kreg Jig, I scabbed my pallet planks together like I showed you in this How to Make a Sign From Reclaimed Wood Tutorial.  This is a way easier process using the jig.  You drill perfect pocket holes based on the wood thickness and the join is flush, edge to edge.  A Clean, strong, quick and easy attachment, that I am told doesn’t even require wood glue!  I used it anyway because I am just like that.  Pallet signs have gotten way easier since I made this investment.  This is not a sponsored post!  Read on to see how it works.

SUPPLIES:

how to use a kreg jig

Kreg Jig with drill bits and clamp

1 1/4 inch Kreg Screws

Shipping Pallet Boards (I pry mine off of the pallet with a pry bar a.k.a I have my husband do that part)

Stencils for words (I cut mine with my cricut machine)Wood Stain and lint free cloth

Acrylic paint (I used Tim Holtz Distress paint but anything will do)

TUTORIAL:

how to drill pocket holes with Kreg Jig

I drill two holes in each pallet, one one each end, a few inches in.  The pocket guide is set to 3/4 inch since that is the thickness of this pallet wood.  You can go down to half an inch but remember to use shorter screws.  There is a great chart that shows you what settings to use.  So the neck of the drill bit has a stopper that you set, then the guide with the holes that you drill through is set to that number, and there is a corresponding screw length.  The jig comes with a handy chart for quick reference.  SUPER easy!

Kreg jig pallet sign tutorial

Once your holes are drilled in each board (except the bottom one, which doesn’t need holes), swap to the screw driver bit which is shown in the drill in this photo (both bits you need come with the jig).

How to make a reclaimed wood sign @savedbyloves

Add some wood glue or don’t (see above).

SerenityPallet10

Then drill your screw into the pocket hole.

SerenityPallet11

Keep going until all of your pieces are attached.  I stained my sign with Walnut color Minwax Gel Stain.  Let dry.

SerenityPallet12

Use your stencil to create the phrase.  I cut mine from contact paper using my Cricut.

Attach wire to the back with nails or a staple gun and hang!

DIY Easy Barnwood Frame and Free Printables

[pinit]
DIY Barnwood Frames from Ana White Plan + free inspirational printables by @savedbyloves

[pinit]

 I have always wanted to make my own frames.  It was time for some new printables so I finally gave it a go, using this Barnwood Frame plan from Ana White as my starting point.  You can read on to see how I tweaked Ana’s plan to get 11×17 inch frames and to download your free Wayne Dyer and fruit of the spirit printables.


Free Printable Wayne Dyer Quote


wayneDyerPrintables2

This project is fantastic because the frames look awesome, and are super cheap.  I found 1×2 in 8′ strips for $0.75 at Lowes.

Follow Ana’s Plan linked above, but change your cut list as follows to get 11×17 frame openings:

2– 1x2s @ 14, 1 1/2″ flat side mitered so the shortest length is 11″

2– 1x2s @ 20, 1 1/2″ flat side mitered so the shortest length is 17″

2 – 1x2s @ 15 1/2″, edge side mitered so the shortest length is 14″

2 – 1x2s @ 21 1/2″, edge side mitered so the shortest length is 20″

wayneDyerPrintables4

Corner clamps are super helpful!

EinsteinPrintable1

Here is an Albert Einstein Printable in a different color scheme that you can also download below…

wayneDyerPrintables3

I made a smaller frame for print in 8×10.  I finished with homemade chalk finish paint I made from this chalk finish paint DIY.

Download and print:

Wayne Dyer Heaven Quote

Fruit of the Spirit Printable

Wayne Dyer Change Quote

Albert Einstein Quote

I printed my 11×17 prints on regular copy paper and mounted them to white foam board with spray mount.  I cut the foam to fit the frame opening and secured the mounted image to the frame with thumbtacks.

I hope you enjoy the printables, and give making your own frames a go.  It is super rewarding!

50+ The Best Instagram Crafts on Earth

Over 50 DIY Instagram Projects to Make Updated Square @savedbyloves

Instagram is a wonderful way to document life in photo form. I love looking back and remembering all of the moments, and checking in to see what my friends are up to. Not only do pictures say it all, they are also great for some super awesome DIY projects. That brings me to today’s post, 50+ DIY Instagram crafts that rock!


Over 50 DIY Instagram Projects to Make Updated Square @savedbyloves

50+ Things to Make From Your Photos

50 Plus Things to Make with Photos

Today I am sharing with you over 50 ways to craft with your special photos. There are projects from home decor to jewelry and more. What better gift idea than a custom photo handmade treasure? If you have photo crafts that I missed, leave a comment with the link!


Digital Art Tutorial & Letter Fun

Screen Shot 2013-02-15 at 3.35.32 PM

I am knee deep in hand lettering classes as part of my 2013 resolution.   My hand hurts from practicing, so I took a break from inspiration and thought I would share with you this fun digital art journal tutorial from Nancie Rowe Janitz.  She has several tutorials that will teach you to make some amazing pieces by scanning in backgrounds, photos, doodles and whatever you can think of to incorporate into your digital art.  Sometimes messy is fun, other times you just want to play in a way that doesn’t involve a ton of supplies and cleanup!  If I am unsure of where to go with a mixed media piece, I often scan in my background to play with text and elements to figure out a layout that I then do by hand.

hand lettering, doodlingHere is a doodle I did with the lettering workshop Letter Lab with Lori Vliegen.  It is a great class and I am looking forward to developing my own handwritten alphabet.

art journal page, doodling, mixed media

This was part of a journal page I learned from techniques in Lori’s class.  It is water color on mixed media paper, Pitt pen and graphite pencil.  I scanned it and applied the Topaz Affects Grunge filter in Photoshop.

Thanks for stopping by, and I hope you are inspired to create!

New Printable Love Trio

#Valentine's Day #Printable Set from @savedbyloves #Freebie

[pinit]

#Valentine's Day #Printable Set from @savedbyloves #Freebie

[pinit]

It was time to update my 11×14 frame trio that gets switched out to correspond with the holidays.  I created this red/pink/white ombre Valentine’s love themed printable set to share with you.  I love how it came out!  For just $1 a print at my local Office Depot, updating the decor can be done without breaking the bank.  Just right click the thumbnail to pull up the full res version.  Save to your computer or flash drive to print.  I have mine done at Office Depot on regular printer paper.  The image is 11×14 inches, which they will print on 11z17 in paper.  Just cut off the excess for your 11×14 frame.  You could have them crop it to 8×10 if that is your preferred frame size as well.

XOXO ombre free printable

Heart free printable

Love chevron free printable

Don’t have frames?  Mount it to MDF or scrapwood like I showed you in this faux canvas art DIY.

Don’t want red and pink?  Check out last year’s printable Valentine’s Day trio I shared with you:


Make Vibrant Artwork in A Snap (+ Love Printable)

Corinthians 16:14 Dylusions ink background art print by @savedbyloves

[pinit]

This post was originally shared at Fox Hollow Cottage.

 I have been playing with Dylusions spray inks lately, and am in love.  Why?  Because you can create gorgeous art with the spray of a bottle.  Using a background I created in about 1 minute with this dye, I made you a Corinthians love verse printable to download and frame.  Want to make your own? Scroll down for the video and get creating.


Free Love Verse Printable by @savedbyloves #Dylusions #Valentine'sDay


Right click the image to pull up the full res 8×10, download and print!

Maybe you wish it were a different color, or had a specific saying.  That is why I am going to show you how to create your own vibrant, watercolor background using spray inks, and how to get your custom text/designs on there.

SUPPLIES:

Dylusions spray ink (Bubble Gum pink and Post Box red used here)

Watercolor paper

Water spritzer

Paper towels

Stencils of your choice (I used hearts to go with my love theme)

Hair dryer or heat tool

Transfer paper, design to transfer, and pencil (or just pencil if you want to freehand your design)

Micron artist pen in black or other permanent black pen (size 03 used here)

Here is a quick video showing you the simple process:

If you scan the background, the editing possibilities are unending.  Use it as the base for subway art with my DIY subway art tutorial.

Change the hues, add text and images, digital scrapbooking, even use it as your blog background.  Here is an example of a Dylusions background that I hand stamped, scanned, and altered the color of the butterfly:

ButterflyNormal

Digital scrapbooking, dylusions ink background, art journaling

Signature

Privacy Policy