Printable Father’s Day Cards Freebie

[pinit]

Free Printable Father's Day Card

Free Printable Father's Day Cards 2014 @savedbyloves[pinit]

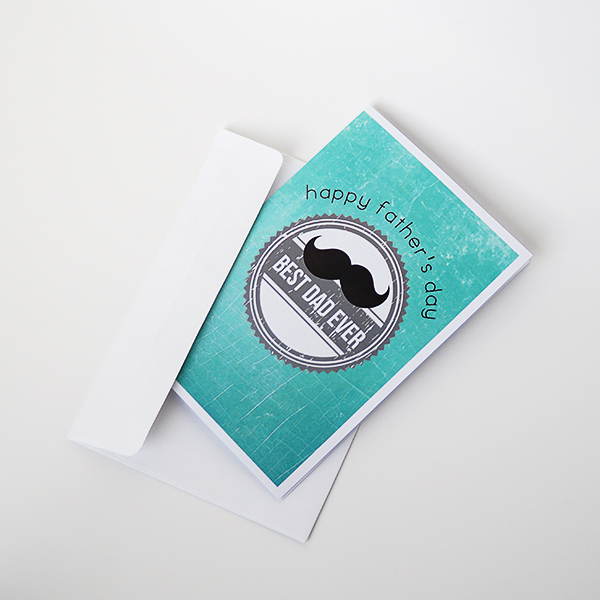
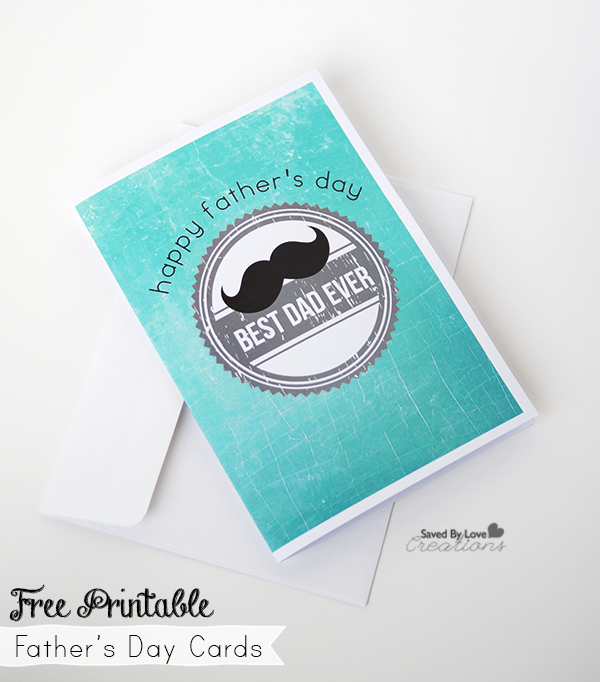
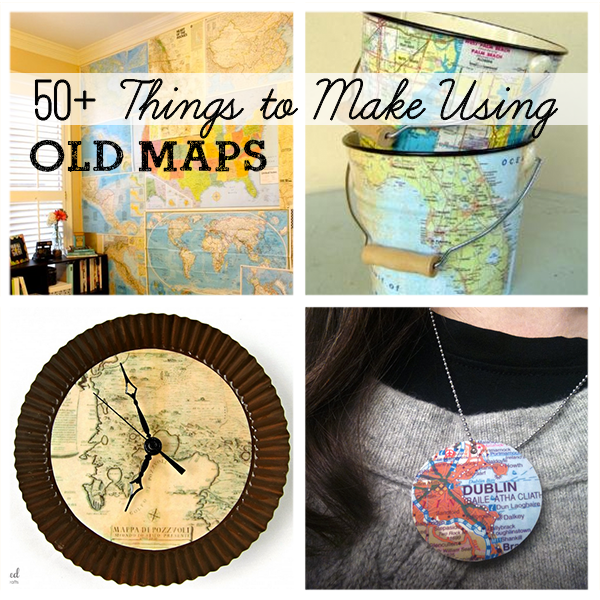
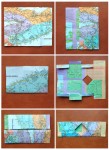
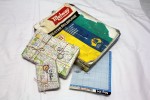
I am excited to share with you these fun vintage Father’s Day Card Printables!  Show your dad he is the best ever.  These are sized 5×7 and can be printed on photo paper or card stock, and folded in half as shown.  There are two version.  I hope you enjoy!

Version 1

*Just right click the thumbnail to pull up the full size version and save to your computer, print, or send to your favorite online photo printer.  I used Walmart one hour photo for this and my card with envelope was $0.97!

FathersDay2

Version 2

Fathers Day Printable Card from @savedbyloves

Free Printable Vintage Camper Art

[pinit]

Free Vintage Camper Printable by Colleen @JustPaintIt @savedbyloves

[pinit]

Hi there, Saved By Love readers! This month I have a little different type of project to share with you and I hope you like it. I love crafting and I especially love sharing craft tutorials but I realized I hadn’t shared any of my artwork with you yet.

With Father’s Day coming up, along with summer vacations getting started, I thought you might enjoy a fun printable that I made from one of my watercolor paintings. I have links to the downloads at the bottom of the post, but first I wanted to show you some of the steps I go thru for a watercolor.

camper-sketch

I start with a sketch, of course.

No, that’s wrong. I actually start by gathering loads of visual references. Google makes it so easy now.

When I started painting in the ’90’s, I was a magazine ripper. I had binder after binder of cataloged photos. When I’d paint a mural at someone’s house, their wall would be covered with magazine photos, held up with blue painter’s tape. Now I just keep photos in folders on my computer. Much, much easier.

When it comes to sketching, there are lots of techniques and methods out there. (I think YouTube has quite a few.) I don’t know any, however. I pretty much eyeball everything. Good erasers are a must!

For drawings like this vintage camper, I sketch in pencil pretty lightly until I’m satisfied that everything is in proper relation to everything else. Then I’ll grab a ruler to draw the straight lines. When the pencil sketch looks about right, I go over the pencil markings with a black marker, usually a Prisma .03. I don’t use a ruler with the marker, however, because if the ruler isn’t lined up perfectly, the whole drawing is shot. That’s happened a couple of times.

I’d rather freehand the lines and have a few bumps here and there. It also adds to the ‘charm’ of a freehand illustration. There are so many great digital artists now, and I love their work, but there’s something pleasingly ‘organic’ to a handdrawn or handpainted piece. At least, I think so.

Another drawing tip I have is to turn the paper (or canvas) upside down and all around while sketching, both with pencil and the marker. This is particularly helpful for curves and circles. Although another reason to turn the sketch upside down is you’ll see imperfections more clearly and, therefore, can fix them.

Try turning your paper upside down the next time you draw something. You’ll be surprised at what you see!

Finally, after everything is inked in – and it has dried (!) – I erase all of the pencil markings. That’s important before the painting starts otherwise you’ll get some graphite smeared into the paint.

camper-watercolor

With the sketch inked in, it’s time to lay down the colors. I’m new to watercolors so bear with me if you’re a watercolorist because I don’t really have any idea what I’m doing. Although I am having a lot of fun with them!

I still need a lot of practice with highlighting and shading but for simple illustrations like this camper, I just add layers of color until I get the depth I want. If you haven’t painted with watercolors since . . . well, since you were a kid, then you ought to give them a whirl again. It’s a great medium and the results are beautiful without a huge time investment, for the most part.

camper-watercolor

Sometimes I’ll leave the painting right there and call it finished, just with the initial inked sketch and color over it.

camper-watercolor

But going back over everything with a marker again helps sharpen the details, I think.

Either way, you wind up with a cute little painting that you can turn into a fun printable.

Home Printable

Click the above photo or here to download this 8 x 10 printable.

I thought this might be nice for a Father’s Day gift or just keep it for yourself!

Home-Camper-blank

Click the above photo or here to download this 8 x 10 printable.

Or you can download this camper and add your own text with PicMonkey or any other photo editing program.

Ever since I started painting, (nearly 20 years now) my goal has been for people to use my art. Sure, if you want to hang it on a wall, that’s great too. But I always wanted my paintings to be on everyday items. Now, with sites like Zazzle, that’s possible!

I also noticed that some artists were making their own digital clipart. After some research, I jumped into that pool too and opened a shop on Etsy where all of my art will be available as downloads. Clip art is in the works and will be in the shop soon. Not only does this keep my prices down, it means that people can use my art to make their own creations, including their blogs and web sites. So exciting for me!

I hope you like these camper printables! And I hope you’ll use them for other creations, besides just printing. I’d love to see what you come up with!

I’ll be back at the end of June with another fun project. In the meantime, drop by Just Paint It for more paint projects. You can also find me on Facebook, Google+, Pinterest and Instagram too. And of course, I’d love for you to drop by my Etsy and Zazzle stores.

Before too long, this camper will be in both. Not yet though. Right now, it’s just for Saved By Love Creations readers.

Happy Summer!

Colleen

Over 50 DIY Projects Using Old Maps

[pinit]
50 Best DIY Projects to Make Using Old Maps @savedbyloves[pinit]

Do you love old maps?  Well if so, today’s round-up is going to make you dance and celebrate.  If not that, you will at least find some inspiration in super cool things to make with old maps.  Here is a collection of over 50 of the best projects “on the map”!  Enjoy, and as always, if you have a tutorial you would like included in the collection, send me the link for consideration.


Free Printable Chalkboard Mother’s Day Set

[pinit]Mother's Day Free Printable Card by @savedbyloves[pinit]

Head over to Printable Decor for this exclusive Free Printable Chalkboard Mother’s Day Card Set for Mom, Grandma and Aunt!

Dollar Store Craft Make $3 Wall Art Trio

 [pinit]

Dollar Store Craft Three Dollar Wall Art DIY

 [pinit]


I am so excited to share with you this great Dollar Tree wall art project that you can make for $3!  I found some adorable spring/summer print gift bags on my most recent trip there and decided to bring them home and make barn wood frames from scrap wood for them. While there, I also grabbed the coordinating navy blue planter, knowing I would put the DIY Paper Daisies I showed you last spring in there to go with the daisy on one of the cute gift bags.  Once I got the three bags framed, I decided there needed to be text on the chevron backgrounds, so I cut out “Oh Glorious Day” using my Cricut.  You can get the cut file too!

How to Make Wall Art

DIY Barnwood Frame Tutorial Reclaimed Wood


Here are the three bags.  I loved the daisy and the chevron prints in coordinating colors on the other bag.

TUTORIAL:

I measured the bags to see how big to make my frames.  I decided I wanted the opening to be 9×10 inches.


How to Cut Wood With Table Saw

I shared an Ana White Barnwood Frame Plan in this DIY Barnwood Frame Tutorial with Free Printables.  For this project, I wanted different dimensions and learned a couple of tricks I want to share along the way.  I wanted to use 1×2 inch boards, but didn’t have enough of that dimension on hand, so I ripped 1×4 scraps with my table saw by setting the guide arm at 1.5 inches (which is the actual width of a 1×2 board).  I

How to cut with Miter Saw

Next I set my miter saw to 45º and cut one end of my homemade 1×2.

How to cut Mitered Corners for frame

I measured from the short inner point of the angle 9 inches over and cut the other side going the opposite direction (so I moved my miter saw 45º to the left).

How to Make a Barnwood Frame

I lined the inner frame up with 1×2 flipped up on its side to know where to make the 45º cuts for the outer frame.  This was easier and quicker than measuring!  I used 2 paint stirrers to give me the thickness for attaching the inner frame to the outer so that the back of the frame would be recessed for my foam mounted gift bags (foam mounting happens after the frames are made, see below).

Ryobi Air Strike Nailer For Joining Inner and Outter Frame

Use wood glue at the join and clamp the inner and outer frame together.  Nail in place with 2 inch nails.  Did I ever tell you I love this Ryobi AirStrike cordless nailer?  I do.  It is a go to tool for me.  So easy to use, CORDLESS, goodbye hammer and nails.

Mount Picture on Foam Board

Cut foam board to fit in the back of the recessed frame.  Cut the desired image area off of the gift bag and adhere it to the foam board with Super 77 or other mounting adhesive.

Smooth out Wrinkles with Hand

Smooth wrinkles from the center out with your hand.

Paint Frame With Chalk Paint

Paint frame with color of choice.  I used white chalk paint and antiqued the edges with  FolkArt Antiquing Medium .  I sealed with Krylon Clear Coat Matte Finish because it was nice outside and I was excited that I could use spray sealer after such a long winter!  Wax or varnish would be fine too.

Put Image in Barnwood Frame

Since the foam board is cut to the same dimensions as the recess in the back of the frame, the picture pretty much fits and stays.  I used clear packing tape to secure it in place.

I used Coordinations adhesive cardstock in yellow and my Cricut with SCAL software to cut out the text, which I created in Photoshop (“oh” is “Always in My Heart” font and “GLORIOUS DAY” is Ostrich Sans Black).  Since the paper was adhesive I just peeled off the letters and put them on the chevron patterned framed backgrounds like you see in the photo.  You could use the cut file to make a stencil and paint the letters on, or print them in your favorite color and cut them out by hand too.

Download “oh”

Download “GLORIOUS DAY!!!”

Attach sawtooth hanger or wire to the back to hang!

Upcycle a Rusty Grate Into a DIY Photo Display

[pinit]Repurpose Photo Display Idea @savedbyloves [pinit]

Today I am happy to share with you this rustic, quick & easy upcycle to display your favorite Instagram photos – all while saving a rusty old grate from a tragic dumpster demise!  This particular grate is from an fire pit that is no longer.  I just couldn’t part with it.  Round objects have a hard time getting away from me since I love the challenge of using them to create unique repurposed wreaths.

Such as this repurposed hubcap wreath

I digress.  Back to the grate.

Upcycled Grate to Photo Display

Here is the old thing.  It has sat on my porch for months, begging for inspiration to strike me.  Along came Susan.

If you haven’t been to Homeroad, you need to remedy that.  Susan is a junker with an eye for upcycling that always inspires.  When I saw her Barrel Strap Photo Holder, I knew what I had to do.

Upcycle home decor DIY rustic decor

Find something old, rusty and round, and you can do it too, within just a few minutes!

How to make a Rustic Photo Holder

Photos

Photos – Use your Instagram photos or other photos and apply a fun vintage filter!

Scrapbook ephemera

I used ATC backgrounds I found at Hobby Lobby in a fun yellow, blue, vintage yet modern, geometric patterned, grungy style.  you know that style, right?

The flowers are from Prima .  I grabbed them at Hobby Lobby, but you can find them with my Amazon link too.

I used silver and white baker’s twine with the intention of clipping the photos with tiny cute clothespins.  While digging through my stash I found the perfect Gator clips from 7 Gypsies.  Their little hook fit perfectly over the rods in the grate.

Easy Photo Display

I threw this piece together in under 10 minutes, and I will cherish it for years to come!

How to Print on Burlap with Free Spring Printable and DIY

[pinit]DIY how to print on Burlap with free Printable wall art @savedbyloves[pinit]

Hi there everyone!
I’m so happy to be back chattin’ with you!
Do you love the look of burlap prints?
If you do, this is your lucky day because I’m going to teach you how
to make your very own right in the comfort of your home!
Honestly, this whole project took me less than 15 minutes to make
and I absolutely adore it!

SUPPLIES:

-burlap
-card stock
-scissors
-home printer
-spray adhesive

TUTORIAL:

DIY Burlap Printable-Supplies Needed

You first step is to cut your burlap to the same size as your card stock.
Spray the card stock with your adhesive and then apply your burlap on top.
 Press down and make sure that there are no lose ends.
How to print on burlap
Now it’s time to insert the burlap into the printer.
You want to make sure the burlap in on the side that will be printed on.
For my printer, I placed it in upside down.
(Please ignore the dust on my printer. Dusting is not my favorite activity!)
if I had a flower

If you would like to print my quote, 
just right click on the image below and save to your computer.
Printing on burlap at home
Then it’s time to print your design or quote.
 I chose this quote because I thought it was beautiful
and I knew I had the perfect burlap accessory to go along with it. 🙂
Now sit back and watch your fabulous art appear.
Burlap home decor
Once it’s done printing some tutorials may tell you to remove the card stock.
But I won’t. Nope.
I am going to use the card stock to give my burlap some support for when I frame it.
I didn’t want my printable behind glass because I wanted to accessorize
with some pretty burlap flowers.
So I placed the burlap print in the frame first and placed the glass behind.
To add my flowers, I simply used my glue gun.
And that was it.
Can you believe how easy that is?
I know right. I better go stock up on ink because I am going to be
a burlap printing fool!  🙂
 Are you addicted to burlap like I am?

I hope you enjoyed this easy burlap craft. 
If you would like to see more of my projects or keep up with my latest updates,
follow me on FacebookPinterestTwitterGoogle+ or Instagram.


Want more?  Check out 50+ Burlap Crafts and Decor Ideas!

Burlap DIY Decor

Easily Screen Print Custom Designs with Lumi Inkodye; Video Tutorial

[pinit]How to Make a Custom Print Tshirt with @lumi inkodye @savedbyloves[pinit]

How to Screenprint

This year at CHA, I saw so many amazing new products that I am busting at the seams to tell you about, and this is one of my favorites!  Watch the video to see how you can use Lumi Inkodye to make prints on natural materials.  I found this white cotton t-shirt at Walmart for $4.88 and came knew it would be perfect to try out this cool product.

Inkodye Lumi Screenprint

I made this negative in Photoshop and printed it on Lumi’s transparency film.

Lumi

Using the DIY Printing Kit in Blue, I followed the steps in the video below to make my custom logo tshirt!

Lumi Inkodye Tutorial

I used a baking pan as my flat surface and pinned my negative on top of the area coated with the solution.

Lumi Inkodye Tshirt

After 10 minutes in the sun, I had a great print. Make sure you wash in the detergent after bringing inside, so the developing stops!

This was so easy.  Look at the detail in the text!  Super impressive.  I am doing more prints as we speak.

Now for the video DIY straight from the Lumi Booth at CHA 2014…

How to Make a Custom Print Tshirt

Mixed Media Valentine’s Day Free Printable + iPad Art Journaling App

Procreate and scanned mixed media are used to create this free Valentine's Day 8x10 Mixed Media "Love" printable #mixedmedia #valentinesday #freeprintable @savedbyloves[pinit]

Today at Printable Decor, I am sharing this mixed media LOVE Valentine’s Day Free Printable.  I made it using some hand sketched elements scanned into the computer, then edited in my favorite new art journaling iPad app, Procreate.

scan art for #procreate #digitalartjournaling #artjournal

You can incorporate your own hand drawn elements via your touch screen, using the amazing selection of mediums for any brush stroke or line you would like to create.  This piece was a pencil out line of the woman on white paper I scanned in (see above), placing over a fun background in Procreate, where I changed the blend mode to multiply.  This leaves just the dark outline and gets rid of the white space.  I painted her all in the app, decreasing the opacity of the painted layers so that the background was visible underneath the skin and clothes.

You can save your files as PSD for further editing in Photoshop if you would like.  Procreate also uploads and downloads directly to dropbox.  Love it!  Super addictive and a great way to journal on the go.


DIY Handpainted Sign + Free Printable Template

[pinit]DIY Hand-painted #reclaimed Wood Sign tutorial and printable cut file or traceable template @savedbyloves #verseprintable #Love #valentinesday [pinit]

I am loving making signs these days.  With Valentine’s Day coming up, I decided to go with this love Corinthians verse, which is great all year round, but particularly so now.  For the detailed tutorial on how to make this sign, see our Rustic DIY Wooden Sign Tutorial.   Below you will find the Photoshop file I used.  The tutorial just linked  shows how to transfer the file to wood and hand paint it.  I used my cricut with the file below to make a stencil.  You can do either with the download.

Corinthians love verse printable template from @savedbyloves

Click the image to bring up the full size version and either print to transfer like I showed you in the tutorial linked above, or use as a cut file.  I use Sure Cuts A Lot for this.  Not sure if that is still available, but I do know that it doesn’t work with newer Cricut machines.  Good luck!

Corinthians Love Verse Sign DIY

Privacy Policy