DIY Upcycled Pop Can & Resin Heart Pendant

[pinit]#Recycle aluminum cans into gorgeous jewelry #Resin #Upcycle @savedbyloves #DIY @Crafts

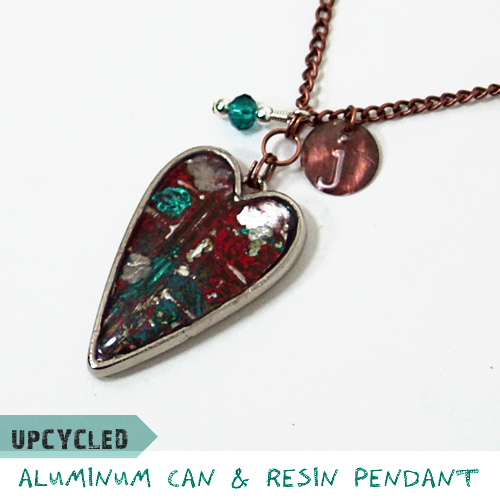
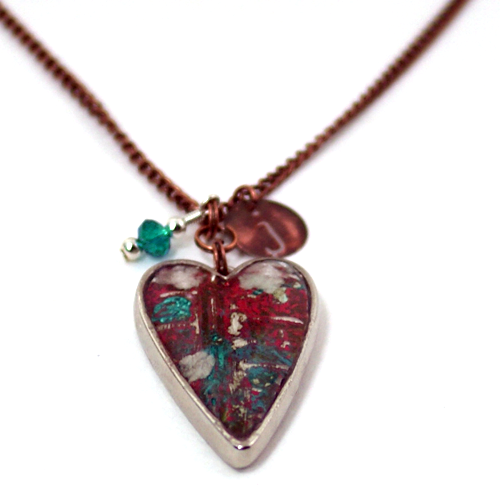
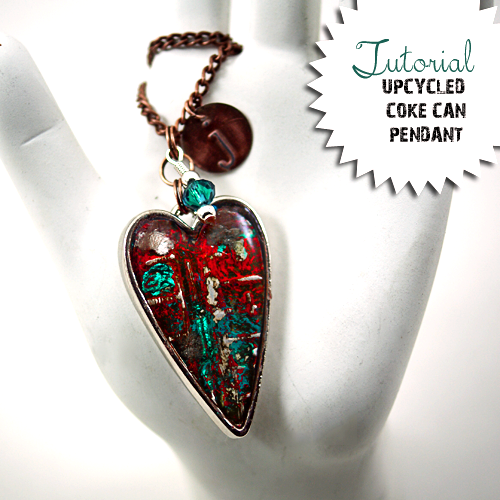
Do you have a pile of aluminum cans in recycling bin purgatory?  Well, if you have been around here long, you know I love to cut my cans and form them into various upcycled jewelry pieces.  Today, I am going to show you how I used a coke can, a bezel and some resin to create this fun, one of a kind heart pendant.  It would make a lovely gift for many occasions, and especially the rapidly approaching Valentine’s Day Holiday.  I made it for a gift and personalized it with a monogram stamped charm.  You don’t need a lot of expensive supplies and equipment to one of these yourself.  Here is how…

SUPPLIES

Empty Soda Can, rinsed with warm soapy water

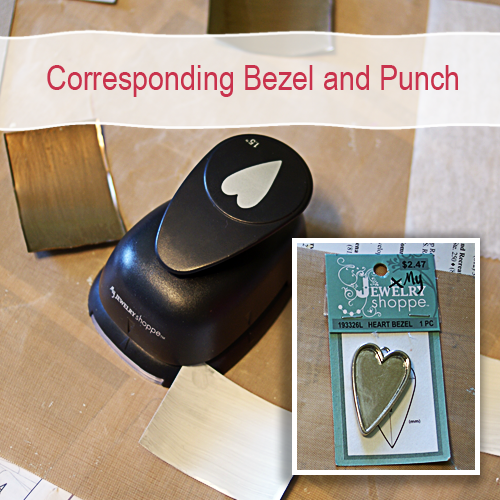
Jewelry Shoppe Heart Bezel and corresponding heart paper punch (got mine at Hobby Lobby)

Resin Jewelry Tutorial, Upcycled Jewelry Tutorial

-OR-

Any heart shape bezel and a sharpie or other permanent marker

Glossy Accents or other metal glue

Grungeboard or scrap cardboard

Embossing folder and machine

Perfect Pearls

3 colors of acrylic paint

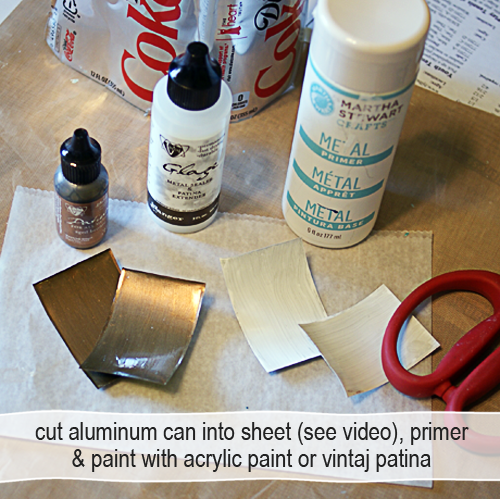
Metal paint primer (I used Martha Stewart’s)

Vintaj Sanding Block

Magic Glos Resin

INSTRUCTIONS

#Upcycled Recycled aluminum can jewelry #DIY #Craft tutorial @savedbyloves [pinit]

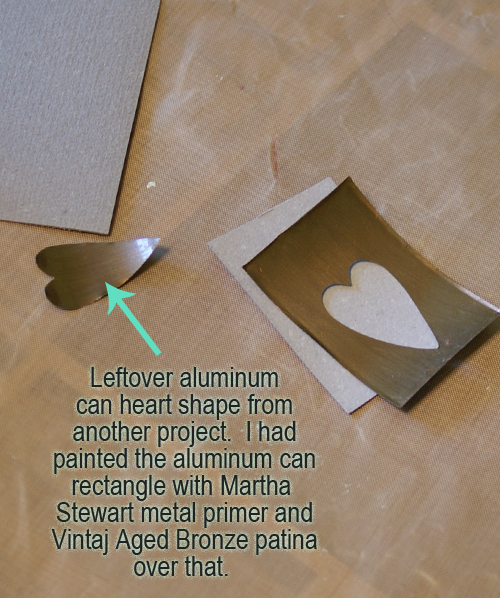
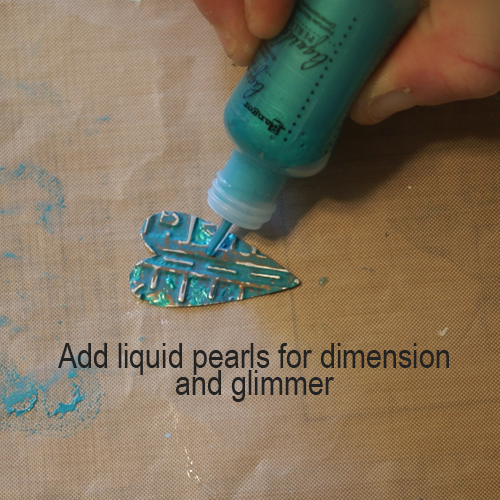
This project came about as I was doing another project that I haven’t shared with you yet.  There was a leftover aluminum can punched heart shape, and I remembered I had the corresponding bezel.  I found the bezel and paper punch at Hobby Lobby (by My Jewelry Shoppe) a couple of months back.  I decided to emboss the heart and add some acrylic paint and Liquid Pearls for a cool effect.

#Recycle aluminum cans into gorgeous jewelry #Resin #Upcycle @savedbyloves #DIY @Crafts

For the other project, I needed rectangles with a heart cut out in the middle.  If you just want the heart shape used in this tutorial, you don’t have to worry about cutting perfect rectangles.  Just primer and paint your can sheet and punch the heart shape from it.  I showed you how to cut the cans into a sheet in the video here…
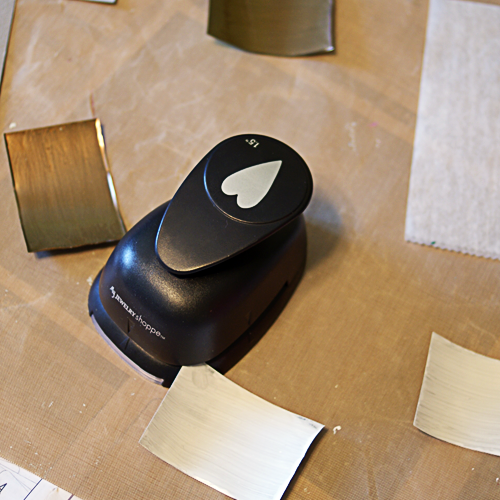
Make an aluminum can pendant
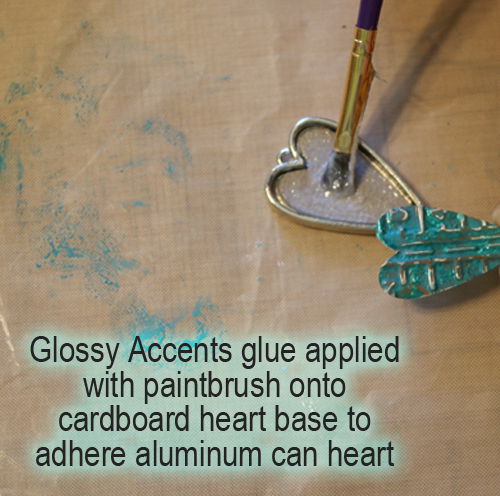
Trace the heart twice onto grungeboard, thick cardstock or cardboard and cut out inside the outlines with scissors.  Glue the cardboard hearts together, then glue to bezel.  Use clothespin to apply pressure for good adhesion.  This gives thickness to the thin can top layer.
Emboss your painted and primed can heart.  I used Tim Holtz Texture Fades embossing folder – Pattern and Stitches Set and my Sizzix Vagabond.  It you don’t have an embossing machine, you can hand emboss, or use the folder and a rolling pin like in this video by Sarah Hamer:

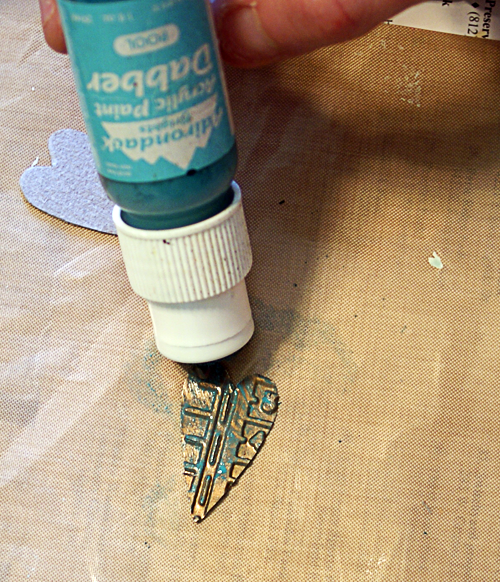
Now apply a second paint color over your base (Ranger Paint Dauber color Pool used here).

Ranger Paint Daubbers Pool

Ranger Paint Daubbers Pool

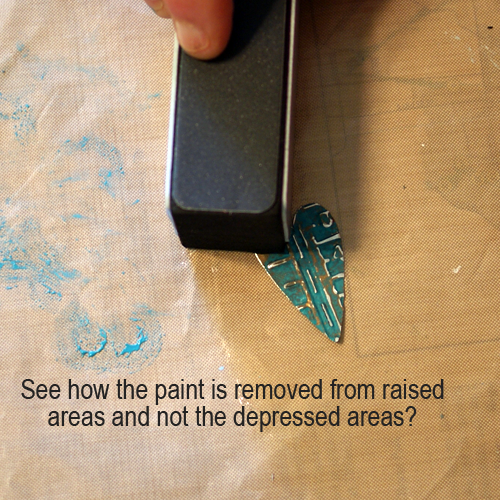
Let dry and and sand with sanding block to distress as desired.  Not shown here, but in my final pendant, I added a third paint color.  The red made the pendant pop.  If you sand away too much paint, it’s ok.  Just paint again and sand until you are happy with your piece.  The raised areas will lose color when you sand, while the depressed areas hold color.  The embossed design is enhanced by the contrast.  So fun!

How to emboss metal jewelry

How to emboss metal jewelry

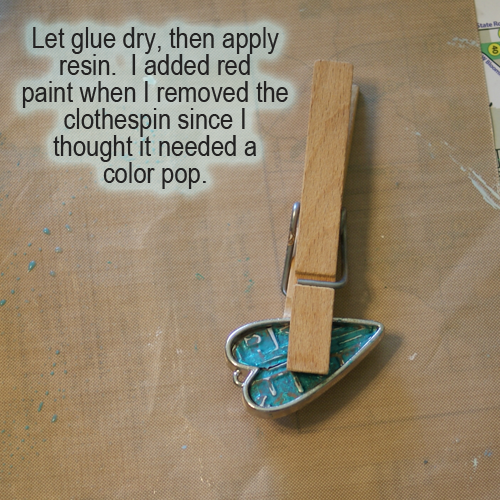
When you are happy with your paint job, glue heart into pendant bezel on top of cardboard base as shown.  Hold in place with clothespin while glue dries.

How to emboss metal jewelry2

How to use Magic Glos resin

Let glue dry completely, then apply Magic Glos resin like I showed you in this Plaid Ring Bling tutorial.

You can use any resin you want.  I just had this on hand, and love the fact that it cures in minutes vs. the hours it takes 2 part resins to cure.  Maybe you are more patient than me!

Add chain and charms as desired and you are done!

#Upcycled Recycled aluminum can jewelry #DIY #Craft tutorial @savedbyloves

HeartBezelPendantDIY8

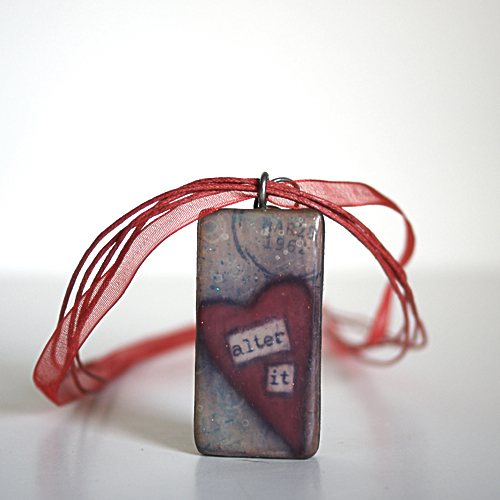
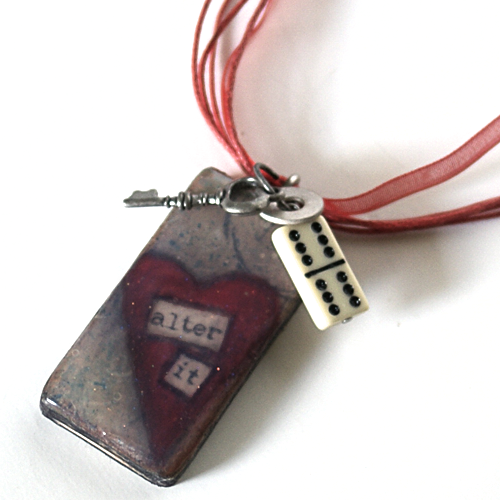
How to Make an Altered Pendant

#Altered art pendant tutorial @savedbyloves #Jewelry #Handmade

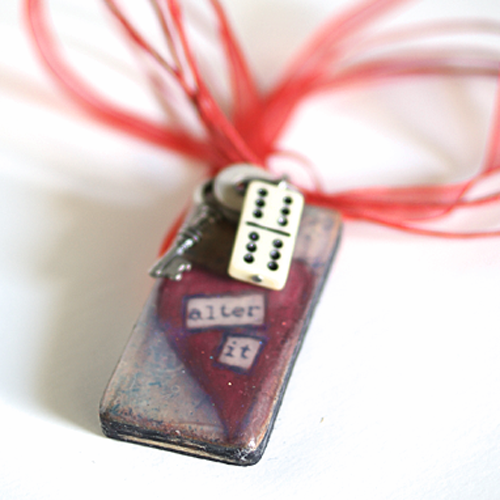
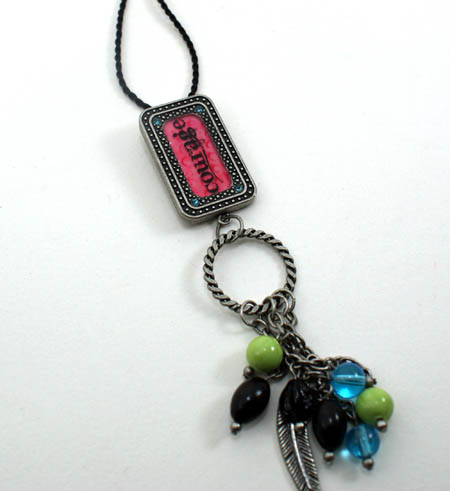
This is another scroll saw project.  I cut a domino sized rectangle from 1/4 inch plywood as my pendant base.  I love altered dominoes, but they are often quite thick/chunky, and have embossed surfaces on both sides.  This makes it hard to adhere paper without having bumpy lumpiness.  Using 1/4 inch plywood solves these issues, and is super cheap.

SUPPLIES:

1/4 inch plywood rectangle 2×1 inches

Matte gel medium

150 grit sand paper

Small, detail paint brushes

Paper towels

Stamps of your choice

Stazon Jet Black

Glimmer Mist Turquoise Blue

Scrapbook paper 2×1 inches

Acrylic paint

Charcoal pencil

Mod Podge Dimensional Magic Glitter Silver

Tim Holtz Chitchat Stickers

Charms

Small Eye Hook or glue on bail

Necklace cording

#Altered art pendant tutorial @savedbyloves #Jewelry #Handmade

TUTORIAL:

  • Paint plywood rectangle with black acrylic paint and let dry
  • Adhere scrapbook paper with print of your choice to pendant base with matte gel medium (I traced my wooden rectangle onto paper scrap and cut out to fit)
  • Let dry completely (about 30 min) and sand edges to smooth and blend paper into wood (this took away some of the black paint on the sides, which is what I wanted since I was going for a distressed look)
  • Stamp as background paper as desired with black ink and spray with glimmer mist.  Let dry.
  • Draw heart with charcoal pencil and paint with red acrylic wash (mix small amount of red acrylic paint with a few drops of water and paint heart so that paper print still shows through – you may need to dab with paper towel)
  • Apply thin, even coat of matte gel medium and let dry 30 min (you can hurry this along with a heat tool)
  • Apply chitchat word stickers (i used “Alter it”) and outline with soft charcoal pencil.
  • Apply layer of matte gel and let dry
  • Outline heart with charcoal pencil and blend for shadowing with Qtip or blending nibs
  • Coat with matte gel a final time
  • Once dry, screw small eye hook in top for hanging mechanism, or glue on a bail
  • Apply Dimensional Magic Silver Glitter – For a domed look, apply thin, even layer and let dry for a couple of hours.  Then apply doming layer.  Let sit for 24 hours.
  • Add charms and string as desired


Sizzix Embossed Poly Clay Pendants

Sizzix embossed clay pendants

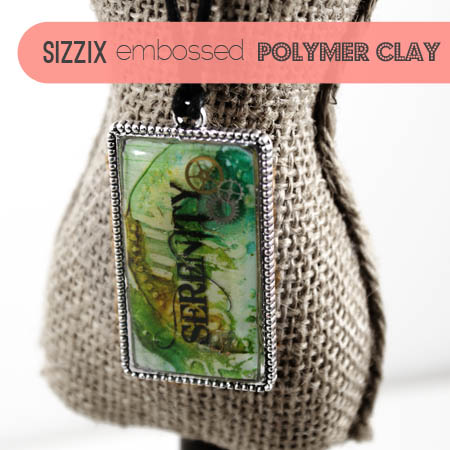
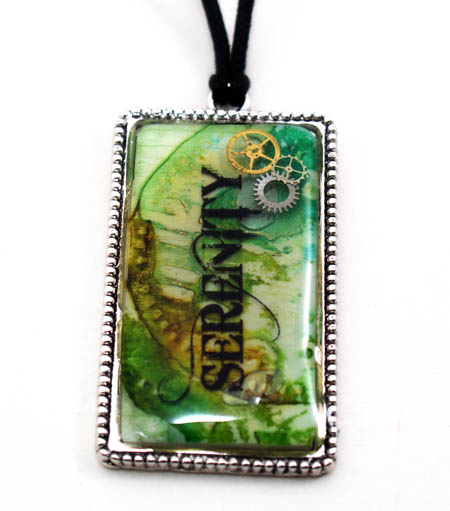
Today, I thought I would share some more polymer clay + Sizzix creations.  For this piece, I baked a very thin (6 on my pasta machine)  sheet of polymer clay (white fimo) for 45 min at 275°.    I let it cool, then embossed with Sizzix using  a Tim Holtz clock embossing folder.  Then I colored it with alcohol inks.  I cut a piece to fit the bezel, used Crafter’s Pick glue to adhere it into the bezel, and layered watch parts and the word on a transparency in resin (Lisa Pavelka Magic Glos).

Polymer Clay and Resin Jewelry

Here is another pendant I made using the same technique.

Polymer clay and resin jewelry

Much more to come with clay and Sizzix.

Resin Rings With Plaid Ring Bling

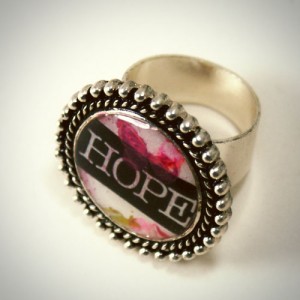
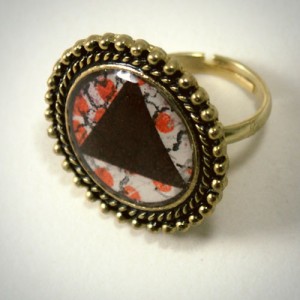
Resin jewelry tutorialMake your own customized ring using Plaid Ring Bling bezels and ring forms.  These are simple, quick and inexpensive, and the possibilities are endless.  Follow along and you will have your own image immortalized in bling form in no time.

Supplies:

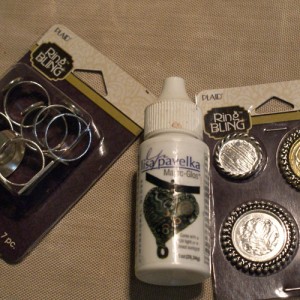
  • Plaid Ring Bling forms and bezels (I got mine a Joanne’s)
  • Magic Glos resin (shown in this tutorial), or Diamond Glaze, or Dimensional Magic
  • Glossy Accents
  • Image to place in bezel (I used a sheet of paper I stamped for the colorful background and ran through my inkjet printer for the words
  • Sunlight or UV curing lamp if using Magic Glos resinusing resin with inkjet images

Instructions:

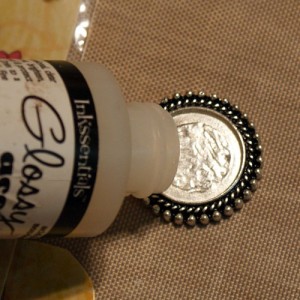
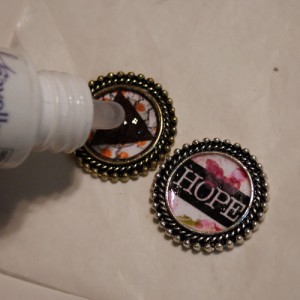
  • Cut out your images to fit the bezels, and glue them into place using Glossy Accents inside the bezel.  Glossy accents by Inksentials
    making photo jewelry


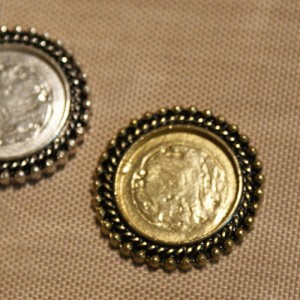
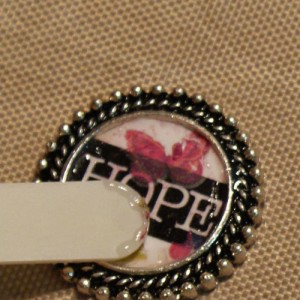
  • Burnish image to make sure in is secure using a popsicle stick or toothpick.  Use your finger to spread the excess Glossy Accents over the top of the image.  If you need to add more to completely cover the top, do so.  This seals the paper and prevents the resin from discoloring it.  how to make your own photo jewelry
  • Let this dry completely before applying Magic Glos, otherwise the Glossy Accents will interfere with curing.  I use a heat tool to speed this up.  If you do not use a heat tool, about 20 minutes dry time will do.
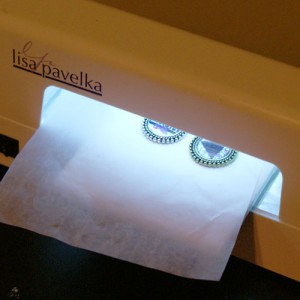
  • Apply Magic Glos and cure under your UV lamp or in direct sunlight.  Magic glos jewelry
    Lisa Pavelka UV curing lamp

I use Lisa Pavelka’s 9 watt curing lamp, which works great for Magic Gloss.  My pieces cure in 10 minutes or less.

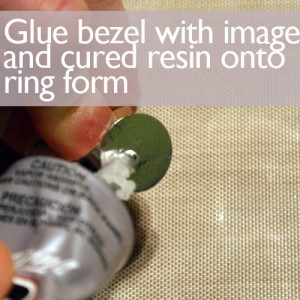
  • Now just glue the bezel with image and cured resin onto the ring form using E6000.  Let that dry and you are finished.  I love the bezel and ring form being separate so that the bezel is easier to set completely flat while the resin is curing.  It makes using the UV lamp way easier for making these rings. 
    Resin jewery


I am planning to make a ring using the Valentine’s Day sprinkles and resin I showed you a couple of weeks ago…

Valentine's day sprinkles jewelry


What have you submerged in resin lately?

Make Charms With Resin and Paper

how to make resin charm
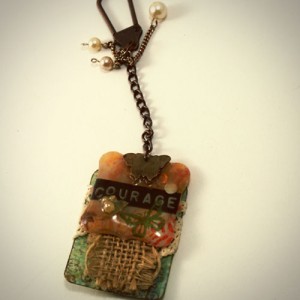
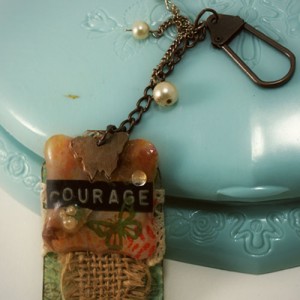
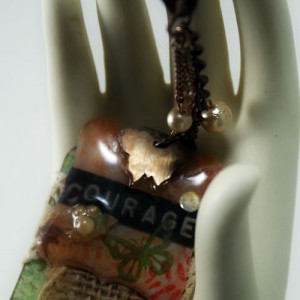
No need for a bezel or pendant blank.  You can make charms with a simple paper shape and resin.  Here, I used my paper punch to get the shape of this orange courage charm, decorated it with word label and rub-ons, and layered Magic Glos resin.

How to make resin charmsTo hang, I just puched a hole in the top and added a jump ring.  I placed it on top of a paper tag wrapped in lace, with a burlap strip on top.  Add a key fob and some dangly pearl charms, and you have a gorgeous mixed media keychain.

mixed media resin jewelry

Glue Free, Drill Free Way to Hang Pendants

How to make a pendant bail

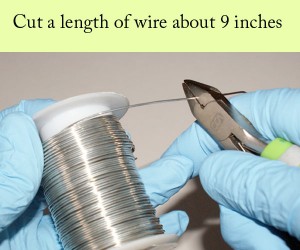
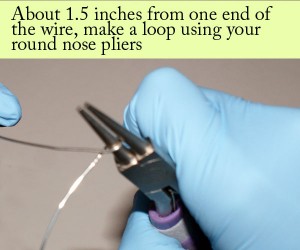
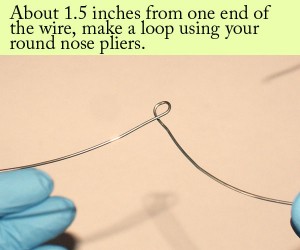
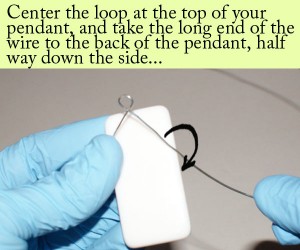
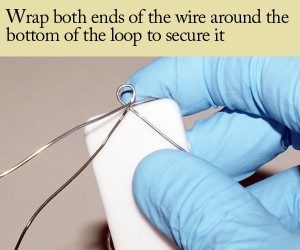
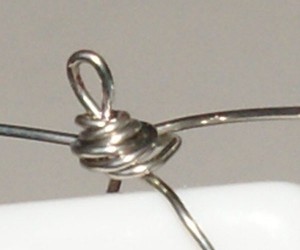
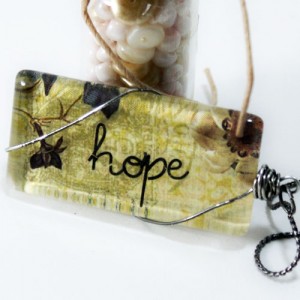
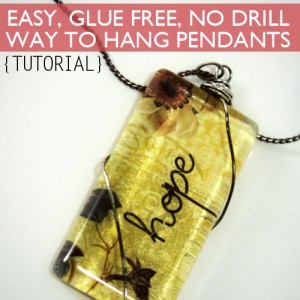
Making a wire wrap bail  is a decorative, inexpensive way to attach pendants that eliminates the need for messy glue-on bails and hole drilling.  The look is intricate and ornate, and can be achieved quite simply with a few basic jewelry supplies.  This is a perfect way to bail glass tile and domino pendants.

TUTORIAL

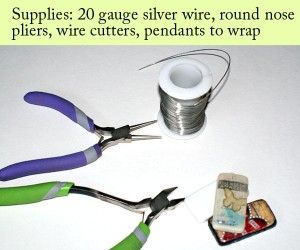
Supplies for wire wrapping pendant

How to wire wrap a pendant

making a pendant bail

How to make a pendant bail

How to attach domino pendant

Glass tile pendant bails

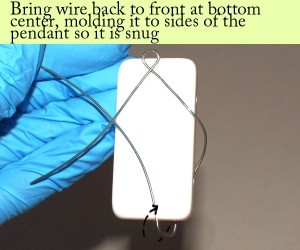
The wire isn’t shaped to the edges very well in the above demonstration.  Make sure to keep it snug against the piece, like it is holding the pendant together.

Glass tile pendant bails

How to make pendant bail

How to attach pendant to chain

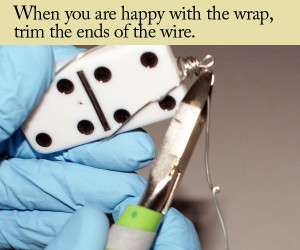
Use pliers to tuck in the cut ends.  Sometimes I file them when they aren’t flush.

It is as simple as that.  Now add a jumpring and your pendant is ready to hang, with fancy pants wire work to boot…

Here is what it looks like on the back…

Glass tile pendant bails

Here, I used the wire wrap method on pre-drilled dominoes with horizontal holes.  It is the same process, but you take the wire to the back through the hole so the wire only frames the top and runs horizontally through the middle.

domino pendant tutorial

domino pendant tutorial

Glass tile pendant tips

attaching domino to necklace

Some 1 inch glass tiles wrapped…

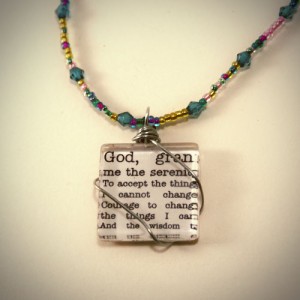
Serenity Prayer Glass Tile Pendant

Spiritual Glass Tile Pendant

Now you are ready to practice your mad wire wrapping skills.  If you try this, share pictures.  I love seeing what you have done!
Triple Strand Beaded Domino Pendants


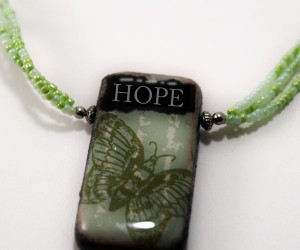
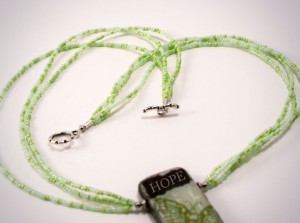
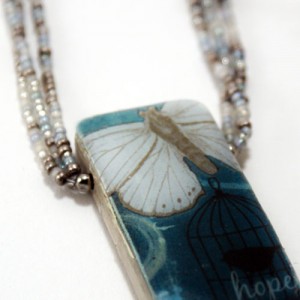
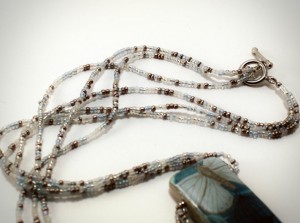
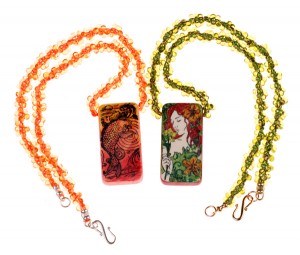
There is nothing quite like multiple strands of seed beads to compliment a special pendant.  I don’t usually take the time to bead, but these domino pendants inspired me to bust out my stash and get busy.  Fast forward 5 hours of stringing these tiny things and I have two finished pieces…’

Seed bead necklace

beading projects

Bead stringing necklace project

how to make seed bead necklace

It is a nice change from pairing pendants with a simple silver snake chain, which is what I normally do with dominoes.  I am not much of a jewelry designer, as far as putting together beaded strings with a focal pendant, but you can’t really go wrong with this simple triple strand design to display your focal.  Just drill a hole in your domino horizontally and string it like you would any other bead.  In my browsing, I found these gorgeous macrame beaded domino necklaces with instructions at Caravan Beads Blog.

domino pendant ideasI actually started the beaded macrame string, and about 2 inches into realized it was going to take way more time then I had to invest in a necklace at the present time.  It was, however,  pretty easy to pick up, and I am not familiar with macrame.  It would be a great project for a long road trip.

Now I am going to ask for your input.  What kind of necklace do you think would pair well with this piece?  I have some ideas, but I want to know yours.  If I go with your design, you may just find a domino pendant in your mailbox in the future, so don’t be shy.

Making Jewelry With Rub-on Transfers

How to make Glass Tile Pendants

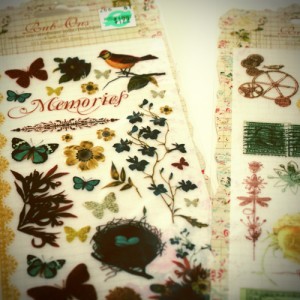
It was a jewelry making weekend for this crafter, glass tile pendants and altered dominoes stealing the show.  Normally, I design images for my pendants and just adhere them as they are.  That all changed when I thought to incorporate the rub on transfers I picked up at Hobby Lobby recently.  I have used these things before, but in papercrafting, never jewelry.  The inspiration hit me because these particular images packs (by Prima) are irresistibly gorgeous , and just the right size for pendants.

Rub-on transfers in jewelry

Adding them to my pendant images was super easy.  Since the sheet they come on is transparent, I was able to move scroll over my printed pendant images to see what the transfer would look like before committing.  Once I decided what transfer I wanted where, I just cut it out and burnished it on as instructed.  I love the effect it gave my pieces.  Super easy, and 1.99 (originally 3.99) a pack at Hobby Lobby right now.

altered domino jewelry

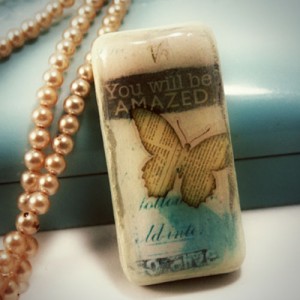
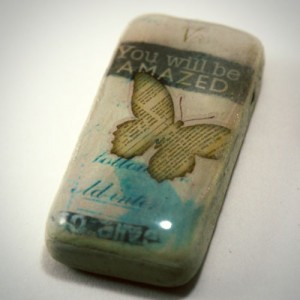
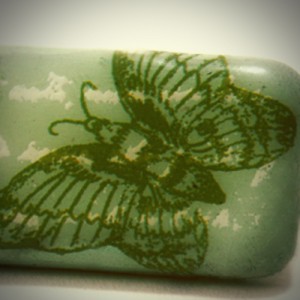
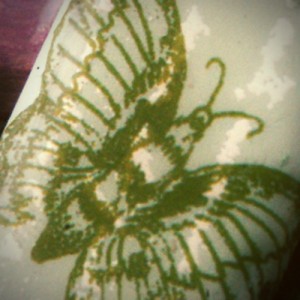
This piece is a domino pendant that I did in layers, with the rub-on green butterfly as the top layer just under the resin.  I started by painting the domino with a coat of gesso.  Once dried, I mixed acrylic paints to get the soft blue/green background color and painted it on using a soft brush.  When that layer dried, I stamped with clear embossing ink using an handwriting script stamp.  I embossed the script using white embossing powder, rubbed on the butterfly transfer and coated with resin to finish.

Altered domino tutorial

I think the layer effect pops more with these rub-on transfers then when I layer in photoshop, and I get images I wouldn’t have come up with on my own digitally.

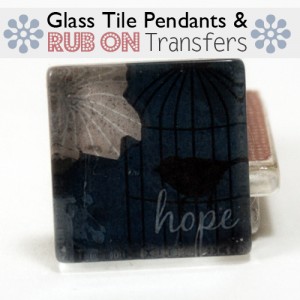
altered domino jewelryHere is another domino I did with vibrant pink leaves and a bird in a cage rub-on transfers.

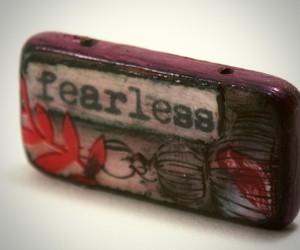
resin jewelryThis bezel pendant uses the same background image (fearless) with a flower and butterfly transfer.

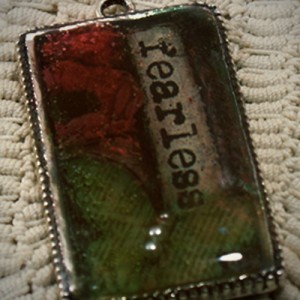
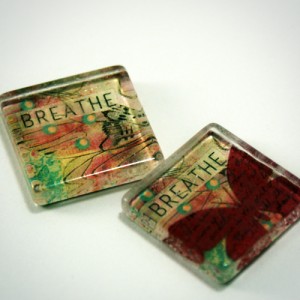
images for glass tile pendantsHere is a side by side comparison:  a pendant with the image I designed, printed and adhered, and another pendant with the same printed image, embellished with a red butterfly transfer.  I love how it refreshes my designs and how fun it is to layer with these.  I will be keeping my eyes peeled for jewelry sized rub-ons!
 

Valentine’s Sprinkles and Resin Jewelry

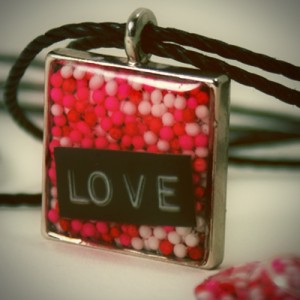
Resin jewelry tutorial Love text & candy sprinkles from @savedbyloves

[pinit]

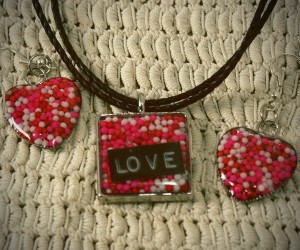
Looking for a quick and easy gift for Valentine’s Day?  This project fits the bill.  Remember this post on patriotic resin jewelry?  The process is the same, except I used Valentine’s Day sprinkles instead of red, white and blue.  I also used heart shape bezels which I found with the polymer clay at Hobby Lobby.   Follow along for the step by step, and you will be on your way to your very own LOVE jewelry.

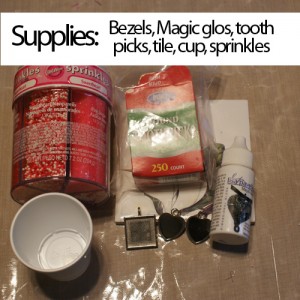
Supplies:

  • Magic Glos
  • Pendant and earring bezels and desired jewelry findings
  • A sunny day, or UV curing lamp; I use Lisa Pavelka’s and it works like a charm
  • Toothpicks
  • Tile small enough to fit into lamp to cure your pieces on
  • Sprinkles
  • small mixing  cupResin jewelry supplies

Instructions:

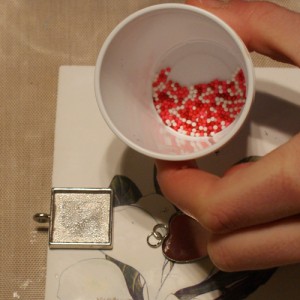
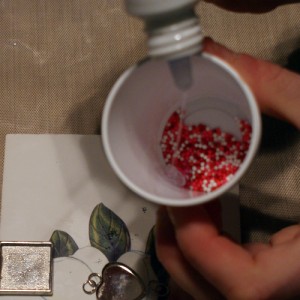
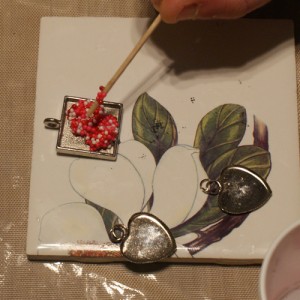
  • Pour some sprinkles into the cup, along with a few drops of Magic Glos and using toothpick, mix resin and sprinkles so that sprinkles are coated.

resin jewelry

Valentine's Day crafts

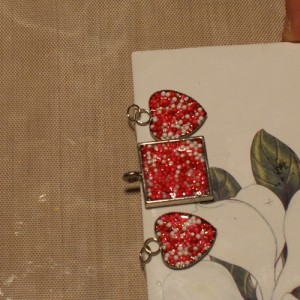
  • Use toothpick to pick up a clump of sprinkles/resin and spread into bezel.  You don’t want the sprinkles to go higher than the lip of the bezel.  When you are happy with the coverage, put a drop or two of Magic Glos in the middle and expose to UV to cure (either outside on a sunny day, or under a UV lamp.  Valentine's Day crafts
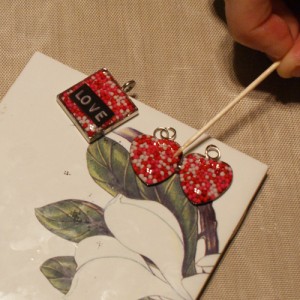
  • Once cured, add another layer of resin to get the dome effect and cure again. You can add embellishments, stickers or whatever you can think of at this point too. I used my label maker to make this love sticker. I put it on top of the cured layer, then put resin over it, then cured.

Valentine's Day crafts

TIP:  Use toothpick to “pull” resin from middle of piece out to the edges

Valentine's Day crafts

I just love this UV resin.  There is another, way less expensive brand called UltraDome, which is being shipped to me soon.  I hope I love it as much as I love Magic Glos.  I will keep you posted!

How to Make Resin jewelry


Charmed Joy Butterfly Resin Pendant

Resin pendant with image

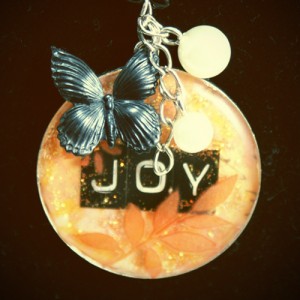
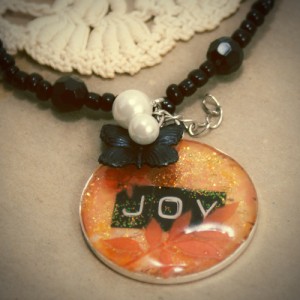
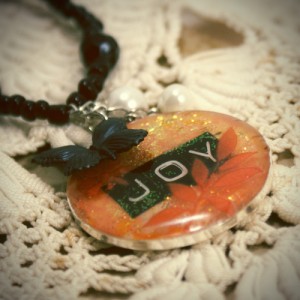
This pendant is made from decorative paper, adhesive “JOY” punch stickers, rub-ons, Magic Glos resin and some charm embellishments (a black butterfly and a couple of pearls I got from some old costume jewelry).  I have been on a resin kick as of late, making pieces for an upcoming show.  I am happy with how this one turned out.  I love how versatile scrapbooking supplies are… home decor, jewelry, all kinds of altered art, and even scrapbooks.

How to make resin pendants

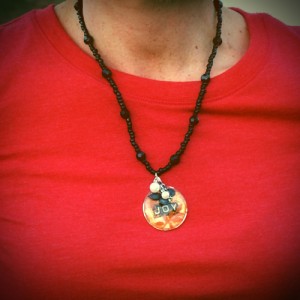
Here, I traced the bezel on scrapbook paper and cut out the circle to fit.  I adhered the letters to spell joy, added some Stickles (glitter glue), then a thin layer of Magic Glos, which I cured under my UV lamp.  Then I did the orange leaves from a rub-on pack I had in my stash.  A  couple of more layers of resin with curing in between, and that was that.  Using a jump ring, I added the pearls from old costume jewelry, and the black butterfly charm I had on hand.  I paired the pendant with a black beaded strand for the finished necklace.

How to make resin pendants

How to make resin pendants

resin jewelry tutorial

Privacy Policy