


 Don’t forget to cherish each moment and make sure everyone you love knows you love them! A grateful heart resides in a peaceful soul. Thank you for reading my blog. Now, go shine your light 🙂
Polymer Clay Day 59: Faux Jade Altered Art "Cherish" Pendant
by
Polymer Clay Day 58: Faux Jade Tutorial and Finished Pendant With Earrings
by


 These are the clay colors I used for my faux jade project; Translucent, green and chocolate..
 I cut 4 of the conveniently serrated bars of the traslucent since I needed 4 translucent balls of clay…
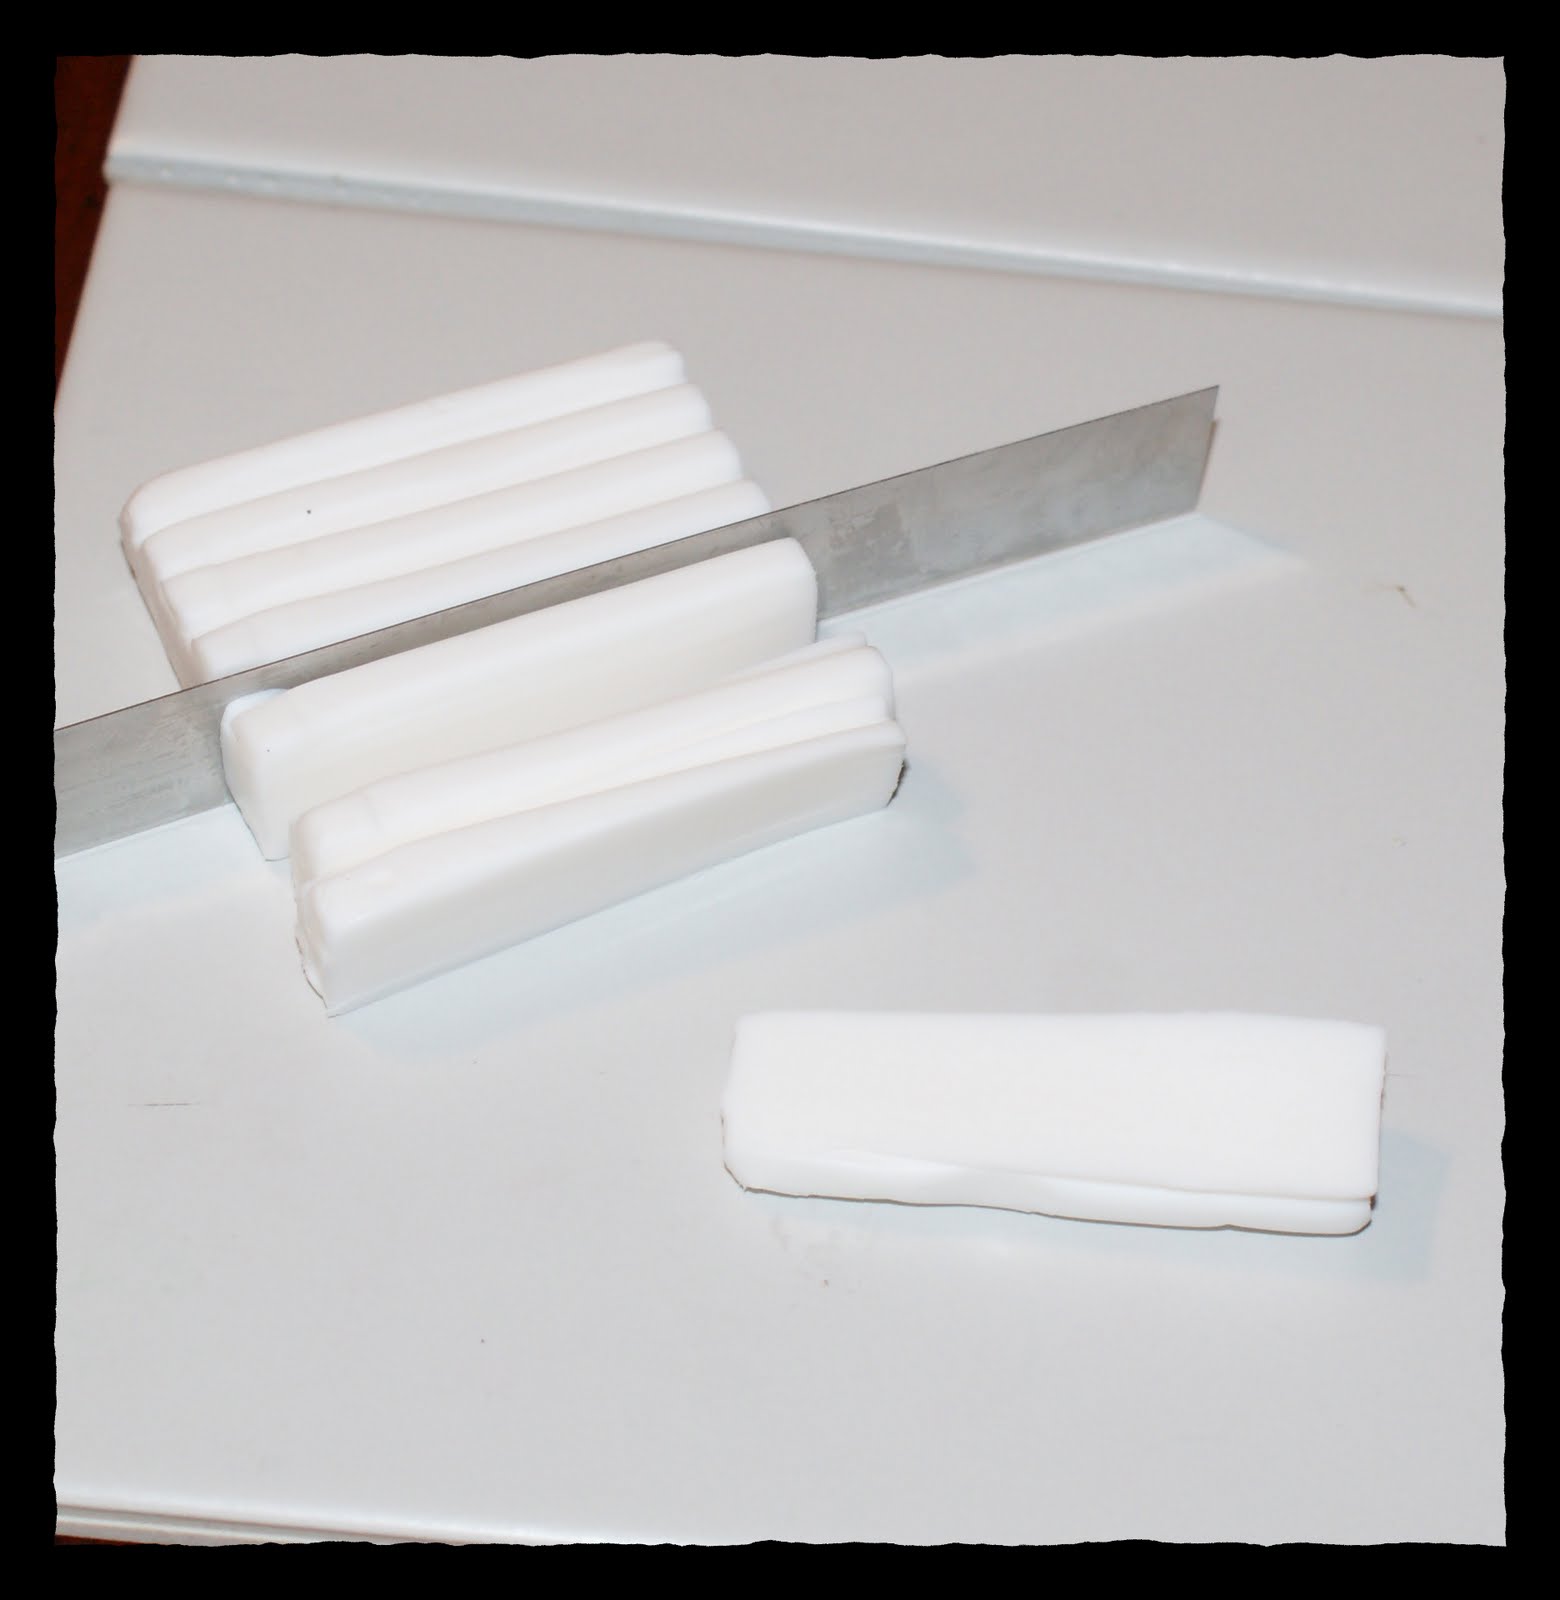 I rolled the each cut piece into a ball in the palm of my hand. They don’t need to be perfectly round. We are just going to mix the green and chocolate with them later.
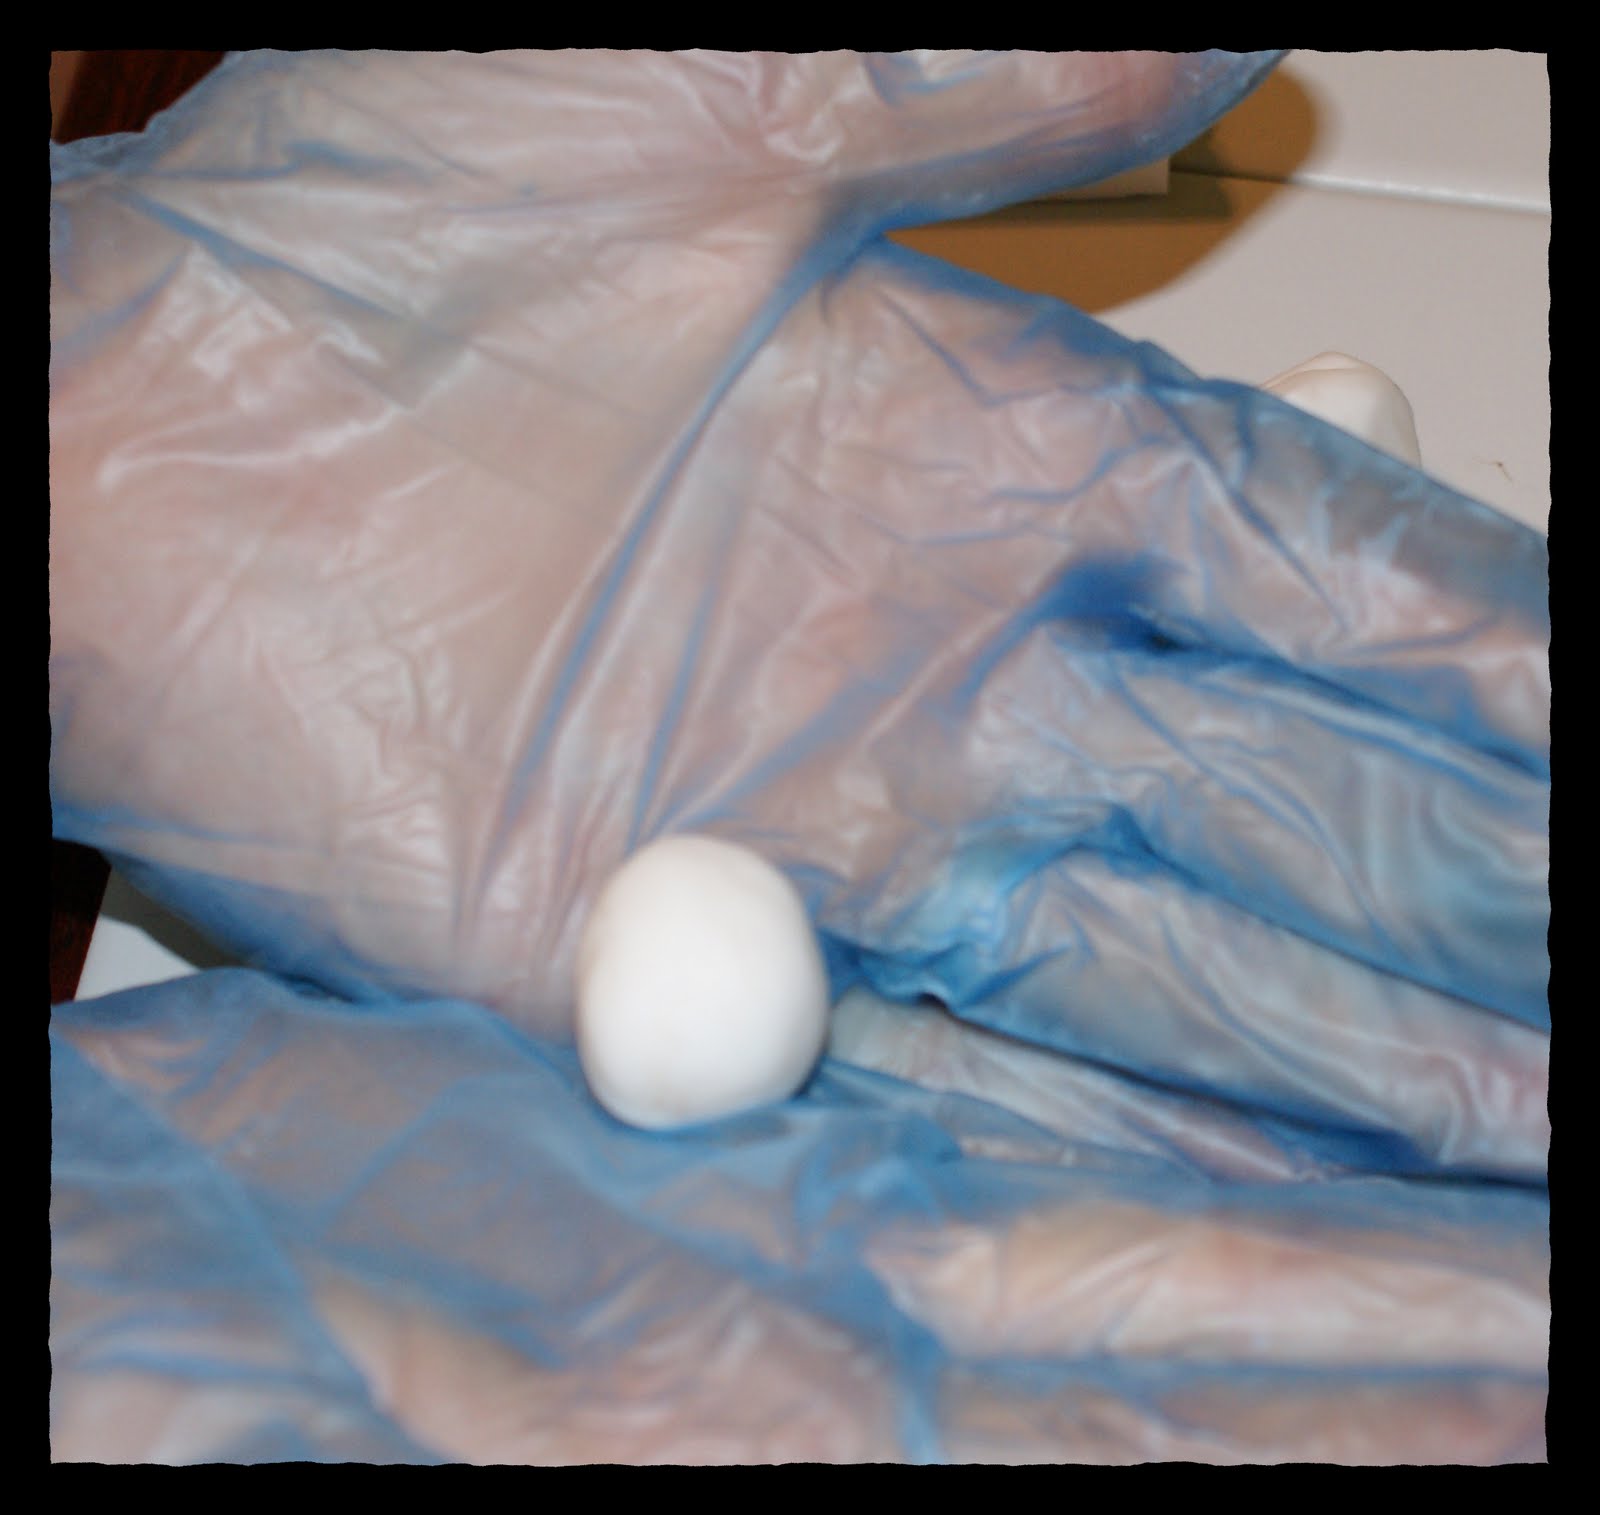 Next, I cut 2 pea sized piece of chocolate and made a ball from each of the 2.
 I repeated the same using the green clay, but cut 4 pea sized pieces to make four balls of green. Three of the translucent spheres were set aside to mix with 2 green peas and 1 chocolate, for the lighter shade of green. The remaining translucent ball was mixed with the same (2 green, 1 chocolate) for the darker shade of green to be used in the faux jade.
 To mix the green and brown with the translucent, I just twist them together and mush them in my hand, and when I get tired of that, I resort to passing it through the pasta machine on a thick setting, and so on until it is a uniform-ish color. Although for a faux jade project, it is cool to have variations as it adds to the realism.
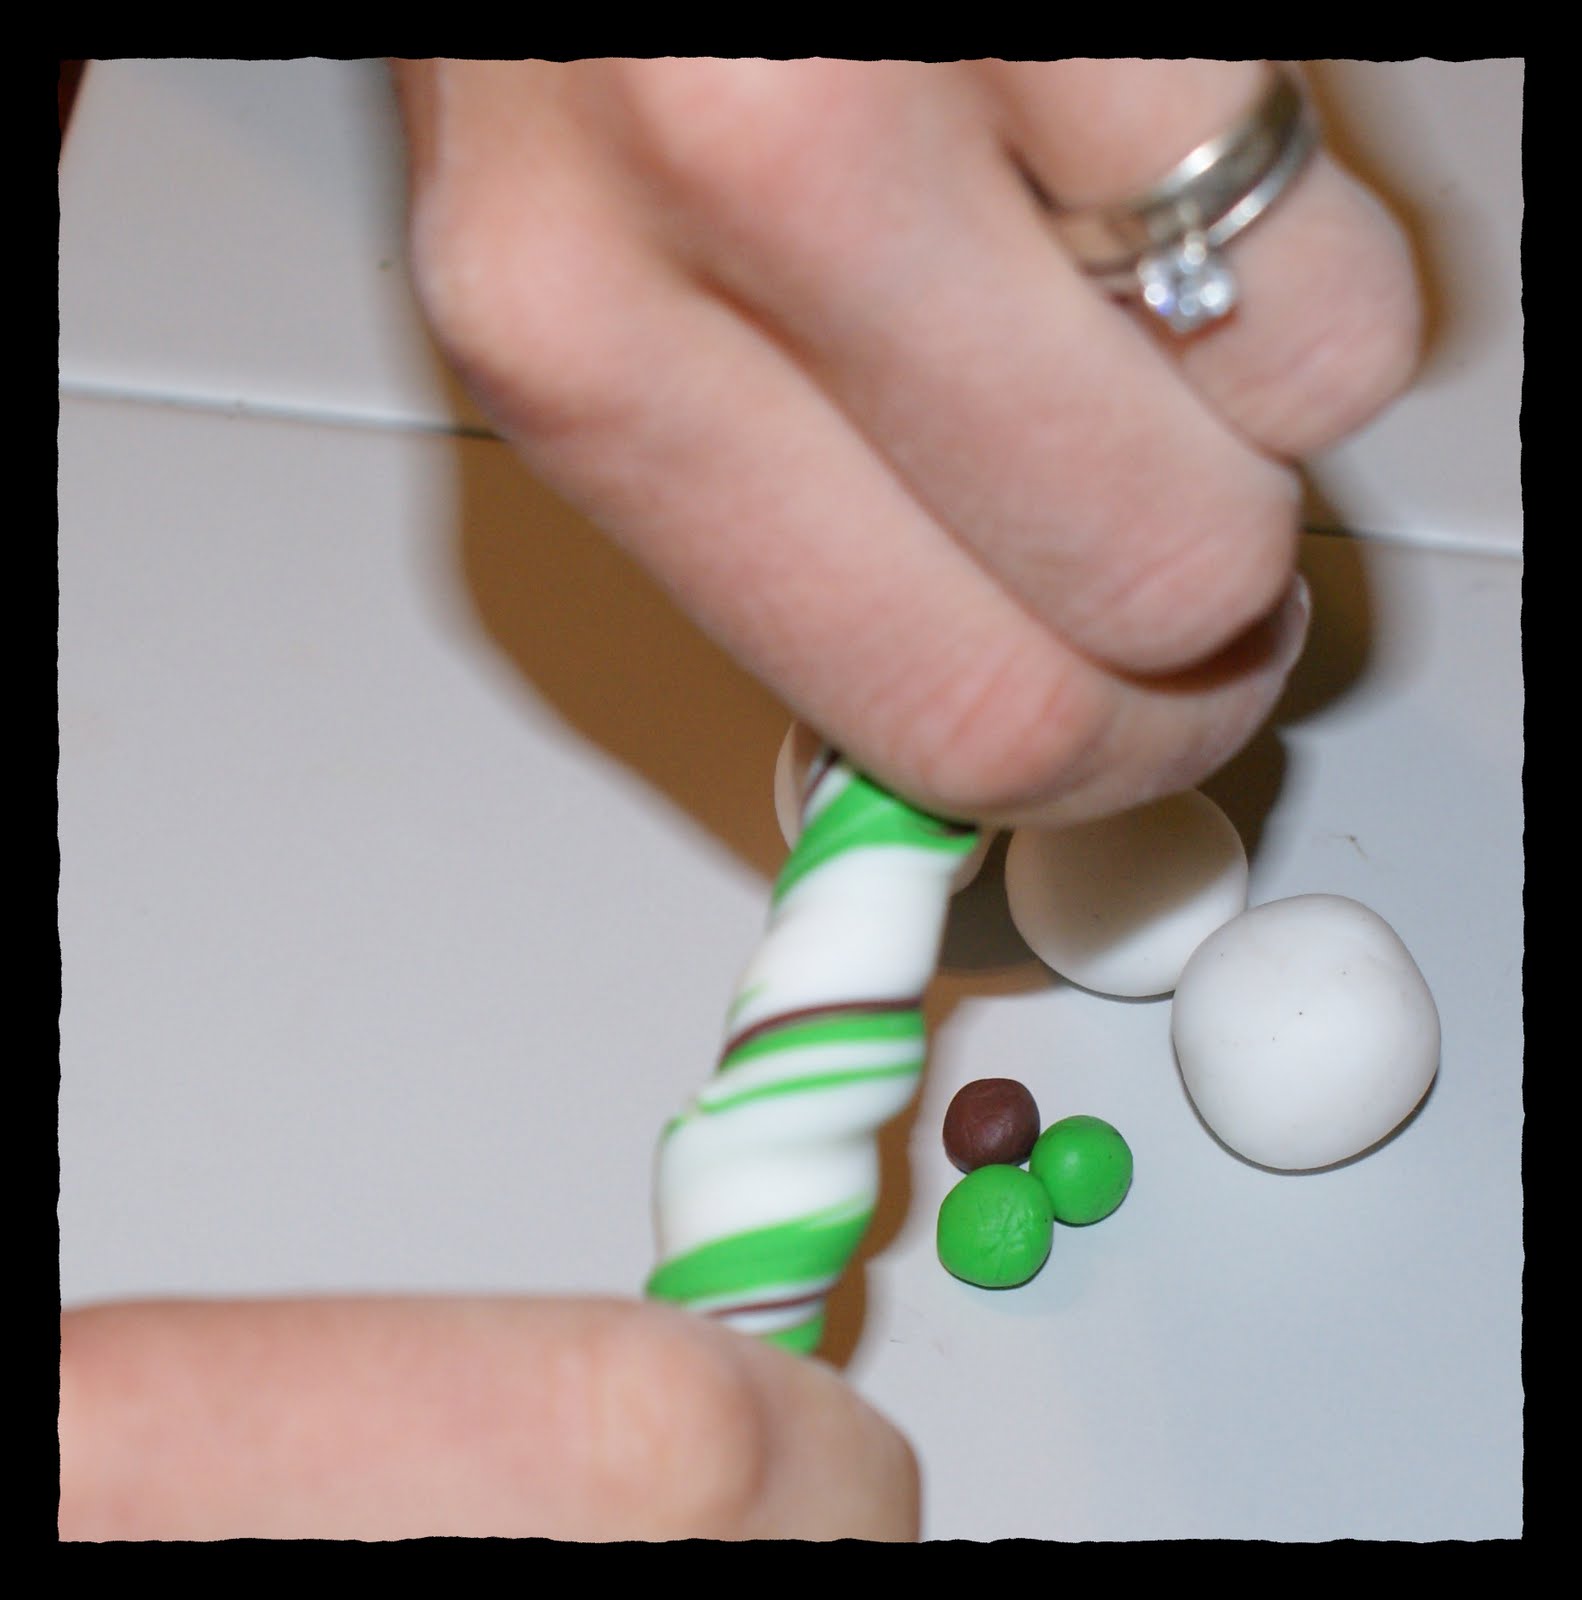 Here are the final sheets of lighter and darker green, which i chopped and mixed together next…
 I used a curvy blade which can be found in the clay section of any craft store. Some people use a food processor for this part, which I hear works great. I just don’t have one, so…
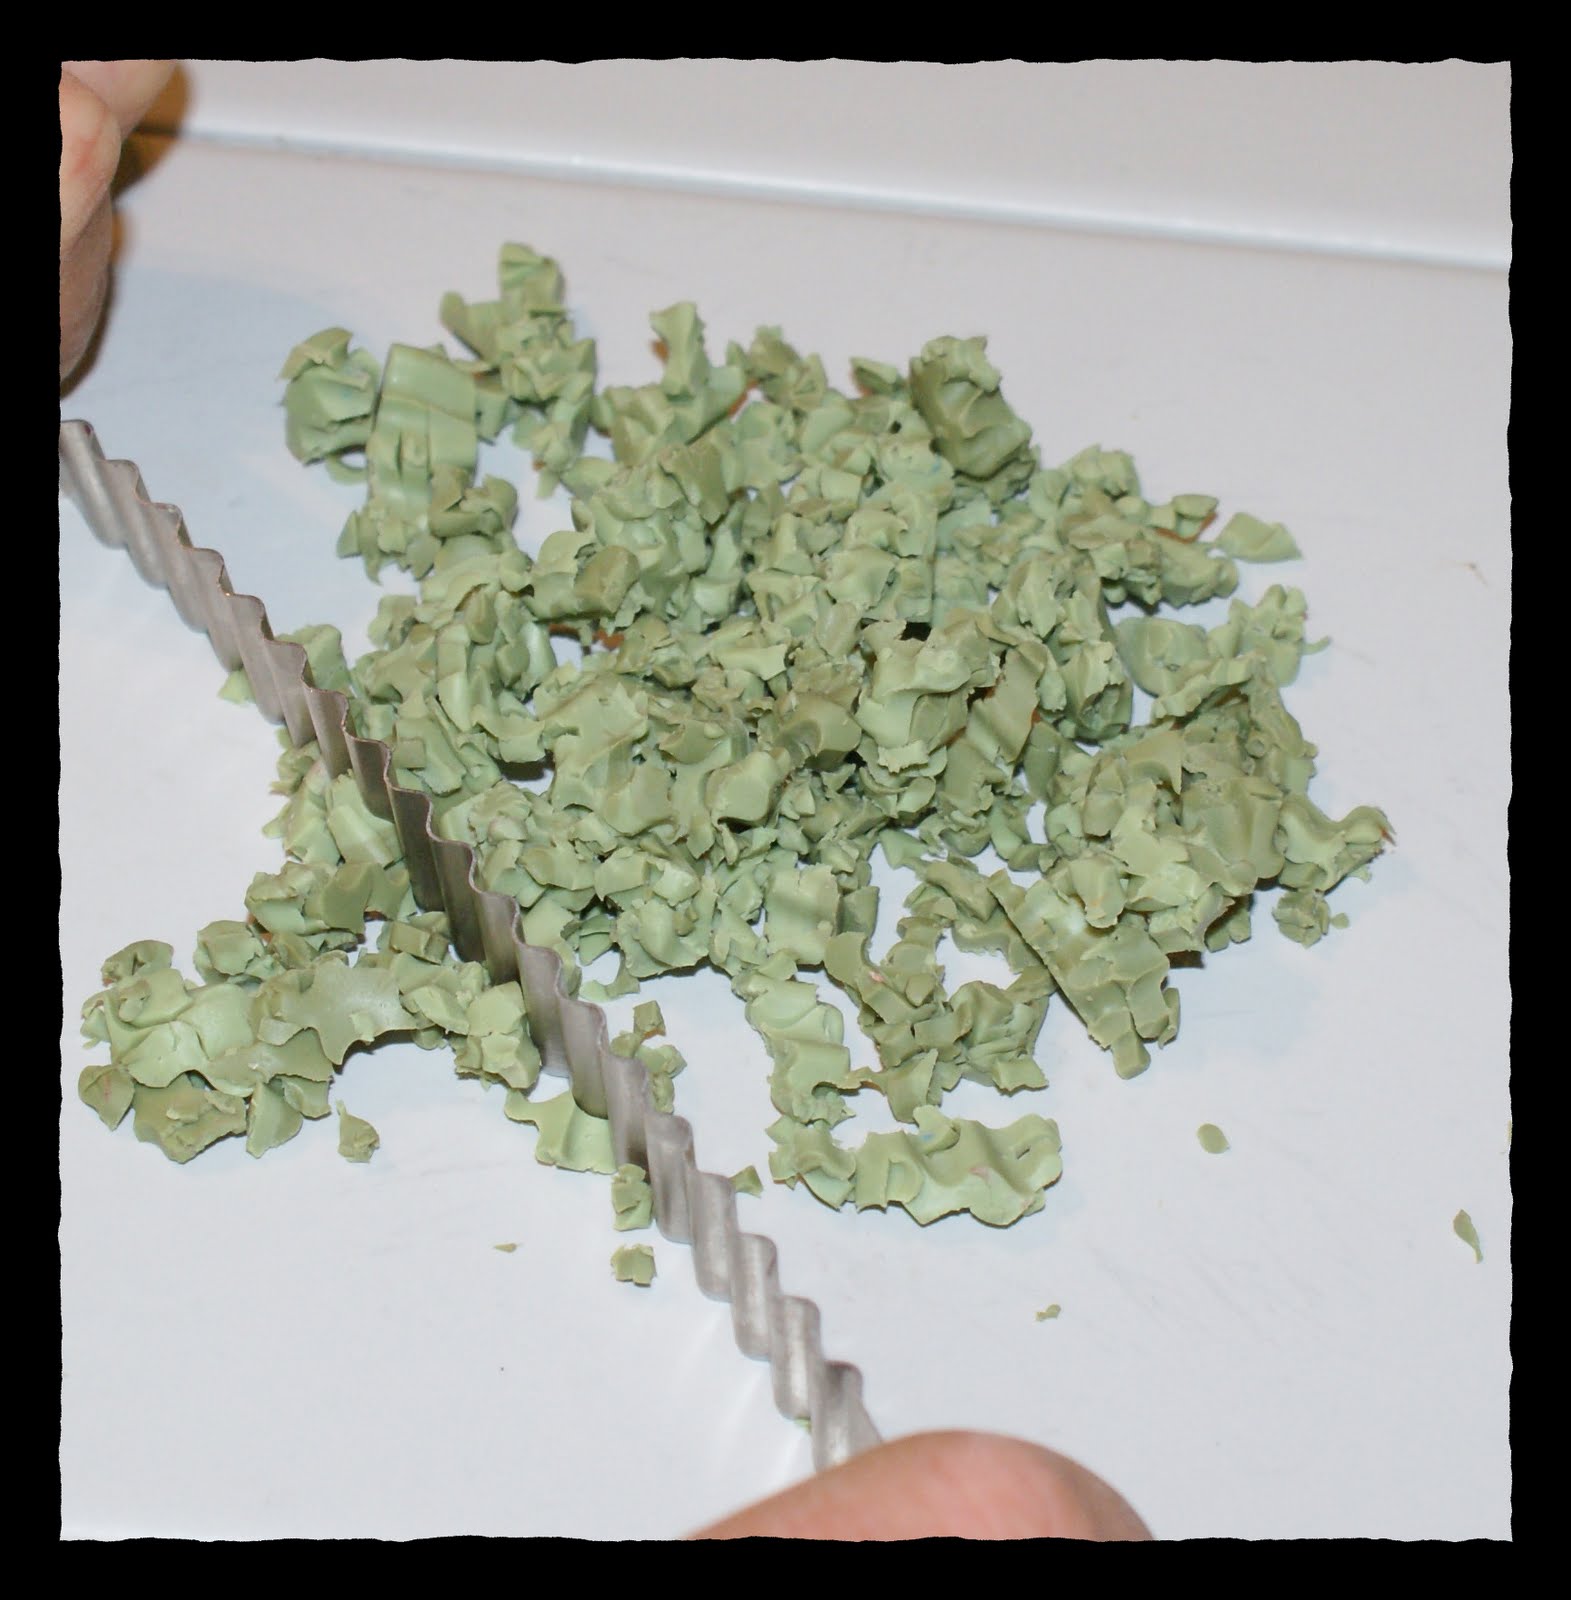 After chopping up both the light and dark sheets together, I smush them into a clump (see below), which I run through the pasta machine at the thickest setting (which on my machine is “1”).
 I take the above sheet which has been run through the pasta machine as described, and choppity chop with the wavy blade, smoosh together then run through the pasta machine at the thickest setting again.
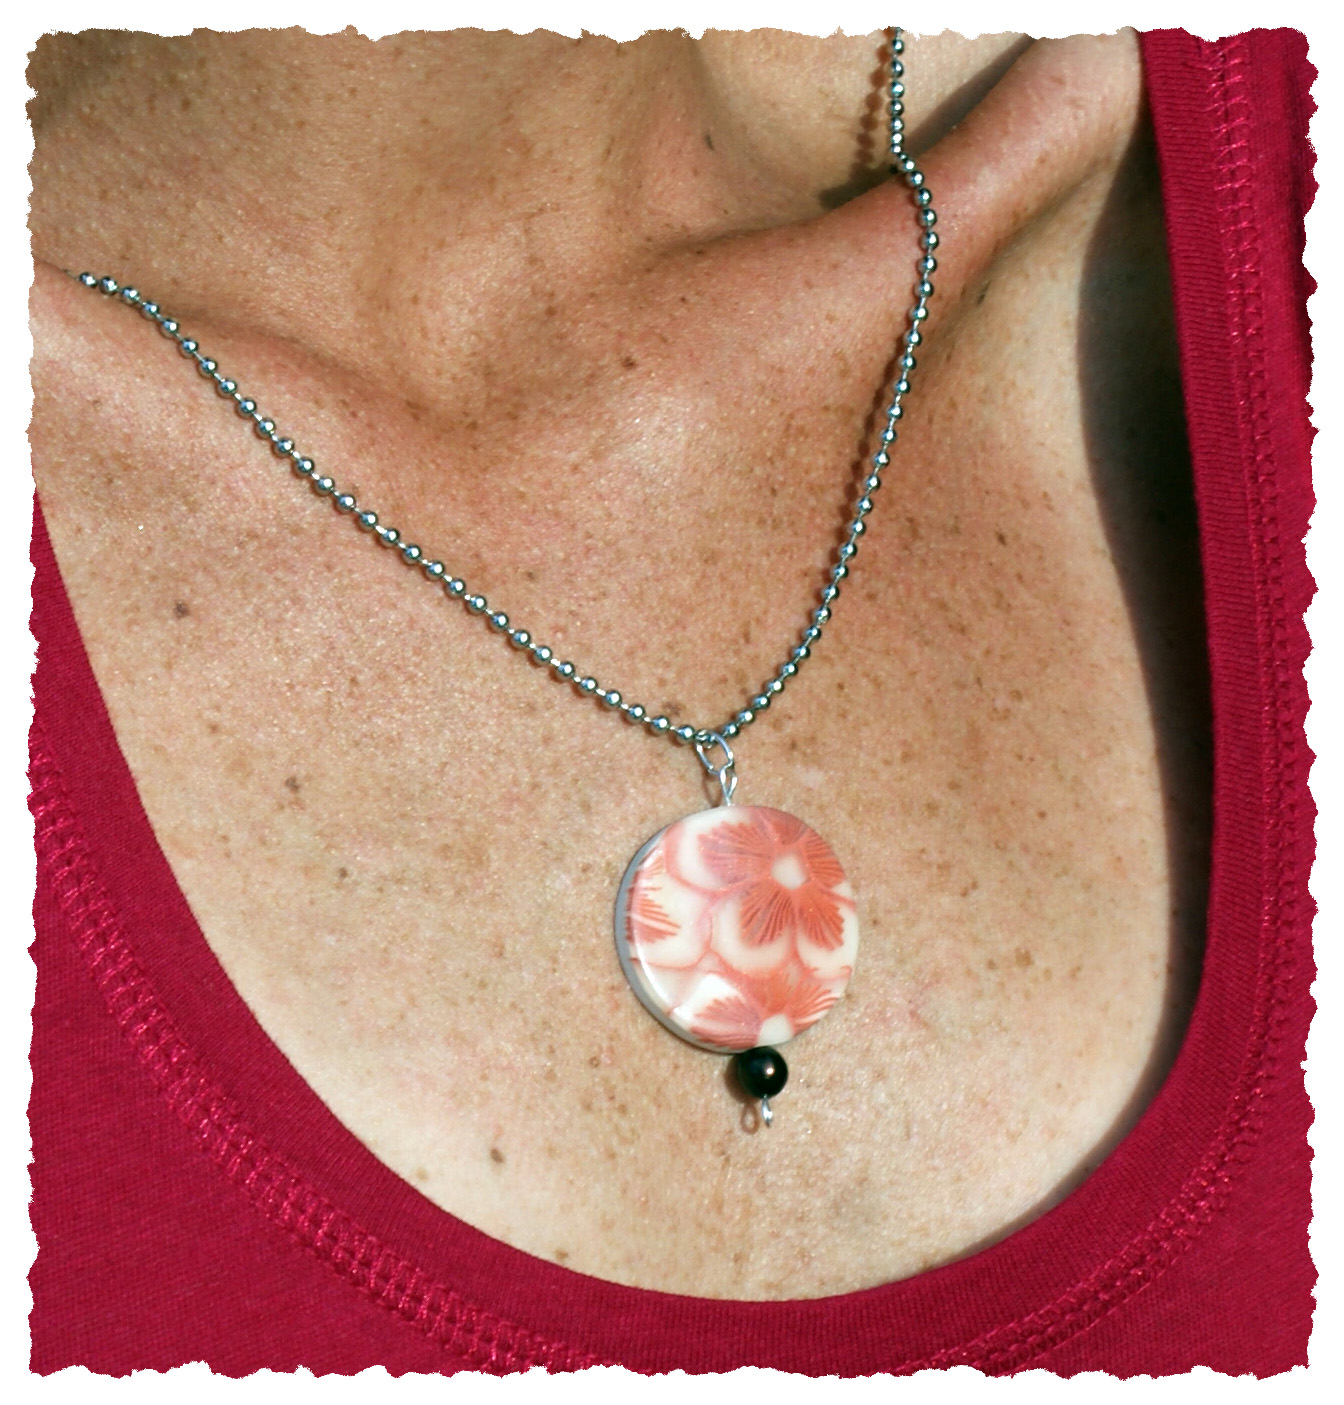
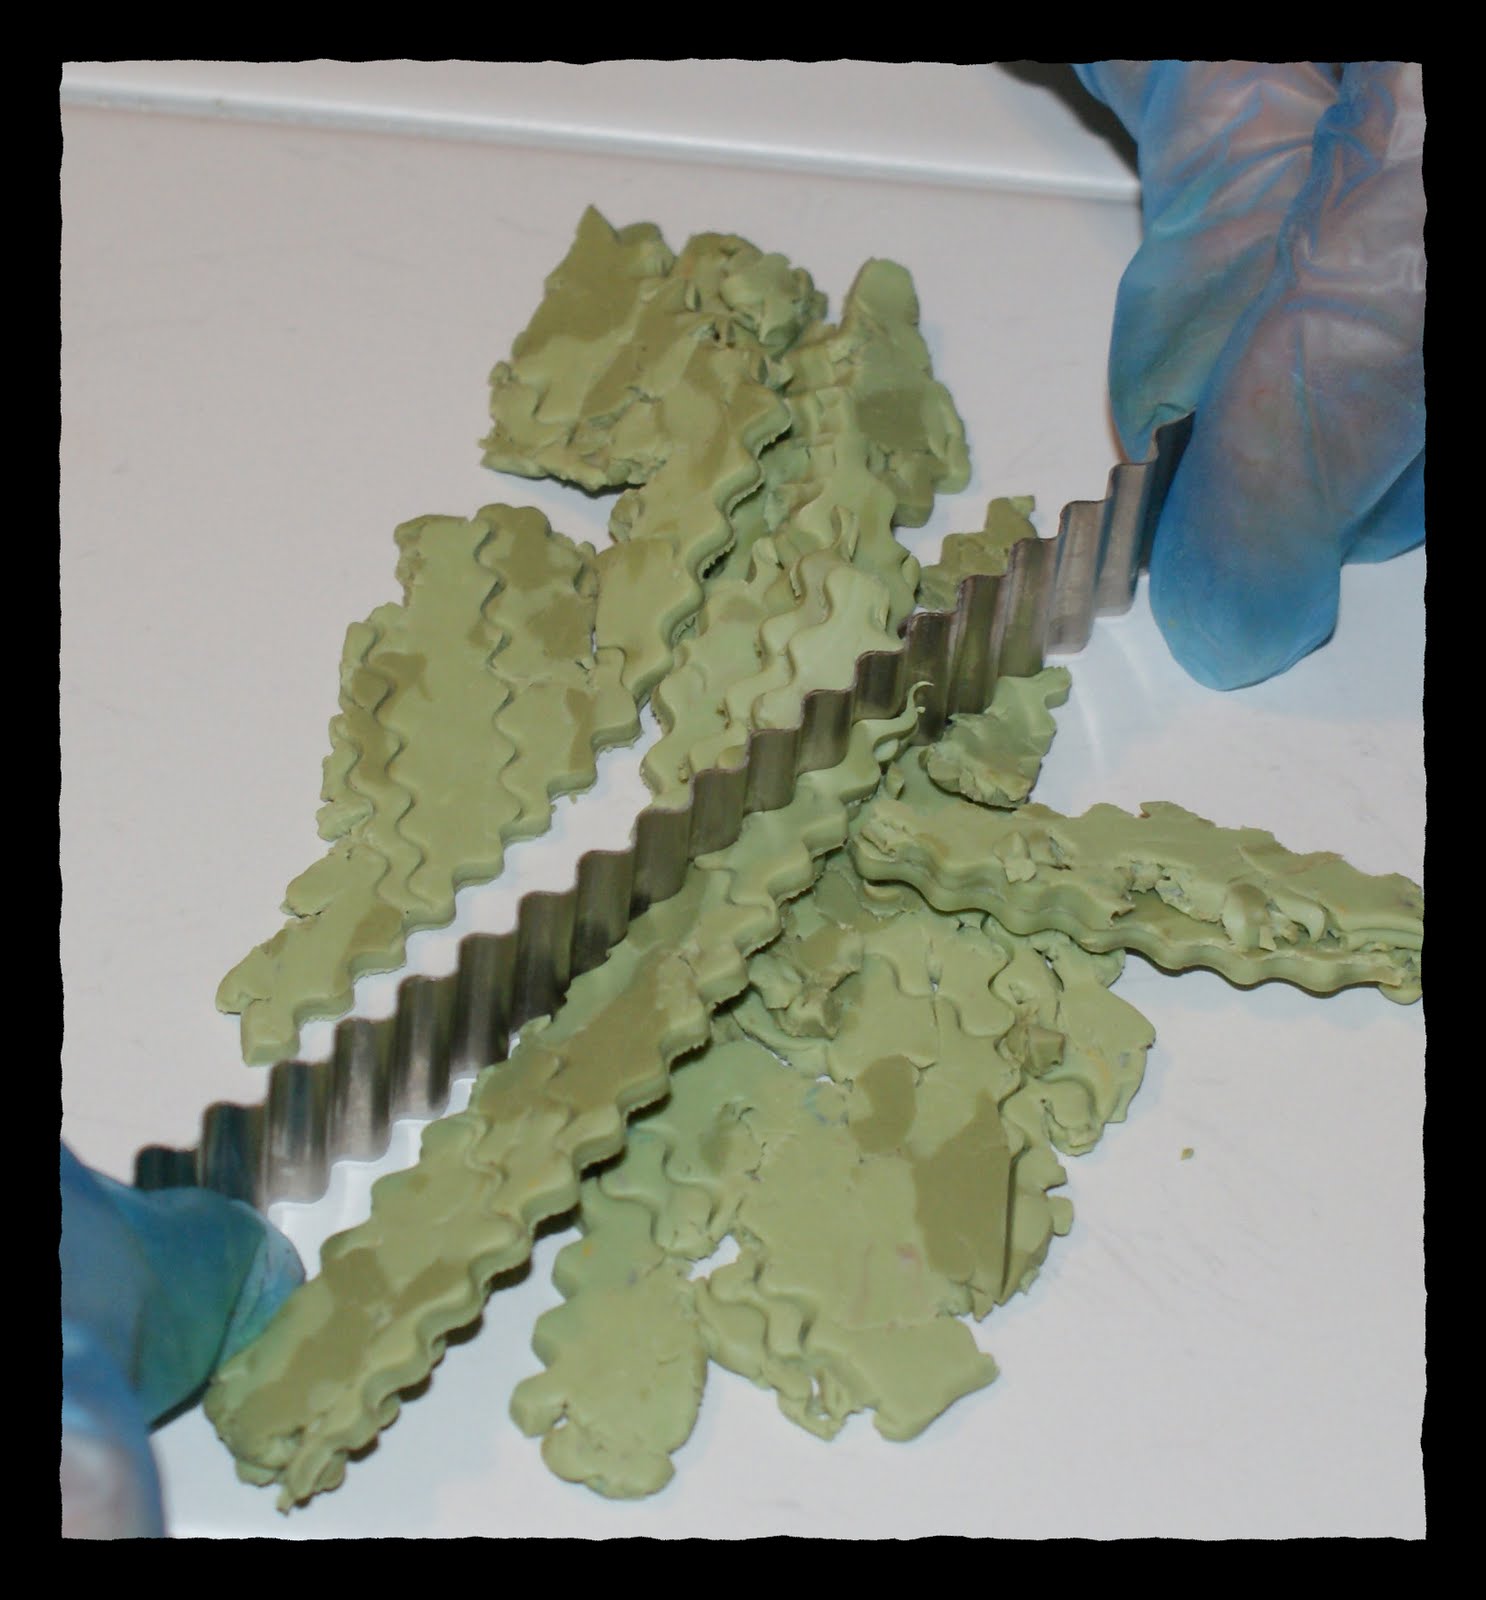 Below is the final sheet with which I will make my beads. Yippie. BTW, the baked piece will look much differently than this raw sheet, as you can see in the first pics above of the final beads.
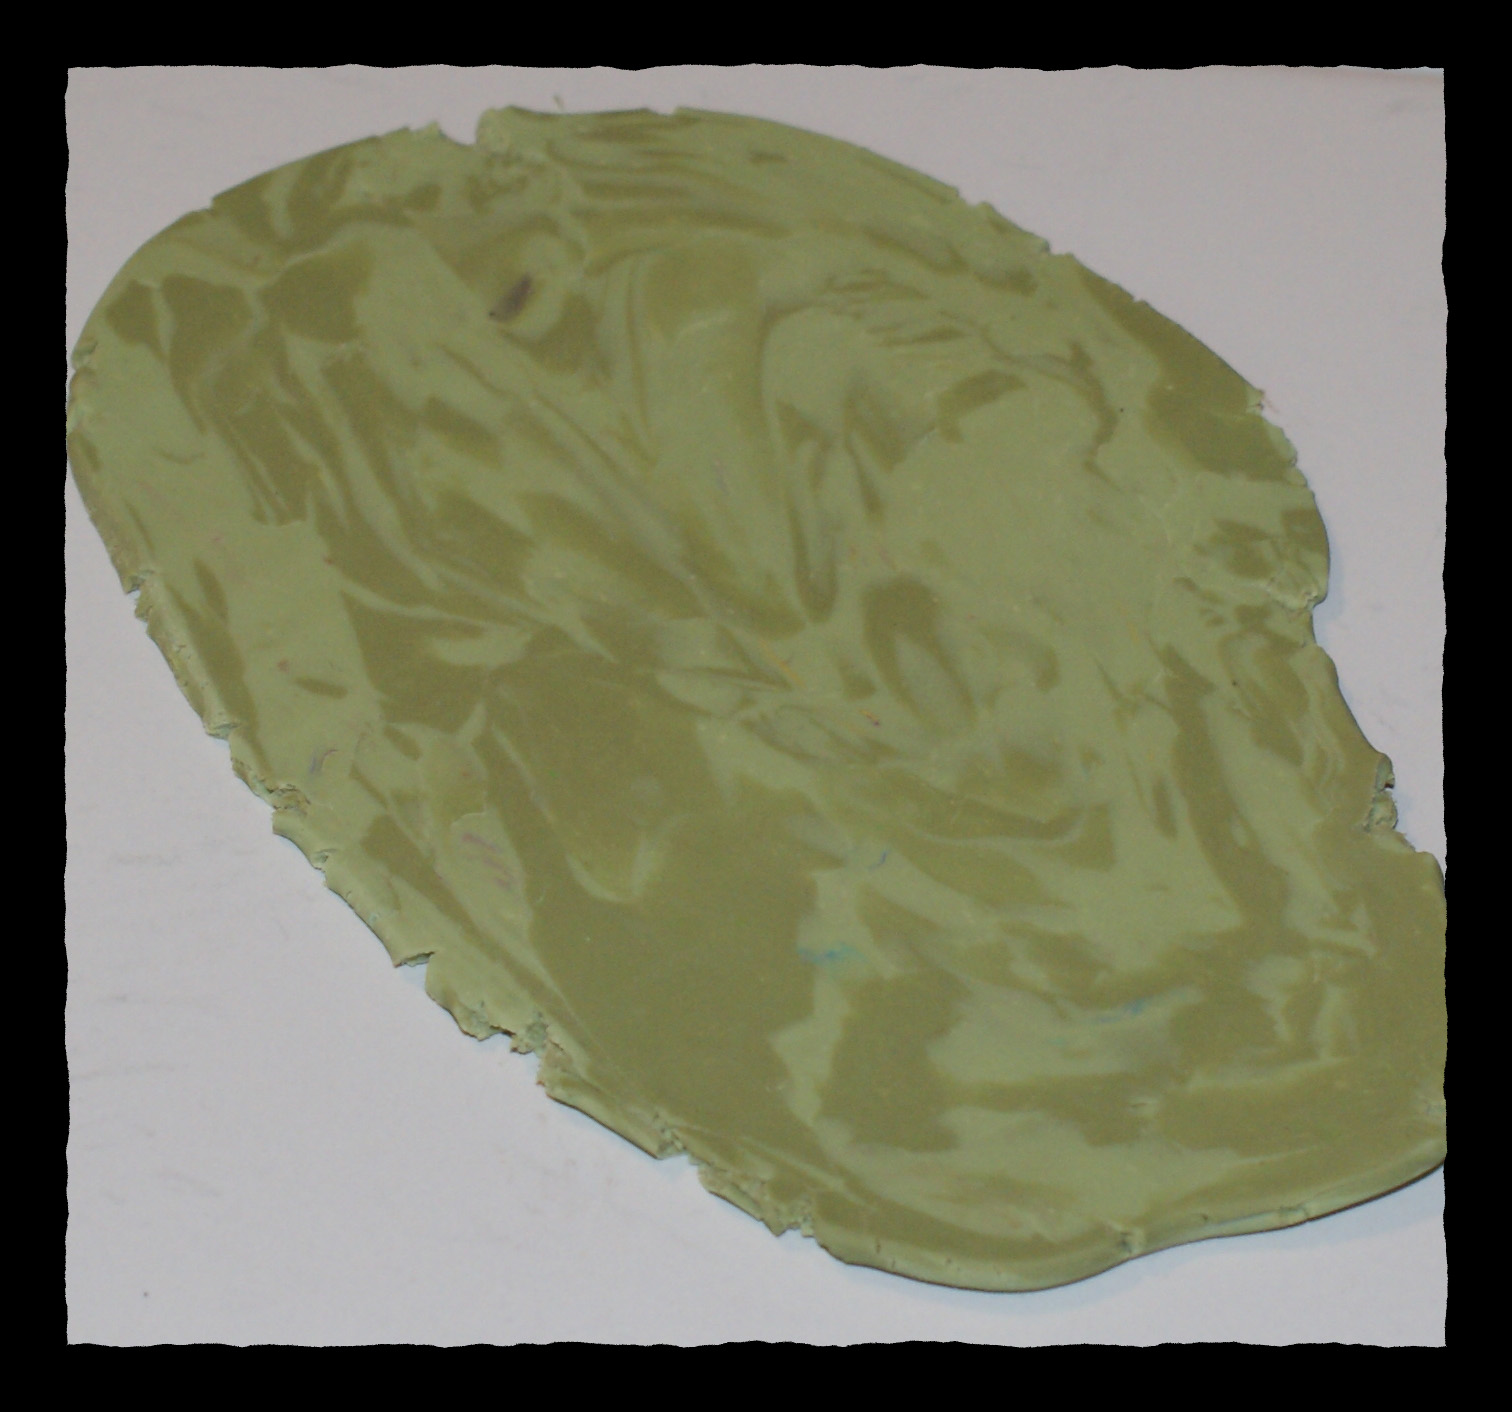 I used my small round cookie cutter and cut out 2 circles to make beads for my earrings. I do this so I can be sure the final beads are the same size.
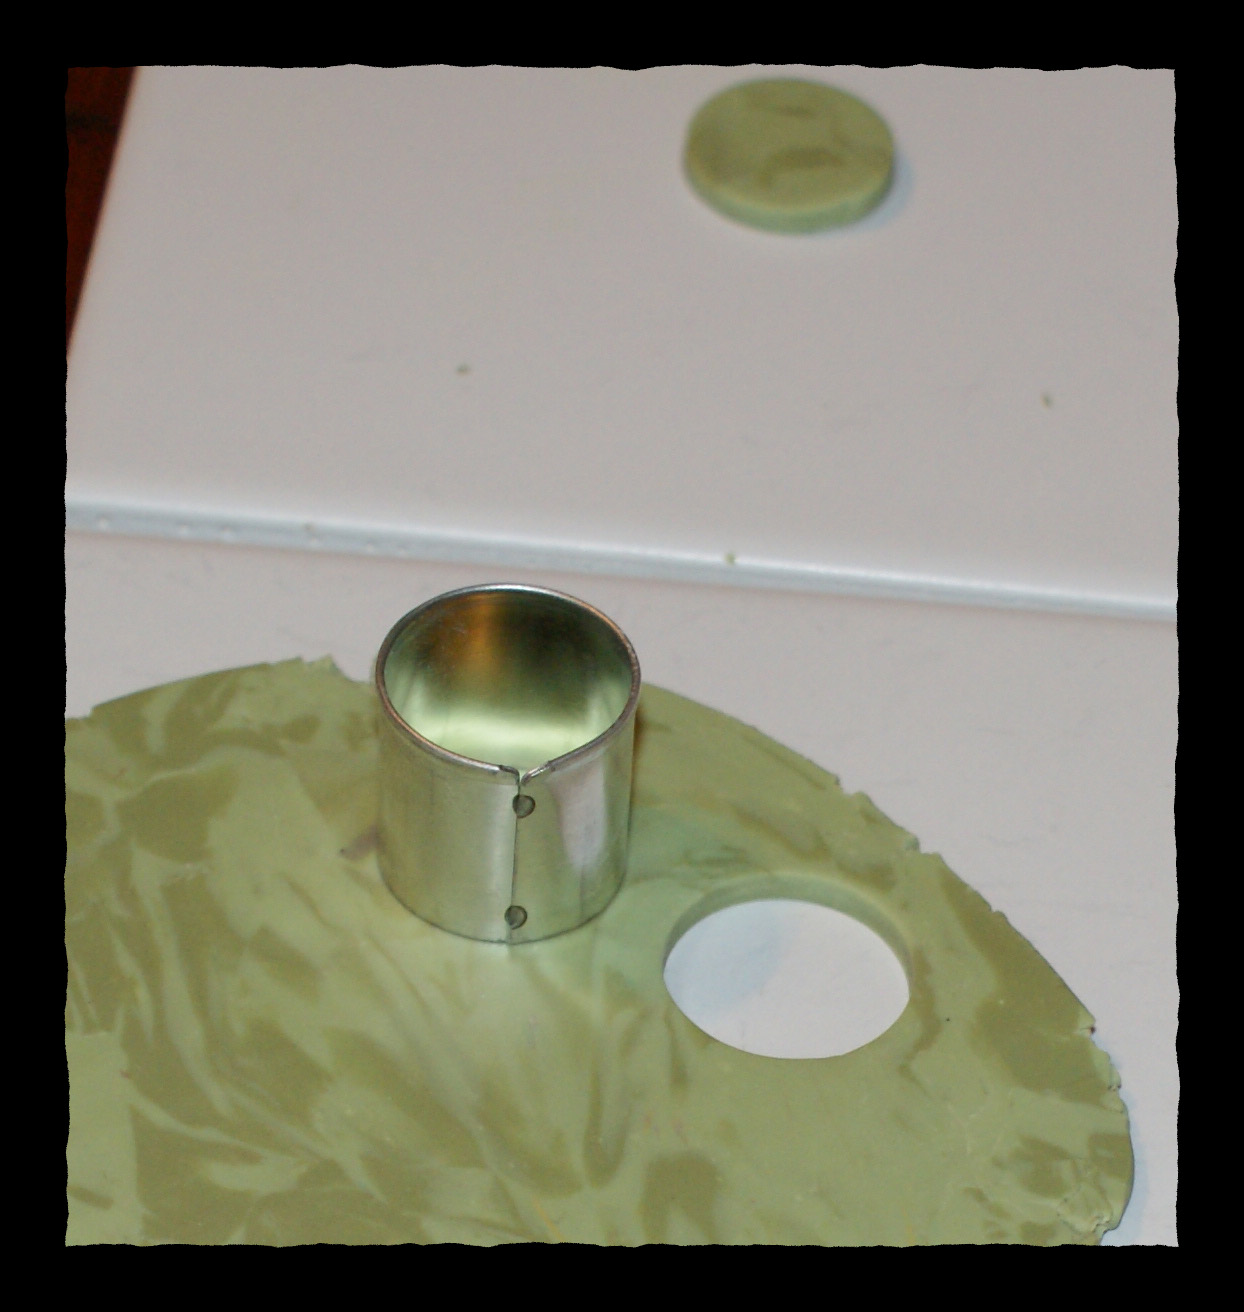 I cut tiny flecks of black clay with my craft knife and added them to the beads to give a more natural jade effect.
  Once I was happy with the shape of my beads, I pierced them on the ceramic tile on which I baked them at 275 degrees for 20 minutes. For the circle pendant, I used the big circle cookie cutter then impressed my Lisa Pavelka chinese character stamp on top using my acrylic roller at an even pressure. I pierced it as well and place all three in the oven. I then ran to the grocery store for milk, so I actually left them in the oven for 23 minutes. I have found if you are at the correct temperature, you can really bake too long, but you can definitely under bake.
 Once I removed the pendant and beads from the oven, I let them cool, then used 800 grit wet to dry sandpaper for smoothing the rough edges.
 I dried them off and buffed them by rubbing them back and forth quickly on denim for 2 or 3 minutes. This brings out the shine, especially since the beads are composed of translucent clay.
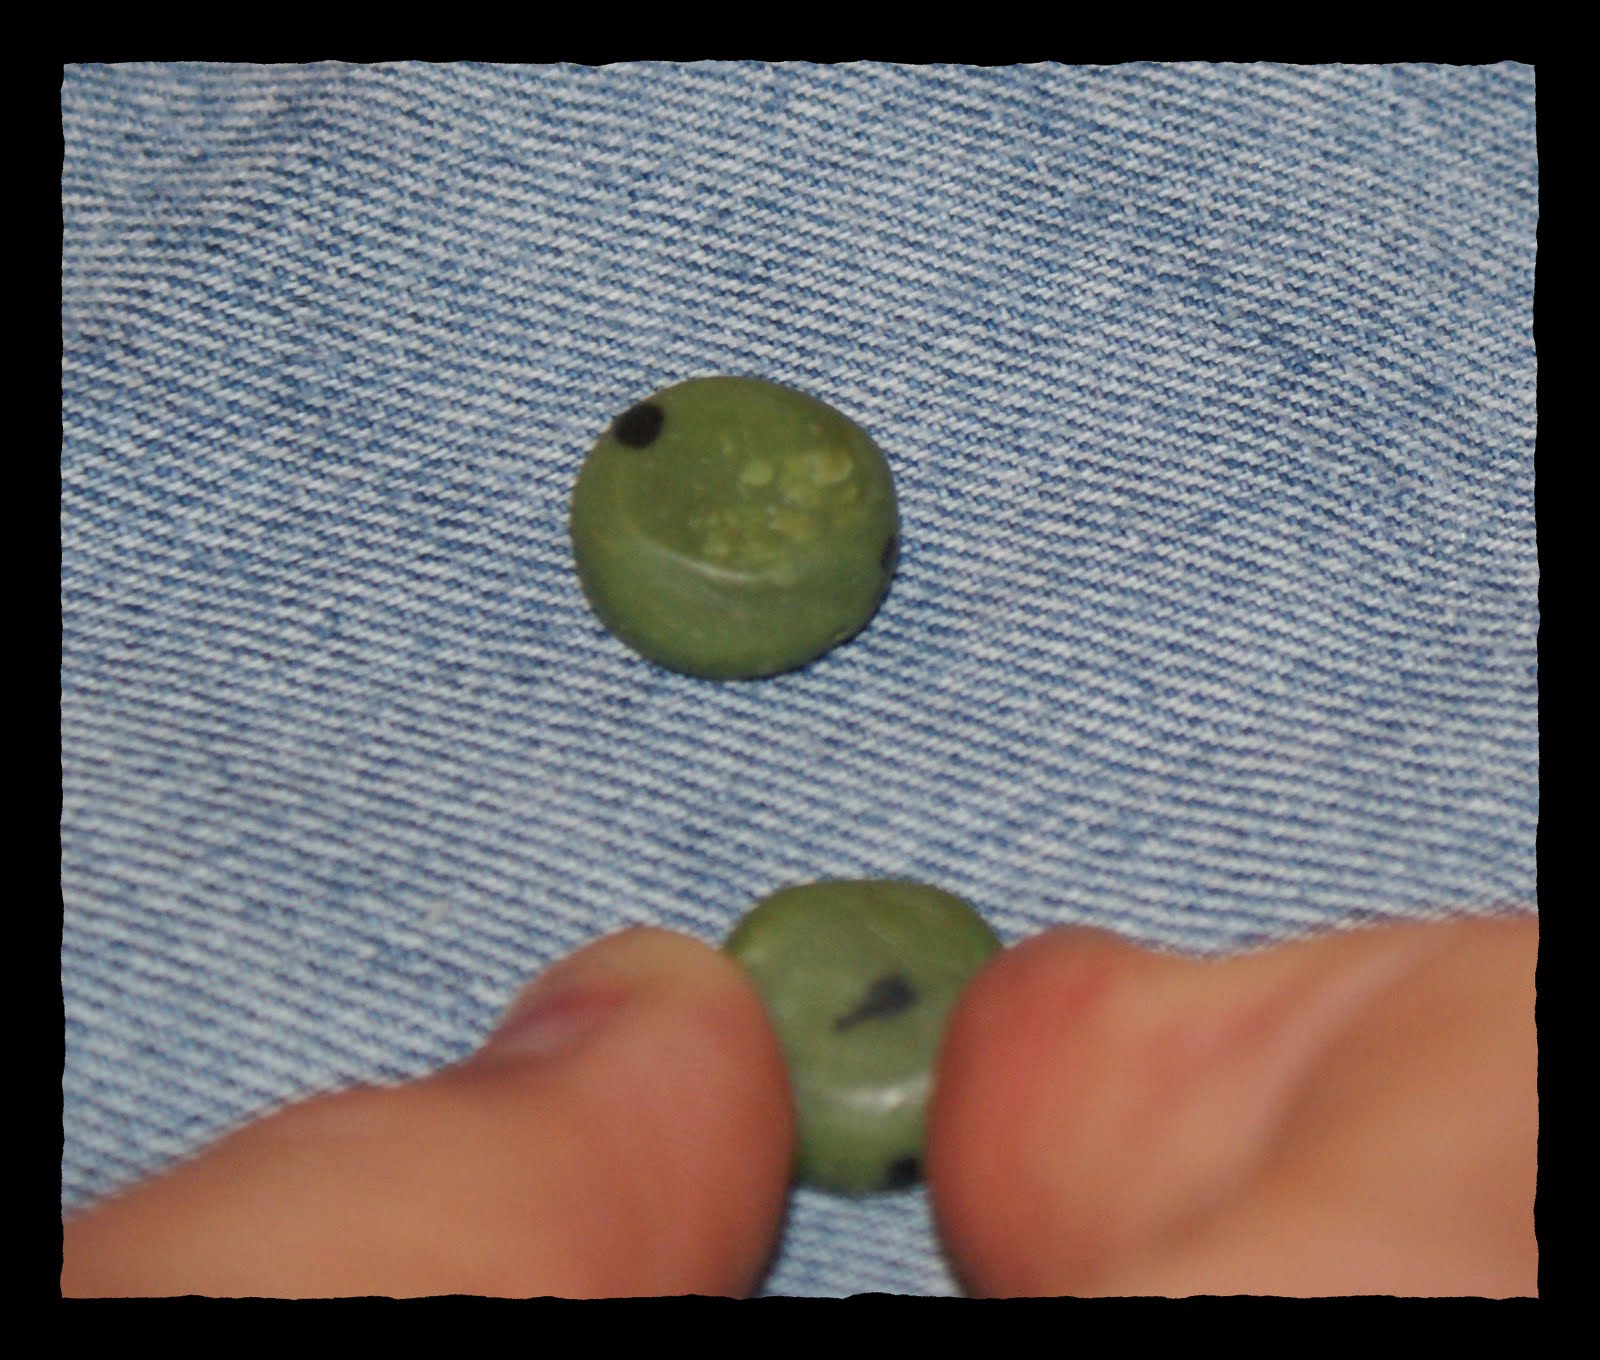 I antiqued the chinese character pendent by wiping burnt amber acrylic paint, then wiping it off immediately, leaving the color in the impressed parts. I sprayed each piece with 3 coats of varathane by rustoleum, allowing drying between coats.
 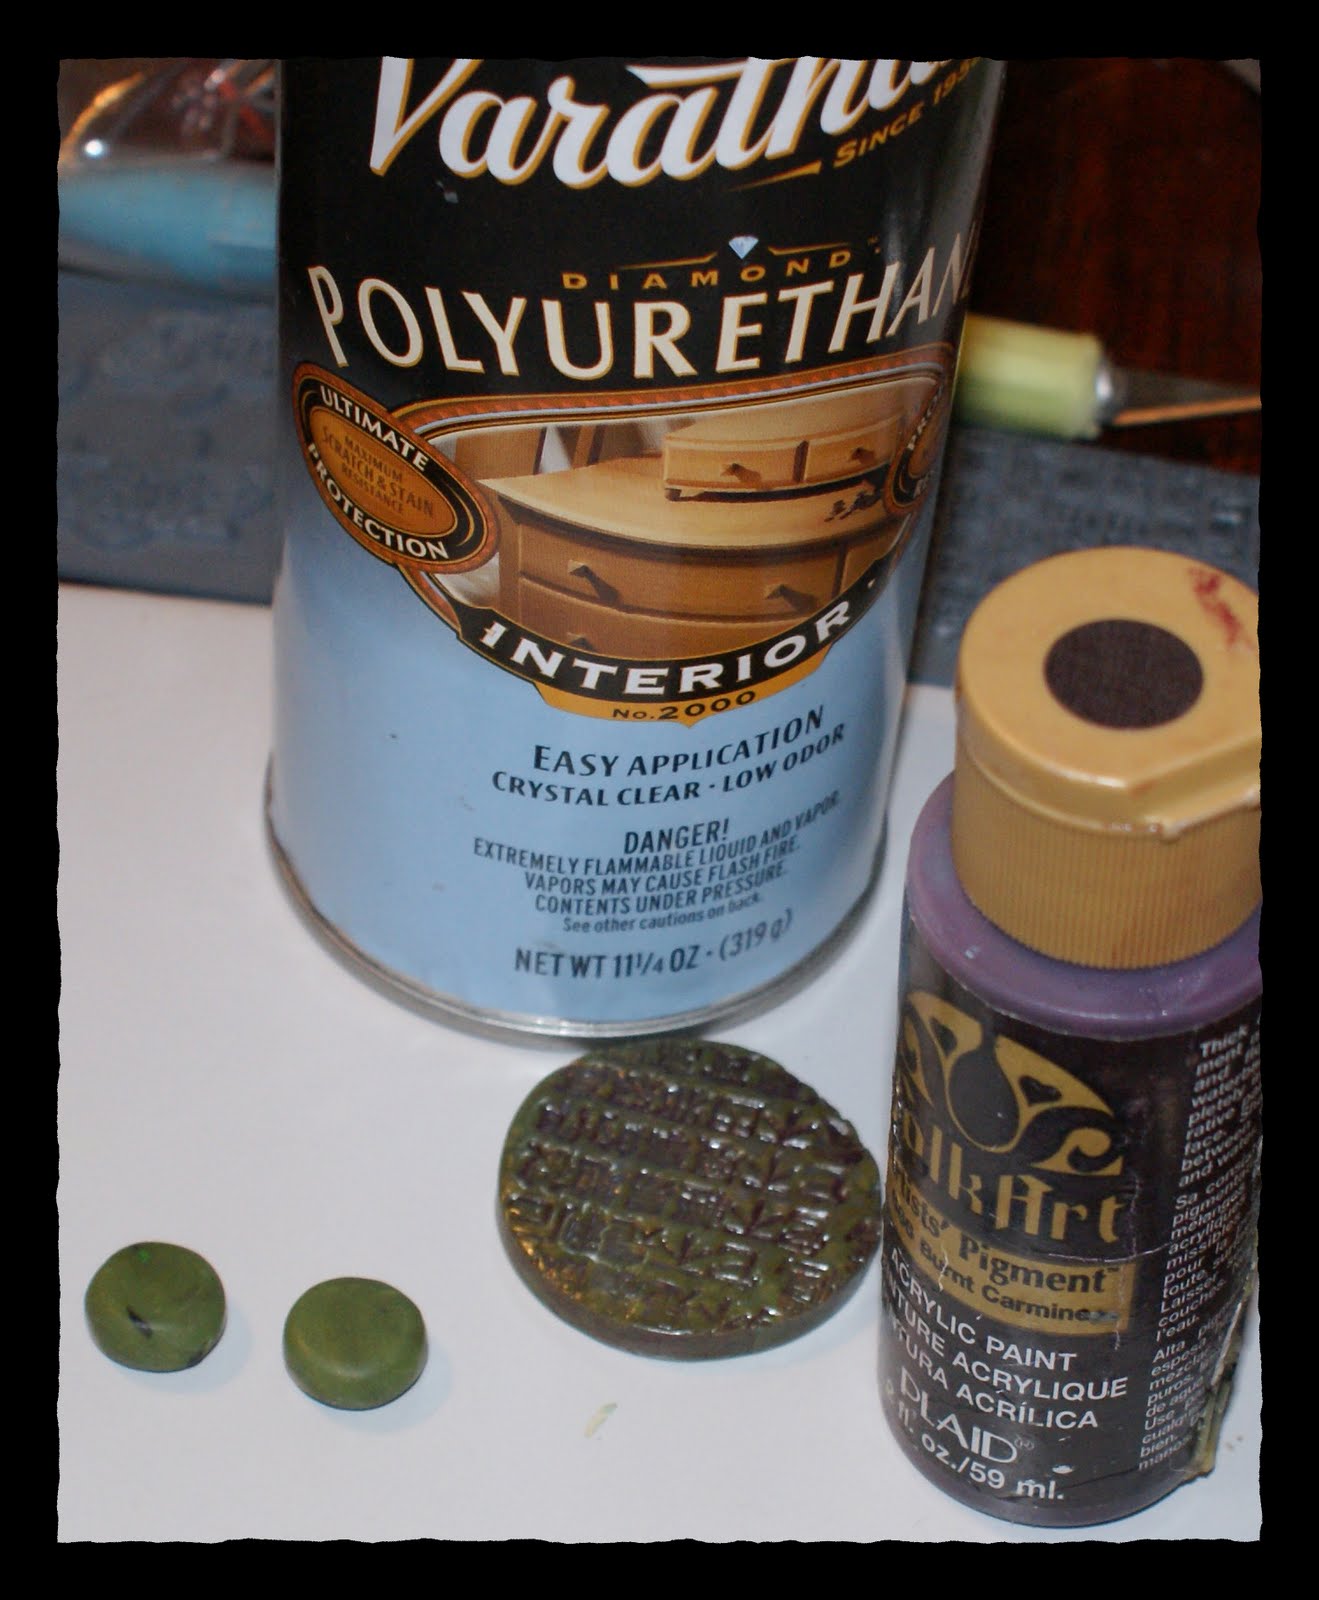 The possibilities are endless with this jade. Go crazy, crafters!
Polymer Clay Day #56; Circle Triangle Pendant Using Cool Stamp Technique
by


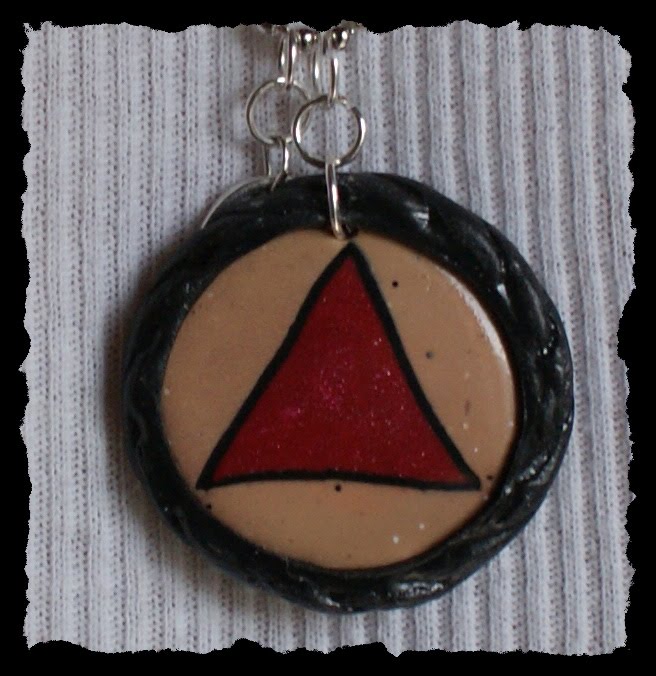
I am thrilled to have found triangle cookie cutters on Ebay. Every craft store I searched had every shape except triangles. This is a big deal for someone like myself, who cherishes the Alcoholics Anonymous circle triangle symbol, which you see in many of my pendants. They came in the mail today, along with a deeply etched rubber stamp, needed for what I wanted to do with the triangle. I used the technique detailed in this awesome tutorial by Ponsawan Sila, a clay artist I refer to often, cause she rocks. Here is the tutorial. While I just used the technique on the triangle, she makes a really awesome pendant. It is definitely worth checking out, and is on my to do list.
20 mile run in a heat advisory today. I know better. Tomorrow when I emerge from my coma, I will write about the experience on my running/sober blog, here.
More tutorials on clay coming. Time to share what I am learning. If there is anything in particular you would like to see a step by step on, speak up. Blessings…
Polymer Clay Day #55; Mokume Gane and Simple Pendant Tutorial!
by
 Finished product you will have if you follow this tutorial.
 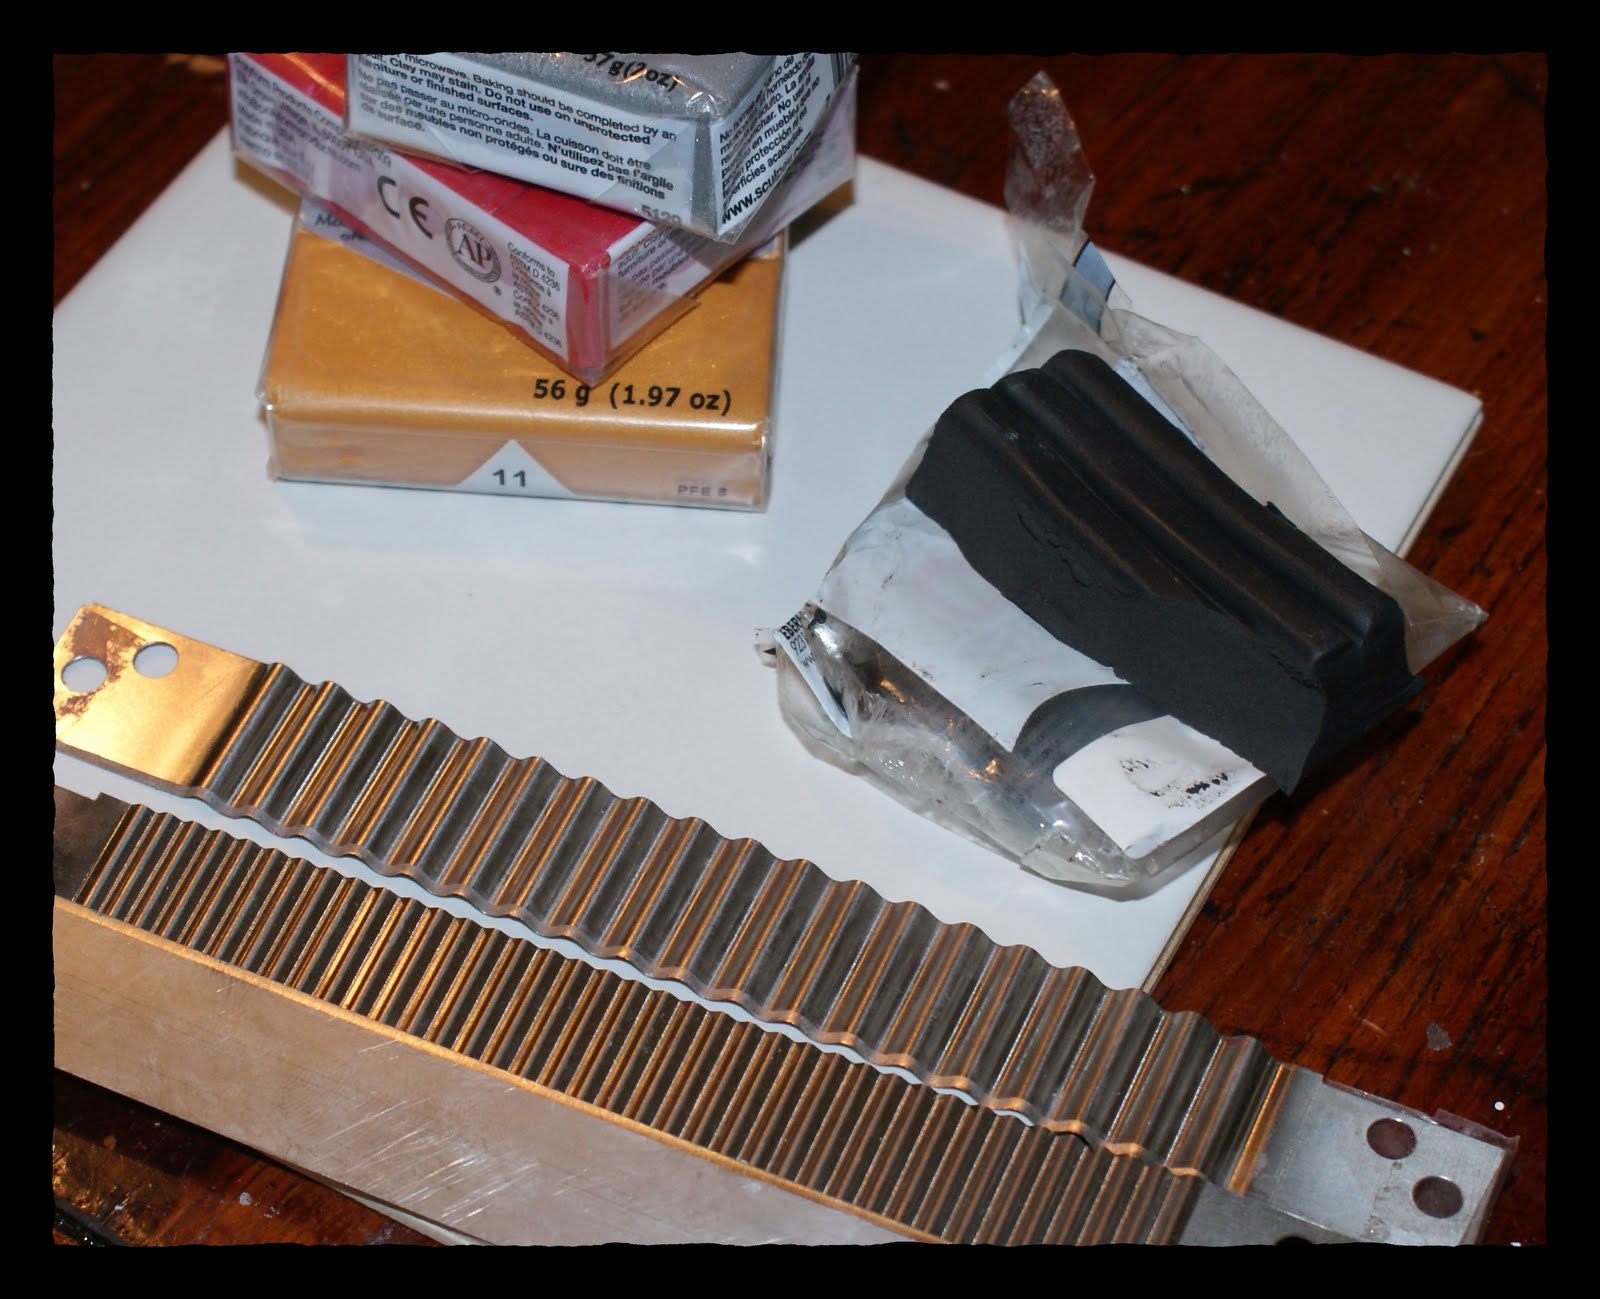 Here is what you will need: Whatever colors of clay you like. They need to contrast well. I used fimo soft in black, copper, gold and silver. A straight tissue blade, a curvy blade as pictured above, varathane or future floor finish, armor all (releasing agent so your clay doesn’t stick to your cookie cutter), oven (I use toaster oven with a thermometer cause baking your clay at the correct temperature is super important), baby wipes for cleaning your surface and your blades between using different colors of clay (to avoid contamination), ceramic tiles which are used as the work surface and can be put in the oven for baking the clay, pasta machine for rolling clay sheets, acrylic roller or brayer. I think that is it.
 I cut two bars off of my clay from the package and condition it (roll it in my hands in a log until bending the log in half doesn’t cause it to crumble or crack). This mixes the ingredients in the clay and warms it up so that it is uniform. I finish the conditioning in the pasta machine, then roll out my sheets at a thin setting (5 on my pasta machine, which has 1 as the thickest, and 9 as the thinnest setting. I use a square template I made from cardstock to cut one 4 inch square of each color, except black – 2 squares of black.
 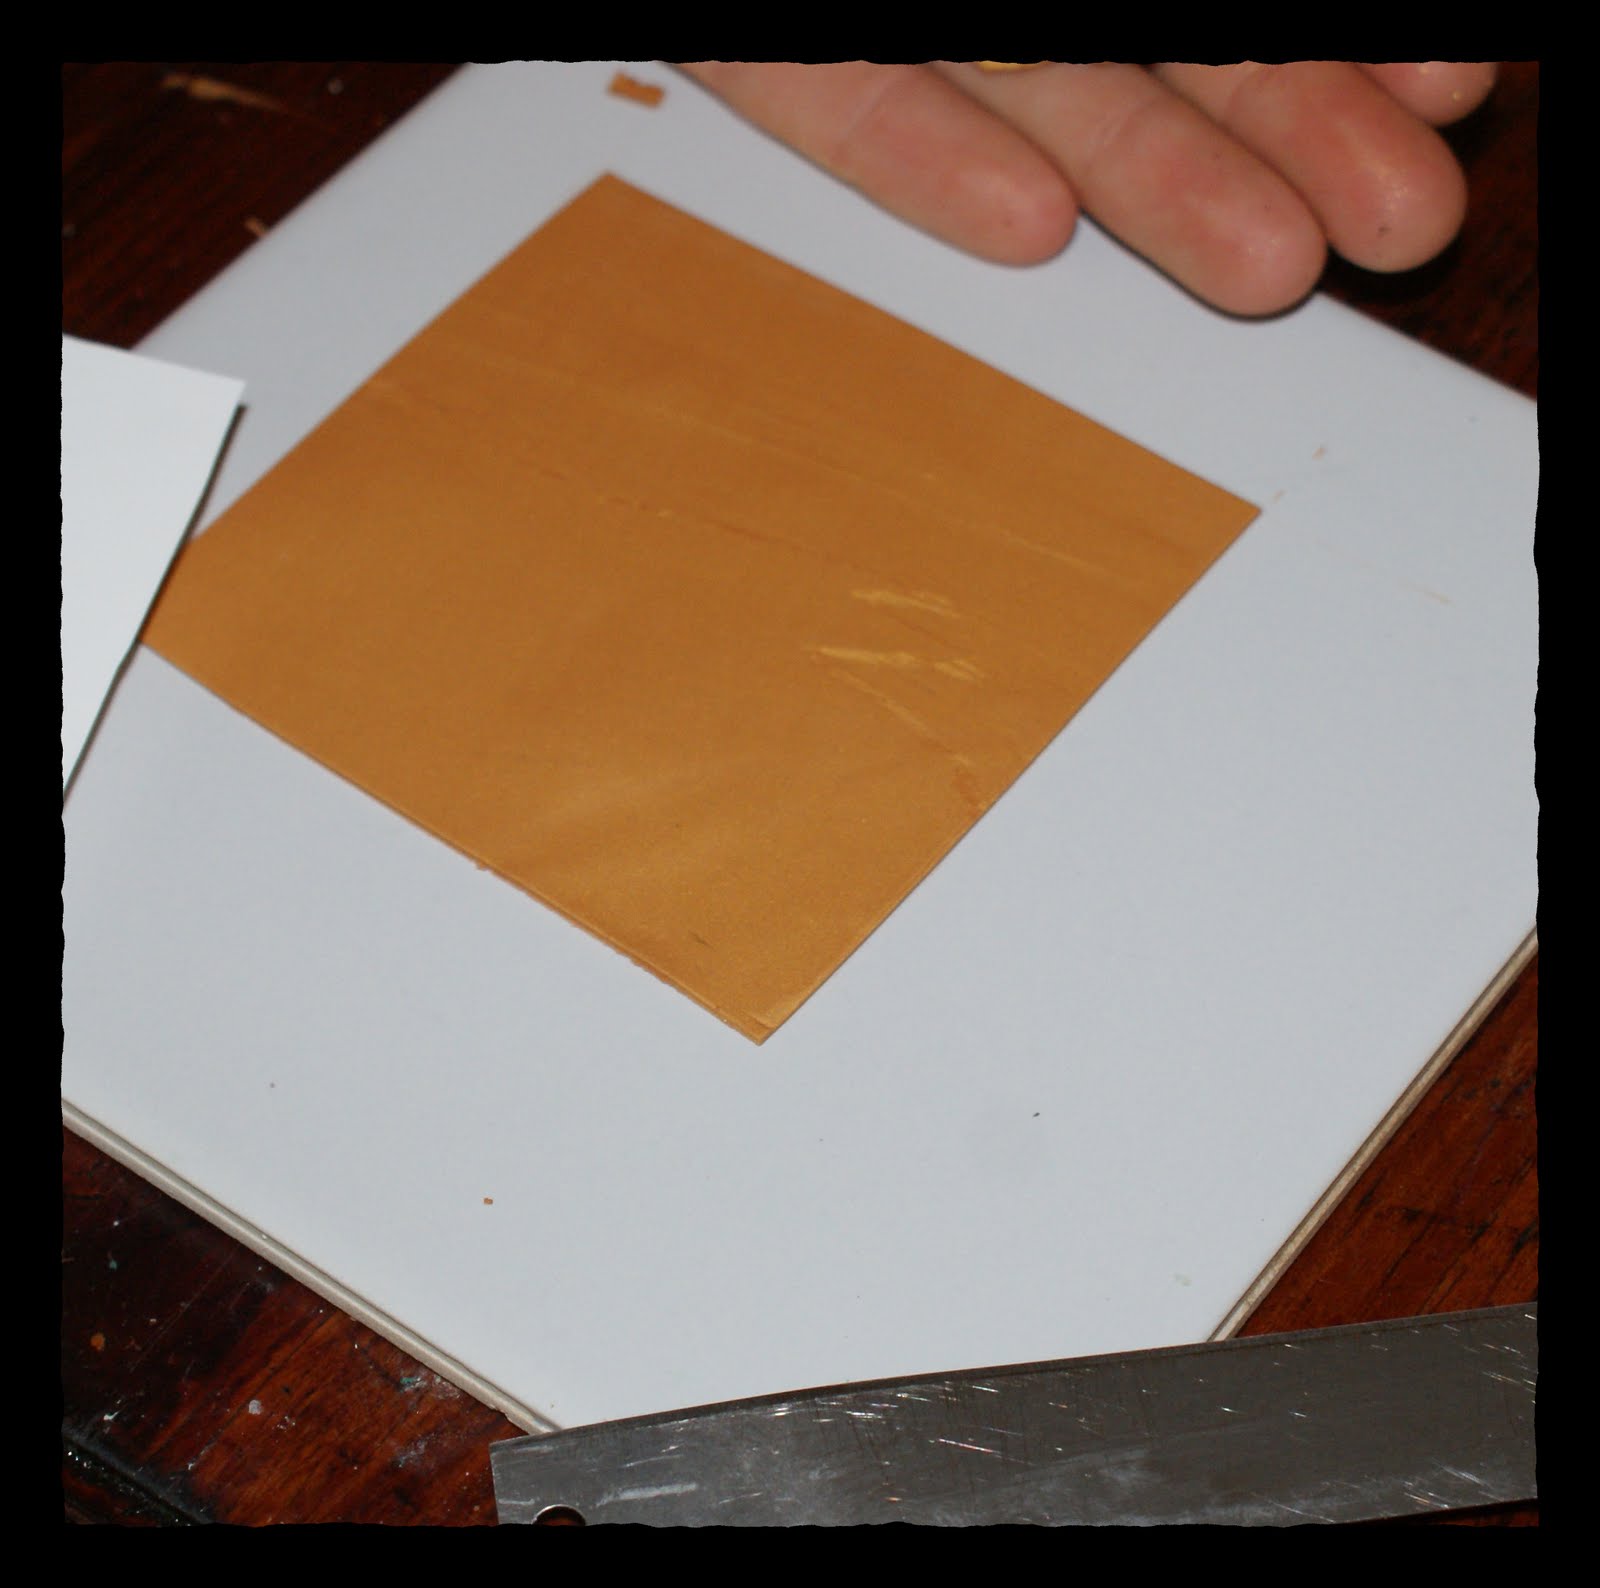 Make your squares as above for each color and set aside.
 I wear gloves because fingerprints in my finished products drive me bonkers. Begin by stacking your silver sheet (or whatever color you use) on top of the black, starting at one edge and slowly going across to the other edge.

 Roll with your brayer or acrylic roller, and use a blade or craft knife to puncture any air bubbles.
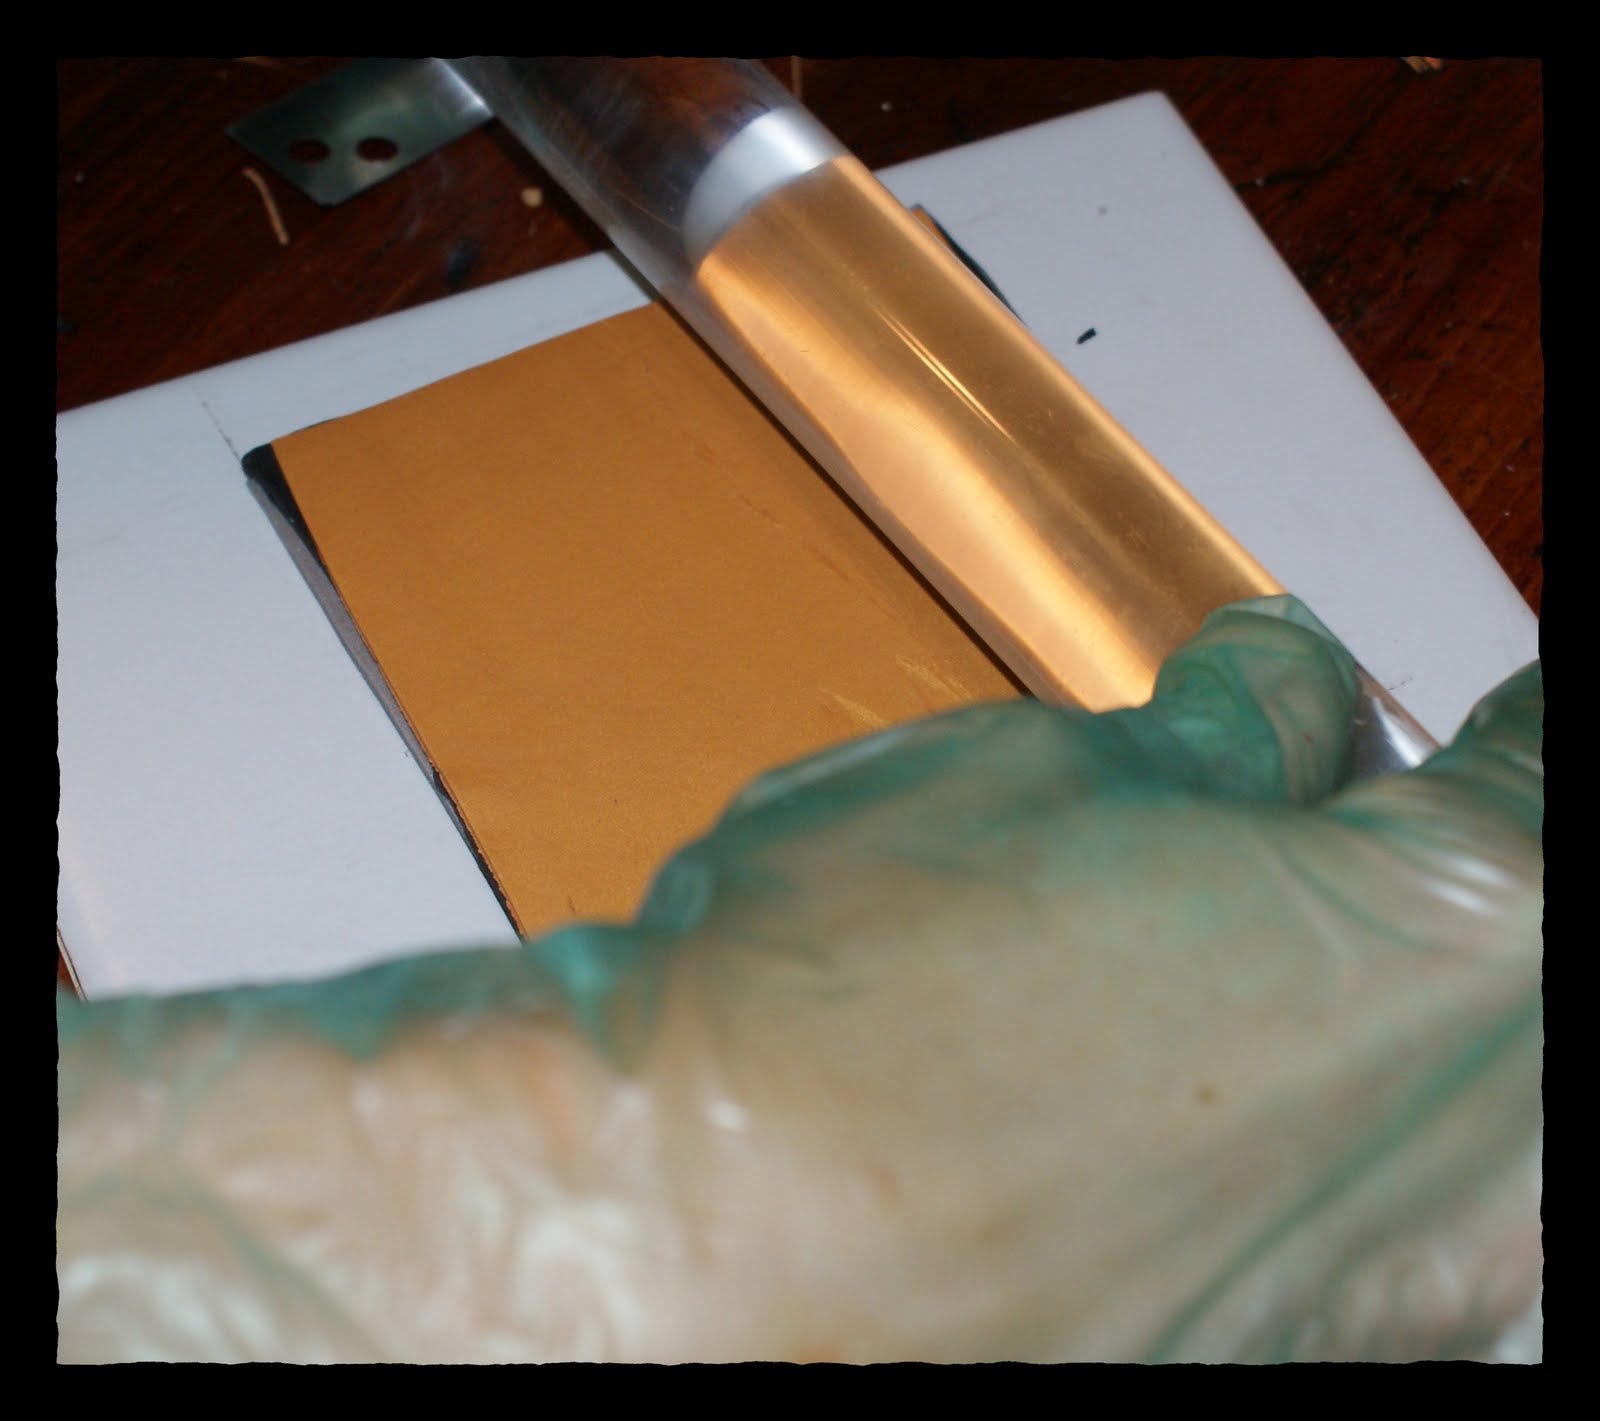 Next I placed my other black sheet on top of the silver, then the gold, then the copper, smoothing with the acrylic brayer and puncturing any air bubbles, then re-smoothing with the brayer.
 Cut the stack in half, and place one half on top of the other, keeping the colors in the same order, as below…
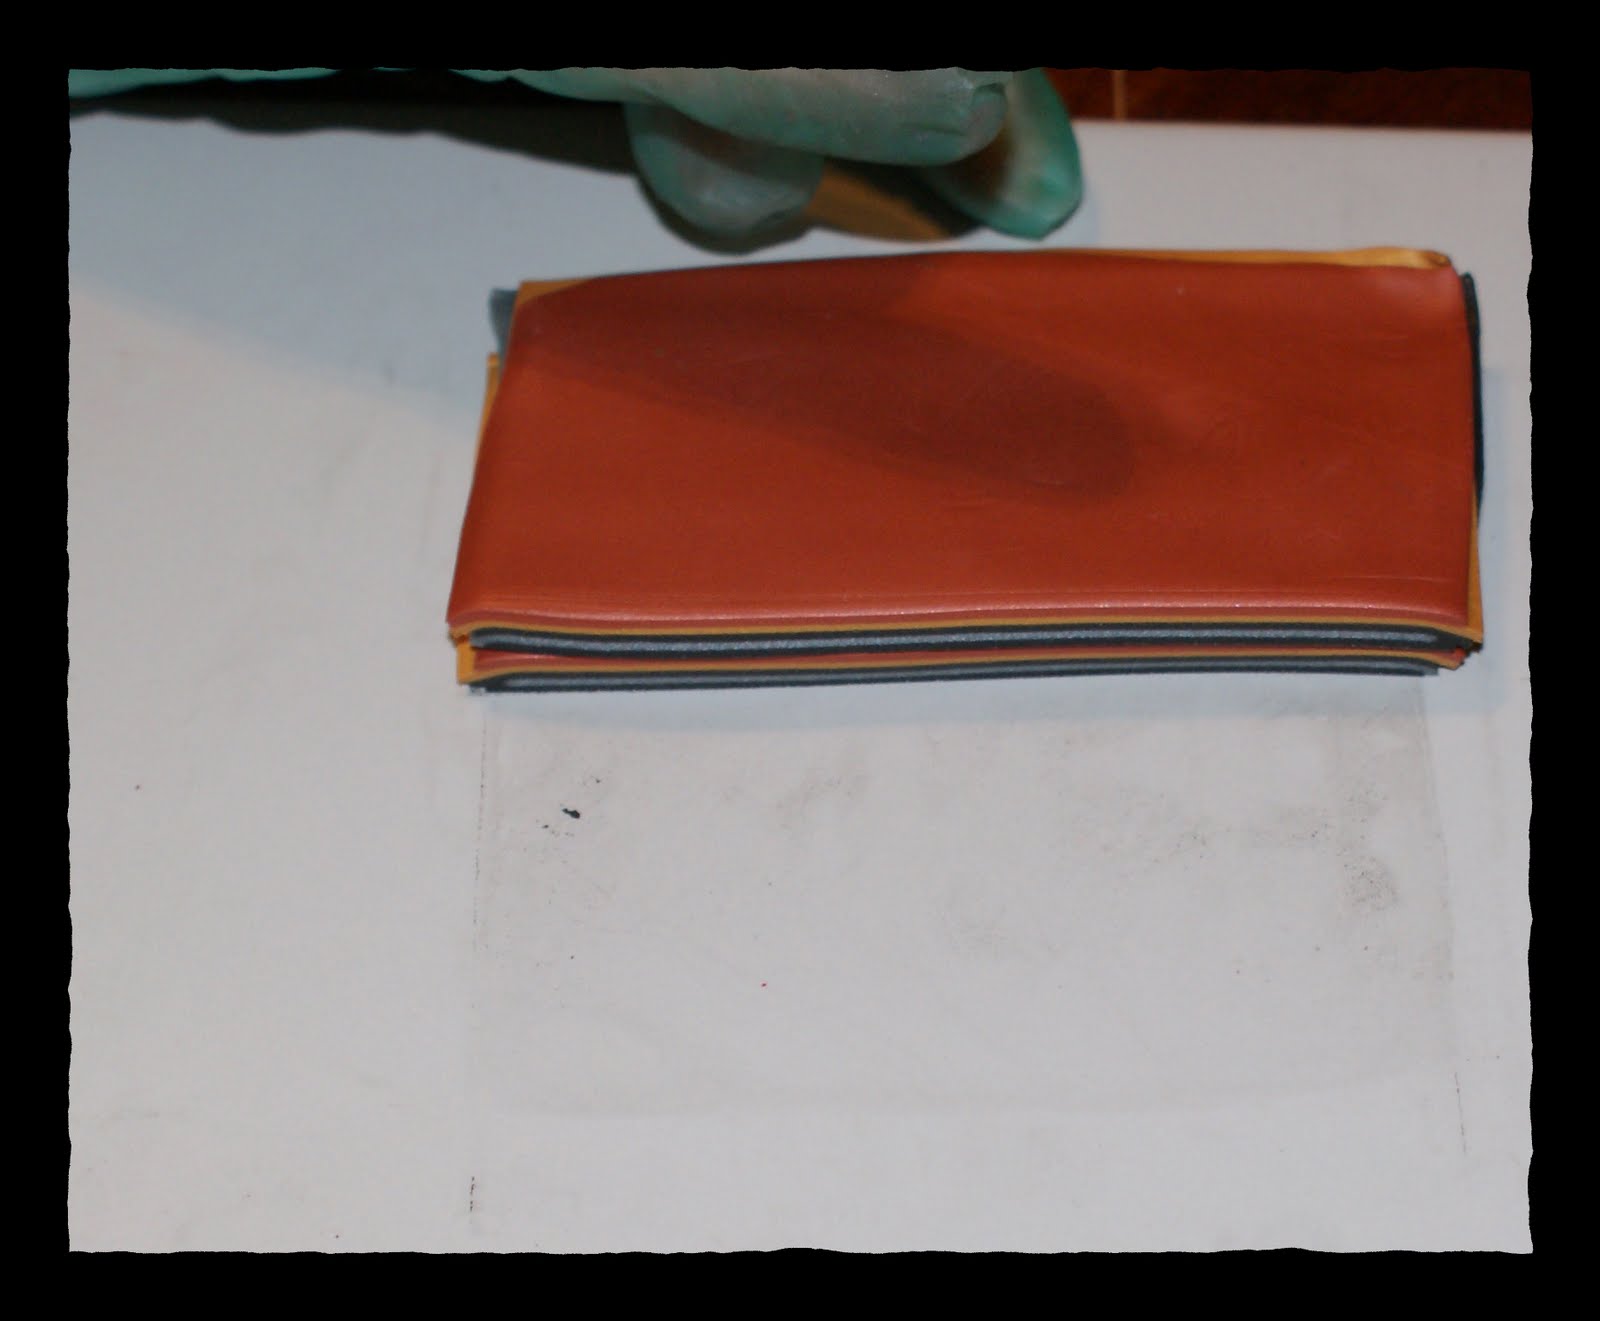 Now roll with roller until stack is half as thick. This doesn’t have to be perfect, as differences in pressure only make the final design more interesting. Cut in half and stack again.
Roll to half thickness, cut in half and s tack. Now you have your block and are ready to cut slices to use for beads, pendants, whatever.
  Before slicing with your curvy blade, let your block cool (the clay is warm after all the conditioning and handling, and will smear when cut warm. I put mine in the fridge on my ceramic tile for an hour before cutting. Turn the block on its side as pictured and slice thinly, but thick enough that you have a complete square (the blade shouldn’t come through on the front side of your slice.

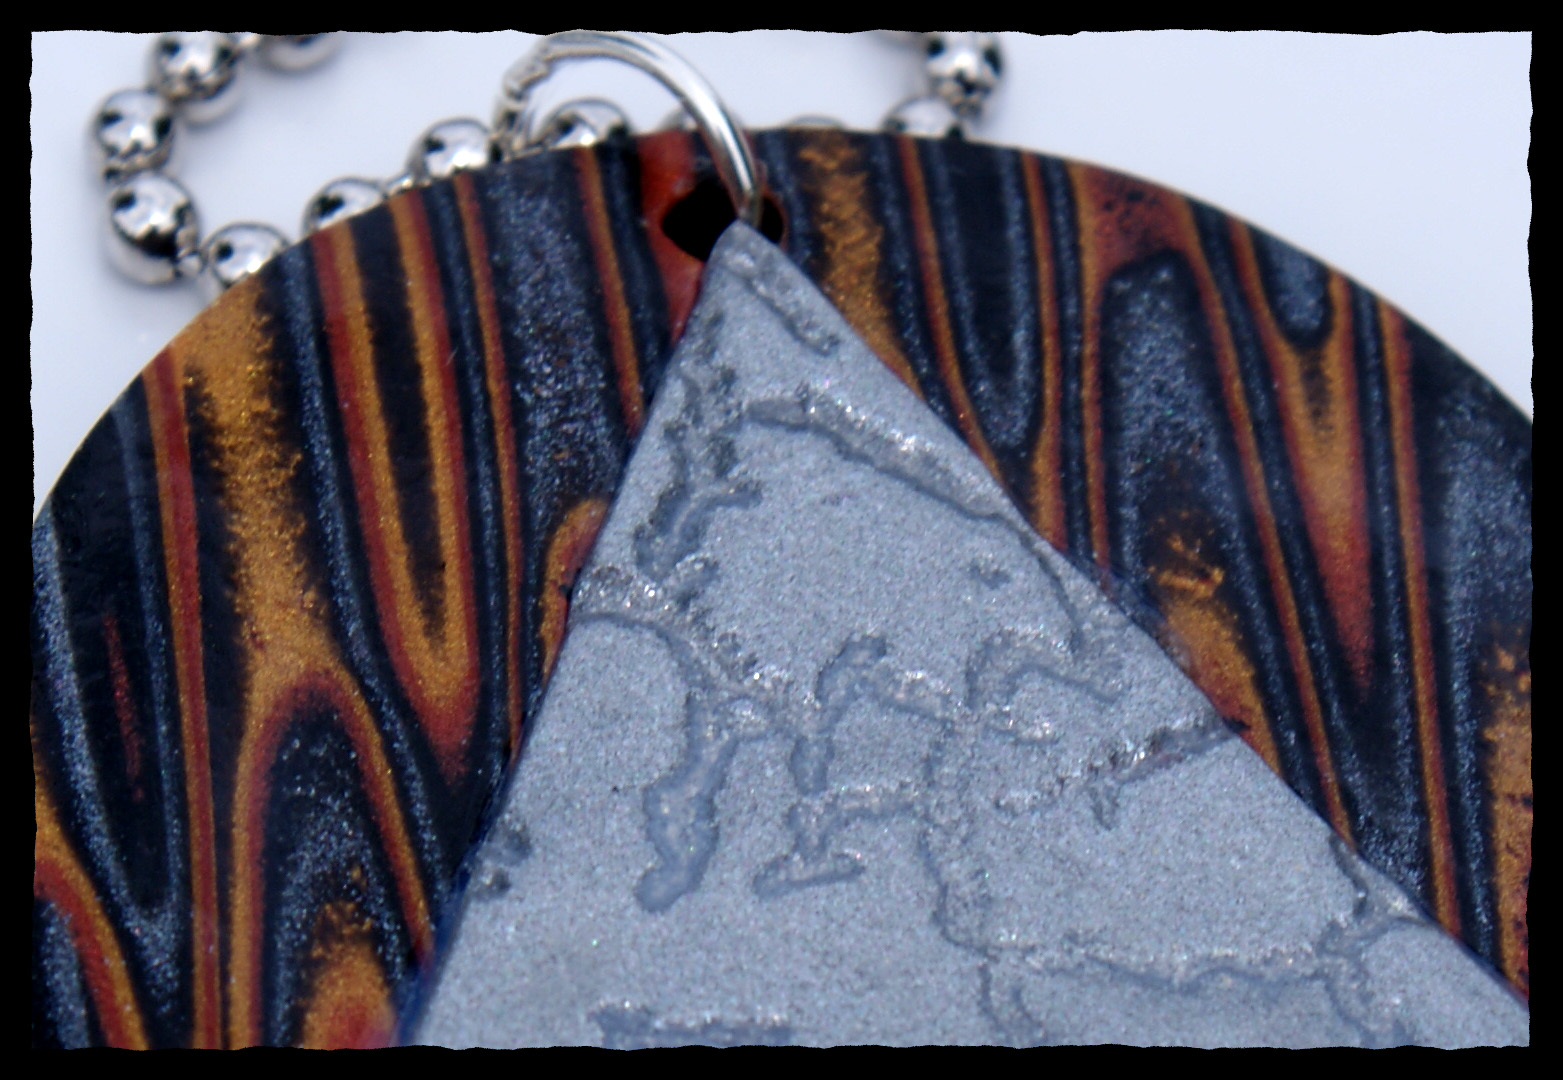
 The above pic is my slice after run it through my pasta machine at a setting of three. Doing this creates a cool distortion. Now I will make a simple circle triangle pendant using my mokume gane slice…
 I rolled out a black sheet on setting 3, cut it in half and stack the two halves.
  I place my mokume gane slice on top of the black. Next, spray your cookie cutter with Armor All so that the clay doesn’t stick to it.
 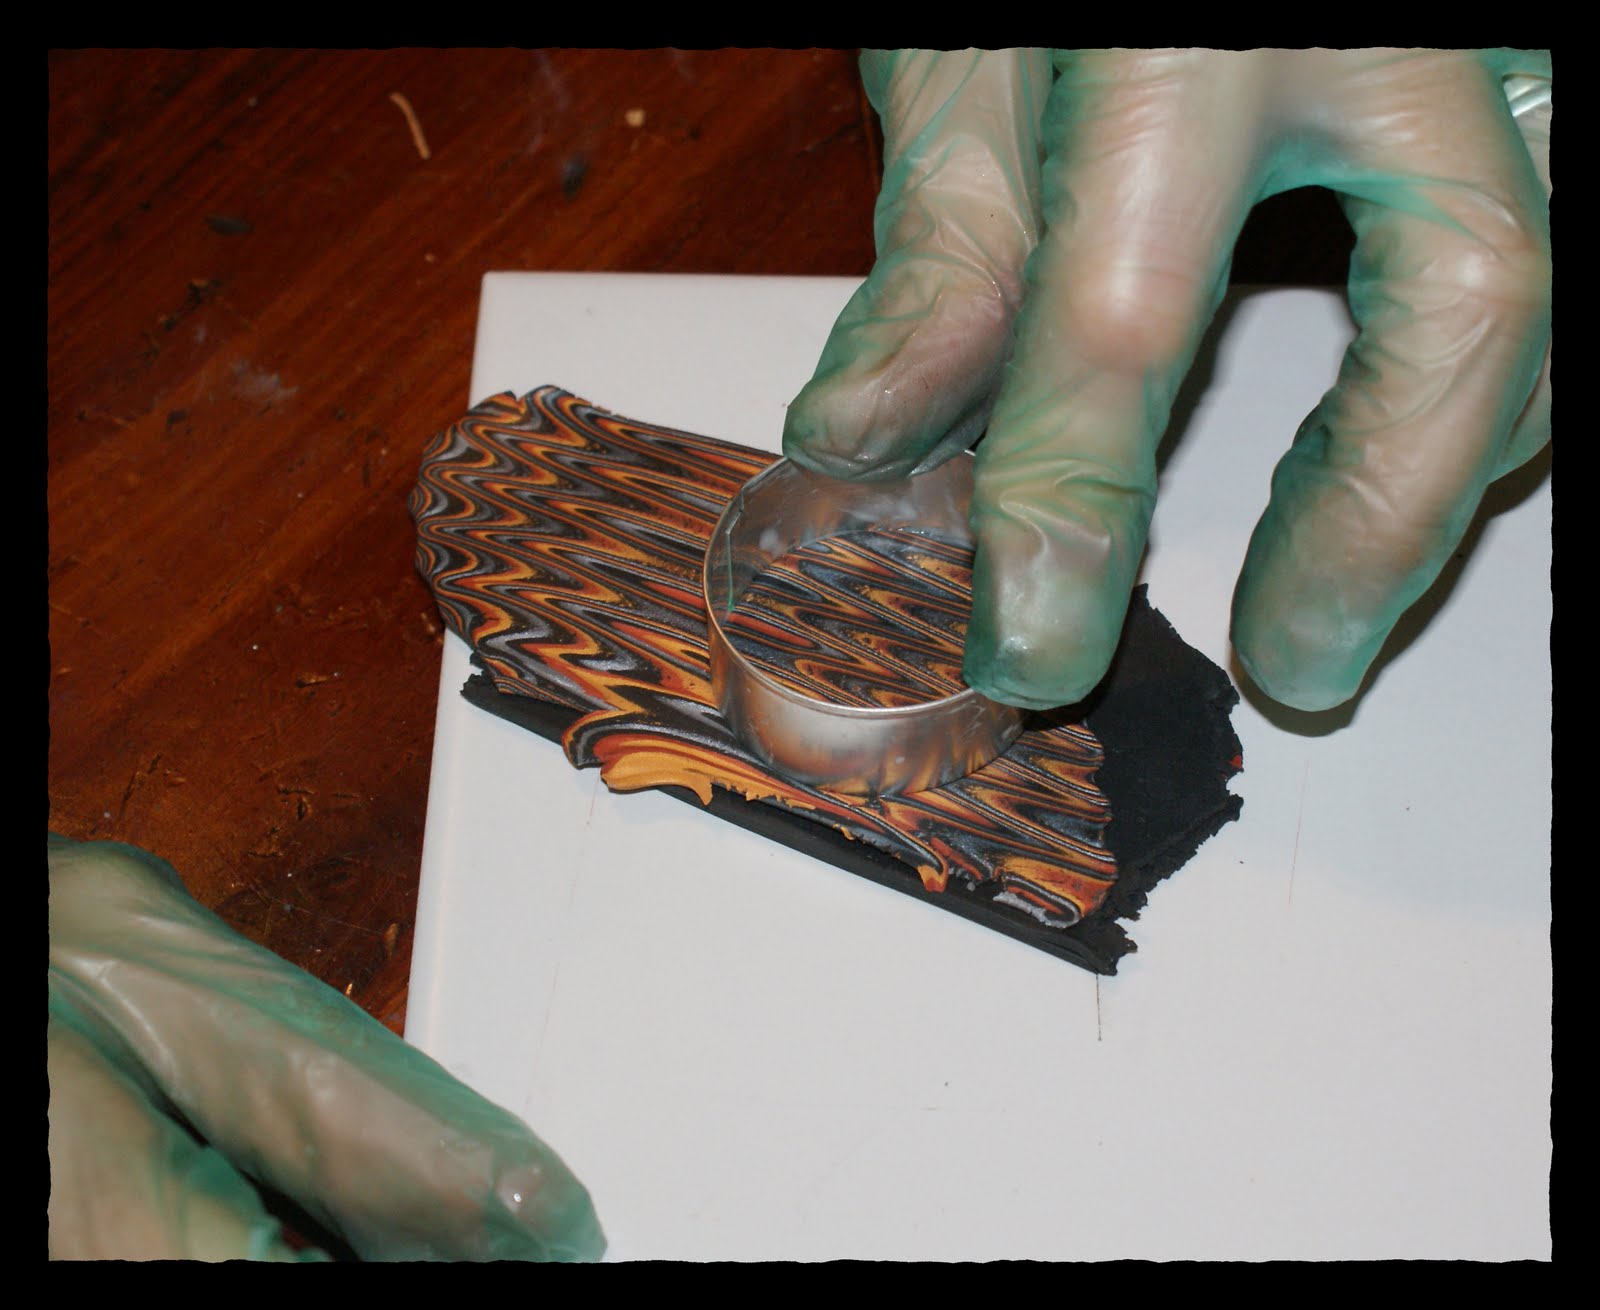 Then, cut out a circle, and lift the clay around it off, leaving the circle on the ceramic tile.
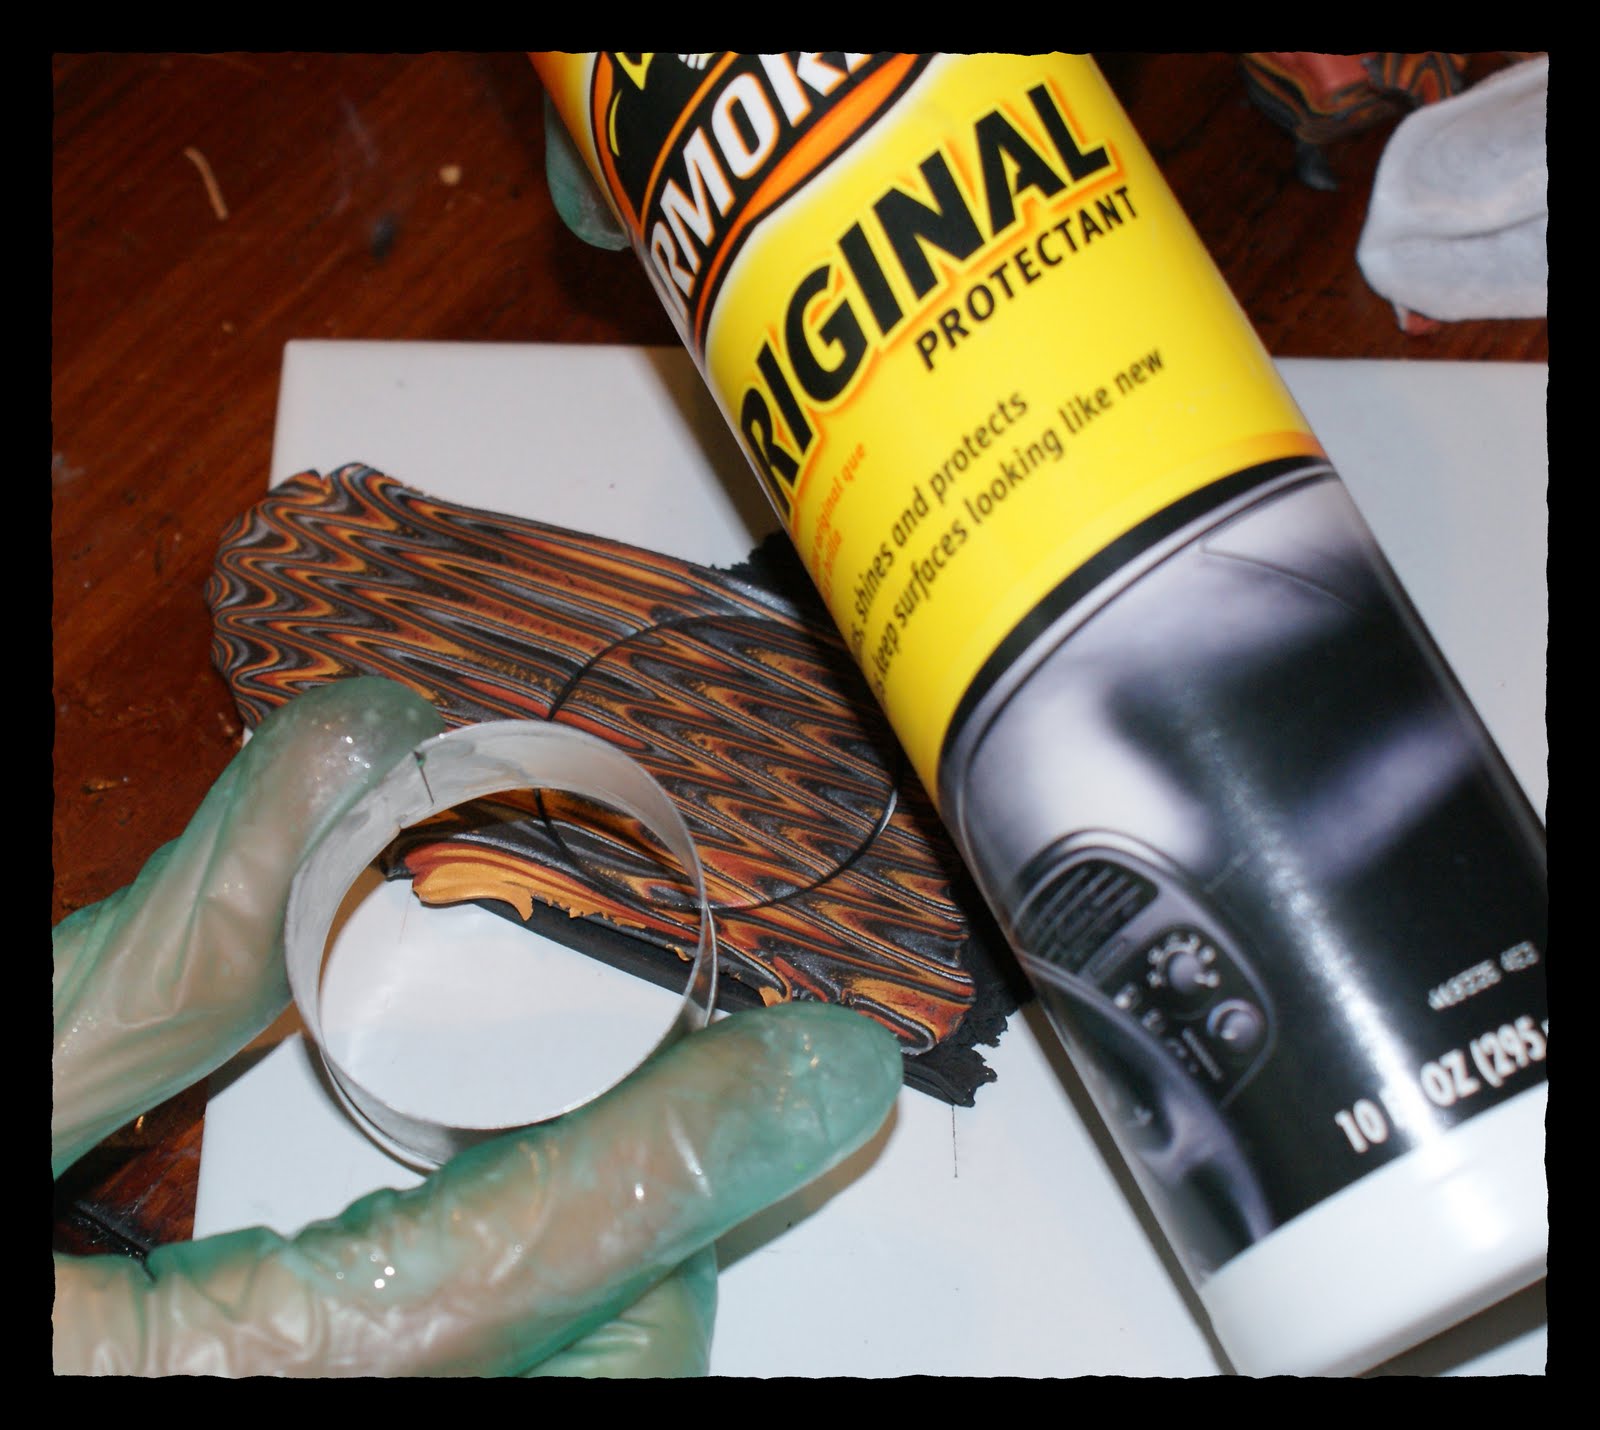 Using my needle tool, I poke a hole where I will place the jump ring to put the pendant on a chain. You can use a coffee stirrer or tooth pick for this as well.
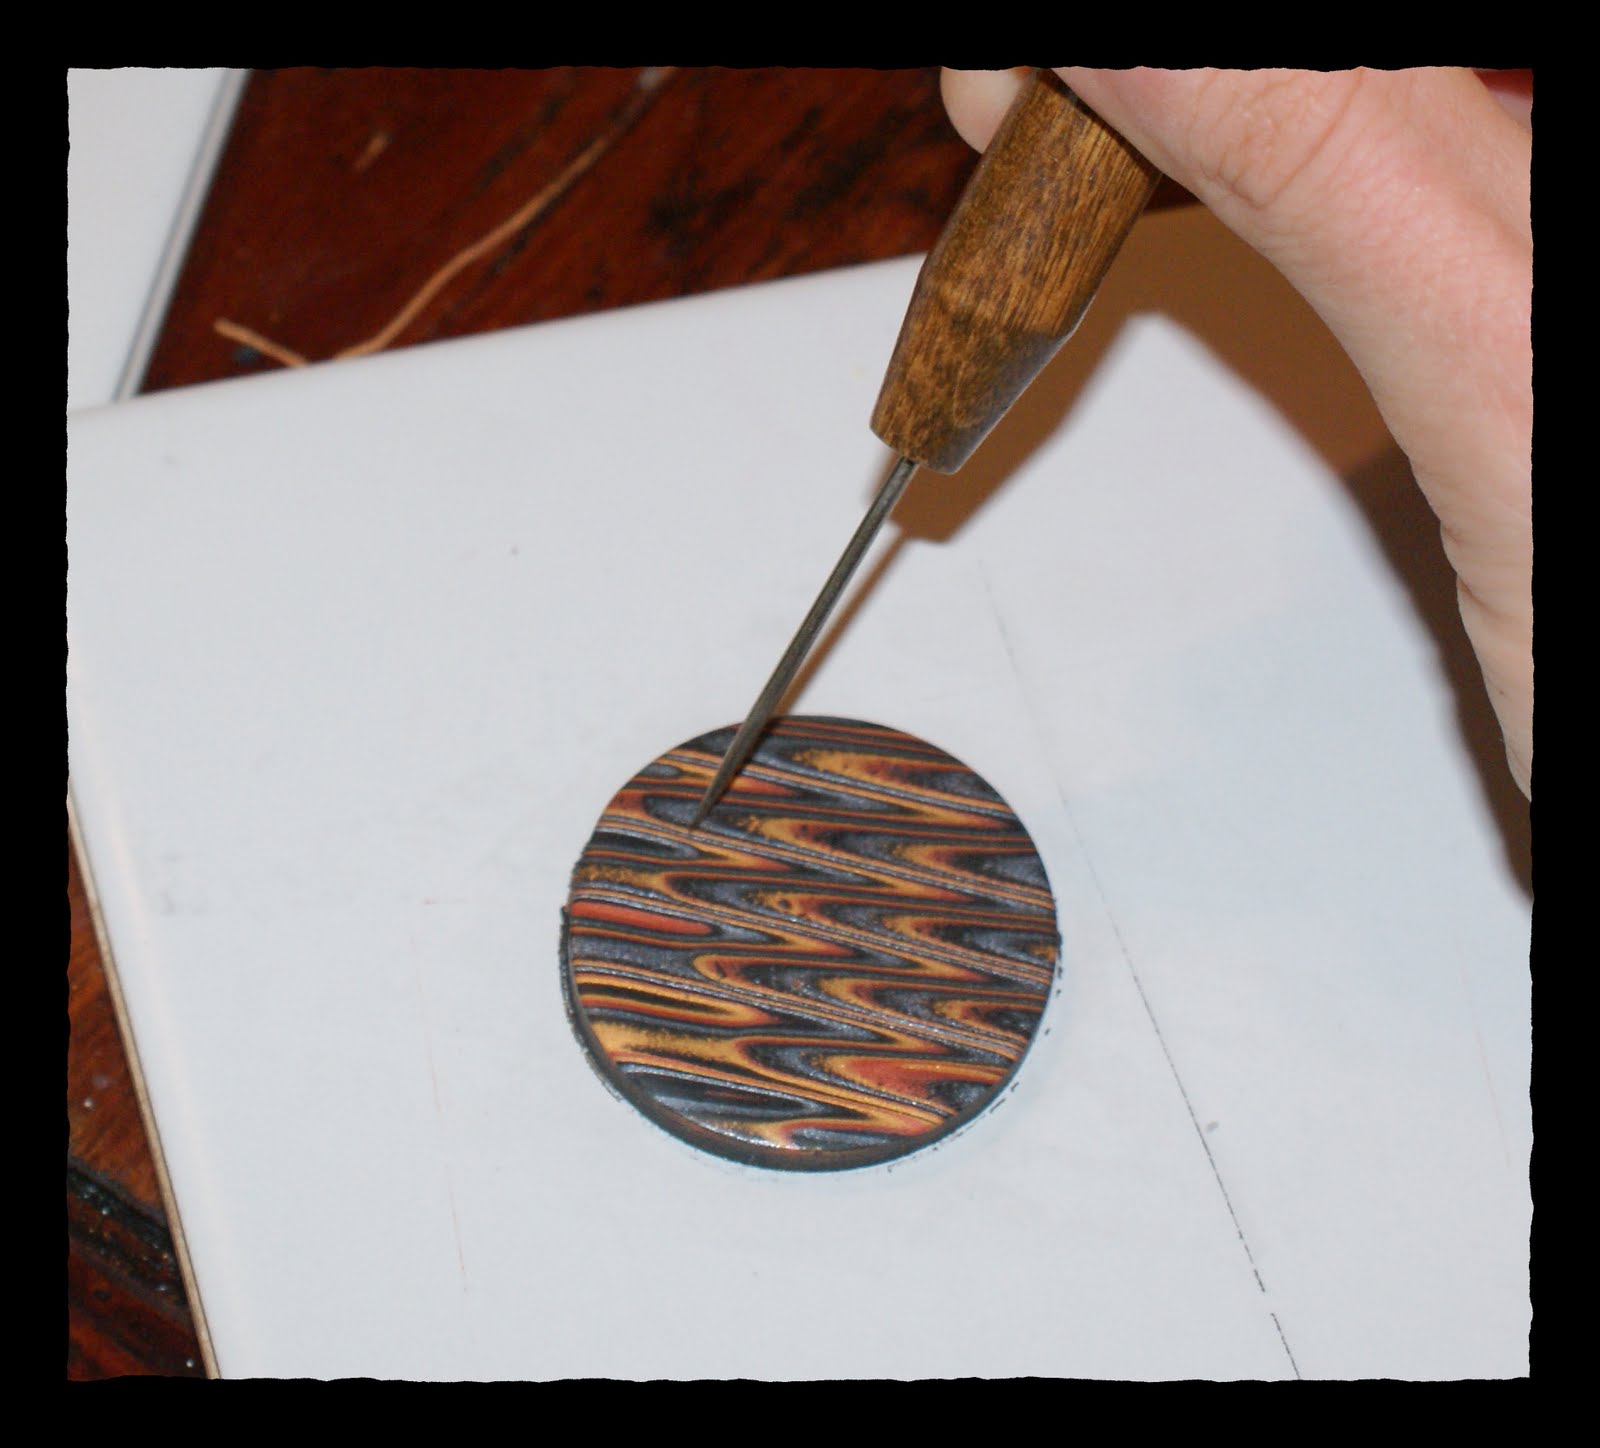 Now place the piece in the oven and bake per clay instructions. I baked this at 275 degrees for 20 minutes. Remove from oven and let piece cool for 5 minutes before handling. I sand my piece with 400 grit, then 800 grit wet to dry sand paper (which you can find in the automotive section at wal mart or wherever). This gets rid of little imperfections. After this, I buff the piece on denim by rubbing it quickly back and forth for 2 minutes or so. This makes it all shiny, in theory 🙂
 I cut a triangle out of a small silver sheet of clay rolled on a 6 setting, and made impression for texture with a rubber texture sheet. I baked this for 15 min at 275, then used Lisa Pavelka polymer clay glue (small amount is sufficient) to glue it to my circle medallion. I could have put the raw triangle on the raw circle and baked them together. This would have eliminated the need for glue since raw clay sticks to raw clay. The downside is that lifting the thin triangle sheet off of the tile while it is still raw will stretch and distort it. No good. Baking it on the sheet allows me to wait until it is cured to lift it off of the tile, thereby not stretching it. Good.
 Once the triangle is glued on, I finish my piece by spraying it with rustoleum varathane spray. You have to be careful what finish you use, as many will react with the clay, even months down the road, making it gooey and ruining your piece. Sprays are generally not recommended, but the varathane pictured has been tested out to one year, with no bad reactions with the clay. I personally like the spray option because there are no brush strokes, but Future Floor Finish (which I found at home depot) is quite popular among polymer clay artists. You will find what works for you. The rustoleum varathane gives a beautiful shine. I am partial to it.
 Add a jump ring to your pendant and throw it on your favorite chain. That is it. I would love your feedback. I am just getting into posting tutorials.
Polymer Clay Day #54; AA Circle Triangle Pendant With Hope Tag
by


I would love to tell you all about the making of today’s cane project, but what I am going to do instead is tell you good night 🙂
Long day. Marathon training makin’ me sleepy. I will share something cool I heard this evening. “Spend your time standing under God, instead of trying to understand God.” That hit home for me. I am always thinking, then rejecting what I can’t tie up with a pretty bow that fits my little idea of what is possible. I don’t get God, but He is. Sweetest of dreams!
Polymer Clay Day #52; Zebra Print Dome Pendant
by

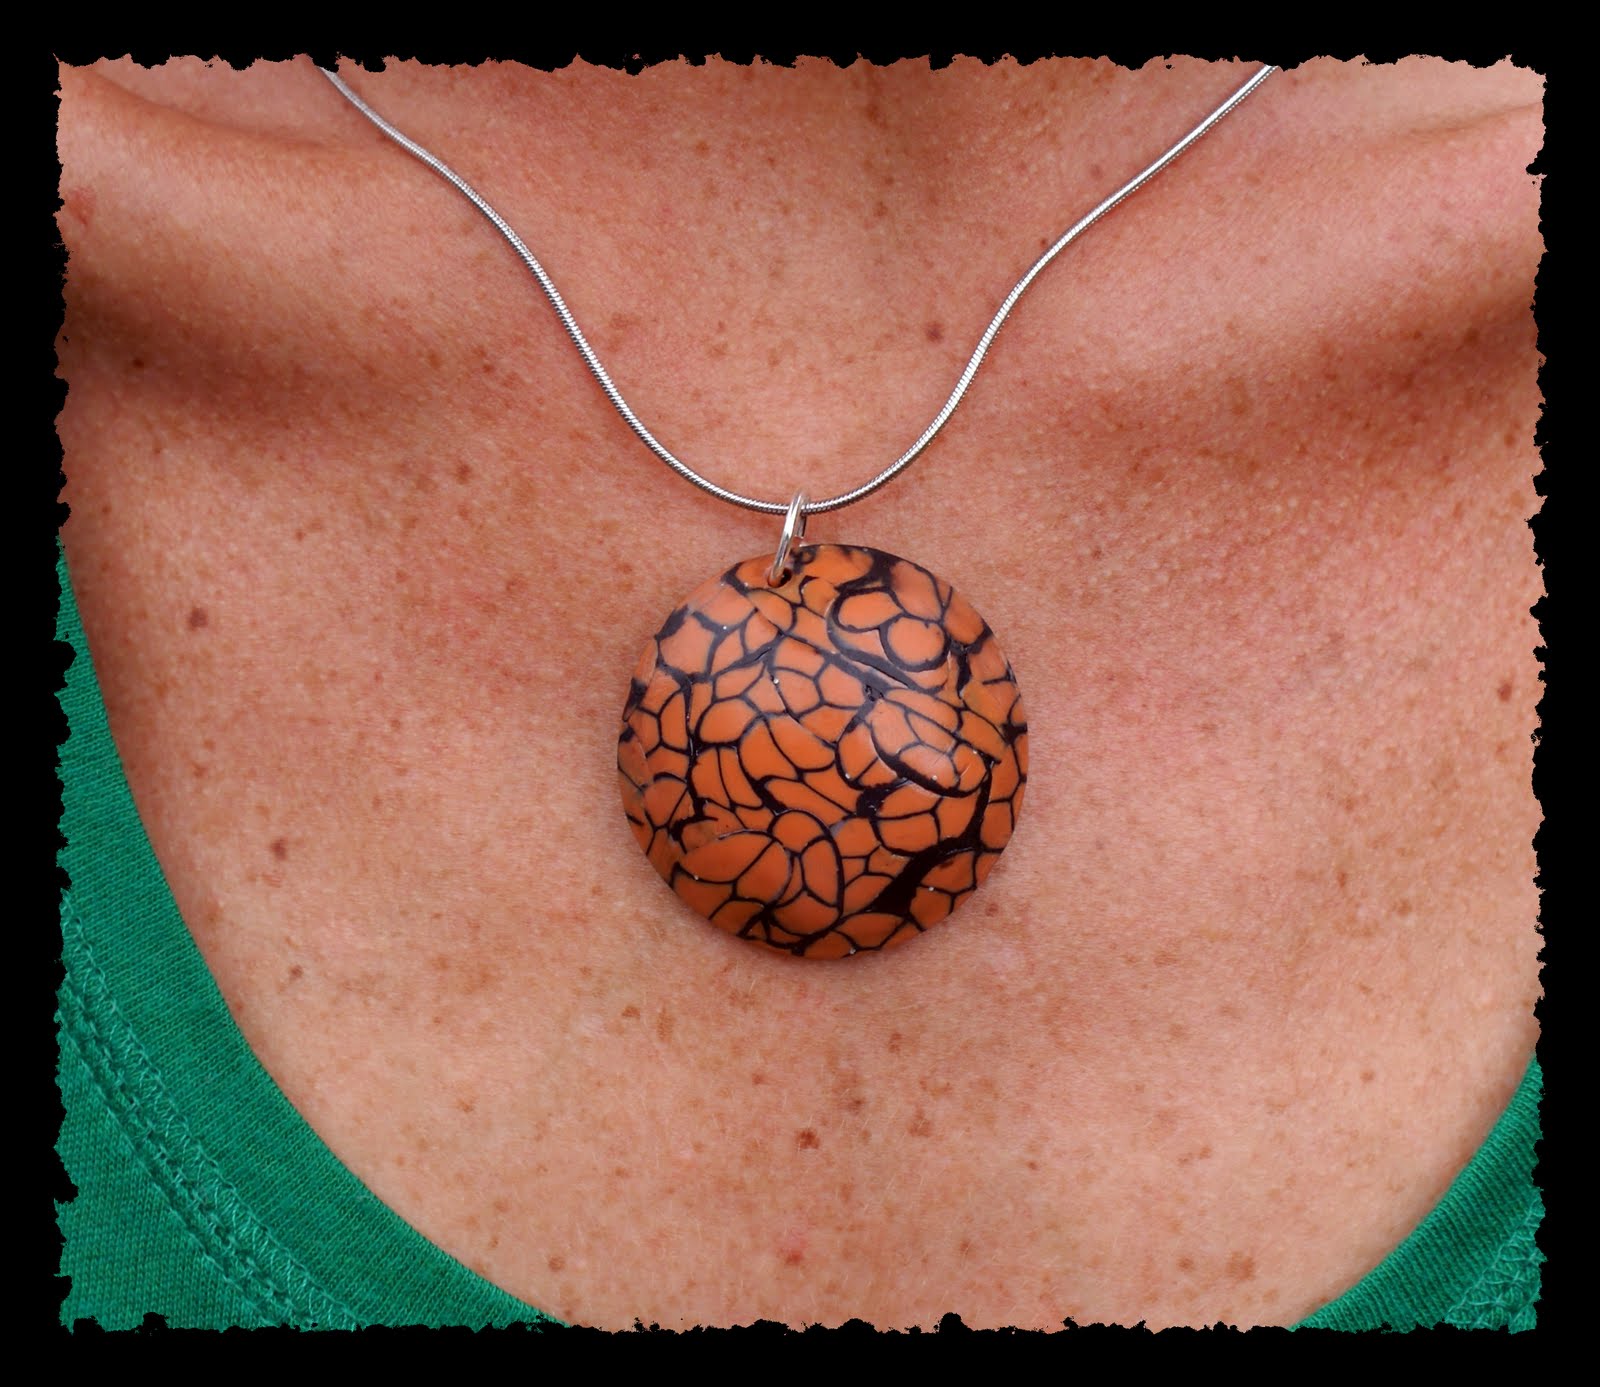
I used my zebra print cane combined with the dome shape I debuted yesterday. To shape this, I cut out a circle from a conditioned sheet of black clay with my circle cookie cutter. I then spray my mold with armor all (to prevent the clay from sticking to the mold) and lightly press the circle into the mold. I use a dome shaped mold for resin jewelry that I found at Hobby Lobby. I use scrap clay to fill the dome, then put a flat black circle piece on the back before applying the cane slices and baking.
It may be time for a home decor clay project, now that I have some painted walls!
Polymer Clay Day #51: Burn For You Pendant
by

 Dome shaped pendant – that is a first for me. I love me some orange. What is your favorite stone? I plan to do some faux precious stone pieces, and would love some input. Jade, opal, turquoise?
Polymer Clay Day #50: Run With the Sun Marathon Pendant
by
 After an awesome 18 mile run this morning, I have marathon on the brain. I am finally getting pumped up for this race. I will be wearing this pendant to keep myself motivated. Now… bed. Oh yeah, skunk update – still stinky, but markedly improved from original spray day (yesterday). My lil’ Bovie still acts a little stunned, and is favoring his front left paw, although I find no lesion or skunk induced scratches. If he’s not better Monday, to the vet we go. I leave you with his adorableness…

Polymer Clay Day #49: Oh MY GOODNESS, My Dog Met a Skunk Hydrangea Pendant
by

First, I would just like to say… WOW. WOW. So, I went for my 7 mile run this morning, pondering how much I have to be grateful for, and how I am happier with life now then I ever have been. I recall a point along the path when I thought to myself, “there are a lot of skunks in my new neighborhood.”. It was a fleeting thought, or maybe a premonition. I return home and let my dogs out to do their thing in the yard while I grab a cool drink from the fridge, a decision I would later regret. I was comfortable in doing this because the 2 have gotten loose from the gated area twice for several hours since we moved here, and have just hung out near the house. Wouldn’t you know it, the jack russell decided to venture out, returning an hour or so later with a birthday present for me – skunk spray. I was in my family room when, just like in the cartoon, the scent rolled in and grabbed my nose. I thought something was burning. I went to investigate, to find my sullen terrier, head hung with a stunned look about him. I picked him up and took him straight to the sink, grabbed the dawn and scrubbed him down. By the smell of my house, you would swear I invited a dozen skunks over and unleashed a wolf among them.
I found this website on how to get the stink out of your dog and home. Since it’s my birthday, I had birthday dinner plans. I had shared the odor trauma story with my sister, and she thoughtfully included yankee candle odor killer votives, which are currently burning in multitudes around my home. Poor Bovie (my terrier). Not only did he get sprayed by a skunk then spend several hours in the scorching heat, but he got to experience 2 hydrogen peroxide, baking soda, dish soap 5 minute soaks/spray downs with the water hose. He still reeked of sulfites, so i sprayed him down with febreeze/downy fabric softener. He has has a bad day. I think I am getting use to the smell. That, or my olfactory cells are playing dead. Lisa, I am wishing about now that I had your loss of smell problem!
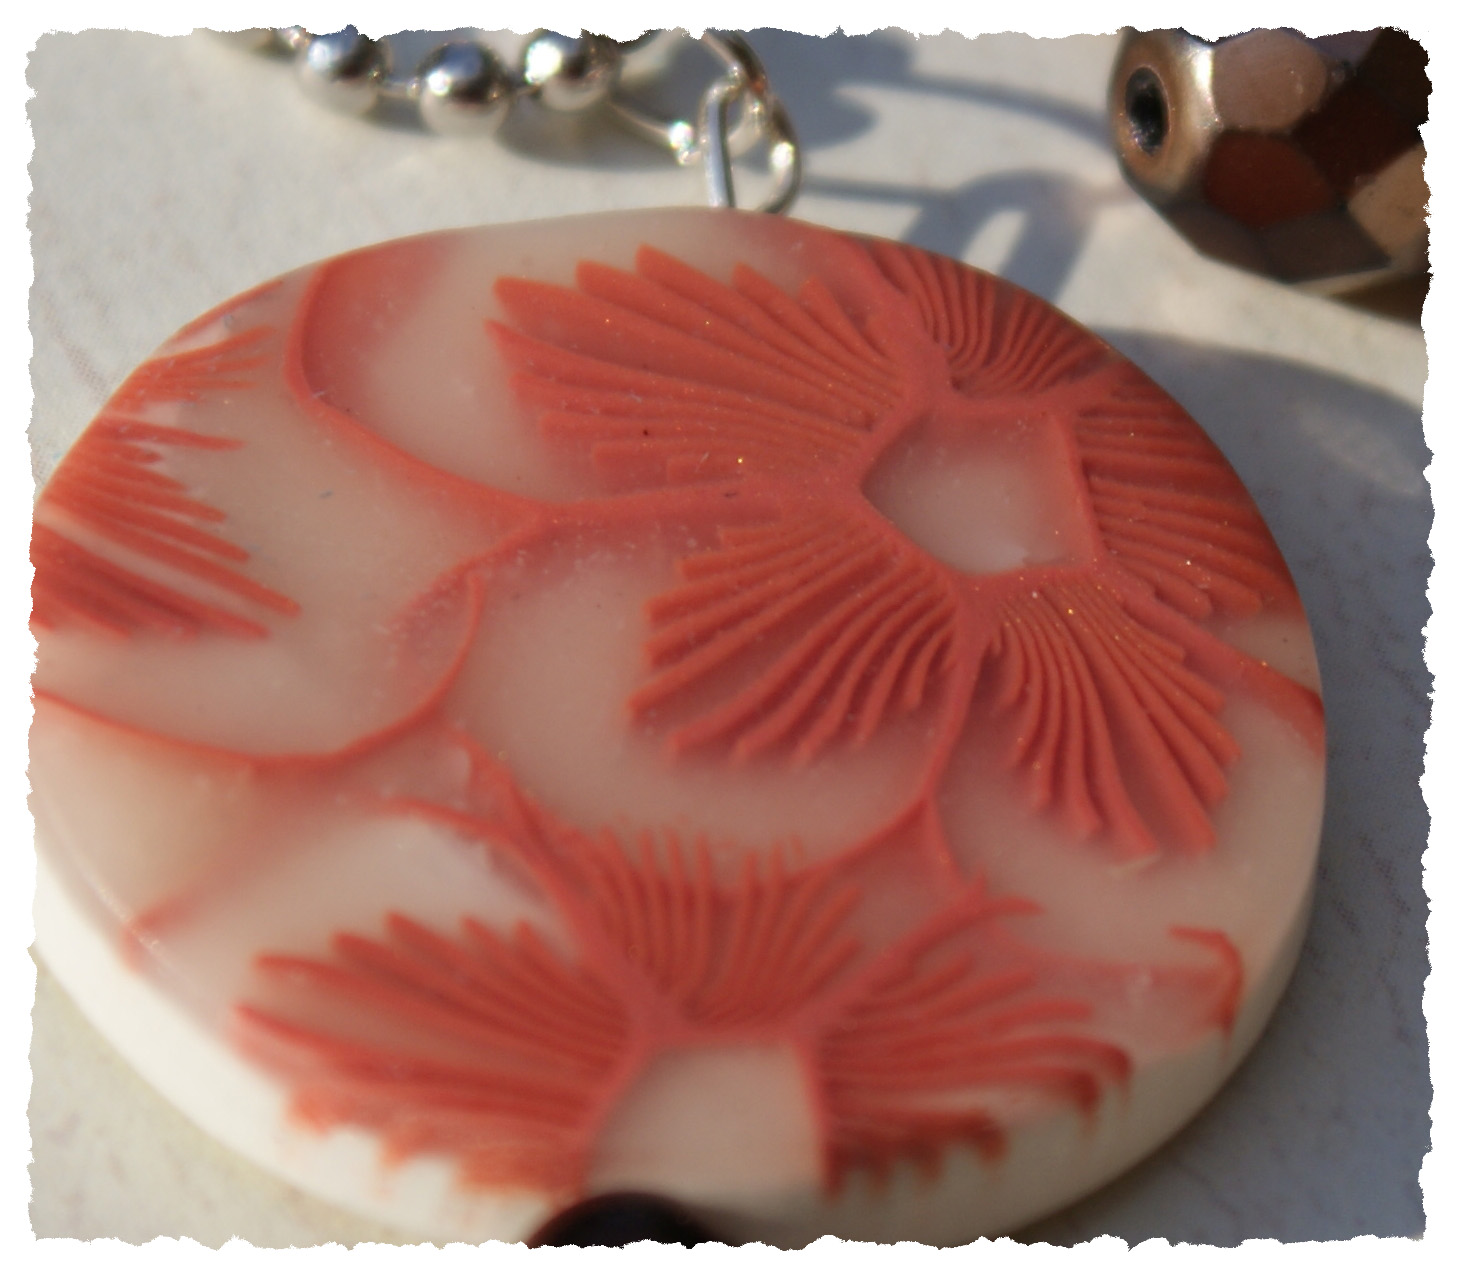
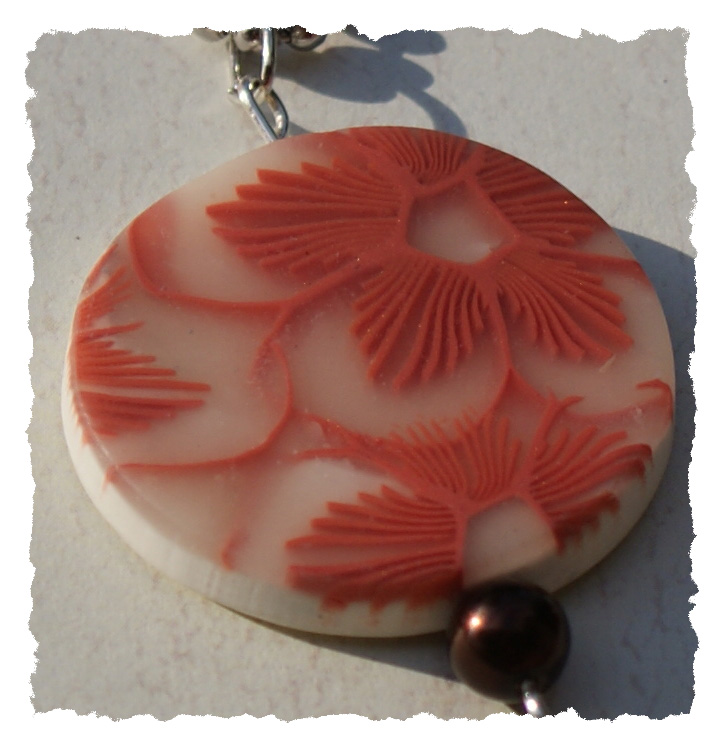
I did make something out of clay through all of this. My first stab at a flower cane. Fun! Here is the tutorial I used by Dawn Naylor, from Polymer Clay Central – an wealth of information for clayers.
If any of you have a magic cure for skunk stank, I am all ears.
Polymer Clay Day #48: Rope Bordered AA Circle Triangle Pendant
by

 Something is appealing about things in 3’s. Triangle, trinity, 33 years old tomorrow, 3rd year sober, 3 marathon in training, AA’s three legacies; unity, service, recovery… good number, 3. Groupings of elements in 3’s is visually pleasing. Father, Spirit, Son. Moe, Larry, Curly.
It is going to be a good year. I can feel it. I went to my first AA meeting in my new town on Monday, and most of the women were knitting or crocheting. They shared with me after the meeting that their Friday night group was mistaken for a knitting club by a worker in the church where it’s held. I think I am going to like these ladies. Amazing to belong to a fellowship that brings you home no matter where you go. Being an alcoholic rocks (a recovered one, I should clarify).
