Over 50 Crepe Paper Crafts to Make

[pinit]

Over 50+ crepe paper crafts to make @savedbyloves #DIY #Wedding #crafts

[pinit]

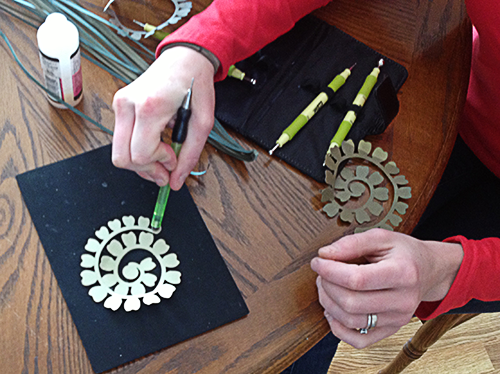
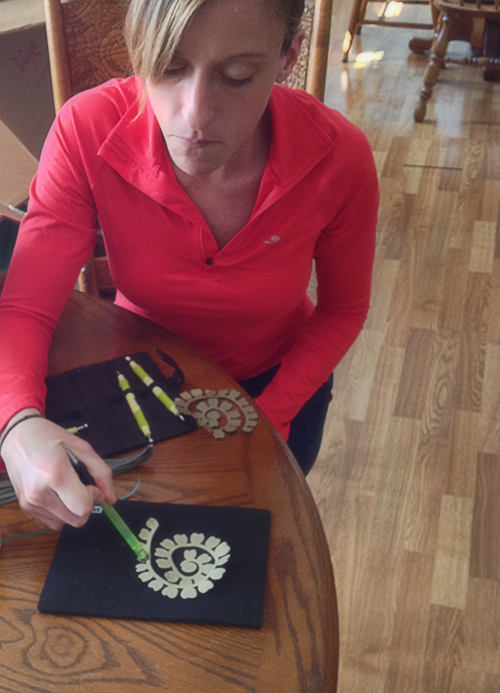
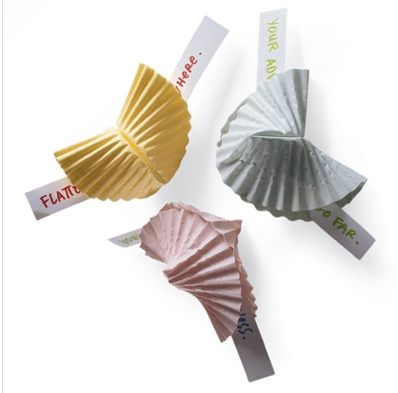
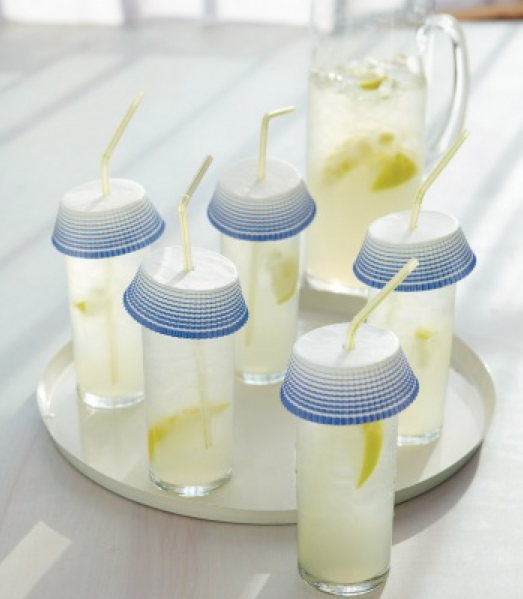
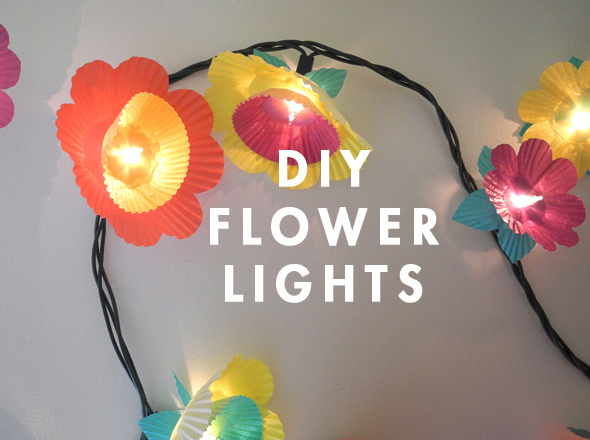
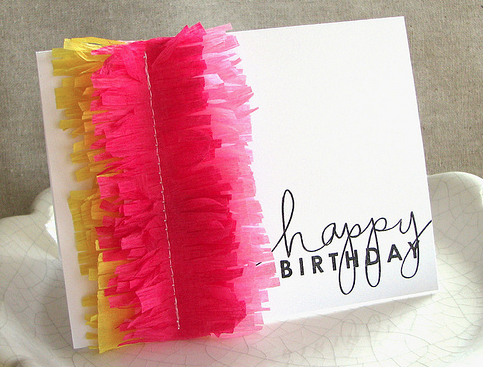
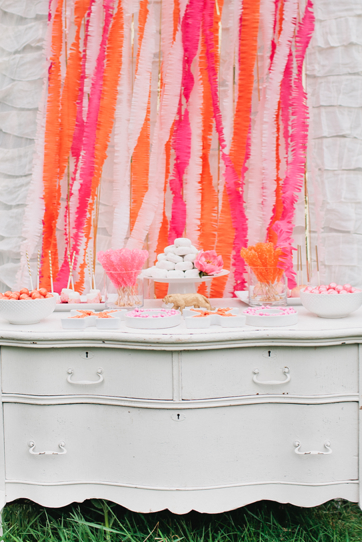
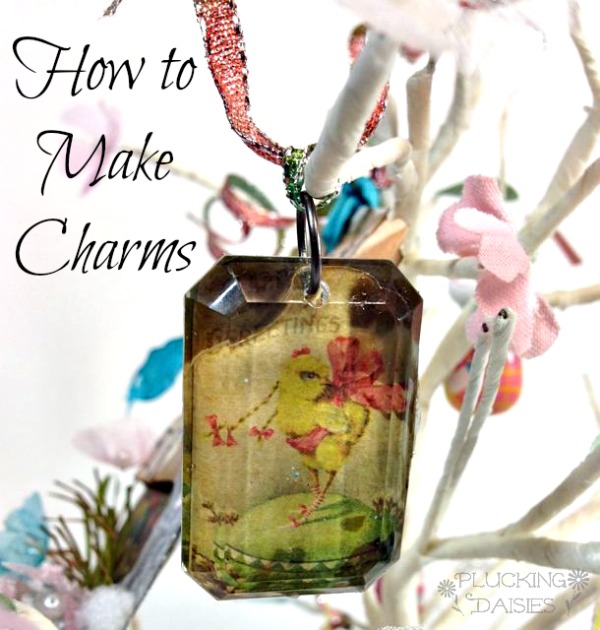
This is the perfect time of year to gather up some crepe paper and create lovely DIY wedding decor, Mother’s Day gifts, paper bouquets, and  countless accessories for celebrations of all sorts.  The paper comes in wonderfully vibrant colors, and is inexpensive to boot.

Make easy crepe paper roses with DIY and template @savedbyloves

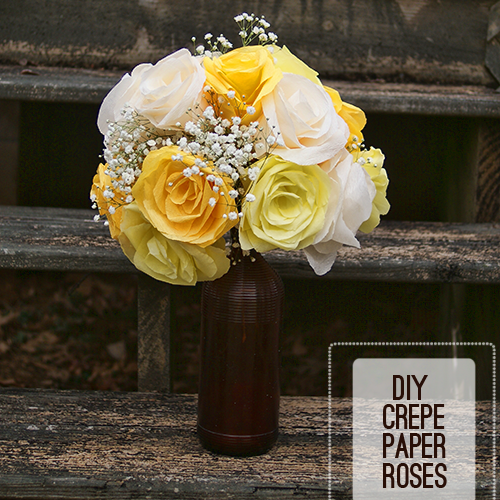
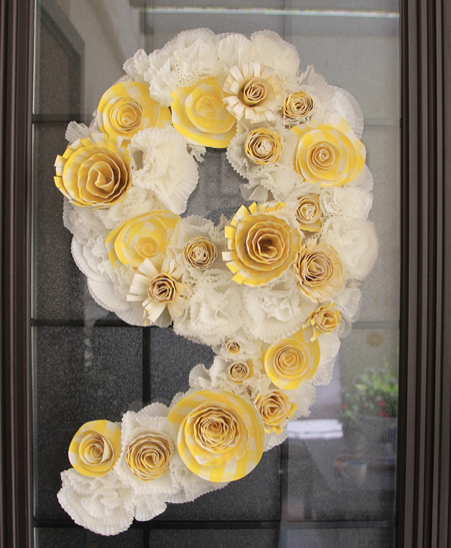
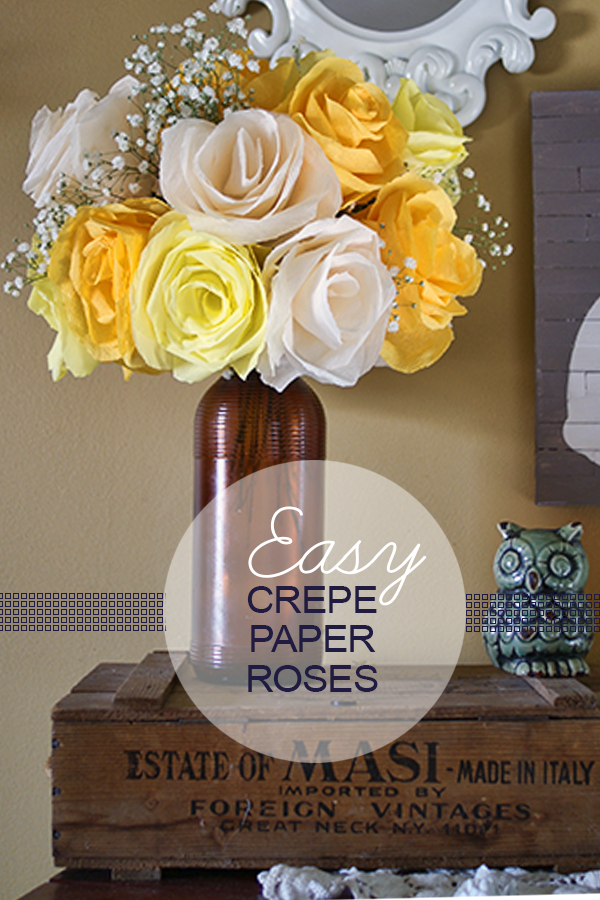
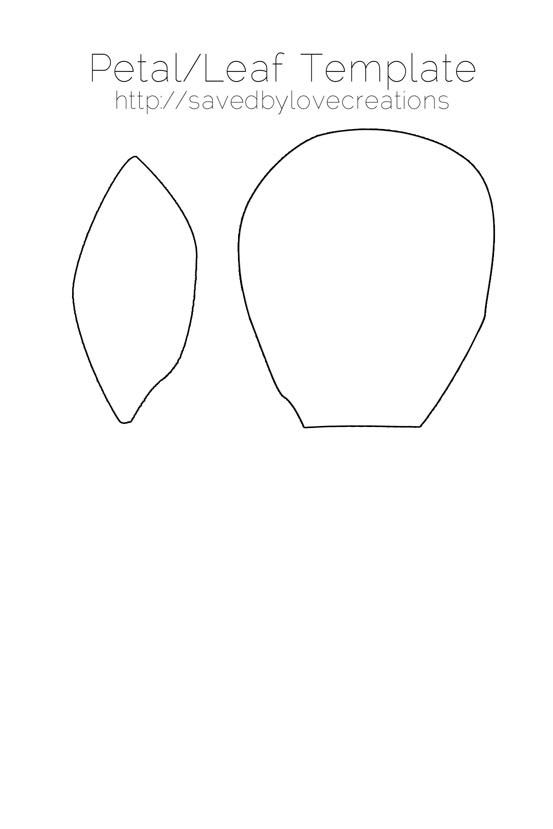
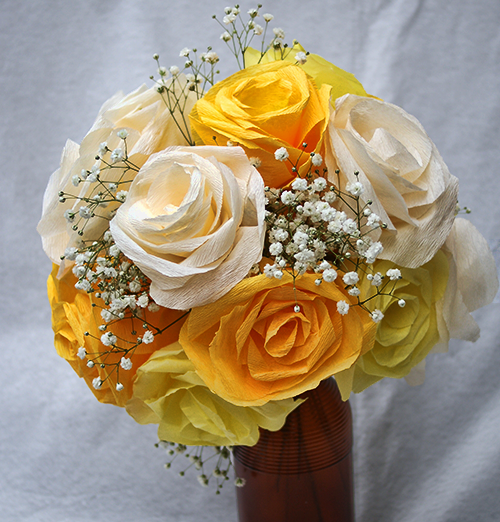
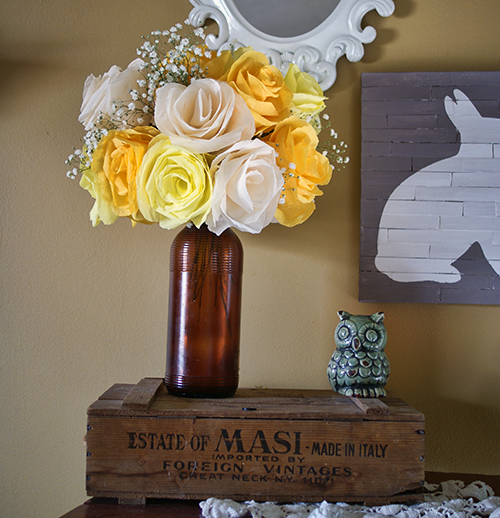
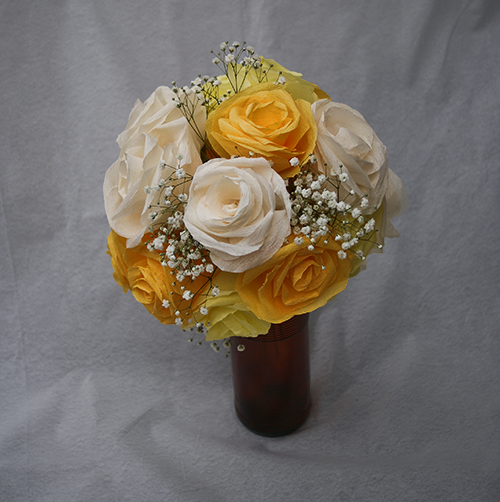
I showed you these crepe paper roses I made last week.  If you missed it, go check out the easy DIY and free template for your petals and leaves.  You will have a gorgeous bouquet that your friends will have to get super close to to see that they aren’t real roses.  Best part?  They don’t wither!  What a perfect Mother’s Day gift for those with moms that love to get roses.

Beautiful hand made card with crepe paper fringe
What a festive, simple to create, one of a kind birthday card!  See what I mean about the vibrant colors?  At Paper Crafts Connection, you can check out how this card evolved.  Make several at the same time to have on hand for those birthdays that sneak up on you.
#weddingDIY crepe paper flower aisle markers
Add that special touch to your ceremony with this crepe paper aisle marker from Hello Lucky.
Over 50+ crepe paper crafts to make @savedbyloves #DIY #Wedding #crafts
Martha Stewart shows you how to make a variety of crepe paper flowers, including peony, tulip, lily and rose varieties.  You would swear they are real flowers.  Sturdier, cheaper and available in any color, any time of year, crepe paper flowers are the way to go for your DIY wedding!
Over 50+ crepe paper crafts to make @savedbyloves #DIY #Wedding #crafts
Make your own photo backdrop easily and for just a few bucks with this DIY Crepe Fringe Party Backdrop at Somewhere Splendid.

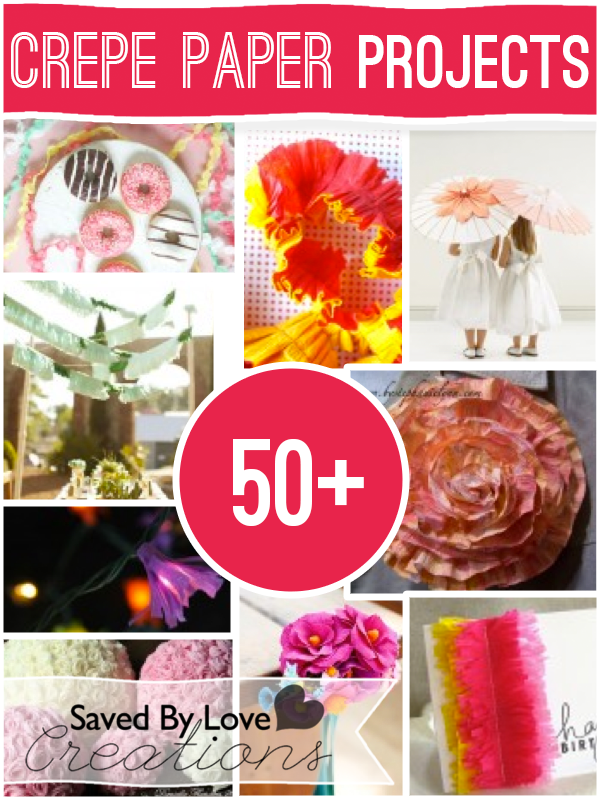
Those are a few of my faves.


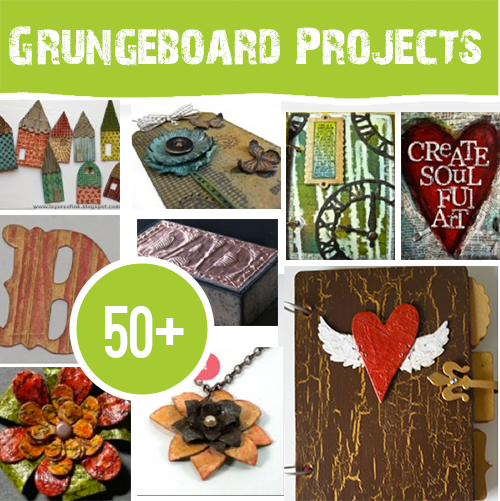
Now for the 50+ collection!


DIY Crepe Paper Roses

How to Make Crepe Paper Roses[pinit]

Make easy crepe paper roses with DIY and template @savedbyloves[pinit]

Spring is in the air and paper flowers are popping up all over the place.  Today’s project fits right in with the flower mania, and can be created in loads of colors to fit your style.  Crepe paper is perfect for making realistic looking roses.  It stretches and curls in a way that is perfect for mimicking actual petals.  Grab some crepe paper sheets in your favorite colors and let’s get started!

Make easy crepe paper roses with DIY and template @savedbyloves

SUPPLIES

Crepe Paper Sheets in Petal colors (streamer rolls won’t work for petals since they are not wide enough)

Green crepe paper sheet or streamer roll for leaves

Scissors

Glossy accents or other paper glue

Floral tape

Floral Wire

Pencil or bamboo skewer

Petal and leaf template (click thumbnail below to reveal full size template and print)

Paper rose petal and leaf template free printable

Make easy crepe paper roses with DIY and template @savedbyloves

 TUTORIAL

I showed you how to make roses using scrapbook paper and the above template in this PAPER ROSE DIY WITH TEMPLATE post.

Follow the same steps, using crepe paper instead.  I had a hard time finding crepe paper sheets, but then ran into a huge stash of it at my local Goodwill.  Score!  I linked where you can find some on Amazon under supplies above.

You can cut several layers of the crepe paper at once, for several petals with one cut.

Make easy crepe paper roses with DIY and template @savedbyloves

Making these with crepe paper was easier than using cardstock since the crepe paper is thinner and wraps around the floral wire more easily.  You can stretch the petals by lightly pulling with your fingers and curl them with the skewer or pencil to shape them more easily too.

I am in love with them!  Won’t they make such a great Mother’s Day gift?!


Make easy crepe paper roses with DIY and template @savedbyloves

How to Make Charms

how-to-make-charms-beauty-chick-text (1)

Happy spring time SBLC friends! Amy here from Plucking Daisies to share with you how to make some sweet springtime charms. These charms are super easy to make and use for a variety of crafty ventures! You can use them for custom jewelry pieces, ornaments or even wine charms for your Easter Brunch or spring celebrations!

I used my charms to decorate an Easter Bunny Tree. They are a lovely addition to my spring table decor and oh so charming!

How to make Charms | @PluckingDaisy #RangerInk

How to make Charms

You can make your own charms for adornments, jewelry, gifts and pretty much anything you can dream up. Grab your favorite images and prepare to be “charmed”!

Supplies:

Tim Holtz Idea-ology Facets or Fragments

Glossy Accents

Images or Photos (copies NOT originals)

Ribbon or Chain

Alcohol Ink

Ranger Foil Tape Sheets

Adhering Images to Charms

You can select any image you like to use when making your charms, a favorite photo (color copy), old greeting cards, a childs artwork…the possibilities are truly endless! For my charms I used these delightful vintage Easter Images from Tim Holtz Seasonal Paper Stash.

STEP 1: Apply Glossy Accents to the back of your charm and press down onto image.

STEP 2: Flip paper over and use a credit card or craft scraper to press out any air bubbles.

How to make Charms | @PluckingDaisy #RangerInk

STEP 3: Allow to dry for several hours then trim off excess paper.

Create Metal Backing for Charms

To finish and complete the look of your custom charms you can easily create a metal backing with Ranger foil tape sheets. Not only will the foil tape enhance the look of your charms, it will also smooth any rough edges and ensure your image stays put.

STEP 1: Ink a sheet of Ranger Foil Tape with Alcohol Ink. I used: Shell Pink – Salmon – Citrus – Aqua

How to make Charms | @PluckingDaisy #RangerInk

STEP 2: Emboss Alcohol Inked foil tape with Sizzix Embossing Folder. *I used Sizzix Dots and Flowers set A2

How to make Charms | @PluckingDaisy #RangerInk

STEP 3: Peel away the backing of your embossed foil tape and press cut out charms onto it. Cut around the charm leaving a slight edge all the way around. Fold edges over onto charm to secure your image.

Hanging Charms

Now that your charms are complete you will need to hang them. Whether you will be using them for jewelry, gift wrap or decor you can customize how you hang them just as easily as you made them!

STEP 1: Add Jump Rings

STEP 2: Reapply Alcohol ink to blending tool and stamp (DON’T swipe) onto Metallic ribbon.

How to make Charms | @PluckingDaisy #RangerInk

Use your stamped ribbon to create pendants, ornaments or “Charming” gift toppers!

How to make Charms | @PluckingDaisy #RangerInkI hope you enjoyed this little lesson in Charm making and will take what you learned to make some “Charming” gifts, jewelry and decor! Thanks for having me back at SBLC! Until next time…

Have a Charming Day!

Amy*

Easy DIY Paper Daisies

Paper Daisy DIY #Sizzix #papercraft @savedbyloves

[pinit]

Paper Daisy DIY #Sizzix #papercraft @savedbyloves

[pinit]

It was time for some new paper flowers to usher in the spring around here.  If you have been here long, you know I am a fan of making paper roses.  I decided to switch it up a bit and create daisies this time.  For a cheap, simple and beautiful DIY spring decor idea, look no further.  These would be great for weddings and other centerpieces too!

For this project, you don’t need much.  I used my SIZZIX machine and a flower die, but a die cut machine is not necessary.  You could easily do this with a paper punch too.

Supplies:

 Sizzix Flower Layers and Leaves Die

White Cardstock

Yellow Quilling paper

Paper quilling tool or toothpick

Craft glue (I use Glossy Accents for paper to paper since it dries in 5 sec and holds great)

Floral wire

Floral tape

Hot glue gun

Tutorial:

Paper Daisy DIY #Sizzix #papercraft @savedbyloves

Cut several 8 petal flower shapes, either from a paper punch or die.  You will use 2 of the shapes per daisy.

How to make paper daisies

Fold each petal lengthwise, as close to the center as you can get.

Make a paper flower bouquet

Once your petals are folded, stack one flower shape on top of another, adhering with glue, such that the petals are alternating (see pic below).

Paper Daisy DIY #Sizzix #papercraft @savedbyloves

Paper Daisy DIY #Sizzix #papercraft @savedbyloves

For the center of the flower, coil yellow quilling strips using a quilling tool or toothpick.  I used 2 strips of quilling paper for each flower center.  When one ends, just glue the second there and continue coiling.

Glue flower center in place.

Paper daisy tutorial

#Papercraft #paperflower #DIY #weddingcenterpiece #DIYwedding

Make a bend in the end of your floral wire to create surface for hot glue to grab and glue wire to flower back.

To finish, I wrapped my wire with floral tape.  This is not essential.  I just like the look of the wrapped wire better.

#Sizzix #paperflowers

Paper Daisy tutorial #DIY #weddingDIY @savedbyloves

Paper quilling tool

If you love paper daisies, check out the crazy awesome project Amy from Plucking Daisies shared with us awhile back:

50+ Candy Wrapper Crafts

[pinit]


Over 50 Candy Wrapper Crafts to make #DIY from @savedbyloves
[pinit]

This week’s 50+ is all about candy wrapper crafts.  There are tons of things to make from them.  Just in time for those Easter candy wrappers, get ready to create luminaries, vases, decoupage, jewelry and more!


Paper Flower Topiaries With Sizzix

[pinit]

Make #Sizzix paper flower topiaries for #Spring @savedbyloves

[pinit]

Make #Sizzix paper flower topiaries for #Spring @savedbyloves[pinit]

3D flower dies from Sizzix are some of my favorite die cuts to use.  I was thrilled to find a new die this weekend while at Michaels.  These fun green and yellow spring topiaries are my first project using them.  This project is simple, but I won’t lie, it is not quick.  I had a little help from my sister and husband, who shaped petals for me as I rolled the flowers and pinned them to the topiary shape.

SUPPLIES:

Sizzix Sizzlits Die – Flower, Rose 3-D

Cardstock in your favorite colors

Glossy Accents

Straight Pins

Topiary Form (got mine at Walmart recently; you could use a stryofoam sphere and dowel rod)

Pot (Got mine at the dollar store last year)

Green moss or other filler

Stylus with large ball or other rounded end (like a pen or sharpie)

Foam pad or mouse pad

Tutorial:

Cut several, I mean way more than you think you’ll need, 3d rose shapes using the Sizzlits die linked above.  I used Coordinations paper in several shades of yellows and greens.  With the Sizzlits dies, you can only cut one piece of cardstock at a time, so get cozy.  I have done a similar project here with the Sizzix Originals 3D rose die, which cuts through several layers of cardstock at a time.  I really wanted to use this shape die though, so I just cut one shape at a time.

Shape the petals with a rounded end stylus ball, or whatever you have on hand that works.  I figured out I really liked the shape of the flower if I pushed in the 7 outer petals of the spiral, then flipped it over and pushed in the remaining petals.  I roll the flower into shape so that the outer petals of the spiral (which become the center petals of the 3D flower) curl inward towards the center like in a real rose.  The remaining flowers bloom outward like a blossoming rose.  I don’t have detailed pics of this, so I hope that makes sense.

This pic shows me starting on the outer petals of the spiral (central petals in final rose).

Shaping paper flower petals

To shape them I just press hard in the center, and draw tiny circles with my stylus ball.  The flower petal “cups”.  I do this for the first 7 petals, then turn the spiral over and do the same thing on the remaining petals.

Make #Sizzix paper flower topiaries for #Spring @savedbyloves

Roll the flower from the outer petals to the center, keeping the bottom strip at the base of the petals aligned.  When you get to the end, glue the tab you see at the center to the base of your flower.  I like to use Glossy Accents for this since it dries so fast and holds great with paper to paper.

Once I had 10 flowers made, I pinned them to the topiary with a straight pen through the center and continued this way until the spheres were full.

Make #Sizzix paper flower topiaries for #Spring @savedbyloves

Make #Sizzix paper flower topiaries for #Spring @savedbyloves

Over 50 Projects to Make With Grungeboard

[pinit] 50+ Grungeboard Projects to Make @savedbyloves

[pinit]

If you have never used Grungeboard, the best way I can describe it is chipboard that you can abuse, twist, sand and color for some amazing effects.  I have used it in several jewelry projects as it is so flexible and durable, and can be cut with my sizzix dies.  I searched out some fantastic projects using this eco friendly material from Tim Holtz.

Check out he describes it in this quick video…

50+ Projects Using Grungeboard


Over 50 Cupcake Liner Crafts to Make

50+ Cupcake Liner Crafts to Make From @savedbyloves

[pinit]

This week I decided to bring you a round-up of cupcake liner crafts to make.  I got the idea to do a 50+ on this subject while creating the Cupcake liner rosette frame I shared with you Monday.  I had so much fun making it, and love the finished product.  It is in a box on the way to Somerset Life (fingers crossed that it makes the cut)!  While coming up with the rosette frame idea, I scoured the web for cupcake liner crafts, and was pleasantly surprised at the number and variety of projects out there.  Here are some of my favorites, then on to the 50+!

Cupcake Liner Craft forturne cookies from SpoonfullI have a weakness for adorable paper crafts, and these cupcake liner fortune cookies from Spoonful fit the bill.  They would be favors for all kind of occasions!

Cupcake liner wreath from Jill at Create Craft Love

Jill at Create.Craft.Love came up with this gorgeous cupcake liner wreath for Valentine’s Day.  It is so full, frilly and festive.  I want one on every door.

Creative Jewish Mom Cupcake liner birthday party decor DIY

Creative Jewish Mom is a great place for gorgeous crafts that won’t break the bank.  I adore this birthday decor number she made from cupcake liners and paper plates.  Monogram initials would be cute too!

Outdoor party decor

Martha Stewart uses cupcake liners as outdoor party cocktail covers!  This is such a simple touch, with a big punch.  Cupcake liners come in so many prints and colors, you are sure to find the perfect ones to coordinate with your party decor.

Cupcake liner lighted flower strand

Over at Oh Happy Day, learn how to whip up these DIY flower lights from cupcake liners!  It’s paper, flowers and lights, I mean how can that be anything but fun?!

50+ CUPCAKE LINER CRAFTS


Long Stem Paper Rose + Template

Printable Paper Rose template and DIY form Ellinee, featured @savedbyloves

Ellinee is one of my favorite places for paper flower inspiration.  These long stem paper roses with template and DIY tutorial are a fantastic example as to why!  I used her template last year for my very first paper roses, and fell in love with the craft.  Stop by for these and more.

Faux Boise Candle Base & Candle

Faux-Bois-Candle-Base-with-candle

Well hello there! I’m Amy from Mod Podge Rocks. I’ve never been a big Valentine’s Day person until I did a Aqua Valentine series last year . . . in which I threw hearts on their head by turning them blue. It made for a more interesting Valentine’s Day in terms of crafting, and I’ve loved making projects for February 14th ever since.

Candle Base 2

This year I made a project that I made for Valentine’s Day but you can use all year round. It’s not “obvious” Valentine’s Day but that is why I like it! I actually used woodgrain (aka faux bois) tissue paper that I got from Target on clearance for $.99 – it was leftover from Christmas. Add some Sparkle Mod Podge, Dimensional Magic and a red candle and you have instant home decor. Here’s how I made it.

Gather These Supplies

$1 candle tray from the dollar store
Mod Podge Satin
Mod Podge Sparkle
Mod Podge Dimensional Magic
Tissue paper
Pencil
Paintbrush
Scissors

IMG_6981

Here’s the dish straight from the dollar store – soak it to get the tag off of the bottom.

IMG_6982

Spread out the tissue paper (try to find the non-wrinkliest area possible) and place the dish face down. Trace with a pencil.

IMG_6983

Cut out the circle and keep trimming until it fits inside the dish. I had to trim and fit several times.

IMG_6984

Spread a layer of Mod Podge Satin down into your dish. You can use Matte or Gloss too – it really doesn’t matter. The reason I didn’t use the Sparkle is because I didn’t want any texture between the tissue paper and the glass (which the glitter particles can cause). If you don’t care, you can use the Sparkle Mod Podge to apply the tissue paper too.

IMG_6992

Put the tissue paper into the glass dish and very carefully smooth down with the paint brush. Tissue paper is very fragile. Let it dry for 15 – 20 minutes and then spread Sparkle Mod Podge over the top.

IMG_6993

Add Dimensional Magic to the top, inside the lip of the glass dish. It’s going to take overnight to dry because of the amount of Dimensional Magic.

Candle Base 2

I love this look! Love that it’s white and red woodgrain, so I can use it for Valentine’s Day, but I can also keep it out all year round. I also love that it only cost me a few dollars to make!

Candle Base with candle 2

Come visit me at Mod Podge Rocks for daily decoupage ideas – also visit me at Facebook, Pinterest, Google Plus or follow my RSS feed for more!

Privacy Policy