Mixed Media “Believe”

Mixed Media flower art by @savedbyloves

[pinit]

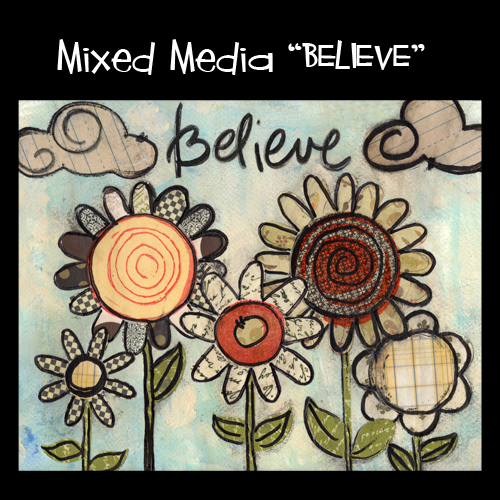
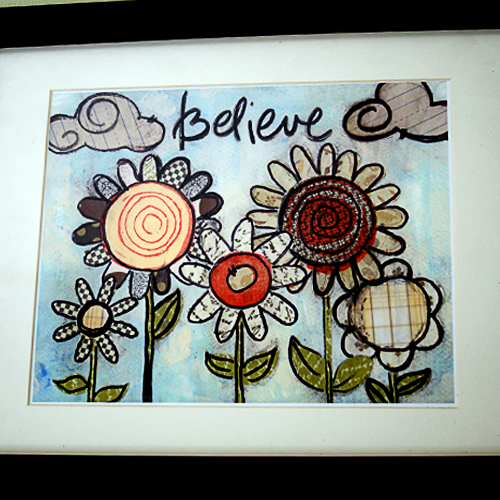
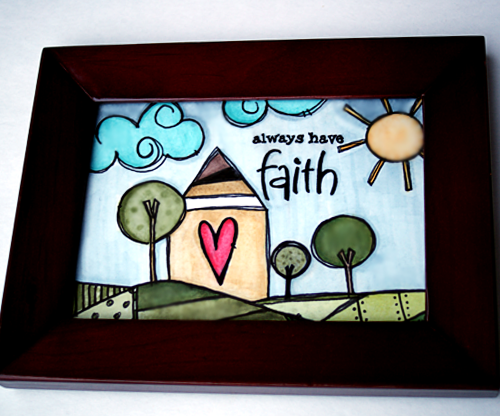
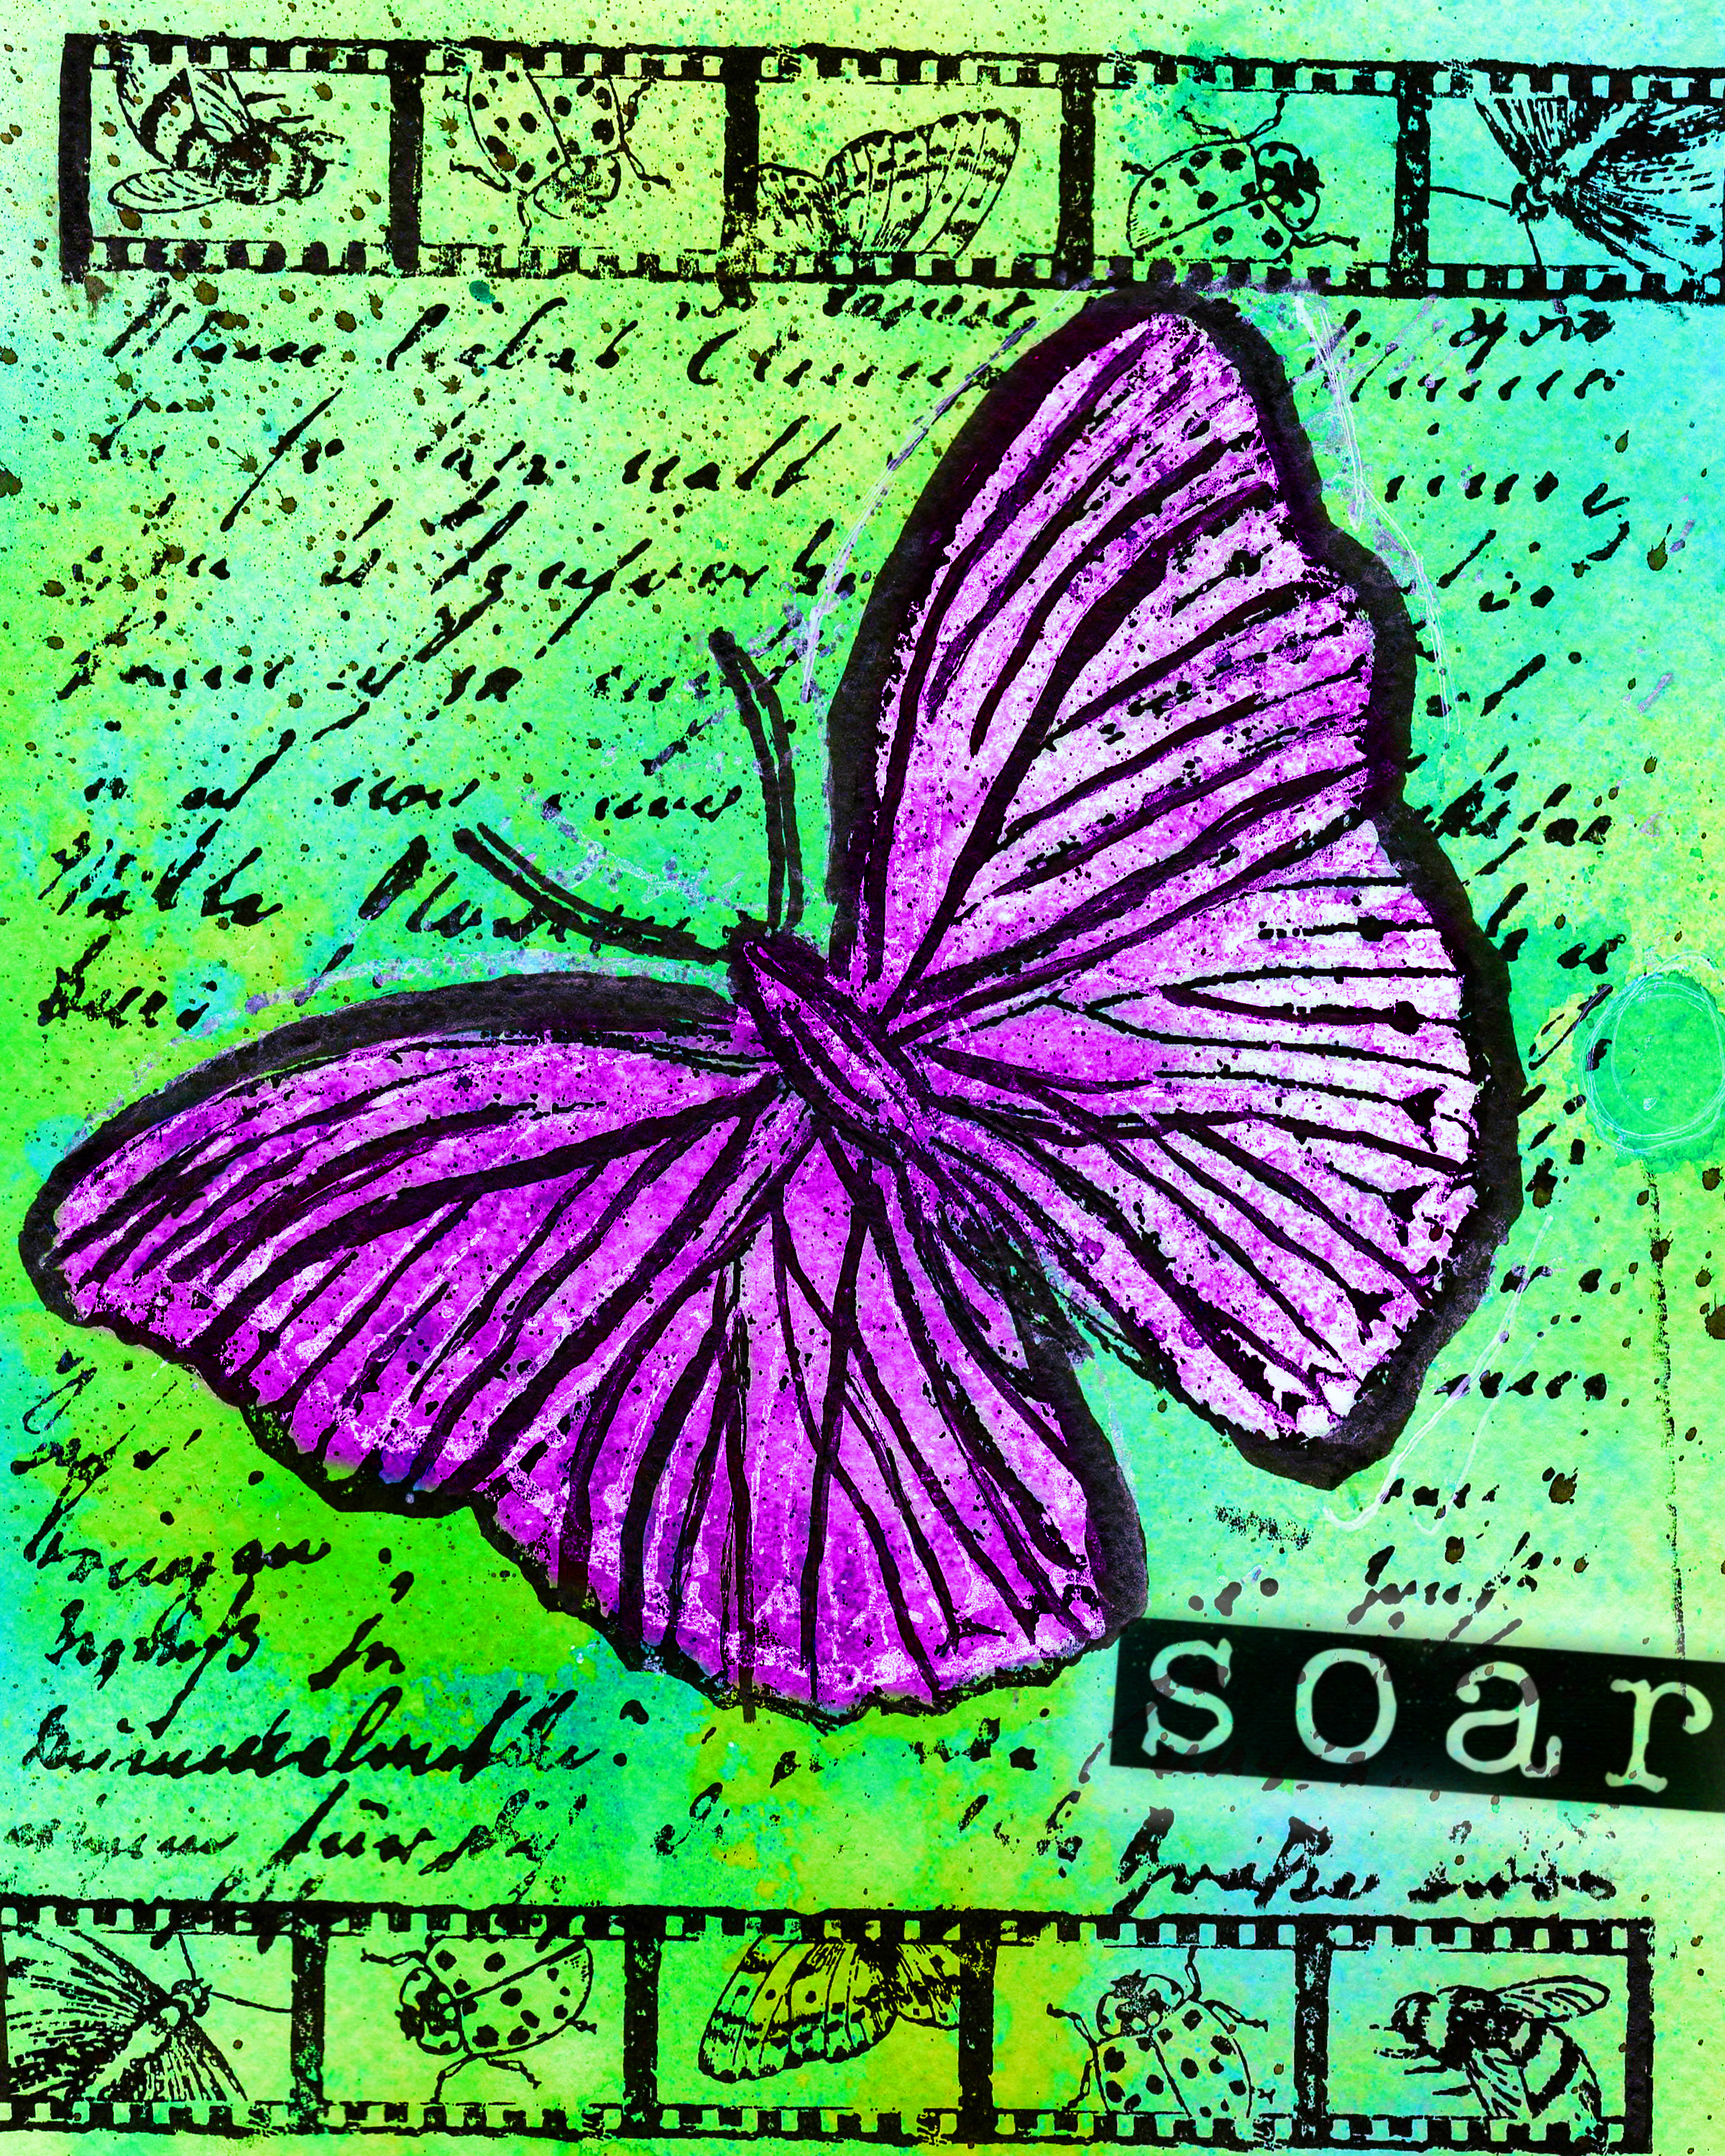
Maybe you read in an earlier post that one of my New Year’s resolutions was to get messy in my studio and create art daily.  Part of that for me has been taking some classes.  This piece is from the first project I did in Doodle Too, a class by Stephanie Ackerman of Homegrown Hospitality.  I loved the process of creating the acrylic paint sky background, and Mod Podging paper scraps to it to create the scene.  I scanned the finished piece and printed/framed it.  The original is part of my art journal.  I have taken the novel approach of just enjoying the process of putting color on paper and letting go of the final outcome.  Way too fun.  Highly recommended.

Mixed Media flower art by @savedbyloves

Believe5

Printables & High Res Watercolor Background

[pinit]

Free butterfly watercolor printable, digital stamp, Dylusions ink, from @savedbyloves

Free butterfly watercolor printable, digital stamp, Dylusions ink, from @savedbyloves

Digital scrapbooking, dylusions ink background, art journaling

I have been a busy girl, playing with spray inks, stamps and my new printer (which I scored over the holiday for a steal)!  As a result, here are a couple of free printables for you to enjoy!  This is a watercolor paper sprayed with Dylusions for the background, stamped with inkadinkado Insect Amalgam cling stamp, and touched up with white gel pin and black Pitt pen for depth.

Just right click the link under the thumbnails to pull up the full res file and save it to your computer or print.  I also included just a watercolor background for you to play with in Photoshop.

***UPDATE:  After much research on printers for mixed media art, I landed on the Epson Artisan 837, and am loving it!  Gorgeous scans, prints, wireless, vibrant, perfect so far.


EPSON MFP image

HERE


Free butterfly watercolor printable, digital stamp, Dylusions ink, from @savedbyloves

HERE


Photoshop watercolor background texture

HERE


Alter these any way you want.  Please do not sell or redistribute as your own, but instead, direct people here for the files!


Marker Art Fun

AlwaysHaveFaith2New Year’s Resolution time always makes me pause and reflect.  I realized I have put off some things I have wanted to do for awhile, and have decided to aim for more balance (same resolution every year… balance).  I am going to draw/art journal everyday in 2013, even if only for a minute.
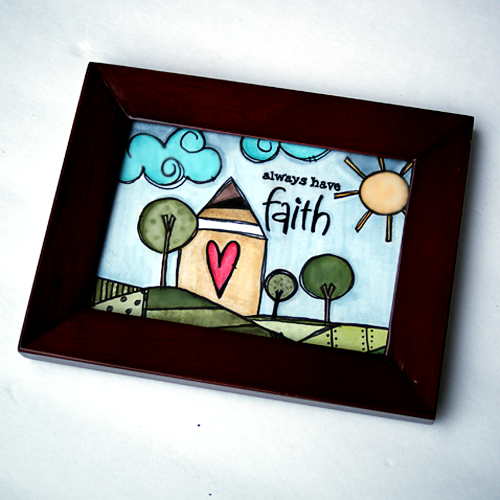
Here is a piece I did this week for a Christmas gift.  I used bristol smooth paper, papermate flair pen for the outline in black, and prismacolor markers for the coloring.  Super fun.  Doodling is addictive.  I took a cool class for $25 called A Whole New Doodle from Stephanie Ackerman, and it has my pen moving.  It is kinda meditative, and perfect for this blizzard that hit today.  Plenty of time for artwork!

Prismacolor marker doodle art @savedbyloves

 What are you working on these days?  New Year’s resolutions?

Leaving you with my back porch…

SONY DSC

Make a Winter Tree


[pinit]

Today, Amy from Plucking Daises is back to share with you this technique packed tutorial for a lovely, glittery winter tree decoration.  You will learn several ways to create fun wintery decorations for little to no cost using recycled items and dollar store supplies.  Warning:  you will be headed to the dollar store after reading this post.  I know I am.

Hi there! so happy to be back at Saved By Love Creations! Last time I was here I showed you how to make a mosaic flower-pot. Today I’m going to show you how to use that pot to create a festive holiday display. You can make this winter tree with some spray paint and a few items from the dollar store!

Make a Winter Tree | @PluckingDaisy #Holiday #Decor #DIY #Tutorial

All you need is a tree branch from your back yard and some spray paint (Krylon Brilliant Silver)…or you can skip the paint and leave your branch au naturale!

*Be sure to pick a sturdy branch…brittle branches will break under the weight of the ornaments. (Gently pull down on the branches to test their durability.)

Make a Winter Tree | @PluckingDaisy #Holiday #Decor #DIY #Tutorial

Now all you have to do is decorate! Creating a branch tree is a great way to use up those mismatched ornaments from your collection, vintage finds or other pretties you may discover in your travels that may not fit the decor of your big tree. Like these craft birds for example.

Make a Winter Tree | @PluckingDaisy #Holiday #Decor #DIY #Tutorial

I can’t resist a craft bird, much less a pack of 2 craft birds for a buck! You can find cute clip on craft birds like these in the dollar section at Michael’s. If you have some vintage birds that aren’t looking their best check out this tutorial for re-feathering old birds. These tiny birds would get lost on a large tree but perching them on a nearly naked silver branch allows them to sparkle and shine!

Make a Winter Tree | @PluckingDaisy #Holiday #Decor #DIY #Tutorial

I have a “Mieneke” approach when it comes to decking the halls. I wouldn’t “pay a lot for a muffler” and I certainly won’t pay a lot for ornaments. A quick trip to the dollar store does it for me!

I found these sparkling snowflakes in a pack of 6 for just a buck! Six seems to be the magic number with dollar store finds. Notice the silver blossoms, also found in a package of 6 in the bridal section at Dollar Tree.

Altering Dollar Store Snowflakes

Make a Winter Tree | @PluckingDaisy #Holiday #Decor #DIY #Tutorial

The snowflakes were a bit too plain for my tree and most of the glitter fell off when I pulled them out of the package. Not to fear Ranger Ink is here! By using a wintery blend of alcohol inks, Elmers spray glue, and Martha Stewart glitter my snowflakes are new, improved and far from plain. Plus, I still have a bunch left over for other projects. Tie your snowflakes to your branches with Tinsel ribbon for an extra pop of holiday flare.

Create Floating Stars

To fill in the gaps among the branches I created floating stars strung on monofilament. These are easy to create with paper punches and mounting squares.

Make a Winter Tree | @PluckingDaisy #Holiday #Decor #DIY #Tutorial

  • Punch stars from sheet music and card stock using a Marvy Star punch. *I used Core’dinations Couture Glitter and Shimmer card stock
  • Adhere monofilament to back of card stock star with a mounting square.
  • Add Distress Ink (Tumbled Glass) to edges of sheet music star and adhere to top of mounting square.
  • Embelish with rhinestones, snowflake punches, and crystals with Glossy Accents.
  • Attach monofilament to branch with a drop of hot glue

Creating Faux Snow

To “plant” your tree simply stuff your pot with floral foam (also available at the dollar store). Create snow by filling the top of the pot with cotton batting. In a pinch you can use bubble wrap painted white.

Make a Winter Tree | @PluckingDaisy #Holiday #Decor #DIY #Tutorial

Give your batting or bubble wrap the look of freshly fallen snow by misting it with spray glue and sprinkling it with a variety of glitter. I used a variety pack of Martha Stewart Glitter for a range of sparkle and shine.

Make a Winter Tree | @PluckingDaisy #Holiday #Decor #DIY #Tutorial

A tree like this can be displayed all winter long even after the holidays have come and gone. The mosaic pot (made with dollar store glass gems) can be used as a planter when warmer weather arrives. This particular pot is used to grow Sunflowers in spring time .

By using smaller pots and branches you can create a festive tree to give as a gift for Teachers, neighbors, and friends. No time to wait for mosaic adhesive to dry? No problem! Try Mod Podgeing wrapping paper to your pot and tie a ribbon around it. I’ve made many of these trees for teachers, family and friends. They make lovely gifts that won’t break the bank!

I hope you all have a warm and wonderful holiday season!

Amy*

Find me at Pluckingdaisies.com | Pinterest | Facebook | and Twitter for more creative ideas and tutorials.

Guest Post: Jewelry Box Makeover

[pinit]

Today Barbara from Chase the star stopped by to share with us a cute jewelry box makeover.  I am a fan of trinket box updates, and this one is no exception.   It never ceases to amaze me what a huge difference can be made with a little paint!  See how Barbara took hers from drab to fab.  Take it away, Barbara!

Hello everyone, I’m Barbara from Chase the Star, where I write about my adventures in crafting, furniture makeovers, recipes, and more!  I’m thrilled to share my latest project, a jewelry box transformation, here at Saved by Love!

{Updating a Jewelry Box}

I found this old and slightly beat-up jewelry box at my local thrift store, it was on sale (oh yeah…second hand and on sale) so I just had to take it home and give it some much needed love.


I had so much fun making this little box over!  All sorts of ideas came to mind.  I envisioned it in a little girl’s room, or perhaps it would live with a sophisticated teen, or even a sit in a family room or entry way.  So many possibilities!  I decided in order to accommodate all of those scenarios, I’d paint it a pretty blue and white.

{Making It Pretty}

The jewelry box had lots of potential.  Although the stain was fading, and it had a few scratches and small chips, the inside lining was in tact, and the bones were great!  This made things easy because repairing and re-lining can take some time.  
Makeover a Jewelry Box @savedbyloves #upcycle

With a small Phillip’s screw driver, I removed the hinges, and the mini drawer pulls.  

The pulls and tiny screws with were sprayed a glossy white. In the meantime making sure to cover the inside lining (I used foil and painter’s tape to protect it), I sprayed primer over the entire piece.

Later, I added a coat of white spray (satin finish) to everything but the drawers. 
Then with a small foam brush I painted the drawers and rims of the top and bottom in a shade of blue I’d mixed together to paint a stool a few weeks back.

I added a light coat of polyurethane to seal my work. Once everything was dry I screwed the hinges and pulls back on to the piece. 


I’m loving the way this piece turned out!  It’s amazing how a little paint can make a world of difference!  
I’d love to see you over at Chase the Star!  Stop by and say ‘hello’, and check out some of my other projects such as my fabric lined mason jars, and metal file cabinet makeover!

You can also visit me here:


Thank you so much Johnnie for letting me share my fun Jewelry Box Transformation with your readers!   

Barbara @ Chase the Star

Make a Mosaic Flower Pot

[pinit]
broken-china-flower-pot-beauty-text

[pinit]

My talented friend Amy of Plucking Daisies is back with a wonderful, whimsical flower pot upcycle.  I love everything about it, but especially the hammer smashing of china plates.  How fun does that sound?!  See how she did it…

Hi there! So happy to be back at Saved by Love Creations! The last few times I was here I showed you how to make flowers. Today I’m going to show you how to make a fun container to put them in. The possibilities are endless with this project and it’s completely up to you how big you want to go with it. Do you have a bunch of mismatched dishes you don’t know what to do with? Well I have a solution for that! Get out your WORST China folks because we are about to break stuff! Opa!


How to Make a Broken China Flower Pot

First you are going to need a terra-cotta pot. Now is a great time to find them cheap. I got mine for a couple of bucks at Ocean State Job Lot. Spray paint your pot any color you like. Keep in mind that whatever color you choose is going to show through in spots after you add the broken china. I chose silver because I didn’t want the china pieces to get lost against a bold color.

Broken China Flower Pot | @PluckingDaisy #Planter #DIY #upcycle #tutorial

You will also need to grab some Mosaic Tile Adhesive (Mercantile) and some cheap plastic palette knives. Both of these items can be found at Michael’s and most craft stores.

Broken China Flower Pot | @PluckingDaisy #Planter #DIY #upcycle #tutorial

If you don’t have any spare china to break you will need to take a trip to the thrift store. Keep an eye out for bright-colored plates with bold and busy patterns. Stay away from dishes that have high ridges and deep curves these are much harder to adhere. The flatter the better!

*You can also use tile cutters to snip more even pieces if you like.

Breaking China:

To break your china simply place it in a towel and hit it with a rubber mallet or hammer a couple of times. *Don’t go crazy, china especially will break pretty easily and you don’t want your pieces to be too small.

Broken China Flower Pot | @PluckingDaisy #Planter #DIY #upcycle #tutorial

As you break your plates make sure you have some containers handy so you can arrange your broken china pieces by color. This will save you tons of time once you start adhering pieces to your flower-pot. I used a variety of plastic containers from my recycling bin.

Broken China Flower Pot | @PluckingDaisy #Planter #DIY #upcycle #tutorial

When working with the adhesive you will need to apply it to the back of your broken china and the spot on your flower-pot where you want it to go. Apply the adhesive like you would apply spreadable cheese to a cracker. You don’t want too much but you want enough to cover and form a strong bond.

*Keep some baby wipes handy to clean any wayward adhesive off of china pieces and fingers.

Lay your pot on its side and cover as much surface area as you can. Arranging the broken china pieces is a lot like putting together a puzzle. Experiment with different pieces before applying the adhesive to ensure a good fit! *You will need to let the adhesive dry overnight before moving on to the next section.

*Some of the sharp edges will stick out so just be careful when you pick up your pot.

Broken China Flower Pot | @PluckingDaisy #Planter #DIY #upcycle #tutorial

Once you have all of your broken china pieces adhered to your pot you can embellish the uncovered areas with paints, gems, or whatever you like! I used Martha Stewart Acrylic paints to create a checkered pattern on the top and bottom of my pot. I also used glossy accents to add tiny silver stars in between the black squares.

The fun doesn’t stop with flower pots for this technique. You can use broken china to make a mosaic on pretty much anything. Maybe around a mirror, or to upgrade the inside panel of a cabinet door. You can also use other materials for your mosaic like glass gems, stones, beads, or found objects. Like I said, the possibilities are endless!

I hope you enjoy making a broken china mosaic of your own….breaking plates and putting them back together in this way is quite enjoyable if I do say so myself 🙂

If you enjoyed this tutorial you can find more inspiring ideas and creative tutorials at Plucking Daisies!

You can also find me on Twitter | Facebook | Pinterest

Have a colorful day!

Amy*

Mason Jar Chandelier DIY

How to make a #MasonJar Chandelier #DIY #craft @savedbyloves

How to make a #MasonJar Chandelier #DIY #craft @savedbyloves

This project was super simple and cheap!  I scored the chandelier at a garage sale recently for $2.  As soon as I saw it, this fantastic mason jar chandelier from Beth at Home Stories A to Z came to mind.  You can get the mason jars for around $7 per case of 12.  I painted them with Deco Art glass stain.  Using E6000 industrial glue, I adhered the lids to the chandelier.  Now I can switch out the jars by unscrewing them from the lid, allowing for changes in my decor!

How to make a #MasonJar Chandelier #DIY #craft @savedbyloves

How to make a #MasonJar Chandelier #DIY #craft @savedbyloves

TUTORIAL:

How to make a #MasonJar Chandelier #DIY #craft @savedbyloves

I will be updating with night photos after placing LED votive candles in the jars for illumination!

How to make a #MasonJar Chandelier #DIY #craft @savedbyloves

What do y0u think?  Have you checked out the 50+ Mason Jar roundup?

Amazing Alcohol Ink Project Roundup

Things to make from alcohol inks from @pluckingDaisy

Alcohol inks have been a favorite medium of mine since first trying them a few years ago.  If you have never used these inks, get some and be amazed.  They come in an amazing array of colors, and are intended for use on non-porous surfaces like glass and metal.  I bring this up because my fabulous friend Amy at Plucking Daisies has rocked my world with this alcohol ink project round-up she has painstakingly assembled.  Grab some ink and explore this one of a kind list of the best projects incorporating this fun medium out there.

50+ Projects to Make From the Outdoors

[pinit]

50+ Nature Supplies Projects to make @savedbyloves

[pinit]

Did you know you could make beautiful home decor and handmade gifts using acorns, leaves, sticks, rocks pistachios and other mother nature craft supplies?  Leave your wallet at home.  Forget about tracking down the 40% off coupon.  Simply take a walk in the woods and gather what you need to make gorgeous projects for little cost!  I knew there were things to be made from nature, but compiling this list blew my mind.  I hope you are as inspired by the collection as I am. 


Halloween Decor With {Scrapbooking} Attitude

Scrapbooking Attitude Halloween Decor DIY at savedbylovecreations.com #ScrapAttitude #Halloween #Fall #Crafts

I had the opportunity to try out a cool new product called Scrapbooking Attitude, and am excited to tell you about it.  This is a printable, transparent film you use with your inkjet printer for endless creative possibilities.  Being a huge fan of image transfers, I was thrilled to give this a whirl.

50+ Image Transfer Techniques

Image transfers are done onto glass, wood, paper, polymer clay, ceramic and more, using a variety of techniques, from acrylic mediums to packing tape.  What I love about Scrapbooking Attitude is that it is simple to use, the results are fantastic (even on the embossed, textured surface I used in this project), and it requires an inkjet.  In my experience, inkjet transfers techniques compared to laserjet are not as abundant, are more difficult, and don’t come out  as nicely.  This is bad news since most people, myself included, have the less costly inkjet printer at home.  Scrapbooking Attitude is a fantastic solution.  My only problem was focusing in on a single project.  You will be seeing me use this product more in future projects.   For this post, I went all Halloween on you.

Scrapbooking Attitude Halloween Decorating

The following step-by-step photo tutorial shows you how I transfered “EEK” and spider graphics I created in Photoshop (available for you use as a free Halloween Printable) onto die cut, embossed paper for the banner.  I used the same steps to transfer the spider web graphics onto an old book with a solid orange cover.

SUPPLIES:

Scrapbooking Attitude

Die Cut, embossed white cardstock  (I used this Tim Holtz die for Sizzix, and this Tim Holtz embossing folder)

Antique Linen Distress Ink Pad to ink the raised areas of the embossed cardstock

Mod Podge

Foam brush

Twine

Tiny white clothespins

Black Cardstock Die Cut Scalloped rectangle (I used a Sizzix scallop rectangle die)

Antique Linen Distress Ink Pad

Scissors

Inkjet Printer

Mod Podge 3D foam mounts

TUTORIAL:

Scrapbooking Attitude Halloween Decor Tutorial

 Once dry, I layered the transferred image and shape onto a black cardstock scalloped rectangle cut using Sizzix.  I used Mod Podge 3D foam mounts to adhere the layers.  Then I just clipped them into place on the twine with my tiny white clothespins.

I just love how this transferred into the grooves of the texture.  It looks like it is one with the paper and you can see the background through the image.  You can achieve the transfer with a lamination machine, an iron, or a glue stick, or use Mod Podge like I did here.  The instructions with the product are extremely detailed, and my craft blogging cohorts are posting their techniques, tips and tricks as well.  At the end of this post is a gallery of other blogger’s creations usiing Scrapbooking Attitude for you to see more of what is possible.

To purchase Scrapbooking Attitude packs, visit the website linked. While you are at it, join me in following them on Facebook, Twitter and YouTube for the latest tips and projects.


*I wrote this post as a part of a paid campaign with Scrapbooking Attitude and The Blueprint Social.  All opinions are mine and honest.


Privacy Policy