Mosaic Frame From Recycled Gift Cards + Free Printable

[pinit]
How to Make a recycled gift card Mosaic frame, + cool free Psalm 56:3 scripture verse printable from @savedbyloves

[pinit]

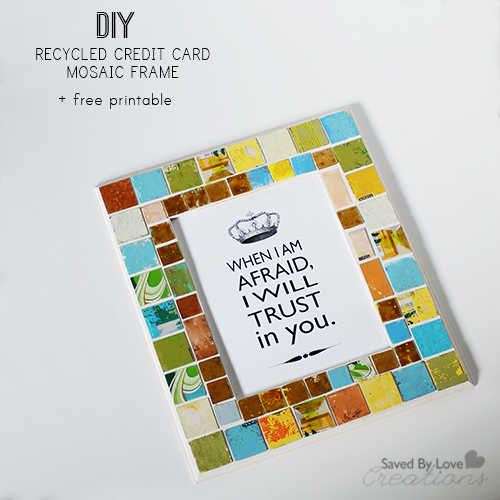
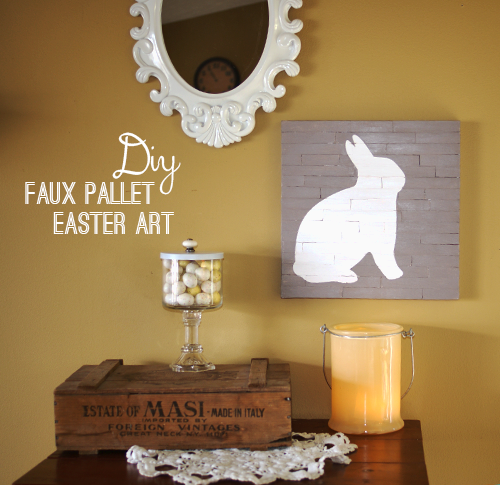
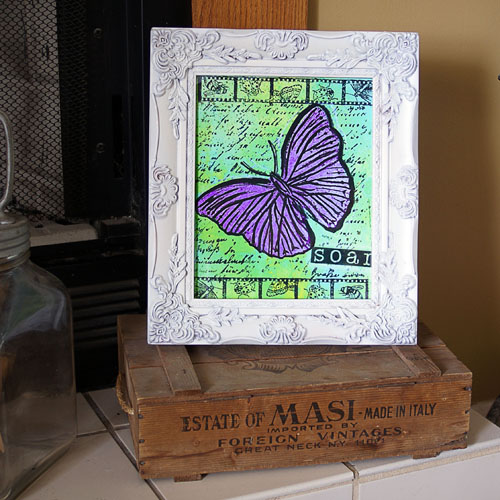
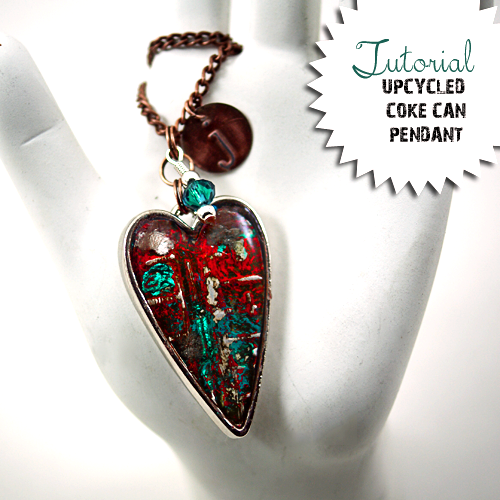
Hi Saved By Lovies!  Today I am sharing with you a fun project you can make for next to nothing using recycled gift cards/credit cards.  It has all my favorite components, and if I know you at all, yours too.  It is a great upcycled craft project, lending to a unique piece of home decor that will leave your friends saying “You made that from what?”.  Oh yeah, and since I created a printable to go inside of my new frame, you get that too.

Are you ready?  Let’s do this.
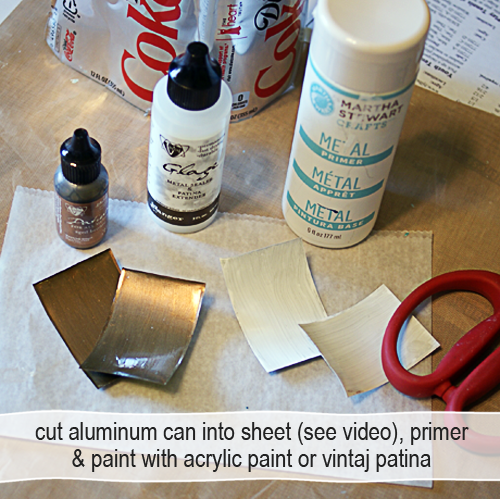
Recycled gift card mosaic picture frame tutorial #upcycled #recycledcrafts

Supplies:

Sizzix home decor project #Sizzix #recycled

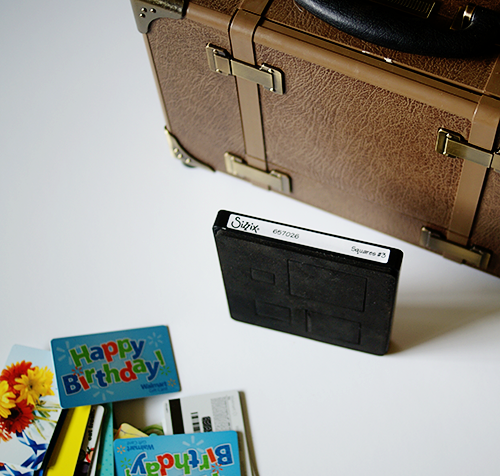
Old Gift/Credit Cards (I have had everyone under the sun keeping these for me for months and months)

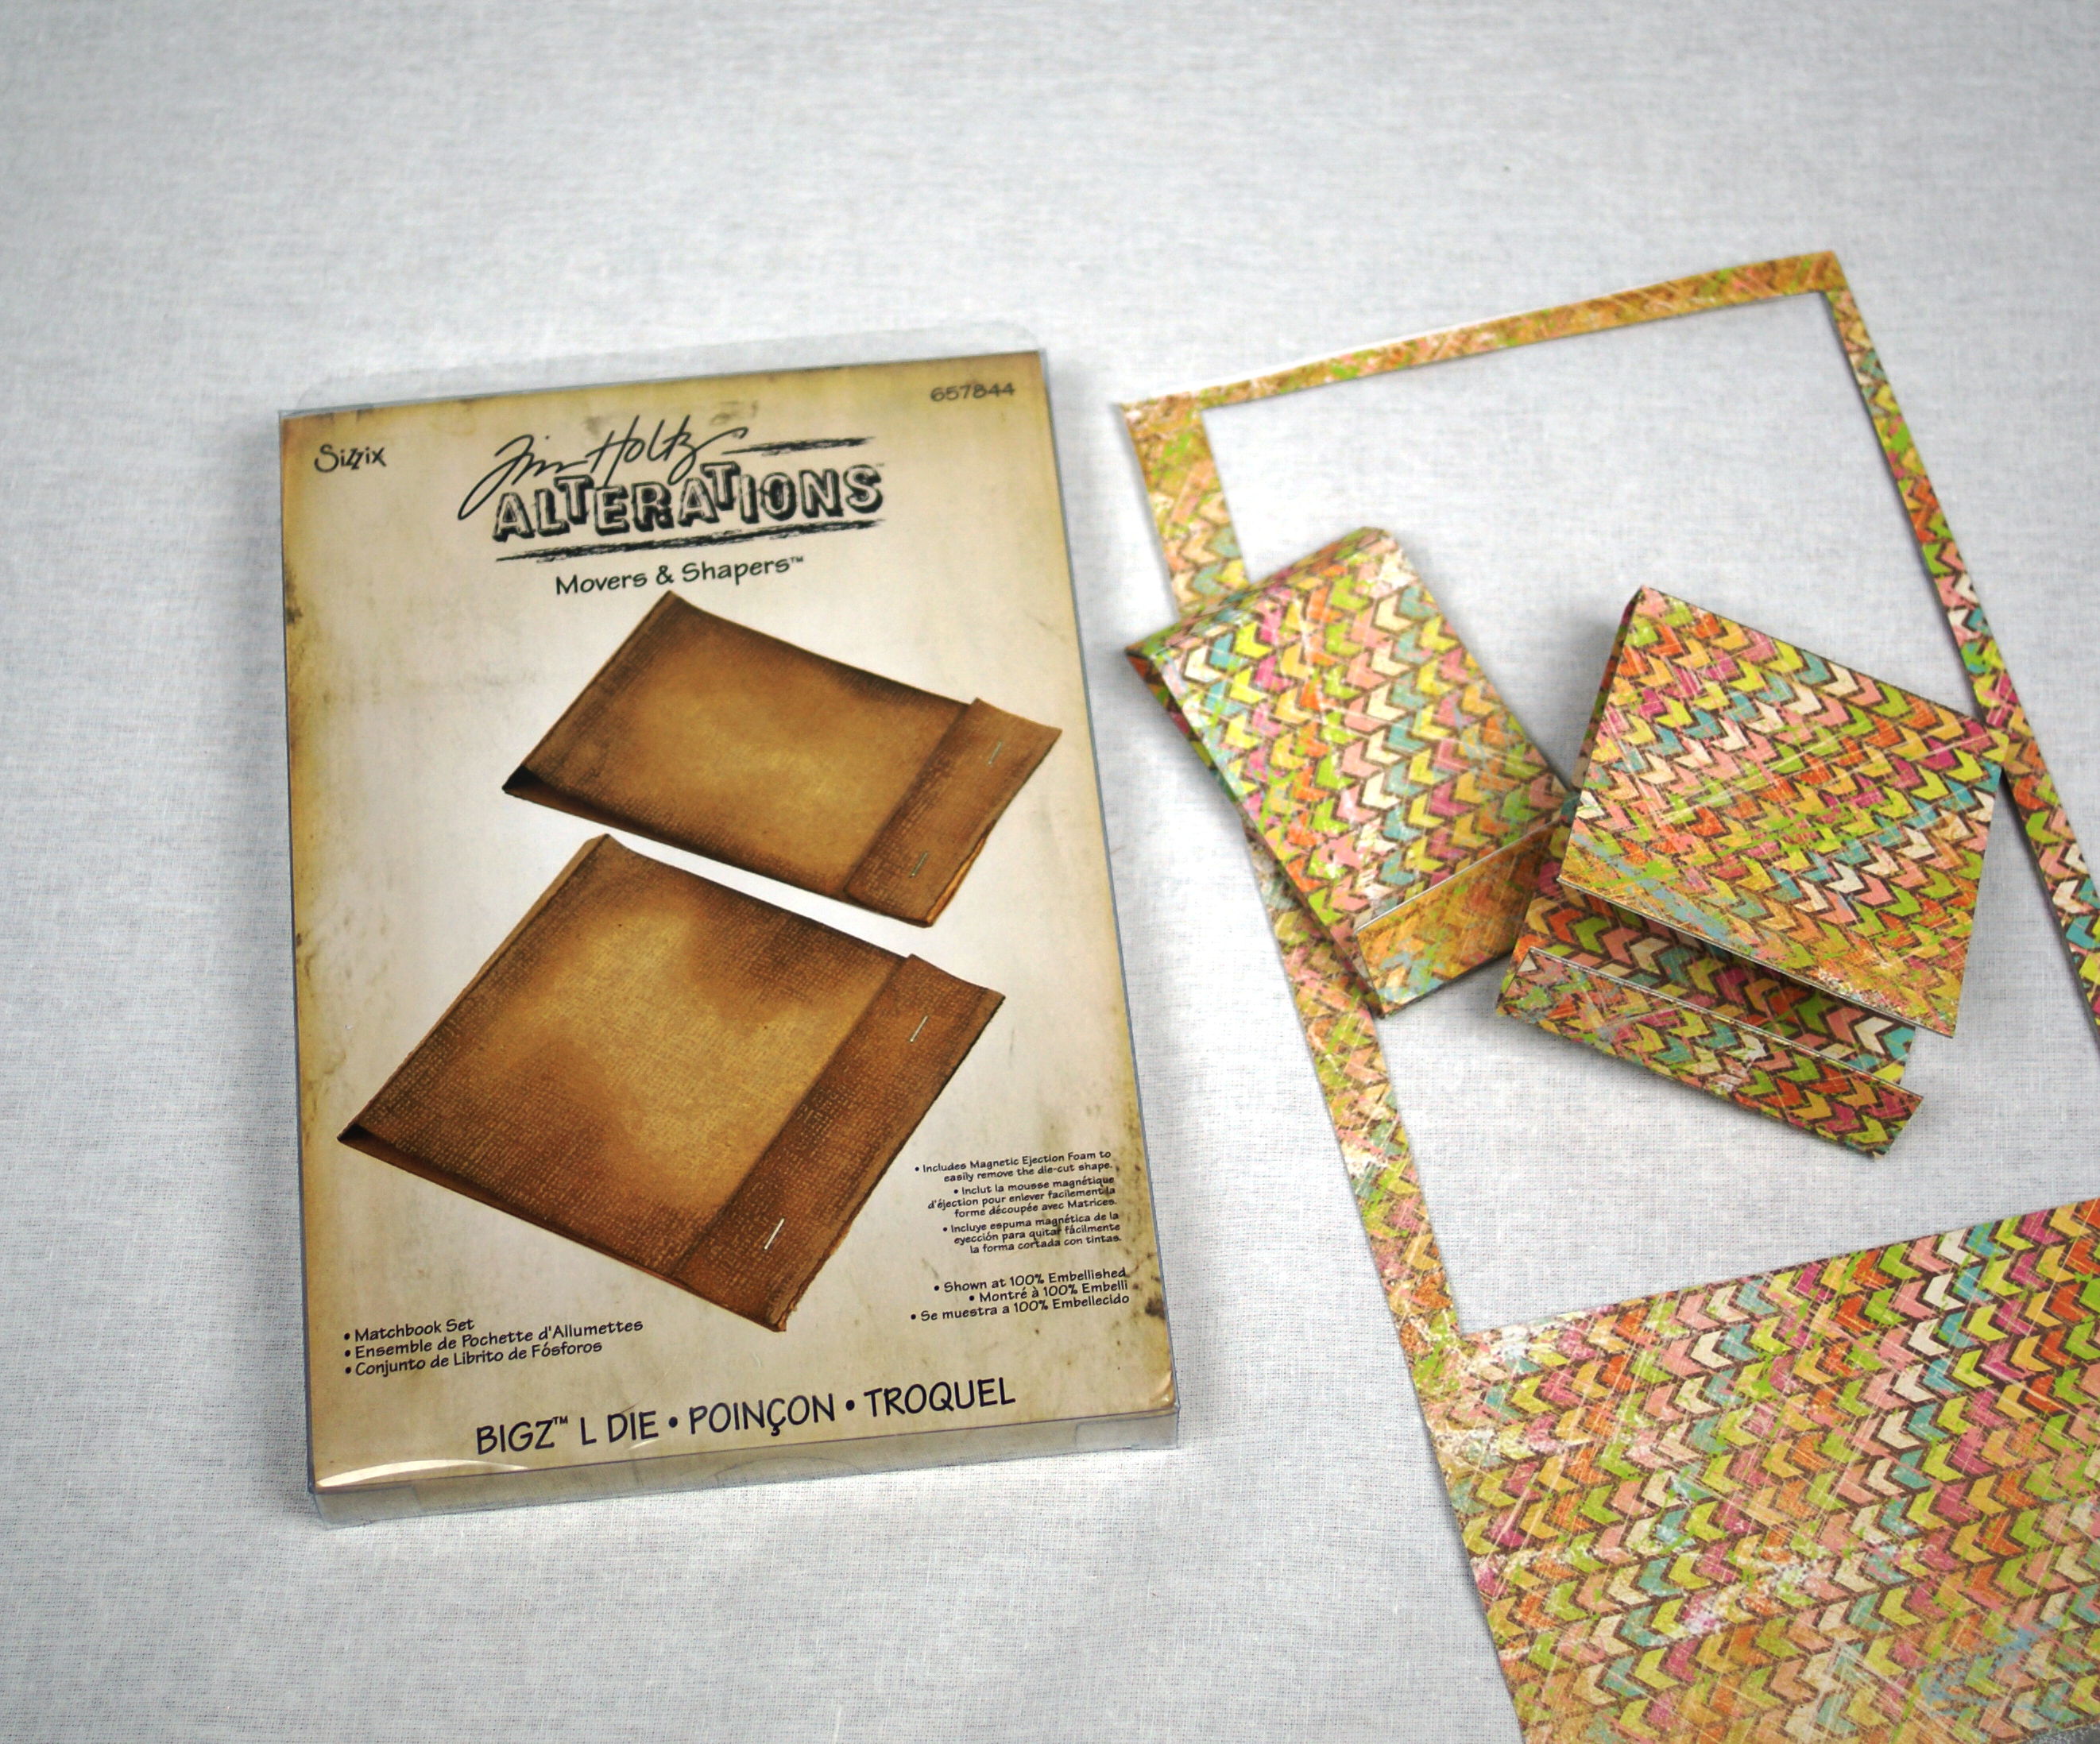
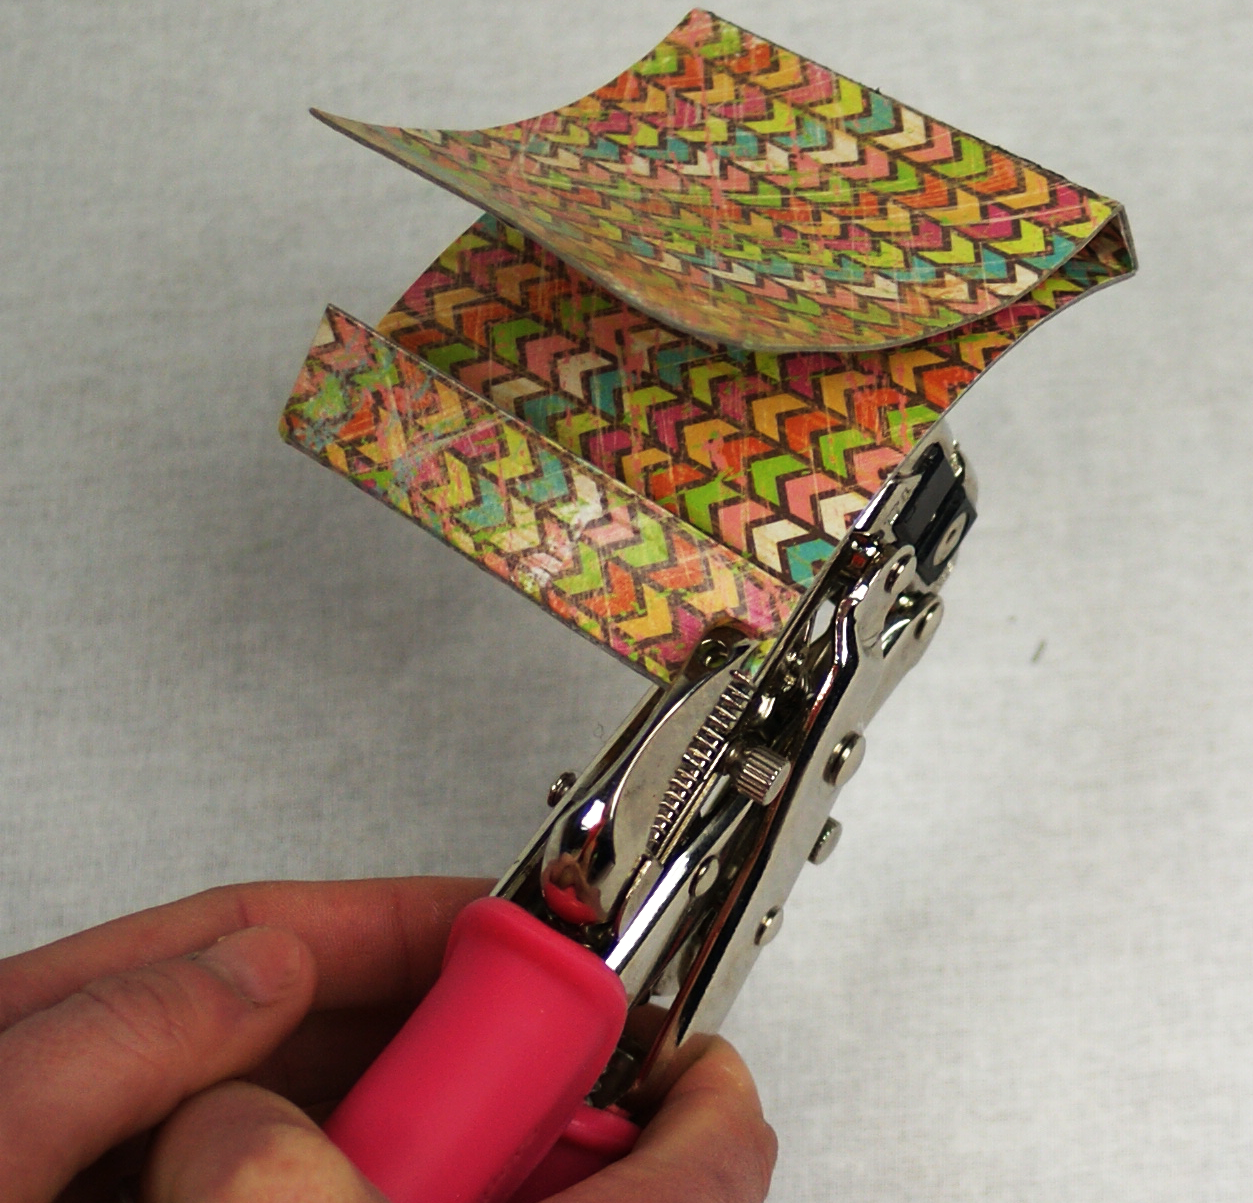
I used my Sizzix machine and the Squares #3 Die (which is on sale over there for $8.79), but you can use cut squares from your credit cards with hefty scissors, like Tonic Studios Tim Holts Scissors

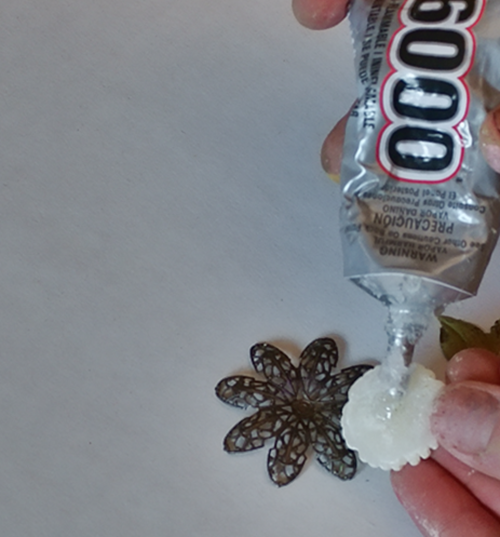
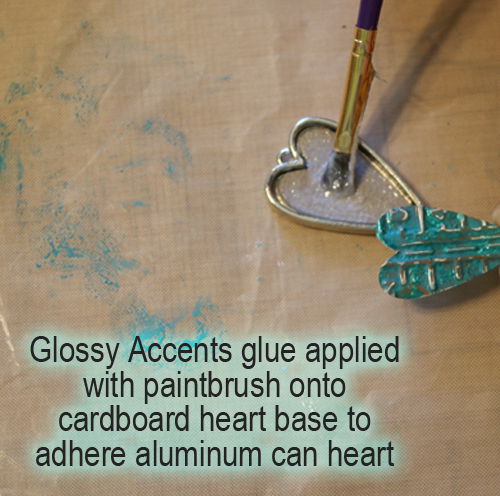
Craft Glue like Crafter’s Pick, which I use for just about everything.  It is non toxic, strong as can be and is great for metal, paper and more
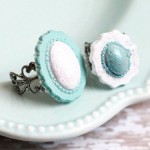
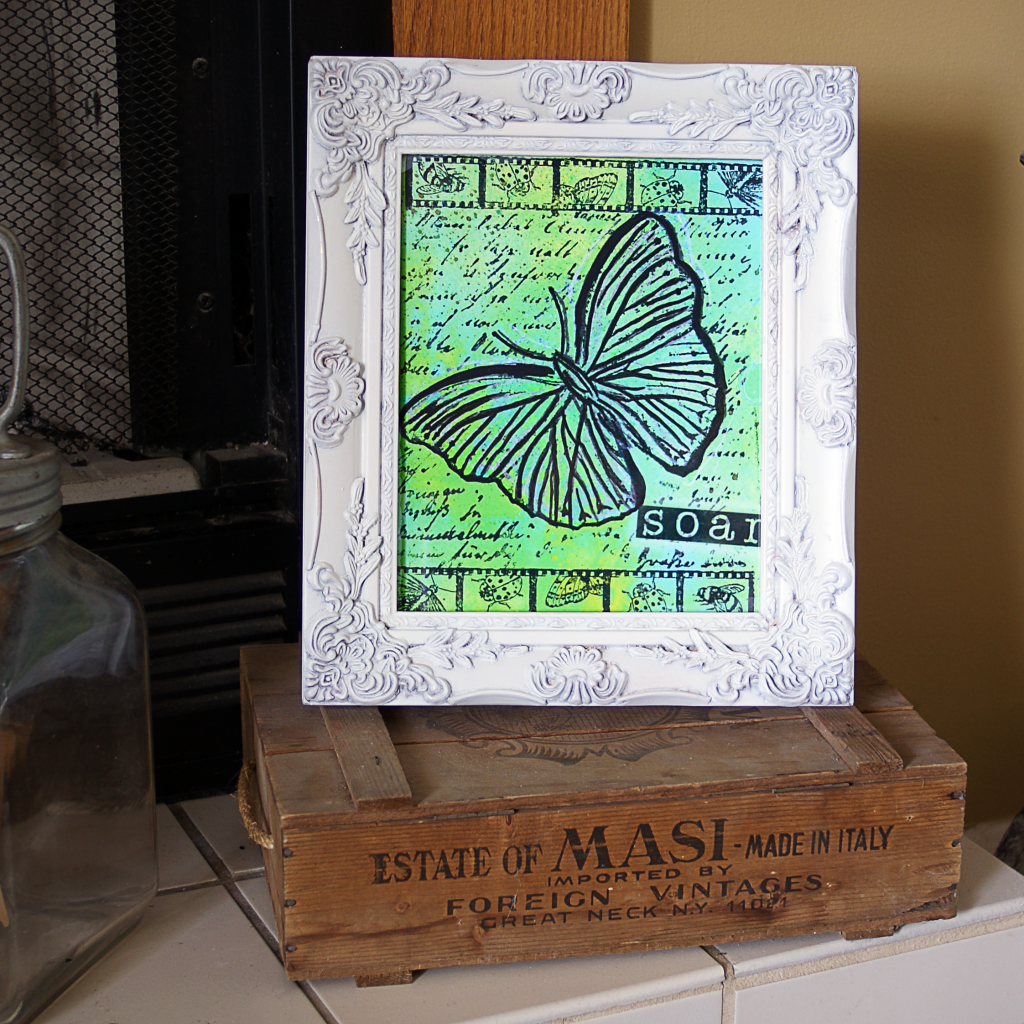
Frame to mosaic

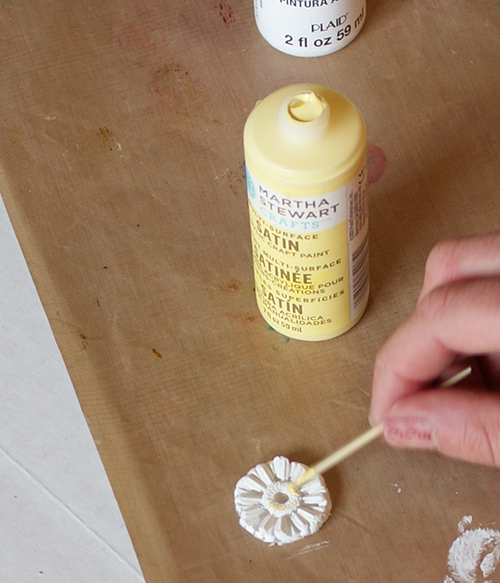
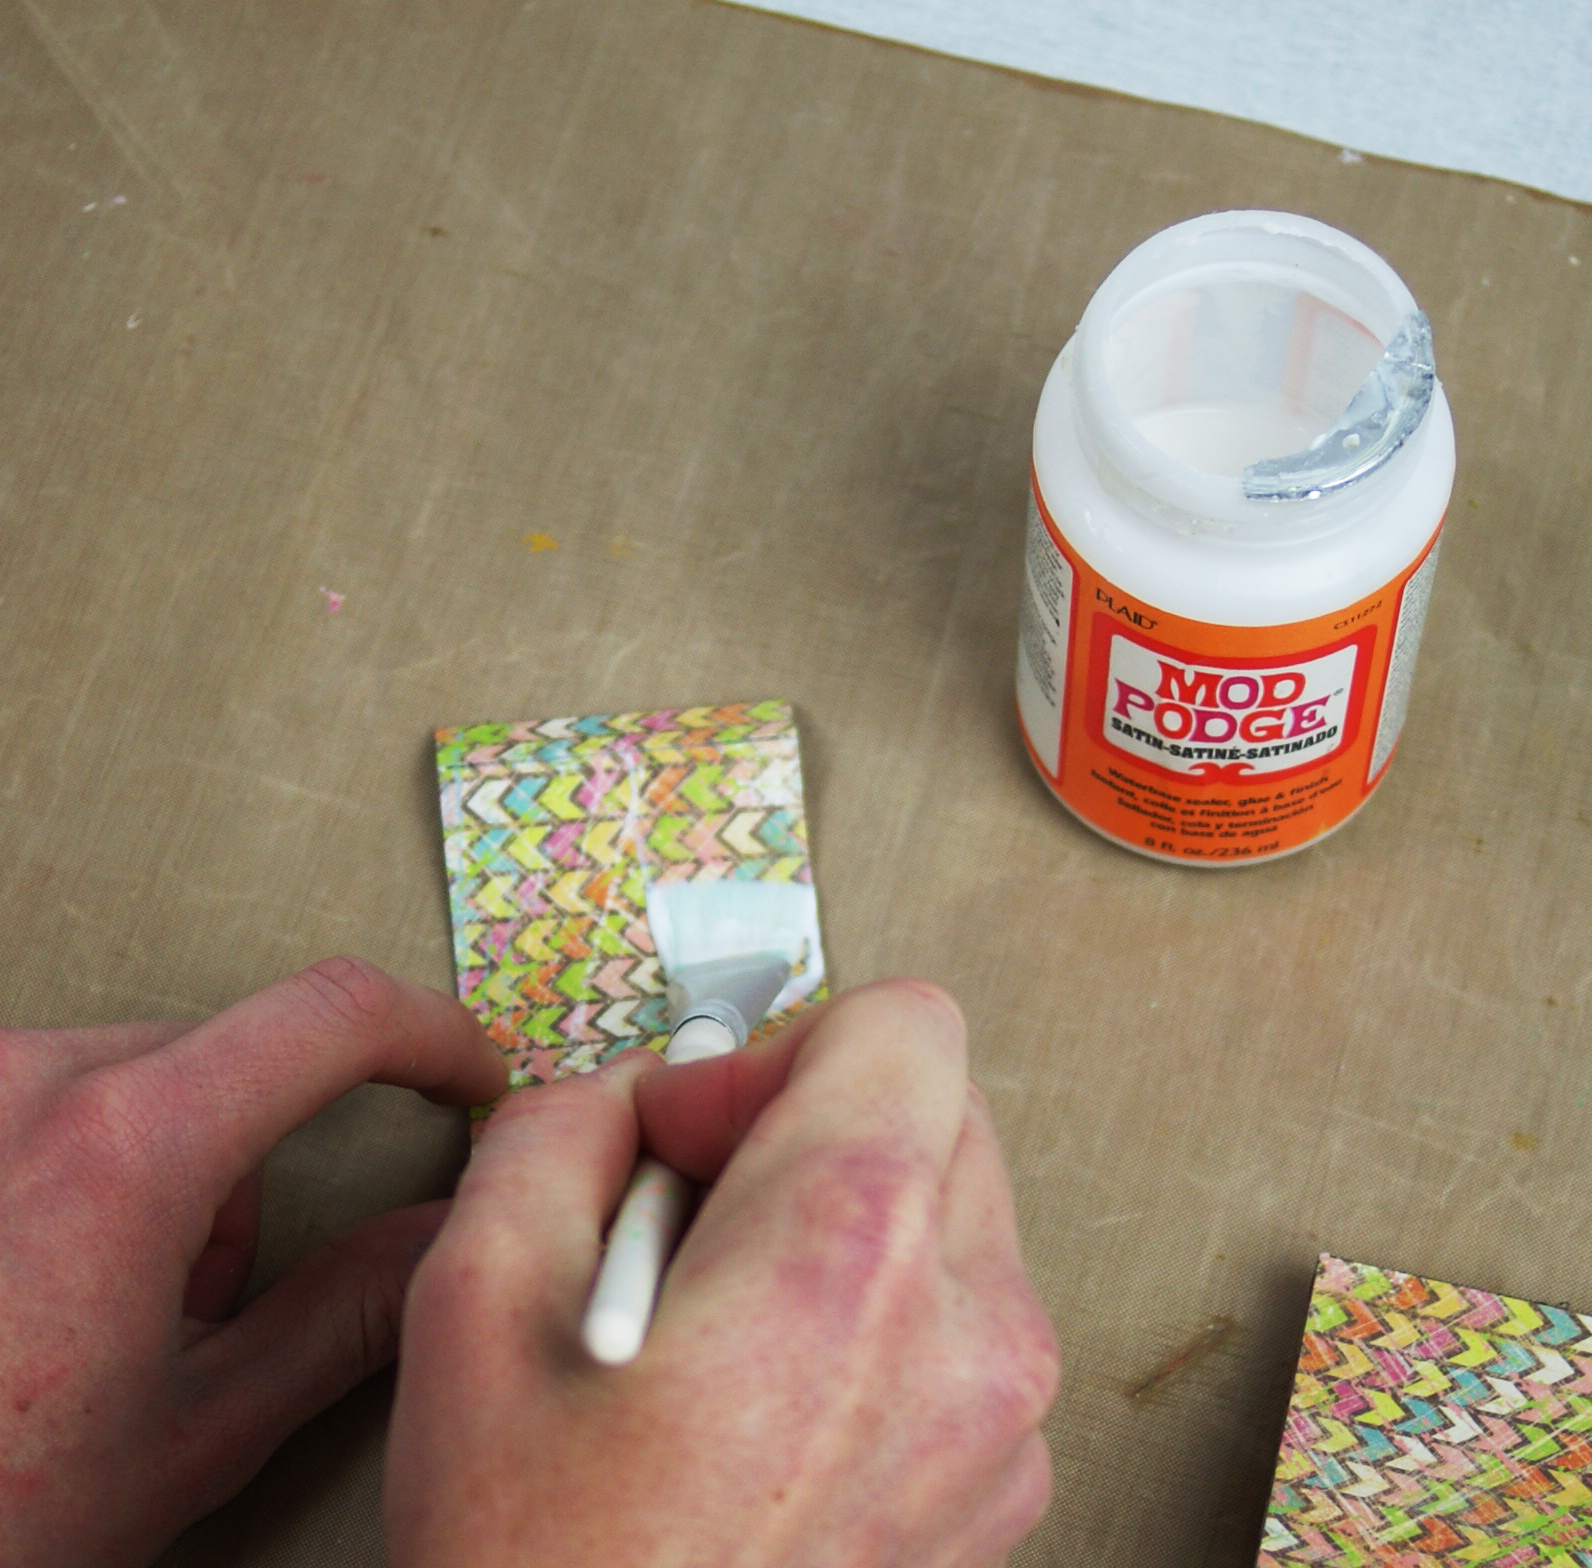
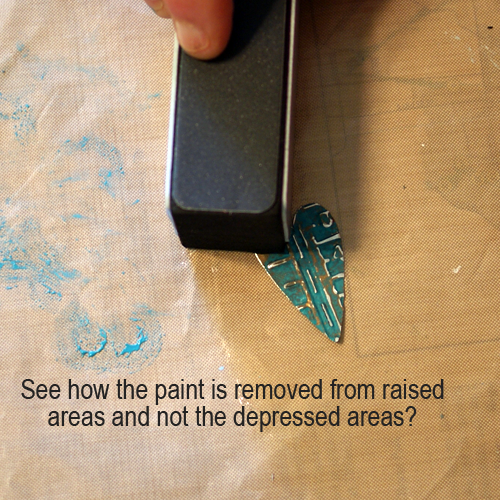
Acrylic paint for tiles if you don’t want to use them as they are (I used Tim Holtz Distress Paint because I am head over heels in love with it)

Free Scripture verse Printable Psalm 56:3

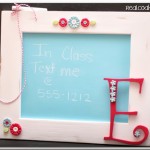
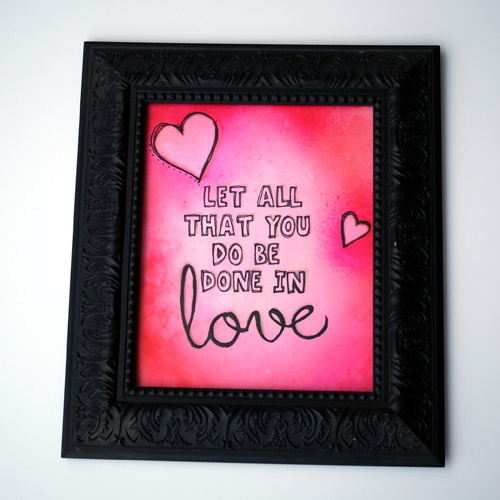
If you want to use the printable I created from Psalm 56:3, just right click the above thumbnail and the full res version will magically appear.  Save it and have it printed your preferred way, or print from your computer.

This verse is coming up all over the place for me, and I use it whenever life hits to remind me that I am held.  I created the printable in Photoshop specifically for this frame, so I went simple black and white since the credit cards have lots of color.  I used Gill Sans, one of my go to fonts.  The lovely crown and design element at the bottom come from Karen at The Graphics Fairy.  What would I do without her library of images??!

Find them at the following links to use in your own creations:

Free Vintage Crown Graphic

Free Ornamental Graphic Separators
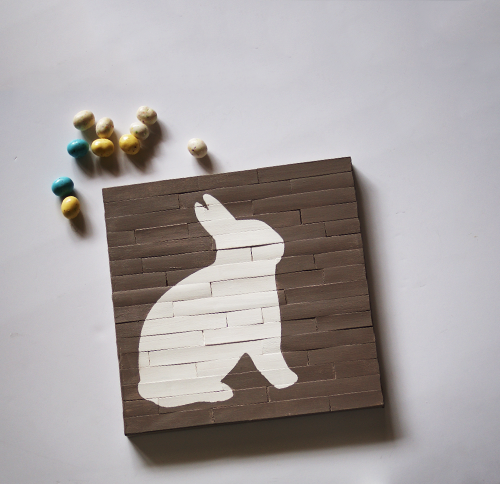
TUTORIAL:

CreditCardFrame2

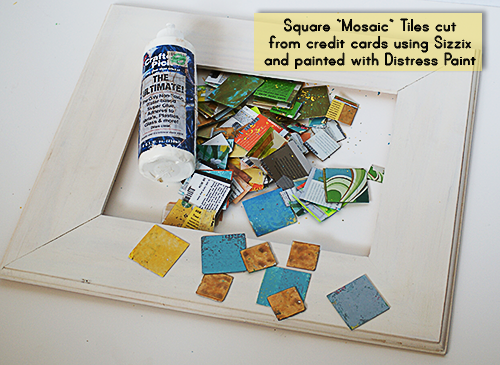
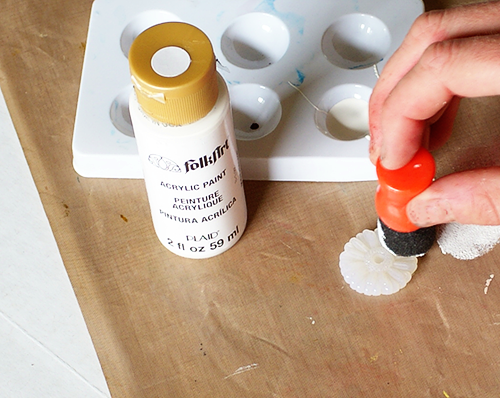
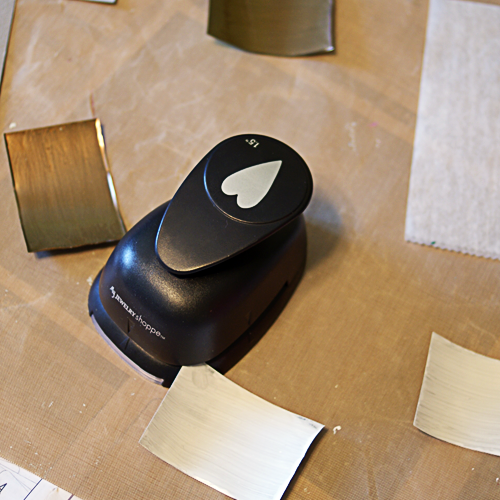
Cut and paint squares from gift cards into the size you want for your mosaic surface.  I used the small and next up size from the Sizzix Square Die.

How to Mosaic a Frame

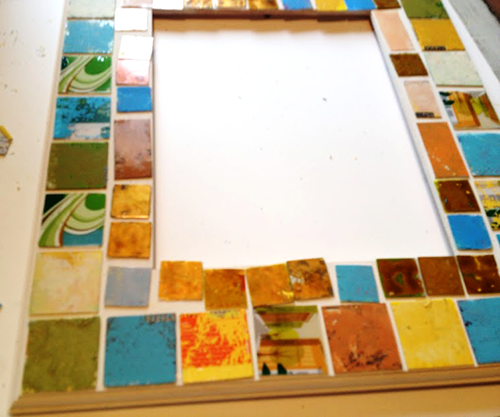
Lay out your “tiles” to get the design you want before you begin gluing.  Trust me.  Do that.

How to glue on Mosaic Tiles

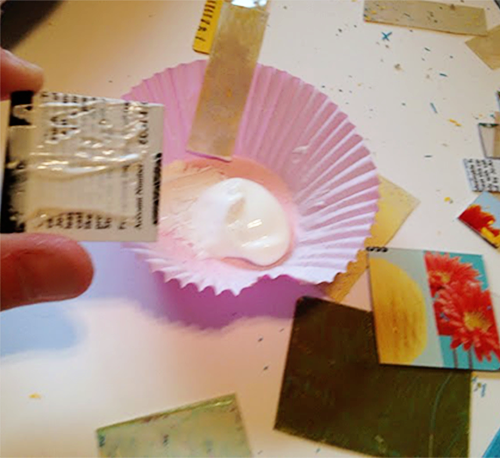
Once your tiles are dry, adhere them to the surface of your frame using craft glue.  I put some craft glue in a cupcake wrapper and applied it to my tiles with a scrap piece of plastic.  You can use a popsicle stick, paintbrush or whatever.  Use a thin layer of glue so that if you move your nudge your tiles to get the spacing you want, you won’t have bleeding out from the edges.

How to make upcycled home decor; DIY mosaic picture frame from recycled credit cards

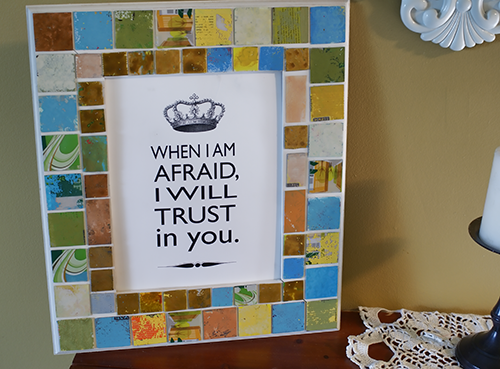
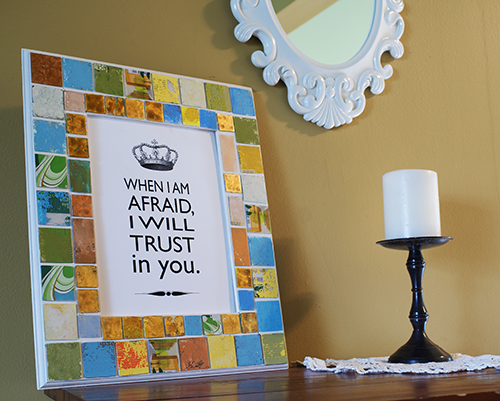
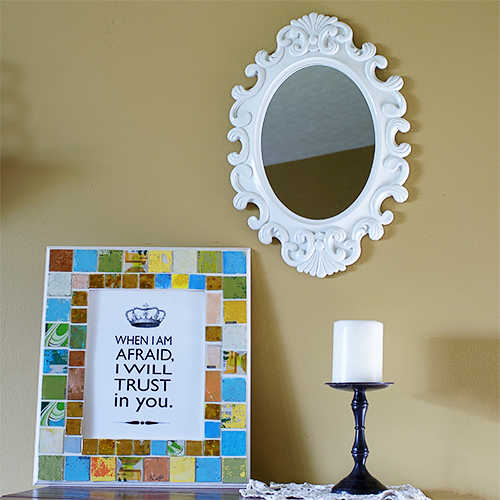
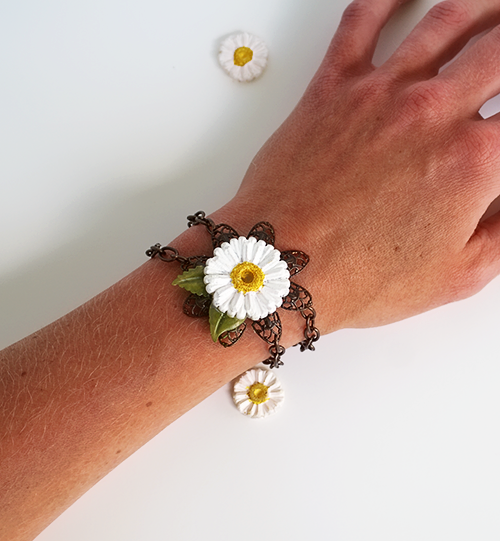
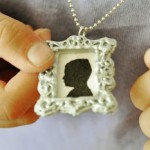
Let the glue dry so the tiles are secure and add a photo, mirror, or even leave empty as a design element all in itself!

Upcycled gift card home decor; How to Make a Faux Mosaic Picture frame

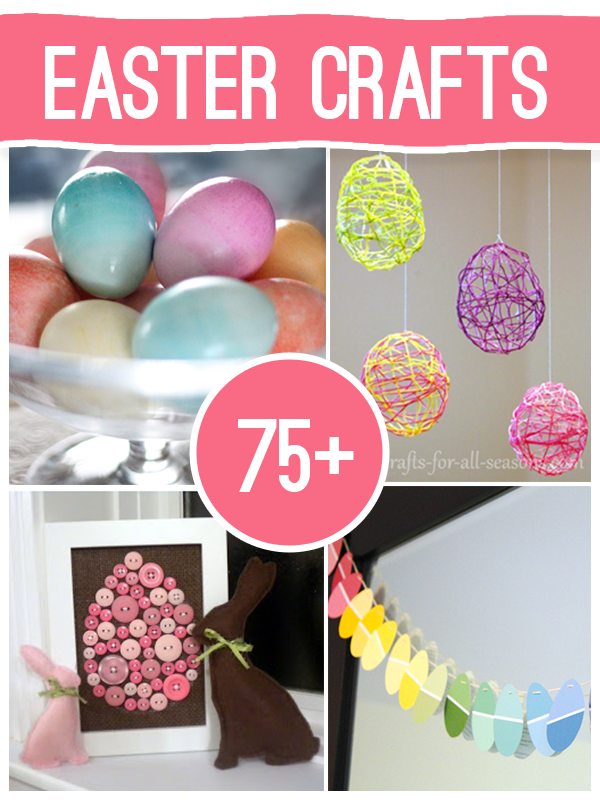
If you like this project, check out the 20+ Gift Card Projects to Make at Totally Green Crafts

20 Ways to Upcycle Gift Cards

Daisy Bracelet Tutorial With Mod Melts

[pinit]Mod Podge Mod Melts Bracelet Tutorial @PlaidCrafts from @savedbyloves #ModMelts[pinit]

Disclosure: This is a sponsored post on behalf of Blueprint Social and Plaid. All opinions are my own.

Have you seen the new Mod Melts and Molds by Mod Podge yet?  This stuff is fantastic!  As one who works with resin and polymer clay, I am in love with the ease of use, the detail of the pieces you can create and the speed of the process.  Today I will show you how to quickly create a beautiful daisy bracelet.  You will be seeing several more pieces in the near future made during my afternoon of creating with Mod Melts.

#ModMelts #diy daisy bracelet from @savedbyloves #jewelrymaking

Supplies:

#ModMelts

Mod Melt Mold

Mod Melt Sticks (Sea Glass used here)

Metal Filigree flower

Metal Chain and Toggle Clasp

Metal leaves

Acrylic paint white, yellow and green

Matte Mod Podge

E6000

Jewelry Pliers

Small Paint brush

Paint sponge daubber

Toothpicks

High Temp Hot glue gun

#ModMelts

Tutorial:

how to make flowers with #ModMelts

Heat the Mod Melt stick in your HIGH temp hot glue gun and squeeze into the larger daisy on the flower mold.  Work from the center out, making sure to not overfill.

How to use hot glue gun diy embellishments

Let cool for about 5 minutes.

ModMelts9

The pieces easily pop out of the flexible mold when you bend it.  This is so freaking cool.  Have you ever used resin in a flexible mold?  Hours upon hours of waiting.  No more.

ModMelts11

Now you just paint your daisy.  Mod Melts can be painted with acrylics, alcohol inks, embossing powders and more.  See Cathie Filian’s great photo examples of different ways to color the embellishments.  I show you FolkArt and Martha Stewart acrylic paint in this tutorial.  I also tried alcohol inks and Vintaj patina.  So awesome!

ModMelts13

I painted the middle of the daisy with a toothpick.

ModMelts14

Here are the three pieces I sandwiched for the focal point of the bracelet.  I sealed them with 2 coats of Mod Podge Matte finish, painted on with small, soft brush.

ModMelts12

I used E6000 to attach the pieces.  Let dry for at least 30 minutes before handling.

How to make a metal filigree bracelet

To make the bracelet, I opened chain links and attached them directly to the metal filigree flower using jewelry pliers.

ModMelts4

Using pliers and a jump ring, I added toggle clasp to the ends for closure.

Mod Podge Mod Melts Bracelet Tutorial @PlaidCrafts from @savedbyloves #ModMelts

Give it a try.  You are going to love it! You can find more great ideas and products from Plaid by via Facebook, Pinterest, Twitter, and Paint Me Plaid.

Check out what others have made with Mod Melts:

50 Plus DIY Sea Glass Crafts and Projects

[pinit]
50+ Sea Glass Tutorials with Jewelry, home decor and more @savedbyloves

[pinit]

Vacationing in South Florida has put me in a sea glass craft mood.  The stuff is so beautiful, and I love that it is just waiting on the beaches to be harvested.  Sea glass, also referred to as beach glass, comes in a variety of colors and is used to create gorgeous art,  jewelry and home decor.  I love the wire wrap pendants and charm bracelets featuring the ocean tumbled and smoothed recycled glass.  Don’t live near a coast?  No fear.  You can order sea glass on line, or try out one of the many faux DIY sea glass tutorials below.  As always, if you have a favroite sea glass project that I missed, let me know and I will take a look to see if it fits in the collection!

Colorful Word Art Tutorial

Hello there SBLC! Amy from Plucking Daisies here to share a Colorful word art tutorial with you. Certain words really rev my creative mojo and I’m always inspired by colors. Combining inspirational words with bright colors is sure to jump-start your creativity with just a glance. I’ve got this colorful “Create” word art hanging in my studio and it keeps my creativity flowing day after day. Come along, and I’ll show you how to “create” colorful word art for yourself.

[pinit]

colorful-word-art-vertical-text

[pinit]

Can you guess what I used to colorize this thrifted C-R-E-A-T-E sign…once old and cold and grey? I’ll give you a hint: You probably have some shoved in a bag from your last trip to the mall.

Colorful Word Art Tutorial with Mod Podge | Pluckingdaisies.comThat’s right it’s Tissue Paper! Plain old white packaging Tissue.

Colorful Word Art Tutorial with Mod Podge | Pluckingdaisies.comSome may say,”it’s too crumpled and plain to ever be used again!” I say…” just add Ink”

Colorful Word Art Tutorial with Mod Podge | Pluckingdaisies.comMy Word Art Project was inspired by this fantastic video I found while researching the web for another creative venture. Check it out to see this fun tissue paper technique in action!

How to Mod Podge Tissue Paper

This word art project is easy to create with recycled packaging tissue Mod Podge and your favorite stamps! I’ve found quite a few of these word signs on my thrifting adventures so keep your eyes peeled if you don’t already have one on hand. You can also use this technique on wooden or cardboard words available at most craft stores.

Supplies:

  • Metal, cardboard or wooden word or letters
  • Dylusions Spray Inks or other ink spray
  • Favorite Stamp (I used “Flower Text” Design Block from Hero Arts)
  • White Packaging Tissue (Recycled from a shopping bag)
  • Black Archival Ink

Colorful Word Art Tutorial with Mod Podge | Pluckingdaisies.com

STEP 1: Stamp your tissue paper with black archival ink.

*TIP* Use a stamping mat or mouse pad for a clear impression.

Colorful Word Art Tutorial with Mod Podge | Pluckingdaisies.com

STEP 2: Lay your stamped Tissue Paper on a piece of cardboard or inside a cardboard box (this will keep any wayward ink from getting where you don’t want it). Spray with Dylusions. Use a piece of wax paper to create blocks of color.

*TIP* Keep extra Tissue Paper on hand to mop up the excess Dylusions and create custom tissue paper for use in another project or for unique gift wrap. You can find a full tutorial on creating custom tissue paper with Dylusions HERE.

Colorful Word Art Tutorial with Mod Podge | Pluckingdaisies.com

STEP 3: Give the front of your word/letters a generous coating of Mod Podge and lay them on the back of your stamped tissue. Let dry for 15-20 minutes.

Colorful Word Art Tutorial with Mod Podge | Pluckingdaisies.com

STEP 4: Cut away the excess tissue to reveal the letter shapes. Smooth any jagged edges with Mod Podge. Add a second coat to the front of your word art.

*TIP* I had some issues with the ink running when applying the second coat of mod podge so I would suggest A) Seal your word art with Acrylic sealer before adding the second coat of Mod Podge or B) Keep several brushes on hand and switch them out in between colors.

Colorful Word Art Tutorial with Mod Podge | Pluckingdaisies.com

Use your now COLORFUL word art to decorate your workspace or a favorite spot in your home! My fresh and vibran word art is like a ray of sunshine in my basement studio. It really brightens up the room and is so cheerful don’t you think? Now don’t go laughing at my cat head lamp now. Nothing says “crazy cat lady” like a cat head lamp 🙂

Colorful Word Art Tutorial with Mod Podge | Pluckingdaisies.com

If you enjoy decorating with word art I have another tutorial for altering wooden letters I think you might find “Inspiring” HERE.

Colorful Word Art Tutorial with Mod Podge | Pluckingdaisies.com

Thanks for having back here at Saved By Love Creations. I always enjoy visiting and sharing creativity with you. Hope you enjoyed the Word art tutorial and wish you the best of luck in finding inspiring words to make more colorful!

Have a colorful day!

Amy*

Find me at Pluckingdaisies.com | Pinterest | Facebook | and Twitter for more creative ideas and tutorials.

Make Paper Feather Earrings

[pinit]
 How to Make Paper Feather Earrings @savedbyloves

[pinit]

I heart paper and I heart feather earrings.  It was only a matter of time before the inspiration to make paper feather earrings hit.  That time is now.  You can make your very own with just a few supplies…

 How to Make Paper Feather Earrings @savedbyloves

So you may have heard me and my creative bloggy friends mention SNAP!, a conference that took place last month in Utah.  It was amazing to meet these ladies face to face, and share ideas, laughs, even some dance floor moves.  We get into the details, us creatives.  You should have seen the business cards all dressed up with washi tape, glitter, clips, candies and on and on…  Rebecca at the Crafted Sparrow embellished hers with little aqua paper feathers to hers.

Die Cut Paper Feathers

In all the room chaos, I must have ended up with my roommate’s Crafted Sparrow business card, but no fear.  I put it to good use.  When I got home and started sorting through my stash, I saw the 2 paper feathers and knew earrings were necessary.  You can make them too, no problem.  If you didn’t happen to get 2 of Rebecca’s cards with feathers, you can die cut your own, or just download this free feather template and use it to hand cut your feathers from pretty paper!

SUPPLIES:

2 Paper Feathers

20 gauge jewelry wire

Ear wires

Beads or crystals of your choice for feather stem

Tiny eyelet and setter

Flat nose and round nose pliers

Magic Glos Resin or Mod Podge Dimensional Magic

Awl

Wire cutter

TUTORIAL:

PaperFeatherEarrings3

Apply resin to paper feathers.  I did both sides (when one side dries, flip it over and do the other).  For my thoughts on Magic Glos resin, check out my patriotic sprinkle earrings tutorial.  You can also use Mod Podge Dimensional Magic or 2 part resin, but you will have to wait overnight for these to dry before moving on to the next step.  With Magic Glos the wait is 20 minutes in sunlight or under a UV lamp.

PaperFeatherEarrings5

Poke a hole in the tip of your feather where the stem starts, and set your eyelet.  For the best explanation of how to do this with tiny eyelets, go to Retro Cafe Art Gallery’s post on DIY acrylic tags.  That is how I did it, but I used a the pointy end of an aluminum crochet hook because I didn’t have an eyelet setter tool.

PaperFeatherEarrings6

Cut about 5 inches of wire and insert into eyelet from front to back of feather.

PaperFeatherEarrings7

Bend wire up with a one inch tail as in photo.

PaperFeatherEarrings8

Loop tail around to form coil as shown.  I wrapped four times.  Cut off excess wire from tail if necessary.

PaperFeatherEarrings9

String beads onto wire on top of coil.  I used 2 small faceted beads on either side of a larger crystal.  Bend wire at 90° as shown.  Leave a space between the bend and the top bead for coiling the wire (see below).

PaperFeatherEarrings10

Loop wire around round nose pliers as shown.

TIP: When making earrings, I like to mark with a sharpie where on the pliers I wrap the wire so that I can make the loop on the next earring the same size.

PaperFeatherEarrings12

Slide ear wire finding onto loop, making sure you have it oriented so that when you put it in your ear, the side of the feather that you want to be the front is facing towards the front.

PaperFeatherEarrings13

Wrap the wire to the top of the bead, forming a coil as shown.  Clip the excess wire off with the wire cutter.


DIY Matchbox Business Card Holder

[pinit]
Make a Matchbook business card holder @savedbyloves[pinit]

In preparation for SNAP! 2013, my very first blogging conference, it was time to update my business cards.  I haven’t gotten new ones since before Pinterest, and lots has changed here at SBLC since then.  Of course with new cards comes the need for a spiffy business card holder.  It needed to protect the cards, but more importantly, it need to be handmade and super cute.

Craft blog business card design

So here are the new cards.  I used this QR code generator, which quickly and easily (and for free) created a downloadable graphic that I opened in Photoshop and added to my design.  I ordered the high gloss cards from Vistaprint.

Saved By Love Creations Business Cards

Here they are close up.

 Sizzix Movers & Shapers L Die - Matchbook Set

To make them, I cut the matchbooks (using  Sizzix Movers & Shapers L Die – Matchbook Set) from grunge paper that I covered on both sides with scrapbook paper (adhered with Glossy Accents).

Mod Podge Satin

I coated the entire inside, outside and edges with Mod Podge satin finish to seal.  Let dry 3o minutes and applied 2nd coat, which I let dry overnight.

Make a Matchbook business card holder @savedbyloves

I punched a hole through the bottom flap and back cover on both sides for ribbon placement.

Make a Matchbook business card holder @savedbyloves

I put the ribbon through the holes and wrapped around the bottom flap and back, tying a knot on the left side (which is hidden under the flower).  I glued the flower in place with Fabri-Tac (it is like hot glue in a bottle, but not hot).

The cards slide under the bottom flap, and the top flap slides over the cards and under the bottom flap.

Make a Matchbook business card holder @savedbyloves

For the text, I stamped onto a tag with archival black ink, using my rolling alphabet stamp.  I inked the edges of the tag with broken china and  antique linen distress ink pads using the ink blending tool.

PRODUCTS USED:


Faux Pallet Easter Canvas DIY

[pinit]

Make Faux Wood Pallet Art #Easter @savedbyloves

[pinit]

Today’s project is a fun, simple Easter decor DIY.  Use jumbo popsicle sticks  and an old canvas to create faux wood pallet bunny silhouette wall art.  The inspiration for this project came from Laura at The Shed Blog, and her Mini Pallet Art tutorial.  I loved her end result so much that it is now on my wall (an endearing story I shared with you here).

Make Faux Wood Pallet Art #Easter @savedbyloves

SUPPLIES:

Jumbo Craft Sticks

Fabri-Tac craft glue

An old canvas (can be used; grab one for cheap at a garage sale or thrift store)

Bunny Silhouette

Die cut machine or printer and scissors

Clear contact paper or vinyl for die cut machine

White Gesso

Sponge brush

Acrylic paint in choice of colors

TUTORIAL:

Head to Laura’s post for a detailed description.  Here is a photo montage of what I did.  She has some great tips for removing the paint between the craft sticks.

Easter decor tutorial Faux Wood Pallet canvas @savedbyloves

What do you think?  I love it and it is super inexpensive to create.  Won’t take you very long either.  This is a great project for each holiday.  Just swap out the silhouette for the current theme and make cool art for the whole year round.

Don’t forget to check out our 75 Easter Projects Roundup:

75 Easter Crafts to Make @savedbyloves

Digital Art Tutorial & Letter Fun

Screen Shot 2013-02-15 at 3.35.32 PM

I am knee deep in hand lettering classes as part of my 2013 resolution.   My hand hurts from practicing, so I took a break from inspiration and thought I would share with you this fun digital art journal tutorial from Nancie Rowe Janitz.  She has several tutorials that will teach you to make some amazing pieces by scanning in backgrounds, photos, doodles and whatever you can think of to incorporate into your digital art.  Sometimes messy is fun, other times you just want to play in a way that doesn’t involve a ton of supplies and cleanup!  If I am unsure of where to go with a mixed media piece, I often scan in my background to play with text and elements to figure out a layout that I then do by hand.

hand lettering, doodlingHere is a doodle I did with the lettering workshop Letter Lab with Lori Vliegen.  It is a great class and I am looking forward to developing my own handwritten alphabet.

art journal page, doodling, mixed media

This was part of a journal page I learned from techniques in Lori’s class.  It is water color on mixed media paper, Pitt pen and graphite pencil.  I scanned it and applied the Topaz Affects Grunge filter in Photoshop.

Thanks for stopping by, and I hope you are inspired to create!

Make Vibrant Artwork in A Snap (+ Love Printable)

Corinthians 16:14 Dylusions ink background art print by @savedbyloves

[pinit]

This post was originally shared at Fox Hollow Cottage.

 I have been playing with Dylusions spray inks lately, and am in love.  Why?  Because you can create gorgeous art with the spray of a bottle.  Using a background I created in about 1 minute with this dye, I made you a Corinthians love verse printable to download and frame.  Want to make your own? Scroll down for the video and get creating.


Free Love Verse Printable by @savedbyloves #Dylusions #Valentine'sDay


Right click the image to pull up the full res 8×10, download and print!

Maybe you wish it were a different color, or had a specific saying.  That is why I am going to show you how to create your own vibrant, watercolor background using spray inks, and how to get your custom text/designs on there.

SUPPLIES:

Dylusions spray ink (Bubble Gum pink and Post Box red used here)

Watercolor paper

Water spritzer

Paper towels

Stencils of your choice (I used hearts to go with my love theme)

Hair dryer or heat tool

Transfer paper, design to transfer, and pencil (or just pencil if you want to freehand your design)

Micron artist pen in black or other permanent black pen (size 03 used here)

Here is a quick video showing you the simple process:

If you scan the background, the editing possibilities are unending.  Use it as the base for subway art with my DIY subway art tutorial.

Change the hues, add text and images, digital scrapbooking, even use it as your blog background.  Here is an example of a Dylusions background that I hand stamped, scanned, and altered the color of the butterfly:

ButterflyNormal

Digital scrapbooking, dylusions ink background, art journaling

Signature

DIY Upcycled Pop Can & Resin Heart Pendant

[pinit]#Recycle aluminum cans into gorgeous jewelry #Resin #Upcycle @savedbyloves #DIY @Crafts

Do you have a pile of aluminum cans in recycling bin purgatory?  Well, if you have been around here long, you know I love to cut my cans and form them into various upcycled jewelry pieces.  Today, I am going to show you how I used a coke can, a bezel and some resin to create this fun, one of a kind heart pendant.  It would make a lovely gift for many occasions, and especially the rapidly approaching Valentine’s Day Holiday.  I made it for a gift and personalized it with a monogram stamped charm.  You don’t need a lot of expensive supplies and equipment to one of these yourself.  Here is how…

SUPPLIES

Empty Soda Can, rinsed with warm soapy water

Jewelry Shoppe Heart Bezel and corresponding heart paper punch (got mine at Hobby Lobby)

Resin Jewelry Tutorial, Upcycled Jewelry Tutorial

-OR-

Any heart shape bezel and a sharpie or other permanent marker

Glossy Accents or other metal glue

Grungeboard or scrap cardboard

Embossing folder and machine

Perfect Pearls

3 colors of acrylic paint

Metal paint primer (I used Martha Stewart’s)

Vintaj Sanding Block

Magic Glos Resin

INSTRUCTIONS

#Upcycled Recycled aluminum can jewelry #DIY #Craft tutorial @savedbyloves [pinit]

This project came about as I was doing another project that I haven’t shared with you yet.  There was a leftover aluminum can punched heart shape, and I remembered I had the corresponding bezel.  I found the bezel and paper punch at Hobby Lobby (by My Jewelry Shoppe) a couple of months back.  I decided to emboss the heart and add some acrylic paint and Liquid Pearls for a cool effect.

#Recycle aluminum cans into gorgeous jewelry #Resin #Upcycle @savedbyloves #DIY @Crafts

For the other project, I needed rectangles with a heart cut out in the middle.  If you just want the heart shape used in this tutorial, you don’t have to worry about cutting perfect rectangles.  Just primer and paint your can sheet and punch the heart shape from it.  I showed you how to cut the cans into a sheet in the video here…

Make an aluminum can pendant
Trace the heart twice onto grungeboard, thick cardstock or cardboard and cut out inside the outlines with scissors.  Glue the cardboard hearts together, then glue to bezel.  Use clothespin to apply pressure for good adhesion.  This gives thickness to the thin can top layer.
Emboss your painted and primed can heart.  I used Tim Holtz Texture Fades embossing folder – Pattern and Stitches Set and my Sizzix Vagabond.  It you don’t have an embossing machine, you can hand emboss, or use the folder and a rolling pin like in this video by Sarah Hamer:

Now apply a second paint color over your base (Ranger Paint Dauber color Pool used here).

Ranger Paint Daubbers Pool

Ranger Paint Daubbers Pool

Let dry and and sand with sanding block to distress as desired.  Not shown here, but in my final pendant, I added a third paint color.  The red made the pendant pop.  If you sand away too much paint, it’s ok.  Just paint again and sand until you are happy with your piece.  The raised areas will lose color when you sand, while the depressed areas hold color.  The embossed design is enhanced by the contrast.  So fun!

How to emboss metal jewelry

How to emboss metal jewelry

When you are happy with your paint job, glue heart into pendant bezel on top of cardboard base as shown.  Hold in place with clothespin while glue dries.

How to emboss metal jewelry2

How to use Magic Glos resin

Let glue dry completely, then apply Magic Glos resin like I showed you in this Plaid Ring Bling tutorial.

You can use any resin you want.  I just had this on hand, and love the fact that it cures in minutes vs. the hours it takes 2 part resins to cure.  Maybe you are more patient than me!

Add chain and charms as desired and you are done!

#Upcycled Recycled aluminum can jewelry #DIY #Craft tutorial @savedbyloves

HeartBezelPendantDIY8

Privacy Policy