Tips to Fast, Mess Free, DIY Glass Tile Pendants

[pinit]
Xyron Create a Sticker for Easy, mess free Glass Tile Pendant @savedbyloves

 [pinit]

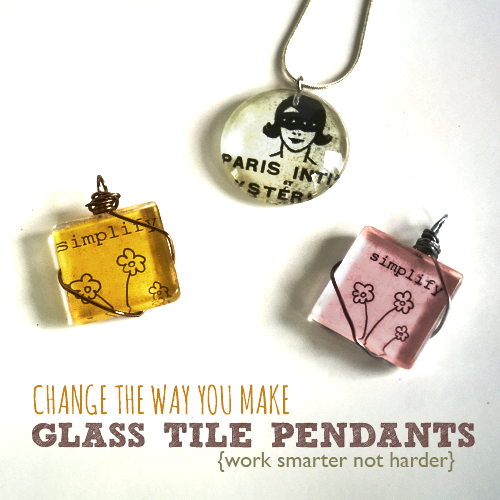
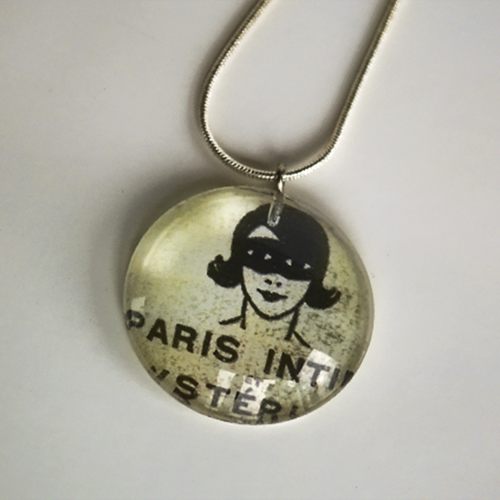
If you have ever made glass or acrylic tile pendants, you probably know that it is more involved than it looks.  About 2 years ago, I need to make a slew of these, and decided to run my images that I wanted to adhere to the pendant through Xyron’s Create-a-Sticker Machine.  I ran them through oriented so that the image side would be the sticky side, and stuck the tile right on the sticky, as you will see pictured in this tutorial.  This eliminates having to glue the images onto the tiles, which is, at least for me, a messy hassle!  I wanted to scream this technique from the rooftops when I thought of it, but I decided to wait and see how the pendants held up long term.  At last I am here to report that after 2 years, the tiles I made this way look gorgeous.  The image has not peeled away from the glass or discolored even slightly.  You still have to seal the backs so that the pendants are waterproof, but I have a great tip for that step as well.  Read on and you will be busting out gorgeous, durable graphic pendants crazy fast.

 Xyron Create a Sticker for Easy, mess free Glass Tile Pendant @savedbyloves

 SUPPLIES:

XyronGlassTilePendant2

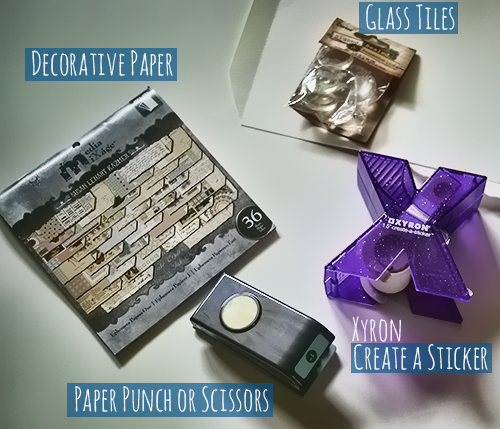
Xyron 1.5 inch Create-a-Sticker  with Permanent adhesive cartridge

Printed images for your tiles, or decorative scrapbook paper/artwork – I create collage sheets in Photoshop with images made to fit whatever tiles I am using (round, square, rectangle in various sizes) and print it, or I create backgrounds with spray ink, ink pads, markers, stamps, rub-ons, doodles to use on my tiles.

Detail scissors

Mod Podge (I prefer satin finish to seal my glass tiles)

Small flat paintbrush

Masking tape or contact paper (super cheap at dollar store and works great for the sealing trick you will see later)

Ceramic tile or other flat surface

Sandpaper 150-200 grit (I use Tim Holtz

Glass tiles or Acrylic Tiles (I use Mod Podge Podgeable Shapes and glass tiles)

Glue on bails (my very favorite are aanraku small bails.  They are beautiful, the perfect size for 1-2 inch round, square or rectangle tiles and are well worth the cost (about $0.40 each)

E6000 glue for the bails (this stuff would glue a person to the ceiling and hold)

-OR-

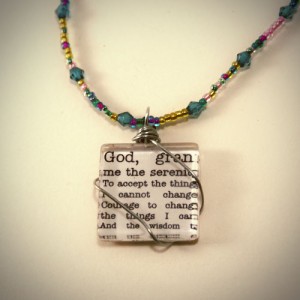
Jewelry wire to wrap pendants in a glue free way like I showed you previously:

Glue Free, Drill Free Way to Attach Pendants

I love this method for the fancier look compared to the glue on bail.  Sometimes people want simple, other times wire is just the special touch that makes them fall in love with a piece.

TUTORIAL:

XyronGlassTilePendant4

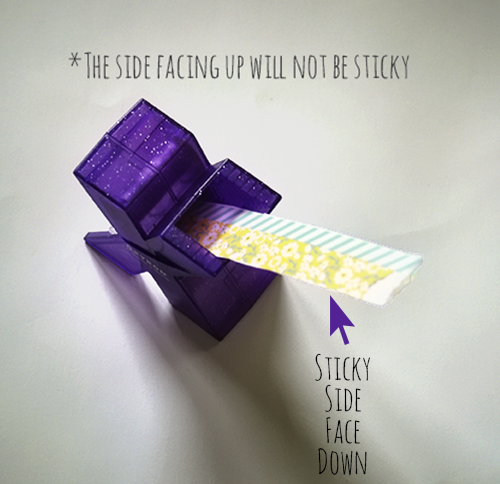
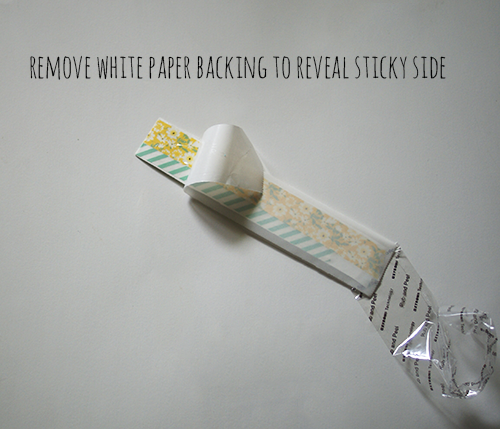
Take the image and cut into a strip that will fit in the Xyron sticker machine.  If you have a larger machine, you can run larger sheets through it to create stickers for several tiles at once.  Here I am using the 1.5 inch on cardstock covered on both sides with lovely washi tape.  Scrapbook paper, photos or whatever you want as your pendant image can be used.  Place the image side face down in the machine (this is the opposite of how you make most stickers since you are going to adhere the glass to the sticky image you want to show).  It is not really important for this example since my washi covered paper is the same on both sides.

XyronGlassTilePendant5

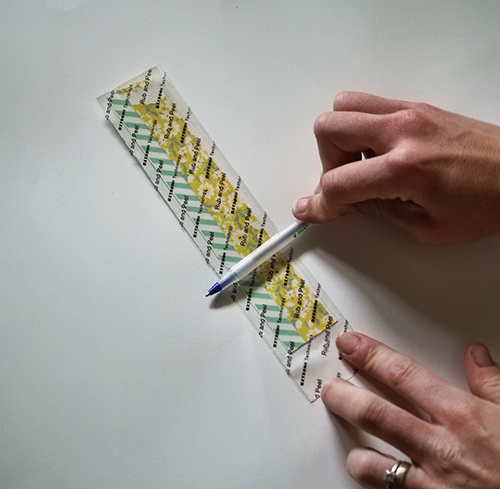
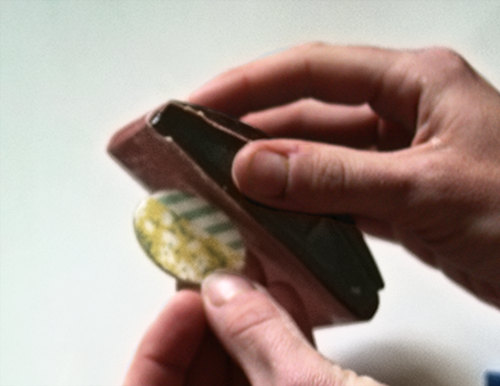
Burnish the image onto the adhesive with a bone folder, credit card or ink pen (yep, I improvised).  This assures the maximal adhesive transfers to the paper image.
XyronGlassTilePendant6

XyronGlassTilePendant7

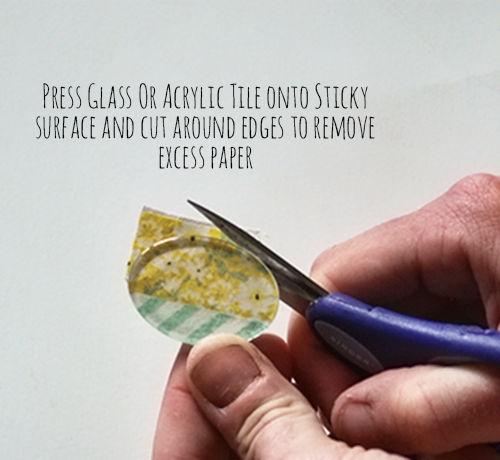
XyronGlassTilePendant8
Sand any uneven edges left after cutting to tidy up your piece.
XyronGlassTilePendant9

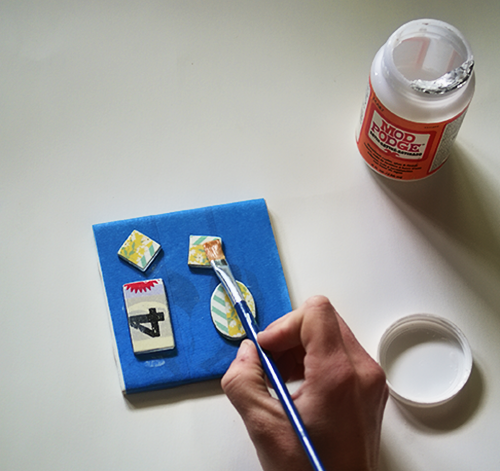
TIP:  Lay contact paper with sticky side up, or masking tape sticky side up on a tile or other flat surface. Place your pendants paper side up, glass side down on the tape or contact paper.  This keeps the pieces from moving around when you seal the back.  I lost hours of my life with sliding pendants that I moved back into place with my fingers, getting glue all over me and fingerprints all over my tiles.  No fun.  This is the best solution ever.

Apply 3 layers of Mod Podge, drying at least 30 minutes between each.  I like to let cure 1 week before sending the pendant off to it’s new home.  After 24 hours, I glue on the pendant bail or make a wire wrap bail like I discussed earlier (see above link).

XyronGlassTilePendants10

Speaking of Xyron, Feature Product Friday is happening, and the start of the show is Xyron.

What is Feature Product Friday, you ask?  It is the brainchild of my friend Amy of Plucking Daisies.  If you’ve been here awhile, you have probably seen her rockin contributions to SBLC.  I love talking about products with Amy.  We are equally obsessed with the next new creative spray ink, paper, design line, gadget and trinket that will help us create what we love and take our imaginations to new places.  We want to share our go to products with you, and see what you have come up with using them.   Each Friday will be a new product featured.  We will show you our projects, as well as a roundup of your best projects using the featured product (see the list below).

Even more good news… Amy is giving away a stash of Xyron supplies, so head over and enter the Xyron Giveaway at Plucking Daisies.

TOP PROJECTS USING XYRON


Guest Post: Beaded Hoop Earrings

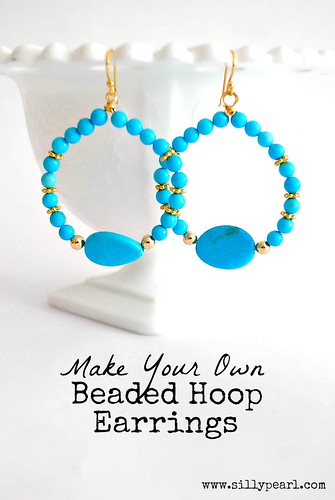
DIY Beaded Hoop Earrings by The Silly Pearl

Today I am thrilled to have Steph from The Silly Pearl here to share with you a fantastic beaded hoop earring tutorial.   She is a multi-talented crafter for sure, but I especially love her jewelry tutorials.  She was in the handmade bridal jewelry business before her twin girls came along, and her experience shines through her projects.  Might I just add that I am all over these earrings.   Thanks Steph!

Hello! My name is Steph from the blog The Silly Pearl, where I write about crafting, thrifting, cooking (and a teeny bit of gardening!), along with my 5 year old twin girls. Thank you so much to Johnnie for having me today on your blog. I was so honored when she asked me to guest post for her this week.

Hope you are having a great Labor Day weekend! Though ironically, my tutorial today doesn’t take much work at all! I’m going to show you how I made these Beaded Hoop Earrings.

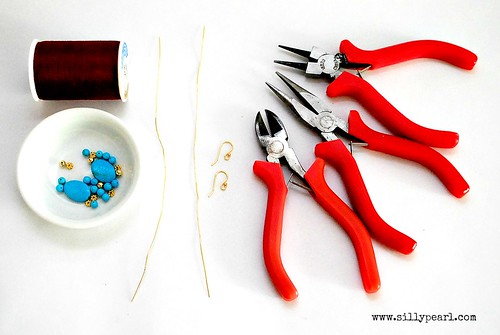
Here’s what you’ll need:

BeadedHoopEarrings1

  • An assortment of beads. This depends on the look you’re going for. I have a large focal bead in the middle, so I have two of those. Then I have three other types of beads, symmetrically strung on either side. I got all my beads at a local bead store, but you can find similar beads at Michaels or Jo-Ann.
  • Two pieces of jewelry wire cut to 6 inches each. I used Beadalon 24-gauge round wire, available at Jo-Ann. I would not go any thinner than 26 gauge or thicker than 22 gauge (too thin…it might break with wear, and too thick…too hard to work with).
  • Something cylindrical in shape, like a spool. This will be your template for bending the wire into a round shape. The finished diameter of the earrings is about 1.5 inches, so if you want bigger/smaller, then use a bigger/smaller template.
  • A pair of ear wires. I purchased these from Michaels as well.
  • Jewelry making tools: Flat nose pliers, Round nose pliers, and Wire cutters.

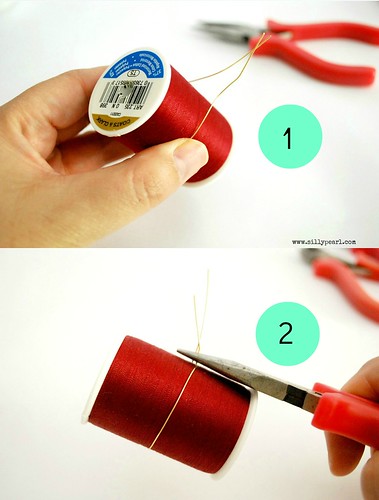
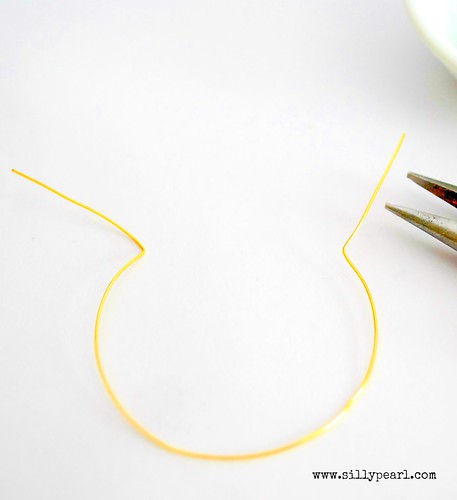
1. Wrap one piece of wire around the spool, so that there is an equal amount of length sticking out, if that makes sense. Then 2. Pinch the wire together so it’s the same circumference as the spool. You’ll be left with a little less than 1 inch of both the ends.

BeadedHoopEarrings2

So when you remove the wire from the spool, it will look like this, with two kinks in the wire.

BeadedHoopEarrings3

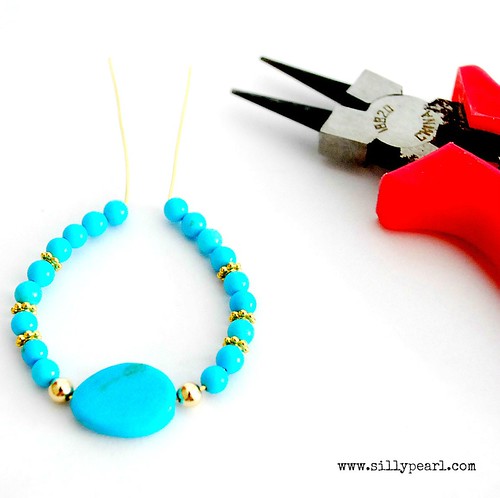
3. Now you’re ready to start threading on the beads. Use your fingers to gently straighten one of the kinks, enough to allow the beads to thread on. If you’re using a focal bead in the middle, thread that on first. Then 4. Thread on the small beads on one side of the focal bead, until there are enough beads to reach the kink. Next, 5. Repeat the same pattern on the other side, again straightening out the kink a little bit so you are able to thread on the beads.

BeadedHoopEarrings4

So when you have all your beads threaded on, it will look like this. For the next few steps, get your round-nose pliers ready…now I’ll teach you how to wire wrap, but you’ll be wrapping both those end strands (instead of just one strand as usual). To see a better tutorial on wire wrapping than I could ever do, visit BeadStyle Magazine’s wire wrapping tutorial, or check out the last few pages of every paper issue.

BeadedHoopEarrings5

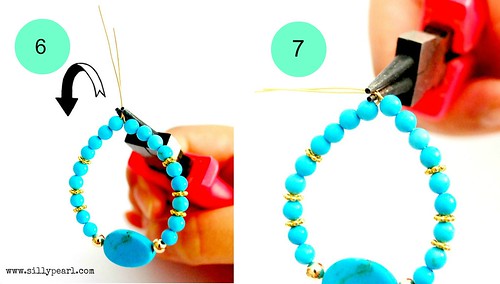
6. Grasp both strands with the round-nose pliers. Then 7. Twist your wrist to one side, bending both wires at 90 degrees.

BeadedHoopEarrings6

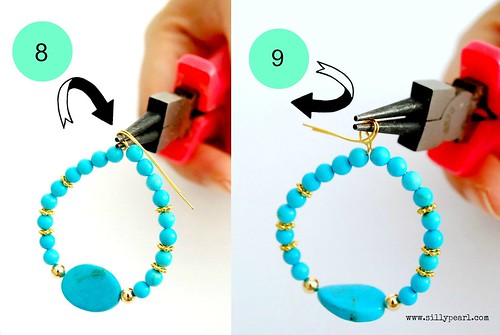
8. Using your fingers, grab both the ends, and loop it around the top of the round-nose pliers. Then, 9. Wrap the wire under the round-nose pliers, remove your pliers from the loop, and insert only the bottom point of the round-nose pliers into the loop.

BeadedHoopEarrings7

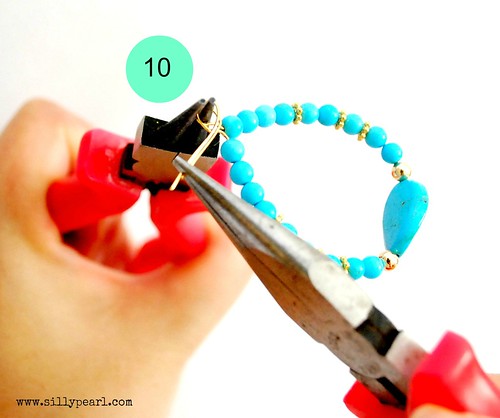
10. Now we’ll start wrapping the ends around the base of the loop to secure the loop. Grasp both ends with flat-nose pliers while you still have the round-nose pliers inside the loop, as described in step 9.

BeadedHoopEarrings8

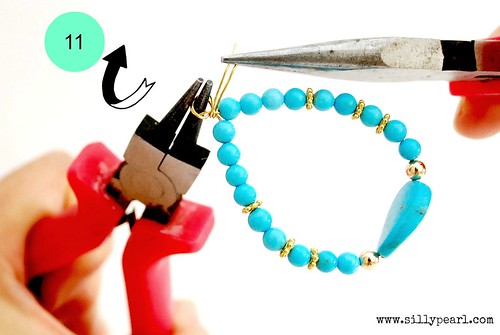
11. Wrap the wire around the base of the loop (there should be a teeny length of vertical wire at the base of the loop, where you formed the kinks earlier, which is where the wire will wrap around).

BeadedHoopEarrings9

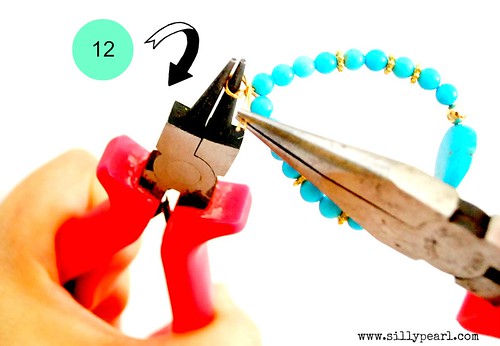
12. Keep wrapping a few more times until…

BeadedHoopEarrings10

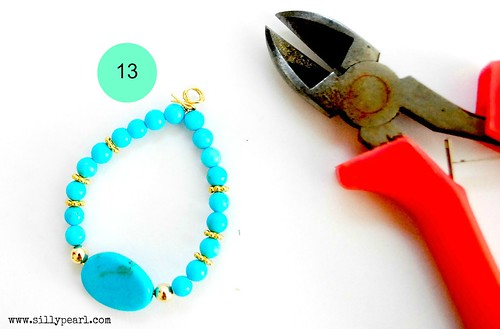
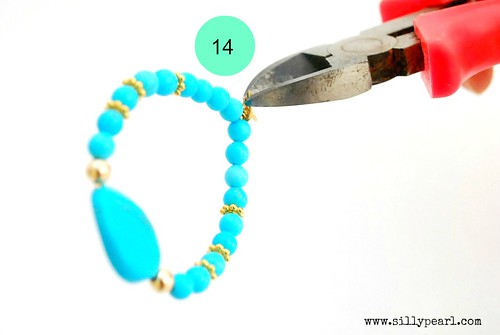
13. You are left with a short length of the wire ends. Next you’ll use your wire cutters…

BeadedHoopEarrings11

14. …to cut off these ends as close to the base of the loop (i.e. where your wrapped wire is) as possible, without snipping anything else!

BeadedHoopEarrings12

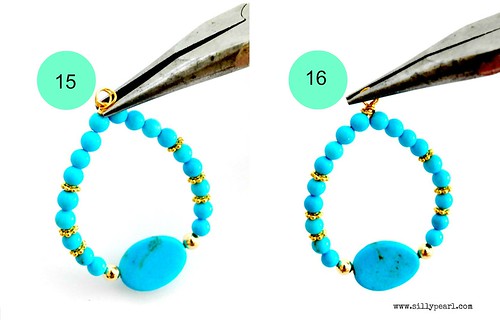
15. Then use your flat-nose pliers to flatten and tuck in those ends so you don’t have anything scratchy or pointy sticking out. 16. You can also use the flat-nose pliers to neaten-up the loops, which you want to try to make as uniform as possible but it doesn’t always happen! It’s ok…it looks rustic, right?

BeadedHoopEarrings13

16. Finally, take your earring wires. On the left in the picture below is a closed one. Usually with ear wires, you can open the loop to slide on your finished piece. Slide open the loop with your flat-nose pliers, like you would open a jump ring (see the BeadStyle Magazine link above for another tutorial on how to open jump rings with a sliding motion, which you would also use to open the earring wire loop).

BeadedHoopEarrings14

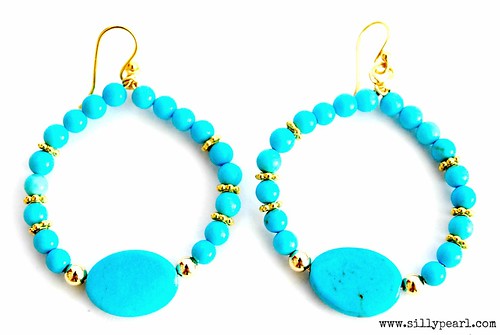
Repeat for the 2nd earring, and you’re done.

Beaded Hoop Earrings

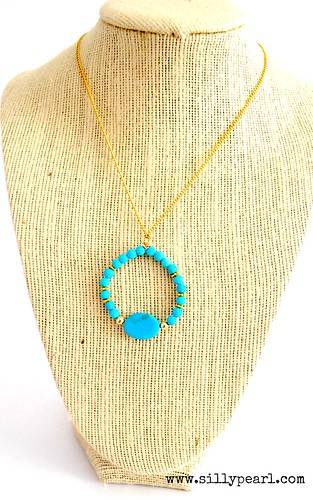
You could also make a pendant…instead of using earwires, just thread a chain through the loop.

Beaded Hoop Necklace

If you enjoyed this tutorial, I hope you’ll stop by my blog, The Silly Pearl, for more! I not only make jewelry, but enjoy almost every other type of craft.

TheSillyPearl

Again, thank you so much Johnnie for having me on your lovely blog today!

-Steph-

DIY Twig Flower Pot

DIY Twig Flower Pot

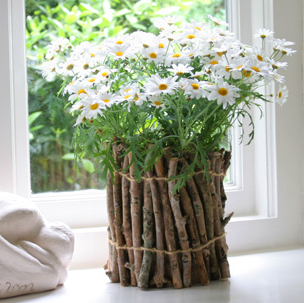
Bring some of the outside in, with this eco-friendly twig vase DIY at Nini Makes.  What a cheap, creative way to display your wildflowers, or gift that gorgeous bouquet.

DIY Crafter’s Clay Flowers

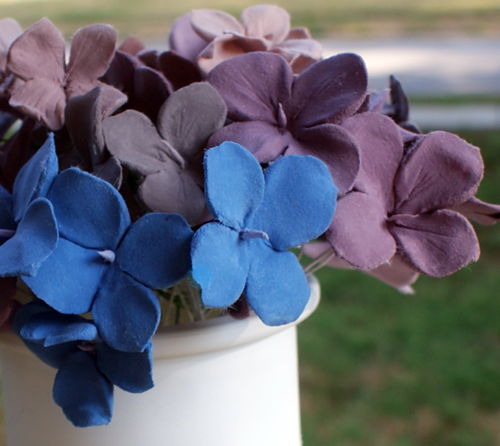
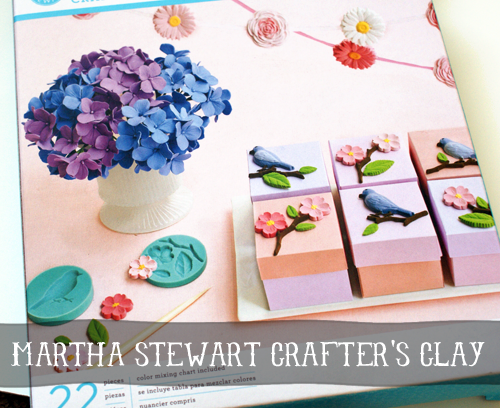
As much of a polymer clay fanatic as I am, I was a unsure how Martha Stewart’s Crafter’s Clay would compare.  I finally got my hands on some, and I am loving the stuff.

There are several differences between this clay and polymer clay.  Like polymer clay, this is pretty easy to use, and you can mix some amazing colors.  It doesn’t fingerprint as easily as polymer clay, which is nice.  You don’t have to condition it, so prep time is essentially zero.  Just mix the color you want and start creating.  It has a different, lighter, spongy kind of feel compared to polymer clay.  One down side is that it starts to dry pretty quickly when exposed to air, even though the instructions say to let it dry for 24 hours.  I would say the working time is about 25 minutes before it becomes to dry to shape.

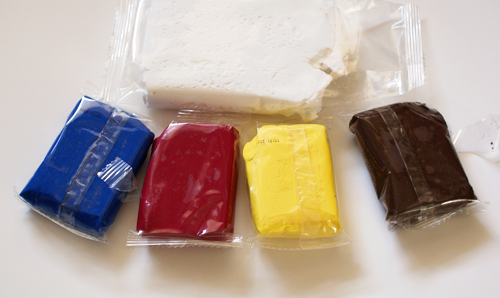
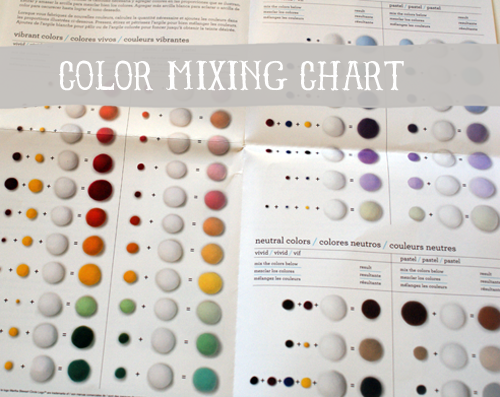
The kit I got came with instructions for making these lovely hydrangeas, a color mixing chart, crafter’s clay in white, brown, yellow, red and blue, detailing tools, 4 silicone molds, floral tape and floral wire.  Read on to see how to make your own hydrangea bouquet.

Crafter's Clay Tutorial

Crafter's Clay Tutorial

Aside from what comes in the Martha Stewart Crafter’s Clay kit, you will need craft glue (I used Glossy Accents).

TUTORIAL:

Clay Hydrangeas Tutorial

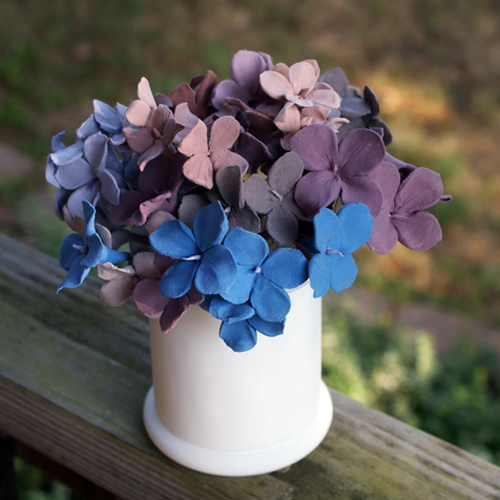
I bunched my flowers into groups of 4 by wrapping the wires together and placed in a glass jar from Goodwill that I spray painted white.

Clay Hydrangeas

If you get a chance to work with this, take it.  You can easily make your own lovely bouquet.  I got my kit from Michael’s recently, using my 40% off coupon.

Clay Hydrangeas

Under $10; Mother’s Day Gifts You Can Make

[pinit]

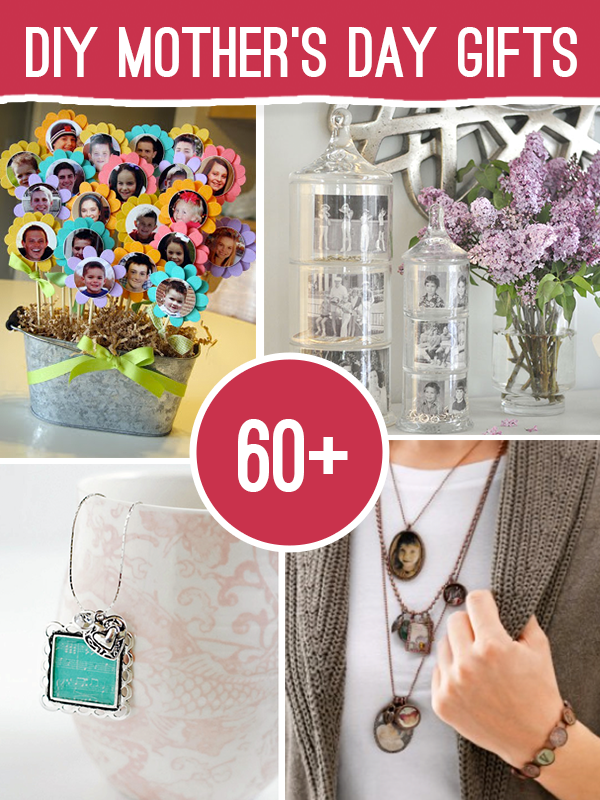
Over 60 Mother's Day Gifts to make for less than $10 @savedbyloves

[pinit]

Mother’s Day is rapidly approaching. I gathered up some great handmade gift ideas with mom in mind, that you can make yourself for under $10. With jewelry, photo, spa and home gifts to choose from, you will find something just perfect for your mom and she will love that you made it for her.

Jewelry


Photo


Home/Spa


Sizzix Cut & Embossed Painted Can Flower

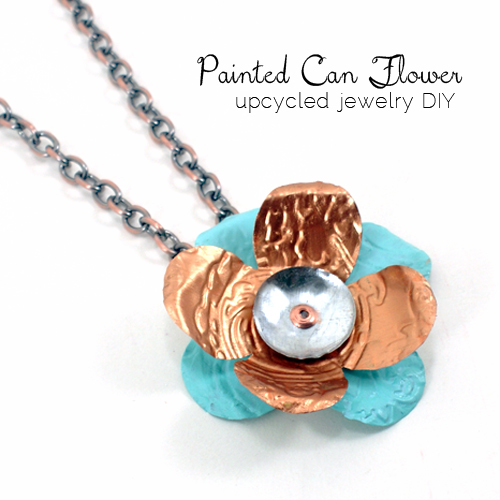
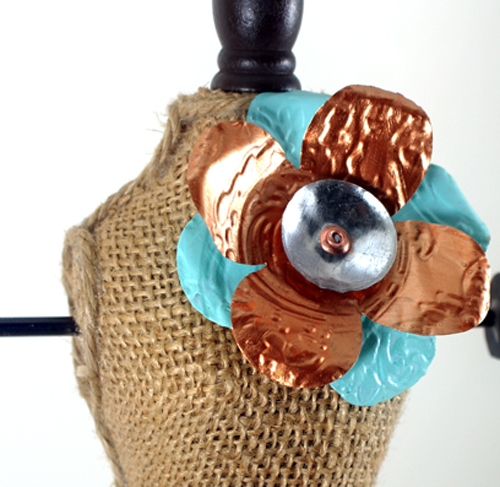
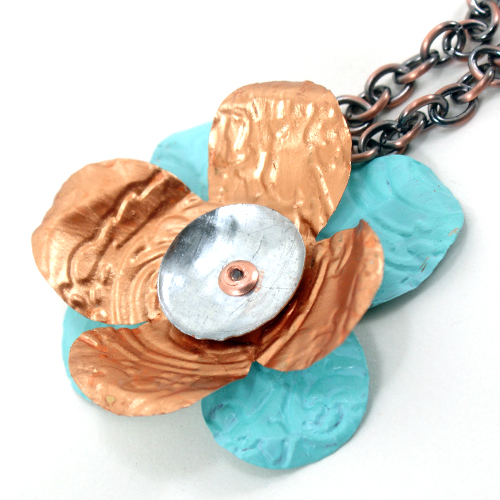
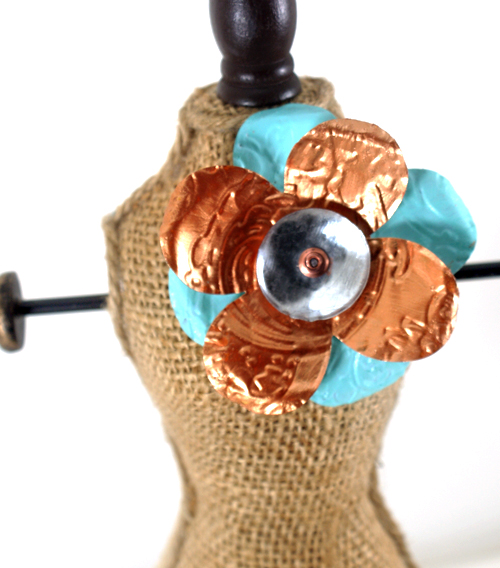
Upcycled Can PendantHere is a cool Mother’s Day gift idea.  This gorgeous flower pendant is made from an aluminum can and a copper rivet joining the 3 layers.  It really couldn’t be simpler or less expensive.  Mom will love it’s uniqueness.  You can paint it to suit her tastes and she will have a heartfelt, handmade gift on her day.

Handmade Mother's Day gift idea

Instructions:

Rinse and cut your aluminum can to a sheet that fits your die.  Cut two flower shapes and a circle.  Emboss the flower shapes and hammer the circle into a dome shape.  Paint petals as desired with acrylic paint.  If you like the colors on the can, no need to paint.   I used Lumiere and sealed with Krylon Clear Coat.

When that dries, connect layers with rivet or eyelet.  Punch hole in back most flower petal in for a jump ring and add your choice of chain or cord.  That is it.

Upcycled Jewelry Tutorial

DIY Mother's Day gift

Printable Mother’s Day Card

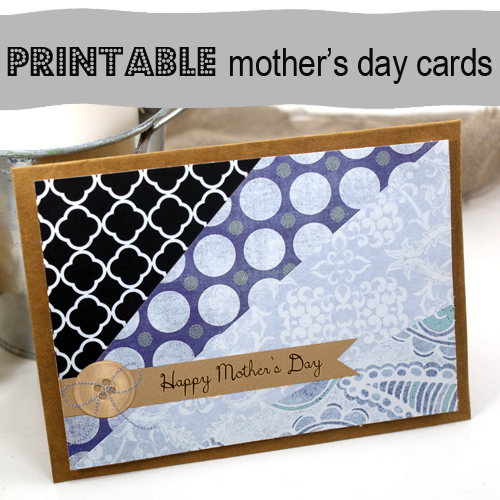
Printable Mothers Day CardI was inspired by this month’s Paper Crafts Magazine to design a Mother’s Day card.  Here, I printed it at 5,75 in x 4 in and mounted it with foam stickies onto a brown card blank measuring 6.25 in x 4.5 in.  Easy!

You could also just print and fold into a card on white card stock.

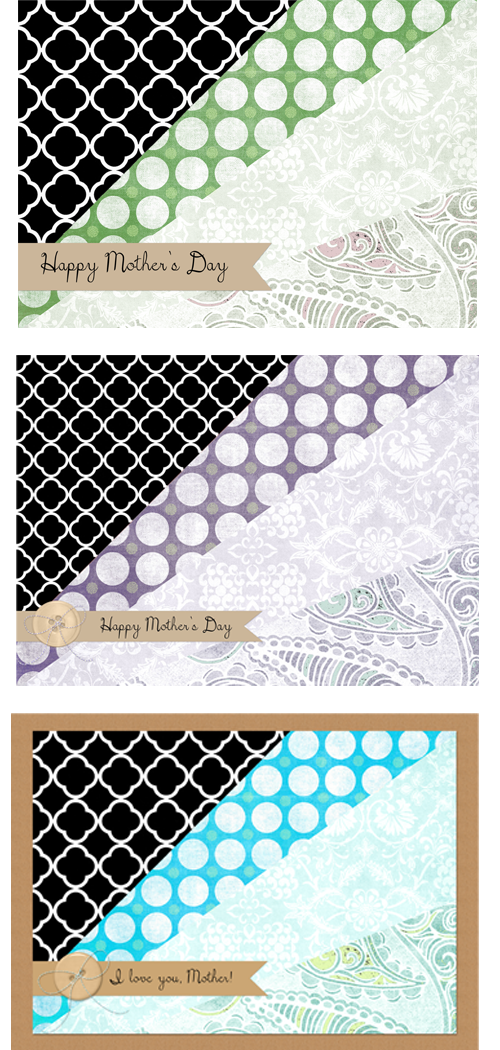
Here are the color schemes:

Free Printable Mother's Day Card

To download the full size image for print, visit my other site,  Printable Decor.

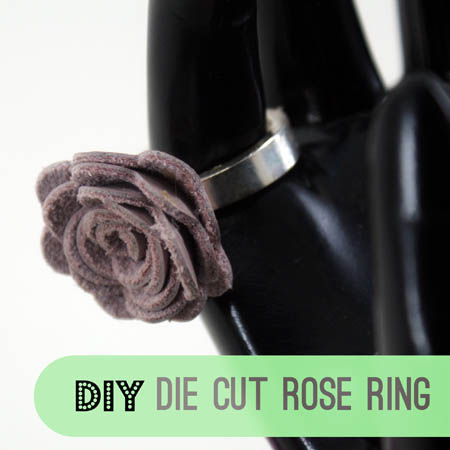
5 Minute DIY Leather Rose Ring

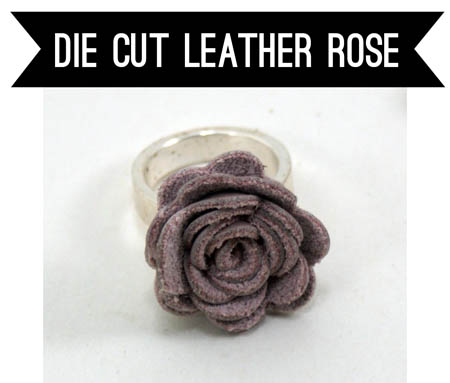
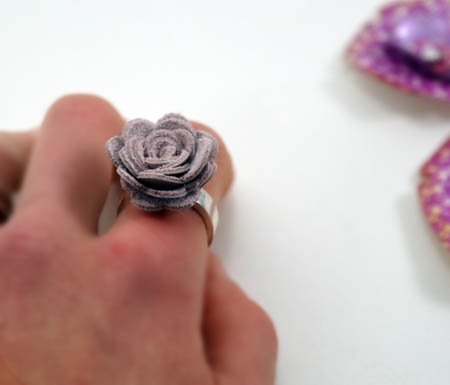
Sizzix Die Cut Rose Ring

Need a gorgeous, last minute gift that you can easily and quickly hand make?  Maybe your are looking for an alternative to candy for a girl’s Easter basket.  Look no further.  This leather rose ring takes less than 5 minutes with a die cutter such as Sizzix Big Shot,  used in this tutorial.  If you don’t have a die cut machine, there are a truckload of fabric rose tutorials that will help you find a template you can cut by hand.   Now on to the tutorial.

Leather Rose Tutorial

Supplies I used:

Sizzix Machine

 3D Rose Die

Leather Scrap (from old purse)

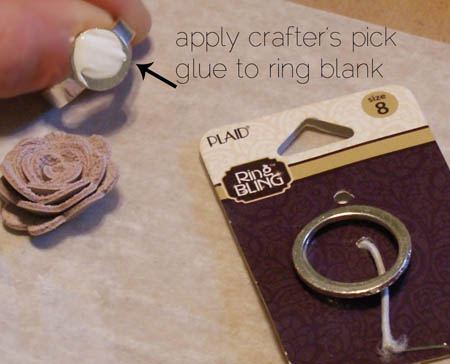
Crafter’s Pick Glue (or other glue for metal)

Plaid Ring Bling or other Ring Blank

Flower ring tutorial

It is pretty simple.  Just die cut your flower, roll into rose shape and glue onto ring blank.  Let dry per package instructions.  Tah dah.  5 minute sweet ring!

Sizzix Jewelry

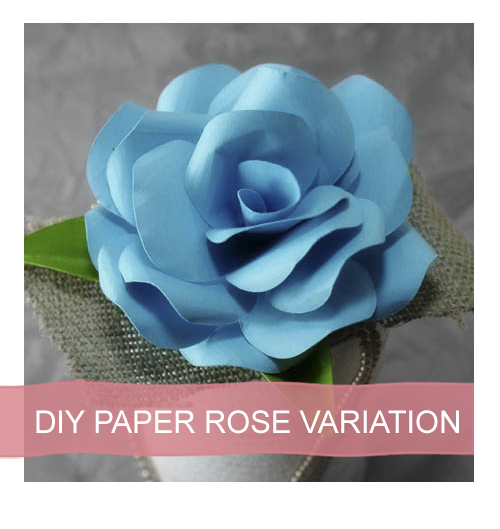
Paper Roses Another Way

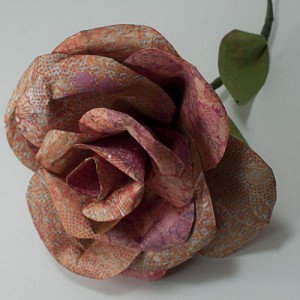
Paper Rose Tutorial and TemplateBeing asked to do centerpieces at a June wedding, I have been trying out paper

rose methods like none other.  This is one of the first ones I came across, and it is

my favorite for several reasons.  It is quicker and less complicated than others, and the

result is gorgeous!  Not only that, but think about the money saved on flowers

when you make your own from paper, and they won’t die.  Perfect!

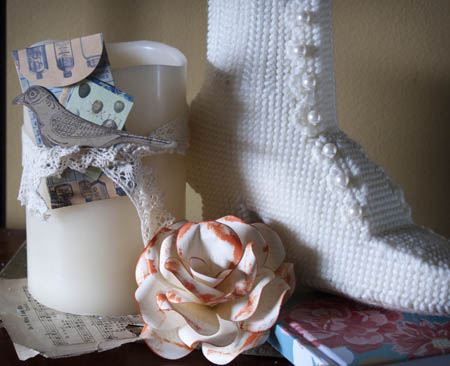
Wedding centerpiece ideas

I found the full tutorial at Ellinee, with free printable templates.

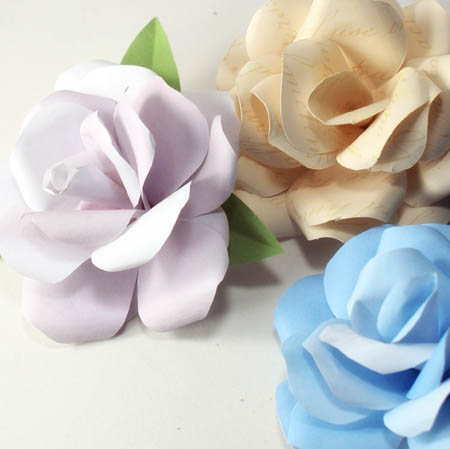
I have made paper roses using this method from cardstock, printer paper

and coffee filters.  They are all stunning, but heavyweight cardstock

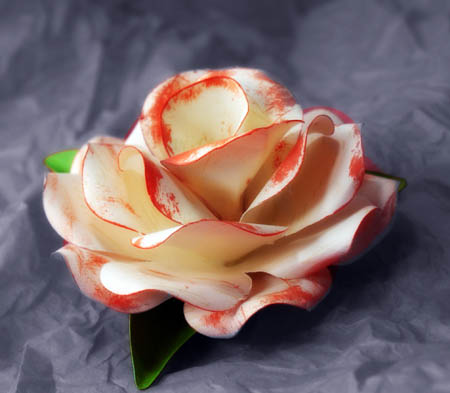
makes the prettiest flowers in my opinion.  I like to chalk the edges

in a bright, contrasting color like here…

Paper rose tutorial

I just love it!!!

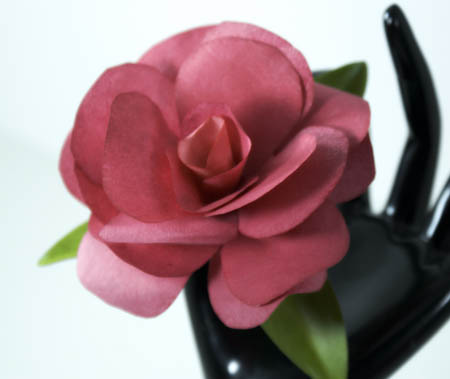
Here is one I made from coffee filters and painted with watercolor.

DIY Wedding Ideas

Since I need my roses with a stem for the centerpieces, I followed the tutorial linked

above, except I built the rose around a floral wire like I showed you

in this paper flower tutorial a couple of weeks back.

This is my favorite!  Remember it from this decorating with vintage

scrapbooking ephemera post?

Do you have a favorite paper flower tutorial?

I would love your ideas!

PAPER ROSE DIY WITH TEMPLATE

Paper crafts

As promised, here is the paper rose tutorial I teased you with at the end of

Monday’s rose embellished frame tutorial.  You can use any decorative scrapbook paper you want,

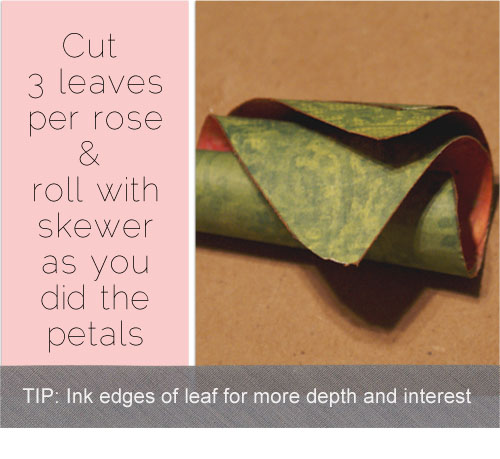
but it should have print on both sides.  I like to ink the edges of the petals and

leaves with distress ink pads.  The possibilities are endless, so raid those scrapbooking

supplies and lets make some gorgeous roses!

SUPPLIES:

SCRAPBOOK PAPER (double sided)

CRAFT GLUE

FLORAL WIRE

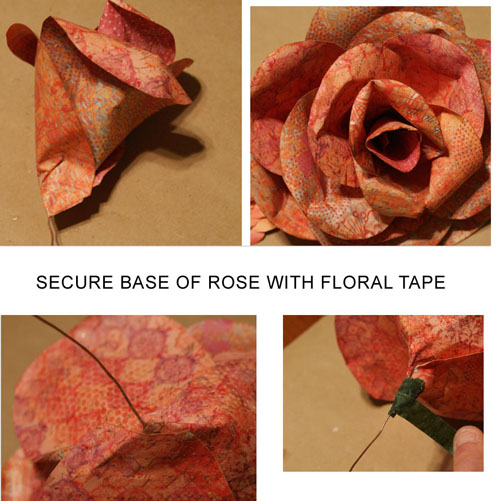
FLORAL TAPE

PETAL & LEAF TEMPLATE (PRINT AND CUT OUT)

SCISSORS

BAMBOO SKEWER


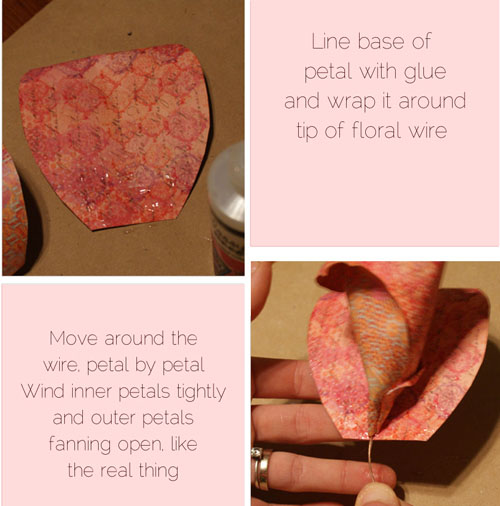
WHEN YOU ROLL THE PETALS, DO 3 AT A TIME BY STACKING THEM

AND ROLLING THEM TOGETHER.  SLIDE THE BAMBOO STICK OUT,

LEAVING A “TUBE” OF ROLLED UP PETALS.

STRAIGHTEN THEM OUT TO GLUE BASE AND FOLD

AROUND FLORAL WIRE IN NEXT STEP.


ADD LEAVES IN DESIRED POSITION
DOWN STEM WITH FLORAL TAPE


Aren’t they FABULOUS?

Mother’s Day gift… check.

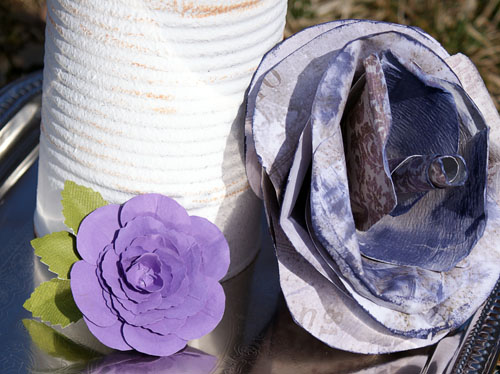
PURPLE? 

Absolutely.

Best part… they live forever!

Paper rose tutorial

Privacy Policy