How to Make an Altered Pendant

#Altered art pendant tutorial @savedbyloves #Jewelry #Handmade

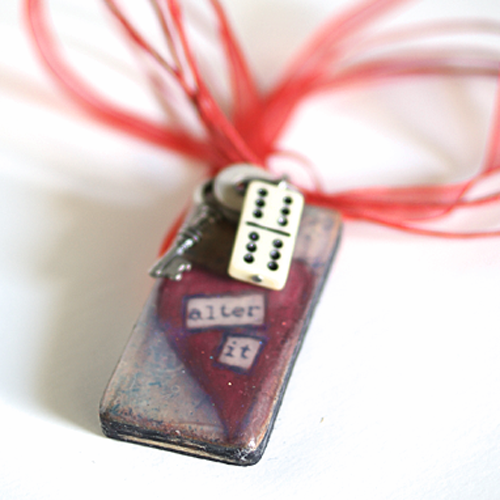
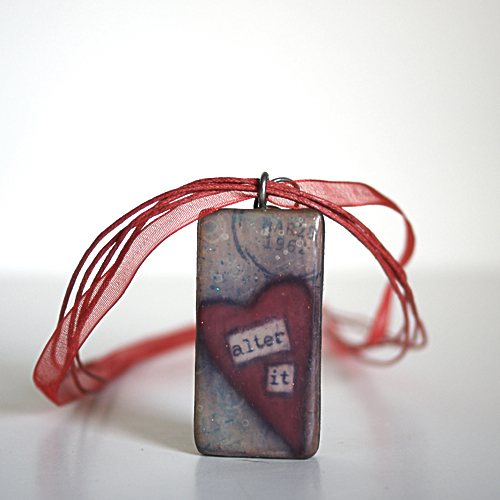
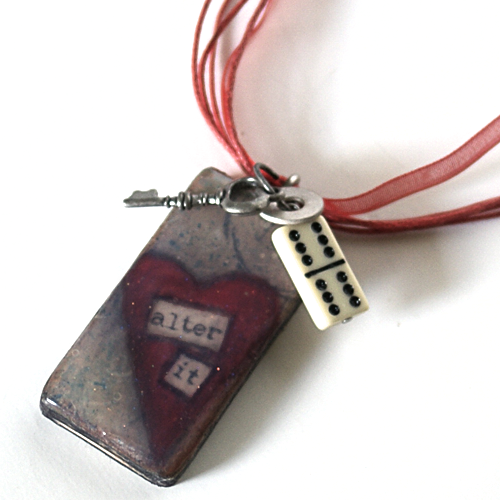
This is another scroll saw project.  I cut a domino sized rectangle from 1/4 inch plywood as my pendant base.  I love altered dominoes, but they are often quite thick/chunky, and have embossed surfaces on both sides.  This makes it hard to adhere paper without having bumpy lumpiness.  Using 1/4 inch plywood solves these issues, and is super cheap.

SUPPLIES:

1/4 inch plywood rectangle 2×1 inches

Matte gel medium

150 grit sand paper

Small, detail paint brushes

Paper towels

Stamps of your choice

Stazon Jet Black

Glimmer Mist Turquoise Blue

Scrapbook paper 2×1 inches

Acrylic paint

Charcoal pencil

Mod Podge Dimensional Magic Glitter Silver

Tim Holtz Chitchat Stickers

Charms

Small Eye Hook or glue on bail

Necklace cording

#Altered art pendant tutorial @savedbyloves #Jewelry #Handmade

TUTORIAL:

  • Paint plywood rectangle with black acrylic paint and let dry
  • Adhere scrapbook paper with print of your choice to pendant base with matte gel medium (I traced my wooden rectangle onto paper scrap and cut out to fit)
  • Let dry completely (about 30 min) and sand edges to smooth and blend paper into wood (this took away some of the black paint on the sides, which is what I wanted since I was going for a distressed look)
  • Stamp as background paper as desired with black ink and spray with glimmer mist.  Let dry.
  • Draw heart with charcoal pencil and paint with red acrylic wash (mix small amount of red acrylic paint with a few drops of water and paint heart so that paper print still shows through – you may need to dab with paper towel)
  • Apply thin, even coat of matte gel medium and let dry 30 min (you can hurry this along with a heat tool)
  • Apply chitchat word stickers (i used “Alter it”) and outline with soft charcoal pencil.
  • Apply layer of matte gel and let dry
  • Outline heart with charcoal pencil and blend for shadowing with Qtip or blending nibs
  • Coat with matte gel a final time
  • Once dry, screw small eye hook in top for hanging mechanism, or glue on a bail
  • Apply Dimensional Magic Silver Glitter – For a domed look, apply thin, even layer and let dry for a couple of hours.  Then apply doming layer.  Let sit for 24 hours.
  • Add charms and string as desired
 

Halloween Decor With {Scrapbooking} Attitude

Scrapbooking Attitude Halloween Decor DIY at savedbylovecreations.com #ScrapAttitude #Halloween #Fall #Crafts

I had the opportunity to try out a cool new product called Scrapbooking Attitude, and am excited to tell you about it.  This is a printable, transparent film you use with your inkjet printer for endless creative possibilities.  Being a huge fan of image transfers, I was thrilled to give this a whirl.

50+ Image Transfer Techniques

Image transfers are done onto glass, wood, paper, polymer clay, ceramic and more, using a variety of techniques, from acrylic mediums to packing tape.  What I love about Scrapbooking Attitude is that it is simple to use, the results are fantastic (even on the embossed, textured surface I used in this project), and it requires an inkjet.  In my experience, inkjet transfers techniques compared to laserjet are not as abundant, are more difficult, and don’t come out  as nicely.  This is bad news since most people, myself included, have the less costly inkjet printer at home.  Scrapbooking Attitude is a fantastic solution.  My only problem was focusing in on a single project.  You will be seeing me use this product more in future projects.   For this post, I went all Halloween on you.

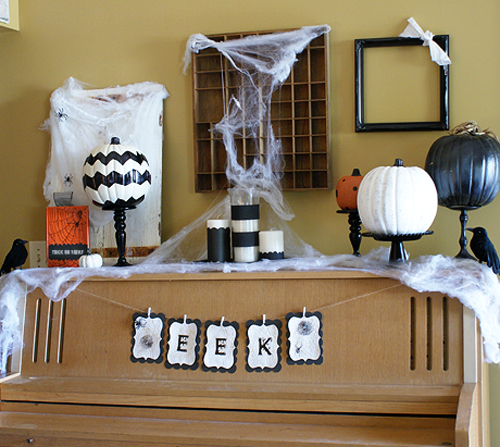
Scrapbooking Attitude Halloween Decorating

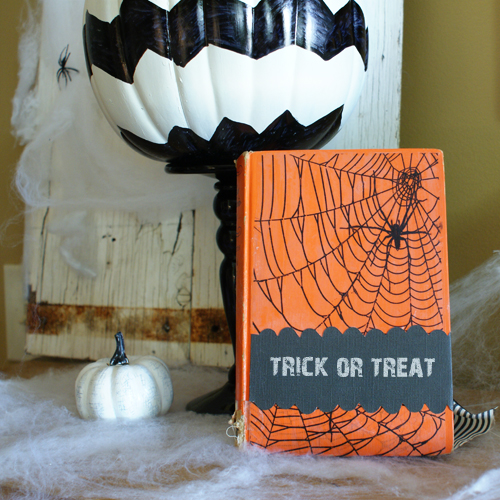
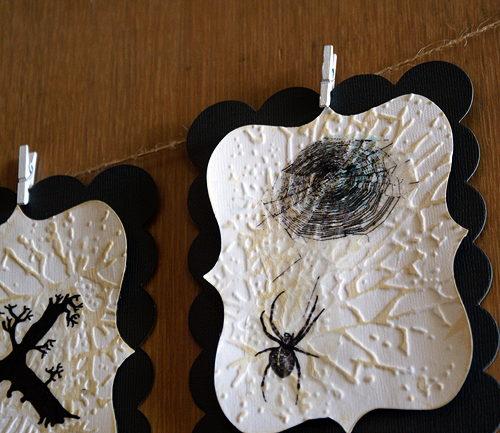
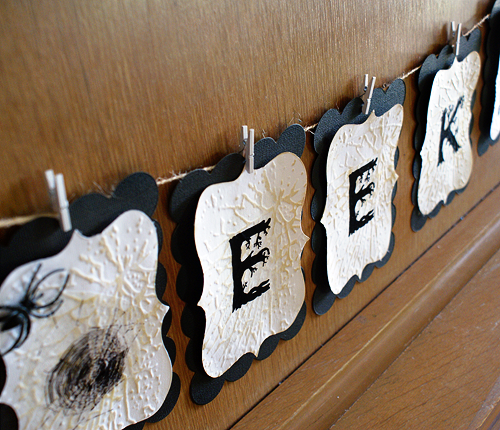
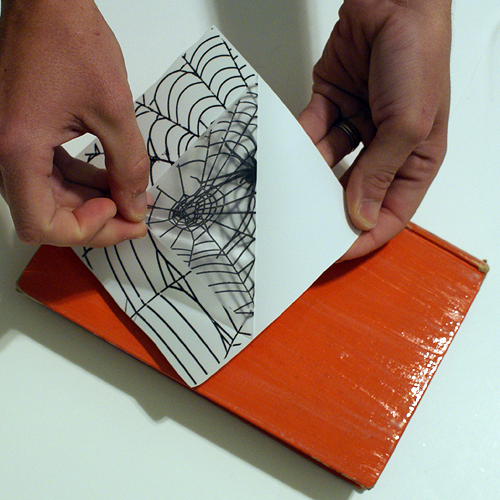
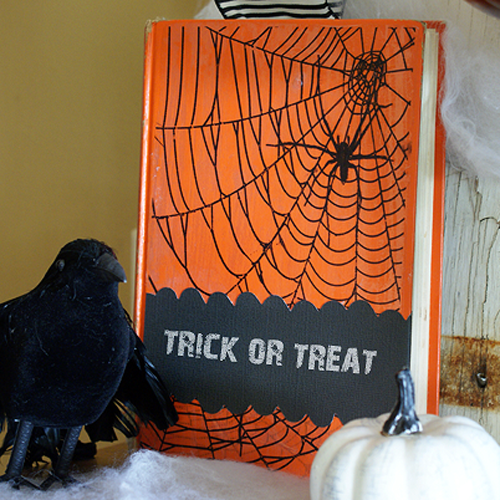
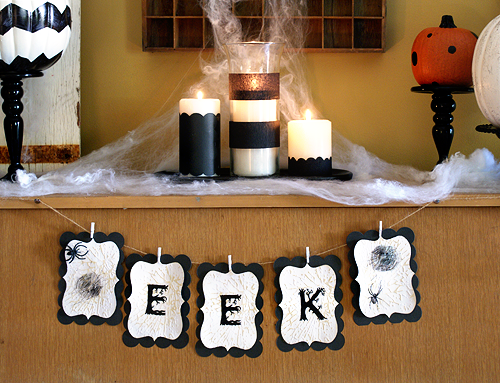
The following step-by-step photo tutorial shows you how I transfered “EEK” and spider graphics I created in Photoshop (available for you use as a free Halloween Printable) onto die cut, embossed paper for the banner.  I used the same steps to transfer the spider web graphics onto an old book with a solid orange cover.

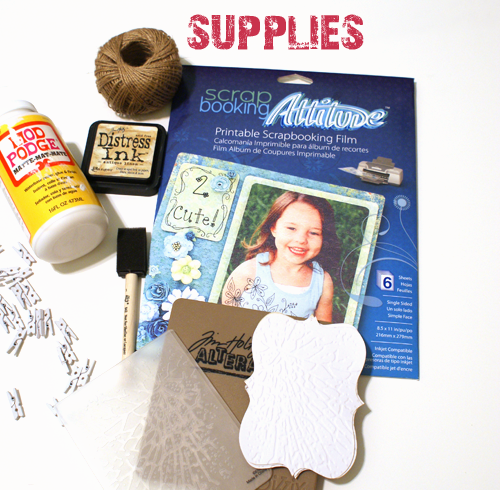
SUPPLIES:

Scrapbooking Attitude

Die Cut, embossed white cardstock  (I used this Tim Holtz die for Sizzix, and this Tim Holtz embossing folder)

Antique Linen Distress Ink Pad to ink the raised areas of the embossed cardstock

Mod Podge

Foam brush

Twine

Tiny white clothespins

Black Cardstock Die Cut Scalloped rectangle (I used a Sizzix scallop rectangle die)

Antique Linen Distress Ink Pad

Scissors

Inkjet Printer

Mod Podge 3D foam mounts

TUTORIAL:

Scrapbooking Attitude Halloween Decor Tutorial

 Once dry, I layered the transferred image and shape onto a black cardstock scalloped rectangle cut using Sizzix.  I used Mod Podge 3D foam mounts to adhere the layers.  Then I just clipped them into place on the twine with my tiny white clothespins.

I just love how this transferred into the grooves of the texture.  It looks like it is one with the paper and you can see the background through the image.  You can achieve the transfer with a lamination machine, an iron, or a glue stick, or use Mod Podge like I did here.  The instructions with the product are extremely detailed, and my craft blogging cohorts are posting their techniques, tips and tricks as well.  At the end of this post is a gallery of other blogger’s creations usiing Scrapbooking Attitude for you to see more of what is possible.

To purchase Scrapbooking Attitude packs, visit the website linked. While you are at it, join me in following them on Facebook, Twitter and YouTube for the latest tips and projects.


*I wrote this post as a part of a paid campaign with Scrapbooking Attitude and The Blueprint Social.  All opinions are mine and honest.


Find it, Cut it, Put a Candle in it


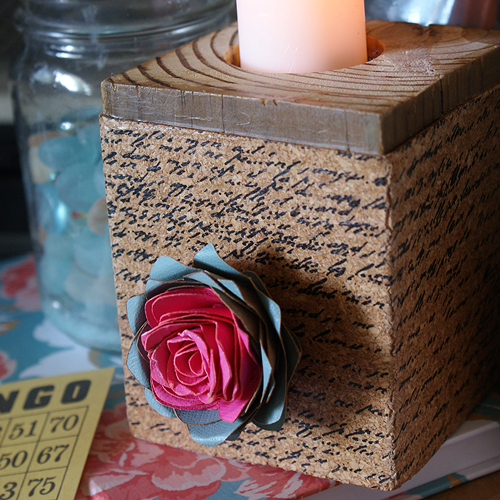
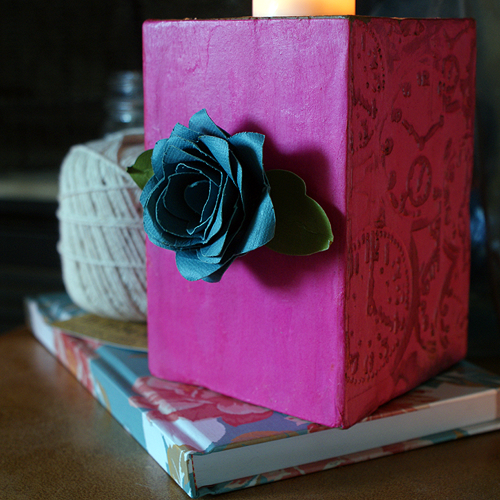
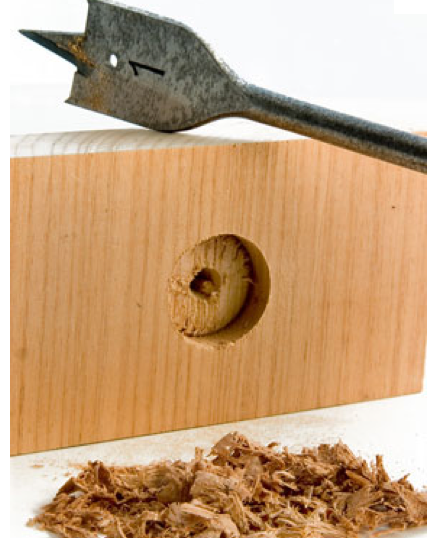
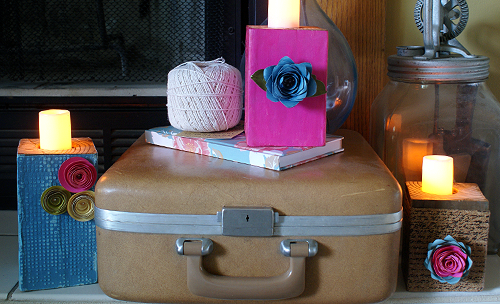
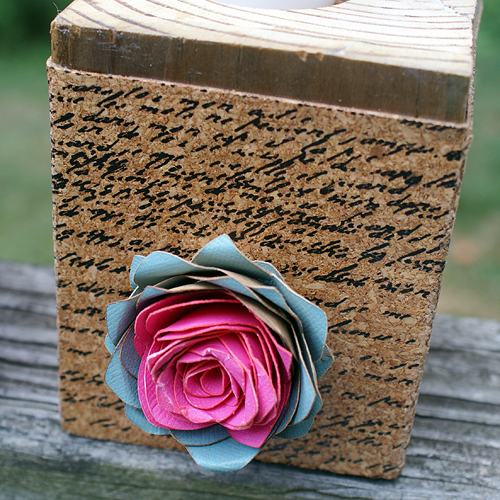
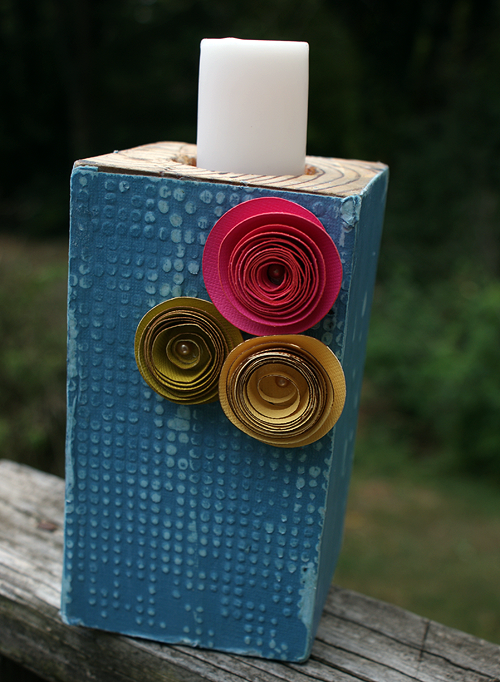
This is another project made from materials I found while running.  Someone had discarded a perfectly good 4×4, and when I saw it, I immediately drew to mind this DIY votive holder from Jen at Tatertots and Jello.  I made my own version, decorated with scrapbook paper and flowers, embossed and cut with my Sizzix.  I didn’t have access to a drill press, so mine are more than imperfect.  Still, they look great.  I am gifting them to my stepdaughters.

TUTORIAL:

DIY Votive Candle Holder From 4x4

Getting rid of the leftover hole was not easy.  It look pretty bad, and was uneven, so I poured resin in to level the surface for the candle.  After doing this project, I learned about spade drill bits.  I have since purchased one from Lowes that is 1.5 in, and have not yet used it.  I will update this post when I do.  It seems like it would be way easier for this type of project, since it gets rid of the middle circle area.

To decorate the candle holders, I used Mod Podge to adhere paper that I had embossed with Sizzix.  I attached paper flowers I made with my Cricut.

Picture courtesy of http://electrical-maintenance-guide-and-tips.blogspot.com

Video: DIY Beaded Macrame Bracelets With Mod Podge Charms

Beaded Macrame Charm Bracelet Tutorial

Make Beaded Macrame Charm Bracelets

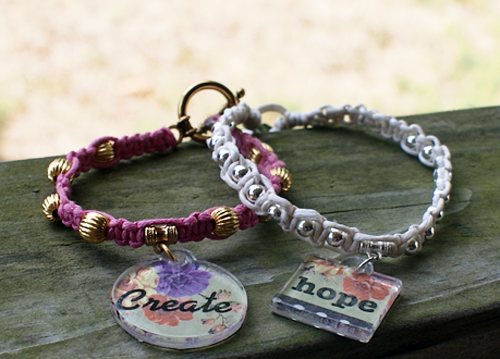
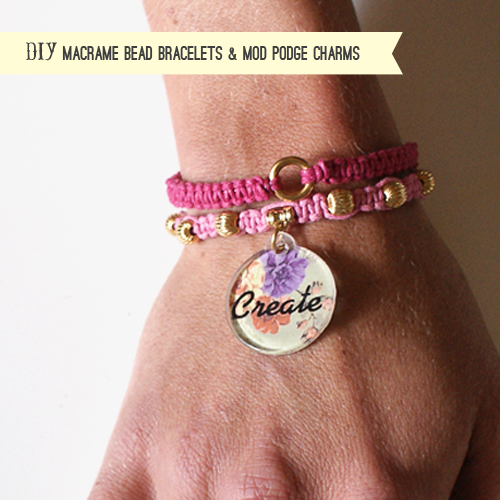
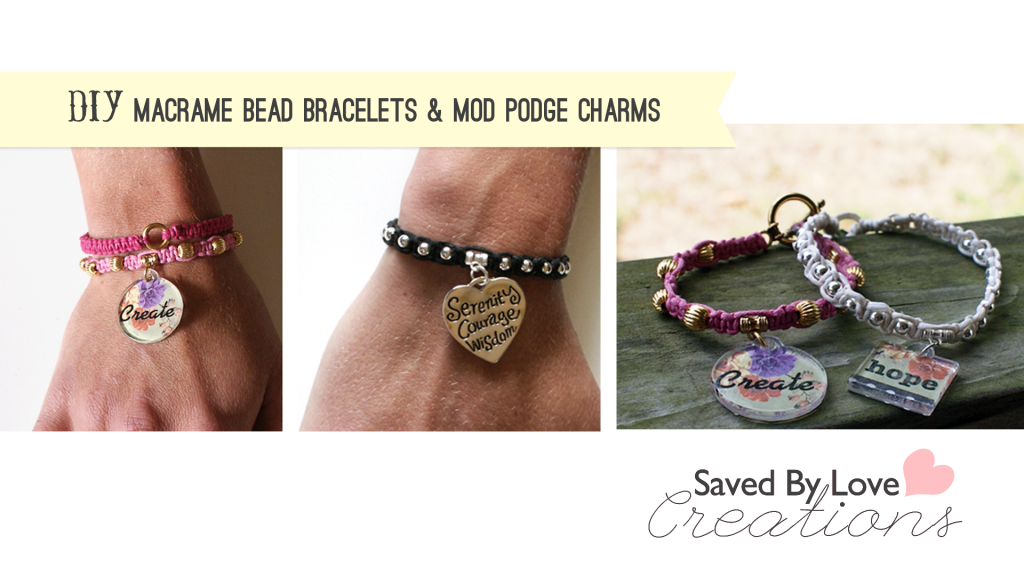
Have you had a chance to play with Mod Podge’s new Podgeable Papers and Shapes?  I used the nature pack to create these cute charms, which I attached to beaded macrame bracelets I made.  This video tutorial shows you how to make the charm ready bracelets and the charms.  Attach a clip to the jump ring to make them interchangeable and swap them out to fit your mood.

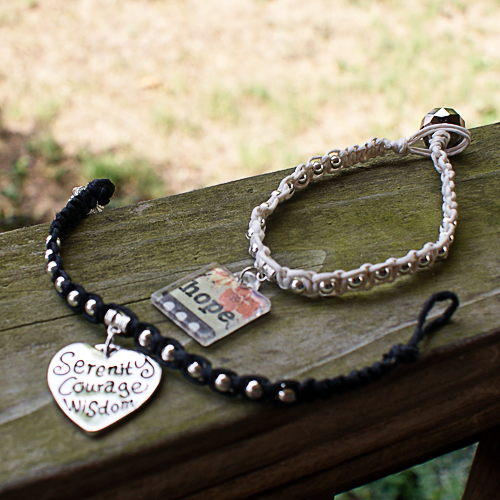
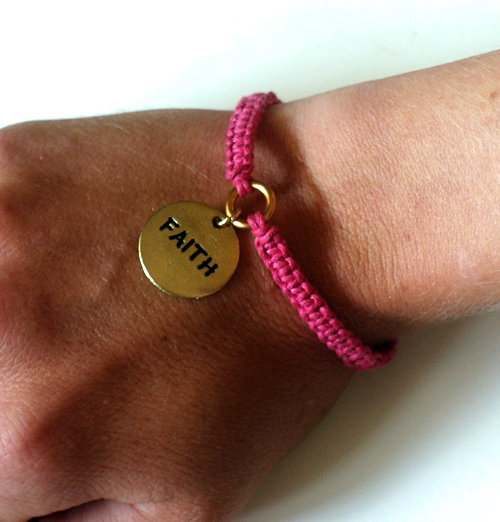
Any kind of charm will work, if you aren’t interested in making custom pieces.  Here are a couple of metal charm macrame bracelets:

On to the video:

Macrame Beaded Charm Bracelet Tutorial

50+ (& growing) Bracelets to Make

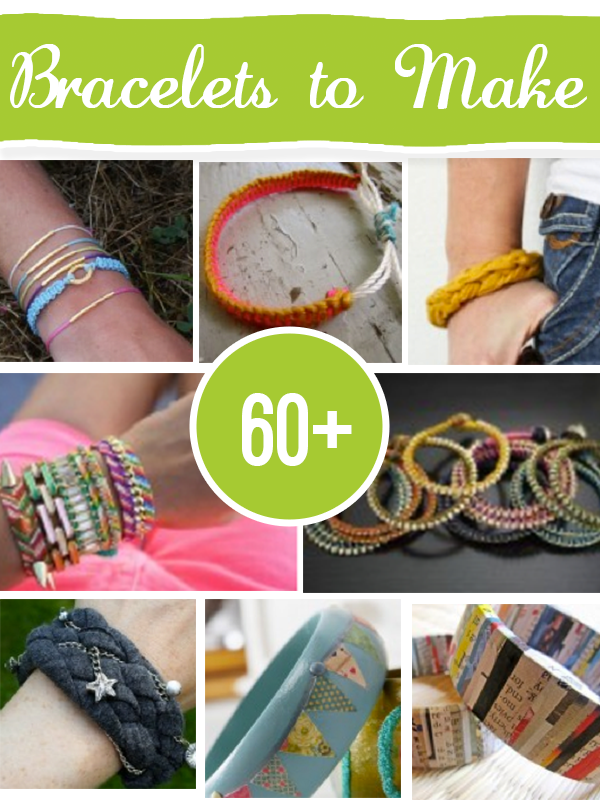
over 60 DIY Bracelets to make from @savedbyloves

The bracelet mania has crept into our 50+ round-ups here at Saved By Love Creations.  You will see a few I have made, and a ton that inspire me.  I hope you enjoy these projects and this round-up as much as I have enjoyed compiling it.  I would love to chat more, but there are bracelets to be made and bare wrists to be adorned.

[pinit]

BraceletPinterestTemplate50plus[pinit]

Mod Podge Transfer Instagram Photos to Canvas & Text Embellish

Mod Podge Transfer

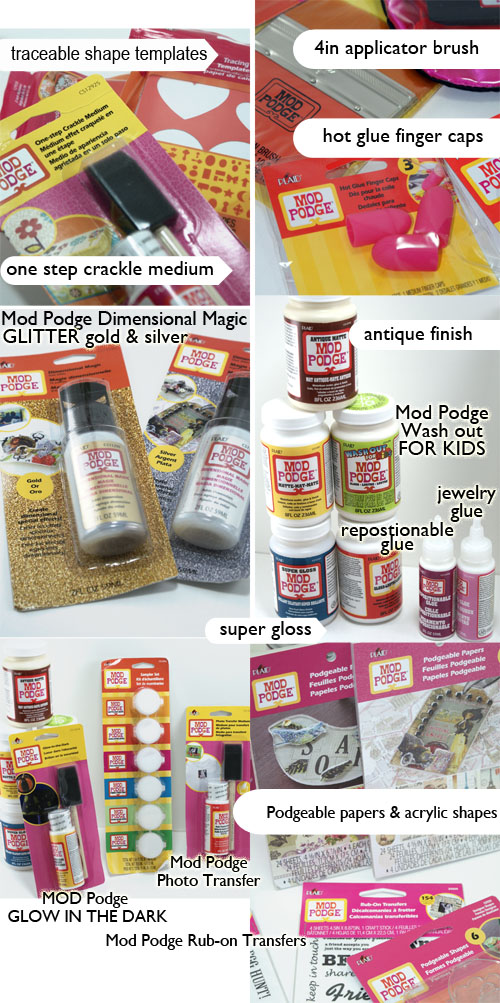
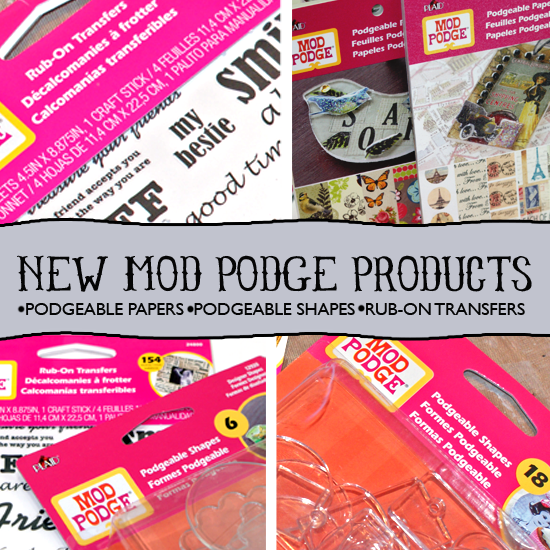
I have been busting at the crafty seams to tell you about this new product line from Mod Podge by Plaid Crafts.  It includes Podgeable collage papers, Podgeable Shapes, a bunch of new Mod Podge formulations, finish sprays and tools!  I could not believe when I opened the box and saw all of the shiny new supplies:

Mod Podge Product Line

Mod Podge Products By Plaid


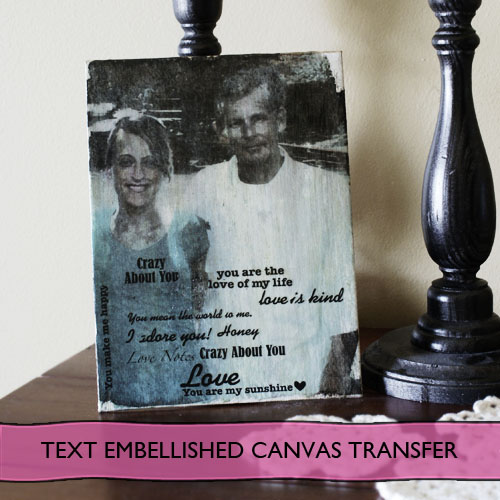
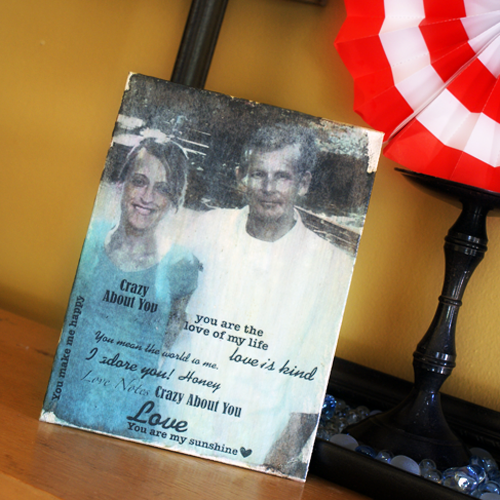
I have used many of the products since getting the package in the mail and will show you a round up at the end of this post.  Today’s project uses the same image transfer to canvas I showed you last week, using Mod Podge Glossy for the transfer and Mod Podge Antique for the finish coat, with a couple of tweaks –   I used Photoshop to create an Instagram effect on the photo before printing it for the transfer.  After the photo transfer, I used Mod Podge Rub-On transfers to embellish the final canvas with text.

You will need:

  • Your photo printed on laser jet
  • Mod Podge Glossy Finish
  • Mod Podge Antique Finish
  • Mod Podge Rub on transfers
  • Foam brush or other paint brush
  • Canvas to fit your print (the print used here is 11×14)
  • Bowl of water
  • Dry towel
  • Mod Podge brayer or squeegee
  • Mod Podge Silicone mat, or other non stick work surface

Follow the instructions I showed you previously, using your photo.  I used these free Photoshop actions by Daniel Box to edit my photos with Instagram effects in PS before having them laser printed at my local Office Depot.

Instructions:

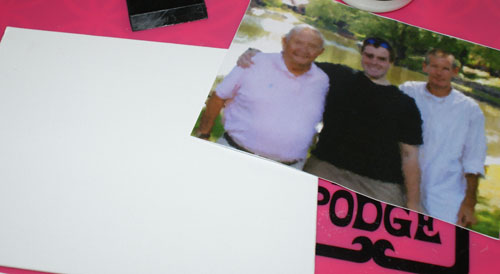
  • Cut Photo to fit canvas, and coat canvas and photo with generous layer of glossy Mod Podge.
  • Flip image (print side down) over onto canvas, making sure to center it where you want it before placing, and smooth out any air bubbles with Mod Podge brayer, squeegee or with your hand from the center out.

Transfer instagram photo to canvas

Let that dry for a minimum of 2 hours.  I let mine dry overnight.

Mod Podge Image Transfer

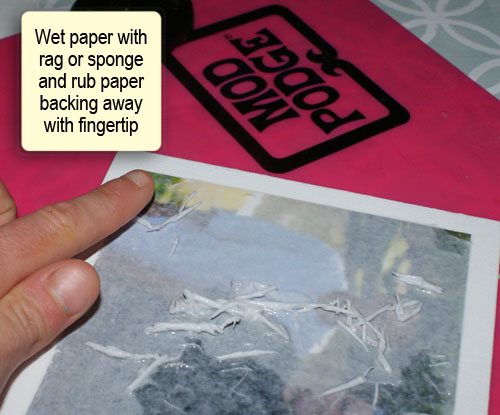
  • You will may need to re-wet with a mister or sponge brush and continue rubbing away paper backing until you are satisfied with the image.  It doesn’t need to be perfect.  You are going for a vintage feel, and you are going to use Mod Podge Antique and rub-ons on top,  so a distressed look is ok.  Just try not to remove too much of your image when you are rubbing away the back.
  • Once you are happy with your image, Coat with Mod Podge Antique, as many coats as you need to get the antiqued effect you desire.  Let dry 30 min between each coat. I applied my the text after the first coat of Mod Podge Antique, then coated twice more to lessen the contrast between the rub-on transfers and the image.  Apply Mod Podge rub on transfers per package instructions.

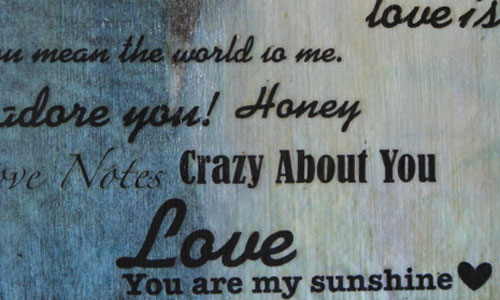
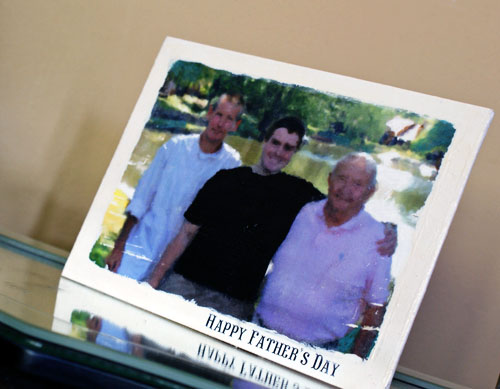
These are fantastic.  They come in phrases for family, love, seasons, holiday, and pretty much anything you can think of.  I used the love theme for the image of my husband and I.  The Father’s Day theme was perfect for the picture of my husband with his father and son.  Application was easy with the included craft stick.

Mod Podge Image Transfer

Mod Podge Image Transfer

Mod Podge Image Transfer

  • Here you can see the image for the Father’s Day Gift I used is slightly smaller than the canvas, giving a white border in my finished piece.  I wanted that look, and I brushed around the edges with white acrylic paint.

Here are all of the projects I have done with the new Mod Podge line, and which product I used in each (click images to go to full photo tutorials):

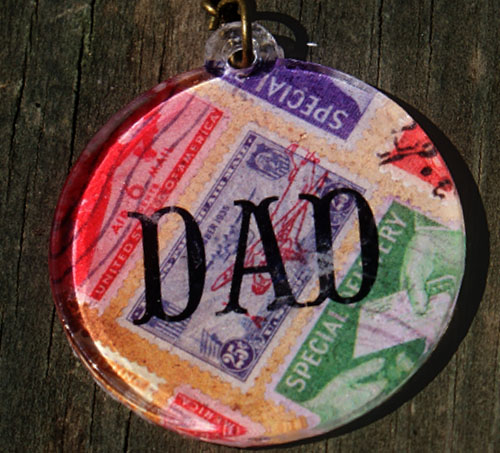
Mod Podge Dad Keychain Using Podgeable Paper and Shapes

PODGEABLE PAPERS AND ACRYLIC SHAPES

MOD PODGE DIMENSIONAL MAGIC

MOD PODGE RUB-ON TRANSFERS

MOD PODGE GLOSS

MOD PODGE GLOSSY

MOD PODGE ANTIQUE

MOD PODGE TRACEABLE SHAPE TEMPLATES

MOD PODGE GLOSSY

MOD PODGE ANTIQUE

MOD PODGE PEARLIZED ACRYLIC SEALER

I am so excited about this line.  Everything I have used has been wonderful.  It is no secret I love me some scrapbook paper jewelry, and the Podgeable Papers are scaled to fit those clear acrylic Podgeable Shapes perfectly.  I have big plans there.  My favorite new product is the Mod Podge Antique.  I love the effect, and that it is produced by a product that also seals. These products are now available at your Michael’s Craft Stores.

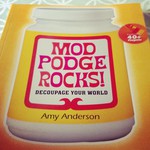
If you want to learn step by step how to use all of these different formulations, and be inspired by over 40 how to photo tutorials, make sure you check out Mod Podge Rocks, the book  It is a steal on Amazon.  I have it, love it, refer to it often, and reviewed it here.
Mod Podge Rocks, the book

Join me in keeping up with the exciting products and projects using them by following Plaid Crafts:

Plaid Crafts on Pinterest: http://pinterest.com/plaidcrafts
Plaid on Facebook: http://www.facebook.com/InspiredByPlaid
Plaid on Twitter: http://twitter.com/plaidcrafts/

Disclosure:  I received product and payment for this post.  All opinions expressed in this post are honest and mine.

Check out these amazing projects using this rockin’ line of Mod Podge products!


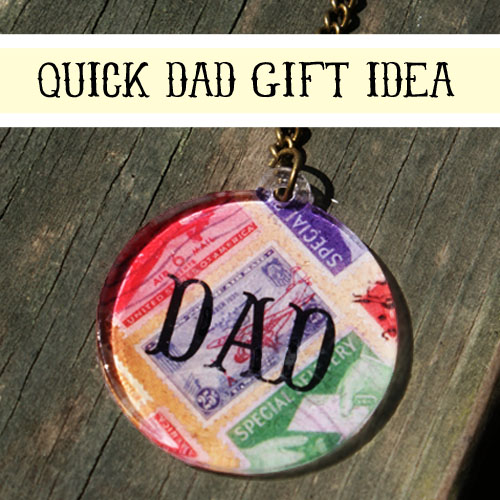
DIY Quick & Easy Dad Gift

Dad Gift Idea

If you need a last minute handmade gift idea for Dad, check out this easy “Dad” keychain you can make in no time.  If you are like me, and you stalk your local Michael’s  store, you may have seen the new, so so so cool product line from Mod Podge.  I will be telling you a lot more about it next week.  For this project, I used some of their new paper craft supplies:

New Mod Podge Products

You will need:

  • Decorative scrapbook paper, with a good guy print (I used the travel themed Podgeable Paper)
  • Acrylic Podgeable Shapes
  • Rub-on transfer, dad themed
  • Mod Podge Dimensional Magic
  • Craft Scissors
  • Key fob and jump ring
  • Sand paper

Handmade gifts for guysDad will love it.

Make a Father's Day Gift

Keep your eyes peeled for upcoming projects using this fun new line all over the craft blog world!


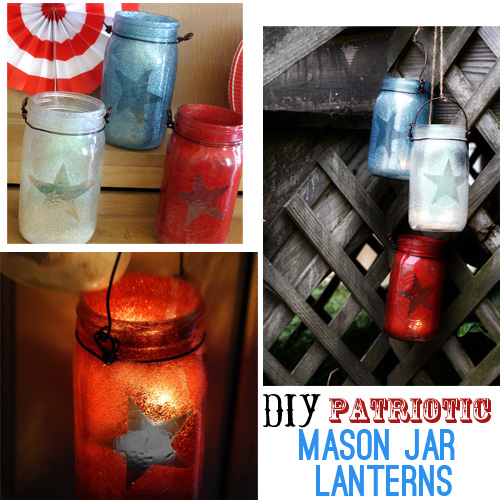
DIY Patriotic Mason Jar Lanterns

Mason Jar Lantern Tutorial

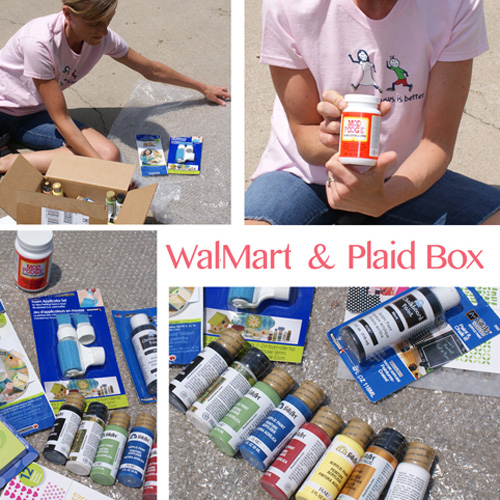
I received a box of Plaid Craft goodies and a $25 Walmart gift card to buy something to embellish with my new supplies.  Oh boy!  Strolling the aisles pondering what I could do with item after item, I couldn’t decide on just one thing.  That is why I have done multiple crafts using items purchased from Walmart and my Plaid Craft products, which you will be seeing over several posts.  Today’s project happens to be my favorite.  You are going to love it!  These lanterns are super easy to make.  Grab your Mod Podge and glitter and let’s get all Patriotic, mason jar style!

Here is the box of Supplies from Plaid Crafts:

Plaid crafts at Walmart

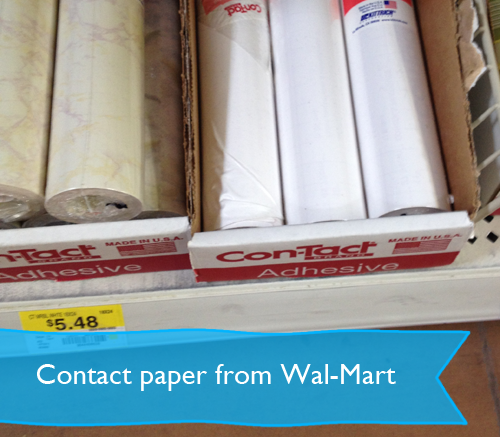
I bought white contact paper for this project at Walmart:

I love this stuff because it is way way way cheaper than buying white vinyl designed for die cut machines, and it is the same thing for my purposes.  You get a gigantic roll of it for a few dollars.  Never ever buy white vinyl again!

I found the mason jars at Walmart too:

Click to CONTINUE TO NEXT STEP

Mod Podge Lampshade Makeover

Lamphade makeover

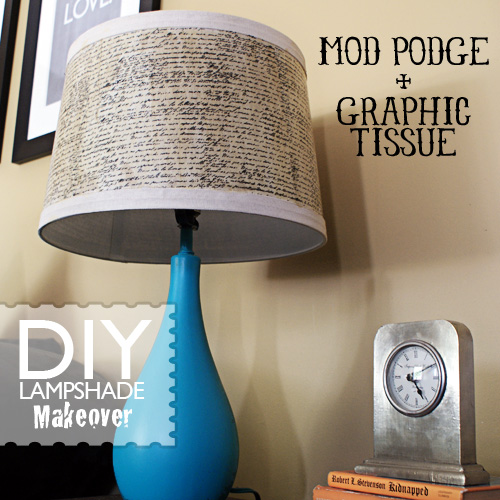
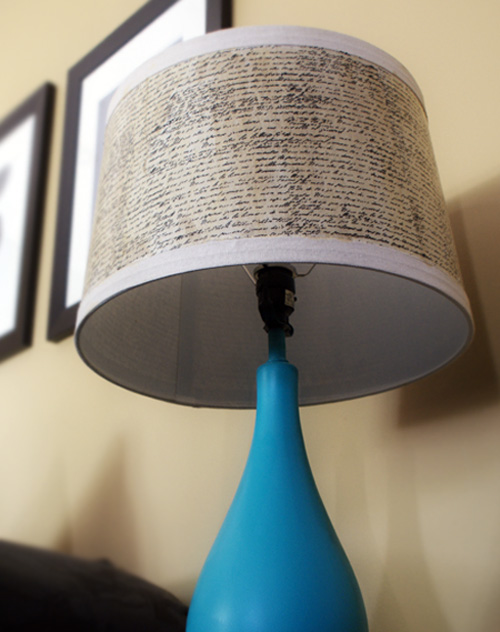
One of the easiest ways to change the feel of a room is to change the accent colors.  When I get tired of my color scheme, or want to have my home decor coordinate with the seasons, I start with accessories.  Today I am sharing a lamp makeover that is part of my living room color scheme transition.  This project shows that some Mod Podge, spray paint and tissue paper can go a long way in updating accents to transform a room’s style.  The best part?  Save considerable cash by working with what you have instead of buying all new home decor.
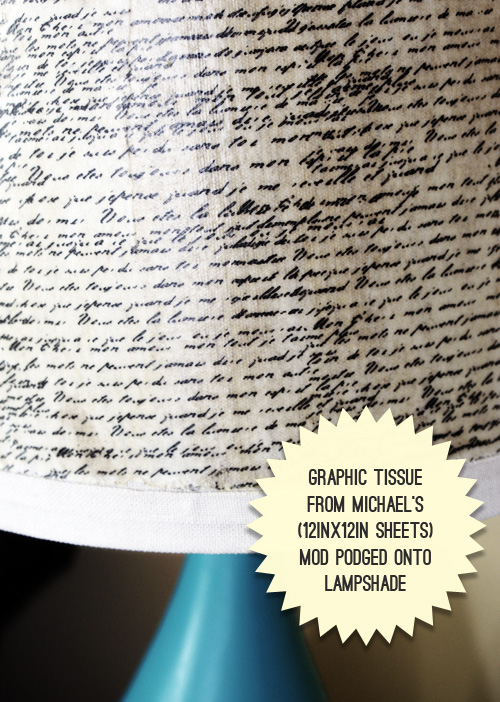
Here is how I took a red lamp with a plain canvas drum shade and gave it an aqua base, old handwriting script lampshade makeover:
Decoupage lampshade
Sooo much better now…

Lampshade makeover

How to Makeover Lampshade

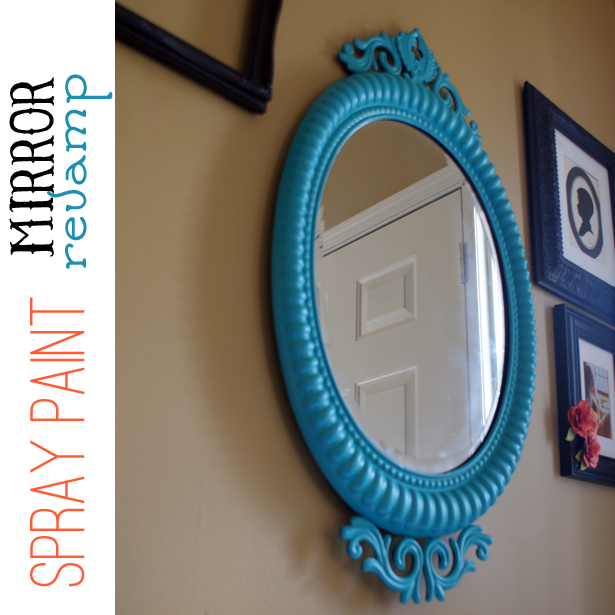
It goes great with the spray paint mirror revamp I showed you over the weekend:

More decoupage to come… tomorrow.  You don’t want to miss it!

50+ Decoupage Projects to Make

[pinit]Decoupage Project Ideas

[pinit]

It is a decoupage kind of week around here, with the awesome Mod Podge Giveaway going on, and some upcoming projects in the works with Mod Podge by Plaid and Wal-Mart.  Keep an eye out!  I have been scouring creative land for inspiration and in the process, compiled this list of some of my favorite decoupage projects.  Break out the Mod Podge and decoupage those surfaces!


Privacy Policy