
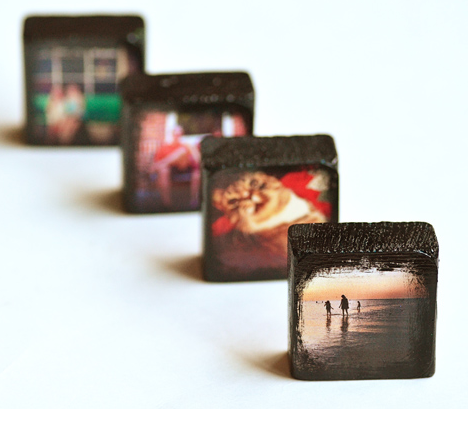
 I am loving these tiny Instagram photo blocks, shared at Intimate Weddings. The project is similar to scrabble tile pendants that have been so popular over the last several years. They are super easy to make, and could be used to create custom photo pendants and embellishments for cards, decor and art!
Make Instagram Photo Blocks
by
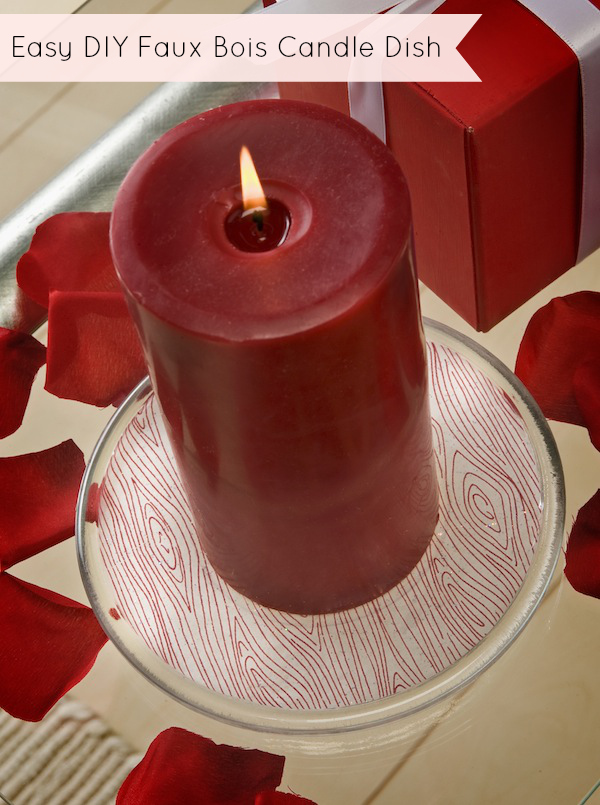
Faux Boise Candle Base & Candle
by
Well hello there! I’m Amy from Mod Podge Rocks. I’ve never been a big Valentine’s Day person until I did a Aqua Valentine series last year . . . in which I threw hearts on their head by turning them blue. It made for a more interesting Valentine’s Day in terms of crafting, and I’ve loved making projects for February 14th ever since.

This year I made a project that I made for Valentine’s Day but you can use all year round. It’s not “obvious” Valentine’s Day but that is why I like it! I actually used woodgrain (aka faux bois) tissue paper that I got from Target on clearance for $.99 – it was leftover from Christmas. Add some Sparkle Mod Podge, Dimensional Magic and a red candle and you have instant home decor. Here’s how I made it.
Gather These Supplies
$1 candle tray from the dollar store
Mod Podge Satin
Mod Podge Sparkle
Mod Podge Dimensional Magic
Tissue paper
Pencil
Paintbrush
Scissors

Here’s the dish straight from the dollar store – soak it to get the tag off of the bottom.

Spread out the tissue paper (try to find the non-wrinkliest area possible) and place the dish face down. Trace with a pencil.

Cut out the circle and keep trimming until it fits inside the dish. I had to trim and fit several times.

Spread a layer of Mod Podge Satin down into your dish. You can use Matte or Gloss too – it really doesn’t matter. The reason I didn’t use the Sparkle is because I didn’t want any texture between the tissue paper and the glass (which the glitter particles can cause). If you don’t care, you can use the Sparkle Mod Podge to apply the tissue paper too.

Put the tissue paper into the glass dish and very carefully smooth down with the paint brush. Tissue paper is very fragile. Let it dry for 15 – 20 minutes and then spread Sparkle Mod Podge over the top.

Add Dimensional Magic to the top, inside the lip of the glass dish. It’s going to take overnight to dry because of the amount of Dimensional Magic.
I love this look! Love that it’s white and red woodgrain, so I can use it for Valentine’s Day, but I can also keep it out all year round. I also love that it only cost me a few dollars to make!

Come visit me at Mod Podge Rocks for daily decoupage ideas – also visit me at Facebook, Pinterest, Google Plus or follow my RSS feed for more!
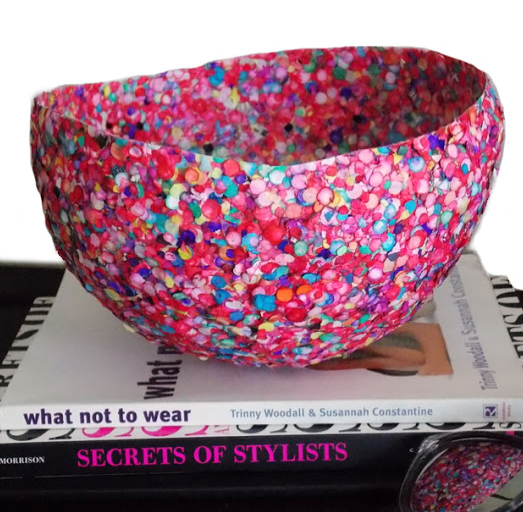
Make a Bowl From Confetti
by
 [pinit]
Today I am sharing a cool DIY I spotted at V Juliet. Learn how to make this colorful bowl using confetti and a balloon! I have seen balloons used to create doily sphere globe lamps and bowls from leaves, but never anything like this. Head over for the full DIY that promises to be easy and fun.
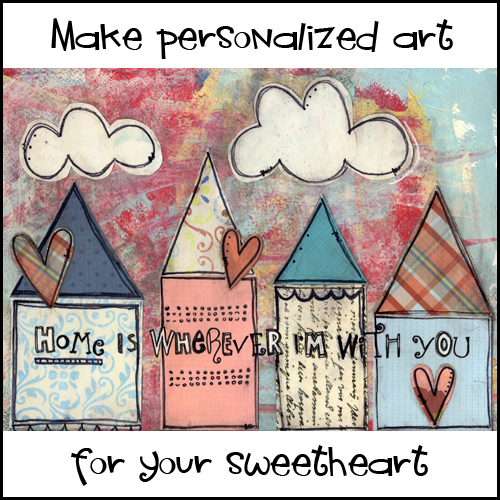
Valentine’s Day Mixed Media Art
by
[pinit]
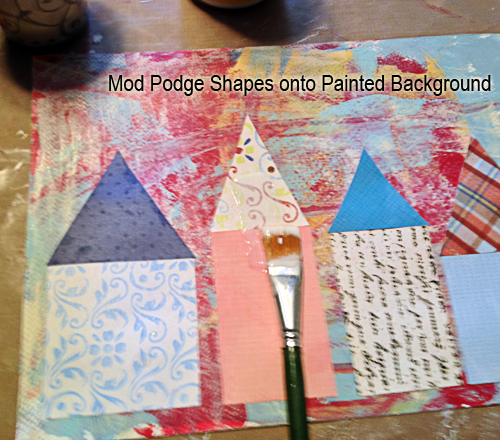
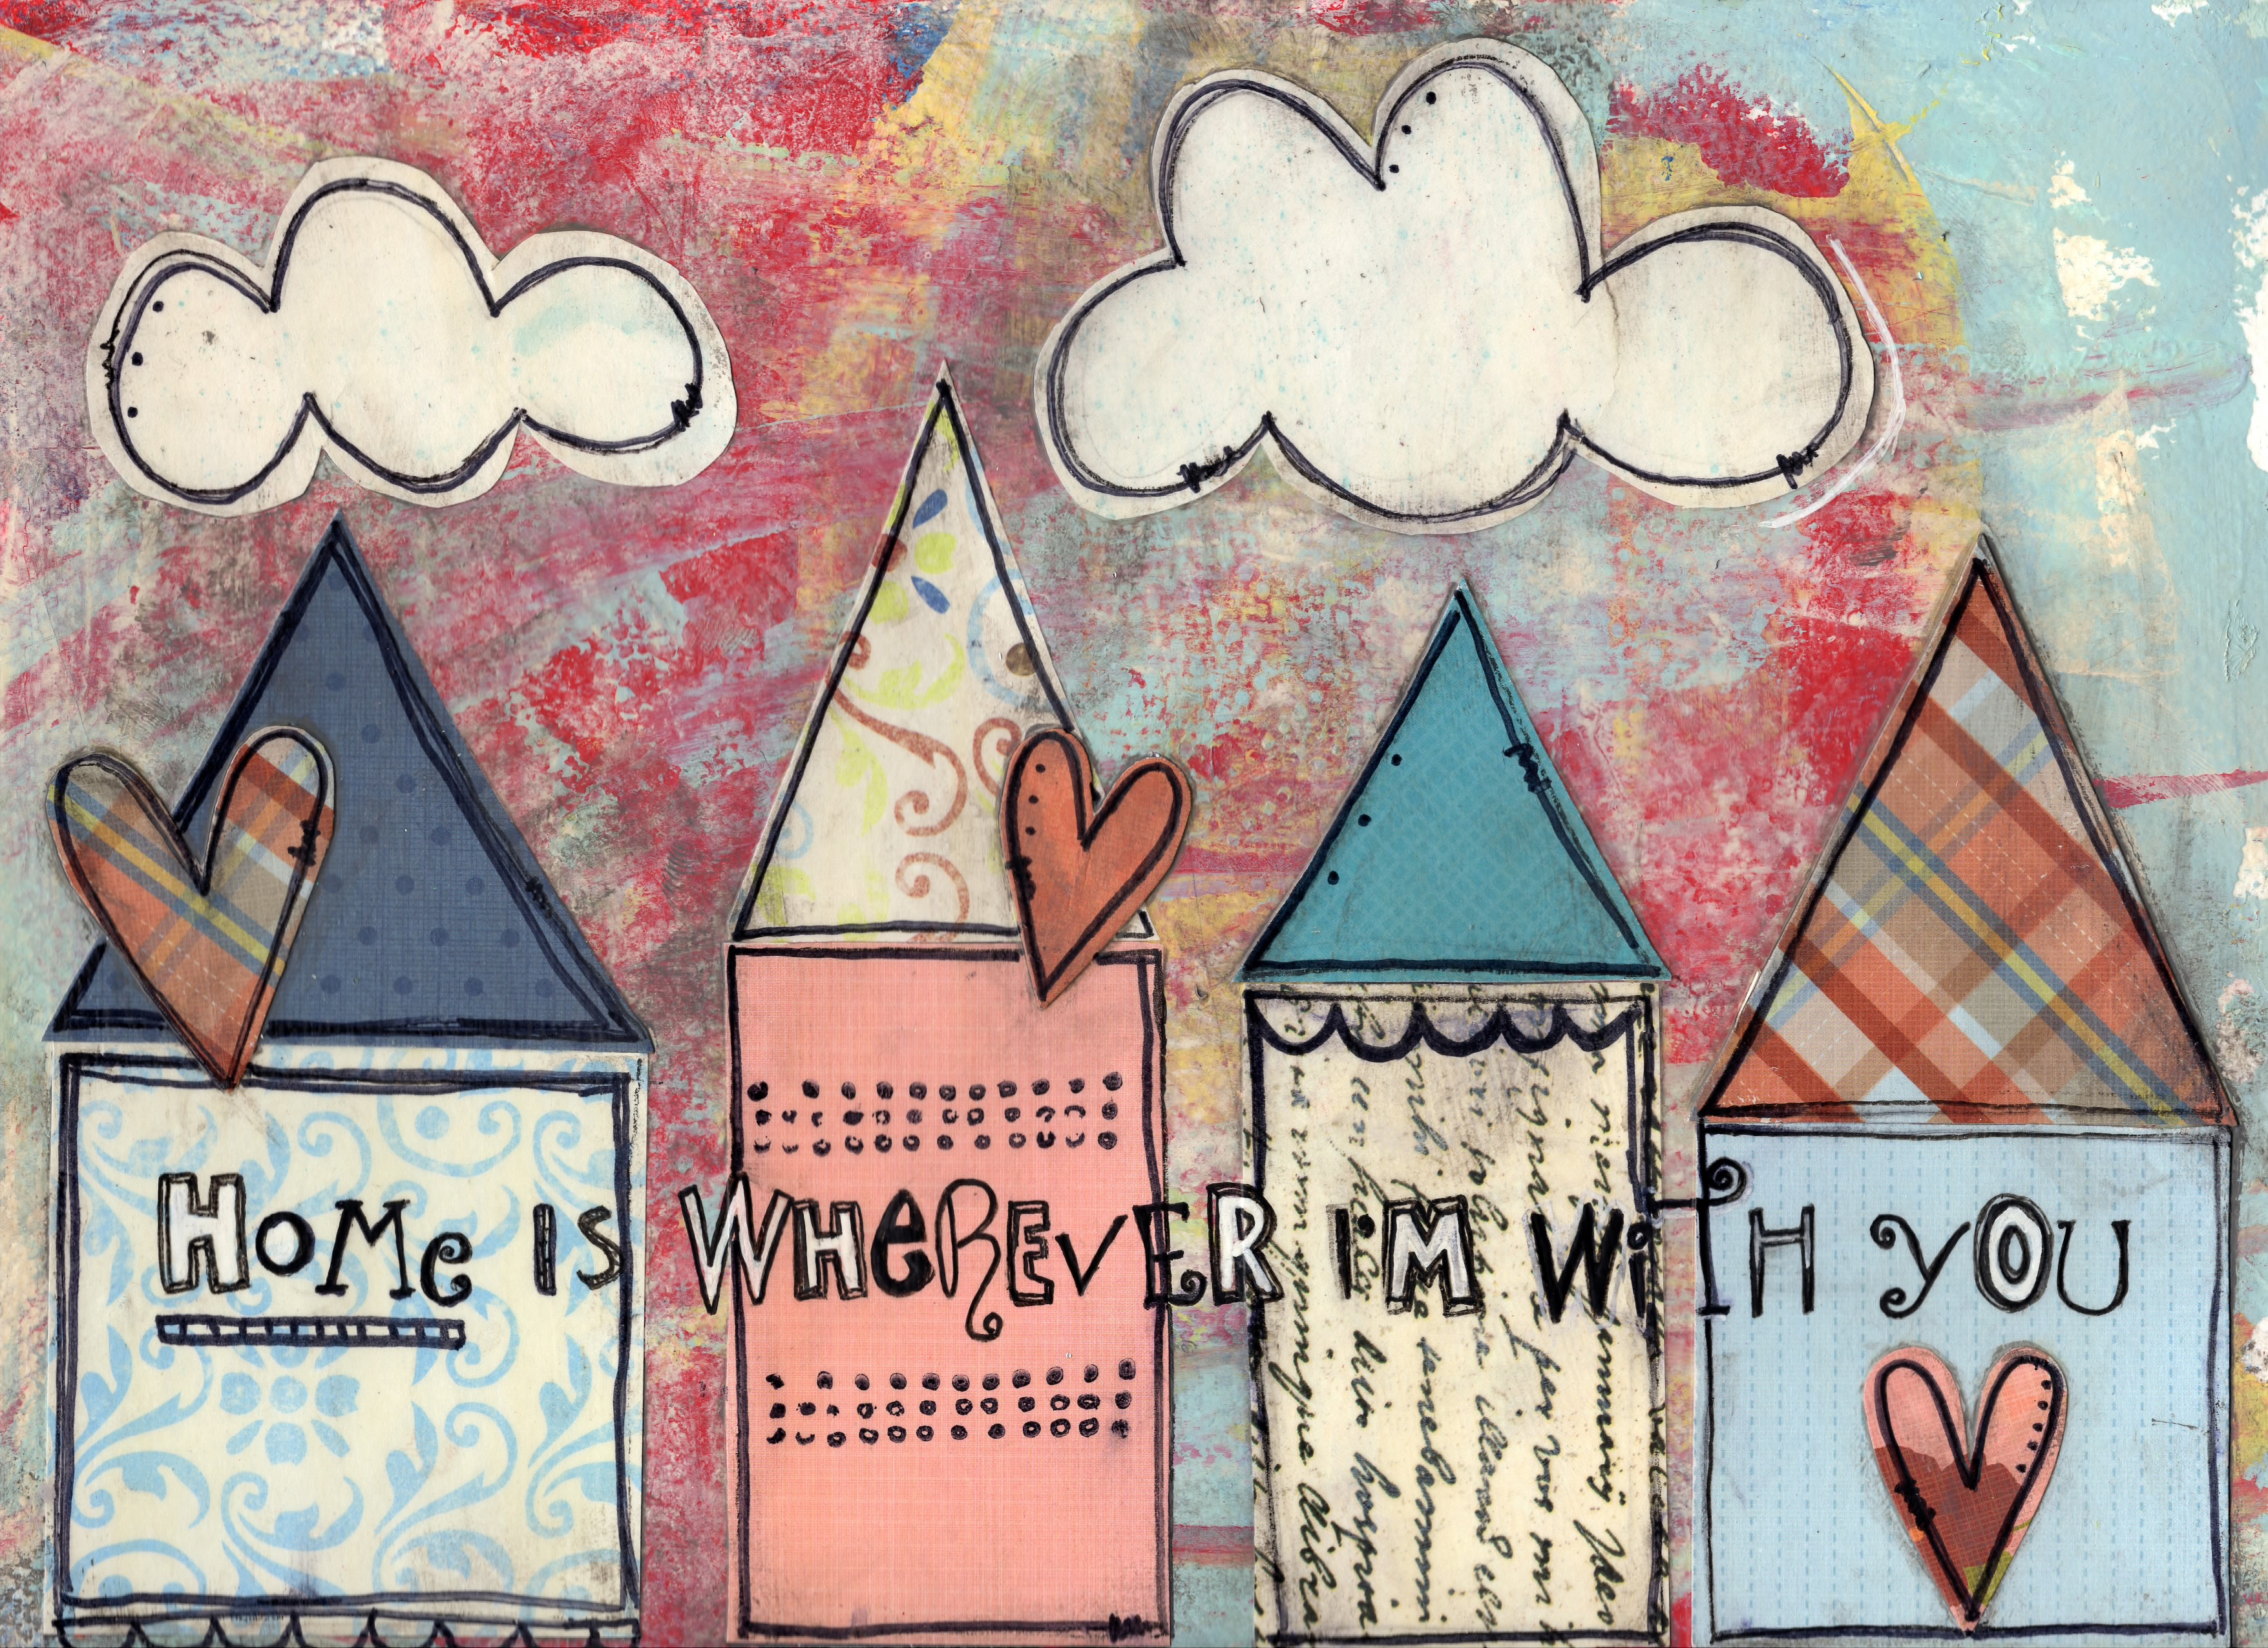
This is my second project adapted from Stephanie Ackerman’s Doodle Too Class (a class that totally rocks my socks off, btw). I made four houses to represent each place John and I have lived in over the course of our marriage. I will show you how I added text, and provide you a printable of the phrase. I am not going to show you the details of the process creating the scene, because I want you to take Stephanie’s class for that. In general, you just Mod Podge shapes cut from scrapbook paper onto a background created with acrylic paint.
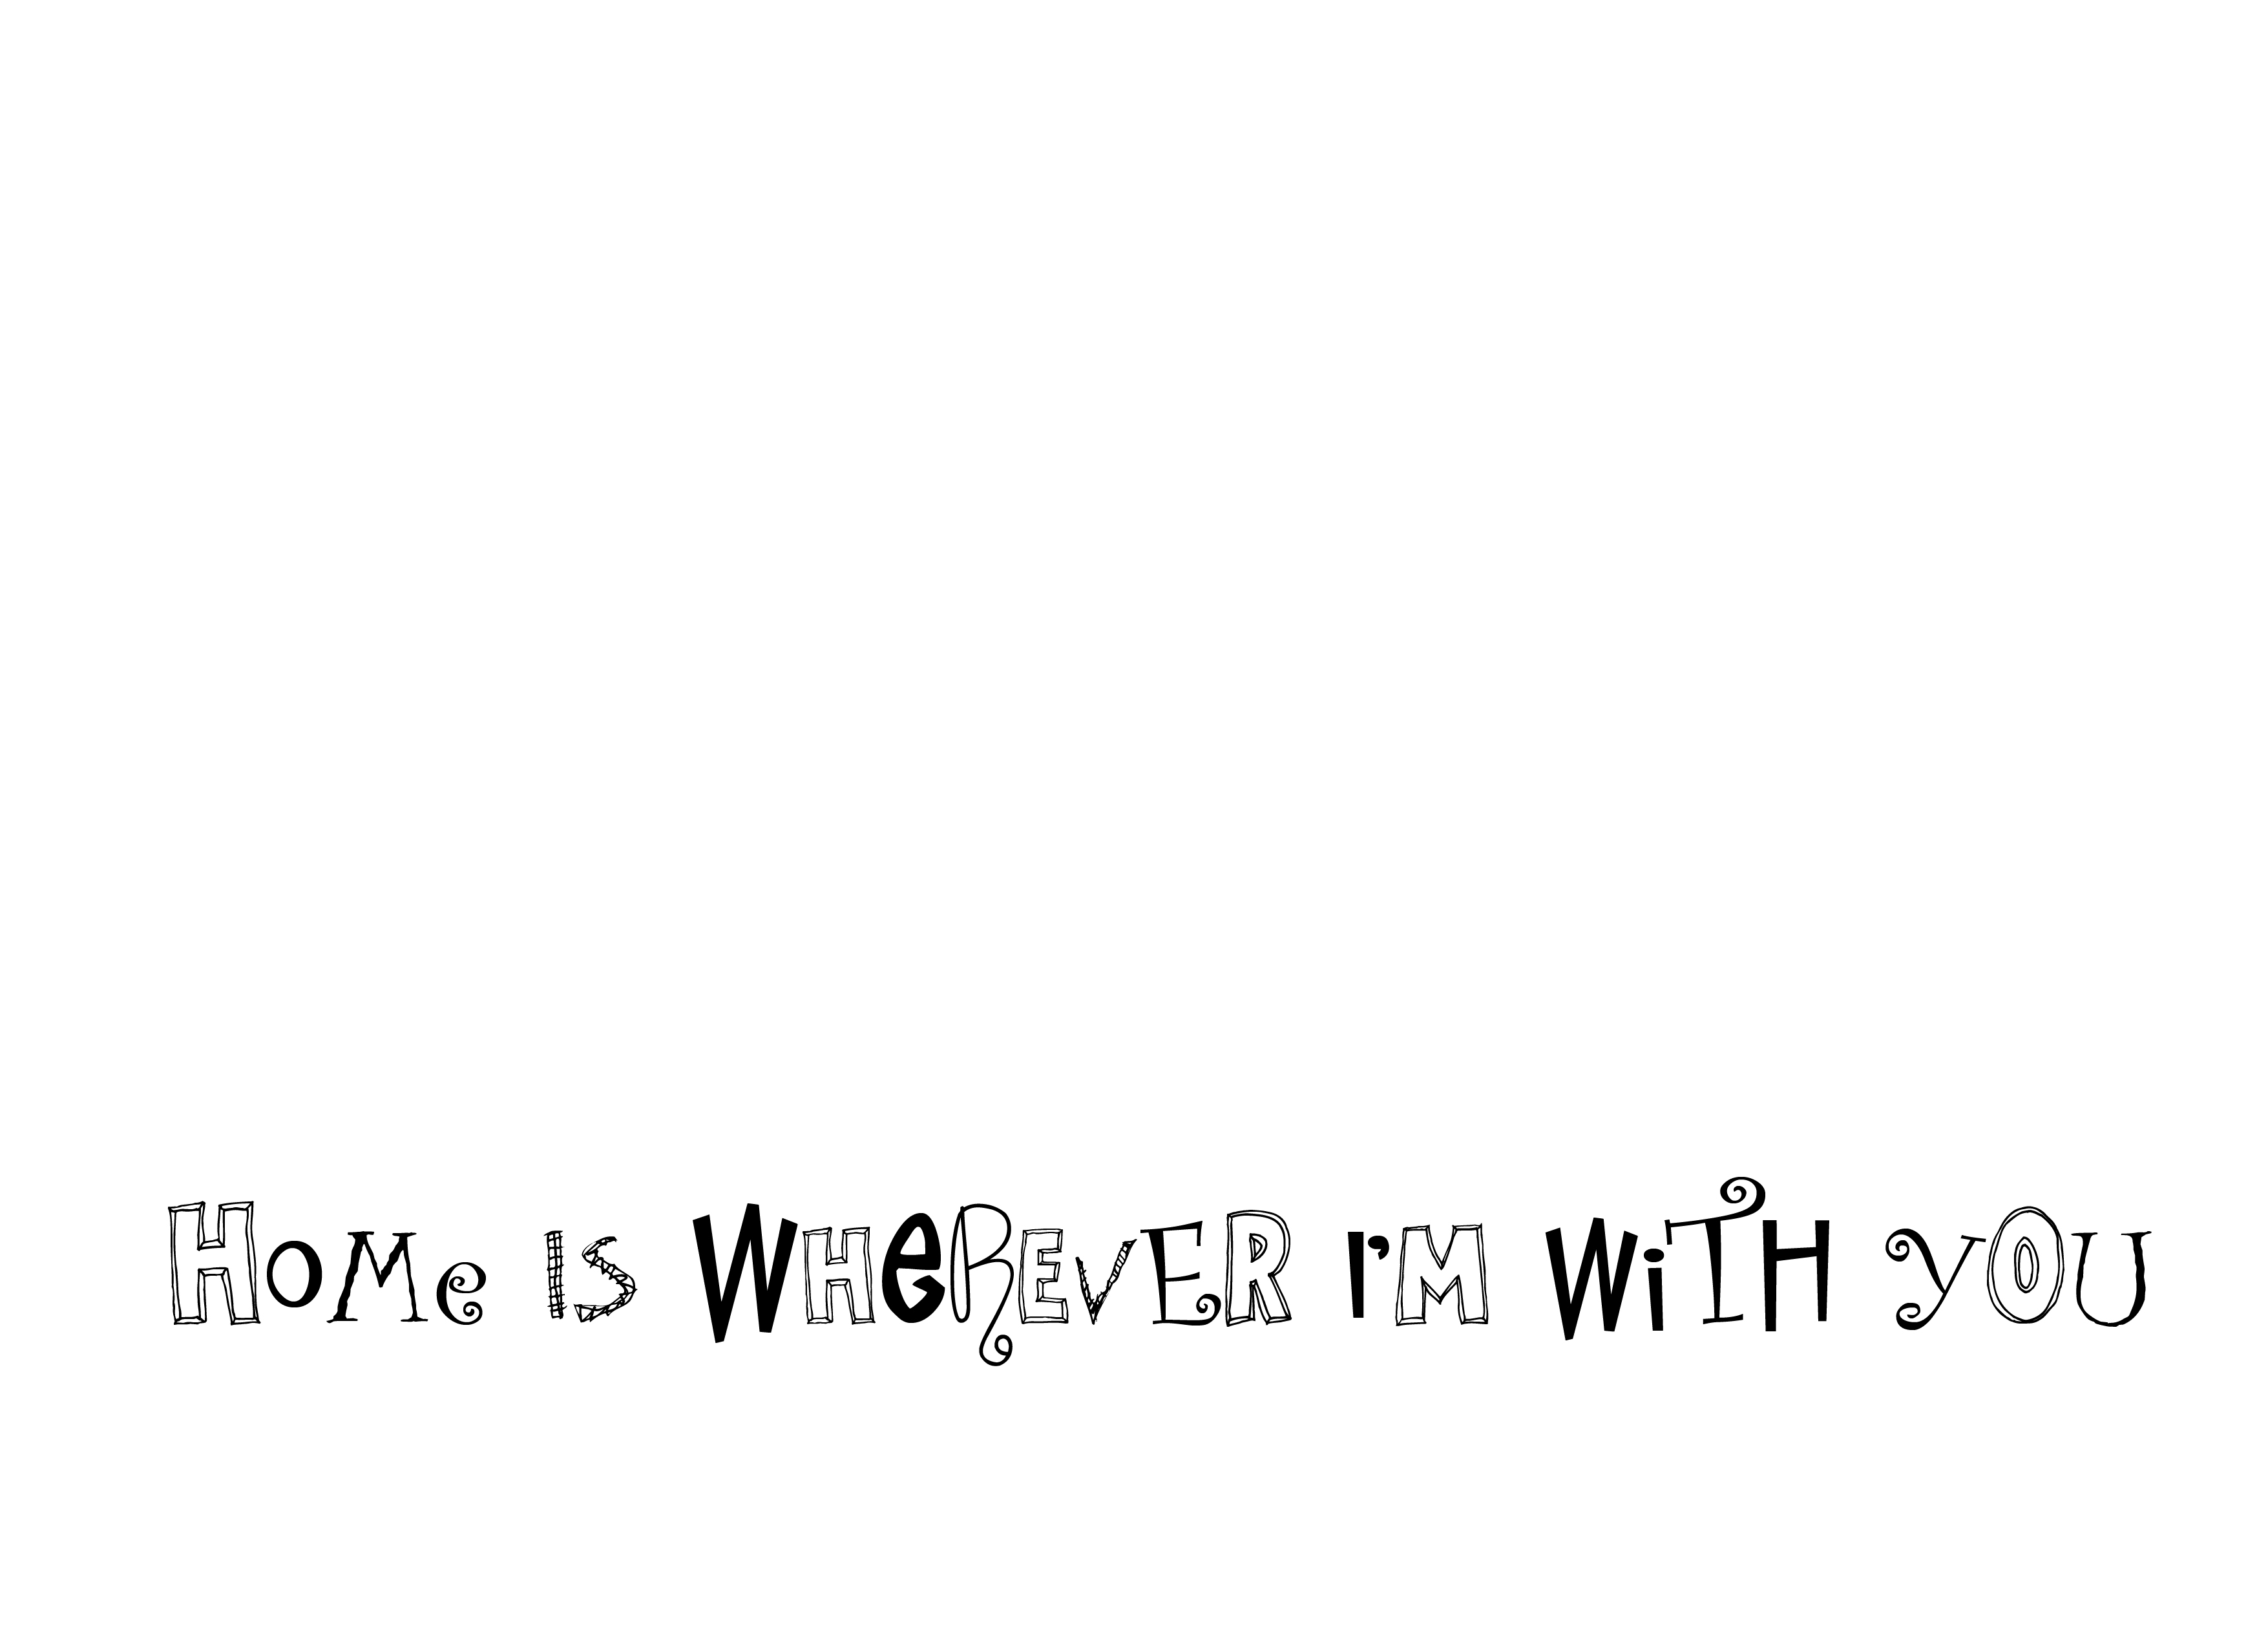
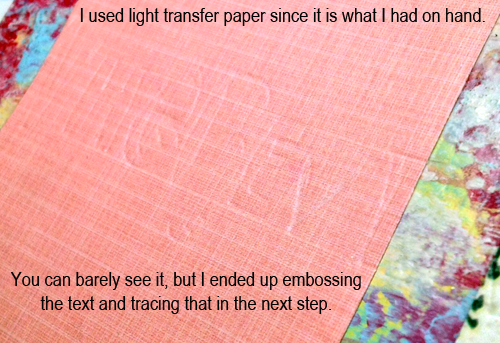
Once your background is fairly complete, at least having the main elements in place, scan it into your computer, open in Photoshop and play with various fonts and phrases. When you are happy with your text, print it and transfer to the original background as shown. You can print my text below to use for your piece if you would like. Just right click it to pull up the full res version and print that.
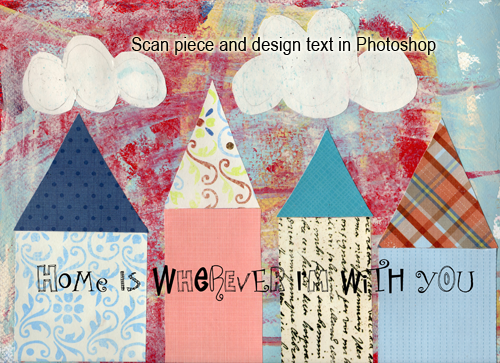
This is what my text looked like over the scanned image. I turned off the background layer of my art and printed just the black text on white paper for the transfer.
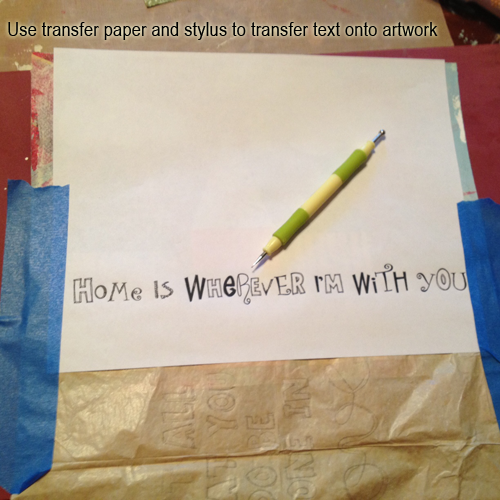
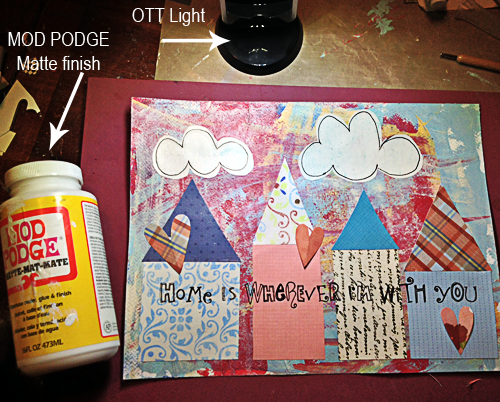
The Ott light is super helpful and awesome for transferring text and for seeing what the heck is going on in my mixed media art!
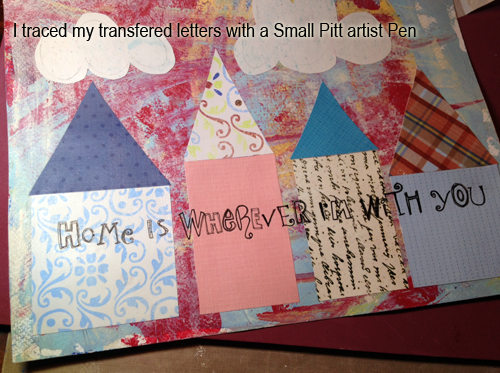
Pitt Artist pen, size small
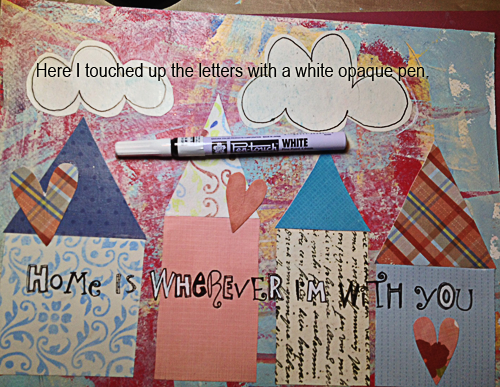
Pen-touch White Pen
After I was happy with the text and the outlining of my shapes, I applied a coat of my favorite Mod Podge ever. It is an antique finish and it is so cool. I use to glaze my final pieces to pull the layers together with an antique tone. Then when that dried I would seal. Now I do it in one step with Mod Podge antique, and it turns out exactly how I love it. Thank you Plaid!
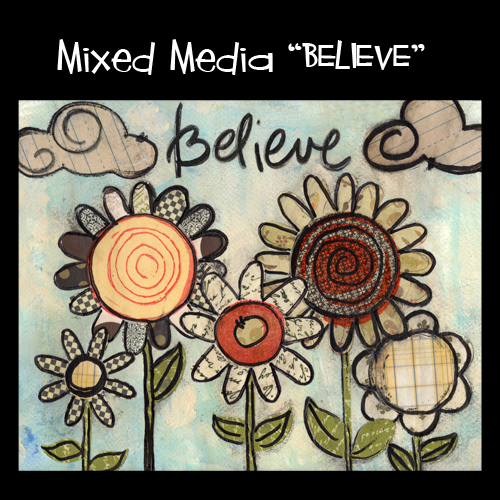
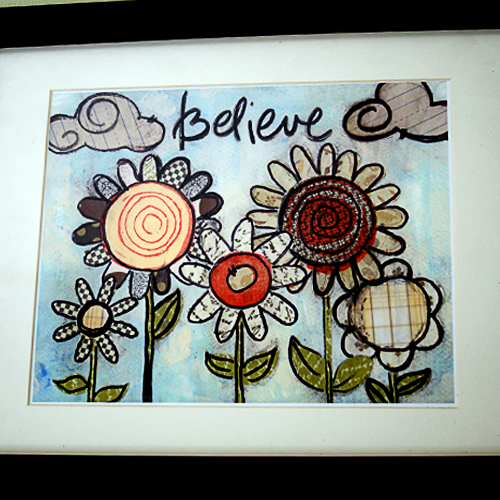
Mixed Media “Believe”
by
[pinit]
Maybe you read in an earlier post that one of my New Year’s resolutions was to get messy in my studio and create art daily. Part of that for me has been taking some classes. This piece is from the first project I did in Doodle Too, a class by Stephanie Ackerman of Homegrown Hospitality. I loved the process of creating the acrylic paint sky background, and Mod Podging paper scraps to it to create the scene. I scanned the finished piece and printed/framed it. The original is part of my art journal. I have taken the novel approach of just enjoying the process of putting color on paper and letting go of the final outcome. Way too fun. Highly recommended.

Make Advent Calendar Blocks
by

[pinit]
This is the first year I have made an advent calendar, and I am loving it! It was so fun to create. I busted out my stamps and other scrapbooking supplies and went to town on some wooden blocks. What is so cool about it is as you turn each block around when that date passes, a wintery scene is revealed on the other side!

To make your very own advent block calendar, you will need:
25 square wooden blocks (I used 1 inch cubes, but size doesn’t matter as long as they are all the same)
Gesso
Christmas scrapbook paper
Acrylic paint in silver, red and green
Matte Gel Medium
Glossy accents or Dimensional Magic
Craft knife
Distress ink pad in Antique Linen
Ranger crackle paint Clear Rock Candy
Ranger crackle paint White Picket Fence
Number stamps
Stazon Jet Black Ink Pad
TUTORIAL:

To finish, I painted the sides of the blocks green, and coated the wintery scene paper side with clear crackle paint to seal.


Make Little Polaroid Magnets
by

[pinit]
One of the most meaningful gifts to give are photo creations. With the abundance of user friendly photo editors out there, you don’t have to be a Photoshop pro to create cool effects on your images these days. Make theme into a keychain, put them on a mug, or create these see mini polaroid magnets with Ambrosia Girl’s DIY. I would love to open a gift and find these little guys inside, full of the people and memories I hold dear.
Make Bowls From Leaves
by

I just can’t get enough of leaf crafts! That is why I just had to share this DIY autumn leaf bowl I found at Hello Lucky! See how it was made with just a few supplies, including my go to supply, Mod Podge.
For more leaf crafts, click the thumbnail:

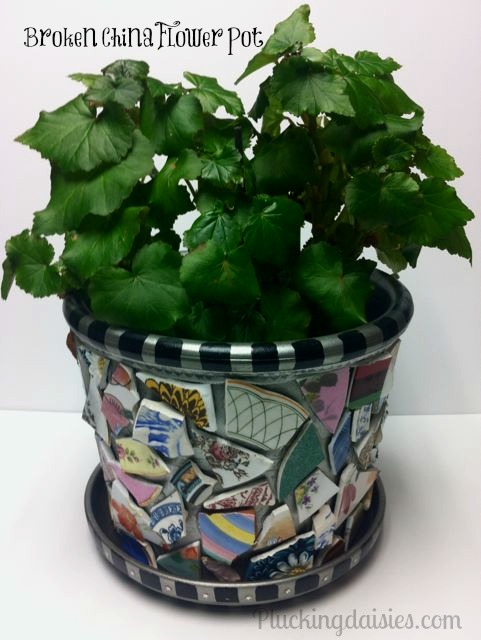
Make a Mosaic Flower Pot
by
[pinit]
[pinit]
My talented friend Amy of Plucking Daisies is back with a wonderful, whimsical flower pot upcycle. I love everything about it, but especially the hammer smashing of china plates. How fun does that sound?! See how she did it…
Hi there! So happy to be back at Saved by Love Creations! The last few times I was here I showed you how to make flowers. Today I’m going to show you how to make a fun container to put them in. The possibilities are endless with this project and it’s completely up to you how big you want to go with it. Do you have a bunch of mismatched dishes you don’t know what to do with? Well I have a solution for that! Get out your WORST China folks because we are about to break stuff! Opa!
How to Make a Broken China Flower Pot
First you are going to need a terra-cotta pot. Now is a great time to find them cheap. I got mine for a couple of bucks at Ocean State Job Lot. Spray paint your pot any color you like. Keep in mind that whatever color you choose is going to show through in spots after you add the broken china. I chose silver because I didn’t want the china pieces to get lost against a bold color.

You will also need to grab some Mosaic Tile Adhesive (Mercantile) and some cheap plastic palette knives. Both of these items can be found at Michael’s and most craft stores.

If you don’t have any spare china to break you will need to take a trip to the thrift store. Keep an eye out for bright-colored plates with bold and busy patterns. Stay away from dishes that have high ridges and deep curves these are much harder to adhere. The flatter the better!
*You can also use tile cutters to snip more even pieces if you like.
Breaking China:
To break your china simply place it in a towel and hit it with a rubber mallet or hammer a couple of times. *Don’t go crazy, china especially will break pretty easily and you don’t want your pieces to be too small.

As you break your plates make sure you have some containers handy so you can arrange your broken china pieces by color. This will save you tons of time once you start adhering pieces to your flower-pot. I used a variety of plastic containers from my recycling bin.

When working with the adhesive you will need to apply it to the back of your broken china and the spot on your flower-pot where you want it to go. Apply the adhesive like you would apply spreadable cheese to a cracker. You don’t want too much but you want enough to cover and form a strong bond.
*Keep some baby wipes handy to clean any wayward adhesive off of china pieces and fingers.
Lay your pot on its side and cover as much surface area as you can. Arranging the broken china pieces is a lot like putting together a puzzle. Experiment with different pieces before applying the adhesive to ensure a good fit! *You will need to let the adhesive dry overnight before moving on to the next section.
*Some of the sharp edges will stick out so just be careful when you pick up your pot.

Once you have all of your broken china pieces adhered to your pot you can embellish the uncovered areas with paints, gems, or whatever you like! I used Martha Stewart Acrylic paints to create a checkered pattern on the top and bottom of my pot. I also used glossy accents to add tiny silver stars in between the black squares.
The fun doesn’t stop with flower pots for this technique. You can use broken china to make a mosaic on pretty much anything. Maybe around a mirror, or to upgrade the inside panel of a cabinet door. You can also use other materials for your mosaic like glass gems, stones, beads, or found objects. Like I said, the possibilities are endless!
I hope you enjoy making a broken china mosaic of your own….breaking plates and putting them back together in this way is quite enjoyable if I do say so myself 🙂
If you enjoyed this tutorial you can find more inspiring ideas and creative tutorials at Plucking Daisies!
You can also find me on Twitter | Facebook | Pinterest
Have a colorful day!
Amy*
Plastic Bottle Kid Safe Trick or Treat Lantern
by

Bettijo at Supermom Moments teaches you how to create this cute, kid safe lantern for your kids to take trick or treating. What a great way to keep the evening illuminated. The idea came from mason jar lanterns, but uses plastic jars so the kids aren’t running around with glass. Brilliant!
