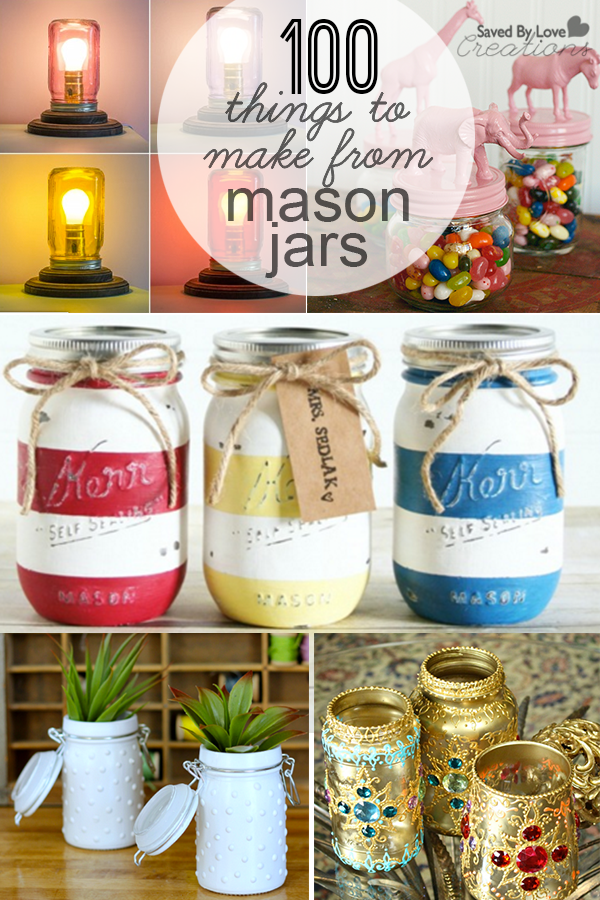
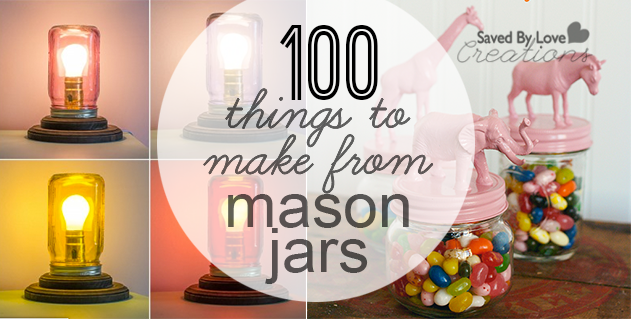
The creative mason jar projects keep rolling in, so we have updated our orignal round-up of jar crafts to include our new favorites. Enjoy!!


Upcycling DIY home decor, woodworking and Crafts

The creative mason jar projects keep rolling in, so we have updated our orignal round-up of jar crafts to include our new favorites. Enjoy!!
[pinit]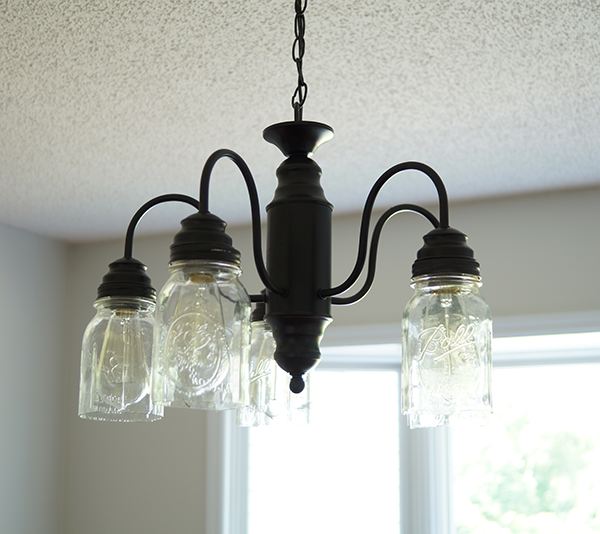 [pinit]
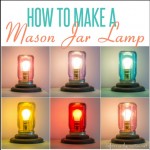
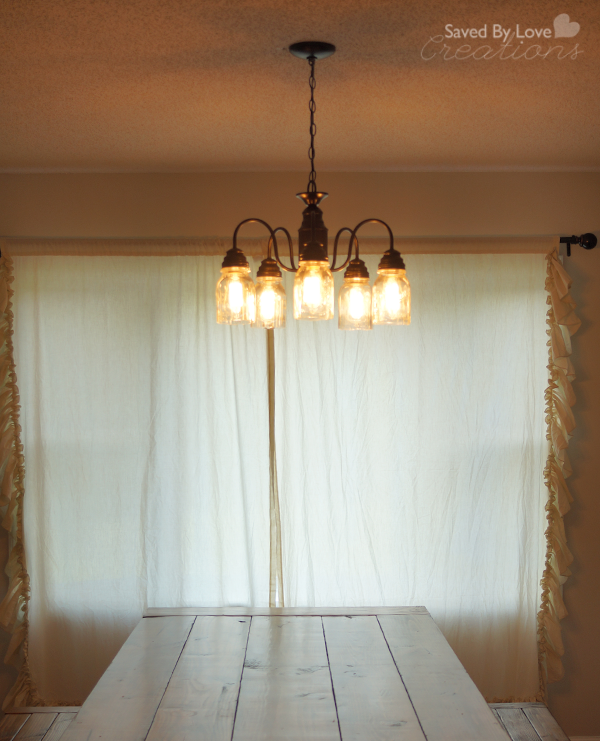
Do you have an outdated brass chandelier that makes you sad every time you look at it? I did. It was even worse hanging over that sweet DIY farmhouse table and benches I shared with you last week. Finding a replacement for that light has been a priority since moving here, and it has happened! Find out how I made this beautiful mason jar chandelier for $10!
Chandelier
Cut mason jars (See How to Cut Mason Jars) with lids

Vintage Light Bulbs
Scissors for cutting metal (I use Tim Holtz Tonic)
Sharpie or other permanent marker
Krylon Dual Oil Rubbed Bronze
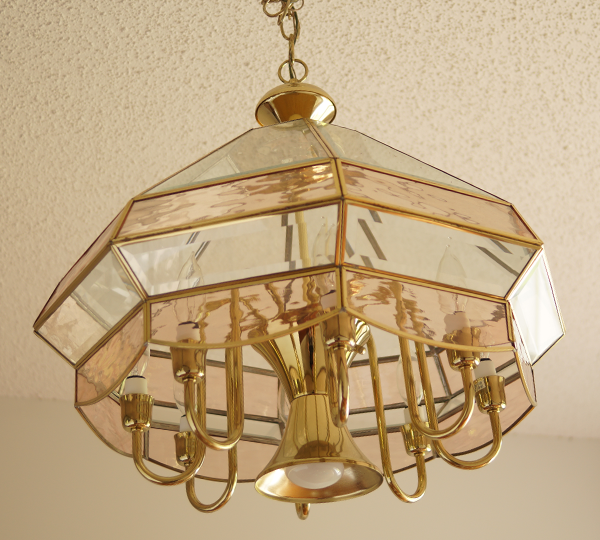
Just to show you what we are replacing!
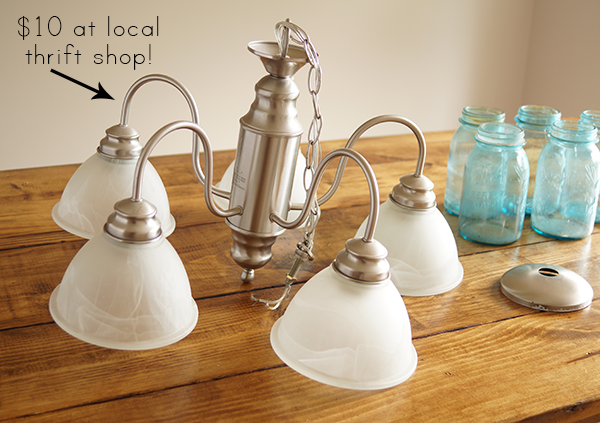
I found this guy for just $10!
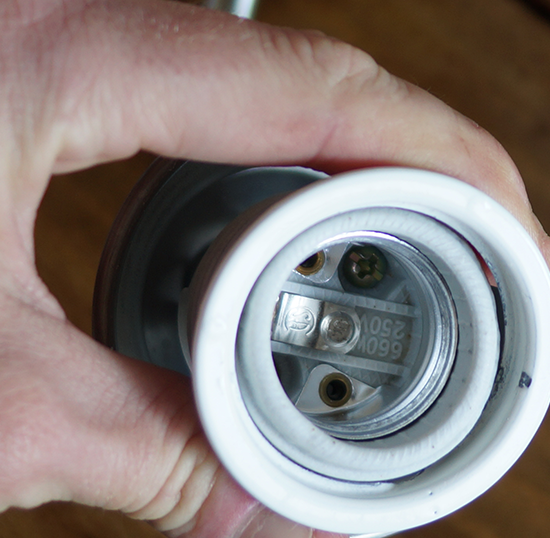
I removed the lamp shades that came with it and unscrewed this white circular piece.
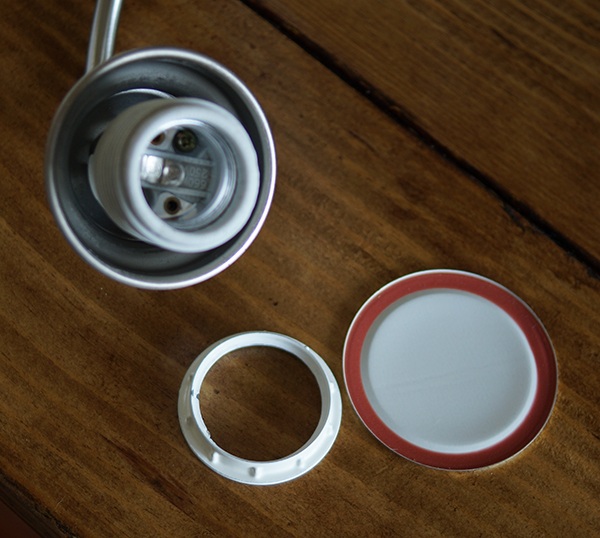
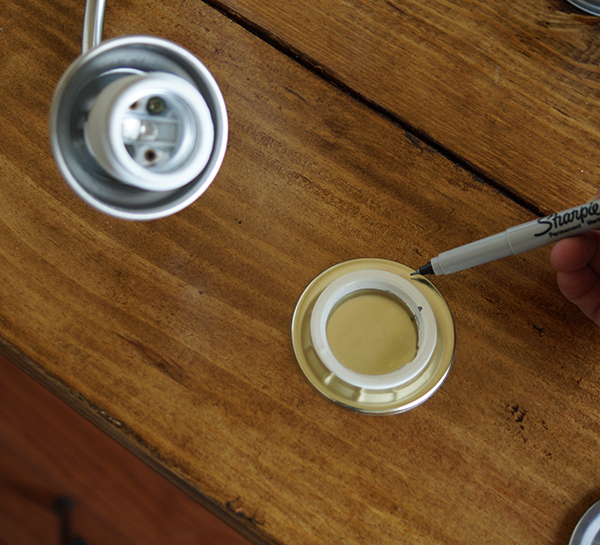 I used the white piece smaller side to trace for cutting a hole in the mason jar canning lid insert.

As you can see, this doesn’t have to be pretty. It will be covered. So long as it fits over the socket and the white piece will hold it in place.
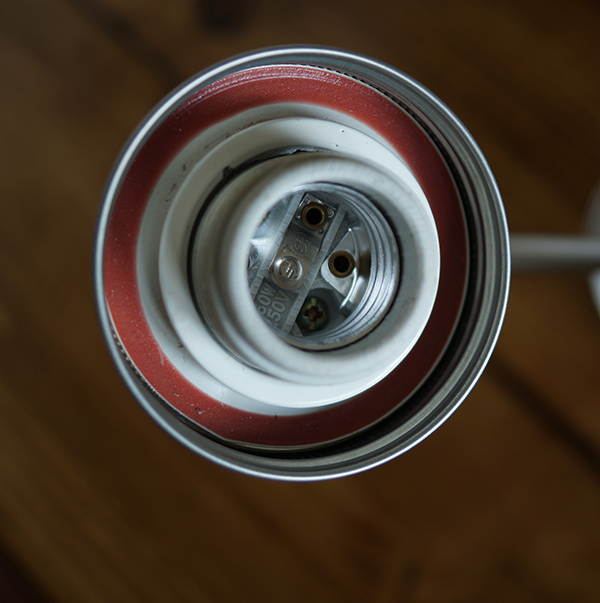
Here you can see the outer ring of the canning lid, then the inner part with the hole we cut and slid over the socket, then the white ring screwed back into place to hold it all together.
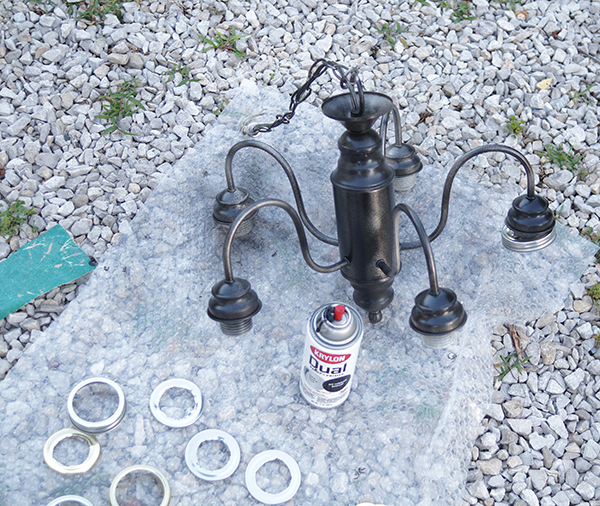
I started to spray without attaching the jar lids, but then realized that was just silly. Attach everything except the jars and bulbs, then spray paint! If you can suspend the chandelier somehow, to get the underneath side good, that is best. We used a bungee cord and hung it in our garage (annoyed husband and suspended chandelier not pictured). Let this dry overnight.
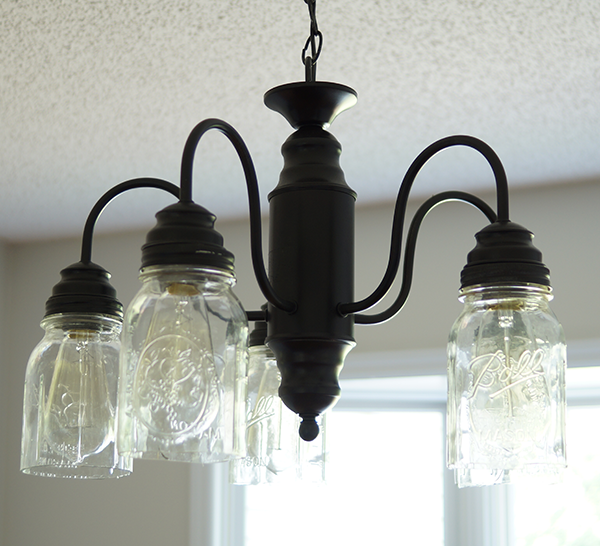
Now we just screw the cut jar onto the lid and insert the light bulbs!
Soooo much better, don’t you think?


[pinit]
 [pinit]

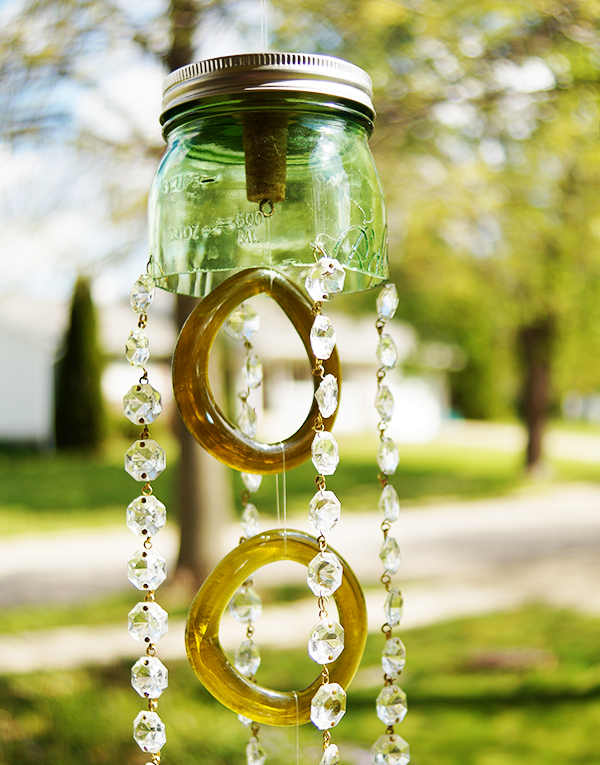
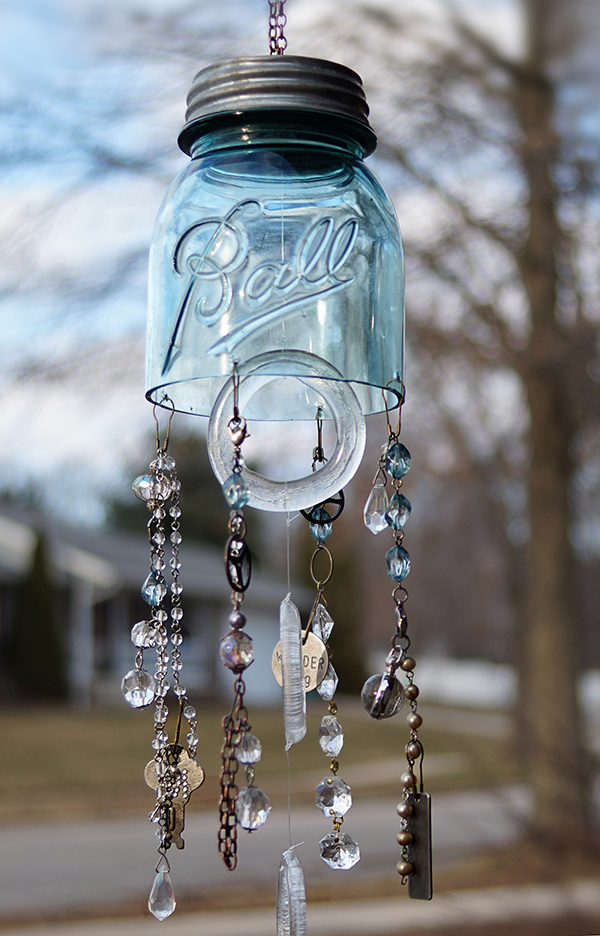
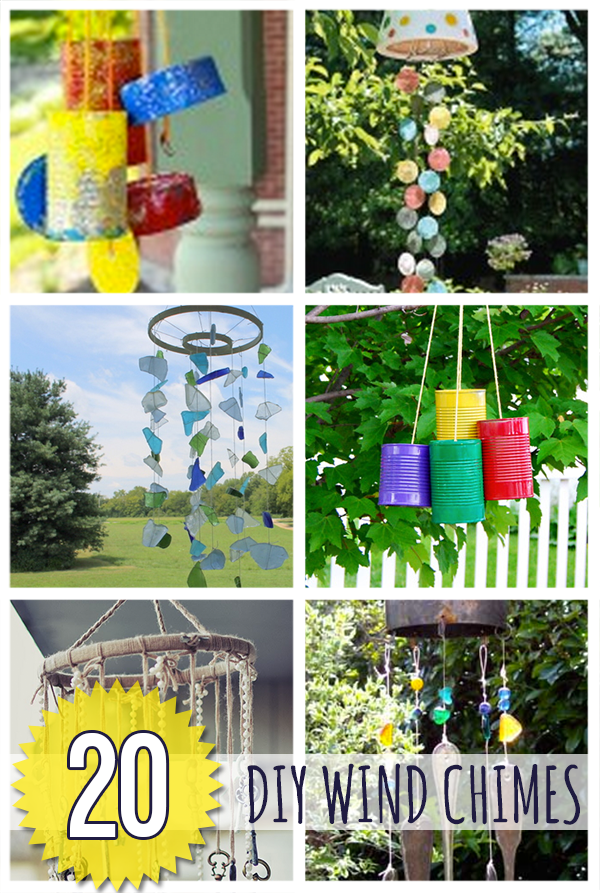
Do you love the sound of wind chimes singing? I have shared with you how to make DIY Wind Chimes from Upcycled Mason Jars in the recent past, and today I am sharing with you my newest addition!
This is the first set I made, which now resides with Pam, a Saved By Love Creations on Instagram follower who won the Instagram only giveaway I ran a few weeks back. That brings up a good point. If you are on Instagram, following me results in two things (besides the obvious getting updates on my projects via the pics I share); Exclusive giveaways of the SBLC creations you love and a follow back from me! Then I can see what you are up to as well.
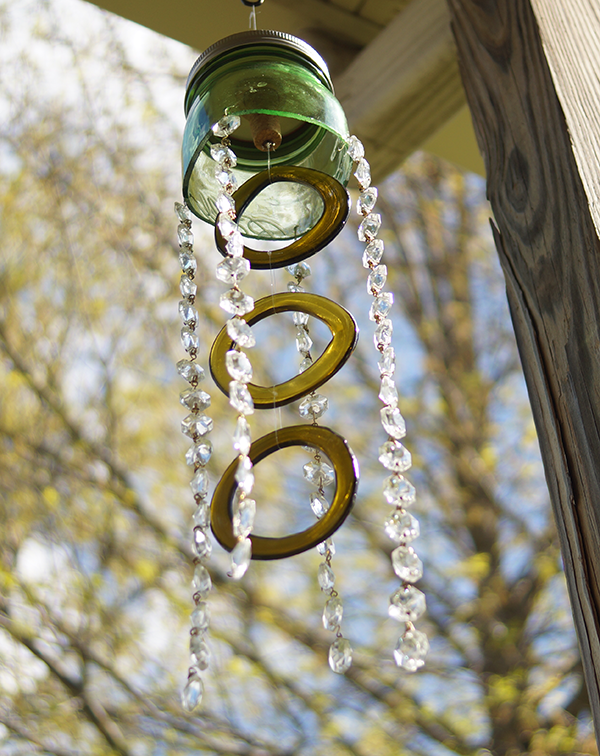
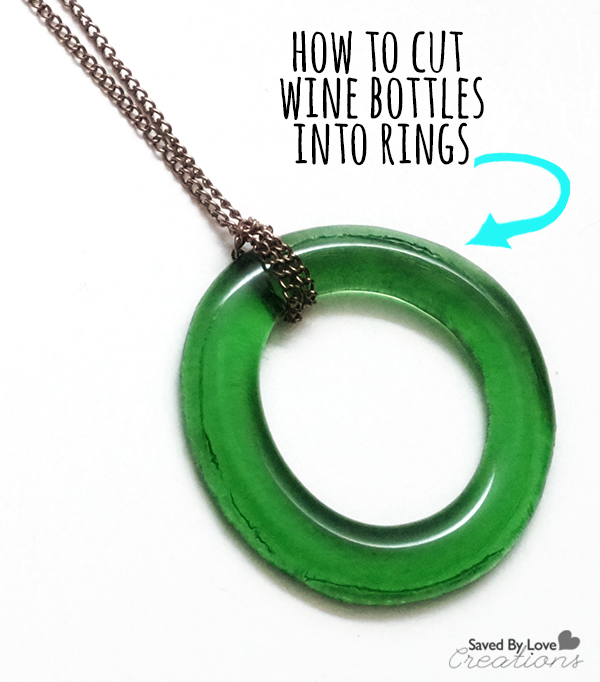
You can make your own set of these chimes by visiting the link in the first paragraph that teaches you how to cut the mason jar, drill holes in it and string/attach the dangly beads. The three rings in the middle are created from recycled wine bottles. I showed you how to make them HERE: How to Cut Wine Bottles for Perfect Rings:
I Hope you try this project!
[pinit]
[pinit]
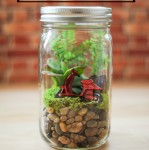
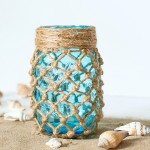
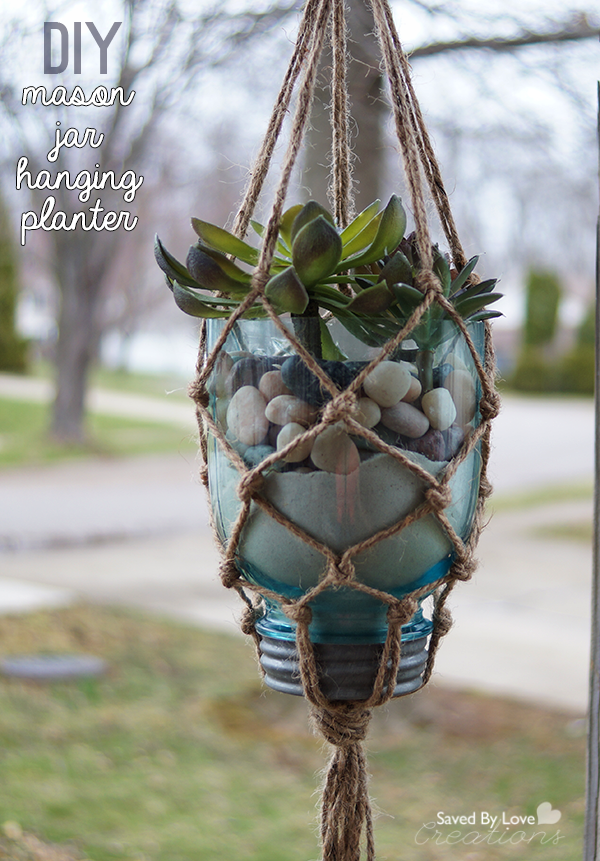
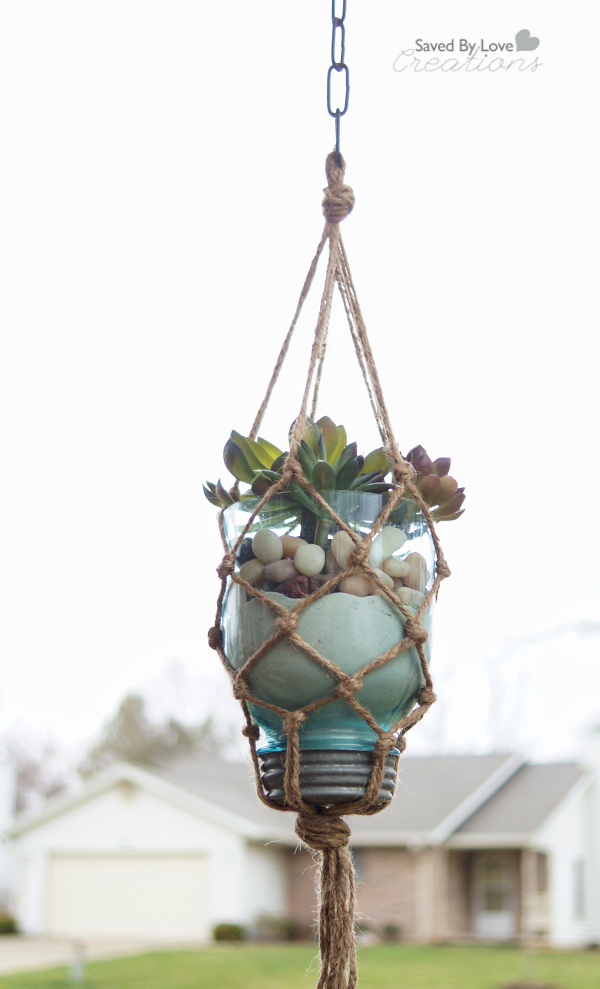
Mason jars are being cut like crazy around here. Today I am showing you how to make this easy macrame mason jar hanging planter. I have always wanted to make a macrame planter like this, and have finally marked it off of my to do list. It was super simple and fast to make. I truly thought it would be a long, complicated process and am pleased to report I was wrong! If you can count to five and tie a knot, you can make this. Let’s go!
Twine
Mason Jar with bottom 1/3 cut off (How to cut mason jars)
Scissors
Masking Tape
Butane Micro Torch or Candle and Lighter
Bucket of Cold Water
Plant
Chain
Cut 5 pieces of twine, each six feet in length.
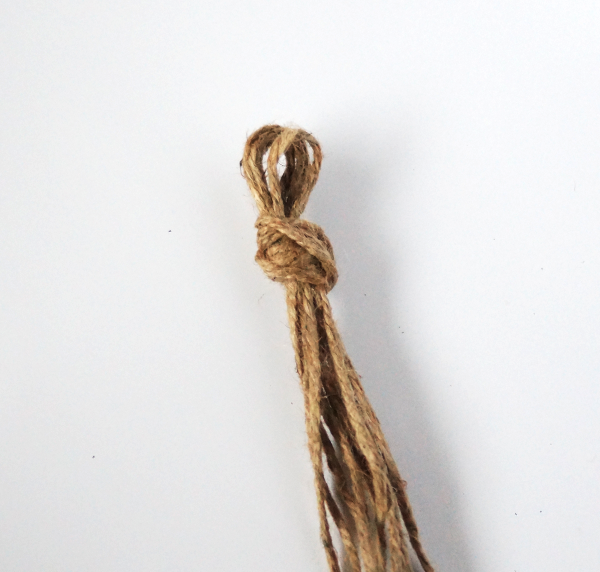
Tie a knot in the middle, leaving a loop at the top for hanging by chain.
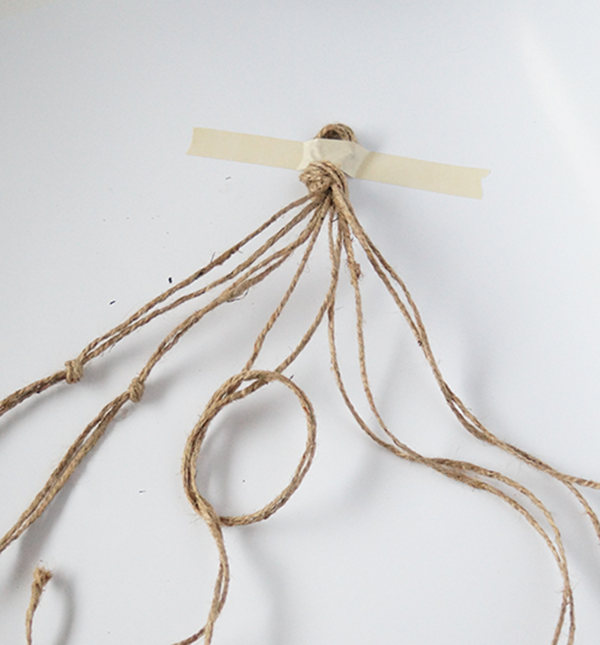
Tie the pairs of strings together to make five knots about 4 inches down from the big knot you made. In the photo I have completed 2 knots and the third one is in progress. Tie all 5 pairs of string into 5 knots.
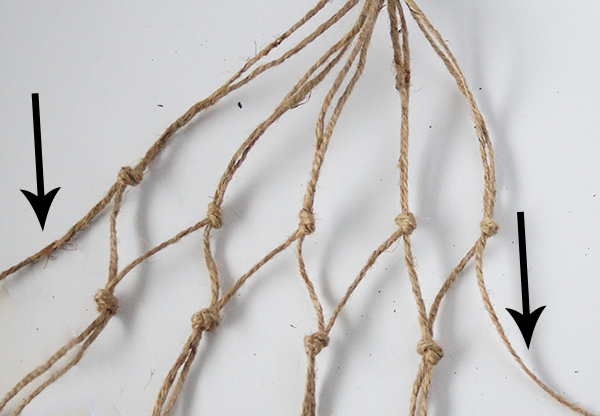
Now you will be making your hanger into a cylinder by joining the outer edges. About 1.5 inches down from previous knots, tie knots with pairs using one strand from each adjacent knot. For the final knot, tie the remaining string on each outer side (at the black arrows in the photo) together. You have a tube.
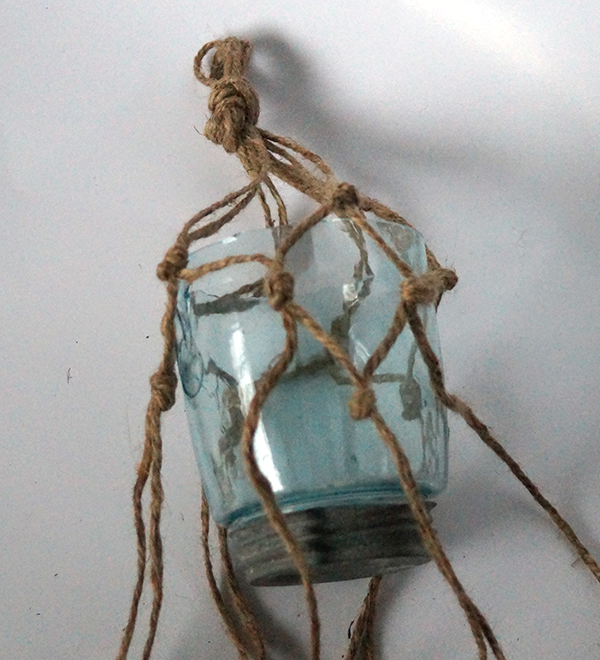
Repeat this step one or two more times, depending on how tall your planter is. You can insert your jar or other container into the planter to determine if you want another row of knots. I aligned mine so that the first row of knots is at the top of the container and decided that I would like one more row.
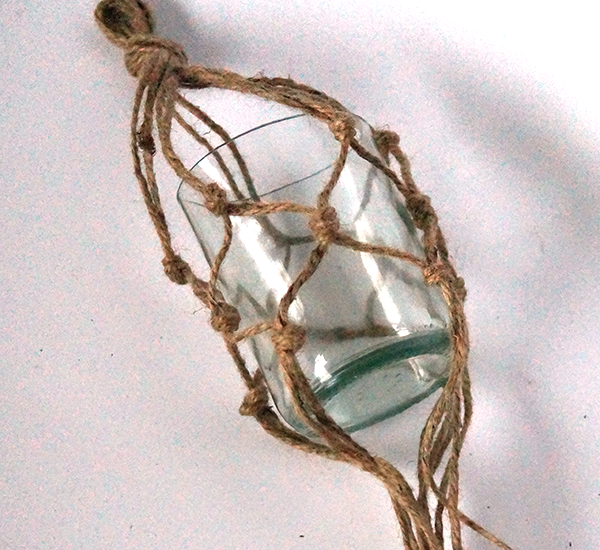
When you are happy with the number of knot rows, Insert plater and gather strands at the base of it to determine where to tie your final knot.
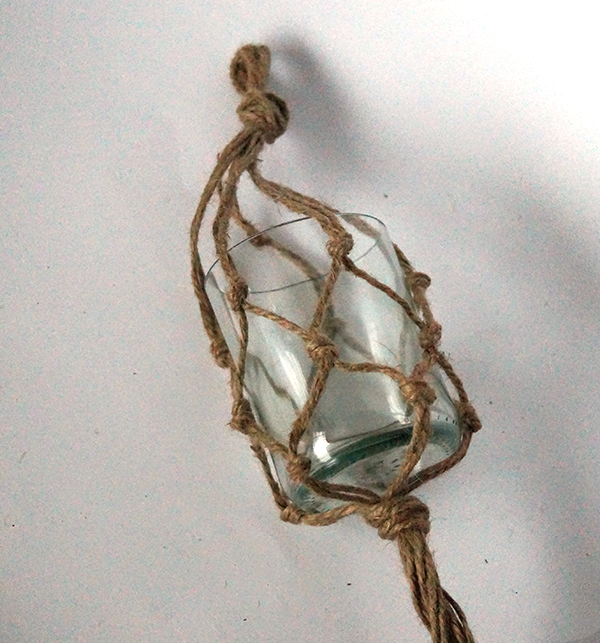
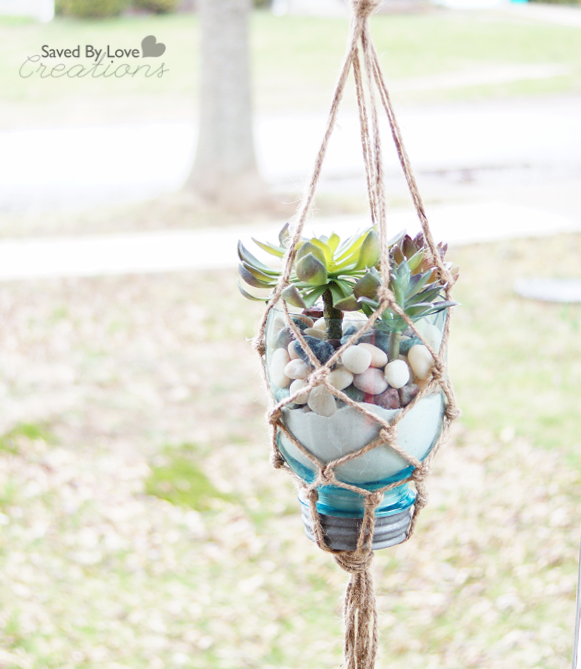
Tie the knot at the base, insert chain in top loop of planter and hang! (These last two pics are with a different container, but it is the same process for a mason jar. Sorry about the graininess!).
[pinit]
[pinit]
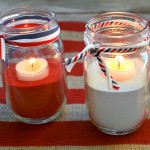
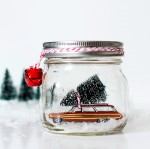
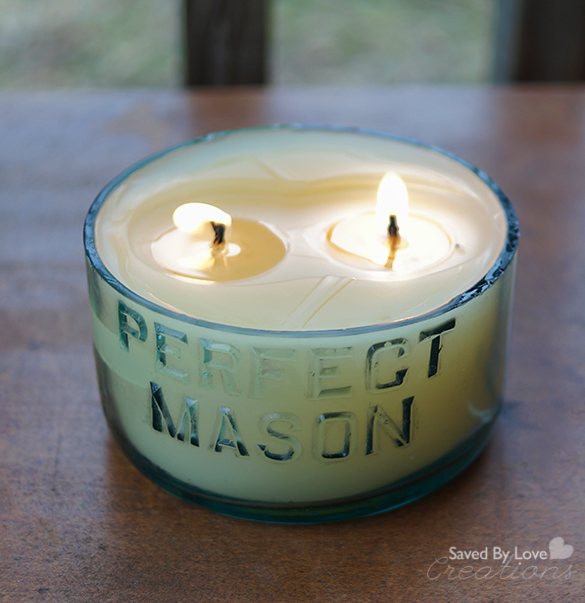
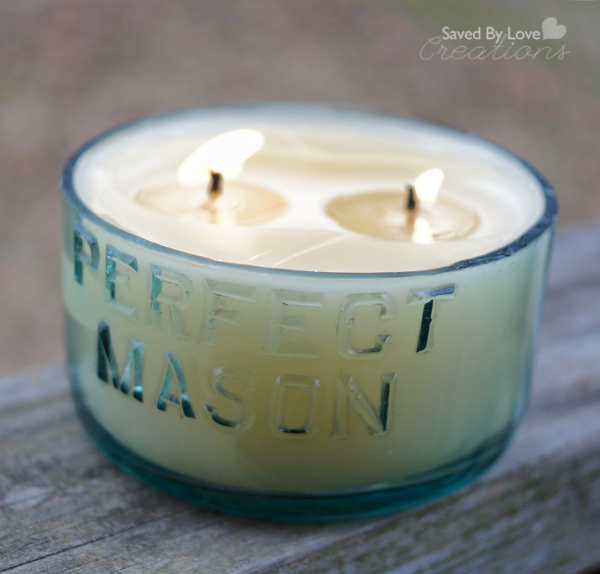
Last week I shared this DIY Mason Jar Chimes tutorial and I bet you were left wondering what was to come of the bottom part of the jar. Since I cut the jar just above the “Perfect Mason” lettering, I thought it would be so cute as a candle. Turns out I was right, don’t you think?! Read on to see how to upcycle a mason jar into one of your very own, These would also be great as part of your DIY wedding decor, or as gifts!
Beeswax
Soy wicks on metal tabs
Double sided adhesive
Melting Pot
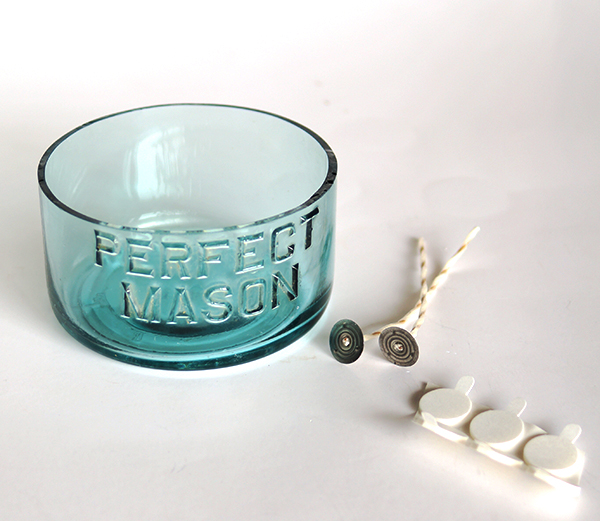
Mason Jar bottom (see tutorial: How to cut mason jars)
Bamboo Skewer or pencil
Clips
Scissors
Lint free cloth
Soap and water or glass cleaner
Melt wax per instructions. I used my Ranger melting pot, which was not really the best plan on earth since I could only melt a little bit of wax at a time, but that is what I did.
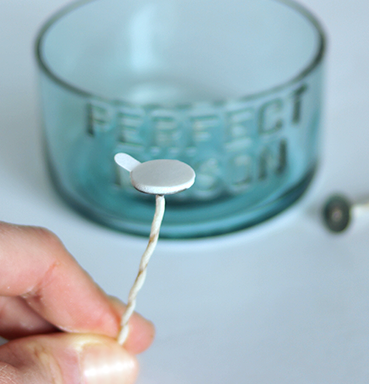
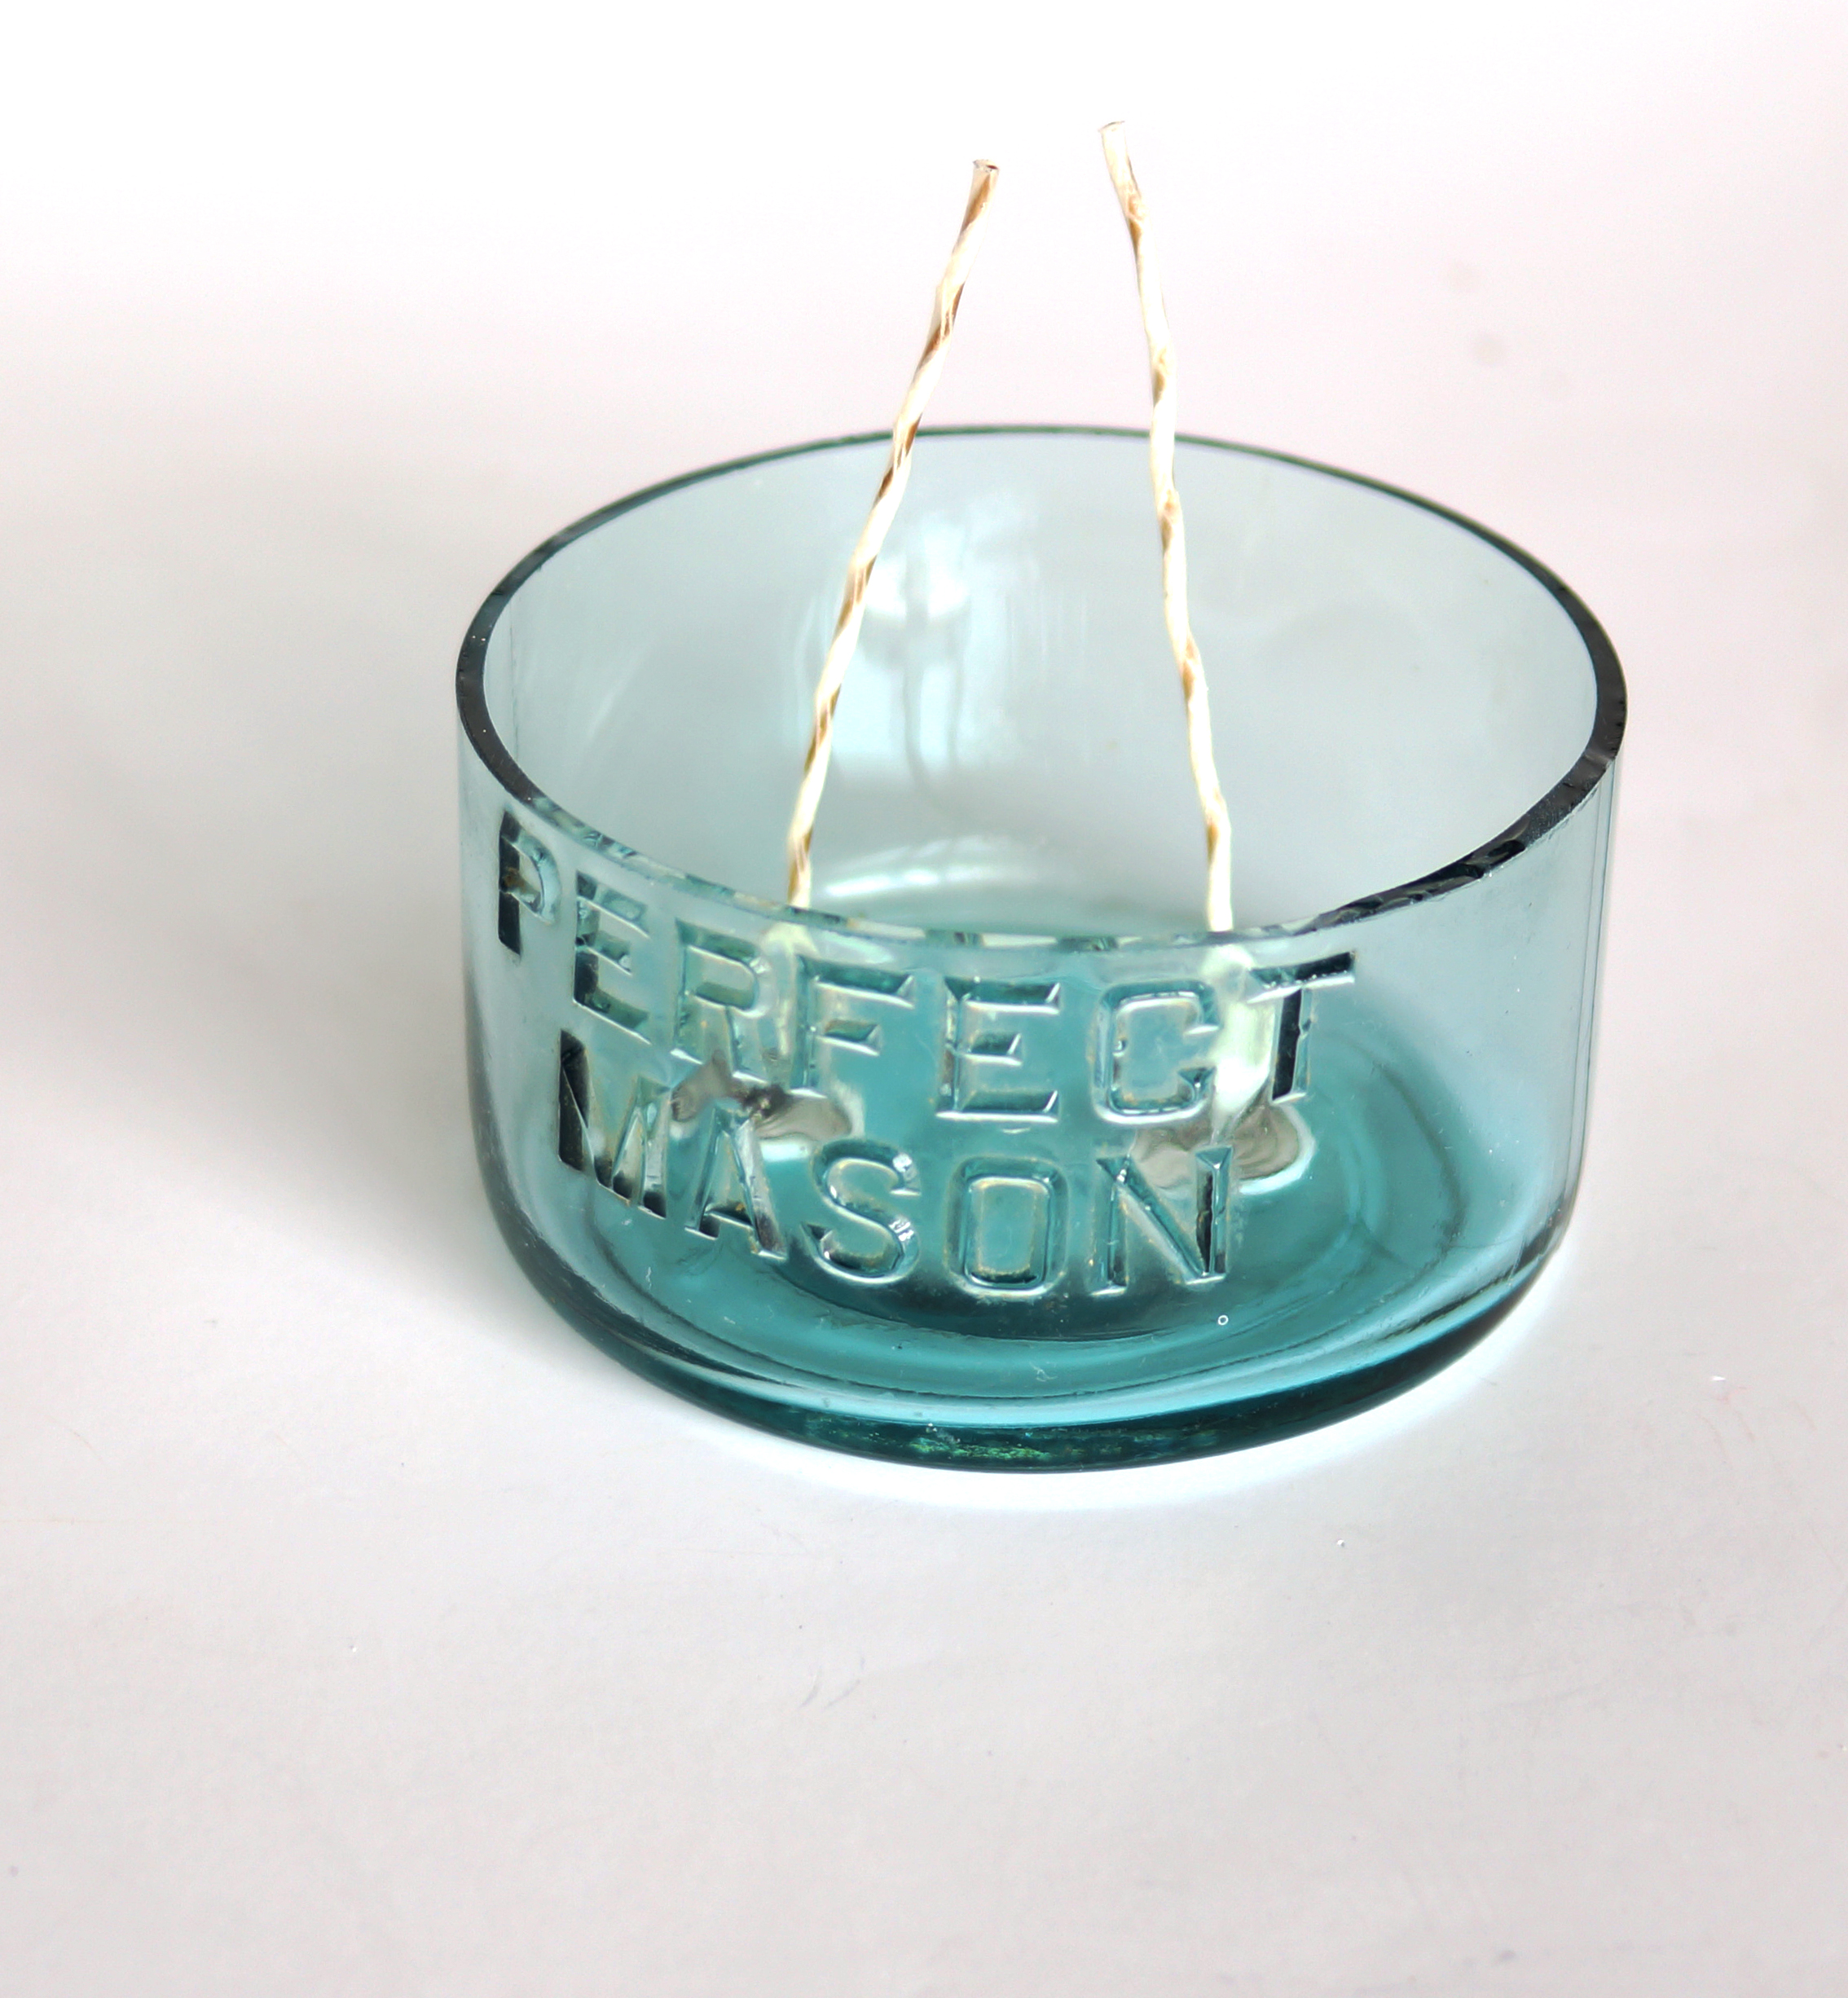
While that is melting, prepare container and wick. Clean container well and dry with a lint free cloth. Adhere wick tab to double sided adhesive, and stick other side into container. I used two wicks since the jar is big. Three might have been even better. That is yet to be seen.
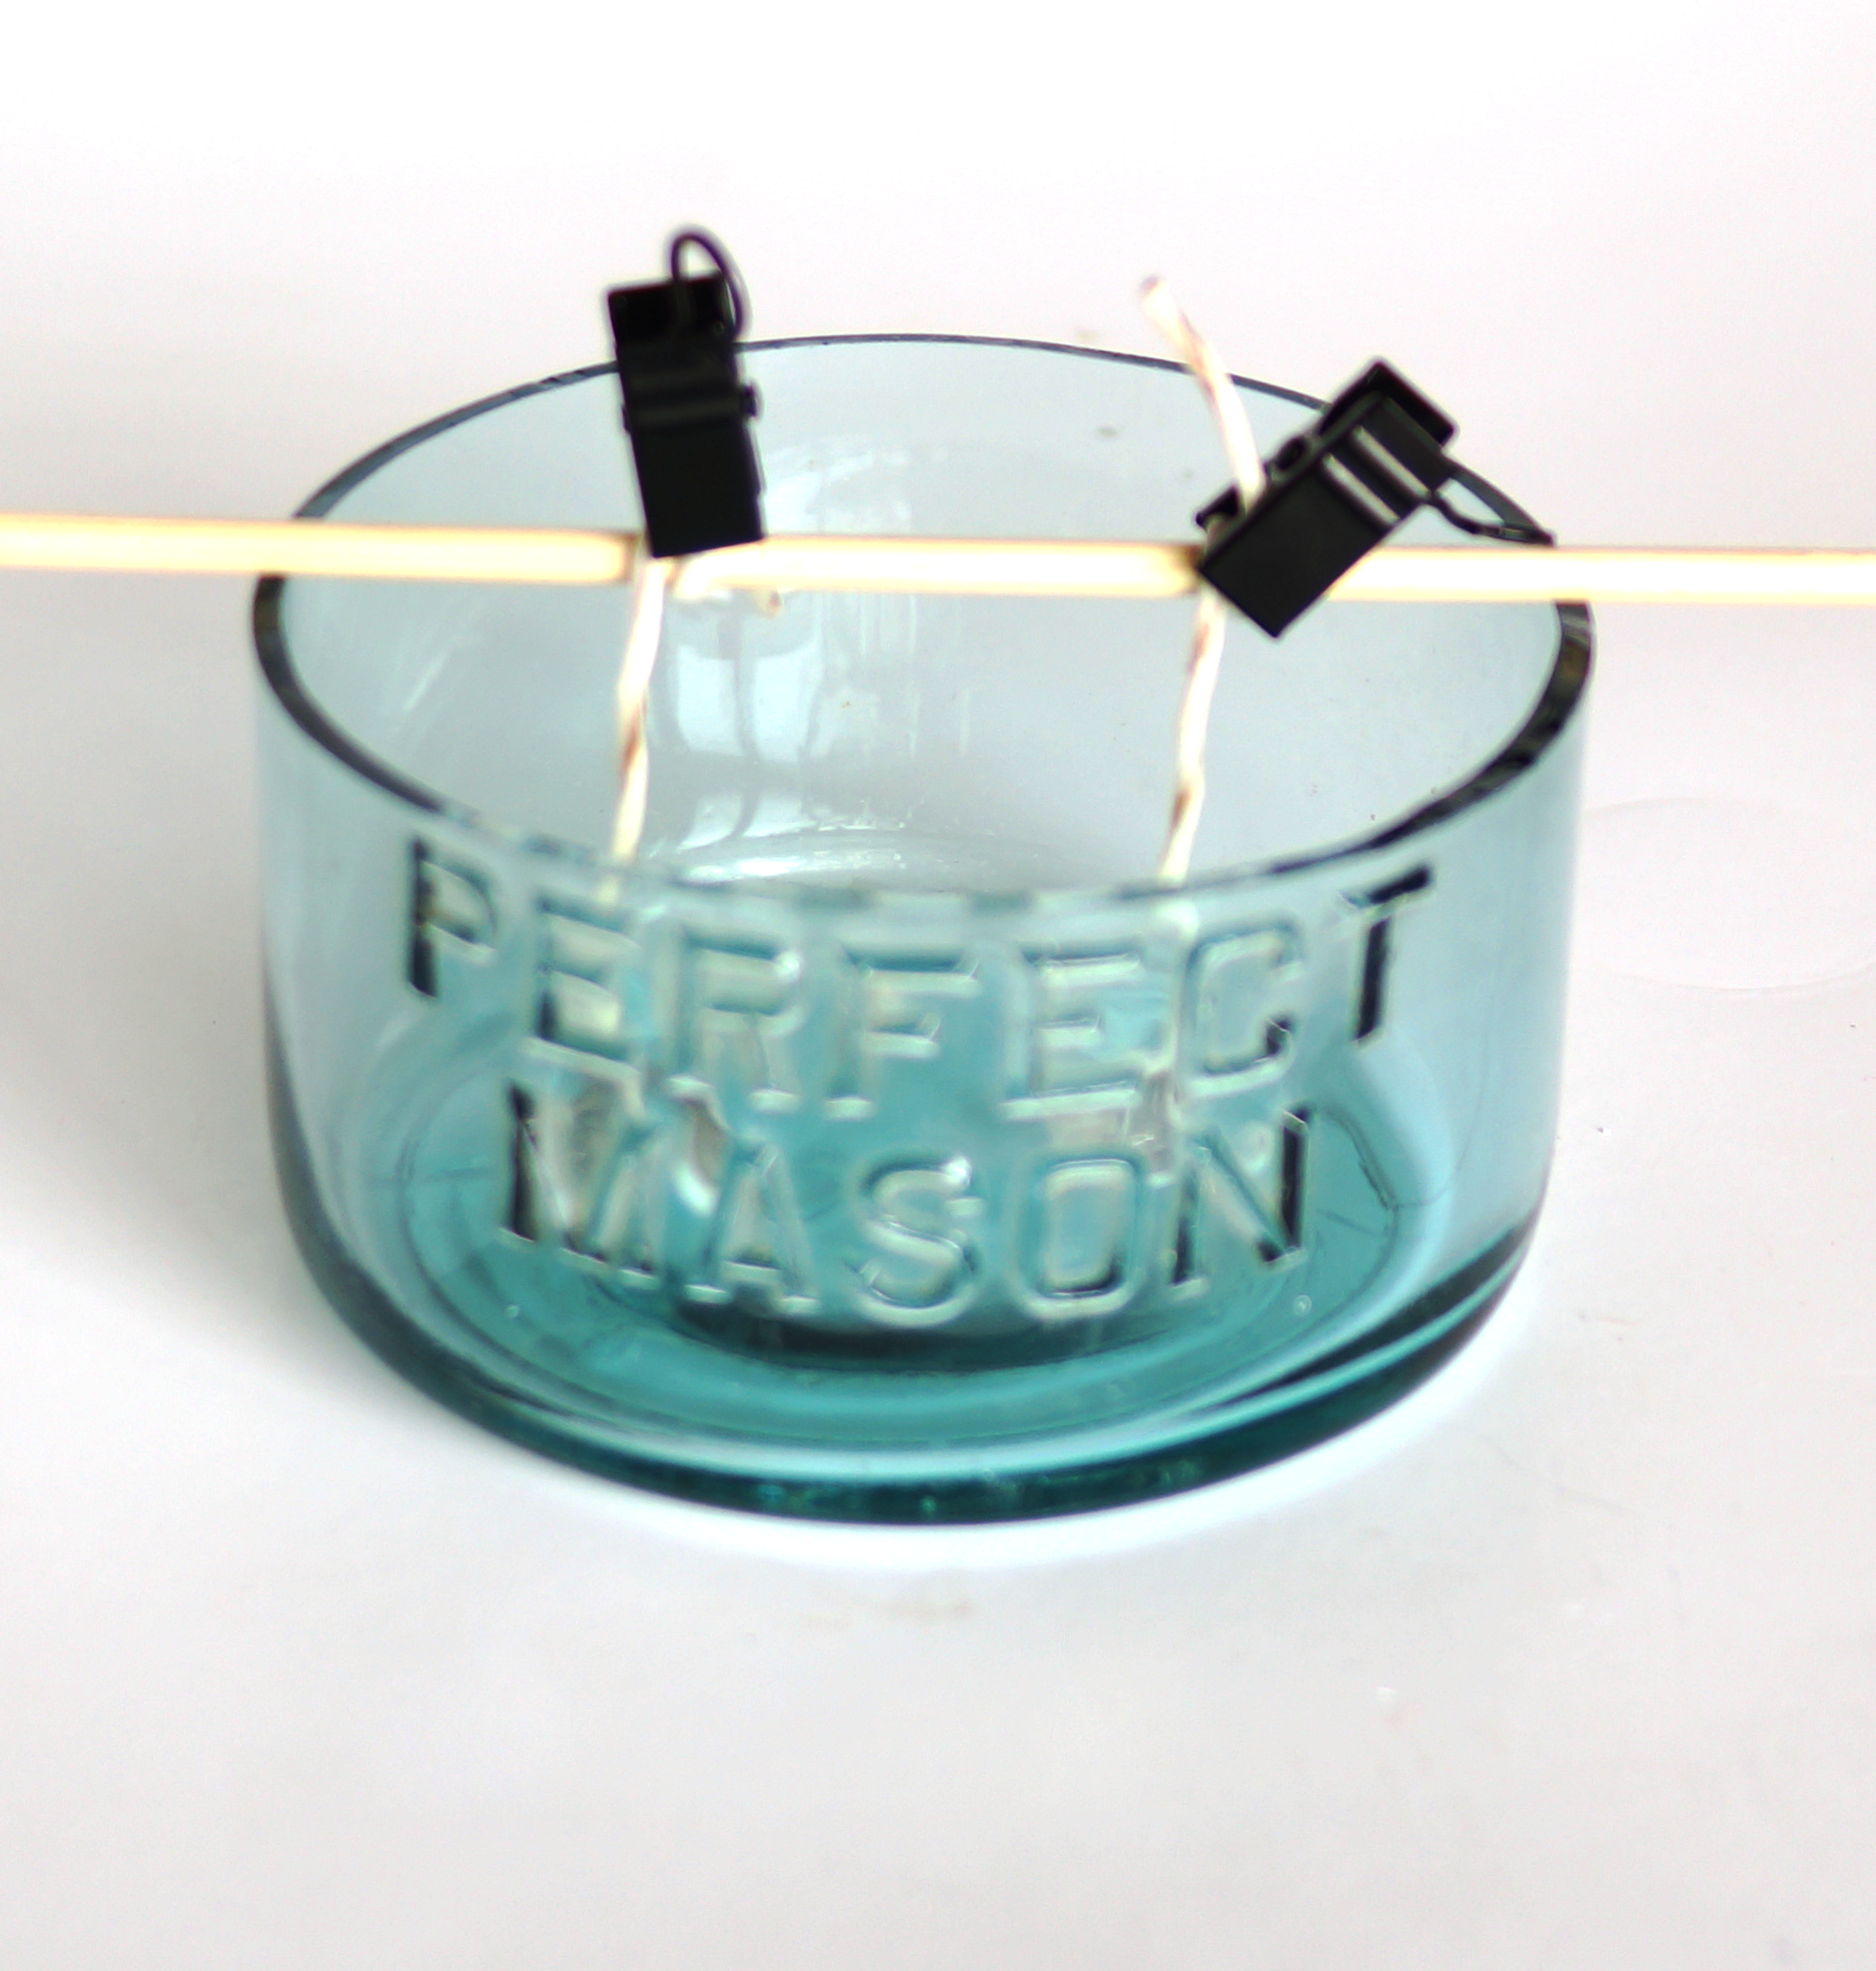
Wrap excess wick around dowel rod, centered so that wicks are straight up and down. Use clips to secure in place.
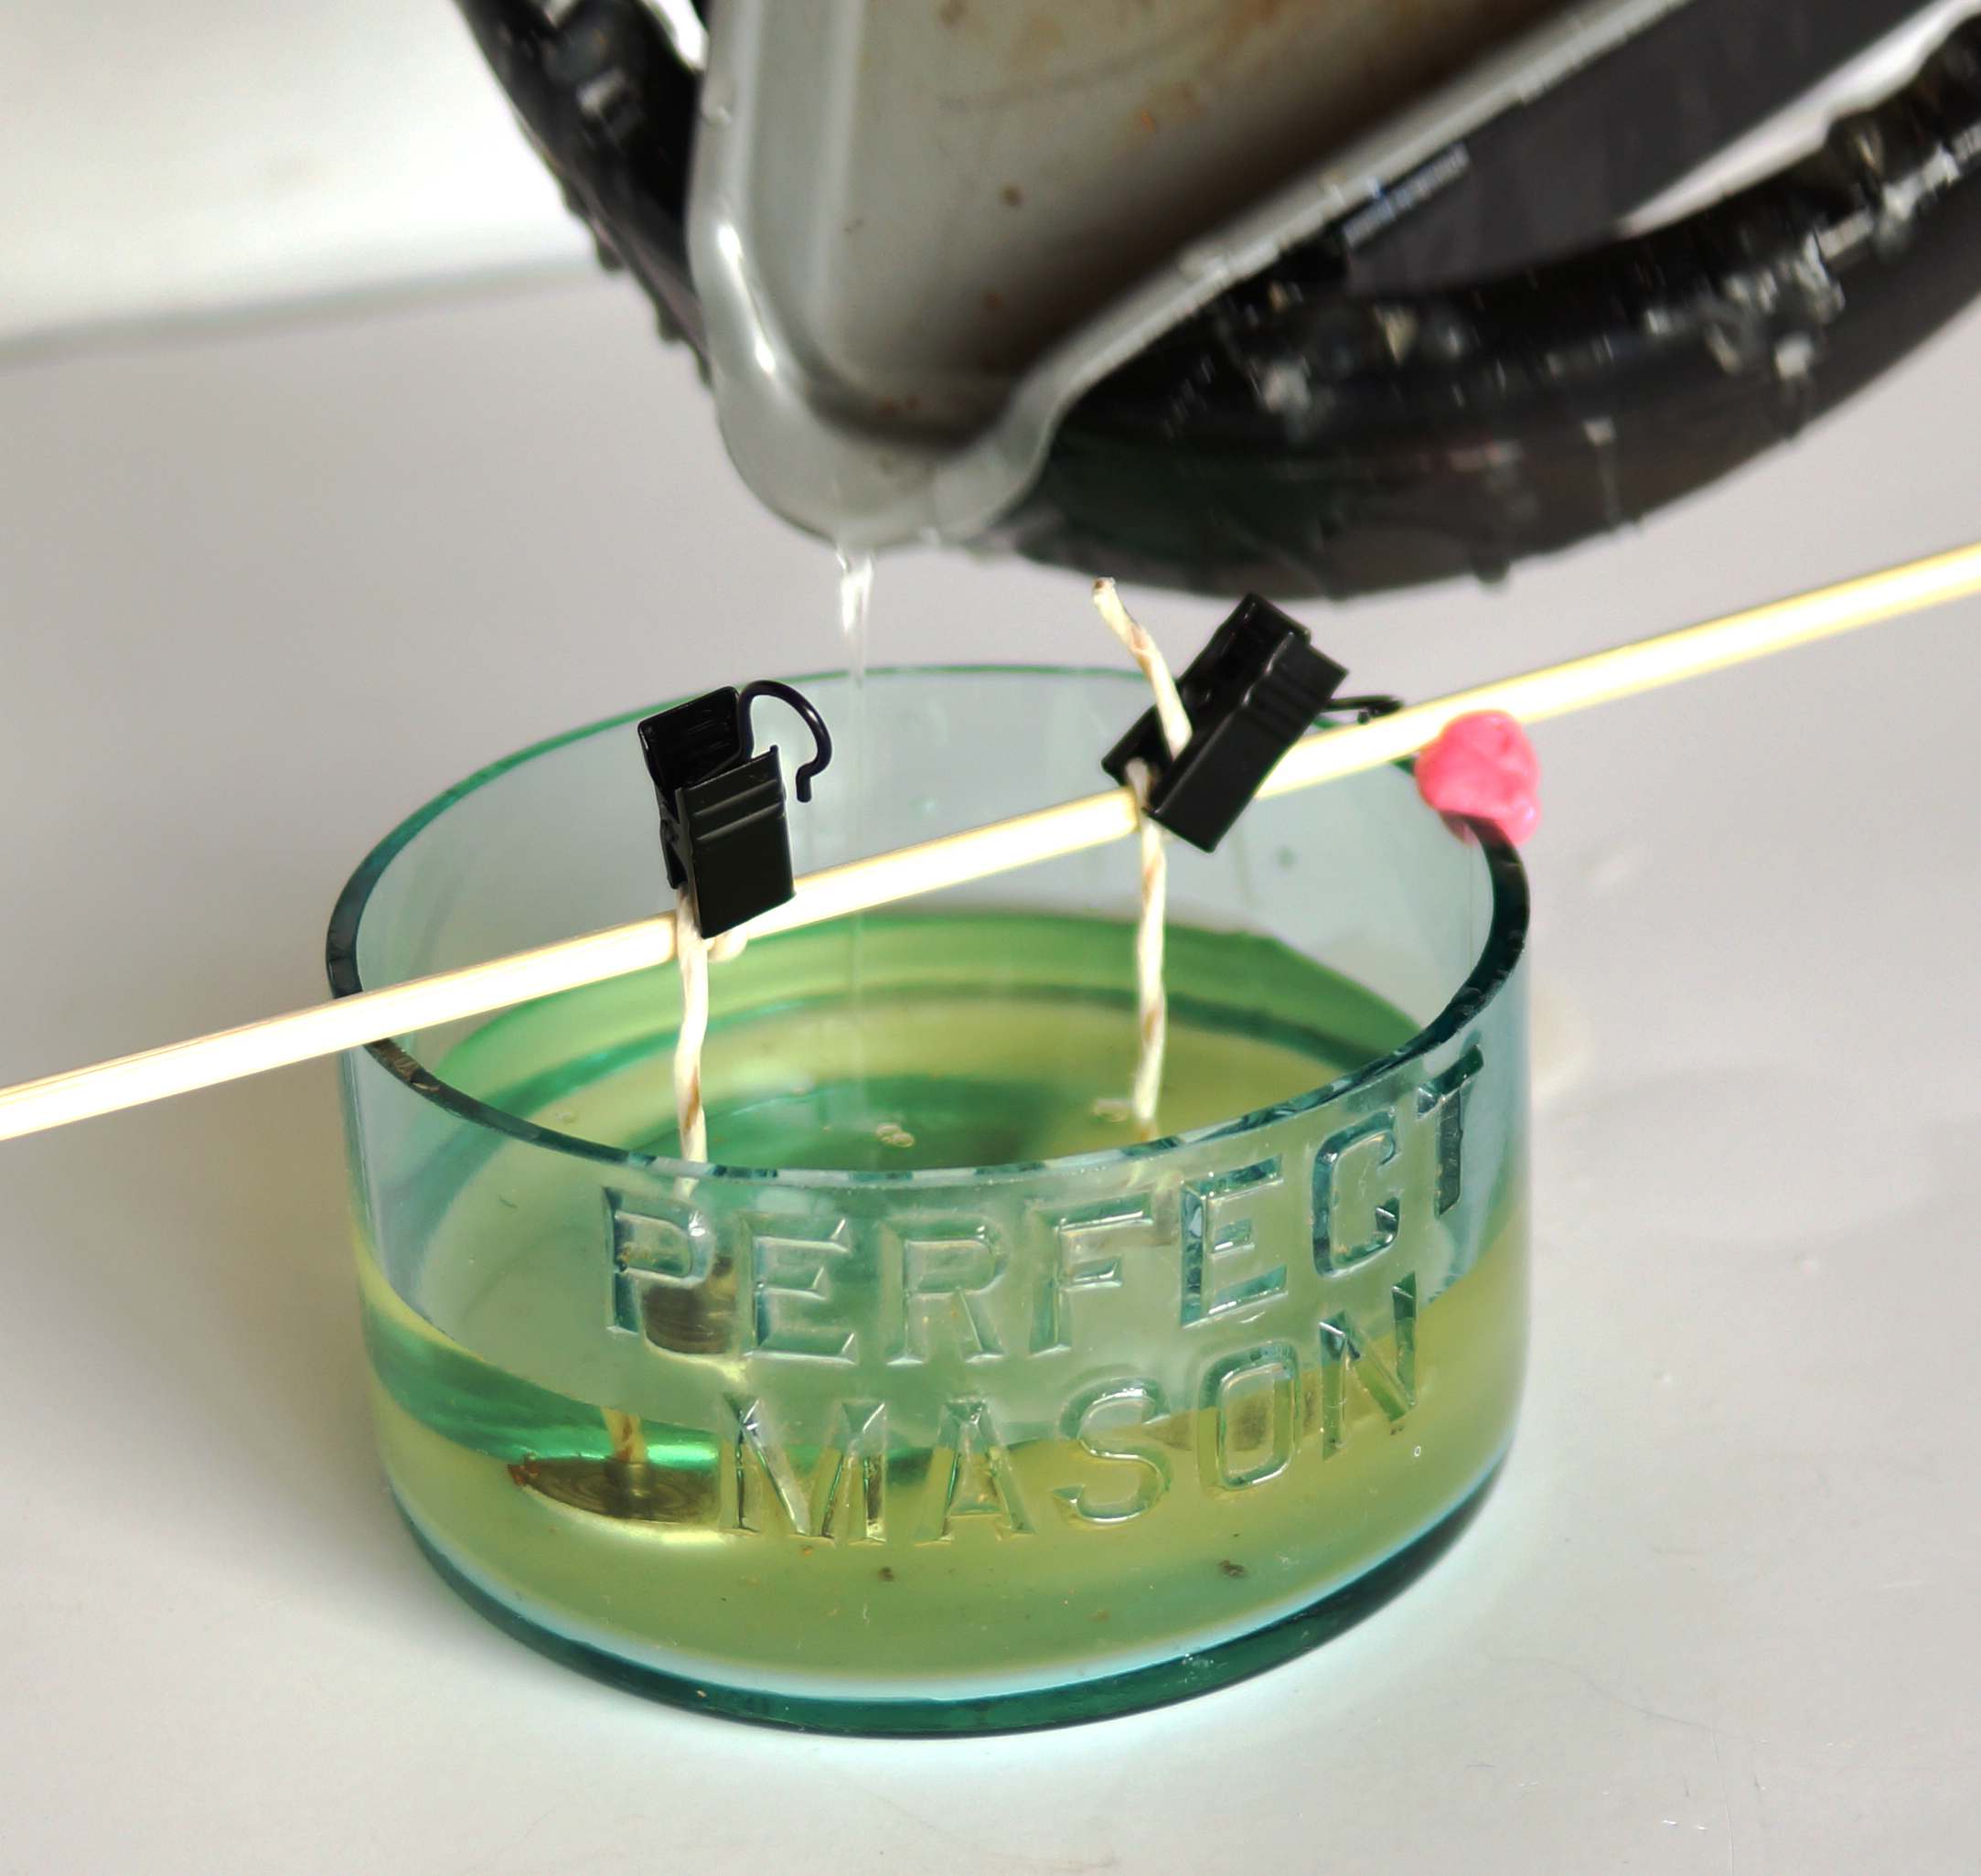
Pour in wax until container is as full as you would like. Let sit overnight, trim wicks and enjoy!
[pinit][pinit]
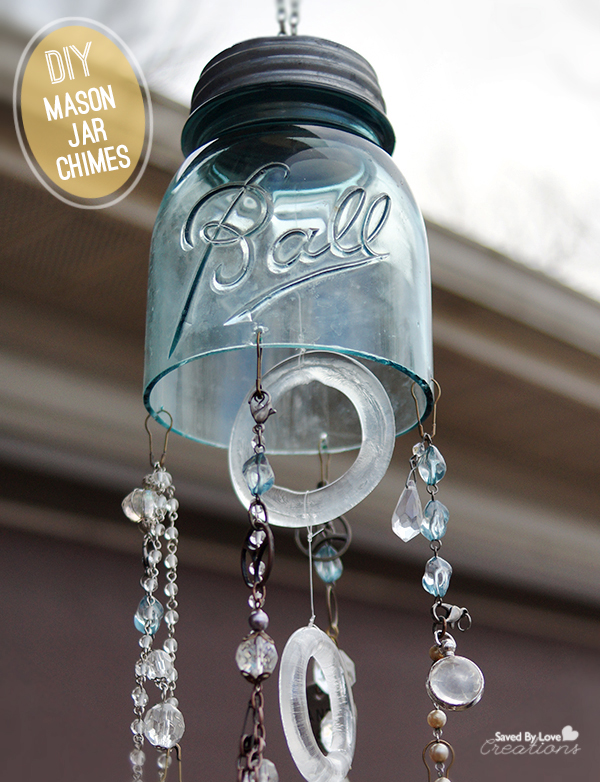
It was only a matter of time before I tried out my bottle cutter on a mason jar. Today I am sharing how I pulled off this mason jar to wind chimes upcycle, just in time for spring and outdoor decor. This project is a great stash buster for those beads and charms you’ve been stockpiling. There will be some cutting and drilling of glass, but don’t fear, you can do this!
Mason Jar with lid
2 eye screws
piece of scrap wood about 1/2 inch thick and smaller than lid
fishing line or other clear string
scissors
beads, chain, charms and connectors of your choice
Bottle cutter (Creator’s Cutter used in this tutorial)
Butane micro torch or candle and lighter
Dremel or other Rotary tool – I used Beads Landing Rotary Tool
measuring tape
Shallow container with cold water for drilling your jar (this will make sense later)
Bucket of cold water deep enough to submerge jar
Protective mask and goggles
E6000
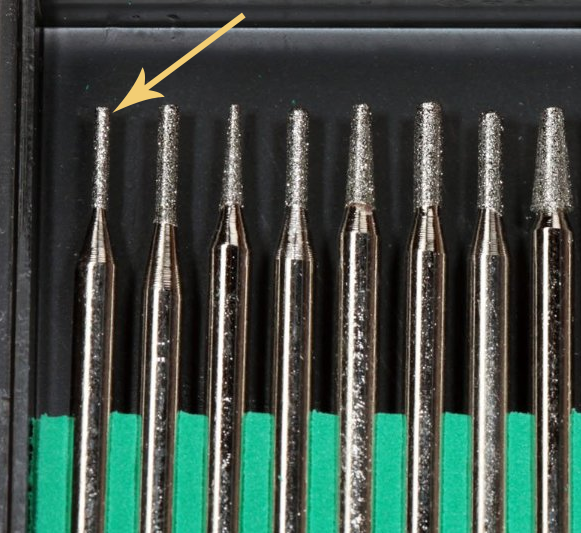
Diamond Bits for glass; I used a bit from this set
Permanent marker
Medium Grit Sand Paper
Glass beads or wine bottle rings (see my Wine Bottle Rings tutorial)
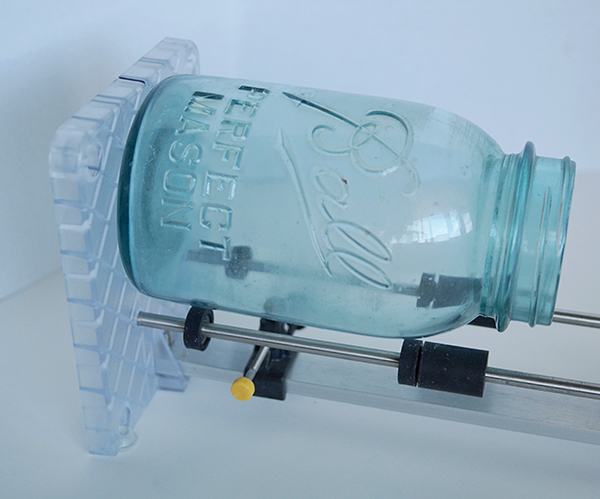
I place the mason jar on the cutter (My wine bottle cutting tutorial has a video on using this specific cutter).
Mark the jar so you know when you have made a complete rotation.

Once the score line is made, it is time to apply heat/cold to it. I like to do this with a butane micro torch while rotating the bottle on the cutter jig. I have moved the blade out of the way and am just using the cutter jig to hold the bottle and give me a way to rotate it easily with one hand while holding the torch with the other.
If you are using a torch, one minute is plenty of time for applying heat. Sometimes this is enough to break the score line. If not, submerge jar into cold water, covering score line. That is all it took for me on this mason jar. If yours doesn’t separate, repeat the heat/cold until it does.
If you are using a candle, watch the video linked above for instructions.

This is what my break looked like. Not bad! Now it is time to sand and smooth the edges.
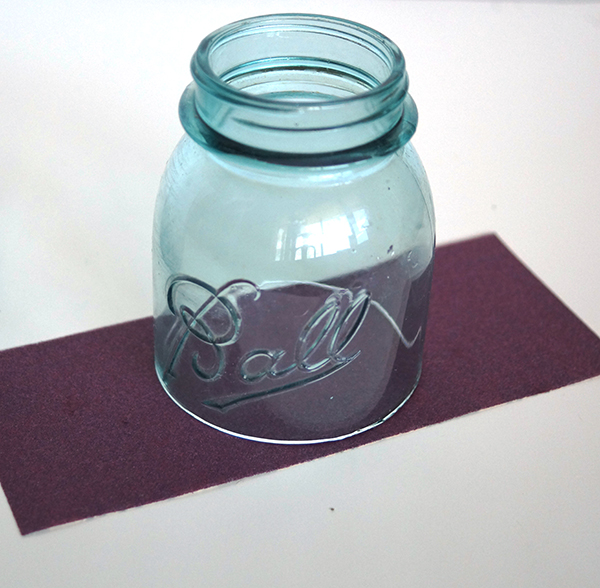
Sand lightly with medium grit paper. Get the inner and outer edges of the break. This is pretty quick.
You will notice after a minute or 2 of sanding that the edge is smooth to the touch and won’t cut you.
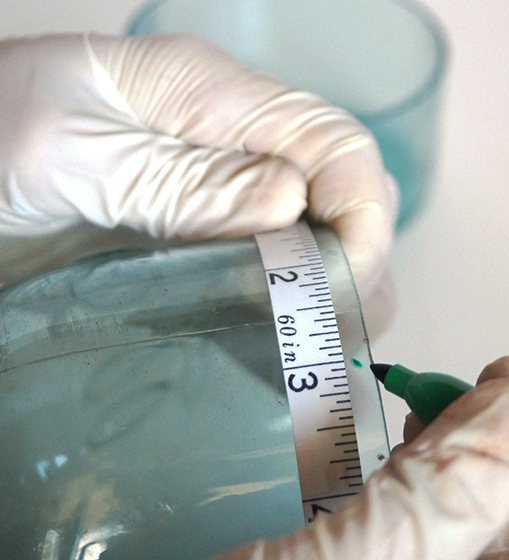
I measured the diameter of my jar and it was 12 inches. I marked every 3 inches for drilling a hole. This gave me 4 holes evenly spaced around the jar for stringing beads and charms.
Before drilling, put on eye gear and mask!!
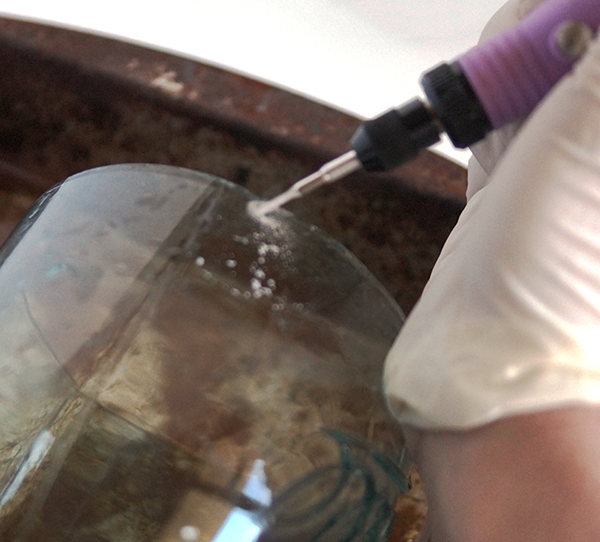
Place jar in shallow container of cold water. I use a square baking tin.
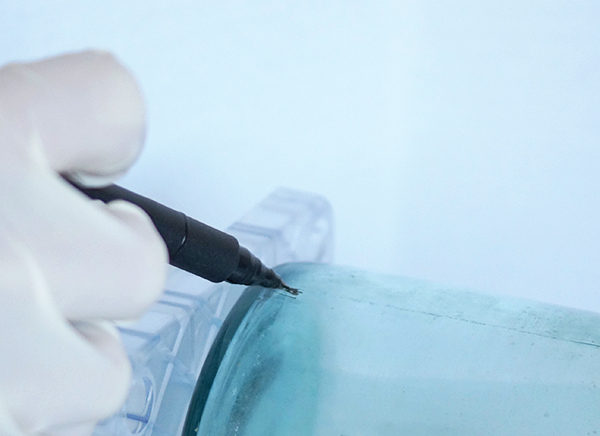
To begin drilling, come in at an angle to start an indentation.
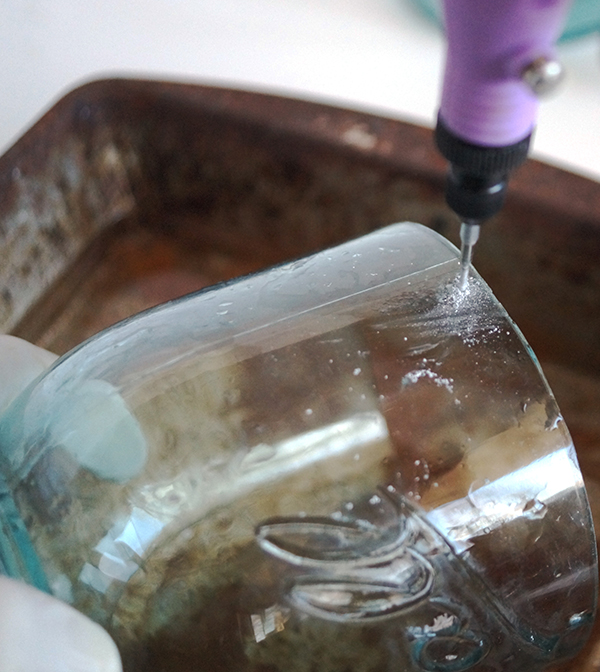
Once the indentation is started, move drill to 90°. Every 30 or so seconds, stop drilling and rotate jar so that hole gets rinsed out and glass where your were drilling gets cooled. This prevents the glass from breaking due to high heat. Continue until you have drilled all the way through.
Do this at each mark around the jar.
Use fishing line or beading string to string various beads, charms, found objects and chain to your liking in each hole.
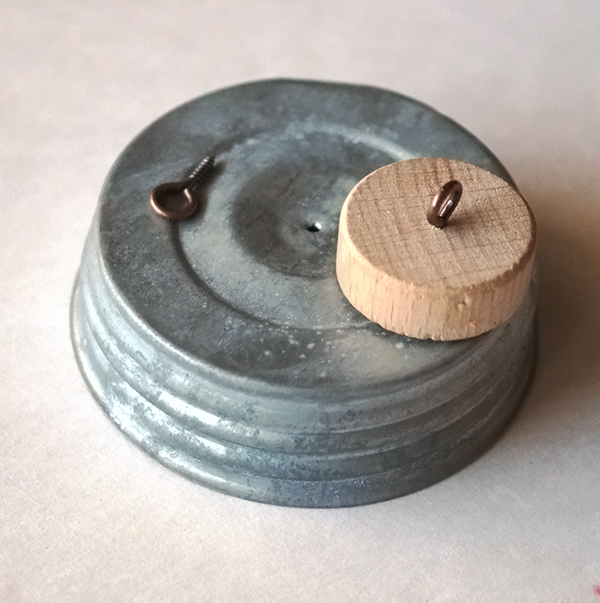
I wanted to use the old lid that was on this jar in the design, so I needed to have a way to hang the chimes by it. I used a hammer and small nail to make a hold in the top center.
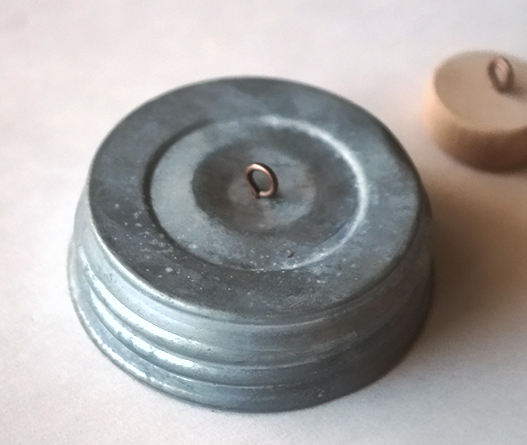
Next I screwed in the eye screw as pictured.
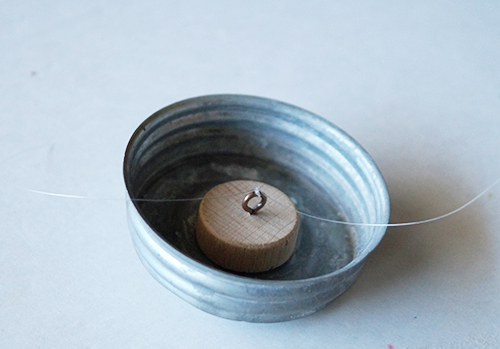
I screwed into the wooden disk and screwed the remaining eye pin to the other side as shown. I later added E6000 to the wooden disk on the side that contacts the jar lid for added strength. It gets pretty gusty around here in the spring!
I cut a length of fishing line to the eye screw and tied the other end to a wine bottle ring, tied another ring to that one, and another ring to that one for a total of 3 hanging down from the middle of the jar.
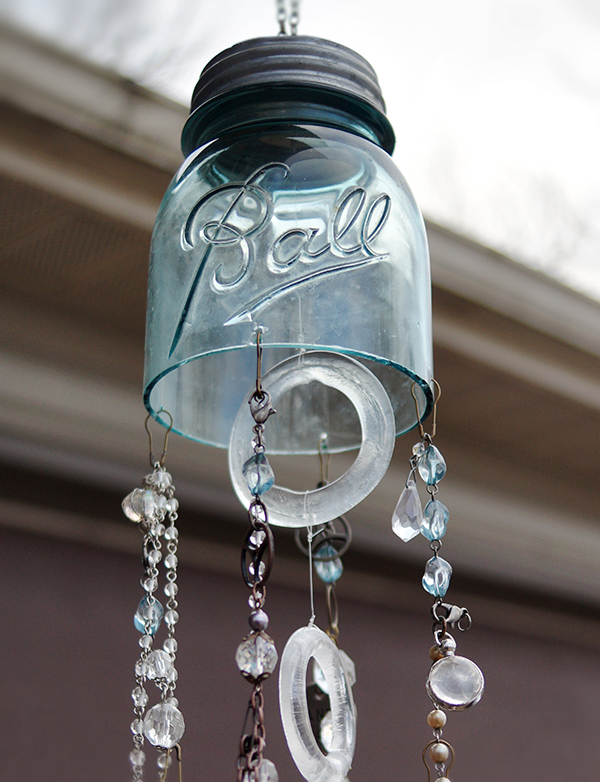
To finish, put the lid on the jar and add chain to the eye screw on top for hanging. Hang and enjoy!
[pinit]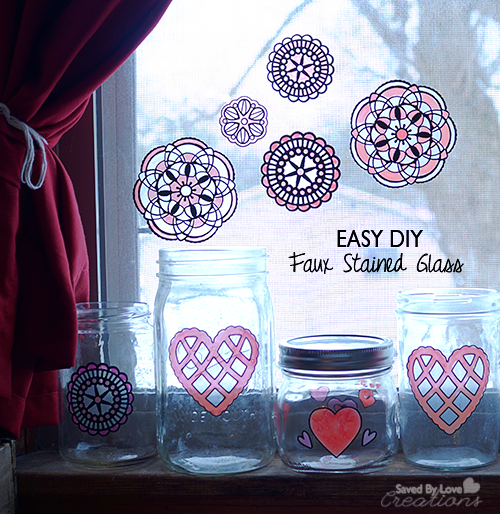 [pinit]
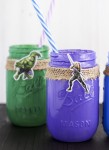
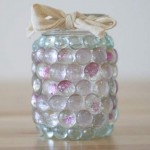
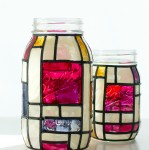
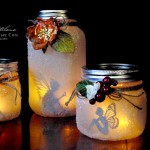
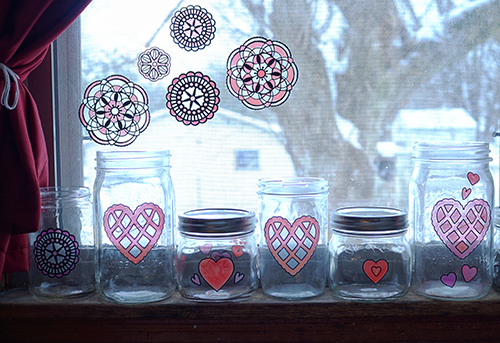
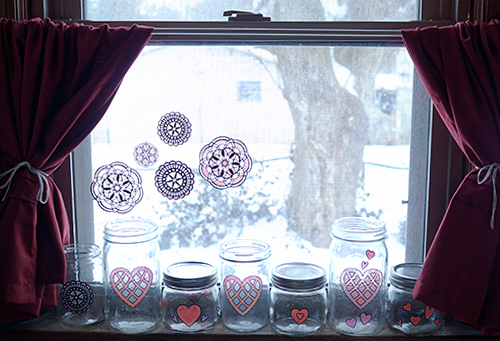
Have you had the chance to use Martha Stewart Paintable Clings? I have always loved the look of stained glass, and these clings give you that in a few easy steps. My favorite part is that they are reposition-able, so you can easily remove them and place them on another surface. Read on to see how to use them for this fun heart themed window scene on mason jars.
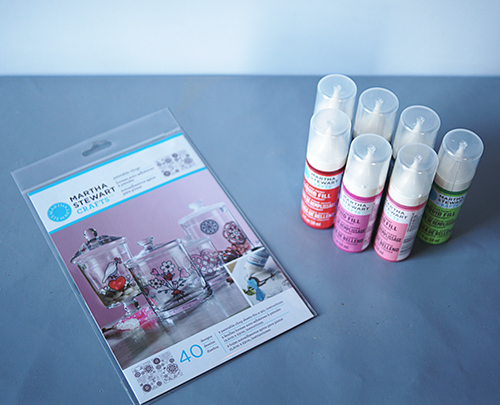
Martha Stewart Paintable Clings Hearts and Flowers
Martha Stewart Liquid Fill in colors of your choice
Glass surface such as windows, mason jars, bottles
Paper towels
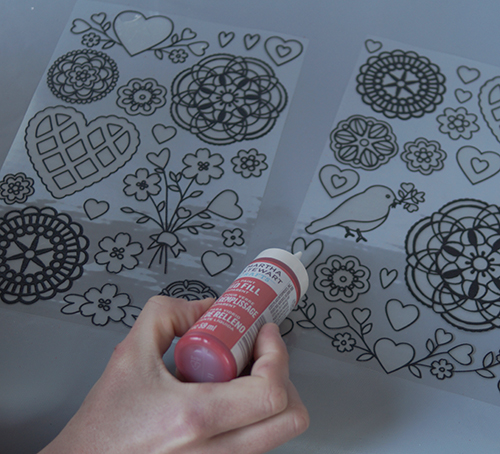
Lay out the clings on a flat surface, leaving them on the clear backing sheet. Paint in the designs using the transparent fill straight from the bottle. I got lots of air bubbles, which I popped with my finger and wiped onto a paper towel.
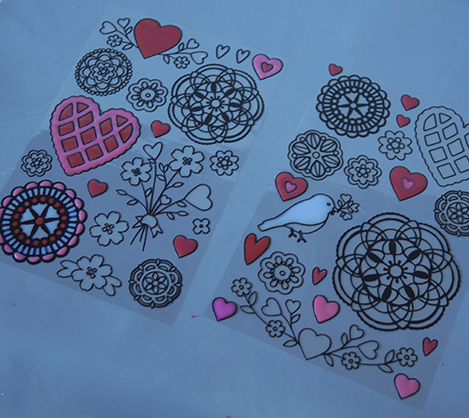
Let dry for several hours. Clean receiving surface with rubbing alcohol and dry with lint free towel. Apply cling and that is it! If you don’t like the placement, you can easily remove and reposition.


