Archives for April 2014

How to Make a Gorgeous French Typography Lamp from a Liquor Bottle

[pinit]

How to Make an amazing french typography lamp from a recycled glass bottle; Distressed with @decoart Chalky Finish Paint @homedepot @michaelsstores @savedbyloves @graphicsfairy

Make a French Typography Lamp[pinit]

This is a sponsored post written by me on behalf of DecoArt.  All opinions are mine and honest.  This paint rocks!

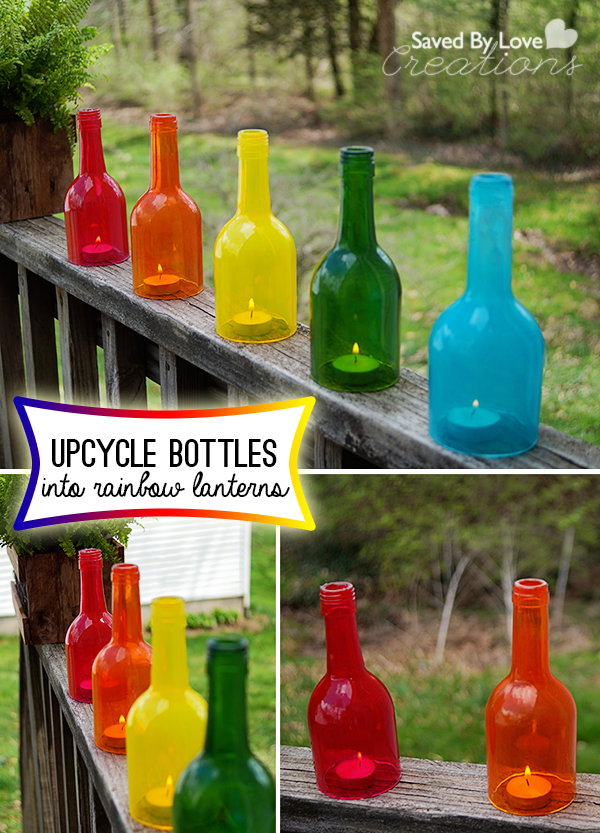
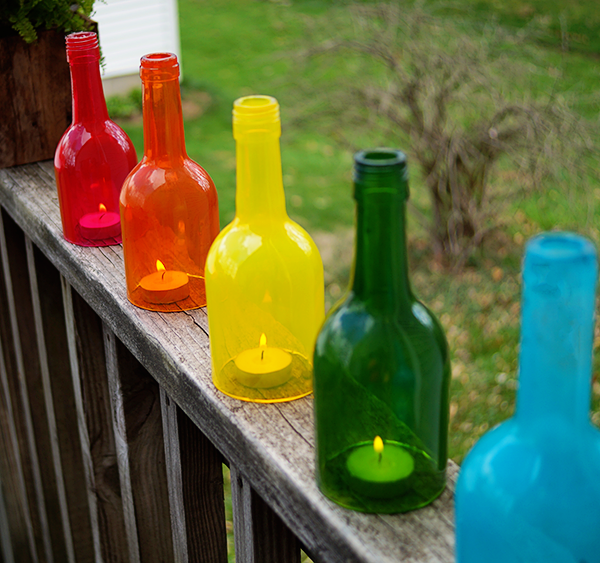
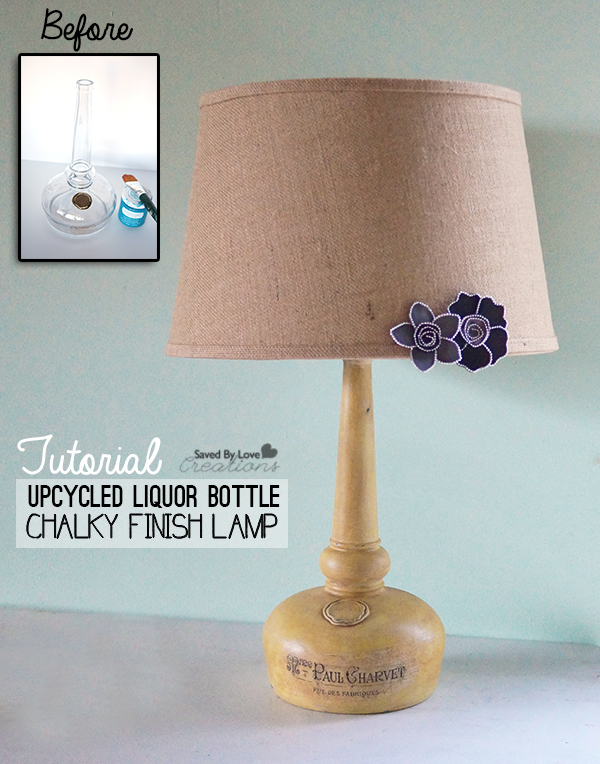
We are getting ready for a big move, and I am busy with DIY home decor on a shoestring budget!  Today I am sharing a super sweet french typography Chalky Finish Paint lamp that I made from a discarded liquor bottle.  You will see how to drill a hole in the bottle for the cord, how to chalk paint and distress the lamp, as well as how to transfer an image to the painted surface.  This project is easy and cheap.  The biggest expenditure is the $6 bottle lamp kit and the $15 lamp shade I just had to have for it!   The new Americana Decor Chalky Finish paint is now available in Home Depot and Michaels stores. It is also available for purchase online at homedepot.com.

Make a chalk paint lamp from upcycled bottle

SUPPLIES:

Really cool liquor bottle

Drill and 1/2 inch Diamond hole drill bit

Small container of water

Towel or paper towels

Rubbing Alcohol or glass cleaner

Lamp Shade

Light Bulb

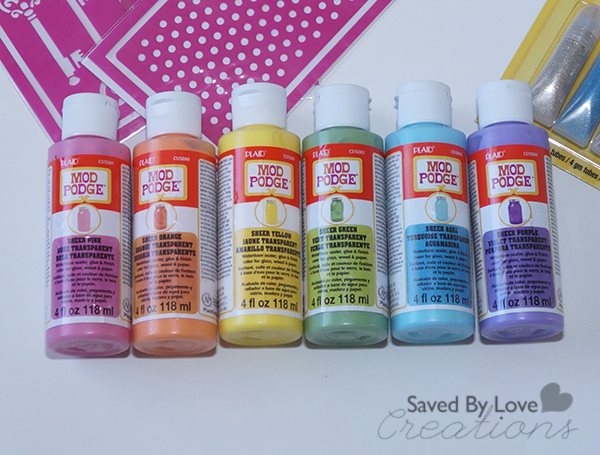
 DecoArt Americana Chalky finish paint In Treasure, Inheritance, Everlasting and Primitive

DecoArt Americana Crème Wax in clear and Golden Brown

Medium grit sand paper

Paint brush and wax brush

Bottle Lamp Kit (I got mine at Wal-Mart for $6.47

White Tissue Paper

Cardstock

Masking Tape

Printer

Image to transfer (I used this French Typography Graphic from the fabulous Graphics Fairy)

TUTORIAL:

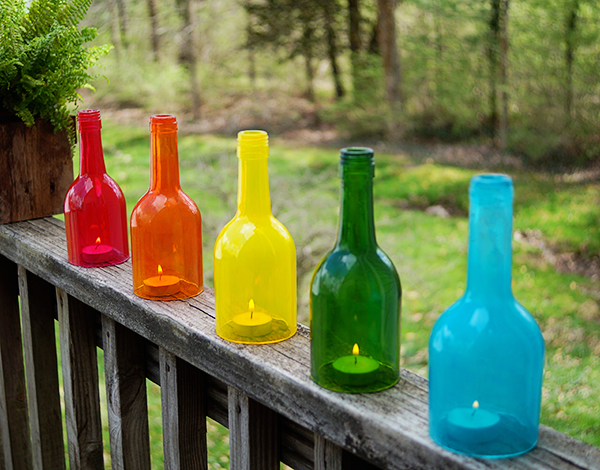
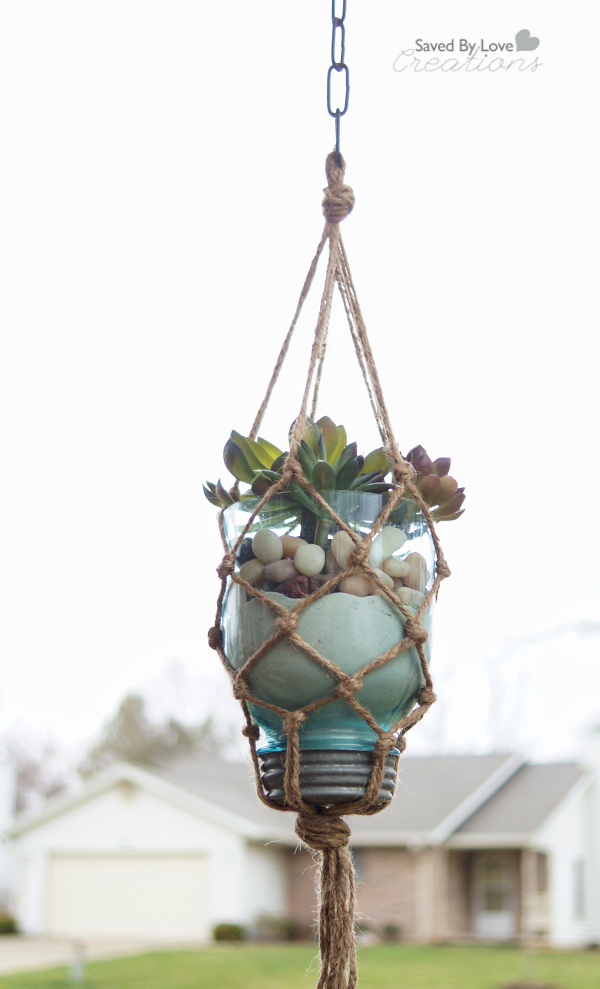
Begin by drilling a hole in the back at the base of your bottle where you want the cord to exit.  I showed you how to do that HERE:

 Upcycle a Glass Bottle into a Lamp

how to chalk paint on glass

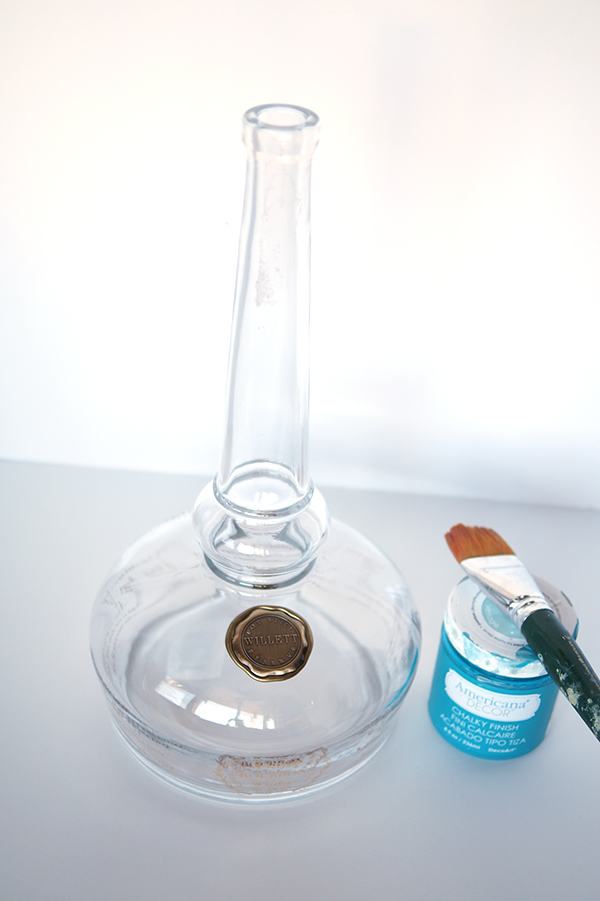
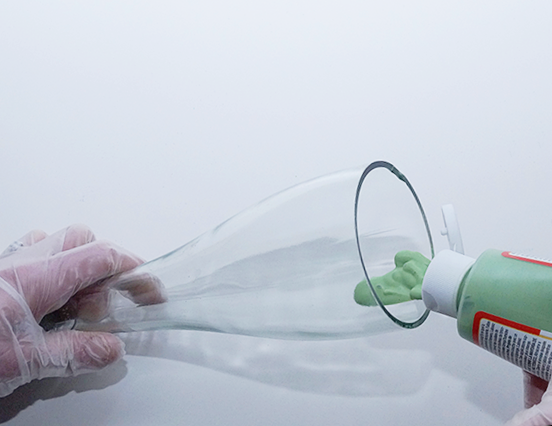
Once your hole is drilled, clean your bottle surface all over with glass cleaner or rubbing alcohol.

Distress painting tutorial

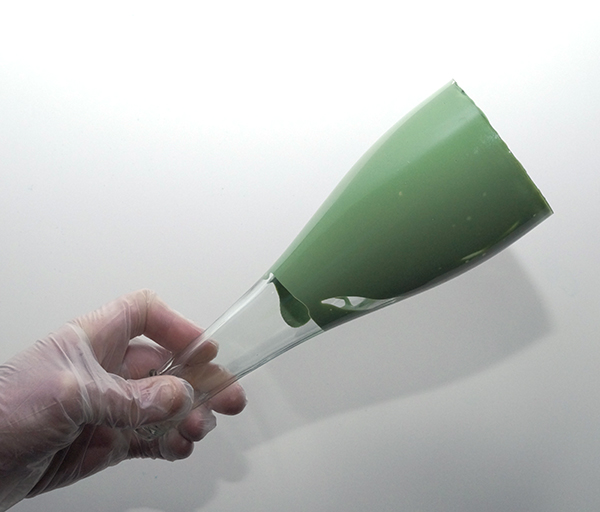
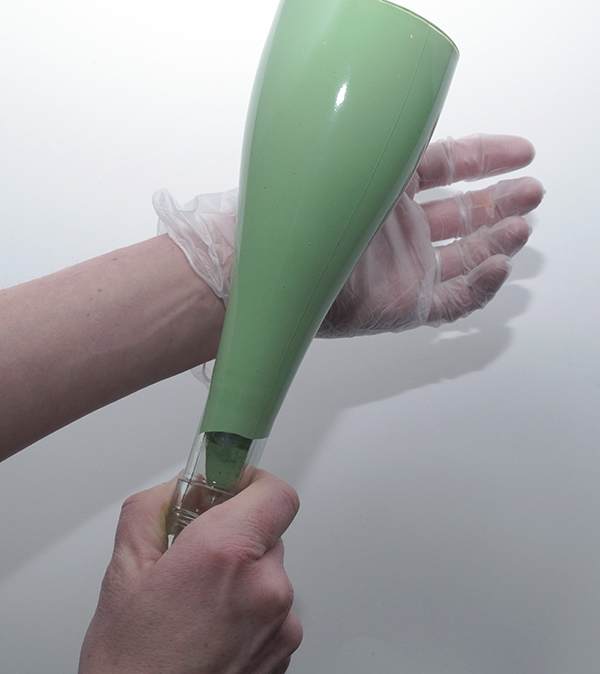
Use a soft, flat brush to paint on a layer of Treasure.  When that is dry, paint on a layer of Primitive.

Upcycle a wine bottle craft

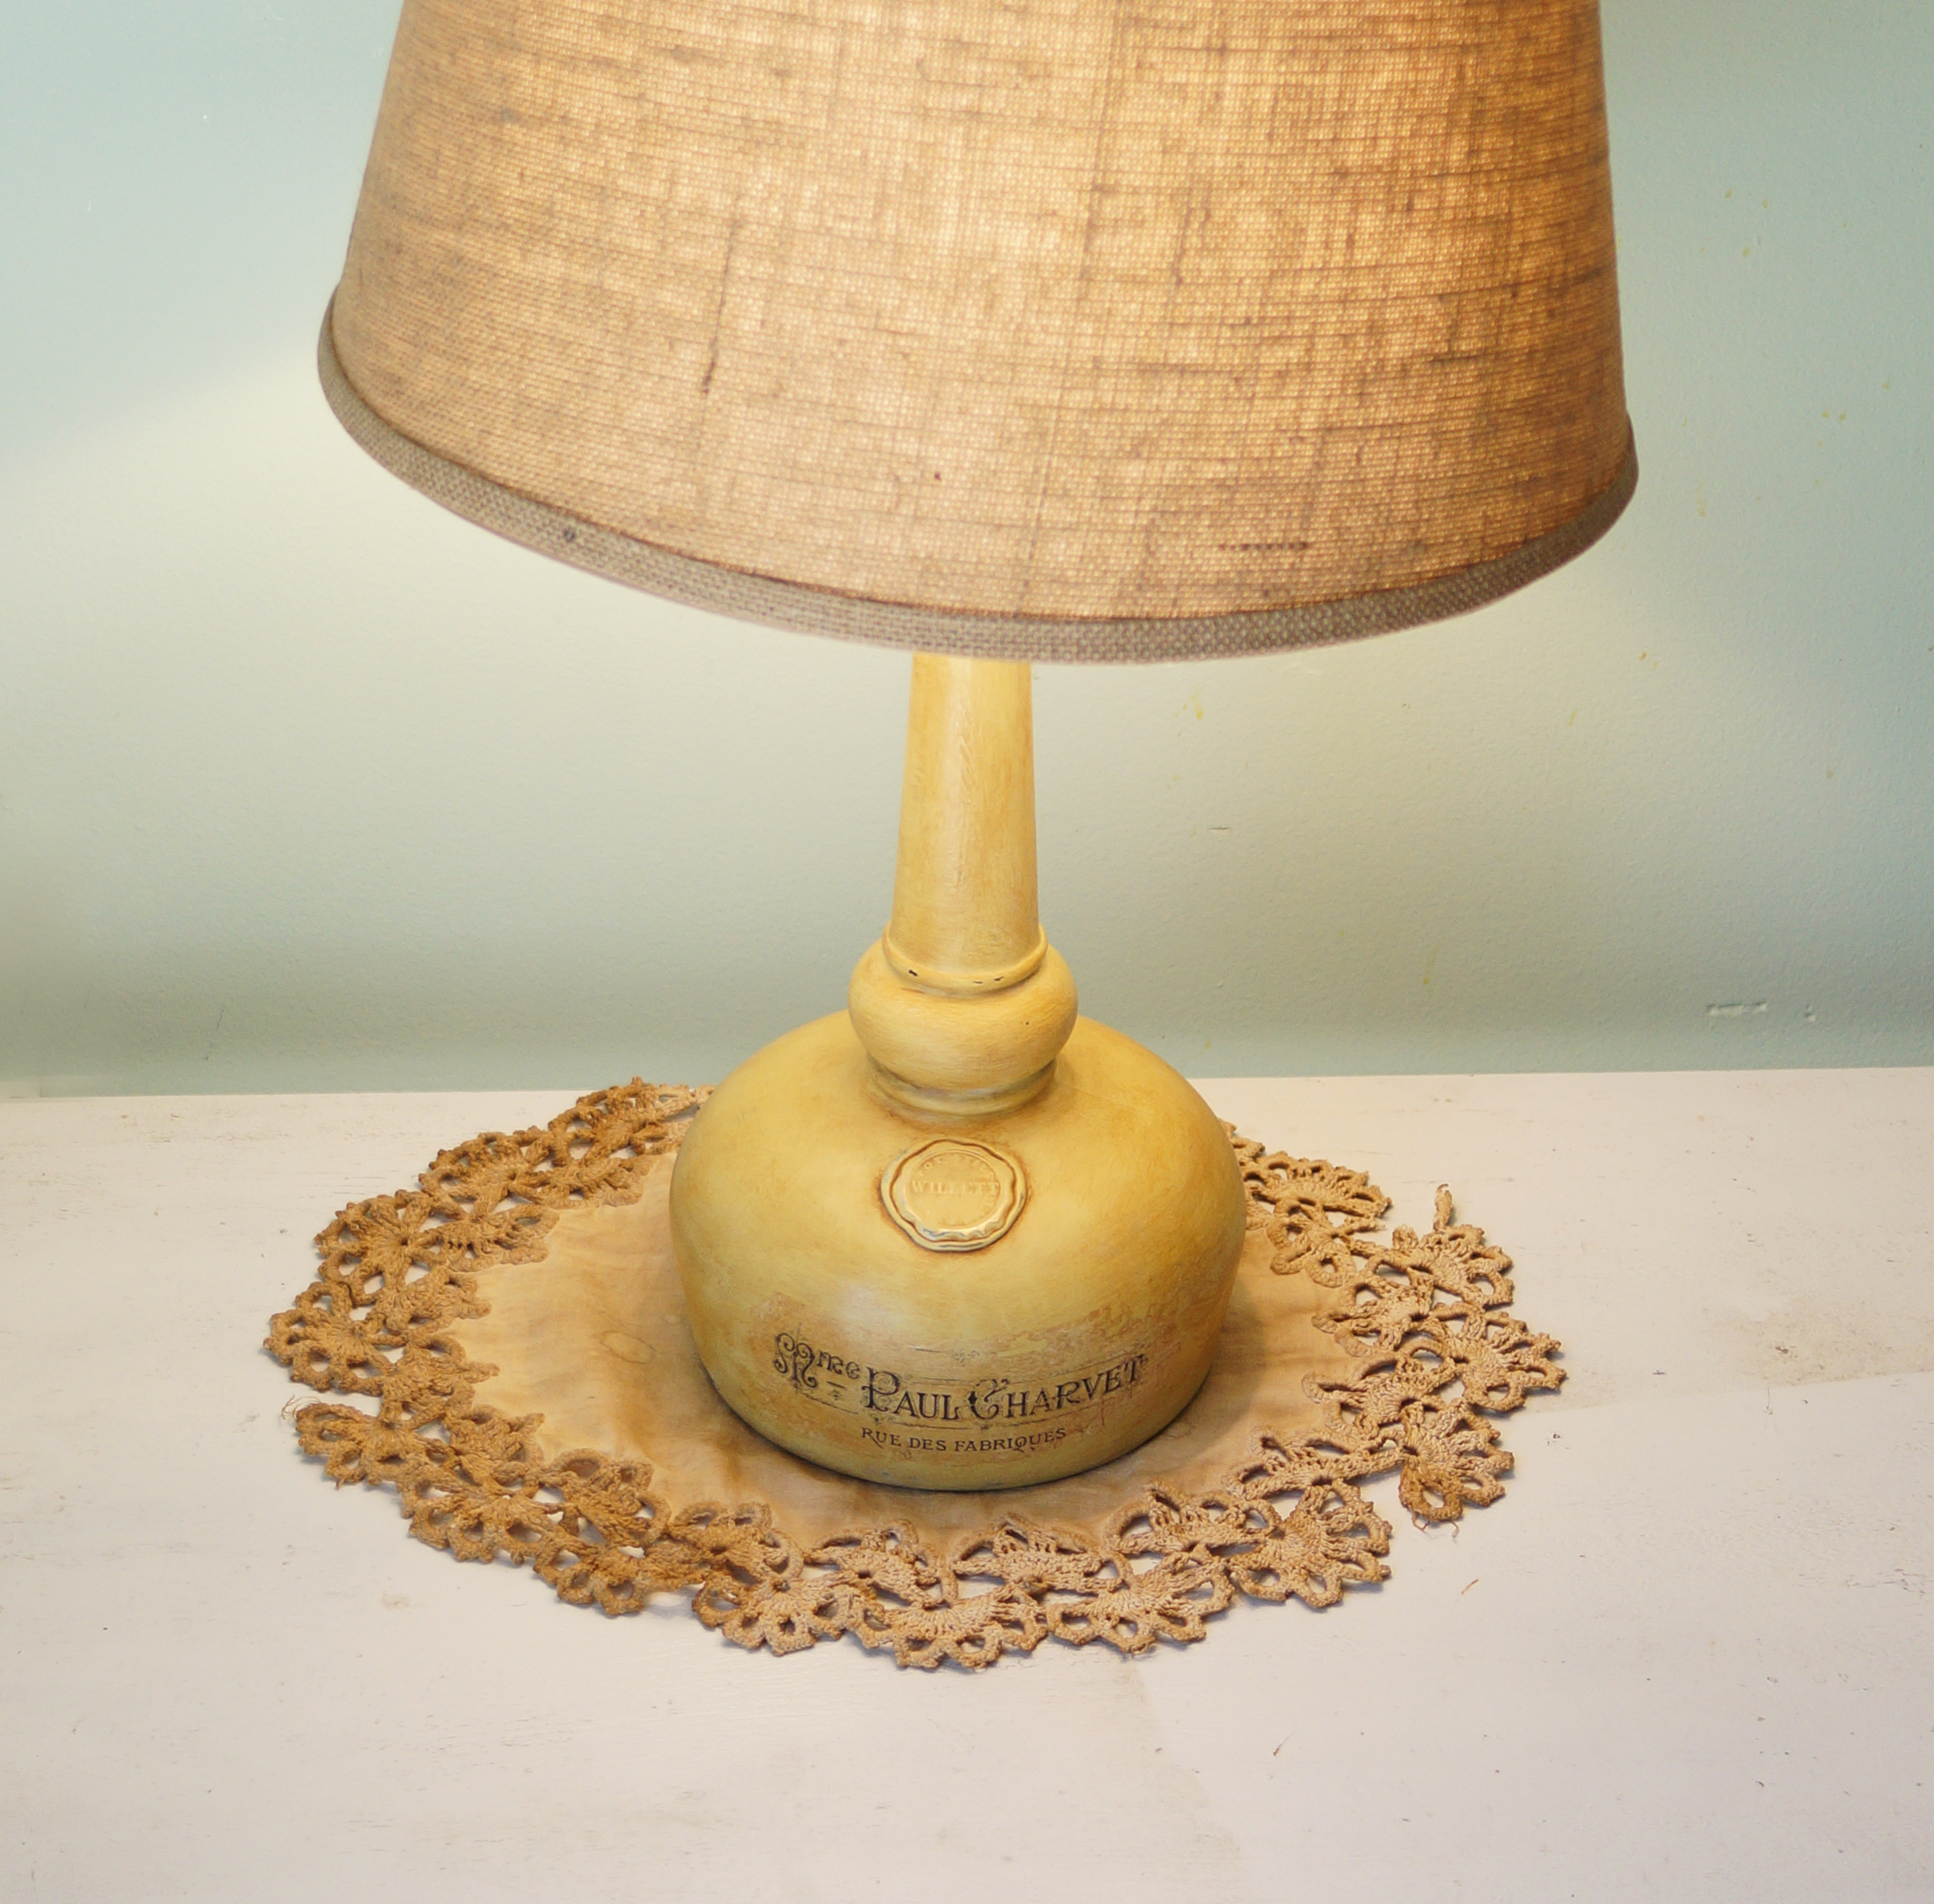
I sanded the gray, revealing the blue base layer.  I decided I wanted a soft yellow top coat, so I mixed Everlasting with Inheritance to lighten and soften the mustard like color.  Then I painted that in a cross hatch, random and messy fashion so that the final piece will have texture and depth.

How to Print on Tissue Paper

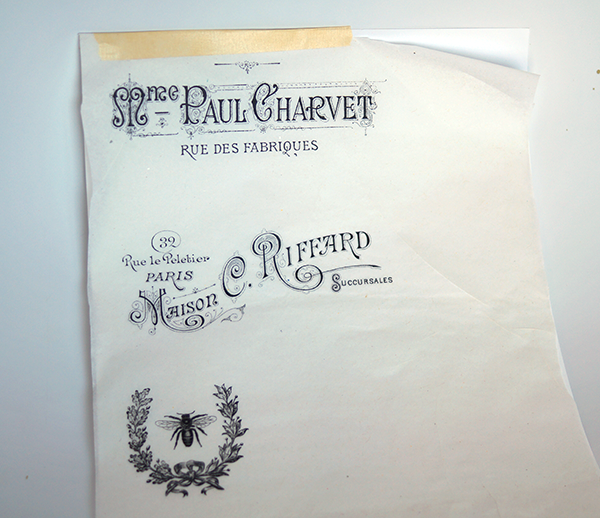
To get my image for transfer, I printed some of my favorites from the Graphics Fairy.  There are thousands of free images there to fit any style.  The one I went with is a French Typography file which you can find linked in the supplies section.

Just cut a piece of white tissue paper to fit your card stock and tape it on with masking tape.  Place in printer and print!

How to Image Transfer on Paint

Cut or tear your image from the tissue paper.  I like to tear it so the edges are feathered and not such a straight edge like you get with scissors.  It blends in better.

Apply Clear Creme Wax where you will place the tissue.  Carefully place the tissue and smooth out wrinkles with your finger.

How to Image Transfer


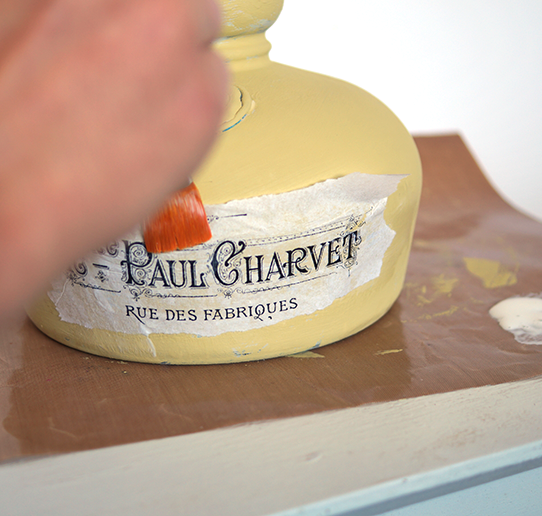
Paint more Clear Creme Wax over that and let dry.

Wine Bottle Craft lamp from upcycled bottle

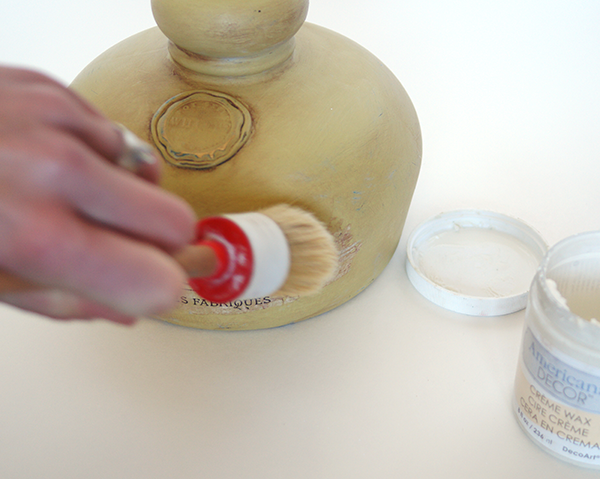
When the tissue transfer dries, sand entire bottle in areas where you want to bring out the underlying paint colors.  Then apply clear wax over the entire bottle.  Let that dry for at least 30 minutes.

How to Antique Chalk Distress Paint

How to Use Antiquing Wax

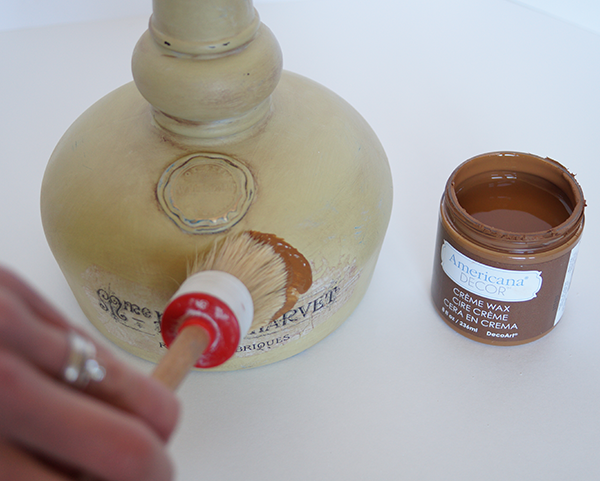
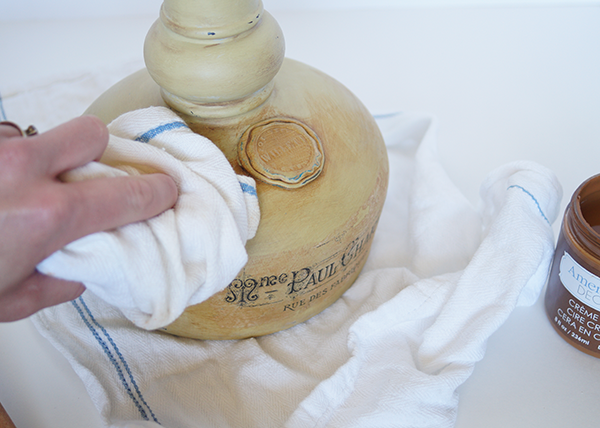
Apply Golden Brown Creme Wax as desired and wipe back with soft cloth.  If you use too much brown, you can wipe it away even further using Clear Creme Wax on a rag.

GE Bottle Lamp Kit

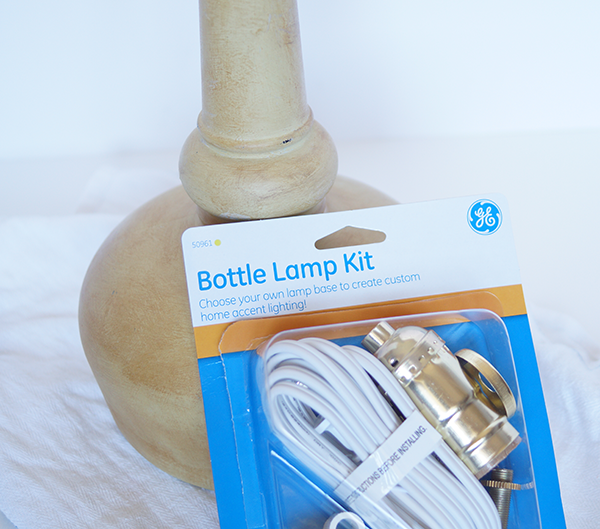
Now it is time to use the Bottle Lamp Kit!

How to make a lamp

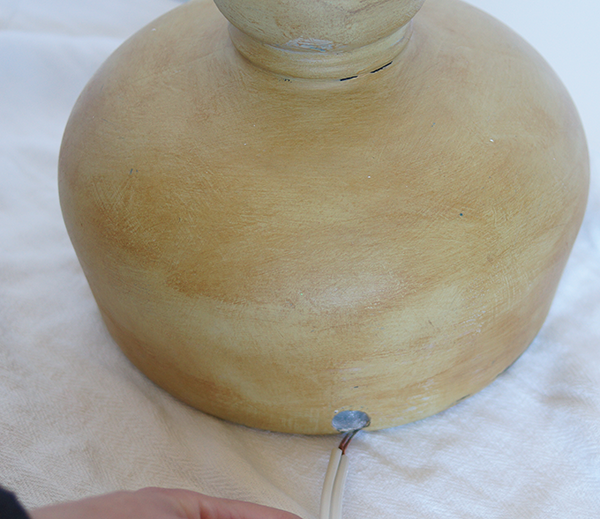
Follow the included instructions, except for where it says to thread the cord.  It has the cord coming out of the fixture just under the light bulb, but we drilled a hole in our bottle to avoid having an ugly cord running down the lamp from top to bottom!

How to make a lamp from a recycled liquor bottle

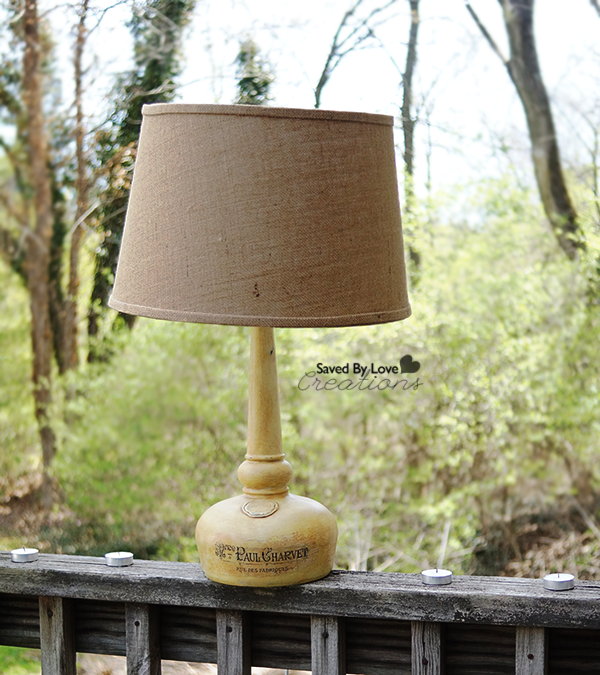
I found the burlap lampshade at Wal-Mart for $15.

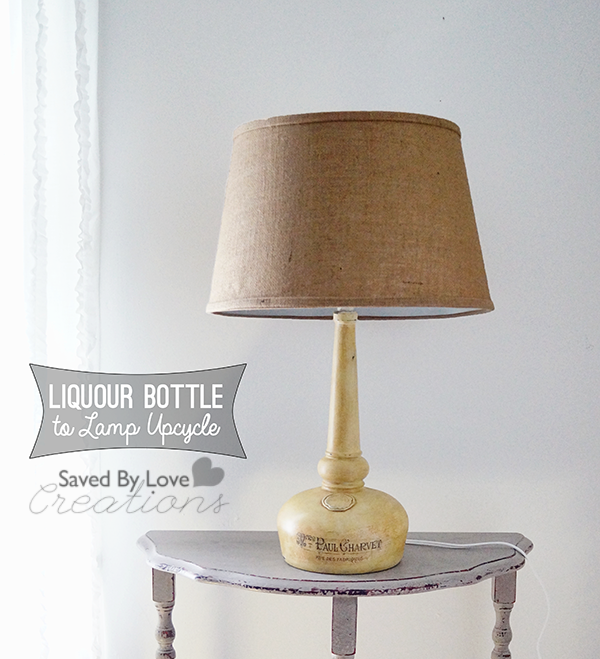
I love my new lamp!  More than that, I love this line of paint.  You will be seeing it in so many more projects coming up here at SBLC.

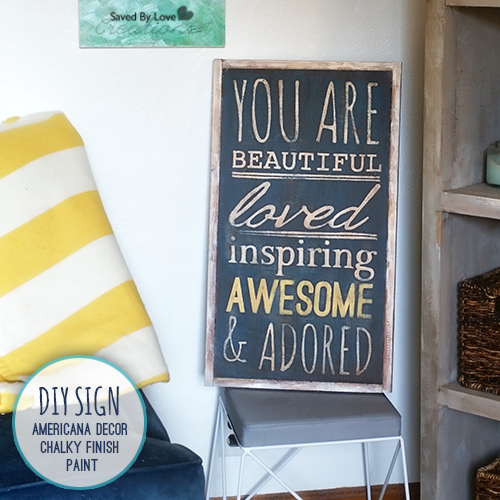
Remember this DIY Hand-Painted Sign?  Yep, same paint line.  It goes on beautifully, is easy to distress, and comes in an amazing color palate.  LOVE!

Visit the DecoArt Chalky Finish website for more information.


DIY Wine Bottle Craft Rainbow Lanterns

[pinit]Wine Bottle Craft Upcycle into Rainbow Decor @savedbyloves[pinit]

Who doesn’t love a good rainbow theme decorated space?  This project is that, and so much more.  For little to no cost, you can create gorgeous rainbow lanterns for your next party, or for every day spring and summer decor!  Upcycle wine bottles by cutting them, pouring in some tinted Mod Podge, letting them dry and putting them over tea light candles.  I am just the DIY blogger to show you how to pull it off, so lets go!

Recycled Wine Bottle Crafts

SUPPLIES:

Wine bottles cut to the size you want (I have showed you how to cut theme HERE:  How to Cut Wine Bottles)

Tea light candles (I used flammable, but battery operated will work as well)

Mod Podge Sheer Colors

Mod Podge Sheer Colors

Wax paper or non stick craft mat

TUTORIAL:

Pour Tinted Mod Podge

Squeeze a generous amount of Mod Podge Sheer Colors into the cut end of your bottle.

Upcycle Home Decor Wine Bottle Crafts

Twirl Bottle to disperse color all over the inside of the bottle.

DIY Wine Bottle Crafts

If you are having a hard time getting it to flow, you can tap the bottle against your wrist as shown.

Let the excess Mod Podge drip into back into the product bottle to save as much as possible for your next project!

I placed my bottles on my kitchen table, on a non stick craft sheet, with the ceiling fan on.  Place them with the mouth down so they dry faster.

Rainbow Themed Decor Craft With Wine Bottles

The color will be opaque in spots, and you may get discouraged, but fear not.  They will dry beautifully.  Once they do, you can cut any of color over the mouth of the bottle with a craft knife to open the bottle top.

Place over your tea lights and enjoy your gorgeous rainbow!

Upcycle a Rusty Grate Into a DIY Photo Display

[pinit]Repurpose Photo Display Idea @savedbyloves [pinit]

Today I am happy to share with you this rustic, quick & easy upcycle to display your favorite Instagram photos – all while saving a rusty old grate from a tragic dumpster demise!  This particular grate is from an fire pit that is no longer.  I just couldn’t part with it.  Round objects have a hard time getting away from me since I love the challenge of using them to create unique repurposed wreaths.

Such as this repurposed hubcap wreath

I digress.  Back to the grate.

Upcycled Grate to Photo Display

Here is the old thing.  It has sat on my porch for months, begging for inspiration to strike me.  Along came Susan.

If you haven’t been to Homeroad, you need to remedy that.  Susan is a junker with an eye for upcycling that always inspires.  When I saw her Barrel Strap Photo Holder, I knew what I had to do.

Upcycle home decor DIY rustic decor

Find something old, rusty and round, and you can do it too, within just a few minutes!

How to make a Rustic Photo Holder

Photos

Photos – Use your Instagram photos or other photos and apply a fun vintage filter!

Scrapbook ephemera

I used ATC backgrounds I found at Hobby Lobby in a fun yellow, blue, vintage yet modern, geometric patterned, grungy style.  you know that style, right?

The flowers are from Prima .  I grabbed them at Hobby Lobby, but you can find them with my Amazon link too.

I used silver and white baker’s twine with the intention of clipping the photos with tiny cute clothespins.  While digging through my stash I found the perfect Gator clips from 7 Gypsies.  Their little hook fit perfectly over the rods in the grate.

Easy Photo Display

I threw this piece together in under 10 minutes, and I will cherish it for years to come!

DIY Macrame Mason Jar Hanging Planter

[pinit]

Easy Macrame Mason Jar Hanging Planter DIY @savedbyloves

[pinit]

Mason jars are being cut like crazy around here.  Today I am showing you how to make this easy macrame mason jar hanging planter.  I have always wanted to make a macrame planter like this, and have finally marked it off of my to do list.  It was super simple and fast to make.  I truly thought it would be  a long, complicated process and am pleased to report I was wrong! If you can count to five and tie a knot, you can make this.  Let’s go!

Outdoor Mason Jar Decor Idea

SUPPLIES:

Twine

Mason Jar with bottom 1/3 cut off (How to cut mason jars)

Scissors

Masking Tape

Butane Micro Torch or Candle and Lighter

Bucket of Cold Water

Plant

Chain

TUTORIAL:

Cut 5 pieces of twine, each six feet in length.

How to Make a Macrame hanger

Tie a knot in the middle, leaving a loop at the top for hanging by chain.

Macrame Plant Hanger DIY

Tie the pairs of strings together to make five knots  about 4 inches down from the big knot you made.  In the photo I have completed 2 knots and the third one is in progress.  Tie all 5 pairs of string into 5 knots.

Macrame Plant Hanger DIY

Now you will be making your hanger into a cylinder by joining the outer edges.  About 1.5 inches down from previous knots, tie knots with pairs using one strand from each adjacent knot.  For the final knot, tie the remaining string on each outer side (at the black arrows in the photo) together.  You have a tube.

Mason Jar Decor Idea

Repeat this step one or two more times, depending on how tall your planter is.  You can insert your jar or other container into the planter to determine if you want another row of knots.  I aligned mine so that the first row of knots is at the top of the container and decided that I would like one more row.

Knot Tying

When you are happy with the number of knot rows, Insert plater and gather strands at the base of it to determine where to tie your final knot.

How to Tie a Knot

Tie the knot at the base, insert chain in top loop of planter and hang!  (These last two pics are with a different container, but it is the same process for a mason jar.  Sorry about the graininess!).

Mason Jar Outdoor Decor

Privacy Policy