Search Results for: upcycle

Upcycled Can & Leather Pendant

Upcycled Jewelry Tutorial

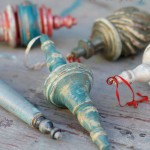
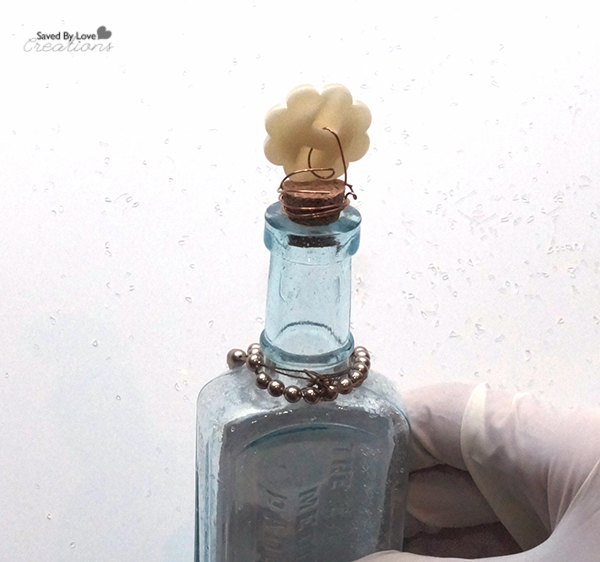
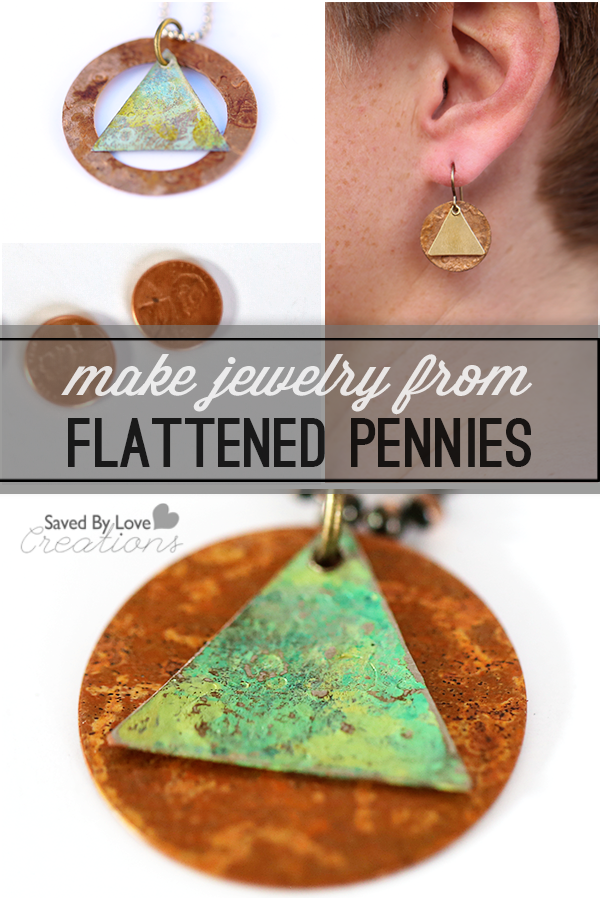
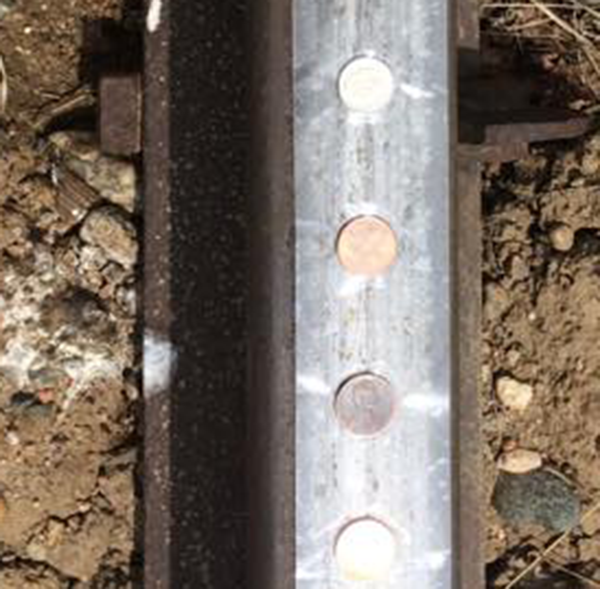
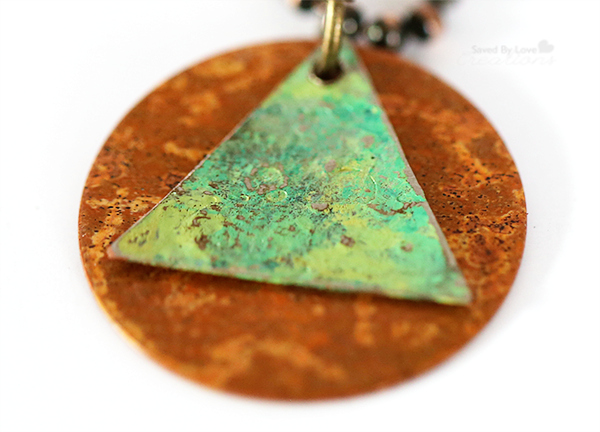
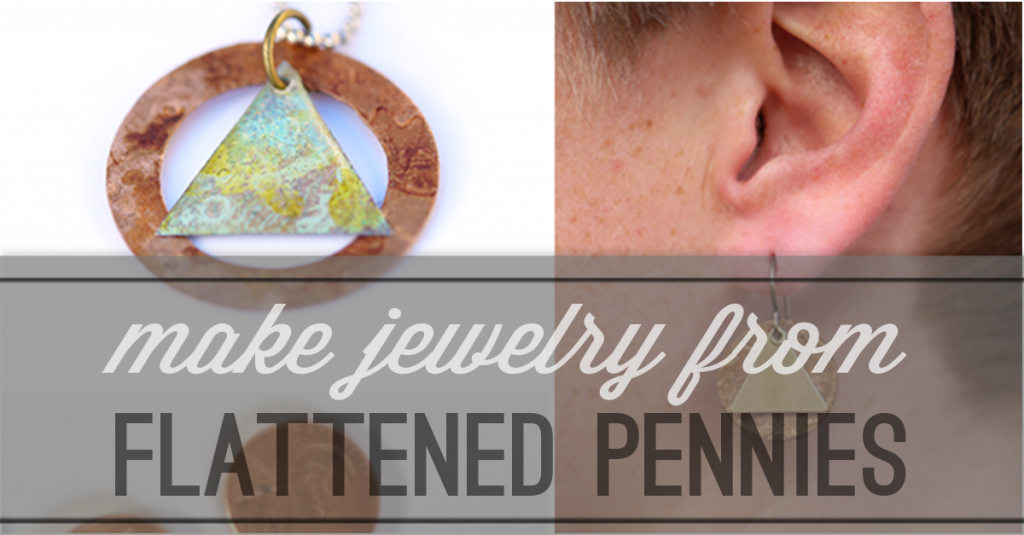
If you have been around here lately, you have seen the die cut jewelry phase I have been in since getting my Sizzix machine.  Last week, I shared this round-up of 60 recycled can projects, which is where I got the inspiration for this pendant.  There are several projects I found that use aluminum cans to create stunning jewelry.

Recycled Can Jewelry

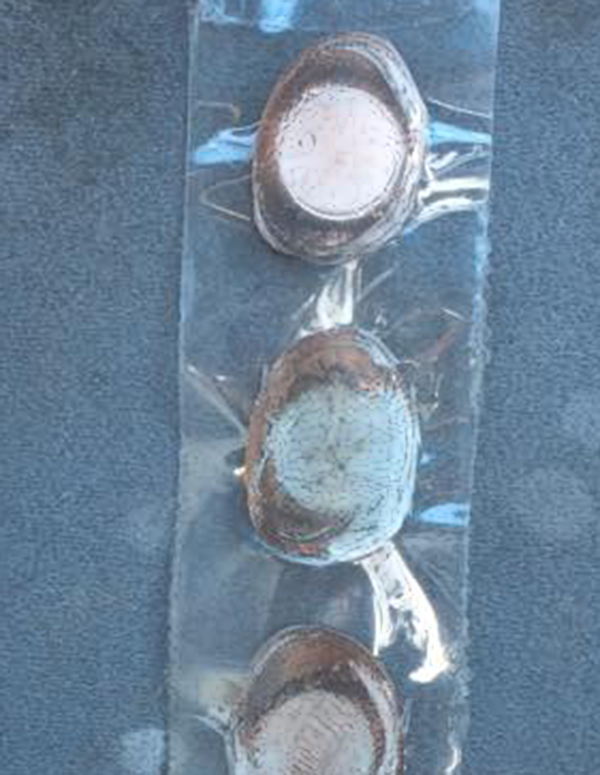
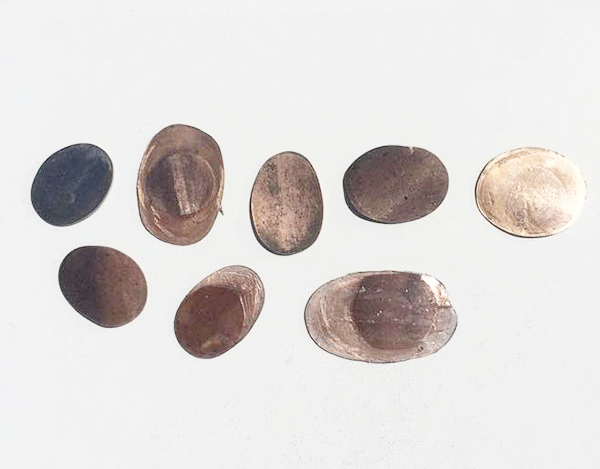
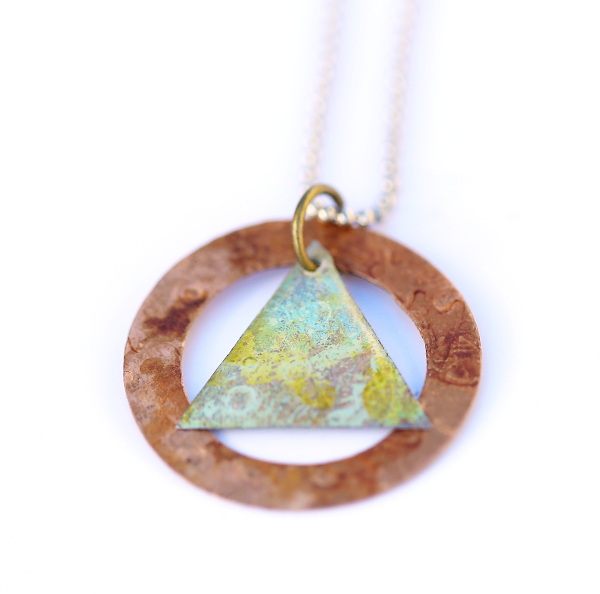
This pendant is made of several layers.  From top to bottom they are:  Decorative pearl brad, leather cut from goodwill purse, metal cut from good will tin, 2 more leather layers, and a recycled starbucks Double Shot can, embossed and cut with sizzix.  I spent the last couple of days cutting tin cans into flowers.  Now that I have a huge stack, I will be creating lots of pieces.  I found several more leather purses in my junking this weekend, as well as some more cool tins, so stay tuned for more die cut, recycled jewelry fun!

Upcycled Leather

This purse was $1.50!!!  Metal tin… $0.50, aluminum cans… free.  My sizzix was well worth the cost!!

DIY Leather flower pendant

Upcycle Cans into Vases

Repurpose tin cans

Wait!  Don’t take out the recycling just yet.  Did you know you can turn your empty tin cans into lovely flower vases in a snap?  In just a couple of easy steps, you will be on your way to gorgeous, simple, chic decor. I think these would make great mother’s day gifts, filled with her favorite fresh florals.  How about centerpieces for that upcoming dinner party or summer barbecue?

Recycled Craft projects

When I say easy, I mean easy.

Supplies:

  • Wall texture spray; I got mine at the local hardware store in the paint section
  • Tin cans
  • Distress Ink Pad by Ranger in Rusty Hinge

Instructions:

  • Remove labels from cans and clean inside and out will with soapy water.  Rinse and dry with lint free cloth
  • Spray cans with wall texture per can instructions on protected work surface.  I did mine with the nozzle set to fine.  I don’t think it really matters.  When you are happy with the coverage, let dry.  I let mine dry overnight.  Tin can crafts
  • If you want the rusty look, run your distress inkpad lightly over the surface of the can, randomly to achieve the desired effect.   I did this on one can, and love the look…

The End!  This is my first time ever using spray wall texture, and it was pretty darn cool.  You have not seen the last of it around here.

Have you upcycled your tin cans another way?  I would love to hear your ideas!

Recycled Craft projects

DIY centerpiece ideas

DIY centerpiece ideas

Magazine Page Jar Upcycle

Recycled Paper ArtIn case the wall art and rosette necklace didn’t quench your recycled paper craft thirst, here is a jar wrapped in magazine page strips.  How many jars do you go through feeding your family each month?  Think of all the precious handmade gifts you could be creating from them instead of tossing them in the recycling bin.   The process is simple and quick, and you most likely have everything you need to make one this instant!

Recycled Paper Crafts

Supplies:

  • Magazine pages
  • Hot glue gun
  • bone folder
  • Old jar
  • Mod Podge or other sealant

Instructions:

  • Fold the magazine pages into strips as I described here.
  • Your glue gun can be heating up as you fold.  Just put a dab of glue on the strip end and attach it to the bottom of the jar.  Go around, putting glue every couple of inches.  When You get to the end of your strip, grab another one and glue its tip where you left off.  Keep going til you have covered as much of the jar as you would like.
  • Seal with mod podge, 2 coats is best.
  • When dry, add embellishments, like twine, and maybe a coiled paper rosette.

You could select pinks and reds only from your magazine to make a cute Valentine’s Day gift, filled to the brim with chocolate, of course.  It would also make a wonderful vase.

Please share your recycled paper covered creations!
Photobucket

How to Make Jewelry From Flattened Pennies

pin-how-to-make-upcycled-jewelry-from-pennies

This post has been a long time coming. At this point, I can’t even recall what inspired me to smash pennies and turn them into jewelry, but something did and here we are. I will walk you through the interesting, not entirely legal process I used. Please note that in no way am I encouraging anyone to break the law, or to go anywhere near railroad tracks. The Midnight Rider controversy is no joke. While cute, this jewelry is not worth dying for, so be smart.

how-to-make-aa-jewelry

SUPPLIES:

Pennies or other coins

Clear masking tape

Jump rings

Jewelry Hole punch

jewelry rivets

Vintaj metal paints

Lisa Pavelka Resin Magic Glos

Magic Glos UV Resin, by Lisa Pavelka

Sizzix machine

Butterfly rings Sizzix Die

Media Mixage Triangle Dies

Media Mixage Circle Dies

Vintaj Vogue Stamping Blanks, Triangle 14mm

Your favorite embossing folders

eyelet setter

ear wire

Jewelry pliers (2 pair)

Paint brush or sponge dauber
1/4 cup white vinegar
1 teaspoon salt
Non-metal bowl
Paper towels


wm-aa-jewelry

TUTORIAL:

tape-pennies-to-track

This is the sketchy part. SBLC assumes no responsibility for any injuries that may occur. That said, this is also the super fun part. Tape the coins to the railroad track as shown in the photo. Not taping them just means searching needlessly after the train has passed, since they get thrown from their original location during the process. The tape keeps them in place.

pennies-after-flattening

This is what y0u will have when you retrieve your now flattened pennies. Flat, but yucky, right? No problem. To clean the little guys, pour the vinegar into the bowl and stir in salt. Put about 5 pennies into the solution and let them soak for about 10 seconds. Use a toothbrush and running water to remove debris and rinse clean.

how-to-flatten-pennies-for-free

They don’t have to be perfect.

how-to-flatten-pennies

Emboss your pennies and die cut into jewelry shapes. Here i cut the flattened and embossed pennies into circles and attached Vintaj Vogue Stamping Blanks Triangle 14mm using a rivet. Just hole punch the penny circles, insert rivet through triangle and circle, set with eyelet setter and attach jump ring and ear wires. Done!

aa-necklace-circle-triangle

For this pendant, I die cut a ring with the Sizzix butterfly rings die – a favorite die of mine. I cut a triangle with another embossed flattened penny and painted it using vintaj patina paints for metal. Once the paint was dry, I applied Magic Glos UV Resin, by Lisa Pavelka. I love the domed resin look. You can put this in direct sunlight to cure, or cure it in 10 minutes using Lisa Pavelka’s UV light. I went the 10 minute route! It’s been awhile since I used that stuff, and I forgot how fun it is.

upcycled-coin-pendant-jewelry-tutorial

This piece is comprised of a Vintaj metal blank (the background circle) and a flattened penny triangle that I painted with Vintaj Patina. I didn’t seal it. I enjoy the simplicity of the circle/triangle, and love the colors together. After applying the paint, go over the triangle lightly with medium grit sand paper to reveal the raised areas created by embossing previously.

Visit here for more RESIN JEWELRY TUTORIALS

fb-how-to-make-upcycled-jewelry-from-pennies

What do you think? Do you have a less illegal method for flattening pennies? Can your rope your husband into doing it for you, like I did?

You can use any coin, by the way. I just like copper.

I’d love to see what you can do with flattened coins. If you don’t have a die cut machine, you can cut shapes with metal shears or tin snips for your own custom creations! Happy crafting!

Over 75 DIY Handmade Father’s Day Gift Tutorials

75 DIY gifts for Father's Day
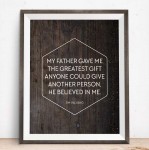
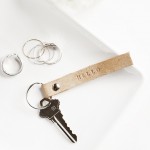
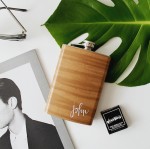
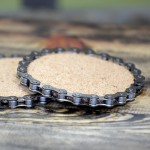
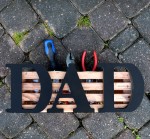
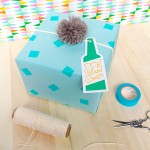
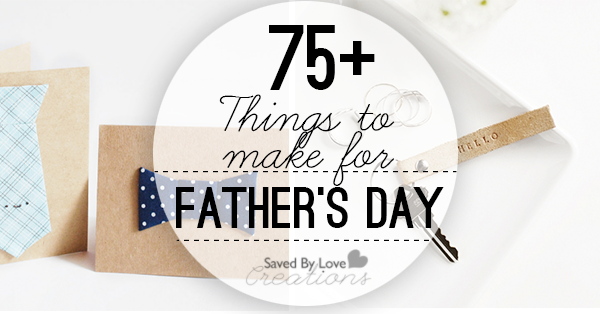
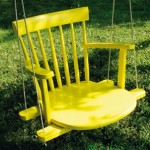
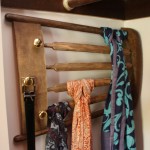
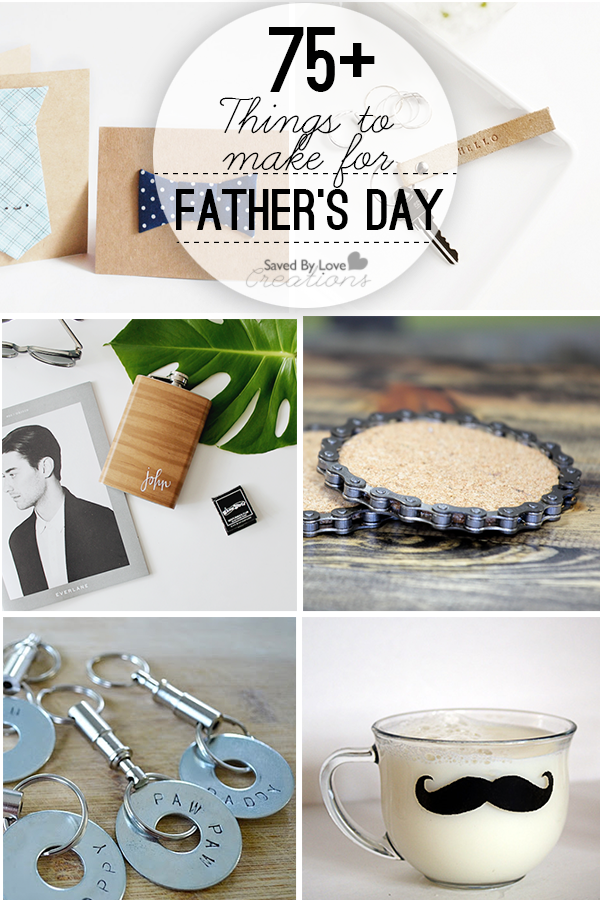
Mother’s Day has come and gone, and Father’s Day will be here in a heartbeat. Nothing is so cherished as a handmade gift, so we have gathered over 75 handmade gift ideas for Dad’s special day. The majority of these projects can be made for less than $10! Enjoy.

75 DIY gifts for Father's Day

More Than 50 DIY Projects to Make From Old Chairs

Over 50 Ways to Recycle Old Chairs FB

If you are planning to ditch that broken or mismatched random chair, I’m here to change your mind. Don’t do it! You won’t regret hoarding chairs and broken chair parts once you browse our collection of over 50 super sweet things you can make from them. Be ready to have your mind blown!


Which project is your favorite? I am super impressed with all of them, and partial to my friend Debi’s imaginative spindle to Christmas ornament upcycle. I’m not surprised. She comes up with some unbelievable DIY projects and shares them on her youtube channel here: Debi’s Design Diary. Not only will you learn how to make awesome stuff from junk, but you will laugh your fanny off as well. Enjoy!
Over 50 Ways to Recycle Old Chairs

DIY Dollar Store Eraser Valentine Earrings

Valentines Day Jewelry Tutorial

I heart creating with dollar store supplies. For one, it is cheap, and it challenges me creatively. When I saw these cute Valentine’s Day erasers over the weekend, I immediately thought they need some resin and ear wires! Follow along to see how I made earrings from dollar store erasers!

Dollar Store Craft Idea

At first I imagined making a pendant, but then I realized the erasers came in pairs, just perfect for earrings. This project is super cheap and easy to do. Don’t be intimidated by resin if you’ve never used it.

ICE Resin Jewelry Tutorial

Especially now that ICE resin has made mixing the two parts so simple.

Dollar Store Resin Craft Idea

When working with 2 part resin, it is crucial to mix equal parts A and B. If you are off even just a little, the resin may no cure properly. ICE resin comes in a plunger that extrudes equal parts automatically.

How to Use Resin

Use a craft stick and mix the 2 parts by stirring for at least 1 minute.

TIP:  After mixing, let resin sit for 5 minutes before applying it. This lets the mixture settle and decreases air bubbles.

How to apply resin

Apply a little bit of resin at a time, starting in the center using the craft stick. It can take awhile to get use to how much resin to use. Just don’t go overboard. You can always add more to create a dome effect after the first layer has dried, but you are in for a mess if you use to much and it spills over the edge.

Let resin cure for 12 hours.

Upcycled Jewelry

I picked up these screw eyes at Walmart for $0.97.

How to Make Earrings

 Upcycling

Just screw the hardware into the top center of your resin eraser.

Jewelry Making Tutorial

Add ear wire and you are set!

Valentines Day Craft

Do you love them as much as I do? You can make 6 pairs with the pack of $1 erasers!

Make Adorable Valentine's Day Earrings Dollar Store Craft @savedbyloves

Find over 50 ways to decorate for Valentine’s Day:

50+Valentine’s Gifts to Make:

How to Make T-shirt yarn and 30 Plus Projects to Make

How to Make tshirt yarn and 30 Plus projects to make @savedbyloves

I have been a busy girl creating yarn from old t-shirts. Did you know you can make a continuous strand of yarn and create a sizable roll of yarn from just shirt? Once you have created your yarn, the potential projects you can create are unlimited.

I used the exact process shown in this video DIY from Releve Design. I have a couple of tips to contribute to this excellent tutorial. Try to find the cheap cotton t-shirts without side seams. They are best so you won’t have bumps where the seams would be. If you want specific colors like I did, you can stock up on white t-shirts from you local thrift store and die them. I created a gradient in blues this way, using the same dye and process I showed you in this ombre Father’s Day gift post
I plan to make a rug, but you can pretty much make any crochet or knitting pattern with this upcycled t-shirt yarn. Here are 30+ t-shirt yarn projects to get you going. Enjoy!


How-to-Make-tshirt-yarn-and-30-Plus-projects-to-make-@savedbyloves

DIY Alcohol Ink Aluminum Can Christmas Wreath

Aluminum Can Poinsettia Wreath by @savedbyloves

If you are anything like me, you love Ranger Ink products.  I am particularly obsessed with alcohol inks, which paint vivid color on non-porous surfaces such as aluminum and glass.  How excited was I to be invited to share a Christmas project on the Ranger Ink Blgo?! Very. Come see how I created this Recycled Pop Can Poinsettia Wreath for less than $3 with cans, dollar store supplies and alcohol inks! With tons of other projects to inspire you, you will want to make sure to look around while you are there!

If you like this project, I have lots more you don’t want to miss!

Fall Leaf Aluminum Can Wreath with Alcohol Inks

Aluminum Can Angel DIY

50+ Aluminum Can Crafts

DIY Recycled Glass Bottle Frames

Photo In a Bottle Upcycle from @savedbyloves

Display meaningful photos in a unique way while busting through your stash of vintage buttons, ribbons, fabric scraps and found objects. These little medicine bottles can be found in thrift stores, at tag sales and online for cheap.  Use them for Christmas gifts, or as photo frames for yourself!

Photo In a Bottle 6


MATERIALS

Photo In a Bottle 1

-Variety of antique medicine and food bottles

-Photos sized to fit in bottles and printed in black and white or sepia tone on copy paper

-Glitter, sand or other filler

-Found objects, beads, vintage buttons, old keys and other embellishments

-Decorative ribbon, twine, lace, burlap and fabric scraps

-Corks for bottle tops

-Copper craft wire gauge 20-22

-wire cutter

-scissors

-hot glue

-Bamboo skewer or pencil

DIRECTIONS


  1. Clean bottle and remove any labels. Let dry.

Photo In a Bottle 4

  1. Add sand or glitter using funnel or folded paper scrap
  2. Drop in a few beads, buttons or other small meaningful objects.

Photo In a Bottle 5

  1. Roll the photo into a tube and insert it into the bottle. Use a skewer to unroll it and flatten it against the inner surface of the bottle.
  2. Embellish outside of bottle with ribbon, lace, twine, vintage pearls and other scraps. Glue on buttons and found objects with hot glue.

Photo In a Bottle 10

  1. Place cork in bottle and embellish with vintage buttons, beads or brooches. Secure with wire wrapped around cork and through button. Add a dab of hot glue at the base of the button to hold in place on top of the cork.

Photo In a Bottle Upcycle from @savedbyloves

Privacy Policy