Make Quick and Easy Pillow Covers

How to Sew Easy Pillow Covers @savedbyloves

[pinit]

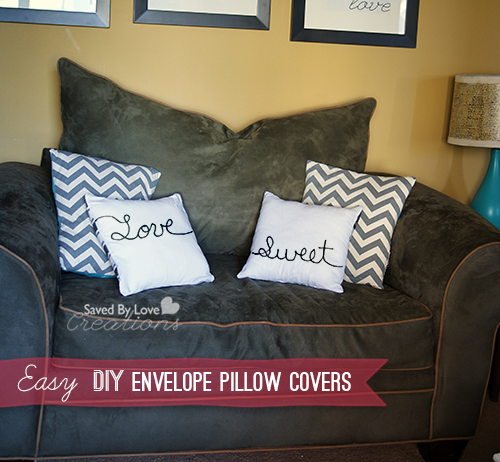
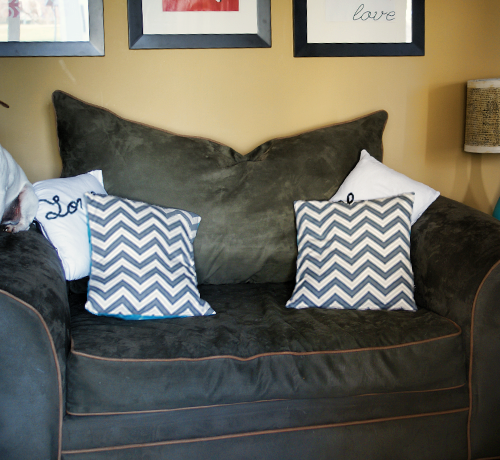
Whether you have a sewing machine and rarely touch it, or you are on it hours a day, this envelop pillow pattern is for you.  I fall in the first category, and these little cuties are a cinch to make.  I created them from some chevron fabric, an old sheet, a white tea towel, and black and white tea towels.  I love using things with seams already present for the back flaps (I know… if I am going to the trouble to sew my own pillow covers, surely I can seam the edge both back pieces, but it makes me really happy when I don’t have to}!  Using old sheets or pillowcases is a great way to create from materials you already have or can grab for cheap at the thrift store.  Warning, this project is very addictive.  You will be making pillow covers out of everything.

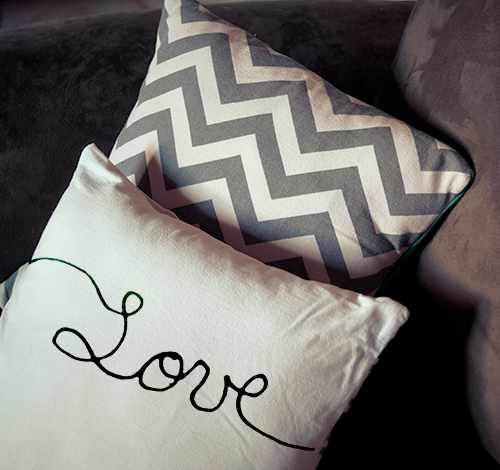
Love

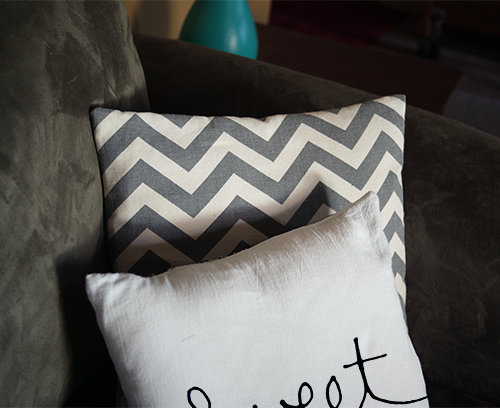
I showed you how to make these last year.  The following tutorial is from the pillows I did then.  Just change up your fabrics for a different look.  I used acrylic paint mixed with fabric medium to put “Love” and “Sweet” on the white tea towels.  The backs of the word pillows are made from plaid and striped tea towels in black and white.  The chevron backs are an old sheet in aqua.

LoveSweetPillows

Supplies:

Fabric for front and back of pillow; Big enough to cut the following; for the front, 17 inch square and for the back 2 rectangles 17 x 12.75 inches each. This is for a 16 inch pillow form or throw pillow, with an extra inch for seam allowance.  If yours is a different size square, no problem.  Say you have a 20 in pillow form.  Cut your front square 21 in x 21 in (you don’t need to worry about adding seam allowance since the pillow will fit in and be nice and full).  For the 2 back rectangles, one dimension is the same as the length of your square sides (21), and the other is that length multiplied by 3/4.  For a 20 inch pillow, that would be 21 x 15.75  inches.

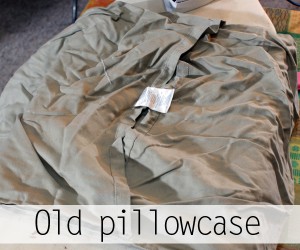
***For my fabric, I found an old shabby pillow case (the beige color on the back) and a cool striped tea towel for the front.

Self healing cutting mat and rotary cutter
Quilting ruler or other straight edge
Scissors
Threaded sewing machine in matching color to your fabric
Iron
Ironing board
pins

fabric pencils or air soluble disappearing marker

INSTRUCTIONS:

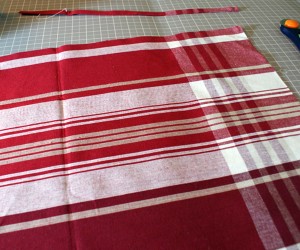
Cut your fabric on your cutting mat.  I like to measure and draw the lines on the back of the fabric.  In this case, the front and back of the tea towels are pretty indistinguishable.  If yours has a clear front and back, turn it over so you are looking at the back, and use your straight edge to draw the 17 inch square.  Then cut it with your straight edge and rotary cutter, making sure to cut away from yourself.  Here is my 17×17 square…

 How to Sew Pillows

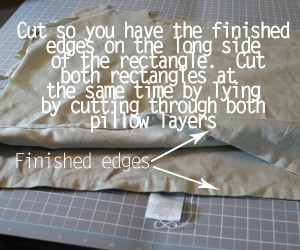
Steam press the back fabric to smooth out wrinkles.  Now you are ready to cut your back pieces the same way, folding your fabric over on itself so that you can cut both rectangles at the same time, since they are the same size…

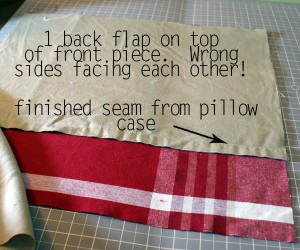
NOTE:  If you are using an old pillow case or other fabric with seamed edges for the back, make sure your cut so that you have the the seamed edges as the long edges on your rectangles.  That way you will not have to seam the back flaps.
How to sew pillows
Sewing pillows
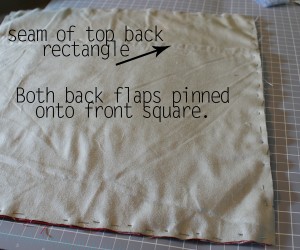
Now you are ready to pin the front to the back.  You will have WRONG sides together.  This is unusual, I know.  You want to be looking at the right (fabric side you want to end up showing in your final project) sides of the fabrics when they are pinned together for the french seam.  Pin about every inch or so, close to the edges, all the way around.  Sew straight stitch length setting 2.5, stopping to remove each pin before you get to it, pivoting at each corner.  (I don’t like sewing over pins, it stress me out).  Back stitch for stability when you get back to where you started.
Easy sewing project
Easy sewing project
Press your stitch line to set the stitches.
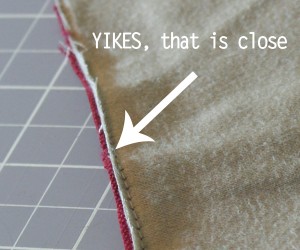
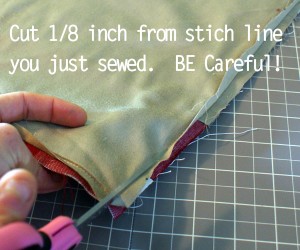
Now cut around the edges, very close to the line you just stitched.  This doesn’t have to be perfect, it is more just to get rid of the bulk of the excess fabric outside of the seams.  BE CAREFUL.  You don’t want to cut through what you just sewed, but if you do, just go back and sew that area again.
Easy sewing project
Easy sewing project
NOTE:  I am far from perfect in my cuts and stitch lines.  These things will look great, even if you are a little off.  Don’t be hard on yourself!
Now you are almost done!  Turn the pillow inside out (so that the wrong sides are now on the outside.  Use a bamboo skewer to gently push out the corners, being careful not to poke all the way through.  Press the piece, then go back to your machine and sew 1/4 inch from the egde all the way around the pillow.  This step hides the raw edges, so that when you turn the pillow cover the right way, no raw edges will be on the inside!  Pivot at each corner, keeping your 1/4 distance from the edge.  Reverse stitch when you get back to the starting point and you are done.  Cut the thread, turn your pillow right side out and push out the corners with your skewer or a pencil.  Press if you want.  Shove your throw pillow or pillow form in there and beam with pride at the beautiful home decor accessory you just made from a towel and raggedy bed linen.  Yay you!

Chevron Pillow DIY

Over 50 Cupcake Liner Crafts to Make

50+ Cupcake Liner Crafts to Make From @savedbyloves

[pinit]

This week I decided to bring you a round-up of cupcake liner crafts to make.  I got the idea to do a 50+ on this subject while creating the Cupcake liner rosette frame I shared with you Monday.  I had so much fun making it, and love the finished product.  It is in a box on the way to Somerset Life (fingers crossed that it makes the cut)!  While coming up with the rosette frame idea, I scoured the web for cupcake liner crafts, and was pleasantly surprised at the number and variety of projects out there.  Here are some of my favorites, then on to the 50+!

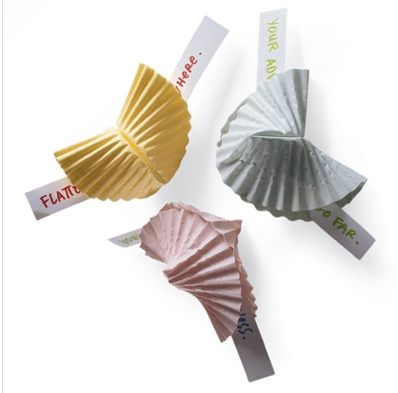
Cupcake Liner Craft forturne cookies from SpoonfullI have a weakness for adorable paper crafts, and these cupcake liner fortune cookies from Spoonful fit the bill.  They would be favors for all kind of occasions!

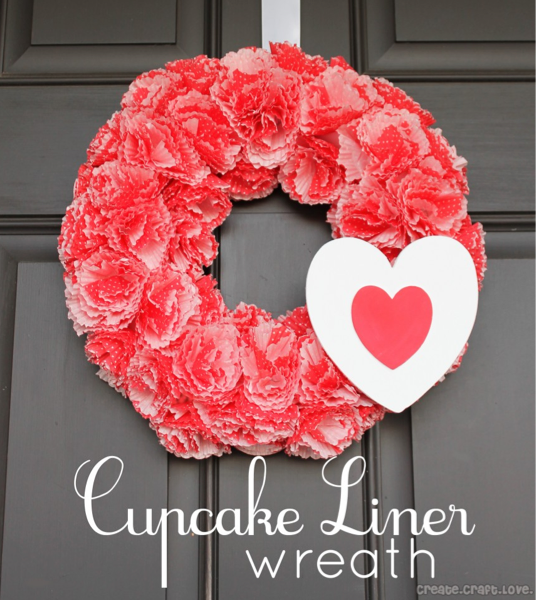
Cupcake liner wreath from Jill at Create Craft Love

Jill at Create.Craft.Love came up with this gorgeous cupcake liner wreath for Valentine’s Day.  It is so full, frilly and festive.  I want one on every door.

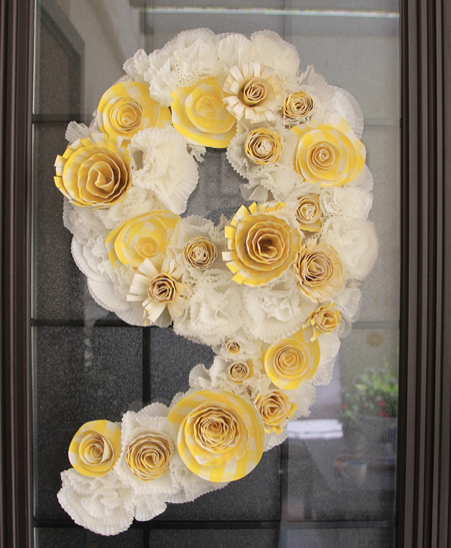
Creative Jewish Mom Cupcake liner birthday party decor DIY

Creative Jewish Mom is a great place for gorgeous crafts that won’t break the bank.  I adore this birthday decor number she made from cupcake liners and paper plates.  Monogram initials would be cute too!

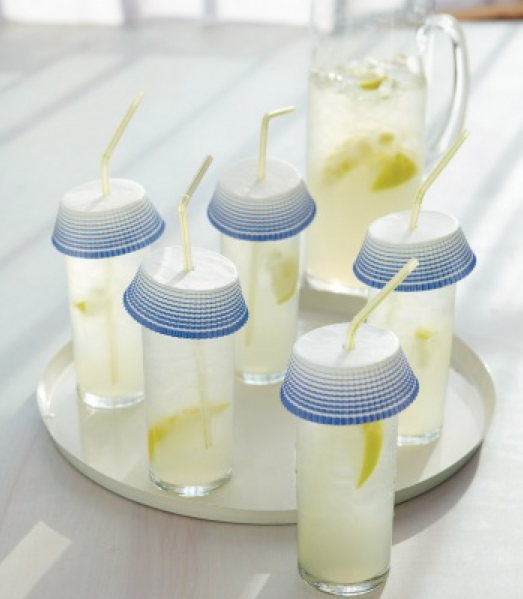
Outdoor party decor

Martha Stewart uses cupcake liners as outdoor party cocktail covers!  This is such a simple touch, with a big punch.  Cupcake liners come in so many prints and colors, you are sure to find the perfect ones to coordinate with your party decor.

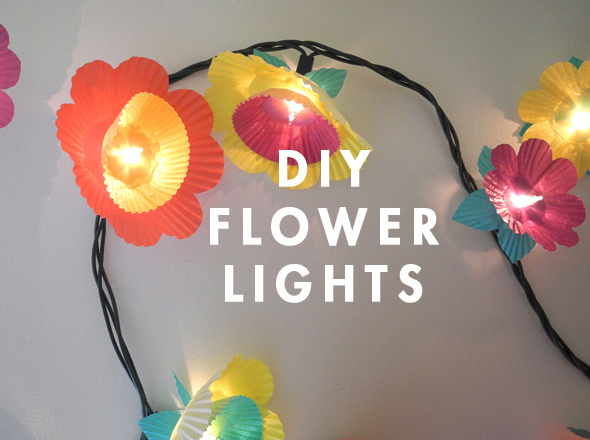
Cupcake liner lighted flower strand

Over at Oh Happy Day, learn how to whip up these DIY flower lights from cupcake liners!  It’s paper, flowers and lights, I mean how can that be anything but fun?!

50+ CUPCAKE LINER CRAFTS


How to Make Soldered Pendants

How to Make Solder Jewelry #Pendant at @savedbyloves

How to Make Solder Jewelry #Pendant at @savedbyloves

[pinit]

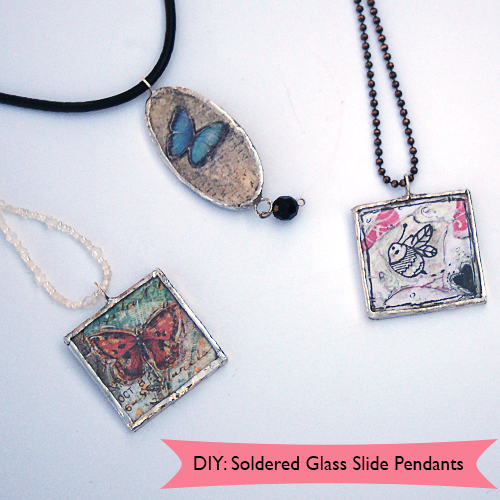
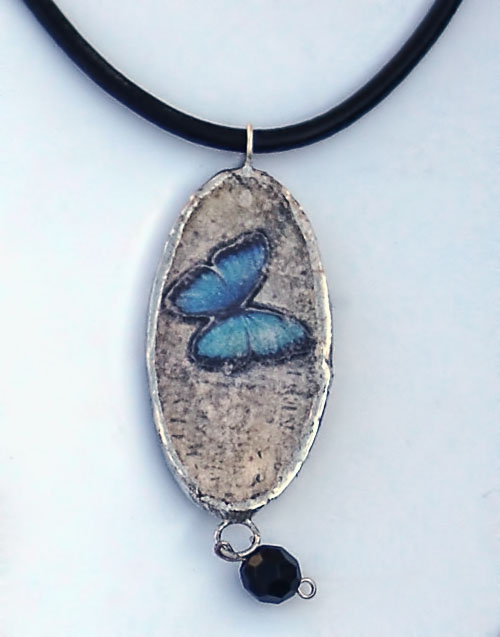
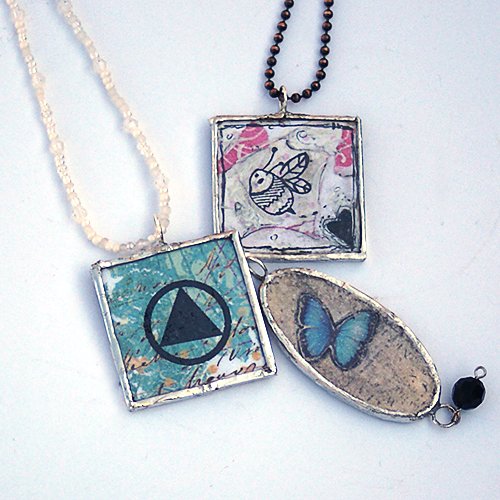
I have wanted to learn to solder for years.  I sold some handmade necklaces in the past, and had issues with the jumprings opening and the pendant falling off the chain.  The best solution I could find was soldering the rings closed, so I picked up a soldering iron and it sat in the closet for 2 years.  I made a resolution to learn the technique in 2013, and ended up with the three finished pieces you see.  This project is great to encase and keep special pictures or sentiments to wear as jewelry or to embellish scrapbook pages and artwork.

How to Solder Jewelry

I was going to create a video, but there is already one out there that covers everything.  Here it is, straight from The Frugal Crafter.  I was lucky and happened to have the exact “third hand” jeweler’s tool that is used in the video.  I picked it up for next to nothing at one of those “As Seen on TV” stores.  You can pick it up at amazon for about $5.  So worth it, and essential for holding the pieces in place and still having a free hand for the soldering iron!  I picked up the square 1.5 in Ranger Glass slides at Michael’s.  The oval slides came in the soldering kit I purchased by Beads Landing (at Michael’s too).

I would love to see your solder work!  Do you have any great tips, or favorite techniques/videos to share?

Cupcake Liner Rosette Frame

Make a cupcake liner rosette frame with #DIY from @savedbyloves

[pinit]

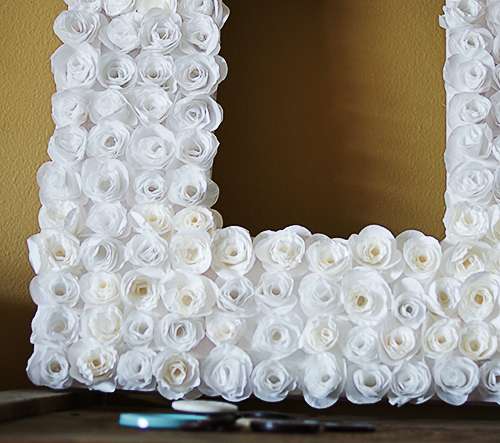
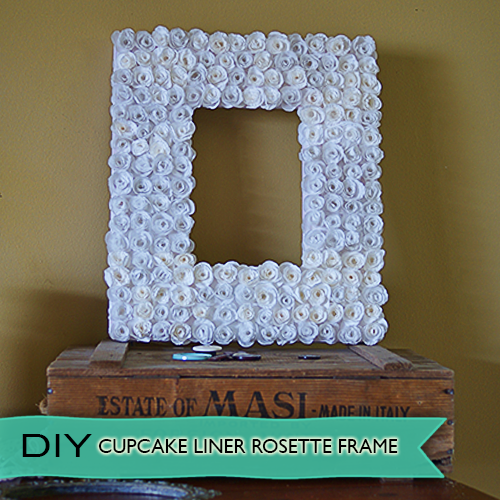
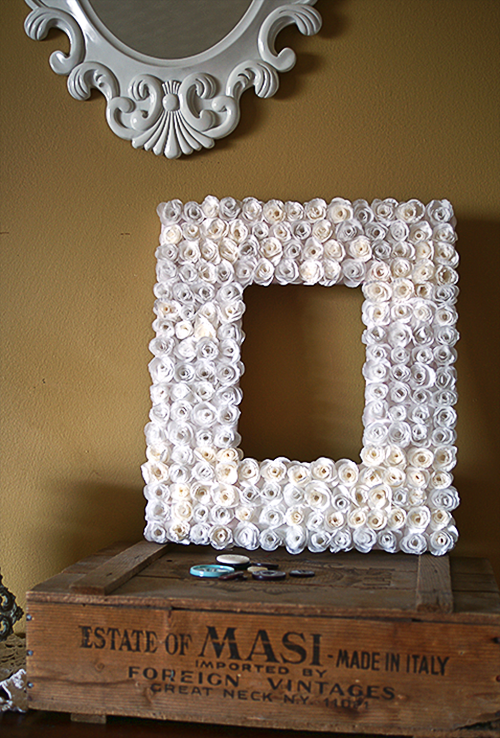
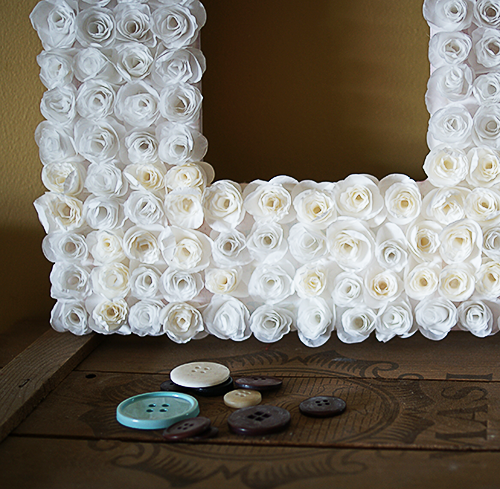
I was browsing the swoon worthy pages of one of my favorite publications, Somerset Life, when I came across their call for cupcake liner crafts.  Oh how awesome it would be to make it onto one of those pages!  I decided to make roses from the liners, and adhere them to a plain wood frame for this rosette wreath.  It took awhile to roll all those little flowers, but the project was easy, and well worth the time.

Cupcake liner craft DIY from @savedbyloves

SUPPLIES

White cupcake liners (a few packs, depending on the size of your frame)

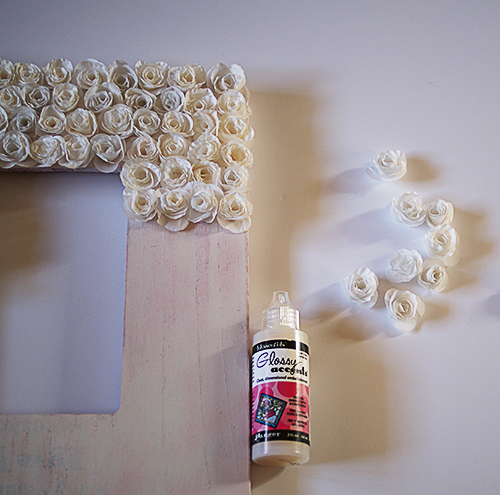
Craft glue (I used Glossy Accents)

Sizzix 3D flower Die

Sizzix Machine

If you don’t have a die cut machine, you can cut the spirals by hand with a spiral rose template, like I showed you here

Wreath form or unfinished frame/garage sale frame

Bamboo Skewer or toothpick

TUTORIAL

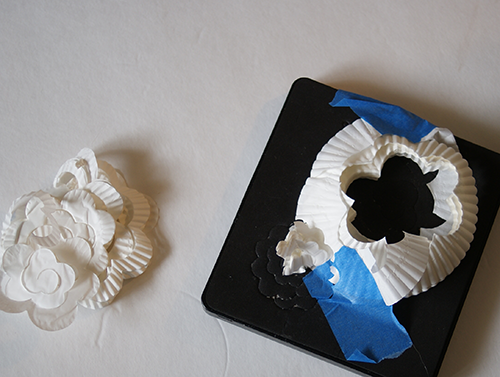
Stack cupcake liners over die cut shape, tape into place with masking tape and run through Sizzix

How to make paper roses

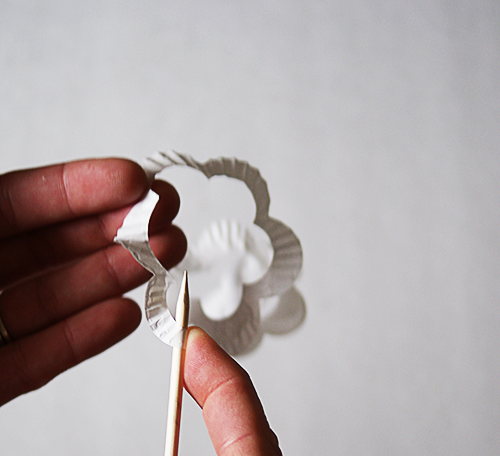
Roll spiral into rose using bamboo skewer.  I showed you a video demonstrating this part in this Decorative Paper Rose Sphere post.

Sizzix Die Cut Paper rose cupcake liner craft

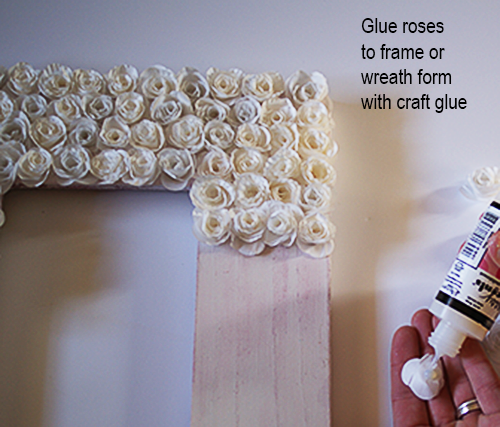
Glue roses to frame or wreath form with a small dab of glue on the back of the flower

CupCakeLinerFrame7

Frame revamp with paper roses

Simple as that!  I decided to leave the picture out of the frame, since it is a piece of art in and of itself.  I think I want to do a matching lampshade.

Make a cupcake liner rosette frame with #DIY from @savedbyloves

What do you think?  Have you done or seen any cupcake liner crafts?  The contest submission deadline is Feb. 15th.  The issue is linked above and contains all the details!

Make a cupcake liner rosette frame with #DIY from @savedbyloves

Lavendar Bath Salts

How to Make Lavendar Bath Salts #DIY #Gift from utryit.com, featured @savedbyloves

[pinit]

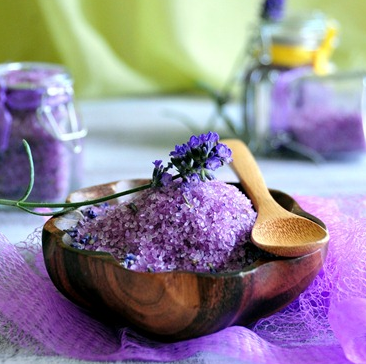
I found this lovely lavendar bath salt DIY tutorial at utry.it, and I just had to share it with you!  I can think of several friends and relatives that would love to get this as a gift.  Whip some up to have on hand for birthdays or Valentine’s Day gifts!

DecoArt Glass Marker Love Mugs

@DecoArt_Inc Valentine's Day Mug Dollar Store Craft @savedbyloves

[pinit]

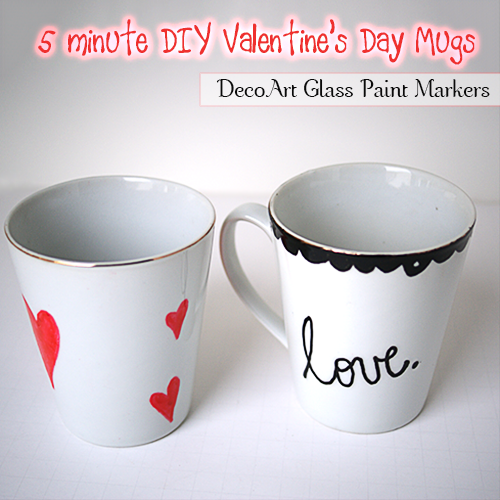
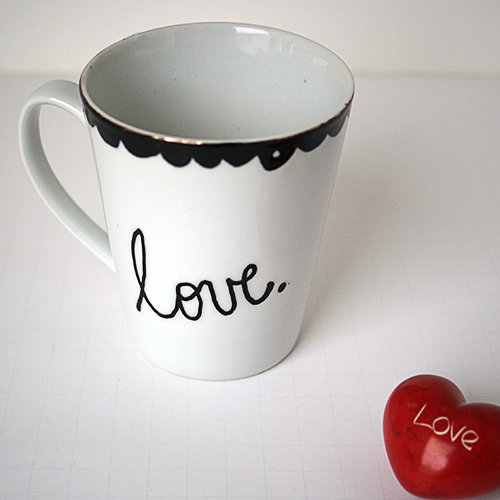
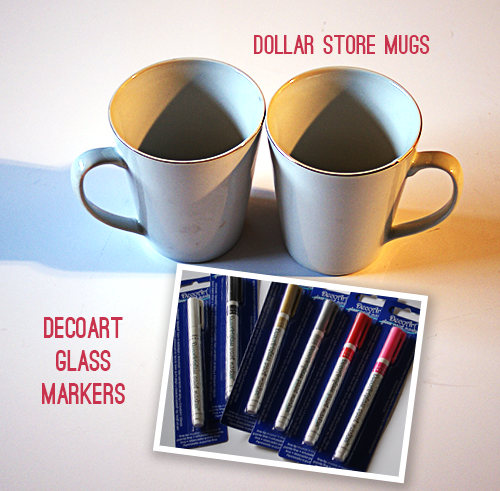
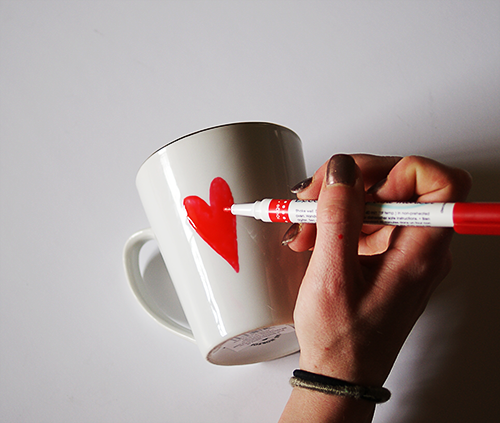
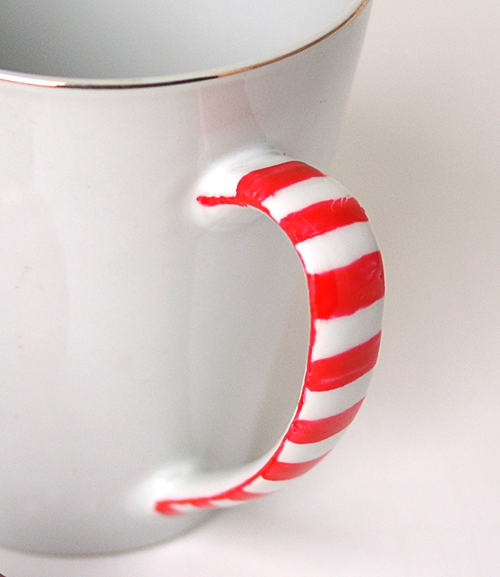
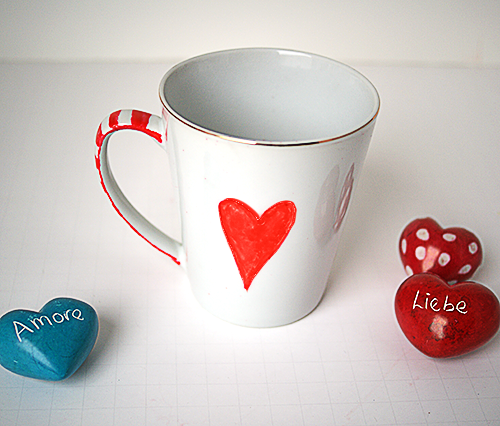
I was blessed to receive a box of craft supplies from DecoArt, including some fun glass markers that I used on dollar store mugs  for this Valentine’s Day craft.  The project couldn’t be simpler or cheaper, and leaves you with some adorable, hand doodled, custom love mugs to gift your sweeties on this fast approaching day!

@DecoArt_Inc Valentine's Day Mug Dollar Store Craft @savedbyloves

Supplies:

Rubbing Alcohol

Lint free cloth

Plain Coffee Mugs

DecoArt Glass Markers

Oven (optional)

DecoArt Glass Markers

Tutorial:

Clean glass with rubbing alcohol

Shake markers well, depress tip on scrap paper until ink flows

Decorate Mugs as desired

Deco Art Valentine's Day Mug

Between 4-8 hours of paint application, bake mugs in oven preheated to 375° for 40 min for dishwasher safe finish.

@DecoArt_Inc Valentine's Day Mug Dollar Store Craft @savedbyloves

@DecoArt_Inc Valentine's Day Mug Dollar Store Craft @savedbyloves

I told you it was simple!  Check out more fantastic ideas and products from DecoArt by keeping up with them on Twitter, Facebook and Pinterest.

*Disclaimer:  I received free product to try for this project.  All opinions are honest and mine!

Long Stem Paper Rose + Template

Printable Paper Rose template and DIY form Ellinee, featured @savedbyloves

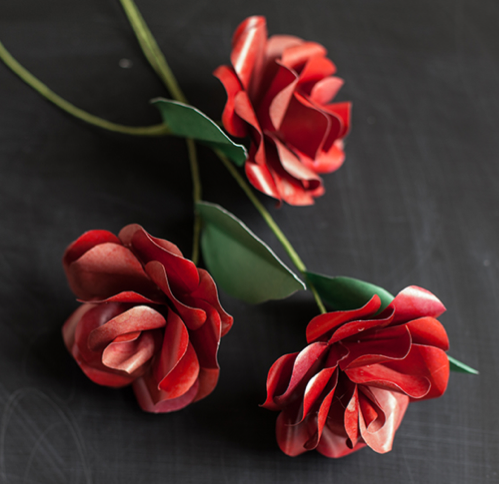
Ellinee is one of my favorite places for paper flower inspiration.  These long stem paper roses with template and DIY tutorial are a fantastic example as to why!  I used her template last year for my very first paper roses, and fell in love with the craft.  Stop by for these and more.

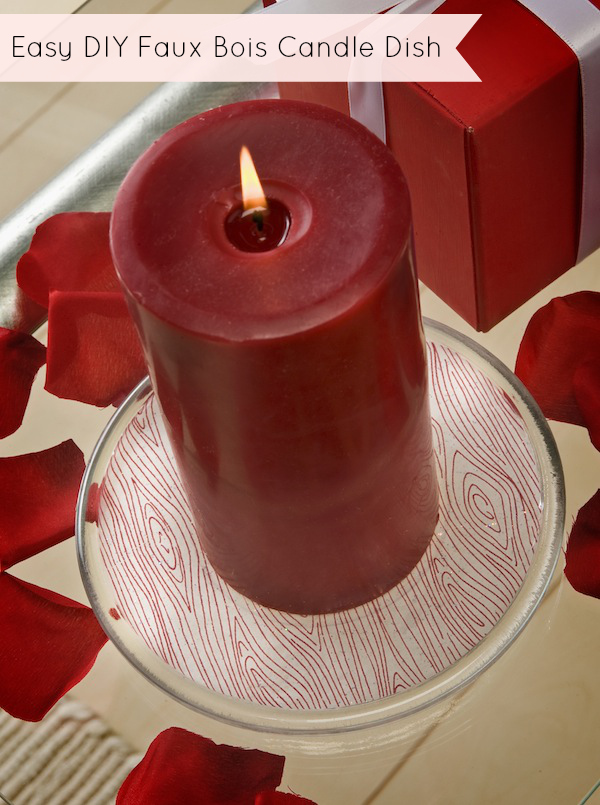
Faux Boise Candle Base & Candle

Faux-Bois-Candle-Base-with-candle

Well hello there! I’m Amy from Mod Podge Rocks. I’ve never been a big Valentine’s Day person until I did a Aqua Valentine series last year . . . in which I threw hearts on their head by turning them blue. It made for a more interesting Valentine’s Day in terms of crafting, and I’ve loved making projects for February 14th ever since.

Candle Base 2

This year I made a project that I made for Valentine’s Day but you can use all year round. It’s not “obvious” Valentine’s Day but that is why I like it! I actually used woodgrain (aka faux bois) tissue paper that I got from Target on clearance for $.99 – it was leftover from Christmas. Add some Sparkle Mod Podge, Dimensional Magic and a red candle and you have instant home decor. Here’s how I made it.

Gather These Supplies

$1 candle tray from the dollar store
Mod Podge Satin
Mod Podge Sparkle
Mod Podge Dimensional Magic
Tissue paper
Pencil
Paintbrush
Scissors

IMG_6981

Here’s the dish straight from the dollar store – soak it to get the tag off of the bottom.

IMG_6982

Spread out the tissue paper (try to find the non-wrinkliest area possible) and place the dish face down. Trace with a pencil.

IMG_6983

Cut out the circle and keep trimming until it fits inside the dish. I had to trim and fit several times.

IMG_6984

Spread a layer of Mod Podge Satin down into your dish. You can use Matte or Gloss too – it really doesn’t matter. The reason I didn’t use the Sparkle is because I didn’t want any texture between the tissue paper and the glass (which the glitter particles can cause). If you don’t care, you can use the Sparkle Mod Podge to apply the tissue paper too.

IMG_6992

Put the tissue paper into the glass dish and very carefully smooth down with the paint brush. Tissue paper is very fragile. Let it dry for 15 – 20 minutes and then spread Sparkle Mod Podge over the top.

IMG_6993

Add Dimensional Magic to the top, inside the lip of the glass dish. It’s going to take overnight to dry because of the amount of Dimensional Magic.

Candle Base 2

I love this look! Love that it’s white and red woodgrain, so I can use it for Valentine’s Day, but I can also keep it out all year round. I also love that it only cost me a few dollars to make!

Candle Base with candle 2

Come visit me at Mod Podge Rocks for daily decoupage ideas – also visit me at Facebook, Pinterest, Google Plus or follow my RSS feed for more!

Embellished Heart Lights

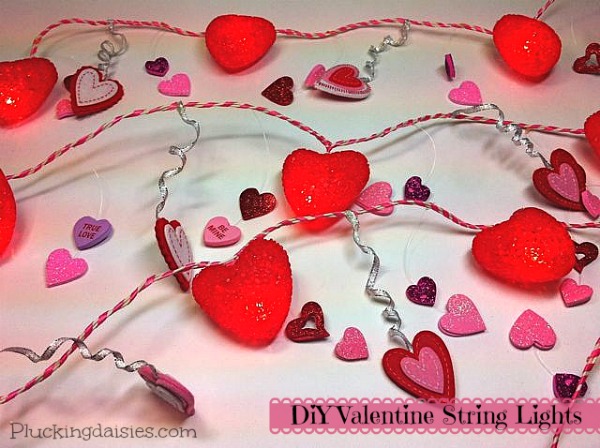
Hey there SBLC friends!  Amy from Plucking Daisies here to share a quick and easy Valentine’s Day decor project.  Today I’m going to show you how to update a set  of string lights and turn them into ribbon wrapped heart lights.  You probably have all the supplies you need to create this project and if not a quick trip to the dollar store will have you “Lighting the way to LOVE” in no time!
ribbon-wrapped-heart-lights-beauty-text-2

I’m in the midst of a MAJOR studio purge and found this beat up set of heart lights (among other things) squirreled away in my stash.  These heart lights were looking less than “lovely” so I decided to give them a makeover.

ribbon-wrapped-heart-lights-text.jpg

How to make Ribbon Wrapped Heart Lights

If you don’t have a set of Heart lights in need of an update regular white string lights will work just fine!
Ribbon Wrapped Heart Lights | @PluckingDaisy #DIY #ValentinesDay #DollarStoreCraft
STEP 1:  Start by cutting a length of thin ribbon.  Don’t worry about measurements, you can always cut more if you run short.
Ribbon Wrapped Heart Lights | @PluckingDaisy #DIY #ValentinesDay #DollarStoreCraft
STEP 2:  Attach one end of your ribbon (as close as possible to the light) with a drop of hot glue.
Ribbon Wrapped Heart Lights | @PluckingDaisy #DIY #ValentinesDay #DollarStoreCraft
STEP 3:  Wrap ribbon around wire allowing some of the white to show through as you go.  Be sure to hold it tight to prevent unraveling.  Keep wrapping until you get to the end and secure with Hot Glue.
*If you run out of ribbon simply cut another piece and attach with hot glue wherever you left off.
Ribbon Wrapped Heart Lights | @PluckingDaisy #DIY #ValentinesDay #DollarStoreCraft
STEP 4:  Trim off any excess ribbon so it is flush with the wire.

Embellishing Ribbon Wrapped Heart Lights

Now for the fun part, embellishments!  You can use whatever your little “heart” desires to embellish your lights.  Use your imagination and especially your stash!  Anything goes here so put a pom-pom, a bird or whatever you want ON IT!
Ribbon Wrapped Heart Lights | @PluckingDaisy #DIY #ValentinesDay #DollarStoreCraft
For my lights I used Heart Table Scatter, Glitter Heart Stickers, and Felt Heart Stickers from Dollar Tree.
Ribbon Wrapped Heart Lights | @PluckingDaisy #DIY #ValentinesDay #DollarStoreCraft
STEP 1:  Count the spaces between each light and select the items to embellish your lights.  Lay them out creating a pattern if you wish.  Cut a 7 in piece of thin wired ribbon to hang a large embellishment between each light.  *I used felt heart stickers from Dollar Tree.
Ribbon Wrapped Heart Lights | @PluckingDaisy #DIY #ValentinesDay #DollarStoreCraft
STEP 2:  Attach ribbon to back of embellishment (Felt Sticker) and place a matching piece on top to secure.
Ribbon Wrapped Heart Lights | @PluckingDaisy #DIY #ValentinesDay #DollarStoreCraft
STEP 3:  Curl your ribbon around a dowel or paint brush handle.
Ribbon Wrapped Heart Lights | @PluckingDaisy #DIY #ValentinesDay #DollarStoreCraft
STEP 4:  Find the center between the lights and wrap the end of your curled ribbon around it.  Secure with Hot Glue.

Adding Floating Hearts

The last time I was here at SBLC I showed you how to create floating stars using Monofilament (Winter Tree project) .  Monofilament makes it easy to create a whimsical “floating” effect on almost any project.
Ribbon Wrapped Heart Lights | @PluckingDaisy #DIY #ValentinesDay #DollarStoreCraft
I used the same technique for the felt hearts only this time with monofilament.  By layering Glitter stickers from Dollar Tree onto a 3-4 in piece of monofilament I was able to create floating hearts on either side of the felt hearts.
Ribbon Wrapped Heart Lights | @PluckingDaisy #DIY #ValentinesDay #DollarStoreCraft
To attach floating hearts just add a dab of hot glue to the back of your light string (preferably on the ribbon wrapped part).  *Remember a “Dab’ll do ya!”
Ribbon Wrapped Heart Lights | @PluckingDaisy #DIY #ValentinesDay #DollarStoreCraft
That’s all there is to it folks!  Now simply hang and enjoy your new and improved heart lights.   Kick back with a box of Russell Stovers (in a heart-shaped box) and let your “Love” lights shine!
Have a Lovely day!
Amy*

Find me at Pluckingdaisies.com | Pinterest | Facebook | and Twitter for more creative ideas and tutorials.

Faux Stone Bracelets from Salt Dough

[pinit]

Faux  stones with salt dough Clay

Hi everyone,

I’m Carolyn from homework. Johnnie is away for a few days enjoying some time with family and I was thrilled when she asked me to share a project with you. This is a fun craft that can be adapted for little kids or made more sophisticated for grown up jewelry.Can you guess what they are?

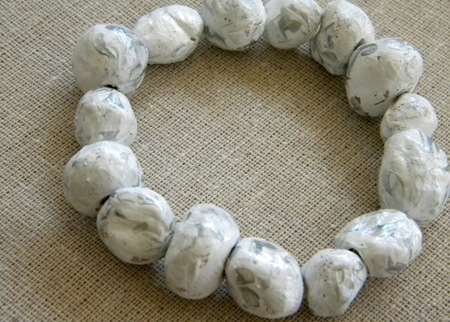
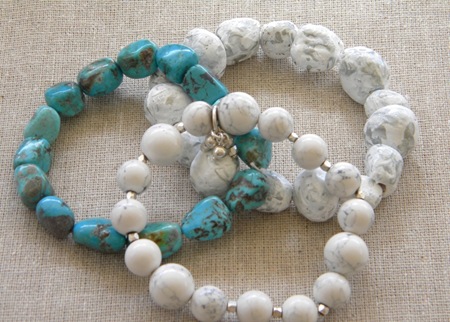
Faux stone bracelet #DIY #Jewelry #tutorial from Carolyn's Homework @savedbylovesThese faux stone beads are made from salt dough. This is another project that has been on my list to make for quite awhile and I was really happy with the results.
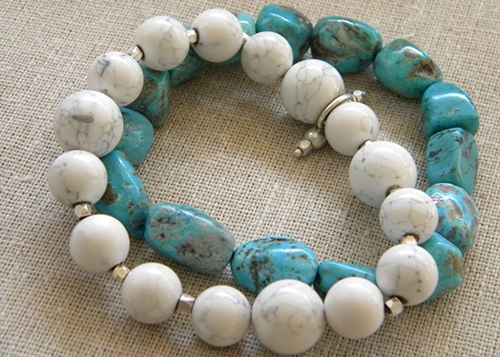
These bracelets are the inspiration. I wear these a lot!  The blue bracelet is turquoise and I’m not sure what type of stone the white bracelet is.
 
I love these bracelets. They’re easy to throw on since they’re on stretchy jewelry cord and their chunky size and variegated tones make a nice statement.
I started by making some salt dough beads. I don’t have a picture of the beads before I painted them but here’s the recipe I used:
4 cups flour
1 cup salt
1-1/2 cups cold water
Note: I cut the recipe in half and had more than enough dough to make a lot of beads.
Thoroughly mix the flour and salt together. Add the water and mix well. Knead the mixture for ten to fifteen minutes. Shape your beads and make a hole with a wooden skewer. Bake at 250 degrees for 2-3 hours or until they are completely dry and hardened.
Tip: The holes on most of my beads closed up during the baking process. I may try baking them on a piece of wire or the skewer next time I make these.

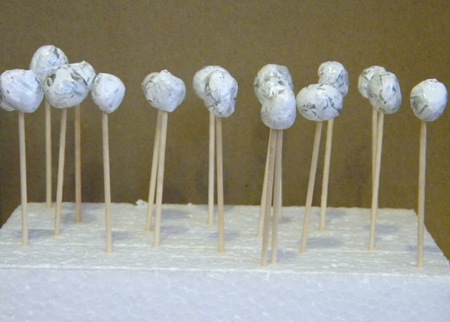
Once the beads were cooled, I started painting them with the craft paints. I used two coats of Martha Stewart High Gloss in Wedding Cake for the white and while the white paint was still wet added Metallic Sterling for the accent. The trick is to just dab on the silver color and swirl it slightly. Dry your beads on toothpicks. Once they are completely dry, finish with a coat of clear gloss sealer.
And here they are… my favorite bracelets; turquoise, white stone and salt dough.
I hope you enjoyed the project I shared here today. Stop by and visit me anytime at homework
 Blog Header 0828 Final
Signature Box flower 
Privacy Policy