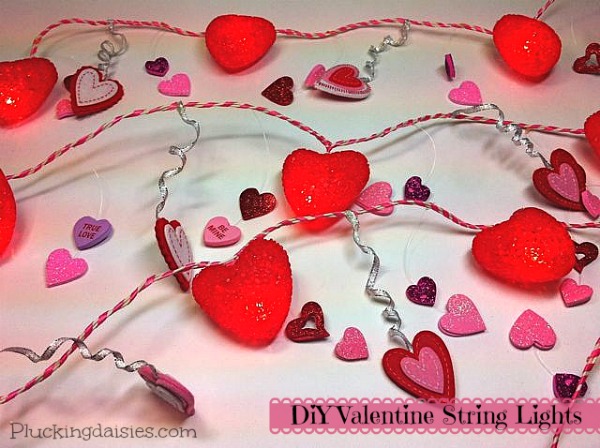
Hey there SBLC friends! Amy from Plucking Daisies here to share a quick and easy Valentine’s Day decor project. Today I’m going to show you how to update a set of string lights and turn them into ribbon wrapped heart lights. You probably have all the supplies you need to create this project and if not a quick trip to the dollar store will have you “Lighting the way to LOVE” in no time!

I’m in the midst of a MAJOR studio purge and found this beat up set of heart lights (among other things) squirreled away in my stash. These heart lights were looking less than “lovely” so I decided to give them a makeover.

How to make Ribbon Wrapped Heart Lights
If you don’t have a set of Heart lights in need of an update regular white string lights will work just fine!
STEP 1: Start by cutting a length of thin ribbon. Don’t worry about measurements, you can always cut more if you run short.
STEP 2: Attach one end of your ribbon (as close as possible to the light) with a drop of hot glue.
STEP 3: Wrap ribbon around wire allowing some of the white to show through as you go. Be sure to hold it tight to prevent unraveling. Keep wrapping until you get to the end and secure with Hot Glue.
*If you run out of ribbon simply cut another piece and attach with hot glue wherever you left off.
STEP 4: Trim off any excess ribbon so it is flush with the wire.
Embellishing Ribbon Wrapped Heart Lights
Now for the fun part, embellishments! You can use whatever your little “heart” desires to embellish your lights. Use your imagination and especially your stash! Anything goes here so put a pom-pom, a bird or whatever you want ON IT!
For my lights I used Heart Table Scatter, Glitter Heart Stickers, and Felt Heart Stickers from Dollar Tree.
STEP 1: Count the spaces between each light and select the items to embellish your lights. Lay them out creating a pattern if you wish. Cut a 7 in piece of thin wired ribbon to hang a large embellishment between each light. *I used felt heart stickers from Dollar Tree.
STEP 2: Attach ribbon to back of embellishment (Felt Sticker) and place a matching piece on top to secure.
STEP 3: Curl your ribbon around a dowel or paint brush handle.
STEP 4: Find the center between the lights and wrap the end of your curled ribbon around it. Secure with Hot Glue.
Adding Floating Hearts
The last time I was here at SBLC I showed you how to create floating stars using Monofilament (Winter Tree project) . Monofilament makes it easy to create a whimsical “floating” effect on almost any project.
I used the same technique for the felt hearts only this time with monofilament. By layering Glitter stickers from Dollar Tree onto a 3-4 in piece of monofilament I was able to create floating hearts on either side of the felt hearts.
To attach floating hearts just add a dab of hot glue to the back of your light string (preferably on the ribbon wrapped part). *Remember a “Dab’ll do ya!”
That’s all there is to it folks! Now simply hang and enjoy your new and improved heart lights. Kick back with a box of Russell Stovers (in a heart-shaped box) and let your “Love” lights shine!
Have a Lovely day!
Amy*


