Search Results for: magic glos

Patriotic Resin Jewelry DIY

Magic Gloss Resin Jewelry
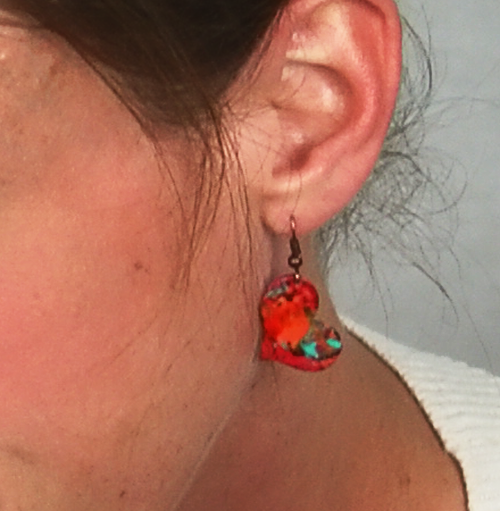
With July 4th around the corner, I thought some patriotic jewelry was in order.  I am thrilled to write about Magic Gloss, the resin product I used to create the glass dome effect seen here.  Read the following detailed step by step and you will be able  to create your own funky patriotic pieces.

Supplies:

  • Magic Gloss resin by Lisa Pavelka
  • magicglossRed, white and blue cake sprinkles, or colors of your choice
  • Jewelry Bezels
  • Play dough
  • Ceramic tile or other flat, transportable surface
  • Toothpicks
  • Sunny day, or at least a 9W UV lamp


Magic Gloss Resin Jewelry

Instructions:

  • I will show how I did the circle earrings.  The pendant is the same process.  Begin by placing a glob (real technical here) of play dough or clay on your glass tile.  This will hold your bezels in place and keep them flat for the resin to cure evenly.  This is so much easier than not doing this, trust me.  My pieces look tons better and are way easier, especially since you will most likely be taking these outside to cure by the sun’s rays.  You don’t want them sliding around everywhere.

Magic Gloss Resin Jewelry

  • Magic Gloss Resin Jewelry


  • Put your sprinkles in a small cup to make it easier to pour into bezel.  They will still go everywhere!  Fill just enough to cover the silver in the background.  You don’t want the sprinkles above the rim of the bezel.

Magic Gloss Resin Jewelry

Magic Gloss Resin Jewelry

  • Now the fun part; Magic Gloss.  Here is why this product is AMAZING (no, I am not affiliated in any way whatsoever, I just love it) – it is a one step resin that cures in 15 minutes with UV light.  No mixing, no odor, no waiting for 3 days for your pieces to cure.  It is quite easy to use.  Just add a few drops at a time to the center of your piece.  With the sprinkles, I add a small amount of resin and mix it all around to coat the sprinkles so they don’t float up while resin is curing.  I decided to do a dome effect on these pieces, which I do in layers.  So, when the sprinkles are coated, take the tile with your piece outside and let it cure in the sun for about 10 minutes.  Bring it back in and add your resin dome.  Just add a drop or two in the middle (depending on how big your piece is) and pull it to the edges of the bezel using your toothpick.

Magic Gloss Resin Jewelry

Magic Gloss Resin Jewelry

Magic Gloss Resin Jewelry

Second coat of resin

  • Take the piece outside to cure and that is it.  You can do more layers of resin if you want to have a drastic dome effect.

The only downside to this resin is the cost, and the dependency on UV for curing.  I find the benefits way outweigh these.  If you have every worked with 2 part resin, you will understand how awesome it is not to have to mix and the mess that comes with that whole fiasco.  Also, I had no problems with air bubbles.  AND you can work with the stuff as long as you want .  It will not start to set until you expose it to UV, so no pressure to get it all done in 20 minutes. You can purchase Magic Gloss at Michael’s or Joannes for around $10 per one ounce bottle.  I found it on amazon, here,  for under $6.  I am on my first bottle and have made about 10 pieces so far.


Give it a try and let me know what you think.  Here are my finished pieces…

Magic Gloss Resin Jewelry

Magic Gloss Resin Jewelry

Magic Gloss Resin Jewelry

Magic Gloss Resin Jewelry

DIY Farmhouse Table and Bench Using Free Plans from Ana White

Farmhouse bench plan
How to build a farmhouse table and benches rustic decor woodworking plans @savedbylovesI have wanted to build a farmhouse table since I first started building a couple of years ago. Our new house I showed you in the recent Home Tour has just the spot for one, so we got busy woodworking and today I am sharing the fruit of our labor. Using free plans from Ana White, we built a lovely table and matching benches.  I have seen similar sets going for around $1200.  Ours cost under $200!  Building saves so much money, and is super gratifying.  If you are intimidated by power tools, I am here to tell you that you can overcome the fear, just like I did!

Minwax Wood Conditioner Gel Stain and Polyurethane

I built my table using Ana White’s free DIY Farmhouse Table Updated Pocket Hole Plan, and the benches using her Farmhouse Bench Plan.  As always her plans are amazing, and free!  This site is my go to for all things woodworking.  It is where I went to begin this journey, and as you can see in my Woodworking Project Gallery, I have built several of her lovely pieces!  Our house is becoming a hand-built home, one plan at a time.

We decided to stain the top and paint the base white.  Finishing each before attaching them together made things easier.  We did this for the benches too.

I used Minwax Pre Stain Wood Conditioner on the table tops before staining.  This evens out the surface of the wood and makes the stain take more evenly.  I kinda feel like a pro when I stain after conditioning!  The conditioner is easy to apply and one can is enough for several projects.  You just apply with a lint free cloth, let it soak in for about 5 minutes and wipe away any excess conditioner.  After 30 minutes, apply stain.

I used Minwax Gel Stain in Aged Oak.  This is my first time using it, and it is gorgeous!

Staining with Gel Stain

This is my first time using the Gel Stain.  I applied it with Minwax’s Staining Brush.  It is definitely less drippy/runny than the regular stain, but not as mess free as the Wood Finishing Cloths.  Those are still my favorite, and if I didn’t want to try the Aged Oak so badly, I would have used the cloths!  I am hooked and you will be too.  Find out why they are so magical here: DIY Reclaimed Wood Headboard.

After Staining

After the stain dried overnight, it was time to seal.  I used Minwax Polyurethane in Clear Satin.  I applied two coats, drying 4 hours between and sanding with 220 grit paper between coats as well.

For the legs, I primed and painted with white glossy latex paint we had leftover from painting out trim.  It took 2 coats.

DIY Farmhouse Table woodworking plan

I am completely in love with this set.  It took a couple of weeks to build all three pieces and finish them, but I was busy with several other projects at the same time.  If you were determined, you could do this in a weekend.

Have you braved power tools?  If not, I hope you are a little closer to taking the leap now.  It is so worth it!!

Make Easy Shrink Film Heart Earrings

[pinit]

How to Make Shrink Film Earrings @savedbyloves

[pinit]

Mother’s Day is around the corner.  Are you ready?   If you need a last minute, handmade gift, today’s post is for you.  I am sharing with you a quick, cheap and simple pair of shrink film heart earrings you can make that any woman on your list is sure to love.  With just a few supplies and 20 minutes or less, you are on your way to making her smile.

How to Make Shrink Film Earrings @savedbyloves

SUPPLIES:

Matte Shrink Film

Heart Paper punch, template or die (I used Spellbinders Media Mixage Hearts One – the middle size die)

Ear Wires

Jewelry Pliers

Mod Podge Dimensional Magic

Alcohol inks and applicator

Distress Paints or other acrylics of your choice

TUTORIAL:

ShrinkFilmEarrings3

Ink your felt applicator and pull stripes (left) or dab color splotches (right) onto rough side of shrink film.  Cover entire sheet or just what you will use.  I made a bunch of shapes, so I covered the entire sheet.

ShrinkFilmEarrings4

Die cut, paper punch or hand cut out your shapes.  You can see the inks I used and how the pieces look before baking.

ShrinkFilmEarrings5

I wasn’t quite thrilled with the coloring after the alcohol inks, so I added Distress paint (barn door).  Punch a hole in your pieces where you want the jump ring to be and bake per shrink film instructions.

How to Make Shrink Film Earrings

Let cool, apply a coat of Dimensional magic for a gloss look.  When that dries, you may have to reopen your hole with a needle tool or awl.  Insert your jump ring and ear wire.

Most people would never guess these were made from shrink film.  I get tons of compliments every time I wear them!

How to Make Shrink Film Earrings

I have a charm bracelet on the work table using the rest of the pieces from this shrink film afternoon.

In the meantime, check out our 50+ shrink film projects roundup:

Projects to make from shrink plastic, #shrinkfilmjewelry #shrinkfilmcrafts

Need more Mother’s Day ideas?  We have you covered with 50+ Mother’s day handmade projects for under $10

Mother's Day GIfts #mothersday #diy to make for less than 10 bucks

DIY Dollar Store Paint Chip Spring Mirror


[pinit]
Paint Chip Dollar Store Spring Mirror #Sizzix @savedbyloves

 [pinit]

Today I am excited to share with you a project I came up with while playing with my new Sizzix dies.  This spring themed mirror is made using a dollar store mirror, an old photo mat and paint swatches.  Add a little die cut magic and it doesn’t take expensive materials to easily create your own stylish spring accent piece!

Paint Chip Dollar Store Spring Mirror #Sizzix @savedbyloves

SUPPLIES

Cheap dollar store mirror

Mat board with opening big enough to cover mirror

Sizzix Dies:  Tim Holtz Word Play Alphabet, Banners and Keys Sets, Squares #3, Flower Layers and Leaves

Glossy Accents or your favorite craft glue

Scissors

Crepe Paper in color you want for flower

Paint chips – (Don’t steal them from a store!  Ask your friends and family and gather a stash.)  I used yellow shades for an ombre effect, and green for the flower leaves.

Embellishments for flower center (I used Dew Drops)

Crop a dile or other hole punch

Jute or other string for banner

TUTORIAL

Sizzix Squares Die

Sizzix square die


I used the second smalles square size for my paint chip “tiles”.  You can cut about 4 paint chips at once.  That is one of the reasons I love Sizzix so much.  The steel rules die cut through several layers of card stock at once, which comes in handy when you need lots of the same die cut shapes for your project.  They also cut leather, fabric, felt, aluminum and thinner gauge metal sheets.

I started out cutting greens, yellows and blues, but then decided to go with shades of yellow.  The blue masking tape holds the material to be cut in place so that it doesn’t shift and run off the edge.  This helps me cut in precise spots on the material so I can get as many shapes as possible from it.

Paint Chip Dollar Store Spring Mirror9

Attaching tiles

You can use a tape runner or craft glue to adhere your tiles to the mat.  Start at the outside and create a border around the entire mat.  Lay them out before adhering so you can get the spacing right.  Work your way in towards the opening in the center of the mat.

Cuttiles

It is unlikely that your tiles will fit perfectly on the mat area.  Use scissors to cut excess tile like in the picture.  I brushed on a coat of Glossy Accents for shine and to seal.  Mod Podge would work great too.  Let dry before moving onto next step.


PaintChipDollarStoreSpringMirror11

Apply a generous amount of Crafter’s Pick or other strong adhesive around the frame of the dollar store mirror.

Glue mosaic frame to mirror

Place your tiled mat on the adhesive and center the mirror in the opening.

Wax paper and books to add weight for adhesion

Place a piece of wax paper on top of the mosiac frame and then some books or something heavy for weight to aid in adhesion.

Sizzix Banners and Keys Die

I cut triangle banner using the Banners and Keys die (linked in supplies above).  You can cut these from paint chips or any paper you like.  I used All Chalked Up by DCWV.  Punch a hole in the top corners of the flags and thread jute or string of your choice to drape on frame.

Word Play Sizzix Die Tim Holtz

Cut out letters from heavy white cardstock or chipboard using Word Play die (linked in supplies above).  Adhere in place with tape runner or craft glue.

PaintChipDollarStoreMirror30

You can see in the final piece, I used the leftover shape after cutting for the letter “n”.

PaintChipDollarStoreSpringMirror7

Flower Layers and Leaves Sizzix Die

To create the flower, cut crepe paper (several layers thick) using the 8 skinny petal shape on the Flower Layers & Leaves die (linked above in supplies).  Separate the layers and stack them with petals alternating, gluing each layer to the next with Glossy Accents or other craft glue.  I love Glossy Accents for paper to paper because it dries super fast.  Fluff the petals with your fingers until you are happy with the shape.

Using the same die, cut leaves from paint chips or cardstock.  Crease them lenthwise by pinching them with fingers.  Glue leaves into place, then flower on top, then jewels or beads in flower center.

Paint Chip Dollar Store Spring Mirror #Sizzix @savedbyloves

Faux Boise Candle Base & Candle

Faux-Bois-Candle-Base-with-candle

Well hello there! I’m Amy from Mod Podge Rocks. I’ve never been a big Valentine’s Day person until I did a Aqua Valentine series last year . . . in which I threw hearts on their head by turning them blue. It made for a more interesting Valentine’s Day in terms of crafting, and I’ve loved making projects for February 14th ever since.

Candle Base 2

This year I made a project that I made for Valentine’s Day but you can use all year round. It’s not “obvious” Valentine’s Day but that is why I like it! I actually used woodgrain (aka faux bois) tissue paper that I got from Target on clearance for $.99 – it was leftover from Christmas. Add some Sparkle Mod Podge, Dimensional Magic and a red candle and you have instant home decor. Here’s how I made it.

Gather These Supplies

$1 candle tray from the dollar store
Mod Podge Satin
Mod Podge Sparkle
Mod Podge Dimensional Magic
Tissue paper
Pencil
Paintbrush
Scissors

IMG_6981

Here’s the dish straight from the dollar store – soak it to get the tag off of the bottom.

IMG_6982

Spread out the tissue paper (try to find the non-wrinkliest area possible) and place the dish face down. Trace with a pencil.

IMG_6983

Cut out the circle and keep trimming until it fits inside the dish. I had to trim and fit several times.

IMG_6984

Spread a layer of Mod Podge Satin down into your dish. You can use Matte or Gloss too – it really doesn’t matter. The reason I didn’t use the Sparkle is because I didn’t want any texture between the tissue paper and the glass (which the glitter particles can cause). If you don’t care, you can use the Sparkle Mod Podge to apply the tissue paper too.

IMG_6992

Put the tissue paper into the glass dish and very carefully smooth down with the paint brush. Tissue paper is very fragile. Let it dry for 15 – 20 minutes and then spread Sparkle Mod Podge over the top.

IMG_6993

Add Dimensional Magic to the top, inside the lip of the glass dish. It’s going to take overnight to dry because of the amount of Dimensional Magic.

Candle Base 2

I love this look! Love that it’s white and red woodgrain, so I can use it for Valentine’s Day, but I can also keep it out all year round. I also love that it only cost me a few dollars to make!

Candle Base with candle 2

Come visit me at Mod Podge Rocks for daily decoupage ideas – also visit me at Facebook, Pinterest, Google Plus or follow my RSS feed for more!

Make Advent Calendar Blocks

#DIY #ChristmasDecor Advent Calendar @savedbyloves

[pinit]

This is the first year I have made an advent calendar, and I am loving it!  It was so fun to create.  I busted out my stamps and other scrapbooking supplies and went to town on some wooden blocks.  What is so cool about it is as you turn each block around when that date passes, a wintery scene is revealed on the other side!

#DIY #ChristmasDecor Advent Calendar @savedbyloves

To make your very own advent block calendar, you will need:

25 square wooden blocks (I used 1 inch cubes, but size doesn’t matter as long as they are all the same)

Gesso

Christmas scrapbook paper

Acrylic paint in silver, red and green

Matte Gel Medium

Glossy accents or Dimensional Magic

Craft knife

Distress ink pad in Antique Linen

Ranger crackle paint Clear Rock Candy

Ranger crackle paint White Picket Fence

Number stamps

Stazon Jet Black Ink Pad

TUTORIAL:


#DIY #ChristmasDecor Advent Calendar @savedbyloves

To finish, I painted the sides of the blocks green, and coated the wintery scene paper side with clear crackle paint to seal.

#DIY #ChristmasDecor Advent Calendar @savedbyloves

#DIY #ChristmasDecor Advent Calendar @savedbyloves

Make a Winter Tree


[pinit]

Today, Amy from Plucking Daises is back to share with you this technique packed tutorial for a lovely, glittery winter tree decoration.  You will learn several ways to create fun wintery decorations for little to no cost using recycled items and dollar store supplies.  Warning:  you will be headed to the dollar store after reading this post.  I know I am.

Hi there! so happy to be back at Saved By Love Creations! Last time I was here I showed you how to make a mosaic flower-pot. Today I’m going to show you how to use that pot to create a festive holiday display. You can make this winter tree with some spray paint and a few items from the dollar store!

Make a Winter Tree | @PluckingDaisy #Holiday #Decor #DIY #Tutorial

All you need is a tree branch from your back yard and some spray paint (Krylon Brilliant Silver)…or you can skip the paint and leave your branch au naturale!

*Be sure to pick a sturdy branch…brittle branches will break under the weight of the ornaments. (Gently pull down on the branches to test their durability.)

Make a Winter Tree | @PluckingDaisy #Holiday #Decor #DIY #Tutorial

Now all you have to do is decorate! Creating a branch tree is a great way to use up those mismatched ornaments from your collection, vintage finds or other pretties you may discover in your travels that may not fit the decor of your big tree. Like these craft birds for example.

Make a Winter Tree | @PluckingDaisy #Holiday #Decor #DIY #Tutorial

I can’t resist a craft bird, much less a pack of 2 craft birds for a buck! You can find cute clip on craft birds like these in the dollar section at Michael’s. If you have some vintage birds that aren’t looking their best check out this tutorial for re-feathering old birds. These tiny birds would get lost on a large tree but perching them on a nearly naked silver branch allows them to sparkle and shine!

Make a Winter Tree | @PluckingDaisy #Holiday #Decor #DIY #Tutorial

I have a “Mieneke” approach when it comes to decking the halls. I wouldn’t “pay a lot for a muffler” and I certainly won’t pay a lot for ornaments. A quick trip to the dollar store does it for me!

I found these sparkling snowflakes in a pack of 6 for just a buck! Six seems to be the magic number with dollar store finds. Notice the silver blossoms, also found in a package of 6 in the bridal section at Dollar Tree.

Altering Dollar Store Snowflakes

Make a Winter Tree | @PluckingDaisy #Holiday #Decor #DIY #Tutorial

The snowflakes were a bit too plain for my tree and most of the glitter fell off when I pulled them out of the package. Not to fear Ranger Ink is here! By using a wintery blend of alcohol inks, Elmers spray glue, and Martha Stewart glitter my snowflakes are new, improved and far from plain. Plus, I still have a bunch left over for other projects. Tie your snowflakes to your branches with Tinsel ribbon for an extra pop of holiday flare.

Create Floating Stars

To fill in the gaps among the branches I created floating stars strung on monofilament. These are easy to create with paper punches and mounting squares.

Make a Winter Tree | @PluckingDaisy #Holiday #Decor #DIY #Tutorial

  • Punch stars from sheet music and card stock using a Marvy Star punch. *I used Core’dinations Couture Glitter and Shimmer card stock
  • Adhere monofilament to back of card stock star with a mounting square.
  • Add Distress Ink (Tumbled Glass) to edges of sheet music star and adhere to top of mounting square.
  • Embelish with rhinestones, snowflake punches, and crystals with Glossy Accents.
  • Attach monofilament to branch with a drop of hot glue

Creating Faux Snow

To “plant” your tree simply stuff your pot with floral foam (also available at the dollar store). Create snow by filling the top of the pot with cotton batting. In a pinch you can use bubble wrap painted white.

Make a Winter Tree | @PluckingDaisy #Holiday #Decor #DIY #Tutorial

Give your batting or bubble wrap the look of freshly fallen snow by misting it with spray glue and sprinkling it with a variety of glitter. I used a variety pack of Martha Stewart Glitter for a range of sparkle and shine.

Make a Winter Tree | @PluckingDaisy #Holiday #Decor #DIY #Tutorial

A tree like this can be displayed all winter long even after the holidays have come and gone. The mosaic pot (made with dollar store glass gems) can be used as a planter when warmer weather arrives. This particular pot is used to grow Sunflowers in spring time .

By using smaller pots and branches you can create a festive tree to give as a gift for Teachers, neighbors, and friends. No time to wait for mosaic adhesive to dry? No problem! Try Mod Podgeing wrapping paper to your pot and tie a ribbon around it. I’ve made many of these trees for teachers, family and friends. They make lovely gifts that won’t break the bank!

I hope you all have a warm and wonderful holiday season!

Amy*

Find me at Pluckingdaisies.com | Pinterest | Facebook | and Twitter for more creative ideas and tutorials.

Mod Podge Transfer Instagram Photos to Canvas & Text Embellish

Mod Podge Transfer

I have been busting at the crafty seams to tell you about this new product line from Mod Podge by Plaid Crafts.  It includes Podgeable collage papers, Podgeable Shapes, a bunch of new Mod Podge formulations, finish sprays and tools!  I could not believe when I opened the box and saw all of the shiny new supplies:

Mod Podge Product Line

Mod Podge Products By Plaid


I have used many of the products since getting the package in the mail and will show you a round up at the end of this post.  Today’s project uses the same image transfer to canvas I showed you last week, using Mod Podge Glossy for the transfer and Mod Podge Antique for the finish coat, with a couple of tweaks –   I used Photoshop to create an Instagram effect on the photo before printing it for the transfer.  After the photo transfer, I used Mod Podge Rub-On transfers to embellish the final canvas with text.

You will need:

  • Your photo printed on laser jet
  • Mod Podge Glossy Finish
  • Mod Podge Antique Finish
  • Mod Podge Rub on transfers
  • Foam brush or other paint brush
  • Canvas to fit your print (the print used here is 11×14)
  • Bowl of water
  • Dry towel
  • Mod Podge brayer or squeegee
  • Mod Podge Silicone mat, or other non stick work surface

Follow the instructions I showed you previously, using your photo.  I used these free Photoshop actions by Daniel Box to edit my photos with Instagram effects in PS before having them laser printed at my local Office Depot.

Instructions:

  • Cut Photo to fit canvas, and coat canvas and photo with generous layer of glossy Mod Podge.
  • Flip image (print side down) over onto canvas, making sure to center it where you want it before placing, and smooth out any air bubbles with Mod Podge brayer, squeegee or with your hand from the center out.

Transfer instagram photo to canvas

Let that dry for a minimum of 2 hours.  I let mine dry overnight.

Mod Podge Image Transfer

  • You will may need to re-wet with a mister or sponge brush and continue rubbing away paper backing until you are satisfied with the image.  It doesn’t need to be perfect.  You are going for a vintage feel, and you are going to use Mod Podge Antique and rub-ons on top,  so a distressed look is ok.  Just try not to remove too much of your image when you are rubbing away the back.
  • Once you are happy with your image, Coat with Mod Podge Antique, as many coats as you need to get the antiqued effect you desire.  Let dry 30 min between each coat. I applied my the text after the first coat of Mod Podge Antique, then coated twice more to lessen the contrast between the rub-on transfers and the image.  Apply Mod Podge rub on transfers per package instructions.

These are fantastic.  They come in phrases for family, love, seasons, holiday, and pretty much anything you can think of.  I used the love theme for the image of my husband and I.  The Father’s Day theme was perfect for the picture of my husband with his father and son.  Application was easy with the included craft stick.

Mod Podge Image Transfer

Mod Podge Image Transfer

Mod Podge Image Transfer

  • Here you can see the image for the Father’s Day Gift I used is slightly smaller than the canvas, giving a white border in my finished piece.  I wanted that look, and I brushed around the edges with white acrylic paint.

Here are all of the projects I have done with the new Mod Podge line, and which product I used in each (click images to go to full photo tutorials):

Mod Podge Dad Keychain Using Podgeable Paper and Shapes

PODGEABLE PAPERS AND ACRYLIC SHAPES

MOD PODGE DIMENSIONAL MAGIC

MOD PODGE RUB-ON TRANSFERS

MOD PODGE GLOSS

MOD PODGE GLOSSY

MOD PODGE ANTIQUE

MOD PODGE TRACEABLE SHAPE TEMPLATES

MOD PODGE GLOSSY

MOD PODGE ANTIQUE

MOD PODGE PEARLIZED ACRYLIC SEALER

I am so excited about this line.  Everything I have used has been wonderful.  It is no secret I love me some scrapbook paper jewelry, and the Podgeable Papers are scaled to fit those clear acrylic Podgeable Shapes perfectly.  I have big plans there.  My favorite new product is the Mod Podge Antique.  I love the effect, and that it is produced by a product that also seals. These products are now available at your Michael’s Craft Stores.

If you want to learn step by step how to use all of these different formulations, and be inspired by over 40 how to photo tutorials, make sure you check out Mod Podge Rocks, the book  It is a steal on Amazon.  I have it, love it, refer to it often, and reviewed it here.

Mod Podge Rocks, the book

Join me in keeping up with the exciting products and projects using them by following Plaid Crafts:

Plaid Crafts on Pinterest: http://pinterest.com/plaidcrafts
Plaid on Facebook: http://www.facebook.com/InspiredByPlaid
Plaid on Twitter: http://twitter.com/plaidcrafts/

Disclosure:  I received product and payment for this post.  All opinions expressed in this post are honest and mine.

Check out these amazing projects using this rockin’ line of Mod Podge products!


Valentine’s Day Quilled Heart Keychain

Paper quilling gift

This is my first non-magazine page quilling attempt, and I am loving it.  Paper quilling is great because you can be a novice and still create some really gorgeous pieces.  If you need a meaningful, unique gift for your sweetheart that is fast and easy, you have arrived.  Today’s post is a tutorial, and free printable for the houndstooth background with “You hold the key to my heart”.

Valentine's Day Gift Idea

Supplies:

easy paper quilling project
Instructions:

  • Print off the background image linked above and cut to fit your fragment.
  • Drill hole in fragment for jump ring (I use Dremel for this)
  • Adhere image to fragment (fragment goes on top) using Glossy Accents or other clear drying, archival glue.  I am a die hard Glossy Accents fan, but Diamond Glaze and Mod Podge dimensional magic are often used to adhere paper to clear embellishments.
  • Make quilled paper heart (there are several tutorials on this… it is very simple)
  • Adhere key and paper heart to top of fragment with Glossy Accents by putting a pea sized glue dab on the fragment, then placing the embellishments.
  • I applied glossy accents liberally to the heart since it is paper and this is a piece that will be handled.
  • Let dry for 30 minutes and finish by adding keychain findings – I used a chain of 3 jump rings and a clip to make mine.

I would absolutely love to recieve a gift like this.   Are you making a gift for a love this year?Valentine's Day Gift Idea


Eggshell Mosaic Domino Pendants

Eggshell Mosaic Domino Pendant

How cool is it to make a wearable piece of art from eggshells and domino game pieces?!  I ran into an eggshell mosaic bracelet tutorial while stumbling in Stumble Upon and have been saving eggshells ever since (By that, I mean I commissioned my grandmother to save eggshells for me, since we just never eat the suckers.  What would I do without her.  She folds magazine pages into strips for me, for crying out loud…).  Ok, I am back.  This project is easy and quick.  Come see my take on eggshell mosaic jewelry.

Supplies:

*Eggshells (soak them overnight and remove the membrane from the interior, then let dry before use)
*Glossy Accents or adhesive of your choice
*Substrate for the eggshell mosaic. I used domino
pieces. Any flat bead would work, like polymer clay or wood. Needs to be a light shade, and a surface that accepts alcohol inks for this method. In the tutorial that inspired this project, resin jewelry blanks were used.
*Alcohol inks

Instructions:

*Apply glossy accents or other clear drying adhesive to pendant blank (domino or other)

Eggshell Mosaic Tutorial

Eggshell Mosaic Pendant Tutorial

*Place  small piece of eggshell on  top of glue and press with fingertip to crack into pieces.  Move Pieces around to your liking with tip of your fingernail or tweezers.

Eggshell Mosaic Tutorial

*Once eggshell is all in place, let dry completely.  I used my heat tool to speed this along.  In the bracelet tutorial, she recommended leaving to dry overnight.  No way.  Couldn’t do it.  I dried with heat tool and 10 minutes later moved on to the next step…

*Break off any eggshell sticking out over the edge of your pendant surface and apply alcohol ink straight from dropper to surface top.  More alcohol ink = more saturated finished project.  Let the top dry and apply alcohol ink to sides with felt applicator.  You can apply to back surface as well.  I didn’t.

Eggshell Mosaic Domino Pendant Tutorial

Eggshell Mosaic Jewelry Tutorial

*I applied glossy accents to the top surface for glass like finish.  You could also use Judkins diamond glaze,  dimensional magic by Plaid, resin, or glaze.

Eggshell Mosaic Tutorial

*Let dry  for several hours and glue on pendant back or drill hole for jump ring.  I used E6000 to glue on pendant bail on one, and dremel to drill hole for jump ring on the other.

Altered Art Domino Tutorial

Mixed Media Jewelry Tutorial

Privacy Policy